Fought At Amsterdam
2237 days 10 hours 53 minutes ago
Australians* Hold the Gap
View Linked Report - CLICK HERE 60 POINTSAustralians* Holding The Gap
* I use US lists to represent an ultra modern Australian force. Waiting on the Free World Book.
For the campaign I will be using the following model proxies
Australian Model Stripes equivalent
M1A1 M1/ 1PM1
ASLAV LAV
Bushmasters M113
F/A 18 Warthog
Euro / Tiger Helicopter AH-1 Cobra
70 years after the Great War, Australian forces are once again fighting in Europe.
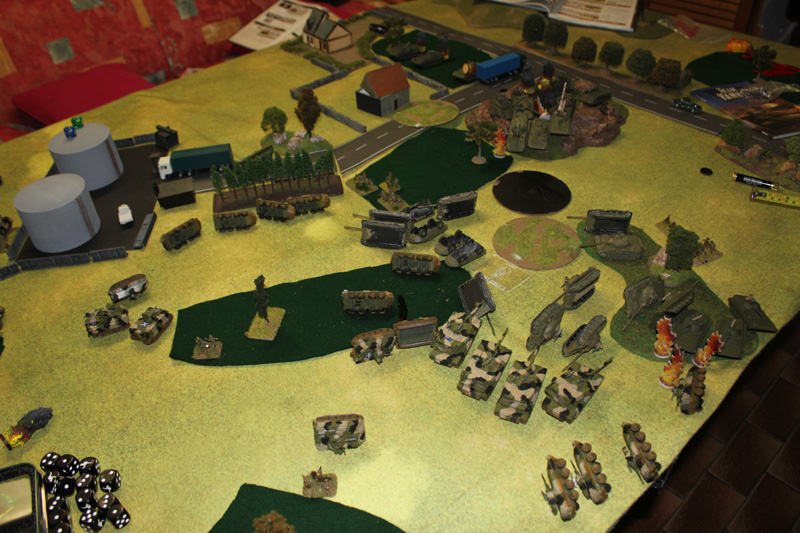
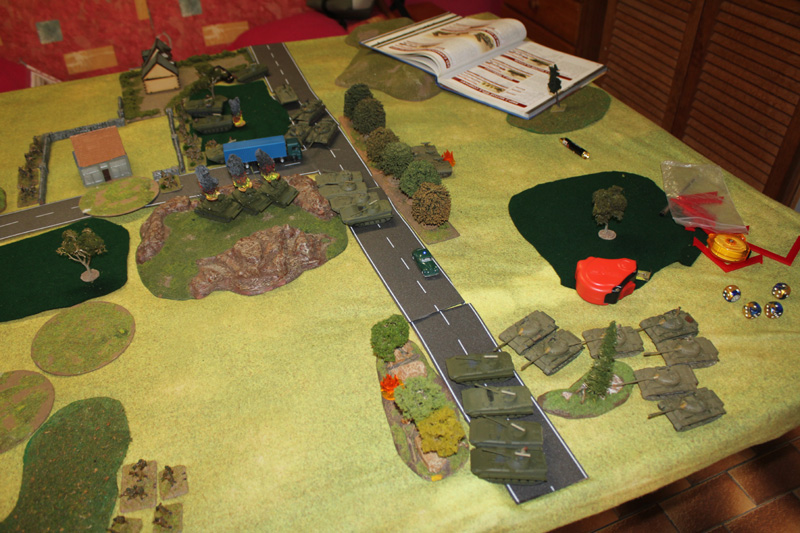
After their successfully defence in Niederbayern, the Australians have now been assigned to help defend Amsterdam. The Australians need to defend a fuel dump to the North just behind their lines and a gap in woods in the centre of the sector. The Australians deploy a platoon of infantry covering the gap in woods with M113 nearby for support. The second infantry platoon deployed well forward in from the fuel dump while their M113 guard the fuel dump. There was just enough time to deploy 3 minefields before the Soviets turned up.
(Game_02_01_Australian_Deployment, Game_02_02_Soviet_Deployment)
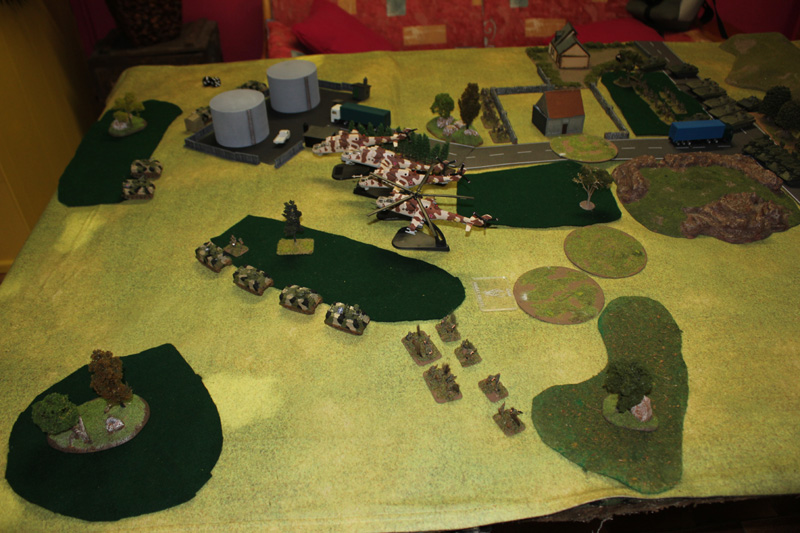
In the darkness, The Soviets send forward a BMP2 recon platoon, a BMP2 Motor Rifle Company in the North A second BMP2 Motor Rifle Company advance in the south. Shilkas take a nominating position in the centre overlooking Aussie infantry. The well dug in infantry survived unhurt. In the rear, the Vads radar light up. Seeing four Hinds bearing down, The Vads taken down one Hind. The fire must have unnerved the Hind gunners as the 3 remaining missed everything.
The two platoons of M113s race out from behind the fuel tanks and woods and effectively ambush the Hinds. The massed 50 cal fire power bring down another two Hinds. The fourth Hind decided that this was a bad situation and flew back to base. Not to be out down by their transports, the Australian infantry in the north and infantry in south destroyed the Shilkas with massed Dragoon fire.
Being totally surprised by the accuracy of Australian fire, the Soviets now advanced more carefully. The Soviets in north took some more shots an infantry facing, but again it was totally in effective.
(Game_02_03_Burning_Shilkas)
The M113s return to their original positions. The Vads head south to reinforce the troops depending the Gap. The infantry in North manage to destroy some more BMP-2s.
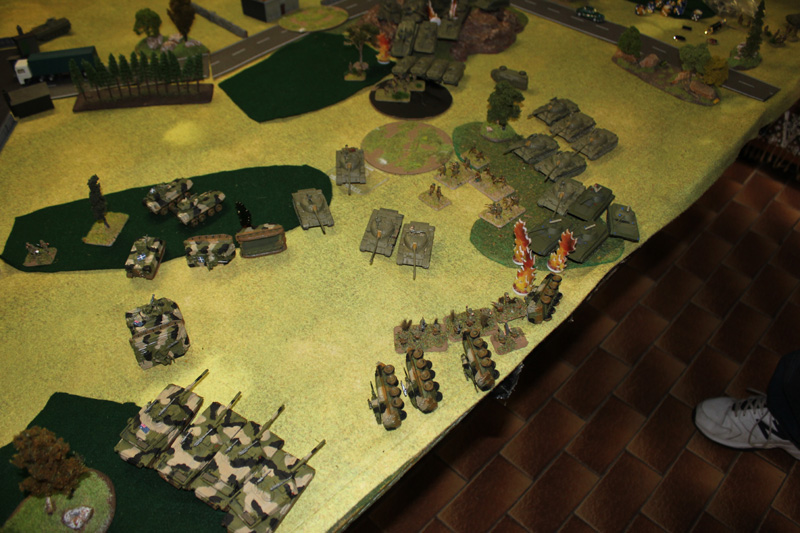
The battle now enters a quiet phase. The Soviets wait for the reserves to arrive. Eventually the Soviets ring on 3 T64s in the centre and 10 T55s in the south.
The Australians bring their ASAVs. One platoon goes to guard the fuel dump. The ASLAV HQ and the second platoon go to defend the gap.
Dawn comes and hell breaks out.
(Game_02_04_Hell)
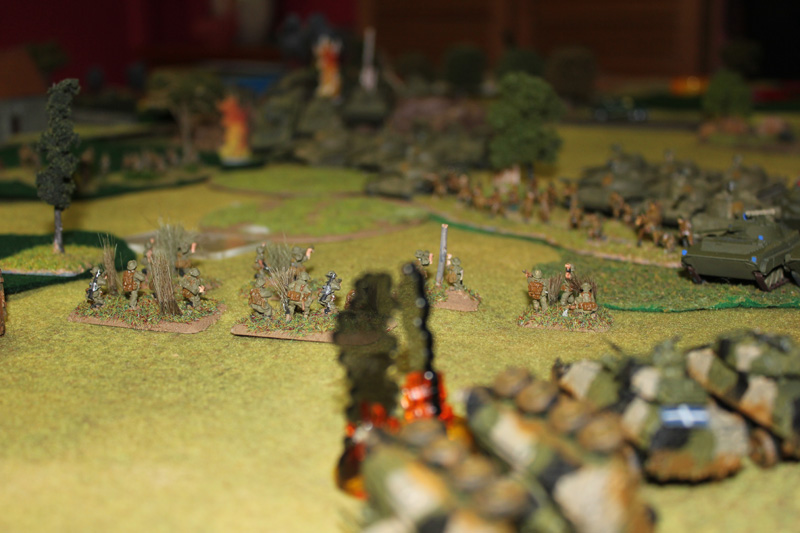
The Soviet infantry in the north assault the Australian wiping them out, but not before reducing their numbers. Their M113s decide it is smoko and head back to Amsterdam looking for pub that sells Aussie beer. T64s and Storms reposition. Soviet Infantry, BMP-2s, T55s all open up on the Australians guarding the gap. The infantry is well and truly dug in and survived unhurt.
(Game_02_05_Facing_The_Swarm)
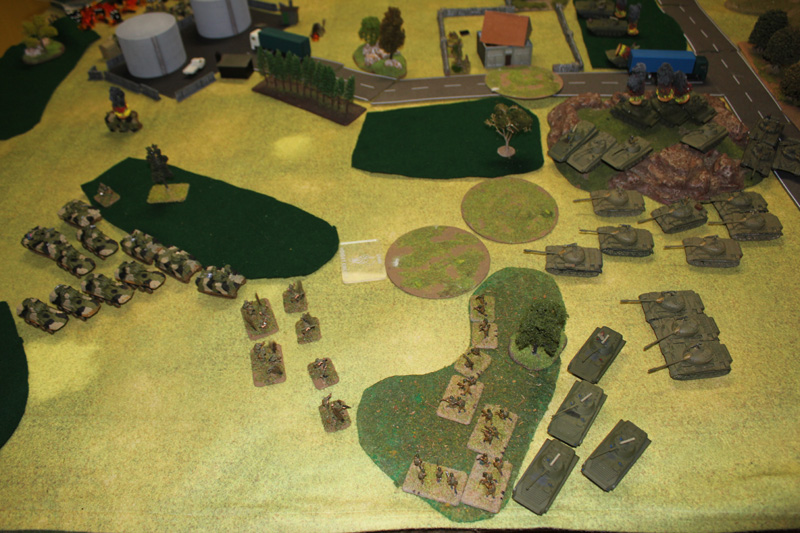
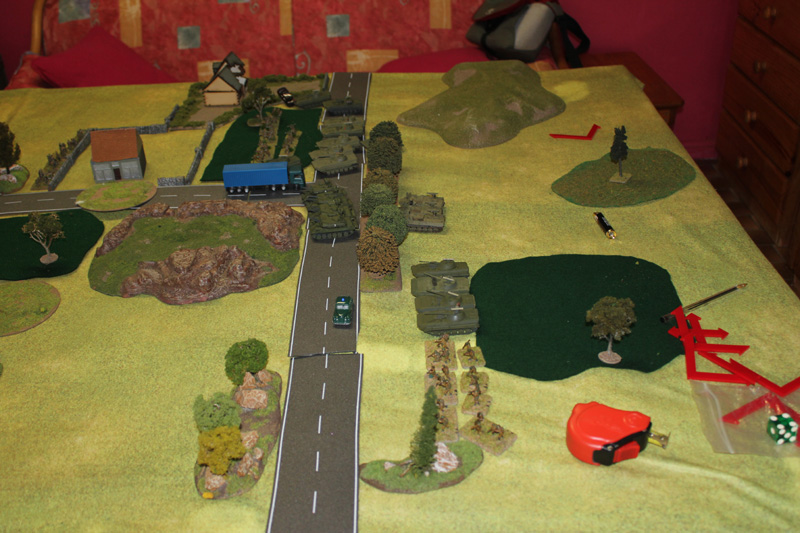
Now knowing where the Soviets have committed their forces and that they are heading for gap in woods, the Australians reveal four 1PM1s that have been waiting for the right moment for their ambush. The 1PM1s destroy a number of BMP-2s and are in position to cover the gap. The LAVs, Vads move to positions engaged to Soviet Infantry. For the first time, the Australian fire was inaccurate. The Soviet infantry survives .
Break through!! Break through!!
(Game_02_06_Break_Through)
T64s, missiles from Storms and BMP-2s all target the 1PM1s but all missed or have their shots bounce of the armour. However the bigger threat is now that the T-55 commander finds a gap in the mine field and orders a platoon of T-55 to follow him through. Infantry clears the other mine field. The T-55s assault into the Aussie infantry that have been guarding the gap since the start of battle. Incredibly , the infantry now take of their first casualties. 2 squads are lost. The infantry falls back, but the infantry have drawn the T-55s into the front of the 1PM1s. The T-55s and Soviet infantry are now controlling the gap.
The situation is now desperate for the Australian with Soviets controlling the gap. The ASLAV HQ head to contest the objective. On ASLAV bogs, however the commander makes it. The remaining Vad and infantry shoot most of the Soviet infantry off the objective. The 1PM1s had to shot at the T-55s rather than the more dangerous T64s, Storm and BMP-2s. Three of T-55s were destroyed leaving only the T55 formation commander on the objective.
The T-55 commander move to get better shots on Australian infantry while opening up firing lines. Soviet Infantry fall back to allow a T-55 platoon, one of the two remaining that has been lurking behind the action to move up. The other remaining T-55 platoon maneuver to come down though a another gap between the woods. BRMs also begin to move through a second gap.
The T-55 Commander and BMP-2s kill 3 squads of Australian Infantry, leaving only the platoon commander. The commander passes his morale and keeps hanging around. BRMS move up to engage the ASLAV HQ. The ASLAVs survive. The fire from T-64s and Storms is getting better, they manage to bail a single 1PM1. A lone BMP-2 in north sneaks towards the centre. The ASLAVs guarding are destroyed by T-54 fire. Again the Soviets are controlling the gap.
The Australian’s require to take decisive action. The 1PM1s are forced to break cover and move to contest the gap. The 1PM1s destroy 3 T-54s including the T-54 commander. However the 1PM1 are now out in the open. On the other side of gap 4 ASLAVs race up to engage the BRMs and the BMP-2. The ASLAVs wipe out the BRMs and the BMP-2.
(Game_02_07_Counter_Attack)
The remaining full strength T-54 platoon push through the gap on the offside sides of the woods to the 1PM1s. The T-54 wipe out the 4 ASLAVs. The T-64s finally hit and destroy one of 1PM1s (A great roar of relief and frustration came from the Soviet lines.
In a spectacular round of firing, 4 ITVs who having been hiding in the Australian rear , knock out the 3 T-54s. The 1PM1 split fire destroying 2 Storms and 2 T-64s. The crew of third T-64 had enough and fled. At this point the Soviets called it quits.
The Australians hold the Soviets at the gap.
(Game_02_08_Carnage)


Battle Report Author
Opponent
Army Lists Used In This Battle
Recommend Commander For Commendation
Share this battle with friends
thunderchildWins

– Nice write up, but would have been better with a narrative spacing of the photos.
Farewell Thunderchild.
lol, as an Aussie you get an auto commendation for bringing back to the future Aussies!
Crikey, those Aussies ARE modern! XD Hoping there will be some cool Australian kit in the Free Nations book. Good win and report.
Stripes list works OK now !! THx
That convinced me: my Free World Nations Support formation will be Australian (due to your pictures) – and our historical and current friendship relations 😉
@Kubikhan: The Australians were somewhat not very happy when they first assigned to Niederbayern. The troops decided that they would go to Amsterdam for some R&R regardless of their HQ and Soviets. The NATO Higher Command soon realised it was easier to “officially” redeploy the Aussies than try and stop them.
@CrazyIvan17: The redeployment did give the Australians plenty frequent driver miles, but the troops didn’t really care as they had other things on their minds.
Man that looked like a tank graveyard by the end. Great AAR and love seeing the Australians in action aiding our fight for the homeland.
somebody washed their tanks 🙂
Congrats on When and the photos
Why am I not surprised the Aussies chose to land at Amsterdam! Congrats on the win, and glad to have you on board, mate!
An excellent AAR. The Australians are all over the map, getting those frequent driver miles huh?
The Australian army would like to know why these Americans keep calling themselves Australian…
Nice report! Like the idea of using the US as a proxy
Nice report
I reloaded the Army List. It works for me.
Oh Thunderchild; your strip[es-02 orbat wont open:
BlobNotFoundThe specified blob does not exist. RequestId:9f7bdb05-001e-0048-5df0-b91cc1000000 Time:2018-03-12T10:55:48.3753581Z
maybe reload???
Congratz on the 2nd win Mate! Recommendation.
I knew my Australian friends would come and shore up the defence of Amsterdam Even win!
excellent AAR and I understand the pictures (role, ….but just)
Like the paintwork on your force