Fought At Ruhr
2244 days 2 hours 10 minutes ago
Training at Sennybridge
View Linked Report - CLICK HERE 70 POINTSTournament in Milan, first match is a Blue-on-Blue exercise.
My infantry formation supported by a reconnaissance squadron vs the armored squadron of HMS.
I decided to defend, as I know Chieftains, without proper support, will struggle to attack.
We roll for the mission and Contact was chosen.
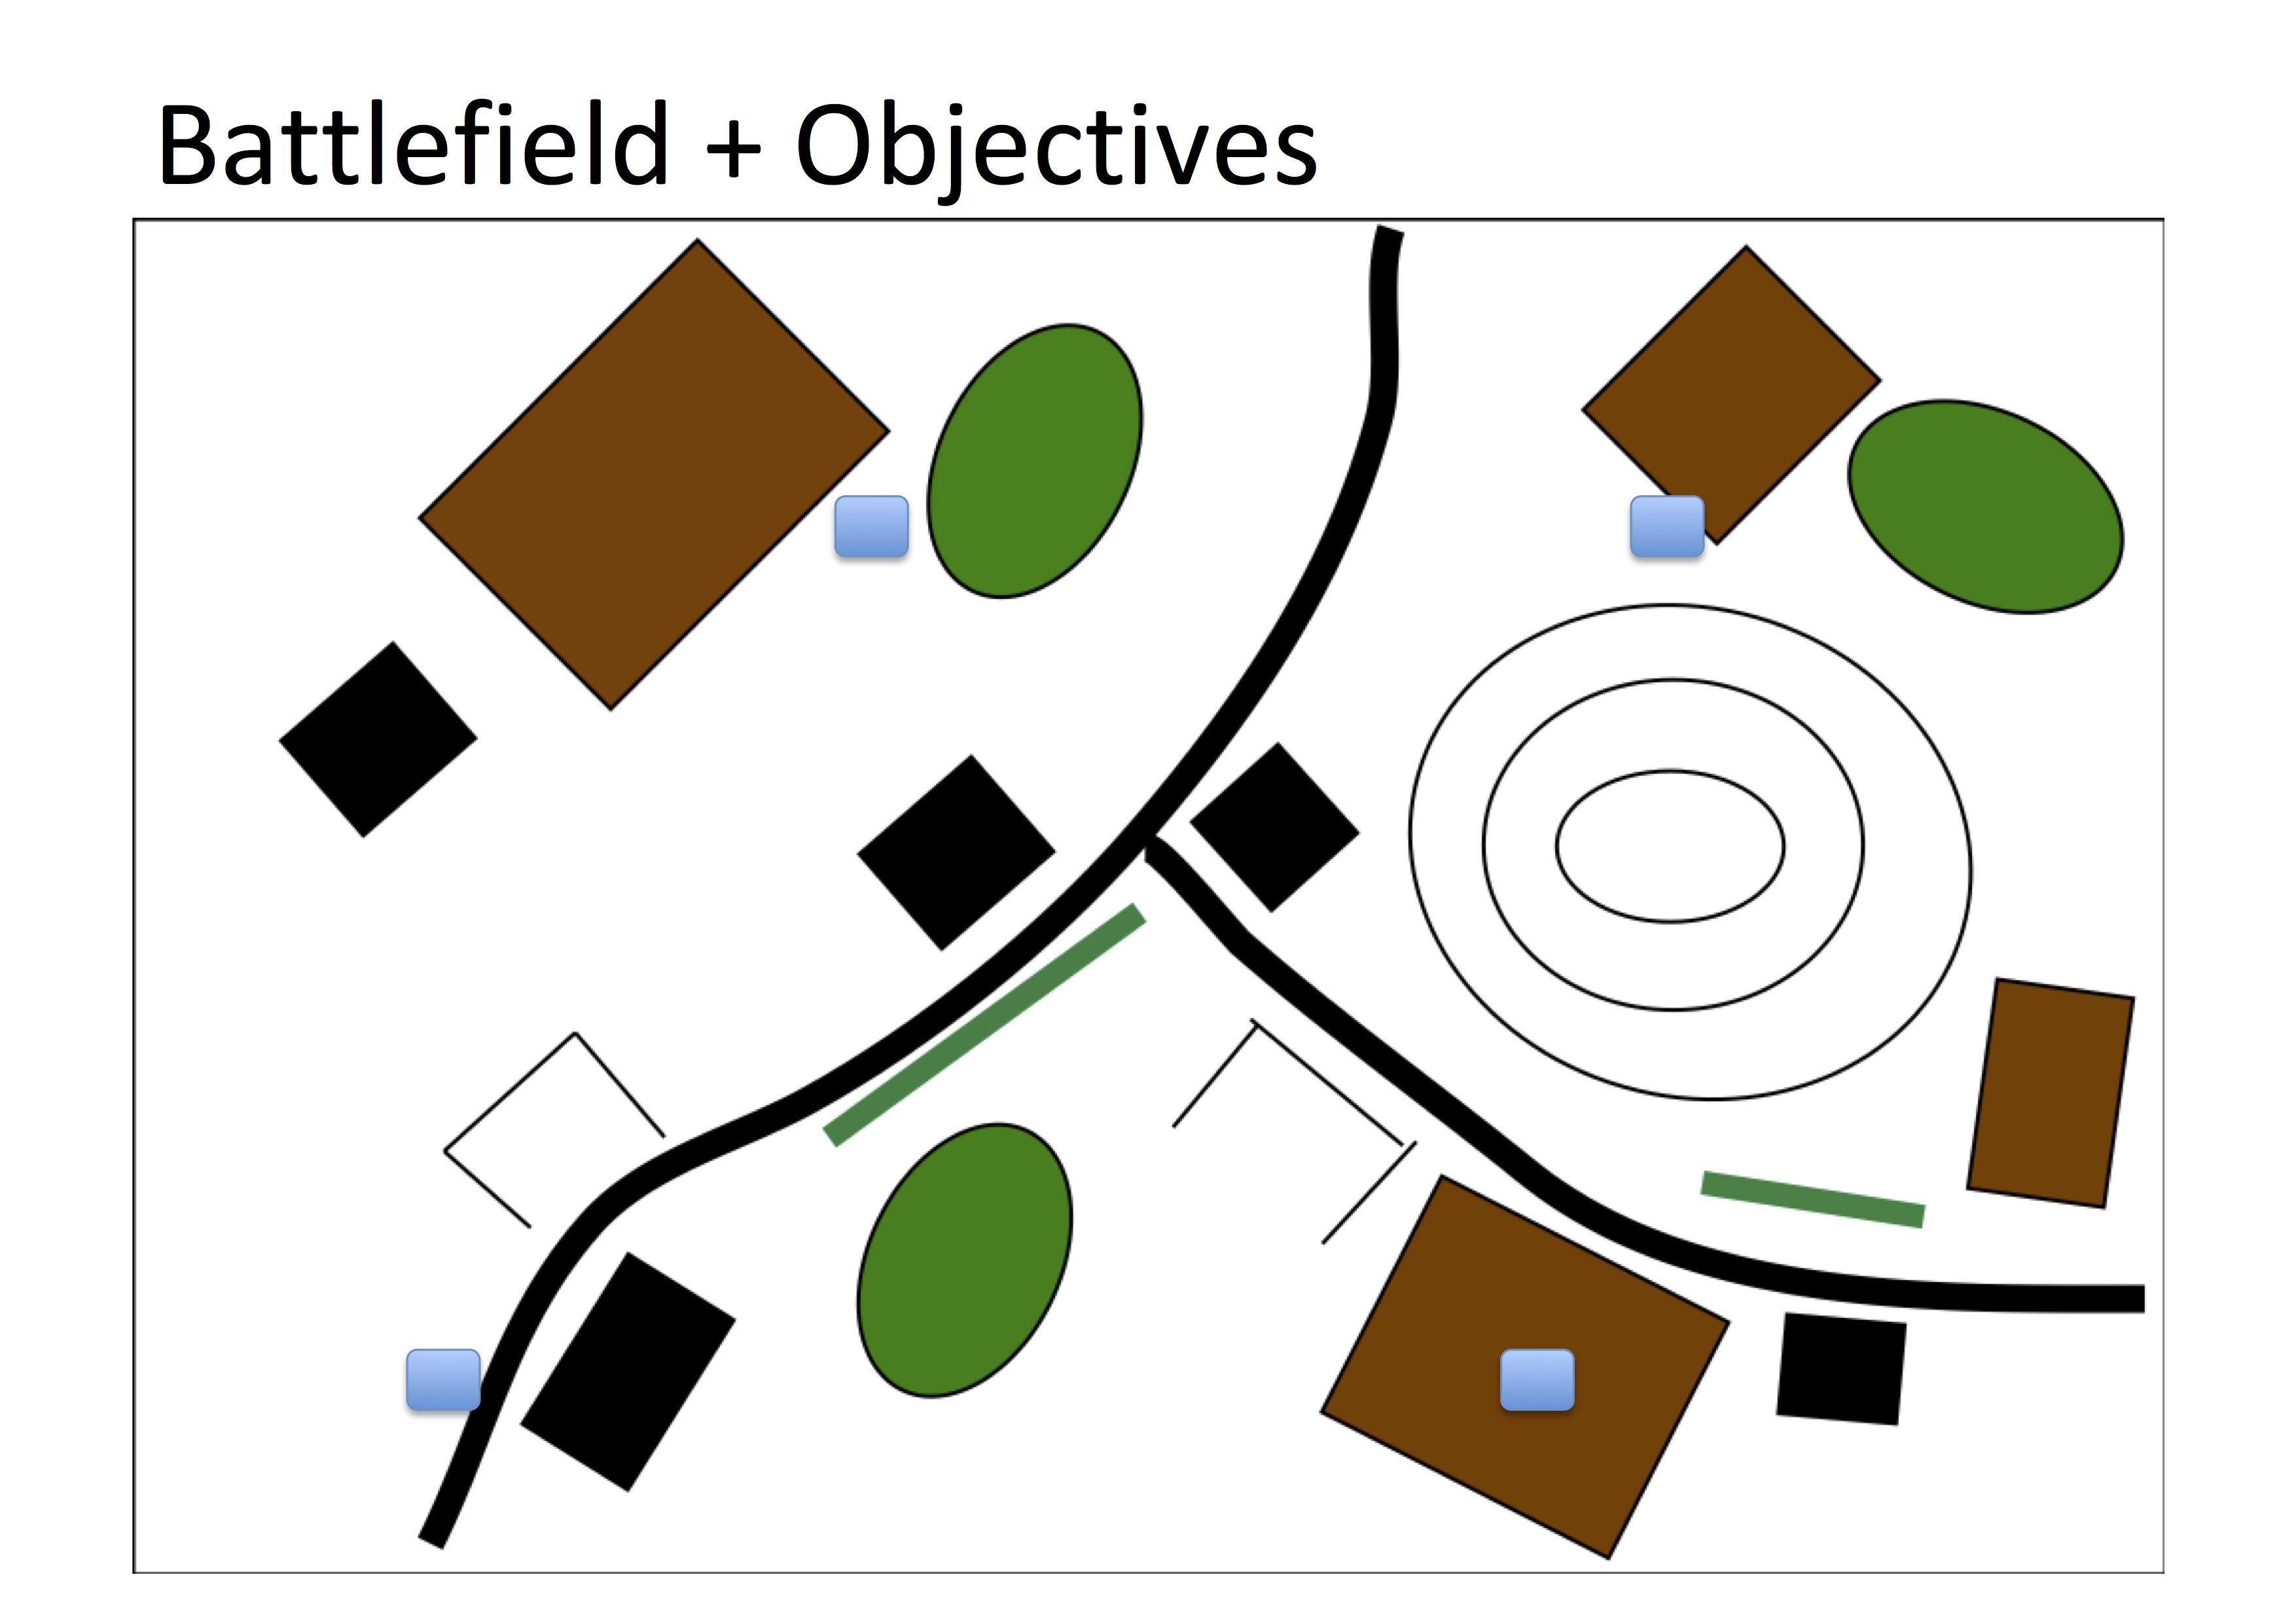
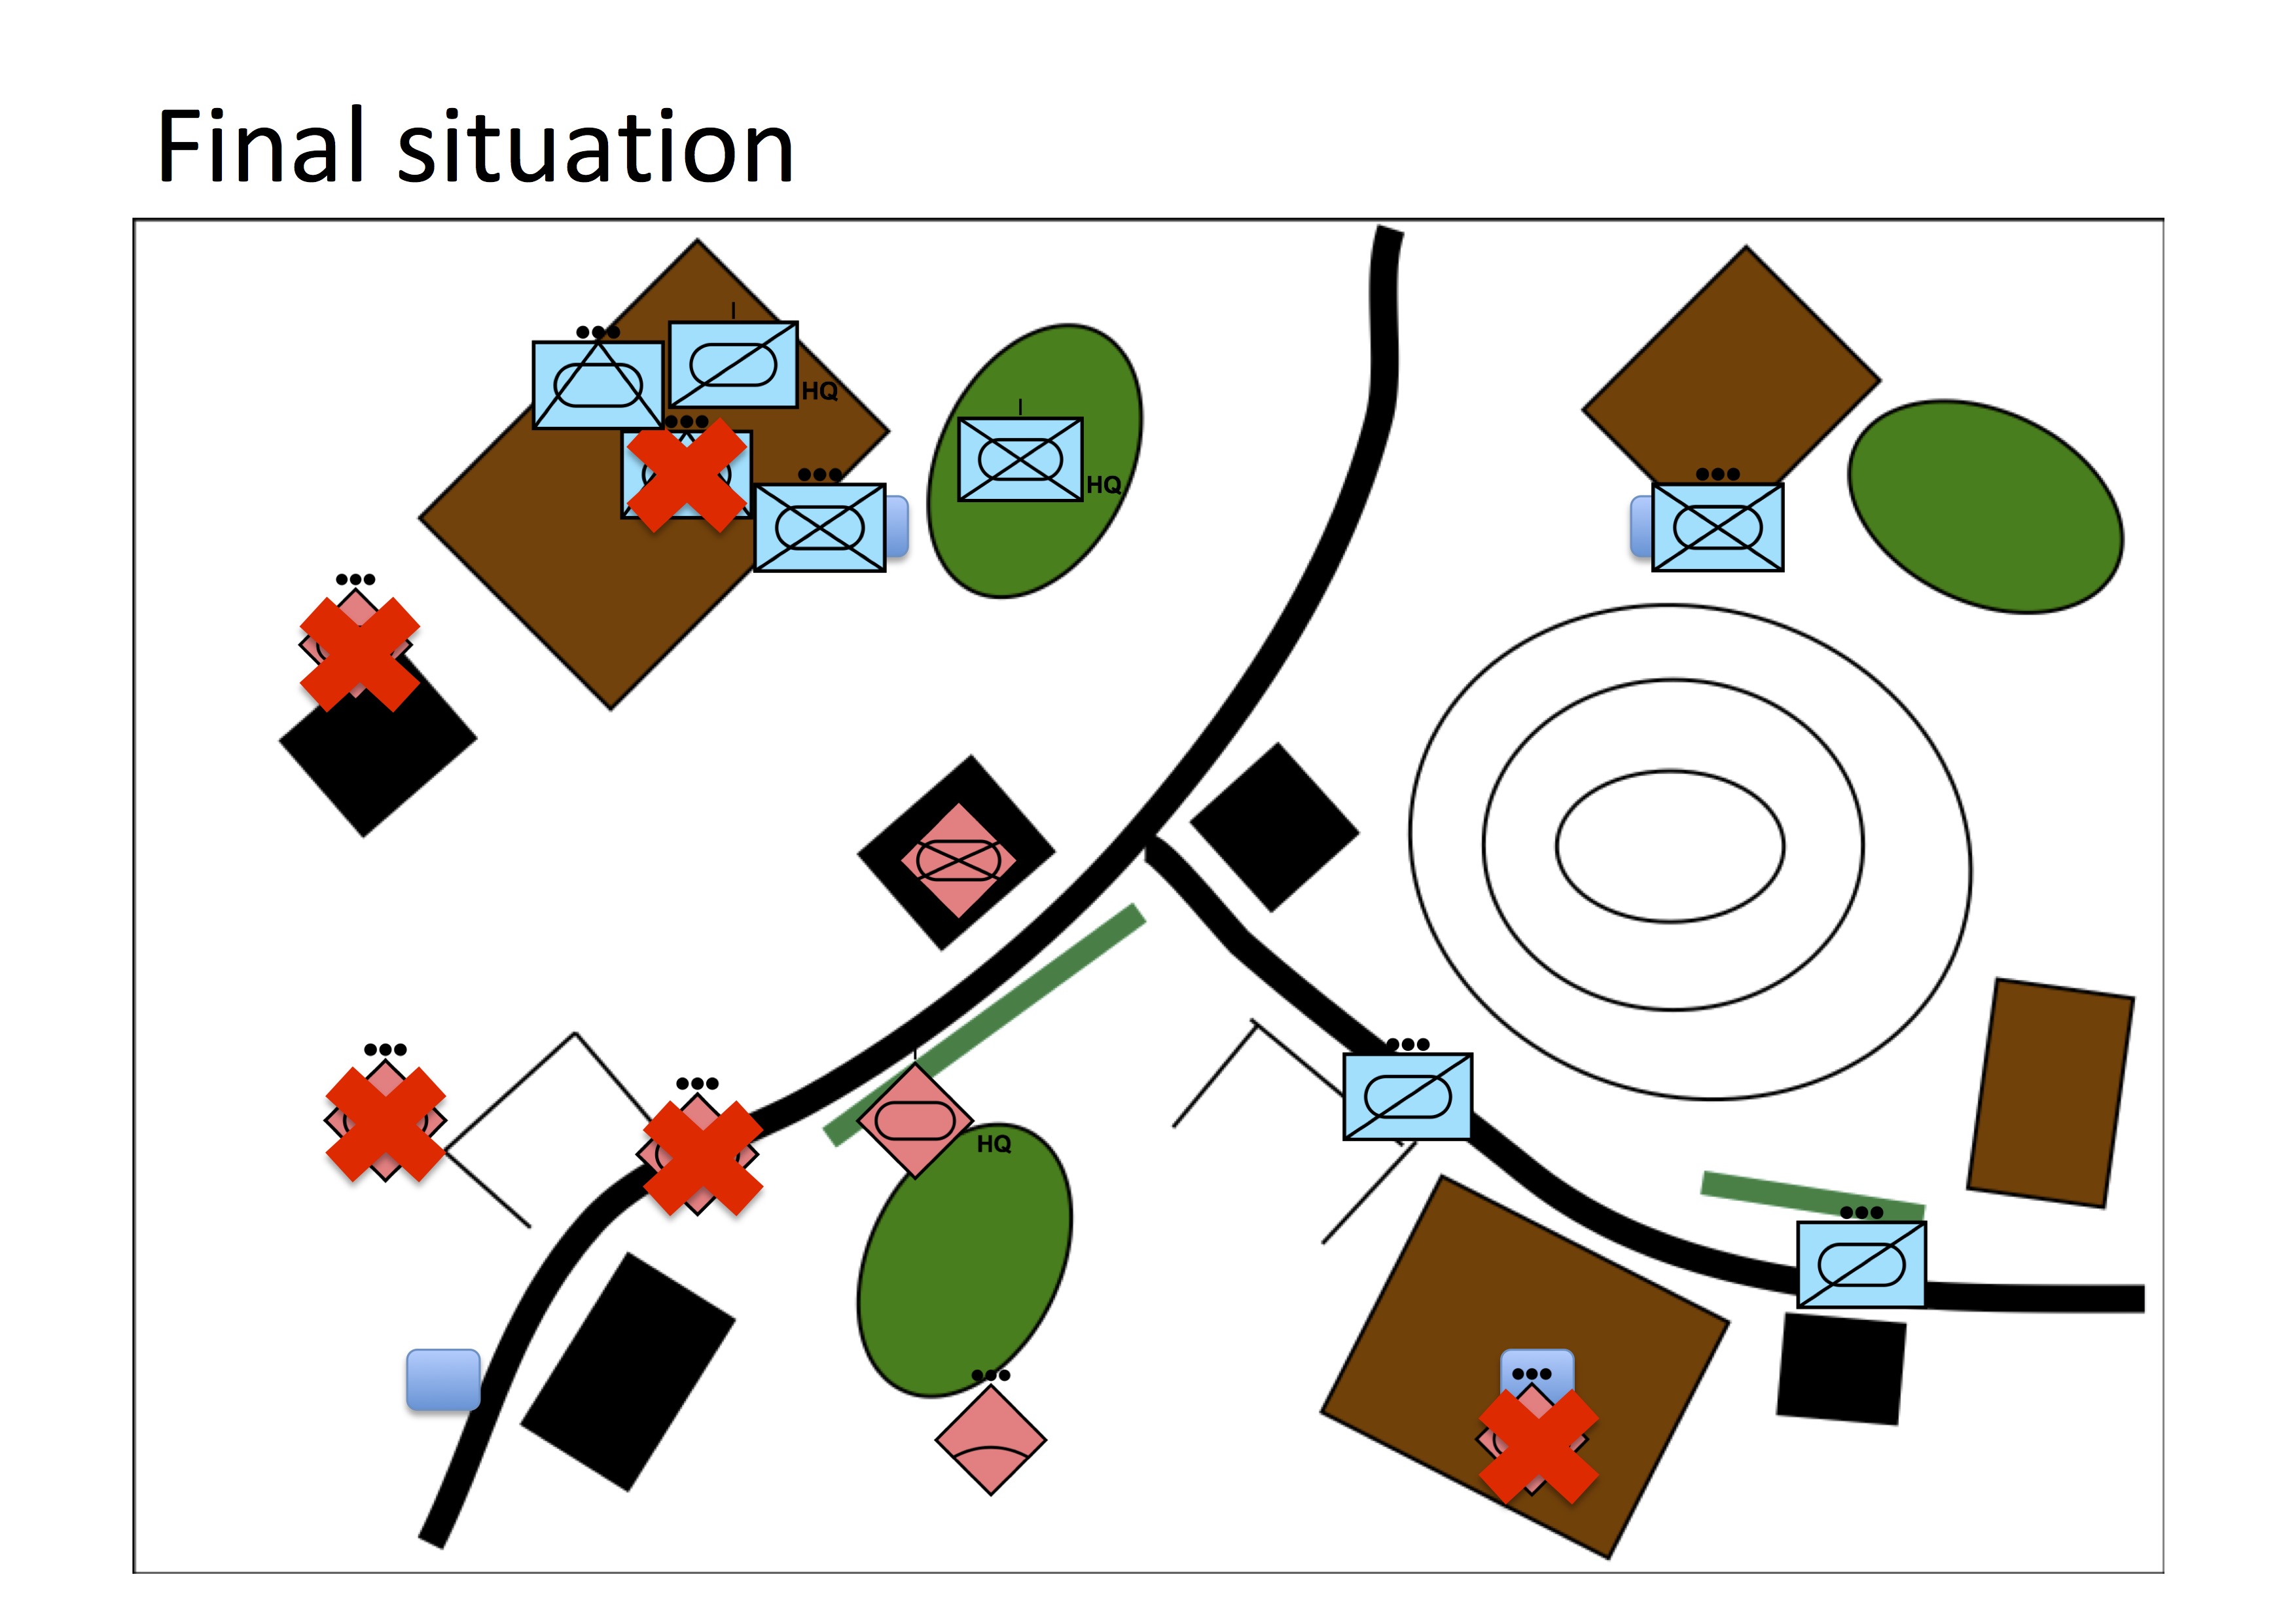
Unfortunately I didn’t manage to take any picture (HMS did, see his linked Battle rep), but I created some situational maps of every phase of the battle.
I defend both objectives with one mech platoon, I held the Strikers in ambush and one platoon of Scimitars ready to support where they were needed the most or to counterattack. Harriers were held ready.
During turn one, HMS blitzed his Chieftain and was able to gain some ground with the infantry and cause me some losses in the infantry platoon defending the left objective.
My reply was ready, Strikers shoot from the ambush destroying two Chieftains and causing the third to flee. Scimitars engaged the infantry transport and destroyed them as well.
During turn 2, HMS was able to receive his second platoon of Chieftains, his infantry shoot at my defending platoons causing some damages.
My Harriers showed up but 2 of them were downed by the Rapiers, the others couldn’t hit a barn. My MILANs and Strikers were able to destroy or bail some Chieftains.
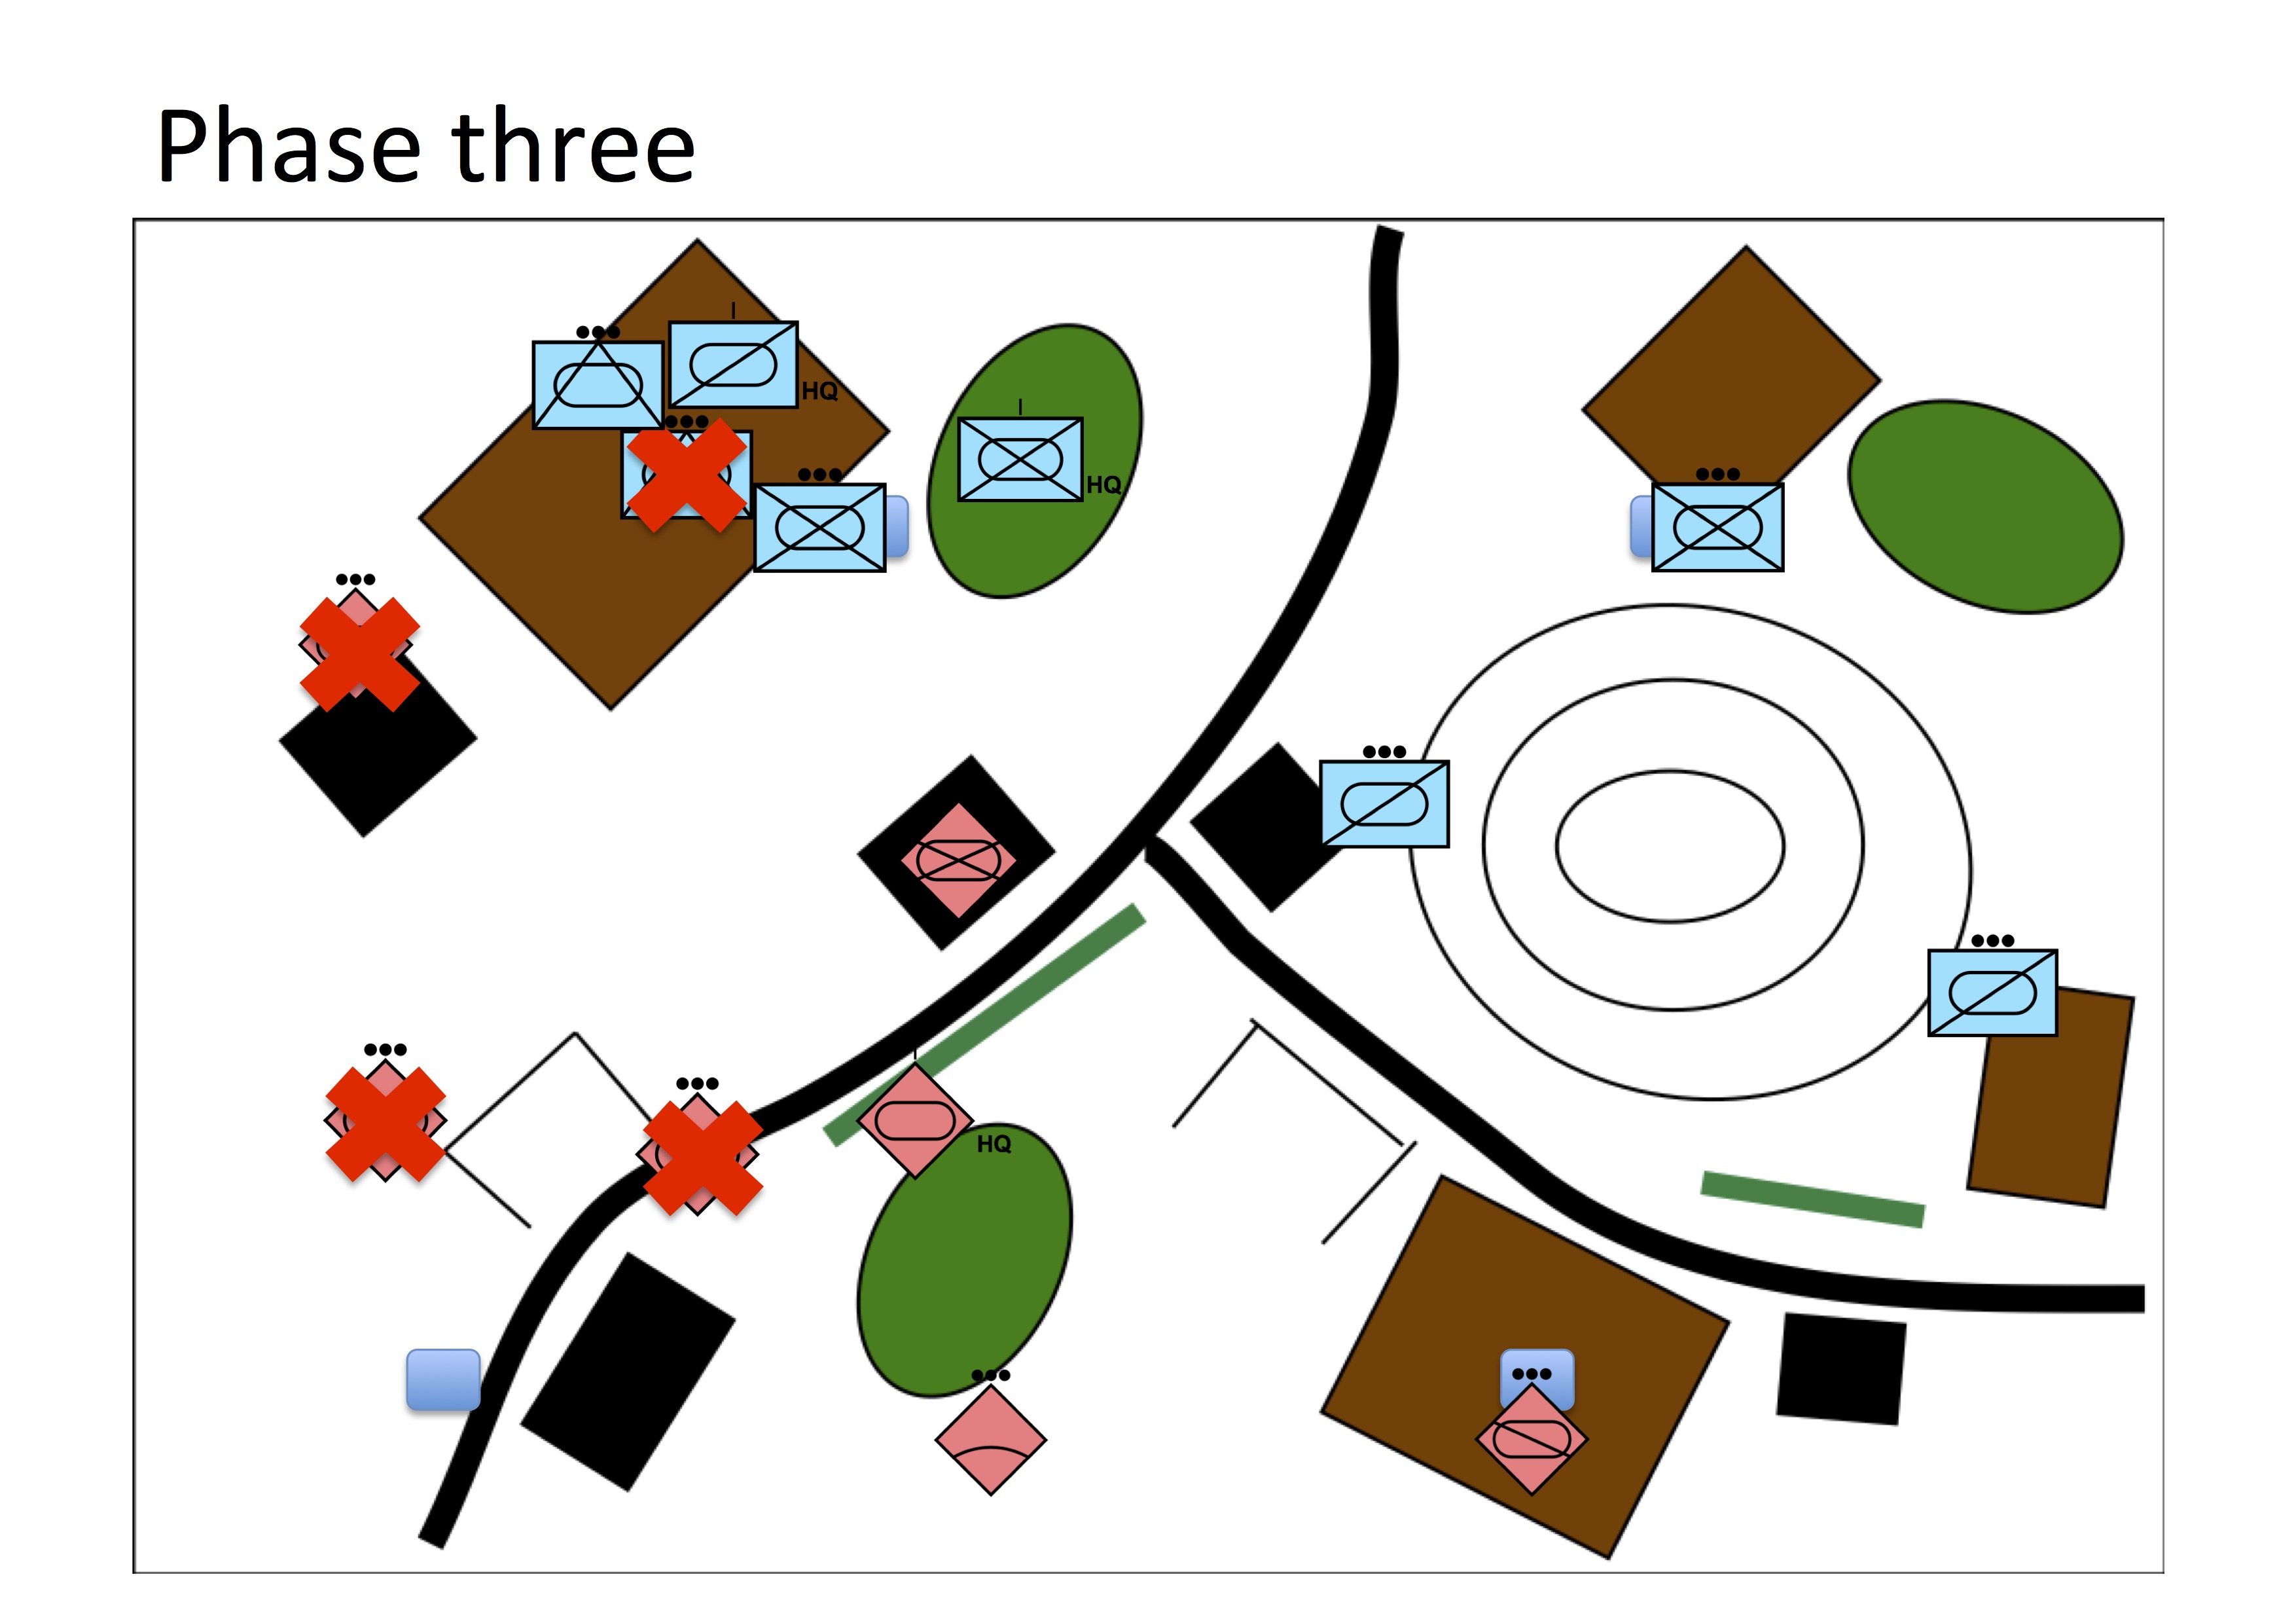
During turn three HMS received his lasts reserves which he used to reinforce his right objective and to add pressure on my left flank. He destroyed my Striker platoon and my infantry transport as well.
I managed to receive my first reserves (MCT) and the Scimitars began a Counterattack. The second Chieftain platoon was destroyed.
In turn 4, I received my second reserve (Scimitars) which I sent around the large hill in order to counterattack HMS’s right objective. The shooting of the Scimitars was deadly and they destroyed the Scorpions guarding the objective.
At this point HMS conceded the game. For sure not the easiest of the game for him and he wasn’t aided by the dices.

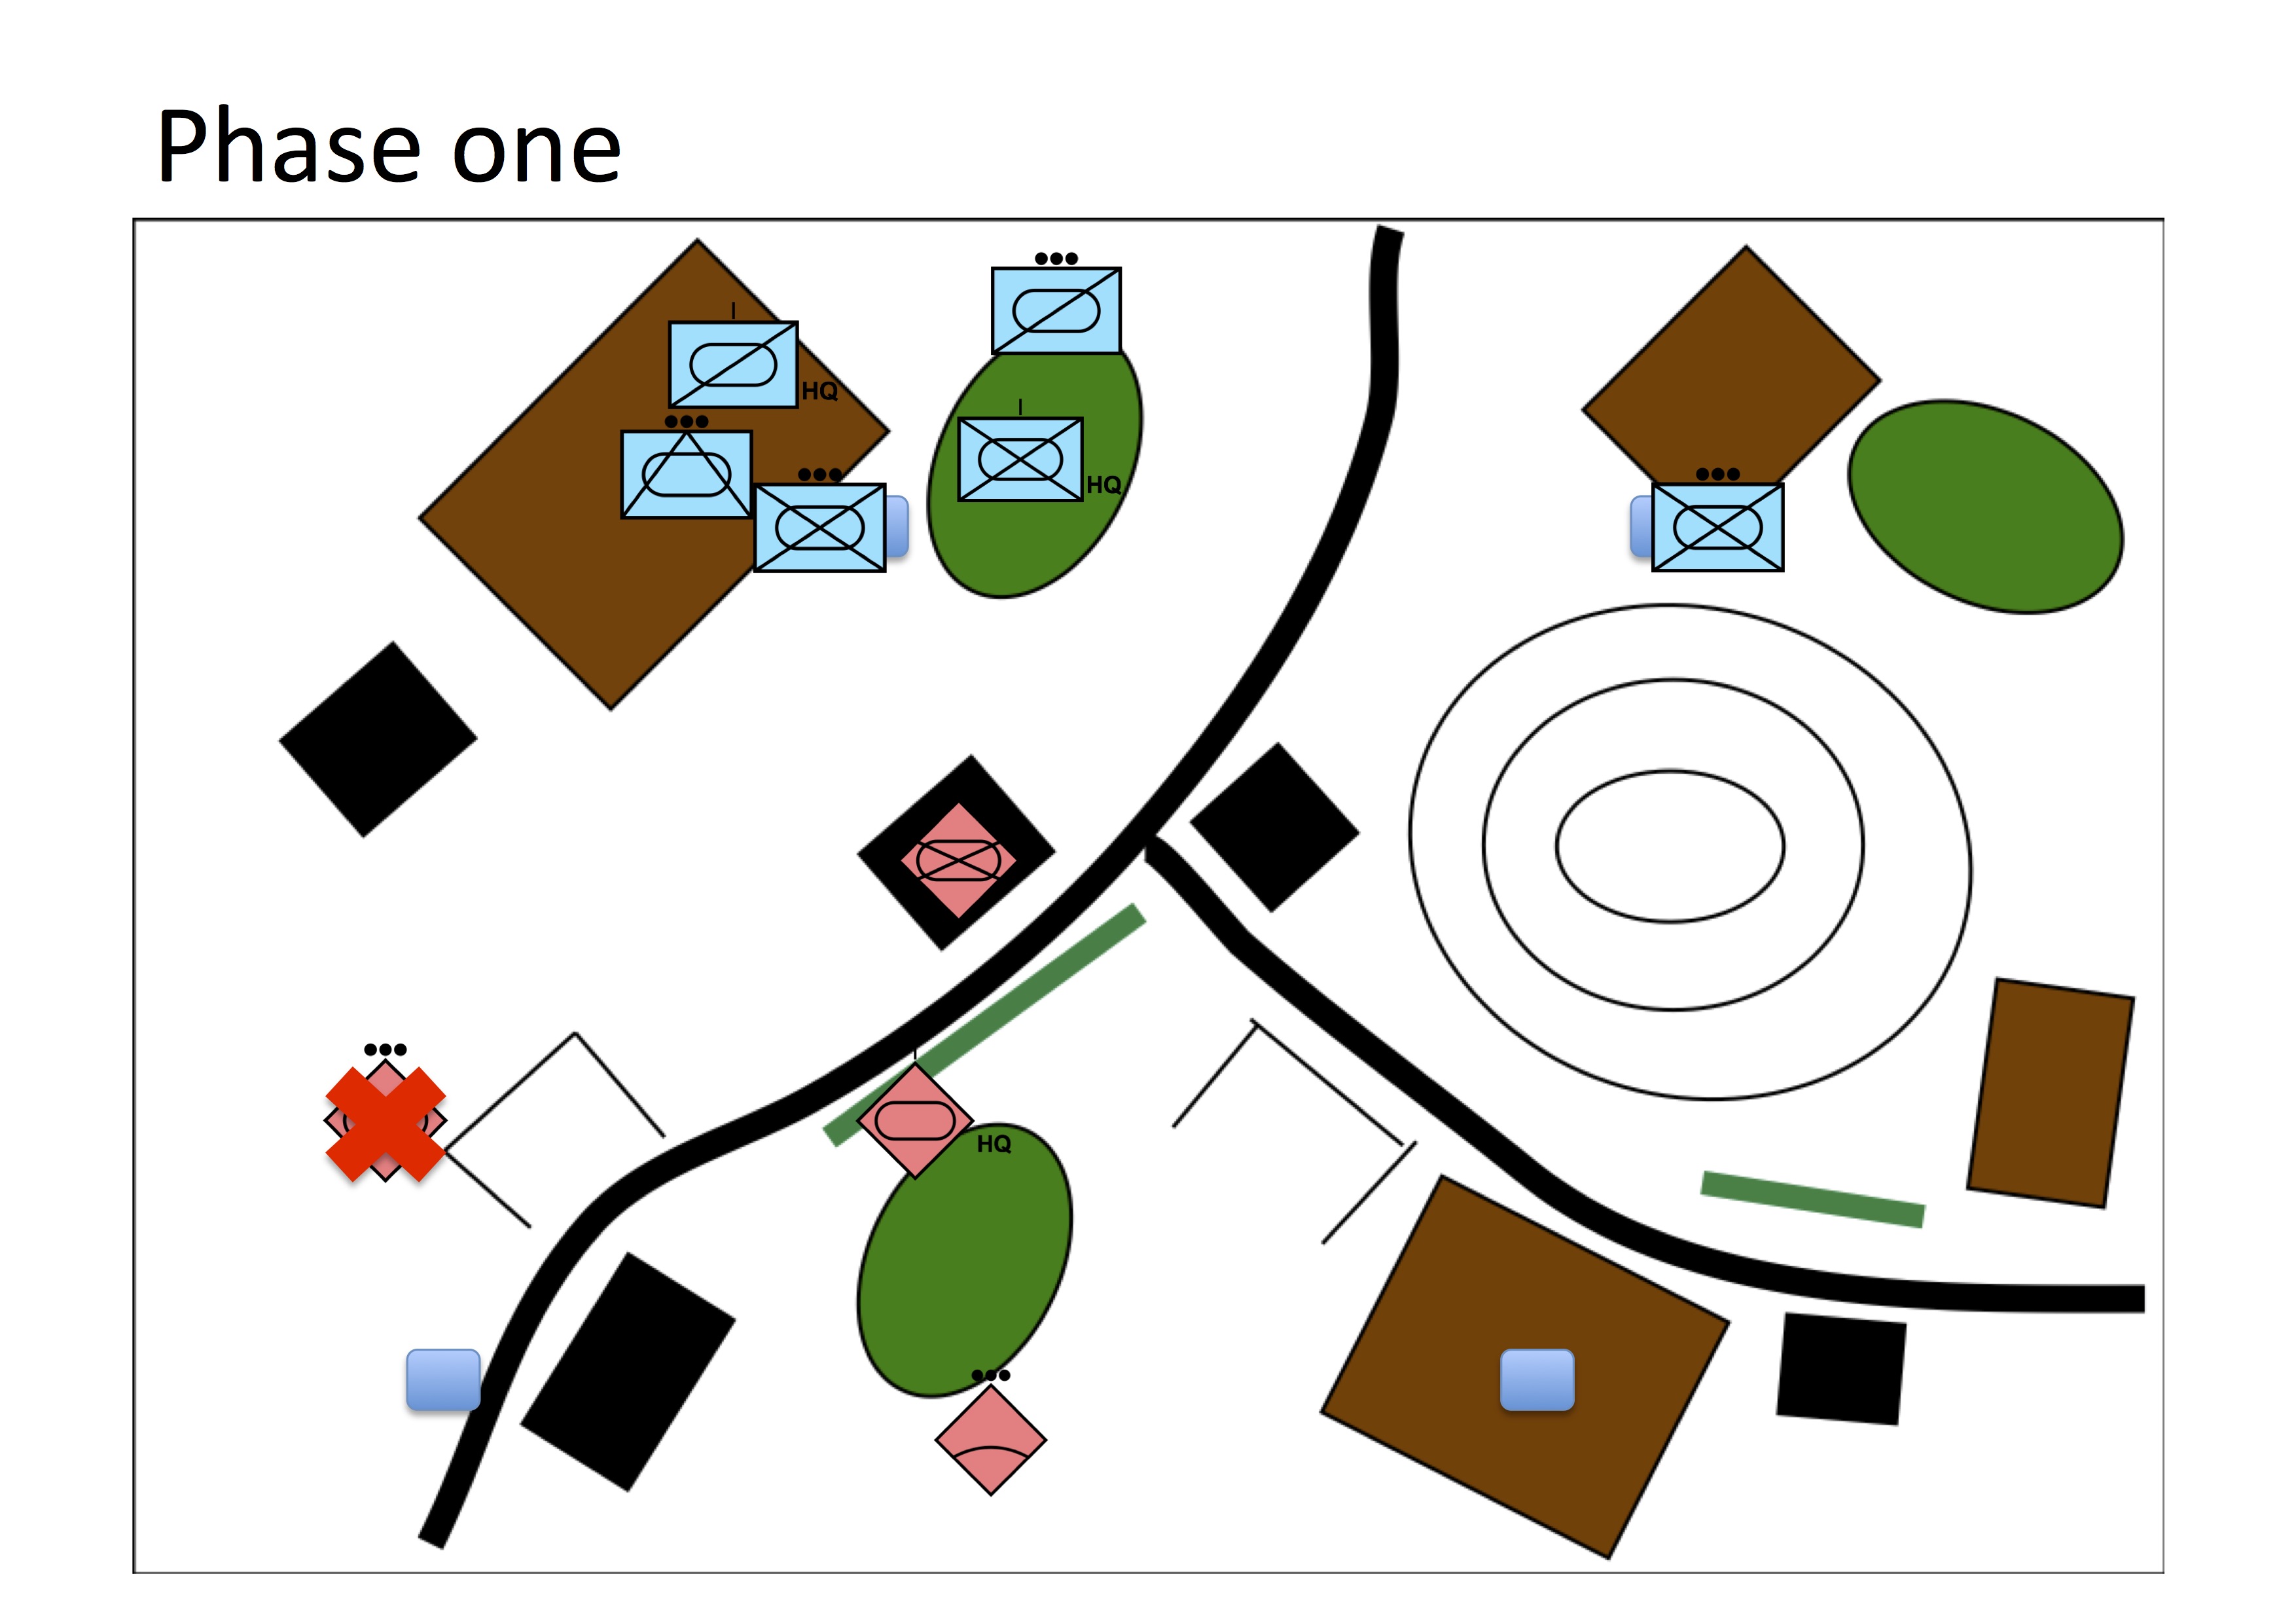 First moves, HMS infantry take position in the building in front of the objectives. Strikers shoot and destroy Chieftains.
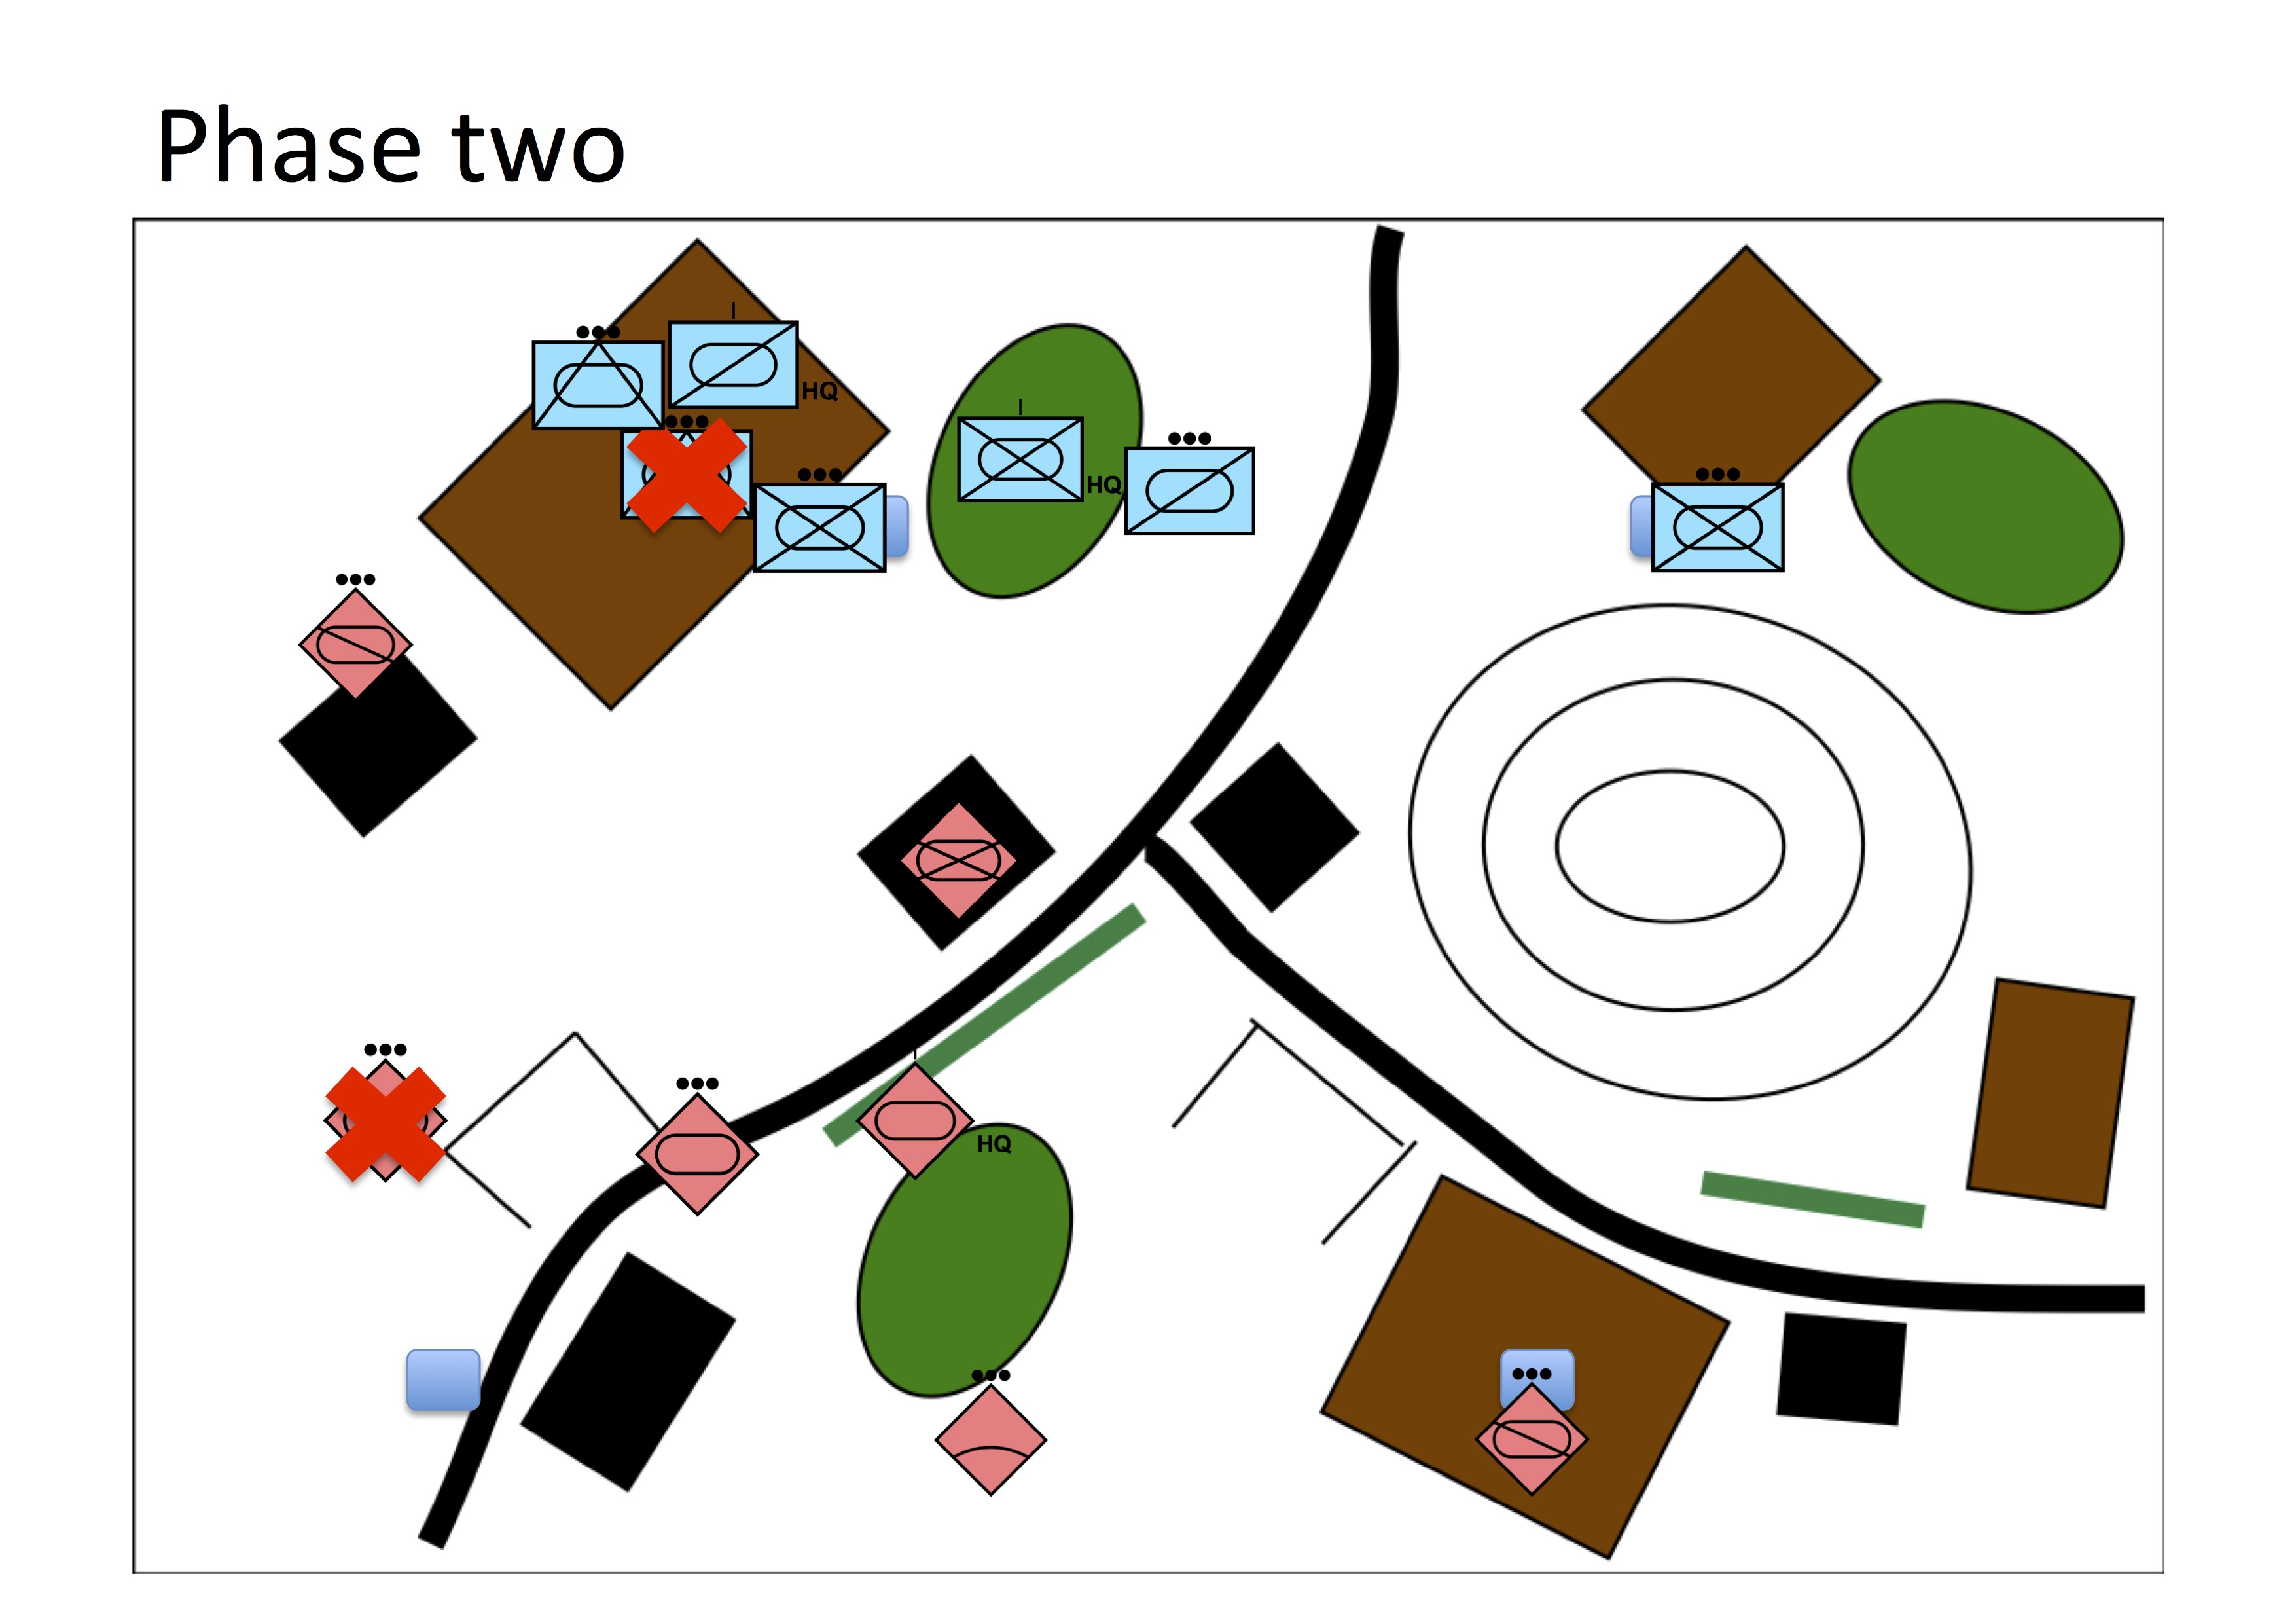
Battle Report Author
Army Lists Used In This Battle
Recommend Commander For Commendation
Share this battle with friends
RegazWins

I really like the you tube vid
Those map recreations are actually pretty informative when you combine them with the text, creative! Would have loved to have seen pics, but this does the trick too. Good job.
The battle flow was easy to follow I just feel like actual pictures could have helped.
Keep up the good work!
Like the diagrams, but I’m not a fan of blue on blue for reported games…
Belfast was the Red Force for the game? Since report all the same
Nice to see that Swiss Army tactical symbology has 100% compatibility with NATO standards.
A nice AAR with some good overheads.
Now who doesn’t love a bit of APP-6A?
Nice report
Warms my heart to see graphics like that. Even without photos, you could still tell what was going on, very nice!
Nice schematics, but I have no idea, how Blue on Blue games make any sense for reporting in a campaign setting.
Brit on Brit action. Does it get any better than this?
Good AAR, and great Idea with the map, now that pictures was not available.
+++
Really scary, like watching the Teletubbies in a World War 3 post nuclear film…
https://me.me/i/18798287
Still you can’t beat it for clarity!
Very nice AAR and the battle sketches were more than helpful. Recce carries the day!!
thx for sharing.