Fought At Ruhr
2242 days 20 hours 49 minutes ago
+++ SECURING THE RUHR
View Linked Report - CLICK HERE 50 POINTS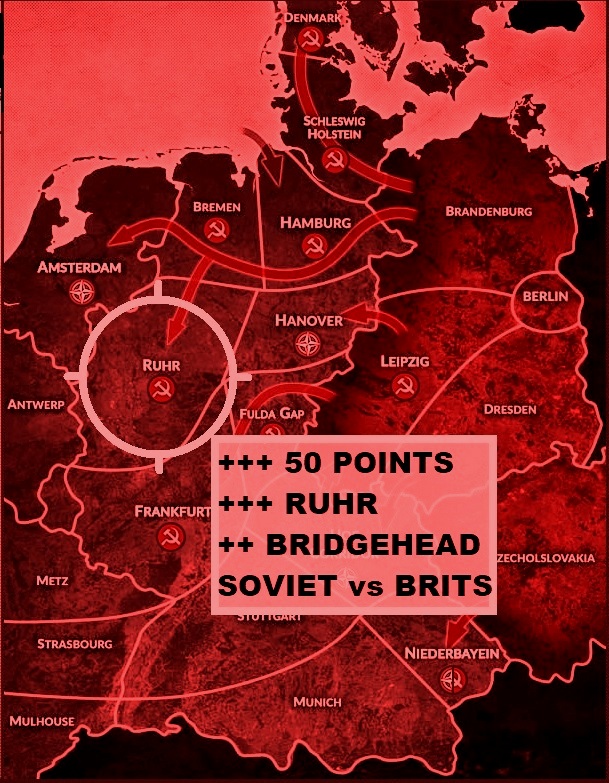
With heavy fighting on the flanks the WARPAC forces struggle to consolidate their gains. A victory in the Ruhr might push Germany out of the war - opening the way of territorial gains when a ceasefire is agreed to.
1-я гвардейская танковая армия
1st Guards Tank Army
BMP Motor Rifle Battalion 50 points
HQ
HQ BMP-2 2
FORMATION UNITS 38
BMP-2 Motor Rifle – medium
– 7xAk-74, 6xRPG-7, 2x LMG, 1x Gremlin 10xBMP-2 20
BMP-2 Motor Rifle – small
– 4xAk-74, 3xRPG-7, 4xBMP-2 8
4x Shilka AA 4
3x 2S1 Carnation 5
BMP-1 Observer 1
SUPPORT UNITS 10
4x Hinds 10
As the force is not fully painted I didn't take a photo.
NORTHAG
3rd Armoured Division 'Iron Division'
Fv432 Mech Company
50 Points
HQ 3
HQ – 1
CPMG 2x CPMG 2
FORMATION UNITS 16
FV432 Mech Plt. 3x CPMG, 2x Carl Gustav, 1x mortar
- 2x MILAN & 4x FV432 7
FV432 Mech Plt. 3x CPMG, 2x Carl Gustav, 1x mortar
- 2x MILAN & 4x FV432 7
Scimitar Recce Troop 2x Scimitar 2
SUPPORT UNITS 30
Scorpion Recce Troop 2x Scorpion 2
Rapier SAM – 4x Rapier 6
TOW Lynx Helarm 2x TOW Lynx 6
TOW Lynx Helarm 2x TOW Lynx 6
Harrier CAS – 4x Harriers 10
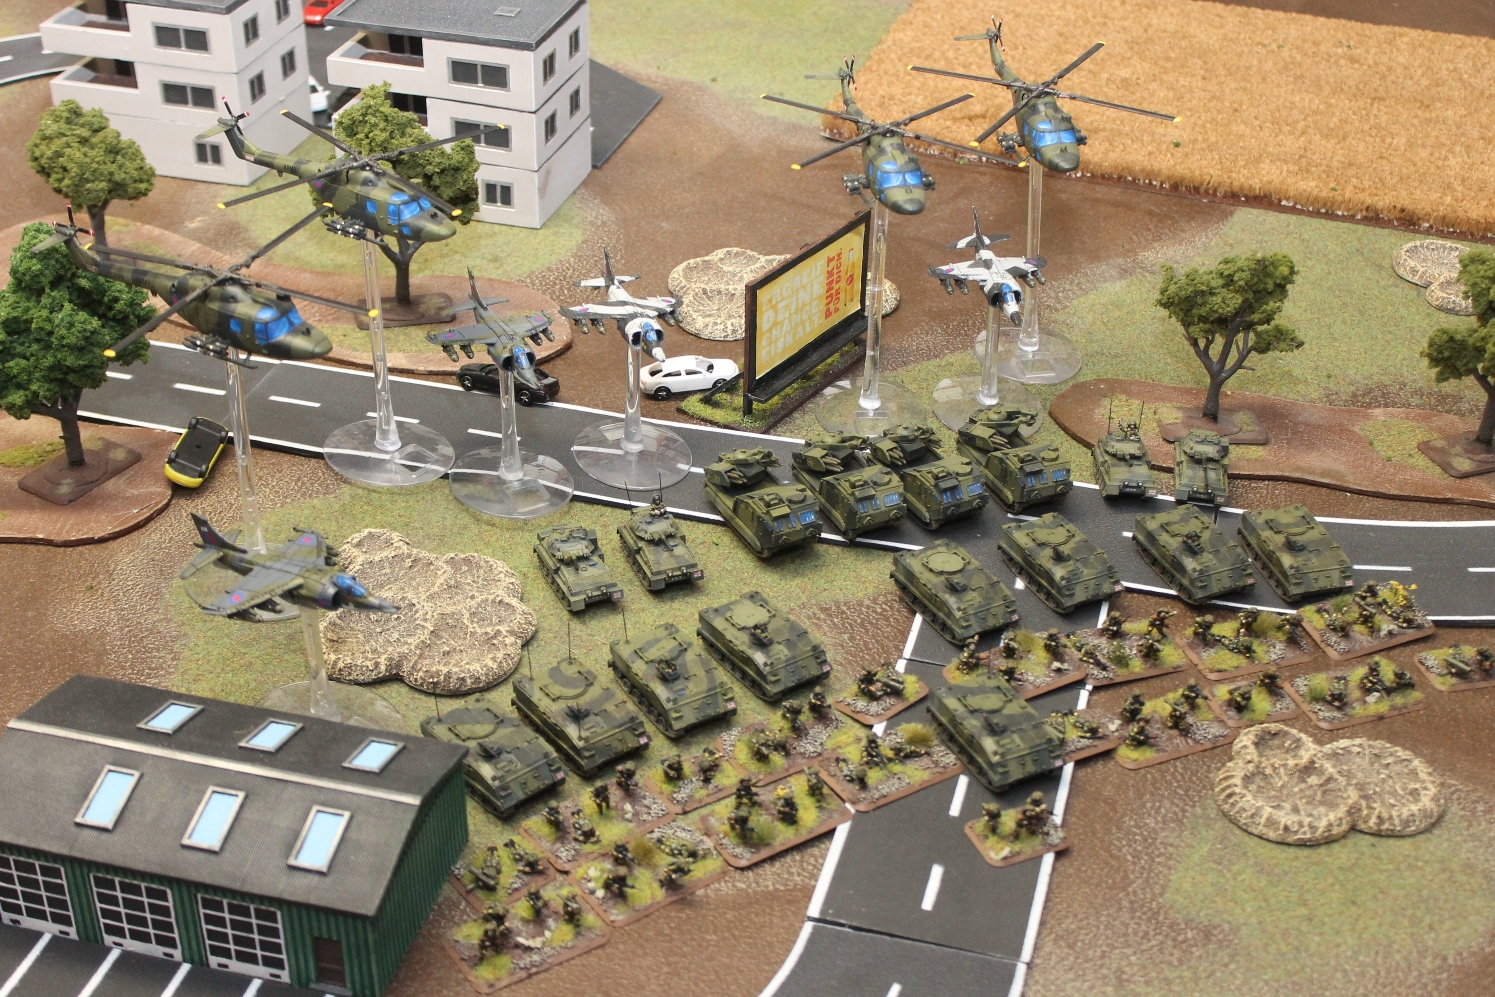
Major Beaver set up his defence with both Fv432 platoons, Raipiers and one unit of Lynx (that started off table).
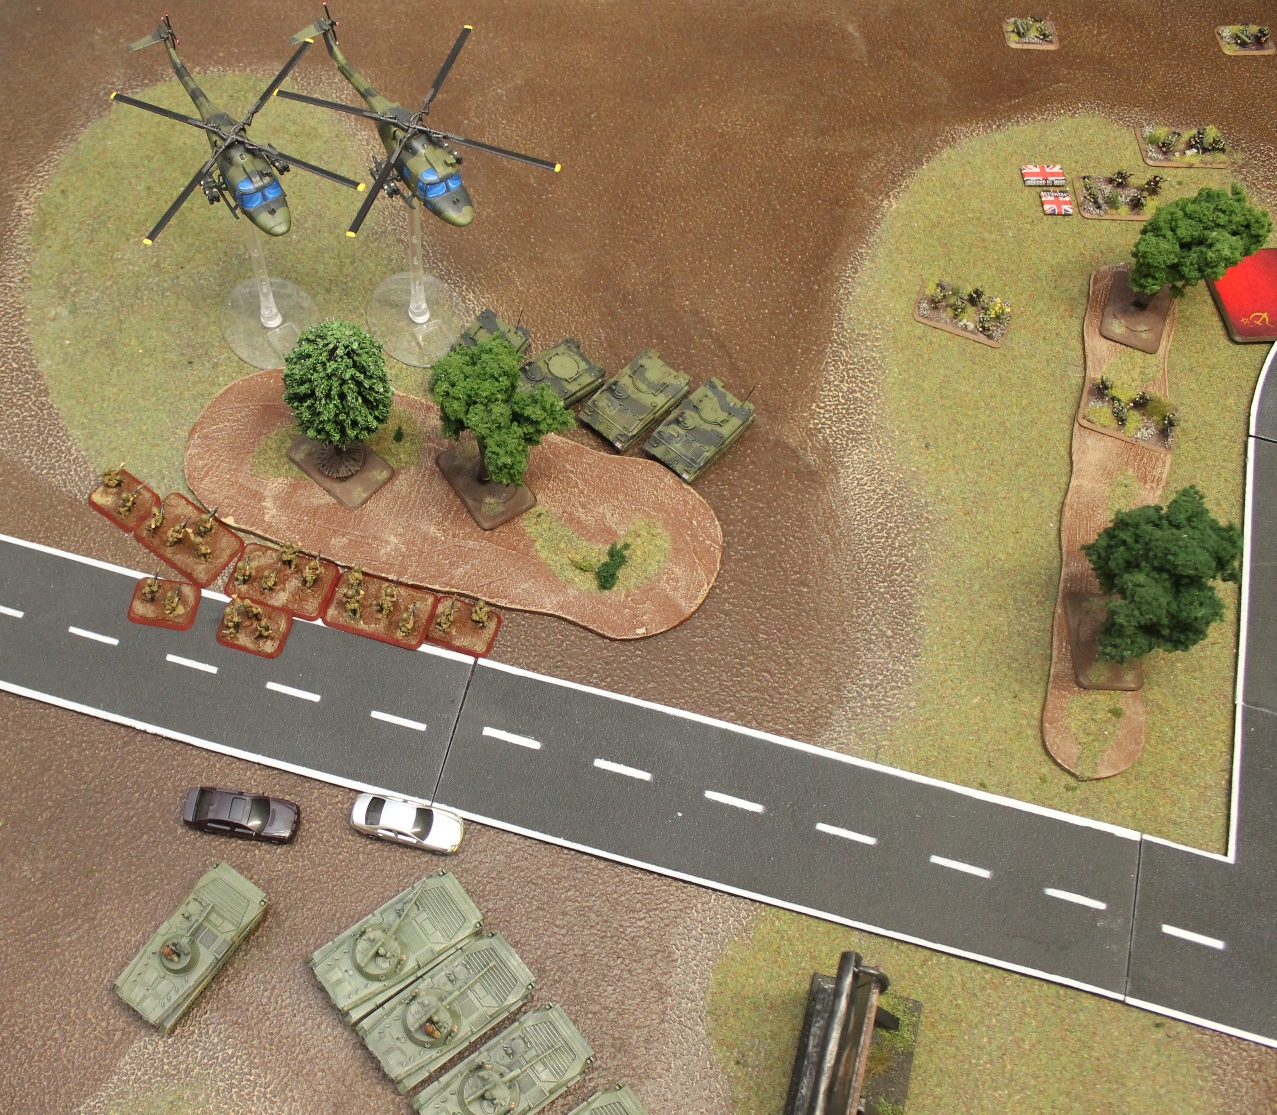
Red Alert placed his units in a U. The strong infantry unit would lead the attack (2) with the strong BMP-2 and Carnation on the right flank (1) and the weaker infantry and their BMP-2's on the left (3). The main attack would be carried out fast by attacks (1) and (2), with the weaker attack threatening the British right flank and preventing Major Beaver from redeploying his troops.
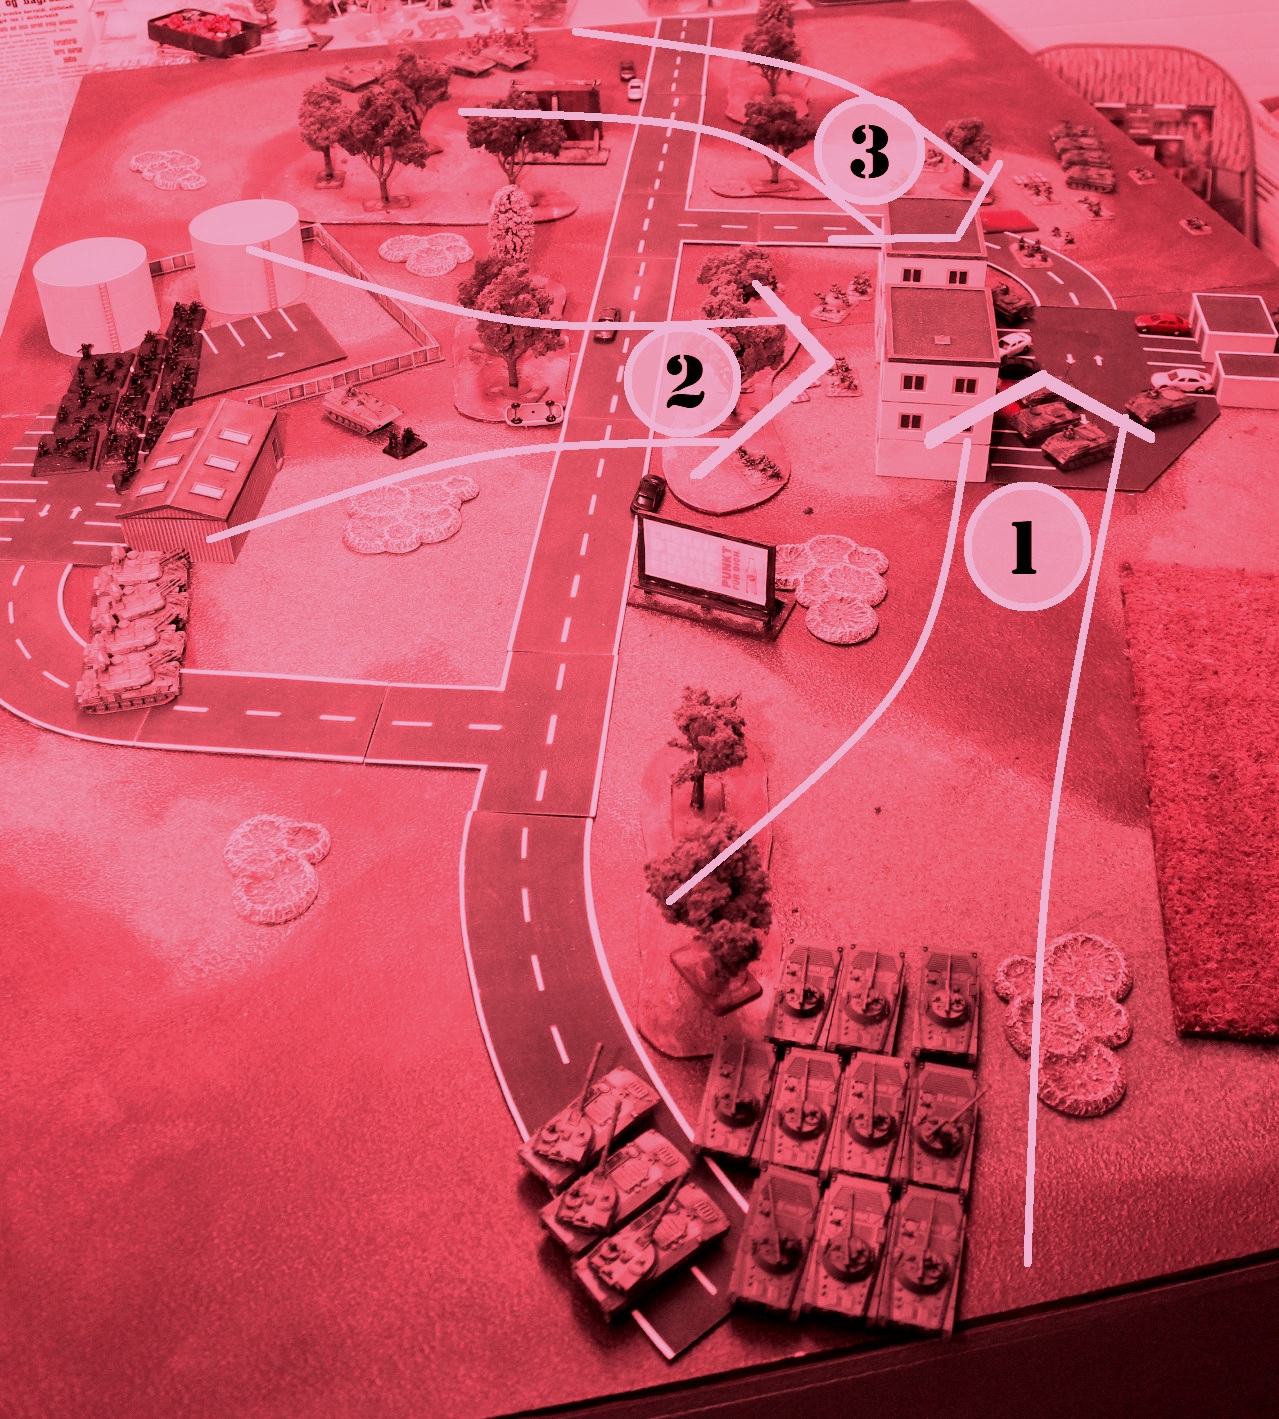
The idea was to attack fast and hard before taking too many losses and Major Beavers reserves arrived.
+++ Soviet turn 1.
Strong advance on all flanks. Good shooting destroyed 3 of the Fv432 on the right flank.
Artillery redeployed for the next turn.
Hinds remained off table because of the Rapiers.
 The British player feels the tinge of fear as the Soviet forces rapidly close in on his defensive perimeter.
+++ British turn 1
Major Beaver tries to redeploy by blitzing and fails causign his fire to become ineffective.
His helicopters also fail to Blitz and cannot fire.
Best results were from the Fv432 on his right flank that shoot up the small Soviet infantry company and kill 2 teams.
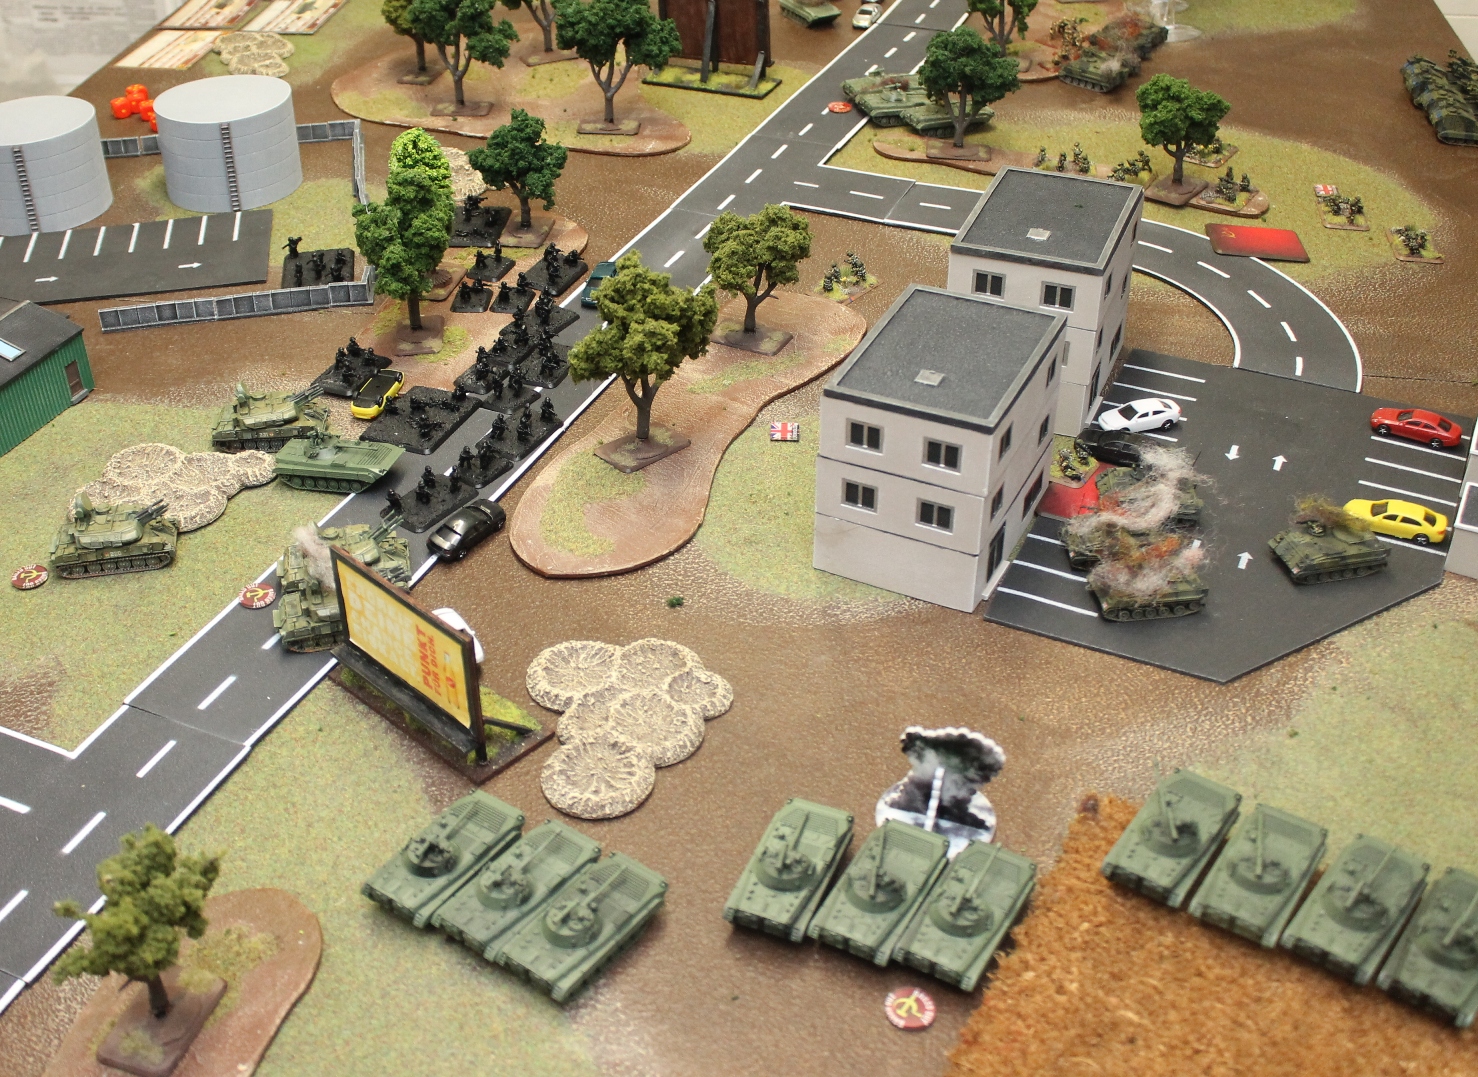
+++Soviet turn 2
Already the large company is in assault position against the centre. Shooting is so effective however that there are no teams left to assault.
On the left flank the combined return fire of the infantry and BMP-2's destroy or bail all British APV. The reminder are destroyed in an assault.
Artillery failed to range in.
Hinds remained off table because of the Rapiers.

+++ British turn 2
Again no reserves and the situation is becoming dangerous.
The British forces do their best to weaken the attack by engaging targets of opportunity with mixed results.
The BMP-2 Company on the right flank is destroyed and then a team here and there but nowhere enough to stop the Soviets.
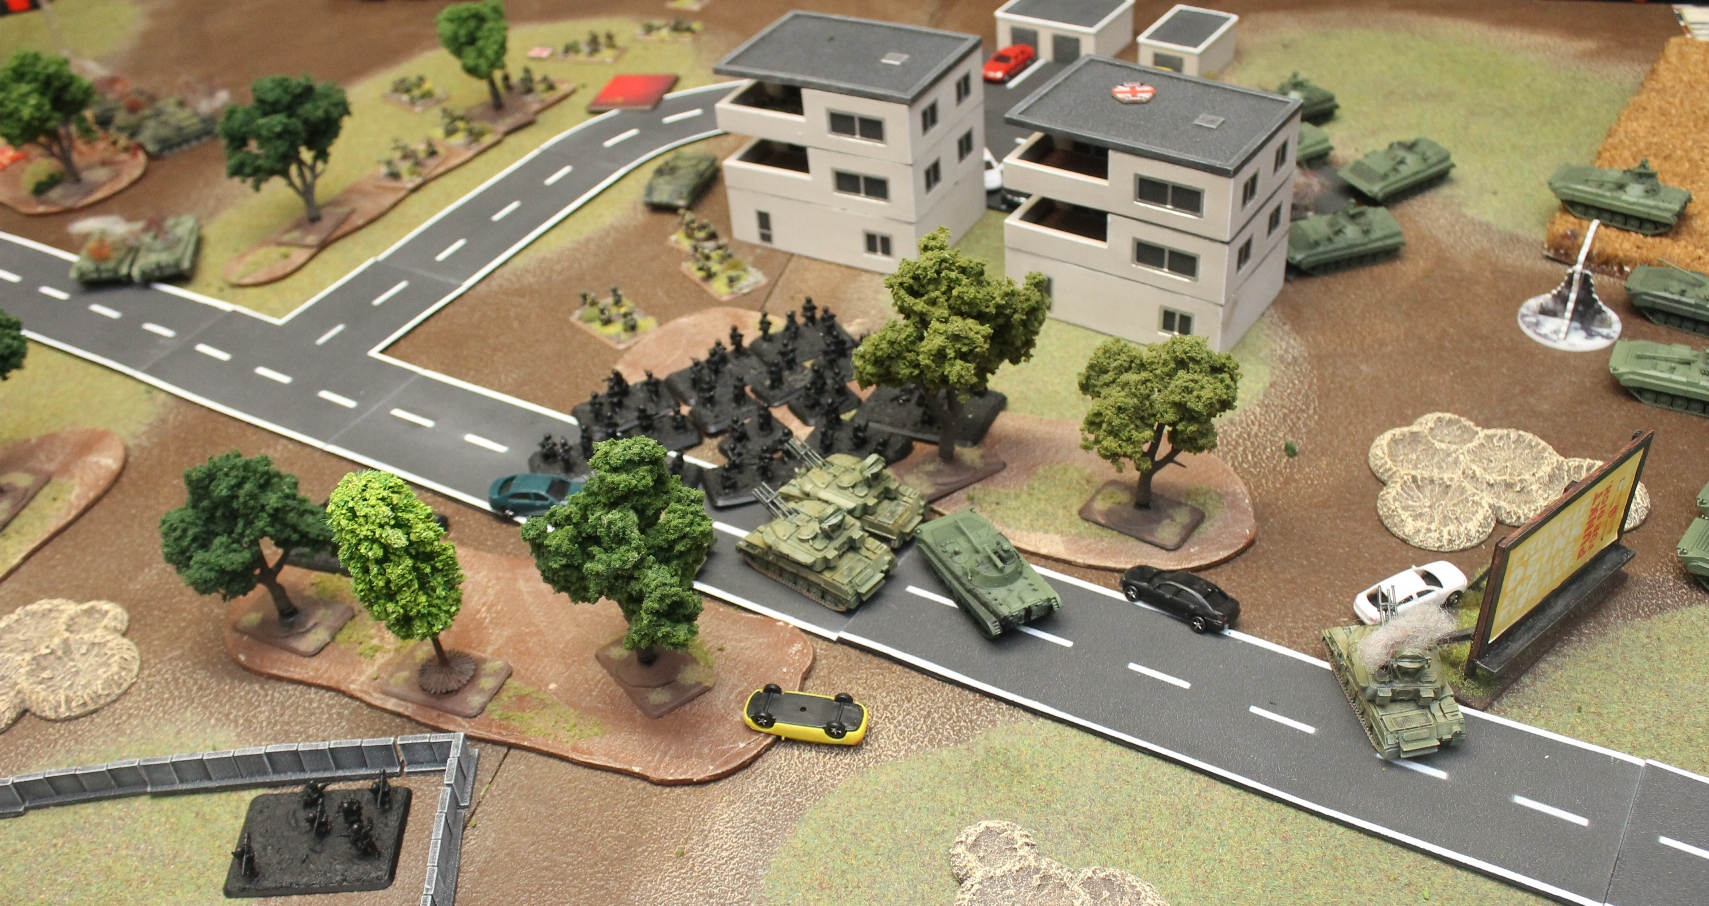
+++Soviet turn 3
The Soviet forces move to assault.
Shooting scores some kills that weaken the British prior to the assault.
The artillery moves to switch to direct fire and fails to score any hits.
Hinds remained off table because of the Rapiers.
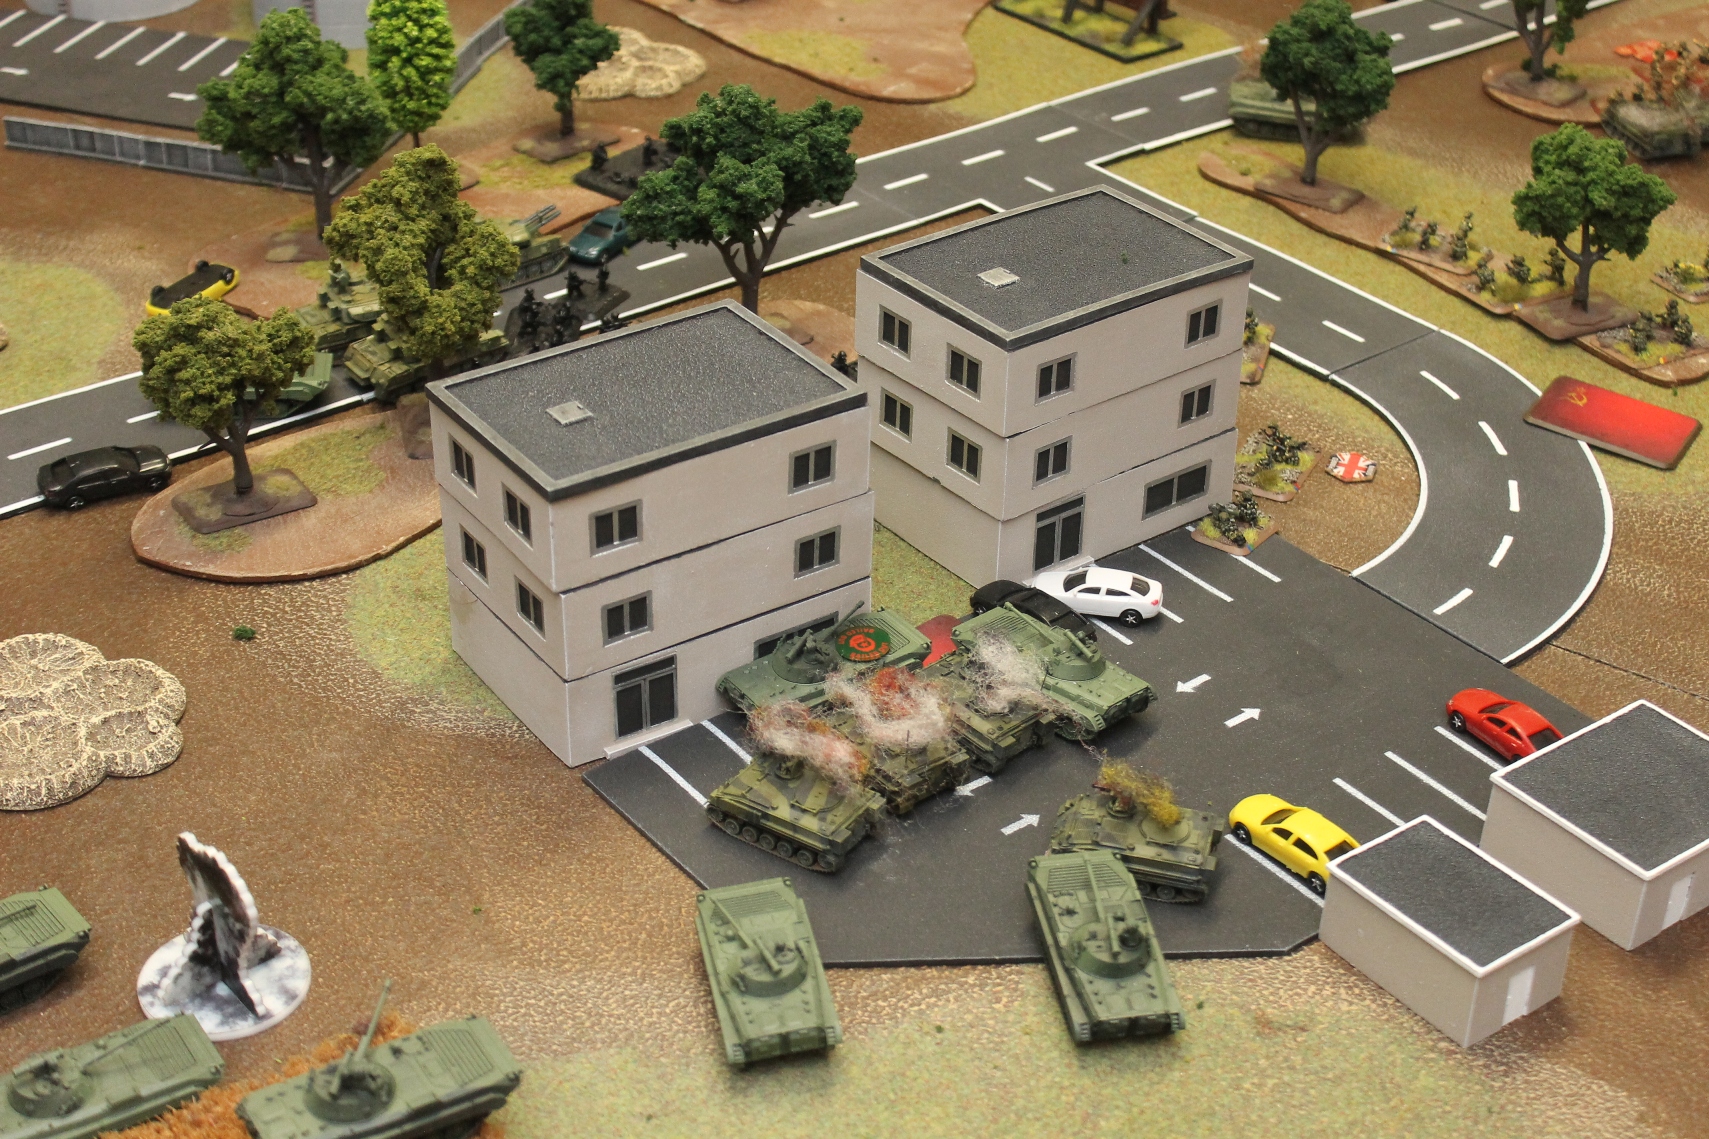
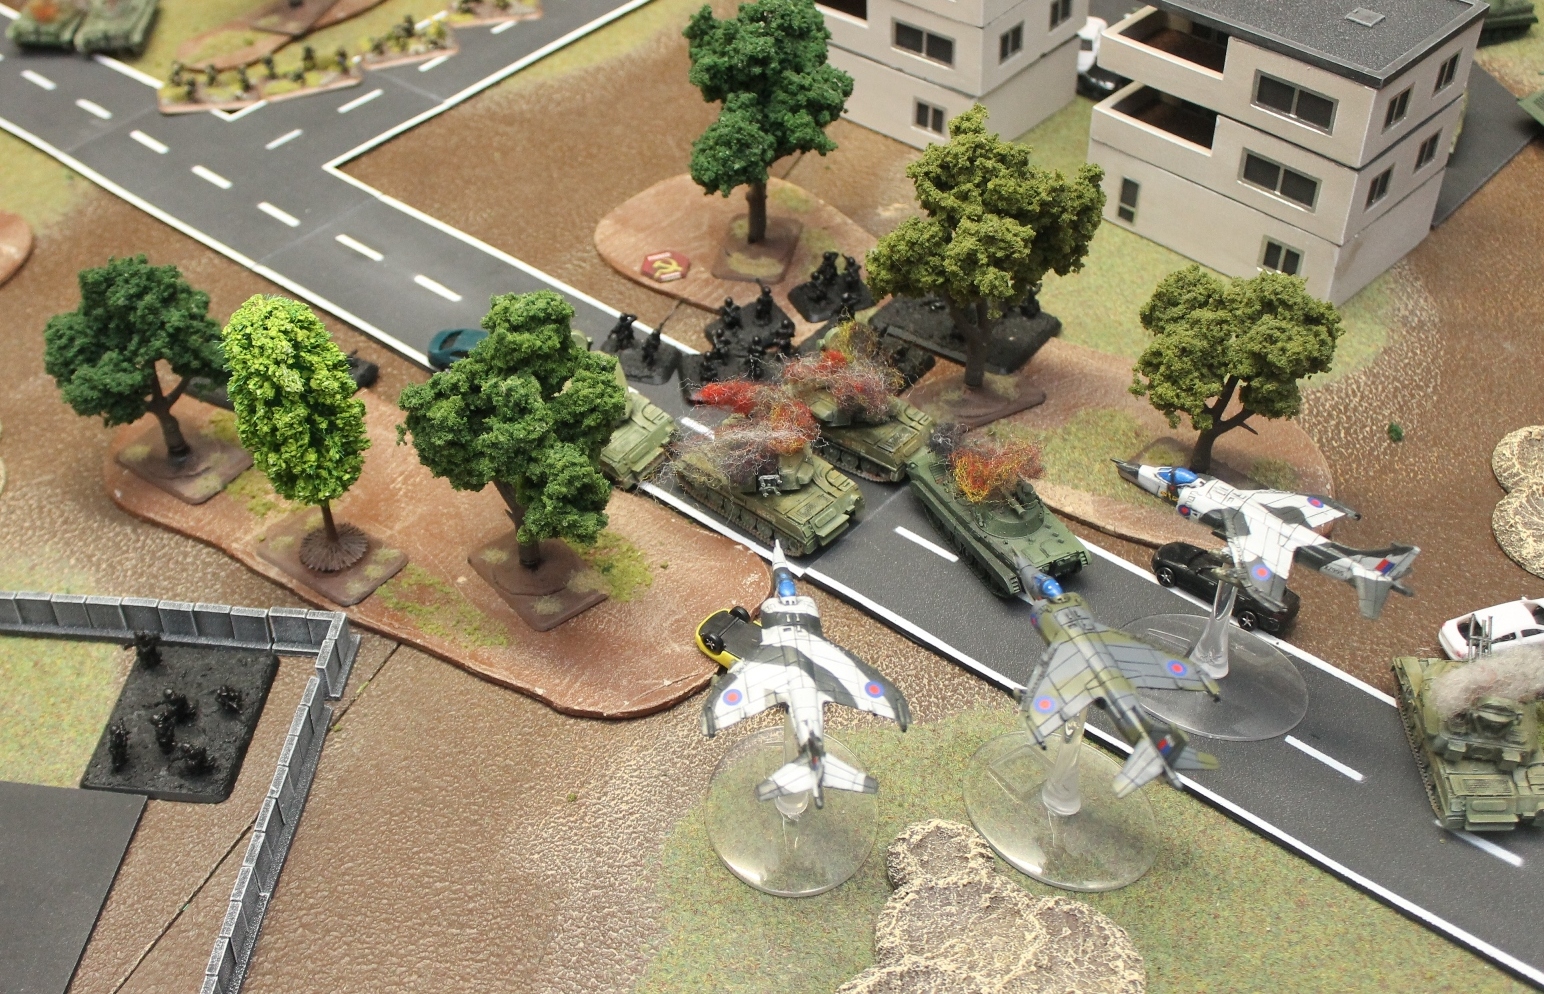
It is the assault that pushes through. The BMP-2's have now entered the parking area and in a long assault between 2 BMP-2's and 3 infantry teams the Soviets finally kill two teams to one bailed BMP-2.
The centre infantry hit hard. The British defensive fire scores 6 hits but the Soviet infantry is still over 12 strong so they enter into close combat. The Soviets win and enter the building but to the loss of 4 teams. The British have lost all but 3 teams and their formation commander.
+++British turn 3
Harriers arrive from reserve, dusk has not yet come, Soviets are now with 4 teams within 10cm of an objective and the British must push them off.
British move both their intact platoon towards the main fight, only one team makes it with in assault distance. Fire is heavy. Those that can fire at the Soviets next to the objective and the reminder pave the way for the Harriers, destroying one Shilka and bailing another, so by this time only one remained. Shooting also manages to bail the BMP-2 on the objective and destroy one infantry team in the building.
Two infantry, one Ak-74 and one RPG are the only teams that are remaining that are withing 10cm of the objective but only two British infantry teams form different platoons can assault.
First one goes in and is destroyed by defensive fire.
Second one goes in and makes it into contact and kills one team. What follows is a long engagement where the British team finally fails to counterattack and breaks off.
The Soviets end their turn in sole possession of the objective and will win automatically in their next turn.
Red Alert and Major Beaver shake hands.
 Harriers arrive and three make it through the weak Soviet AA. But the Harriers cannot turn the tide.
 It is down to the last assault, MILAN had fired and the Heavy Machine gun is a heavy weapon and cannot assault.
These are close to the typical forces we are playing in our group. Notice the total absence of MBT.
The Hinds remained off the board the whole battle and the Carnation artillery never did a thing. On Major Beavers side then reinforcements showed up too late or not at all.
He might have done better had he used a layered defence but as it was then only one platoon had to meet the main Soviet attack by itself and the Soviets won in only 4 turns.
Battle Report Author
Army Lists Used In This Battle
Recommend Commander For Commendation
Share this battle with friends
Red AlertWins

+++ SPASIBO NABESHIN
Kind words indeed. But for the effort I’d prefer you read them than the rating. 😉
Enjoy.
I think it’s got to the point where I don’t need to read your reports anymore, RA; I just hit a high rating, hit the commendation button and be on my way!
well done!
Storm Caller says:
March 7, 2018 at 7:00 pm
Red,
How do you get so many games and be a National Commander?
Real great report, as always!
—
Red Alert says: It is a question of enjoying yourself, then nothing is a duty or chore, all is fun. That is why we call it The Communist Party!
Great game. The table itself looked fantastic. Great AAR.
Red,
How do you get so many games and be a National Commander?
Real great report, as always!
+++ We have newspapers comrade, the best is Pravda, in English that means Truth and that is what they print.
+++ In the glorious soviet we do not need propaganda, because the truth is most glorious.
The propaganda machine is in full effect from Comrade Red Alert again. I suppose it makes good reading for the civilians back home. Or, do they even get newspapers in Soviet Russia? Or is it just a state-sponsored rag?
+++ STATISTICAL ANALYSIS
+++ ARTILLERY COMPLETE FAILURE (100% FAILURE IN THIS BATTLE)
+++ HINDS INEFFECTIVE AGAINST STRONG AA. SITUATION DID NOT REQUIRE DESPERATE MEASURES
+++ INFANTRY AND BMP-2 – STERLING SERVICE
Medals are mine, a quaint hobby started when I wrote a book about the Eastern Front and found that I could actually buy the medals for less than to buy pictures of them. Then as most of us I am a collector of things so the collection has expanded over time. But they are there on display and add feel to the gaming room.
Congratulations on the victory Comrade Marshal.
Too bad about the artillery, would have liked to see some effect but two failed turns in a three-turn game isn’t a good basis for future expectations.
Excellent AAR, as expected Red Alert; – BMP 2 hordes are always a challenge – stron battle plan – no surprises here also.
I think the music didn’t help either as it is pure propaganda, from the loudspeakers of the BMPs – are those your medals on the wall Red Alert? I presume you’ll earn some more before this campaign is over
nice terrain and models both!
thx for sharing!!
I’m rating this report on music selection only. But mind, you won’t fool me the next time 😀 .
Another outstanding AAR Comrade! I see you continue to lead from the front to show us all how good Soviets execute warfare at all levels.
Well done Komrad. Have a real good feel for the flow of the action. We’ve tended to be 70+ point machines but I think I’ll push for some smaller 50 matches for the extra challenge.
Well done on the victory! Also to the British player that force is painted beautifully, giving me inspiration for when I start a NATO force
Fantastic battle comrade!!! Congrats on the win. But, no tanks? Do you even soviet brah? hahahaha again great report well done my brother!!!!
Fantastic work comrade. You will defiantly be mentioned in dispatches.
Super outcome, Tovarishe, and report to your usual high standards
Brutal game but awesome report as per usual Red!
Well fought, well deserved. Congrats!