Fought At Hanover
2248 days 5 hours 56 minutes ago
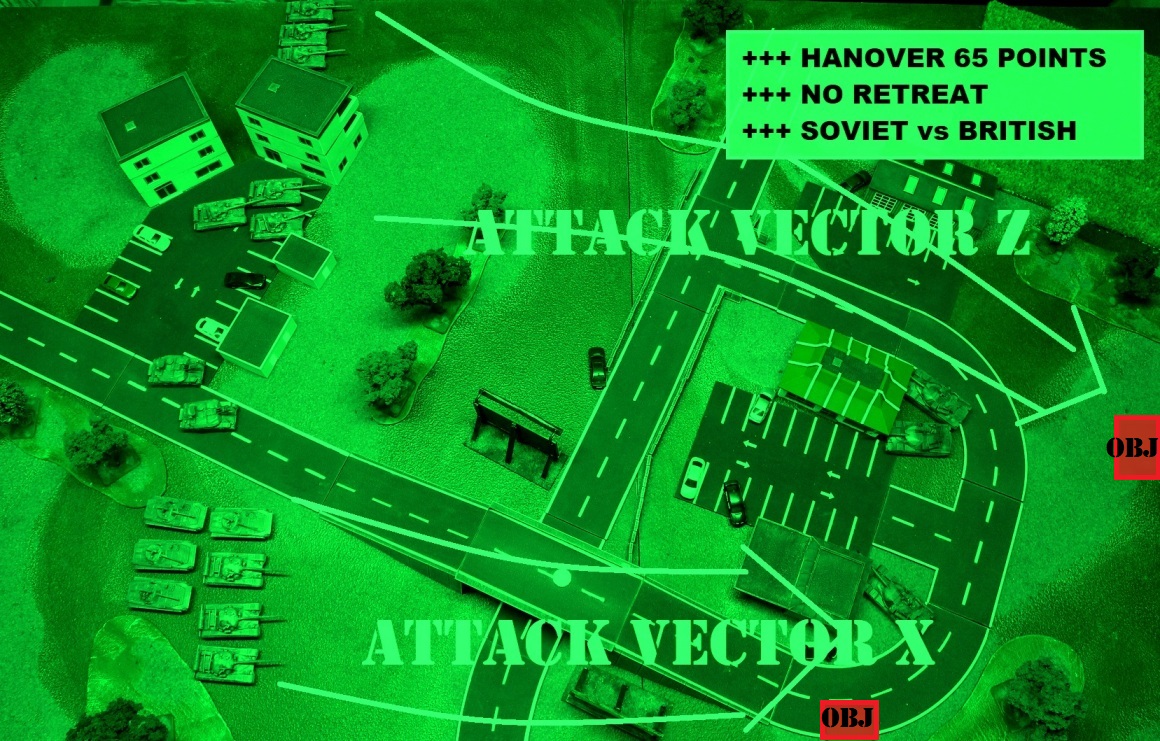
+++ HARD FOUGHT AT HANOVER
View Linked Report - CLICK HERE 70 POINTS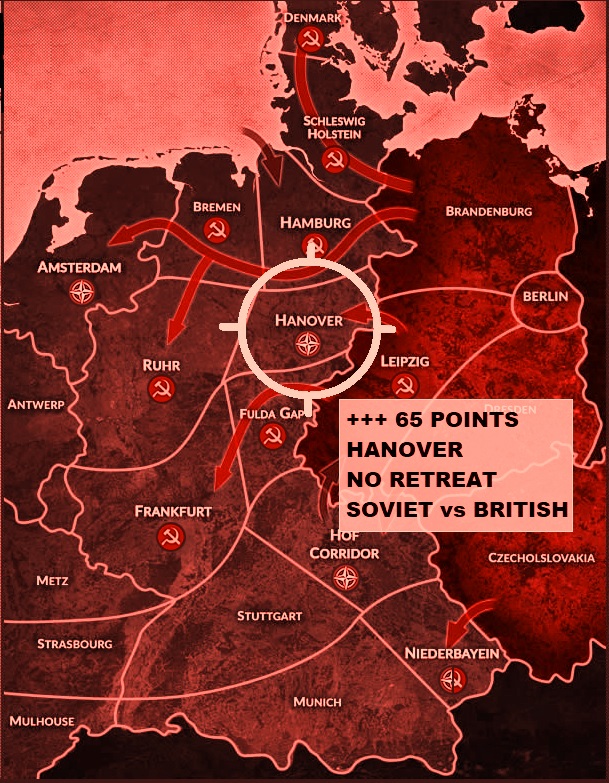
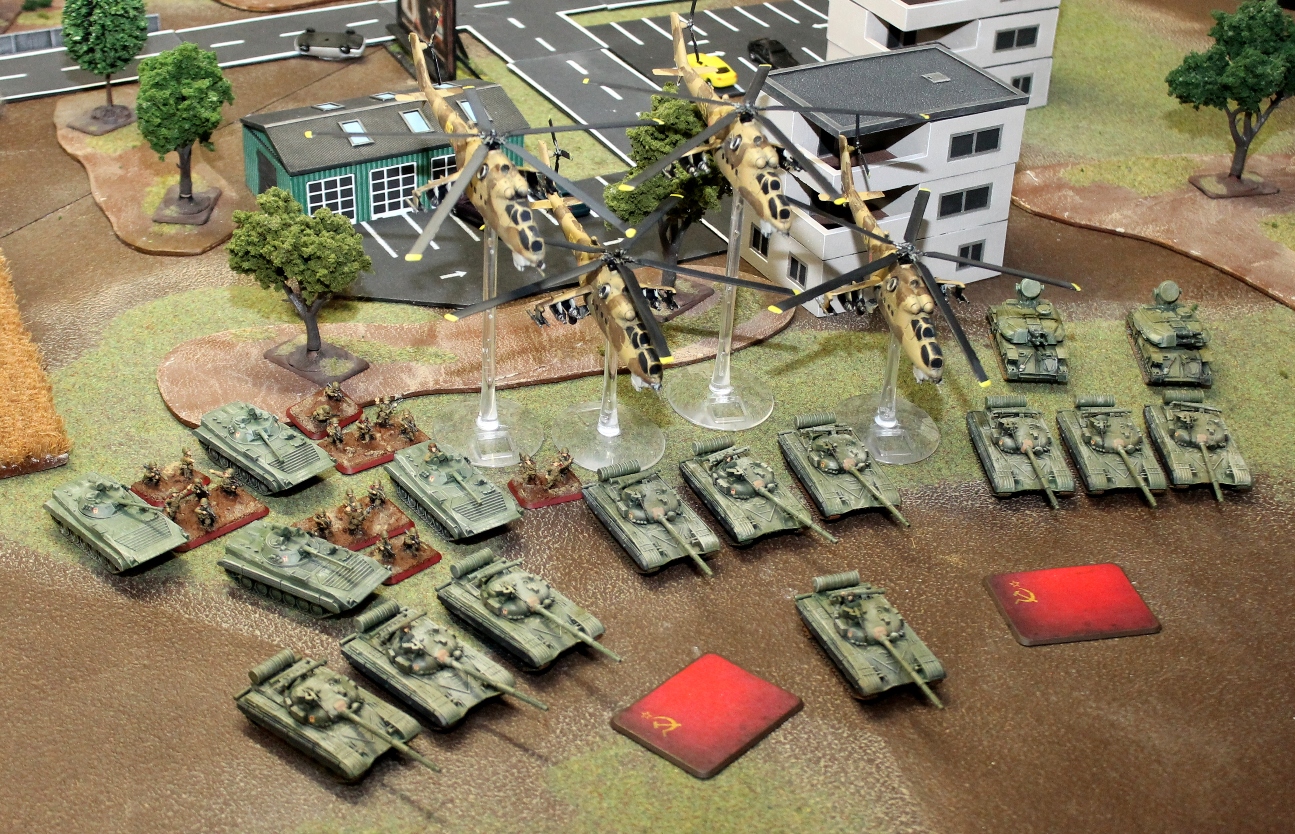
1-я гвардейская танковая армия
1st Guards Tank Army
9th Red Banner Order of Suvorov Babruysk-Berlin Tank Division, Riesa (call sign – Strelka)
T-64 Tank Battalion 65 points
HQ
HQ – T-64 6
FORMATION UNITS 49
Tank Coy – 3x T-64 13
Tank Coy – 3x T-64 13
Tank Coy – 3x T-64 13
BMP-2 Motor Rifle – small: 4xAk-74, 3xRPG-7, 4x BMP-2 8
ZSU-23-4 Shilka SAM Plt – 2x 2
SUPPORT UNITS 10
MI-24 Hind – 4x Hind 10
NORTHAG
Tank Company
65 Points
HQ
HQ – Chieftain 6
FORMATION UNITS 37
Chieftain Armoured Troop 3x Chieftain 18
Chieftain Armoured Troop 3x Chieftain 12
FV432 Mech Plt. 3x CPMG, 2x Carl Gustav, 1x mortar
- 2x MILAN & 4x FV432 7
SUPPORT UNITS 22
Rapier SAM – 4x Rapier 6
TOW Lynx Helarm 2x TOW Lynx 6
Harrier CAS – 4x Harriers 10

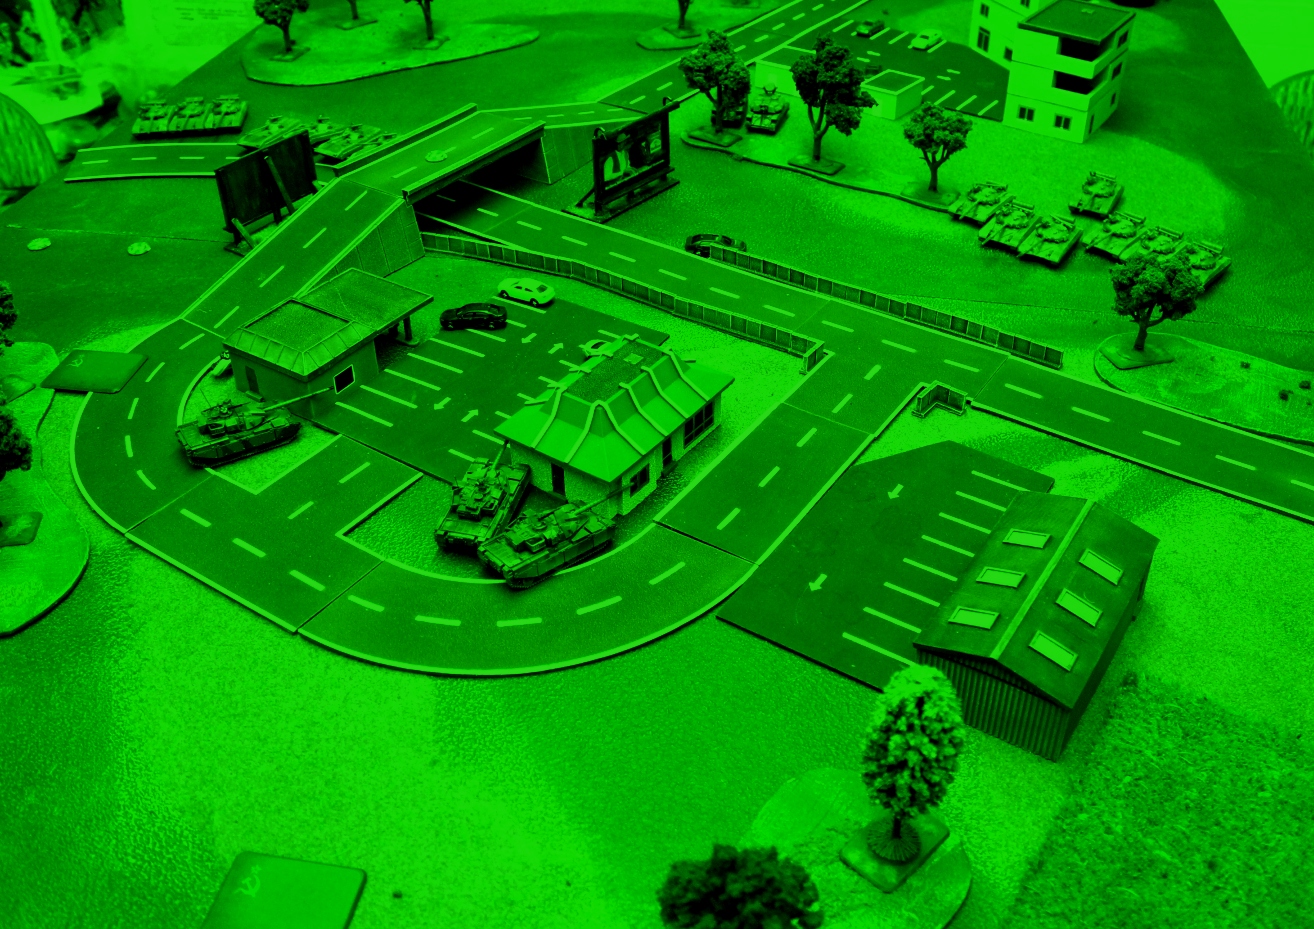
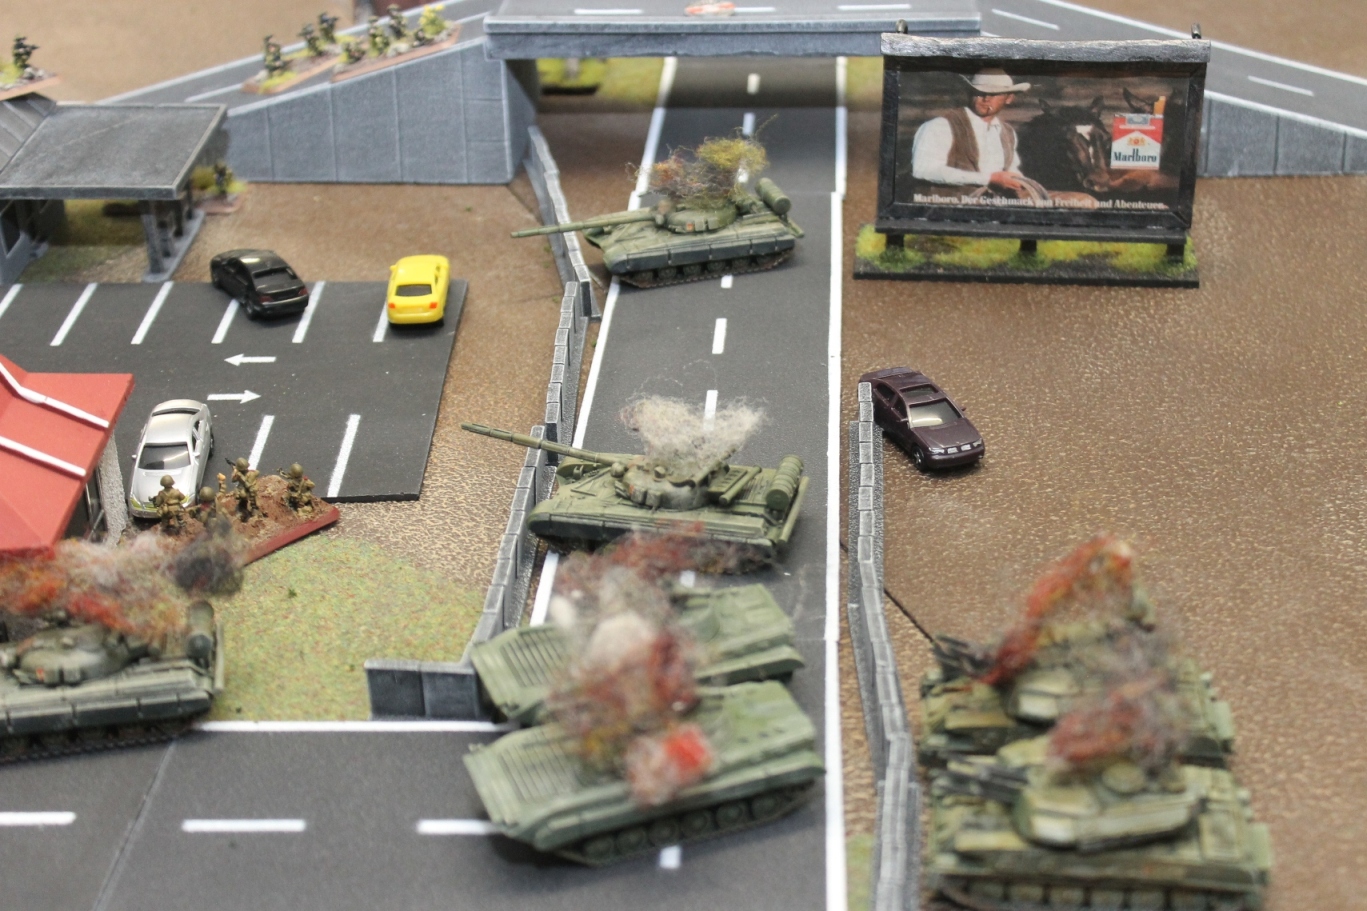
Straight forward attack, threaten both objectives. British held Infantry in Ambush and covered their left flank with minefields. One was set on the overpass and we ruled that it had to be on top or below. Major Beaver decided to have it on top.
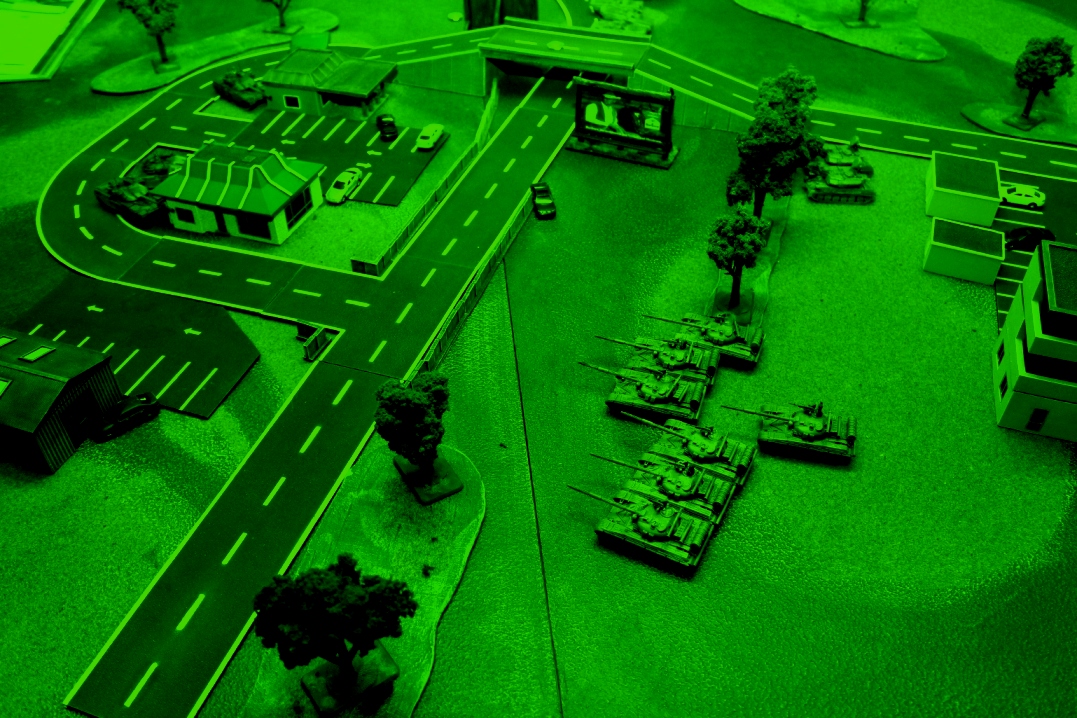
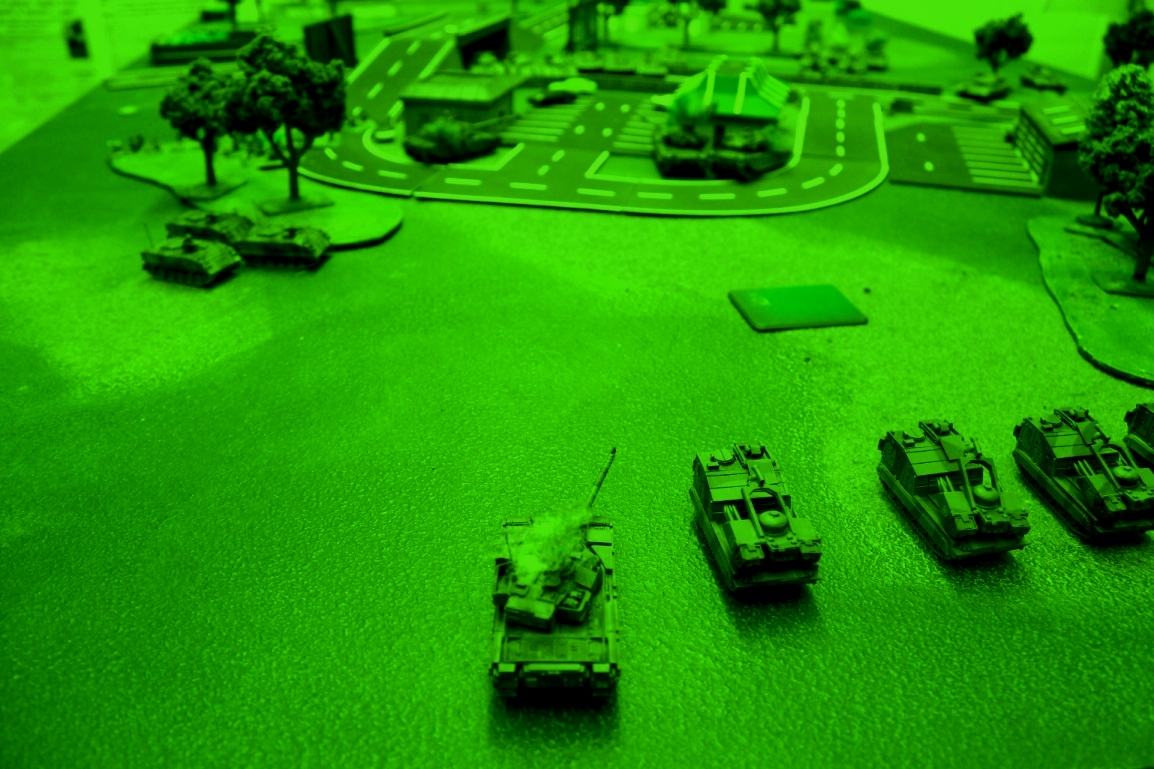
We played using Dawn rules so the battle started in the night.
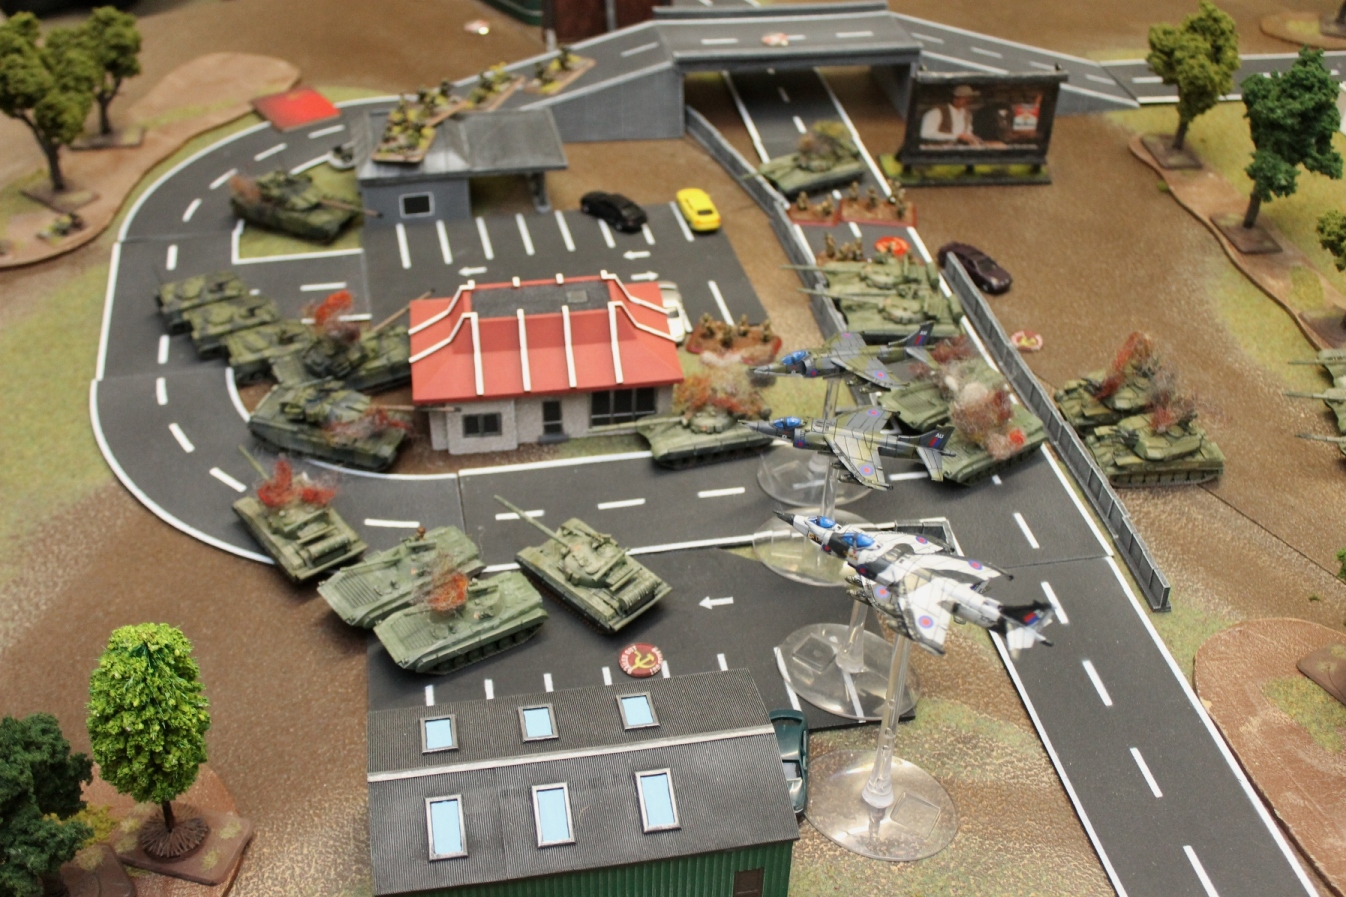
Attack was straight forward with a general advance. One T-64 unit could locate the enemy, hit once but the Chieftains armour held.
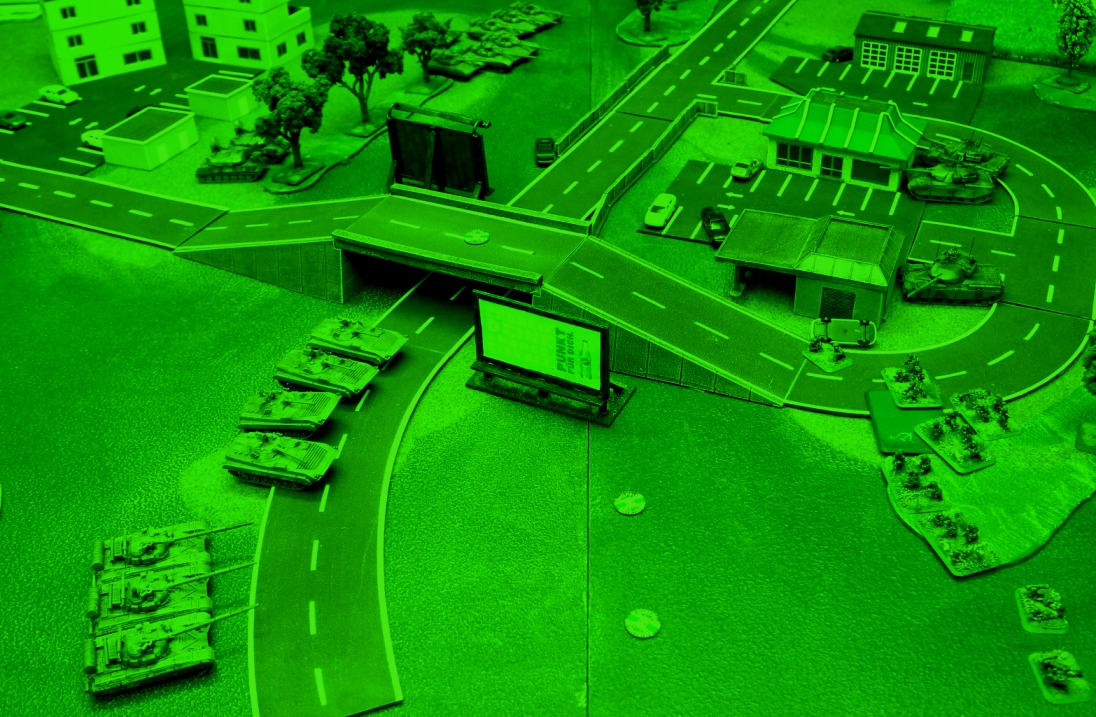
Major Beaver decided to spring his ambush on the objective the BMP-2 and 3 T-64 were closing on.
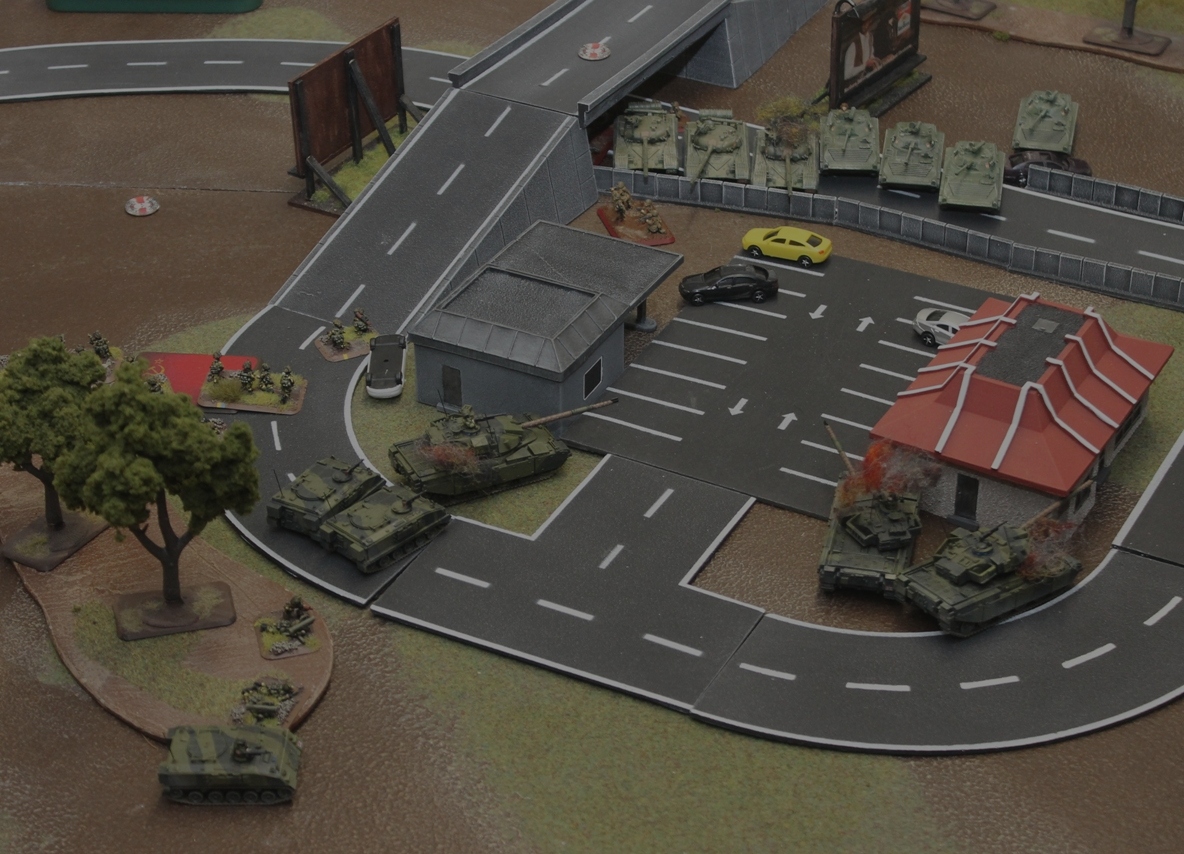
British Chieftains returned fire with very effective shooting destroying 2 T-64'2 and bailing one more. The Soviet formation commander joined the remaining tank only to flee of the table. 4 T-64 lost in one round! The infantry could not make out their targets in the dark.

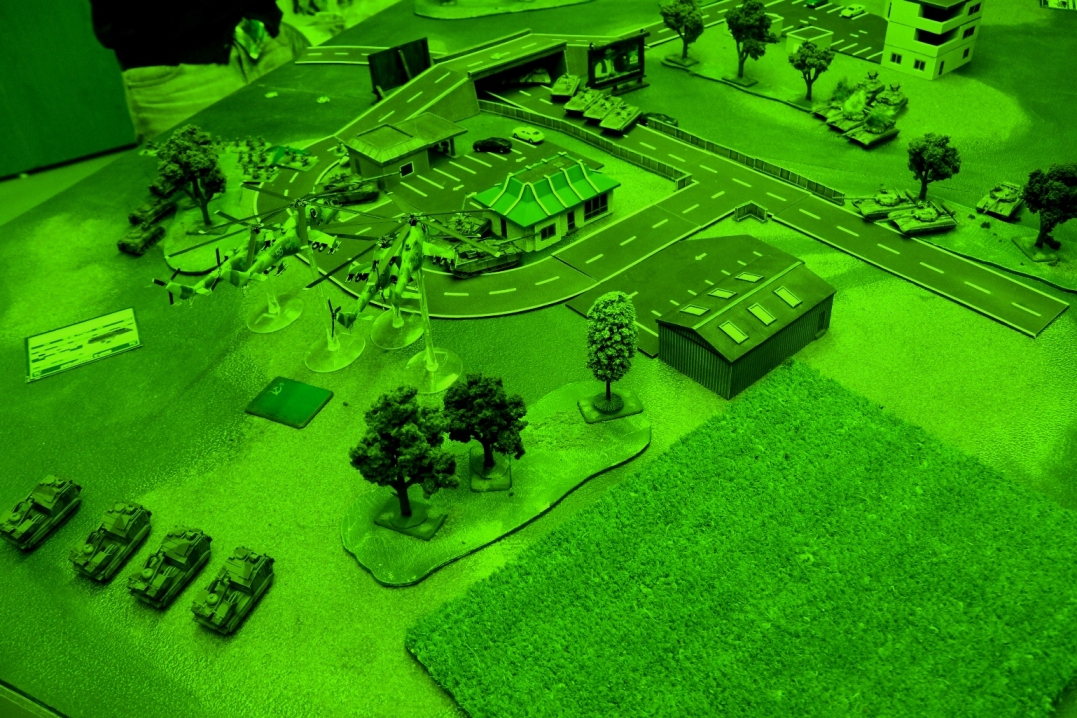
This forced Red Alert to commit heavily, sending in his Hinds, knowing that there were 4 Rapiers in Air defence.
The advance turned. Deciding not to go against the Birtish infantry the right flank joined towards the centre attack.
The gamble paid off, at the cost of 2 Hinds the main Chieftain sqd was annihilated by the fire from the Hinds and T-64's.
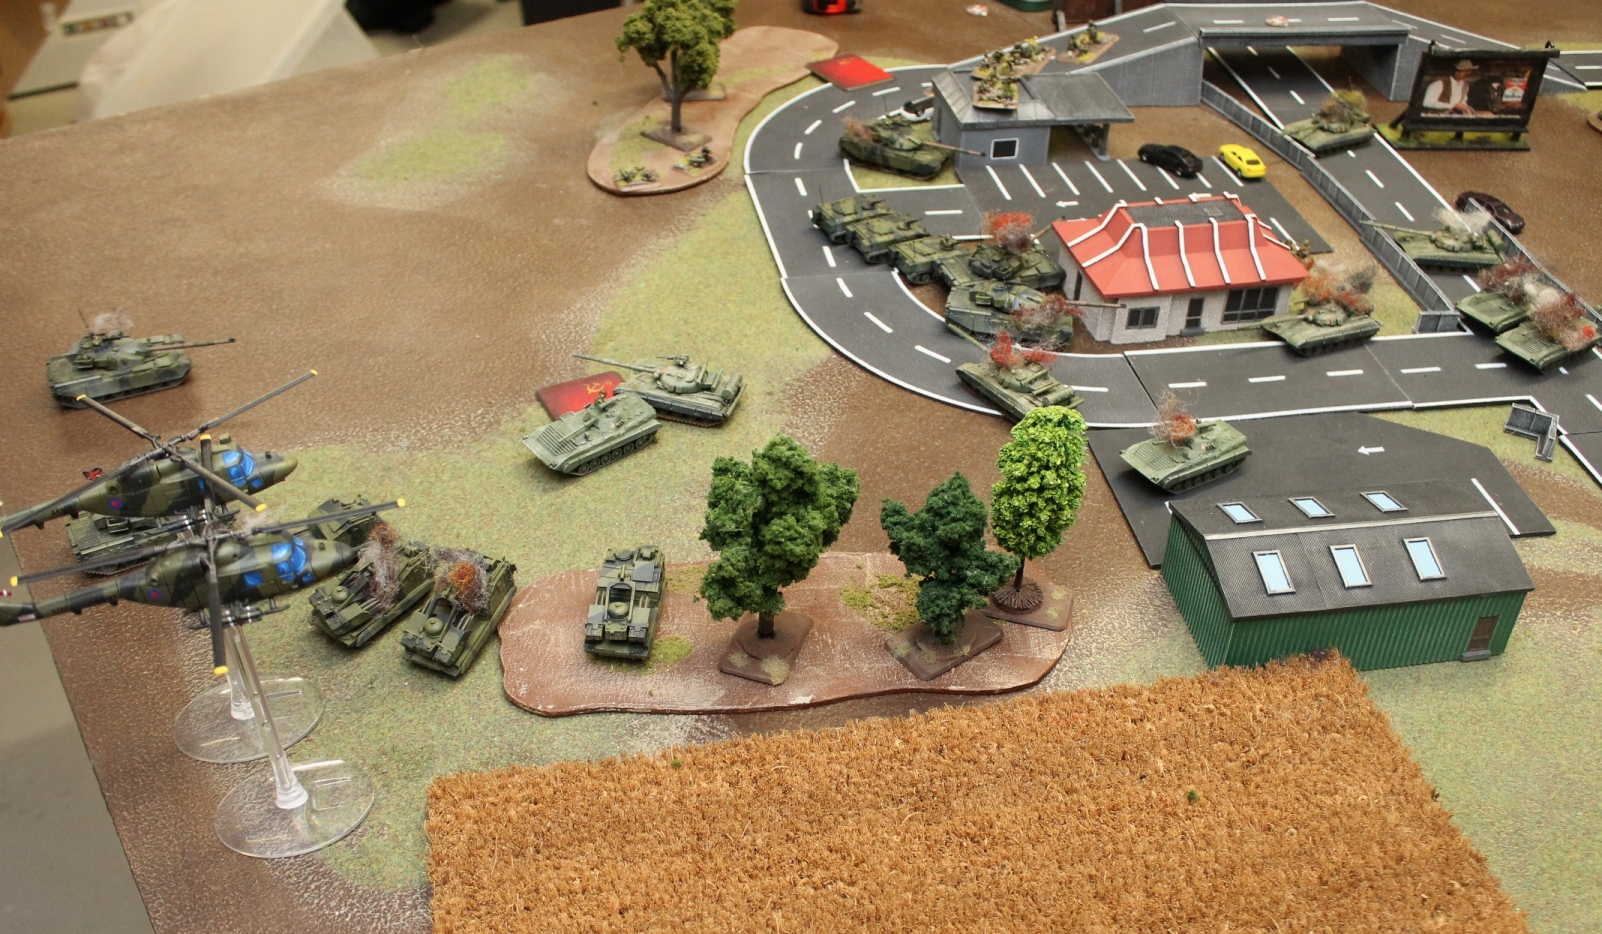
British saw their first reinforcements arrive, a two strong Chieftain troop moving in to fill the gap. They managed to bail a T-64 but their arrival was less than impressive.
The Soviet forces quickly lined up to face this new threat firing everything they had against the tanks only managing to bail one, but enough to force a morale test, which the British failed!
The British continued to bring in their reserves and this time two Lynx attack helicopters arrived and managed to take out a T-64.

Morning has broken and the Soviet advance is still strong. Their forces are well concentrated.
Shooting was disappointing, two Rapiers were taken out but the Shilka failed to down a single Lynx.
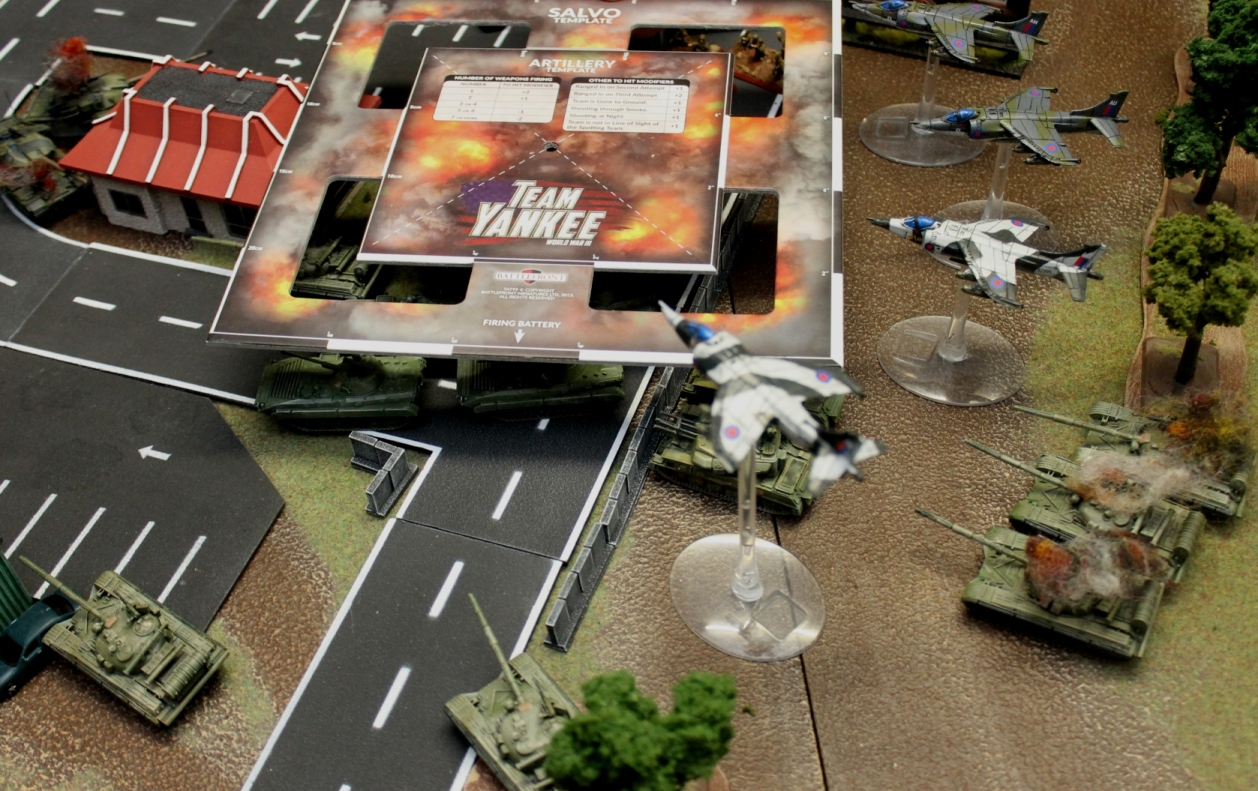
The next reinforcements came as a surprise. 4 Harriers swooped in on the battlefield.
The rest of the British forces cleared the way for the airstrike and managed to destroy the Shilkas.
The bombardment cause the attacking Soviets serious damage.
Their effort seriously blunted the Soviets push on, hoping to capture the objective with their remaining forces.
Their fire was rather ineffective.
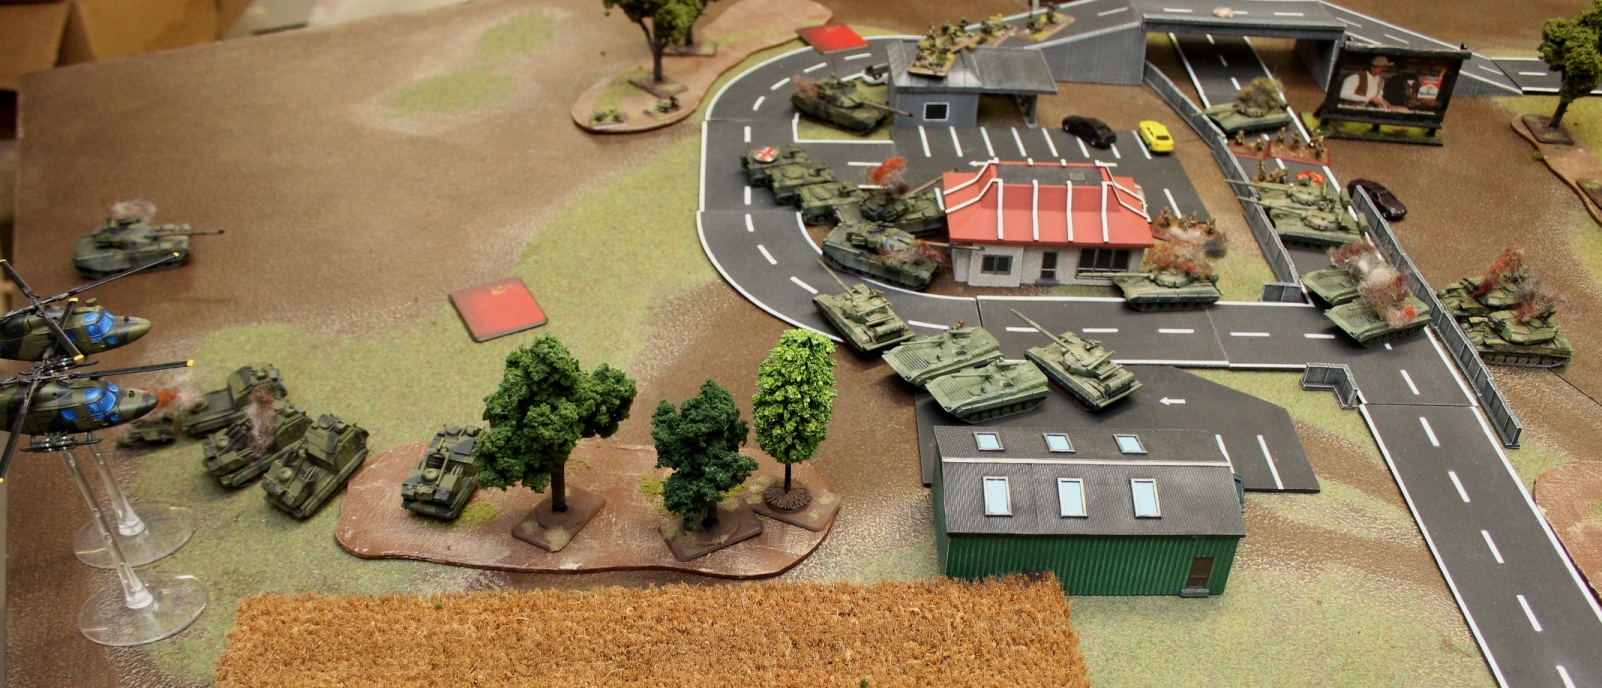
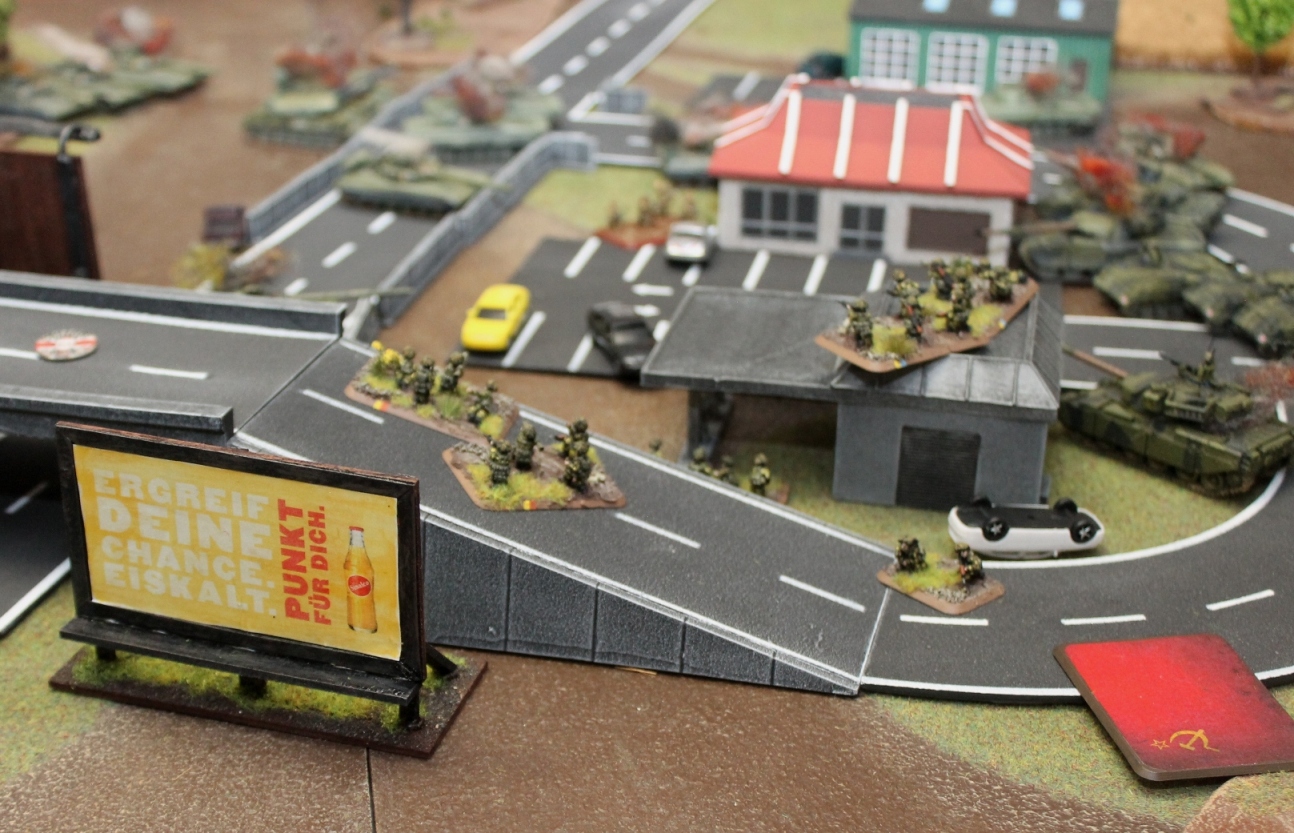
Harriers arrived again and this time the British formation commander arrived from reserve. The British infantry also redeployed to take on the Soviet infantry. Once the shooting was over every Soviet tank was blown, bailed or had fled.
One BMP-2 and a T-64 remounted and made a mad dash at the objective. They even managed to take out a Rapier but seeing that the battle was going in their favor the last Rapier remained. All that was now needed was a stroke of great fortune.
'Fortune favors the bold' and 'Who dares wins'
But not the foolhardy. The Harriers made yet another appearance. Then the combined fire from a Chieftain, 2x Lynx attack helicopters, 2x MILAN launchers and Harriers ended this dash and left two burning wrecks on the objective. With only 3 infantry remaining in a fast food restaurant (and 2 Hinds off the table) the outcome was clear and Red Alert conceded defeat.
This was a fun battle.
I'd rather play a done to the nails battle and lose than win easily any day. Of course I'd rather like to win at the end but the main thing was that Søren and I had a great time.
For this and the last battle we made it mandatory to have at least 50% of your force MBT's as we have been seeing a trend towards infantry heavy armies. This makes the game faster paced and probably more fun too. Well at least IMHO.
We will mix things up during the Campaign so we will not stick to this rule every time.
Søren's game was prefect. He held until the reserves arrived and I was surprised by the amount of Air power he could muster. My two Shilkas didn't stand a chance in stopping them. I was also unlucky to lose my Formation Commander in the first morale test... the second game in a row! Well hopefully I will manage the 2+ roll at some later game.
I hope you enjoyed the report. It was frustrating to write it as the connection to the warconsole repeatedly broke down.
At the end I just have to show off the fantastic billboards Søren made.
Battle Report Author
Army Lists Used In This Battle
Recommend Commander For Commendation
Share this battle with friends
Major BeaverWins

Nice looking battle report. Congrats on the win.
Great report
tough fight, well done Red Alert
Excellent report as always, RA. Commendations again, and you’ve reminded me to Photoshop my pictures again!
Even in defeat you provide a top notch report Red!
Well done!
Great Batrep! I Like the Nightvision Idea 😉
Cool billboards, crappy dicing, just what we’re used to from you Jokull! 😉
Looks like an awesome battle though, and yes hard fought losses over easy wins
+++
We only set in the “at least 50% MBT” to counter the trend of them being excluded in favor of, well almost anything and everything else 🙂
Infantry has become the primary unit in our games but MBT are faster and more fun (IMHO).
I don’t think we will be continuing it through the campaign, but we might add some other twists.
Funny and enlightening, these other side of the hill reports 🙂
Beautiful terrain, full of atmosphere with the civilian cars and “Thermal Imaging” photos of the night scenes.
agree with the hard fought loss part – you’d might to rethink the 50%+ tank force, as the Soviet (& NATO) Force Composition was different also
& I wish you ‘Warriors luck’ in the upcoming battles ( the unit is only so strong as its commanders’ dice roll)
Excellent report!
10 with two hands and a recommendation!
The pictures are so clear!!!! Awesome report again my good sir-well played. Next time!!!!!
A hard fought action against a skilled opponent Comrade. Another excellent AAR!