Fought At Hamburg
2214 days 2 hours 20 minutes ago
+++ PUSHING THROUGH HAMBURG
50 POINTS
+++ After securing Brandenburg I moved the 20th Guards forward to reestablish Line of communication (LOC) to Bremen and the Ruhr.
I would be the attacker at Hamburg Brawl.
20-я гвардейская армия
20th Guards Army
35th Motor Rifle Division – Order of the Red Banner
BMP Motor Rifle Battalion - 50
HQ
AK-74 – 1x BMP-2 2
FORMATION UNITS 30
BMP-2 Motor rifle – med: 7xAk-74, 6xRPG-7, 2x LMG, 9x BMP-2 18
BMP-2 Motor Rifle – small: 4xAk-74, 3xRPG-7, 4x BMP-2 8
ZSU-23-4 Shilka SAM Plt – 4x Shilka 4
SUPPORT UNITS 18
MI-24 Hind – 4x Hind 10
BM-21 Hail Rocket Launcher Battery 3x BM-21 4
BMP-1 Observation Post (Independent unit) 1
Storm AT Platoon 3x Storm 3
Major Beaver's defenders
NORTHAG
FV432 Mechanised Company
50 Points
HQ
1xSLR Rifle, 1x FV432
FORMATION UNITS 37
FV432 Mech Plt. 3x CPMG, 2x Carl Gustav, 1x mortar
- & 3x FV432 5
FV432 Mech Plt. 3x CPMG, 2x Carl Gustav, 1x mortar
- & 3x FV432 5
FV432 Milan – 4x MILAN, 2xFV432
Abbot Field Battery 4x Abbot 6
Chieftain Armoured Troop 3x Chieftain 1x Stillbrew 19
Scimitar Recce Troop 2x Scimitar 2
FV432 FOO 1
Scorpion Recce Troop 2x Scorpion 2
SUPPORT UNITS
Tracked Rapier SAM 2xRapier 3
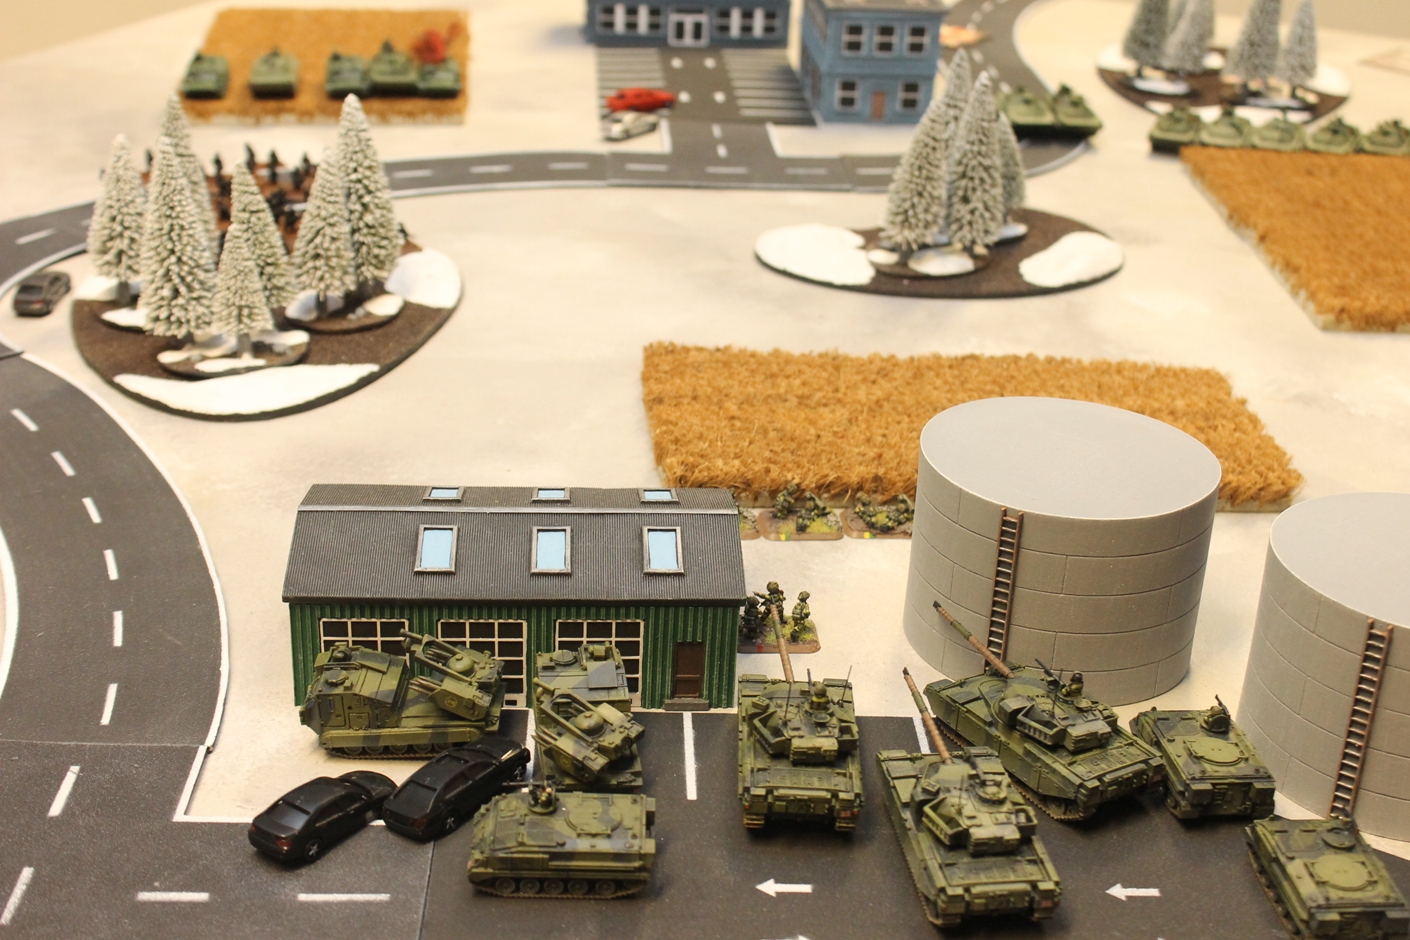
This time I was much bolder in my placement of units and since I know from experience how though the British infantry can be I decided to use my infantry for the main attack and the BMP-2s to cover the objectives in the rear with the option of moving them to the attack.
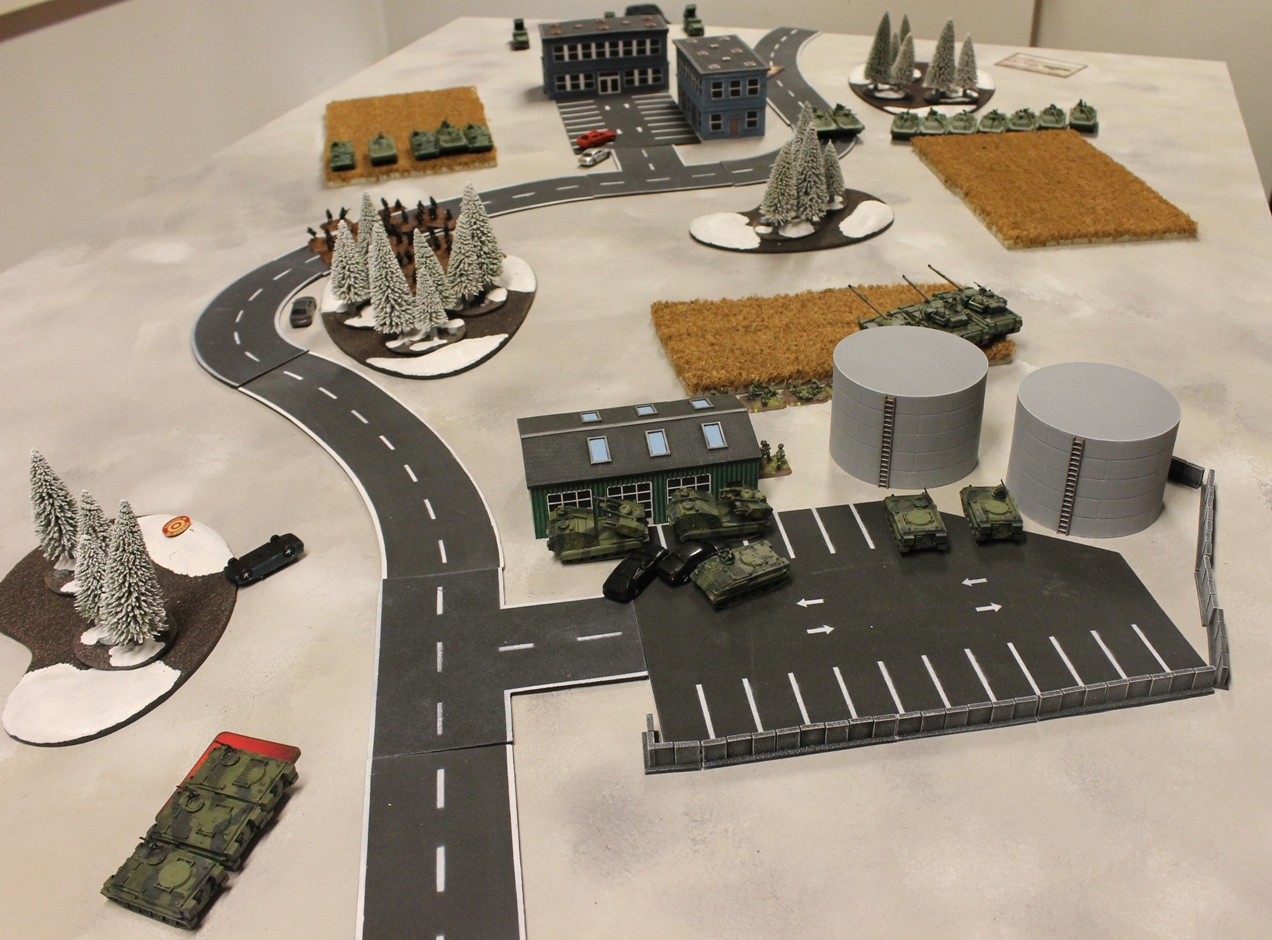
+++ SOVIET TURN 1
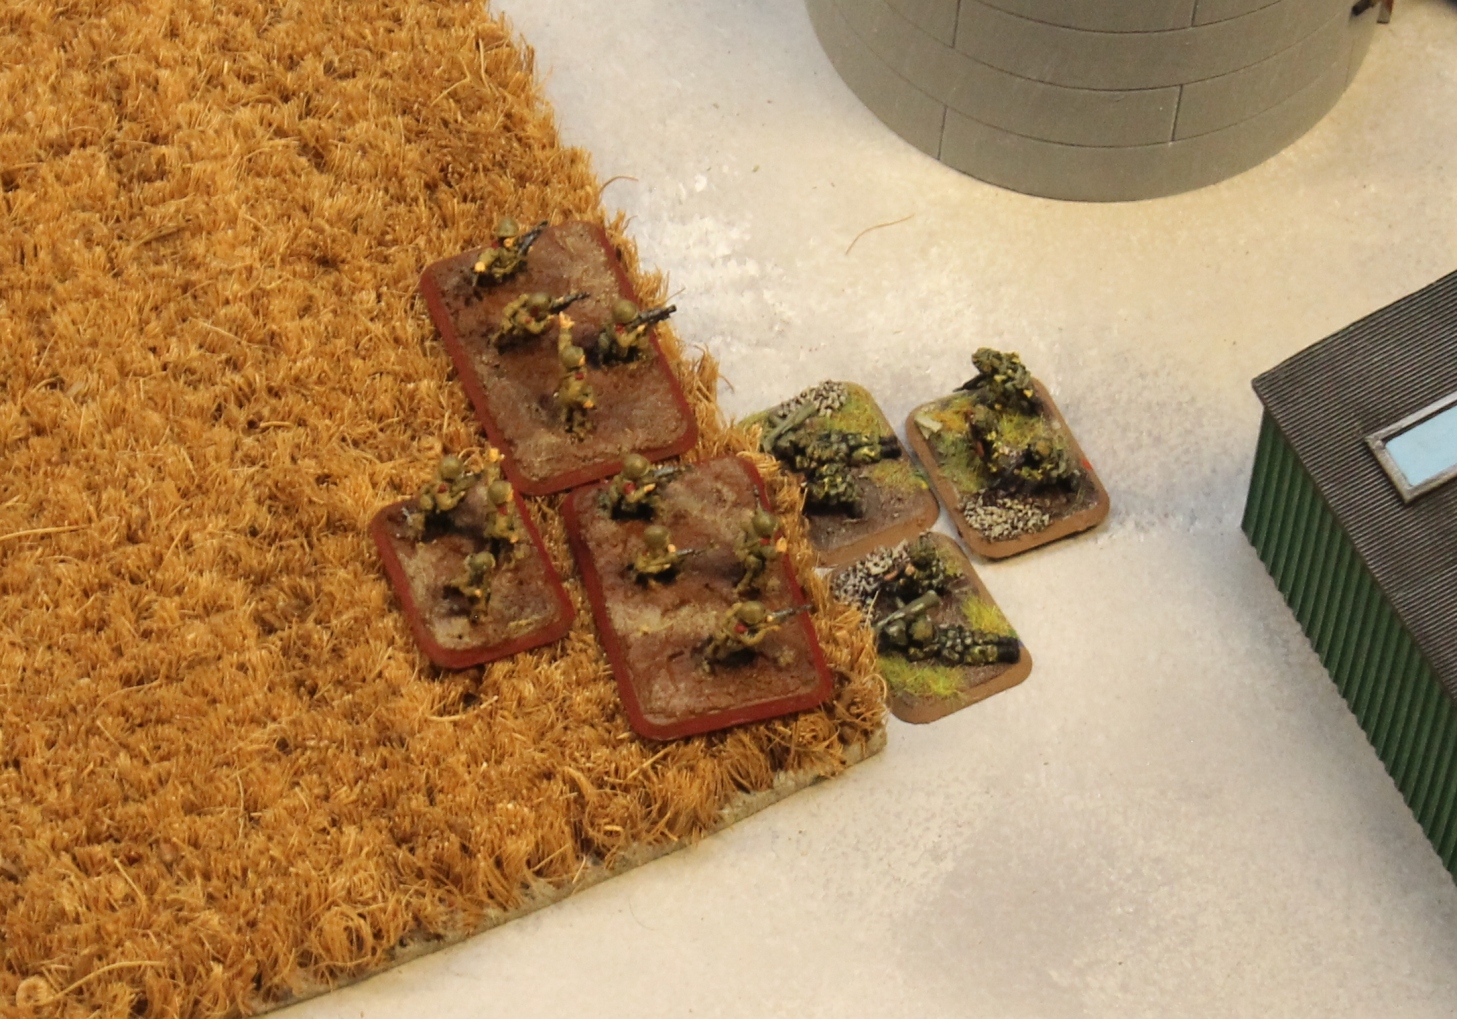
I moved my infantry and BMP-2's forward. Since I couldn't fire any missiles as this was a meeting engagement I wanted to force Major Beaver into a bad situation, it he would remain stationary next turn to fire he would be caught between the Storm unit and the BMP-2s.
There was no shooting as my units dashed forward.
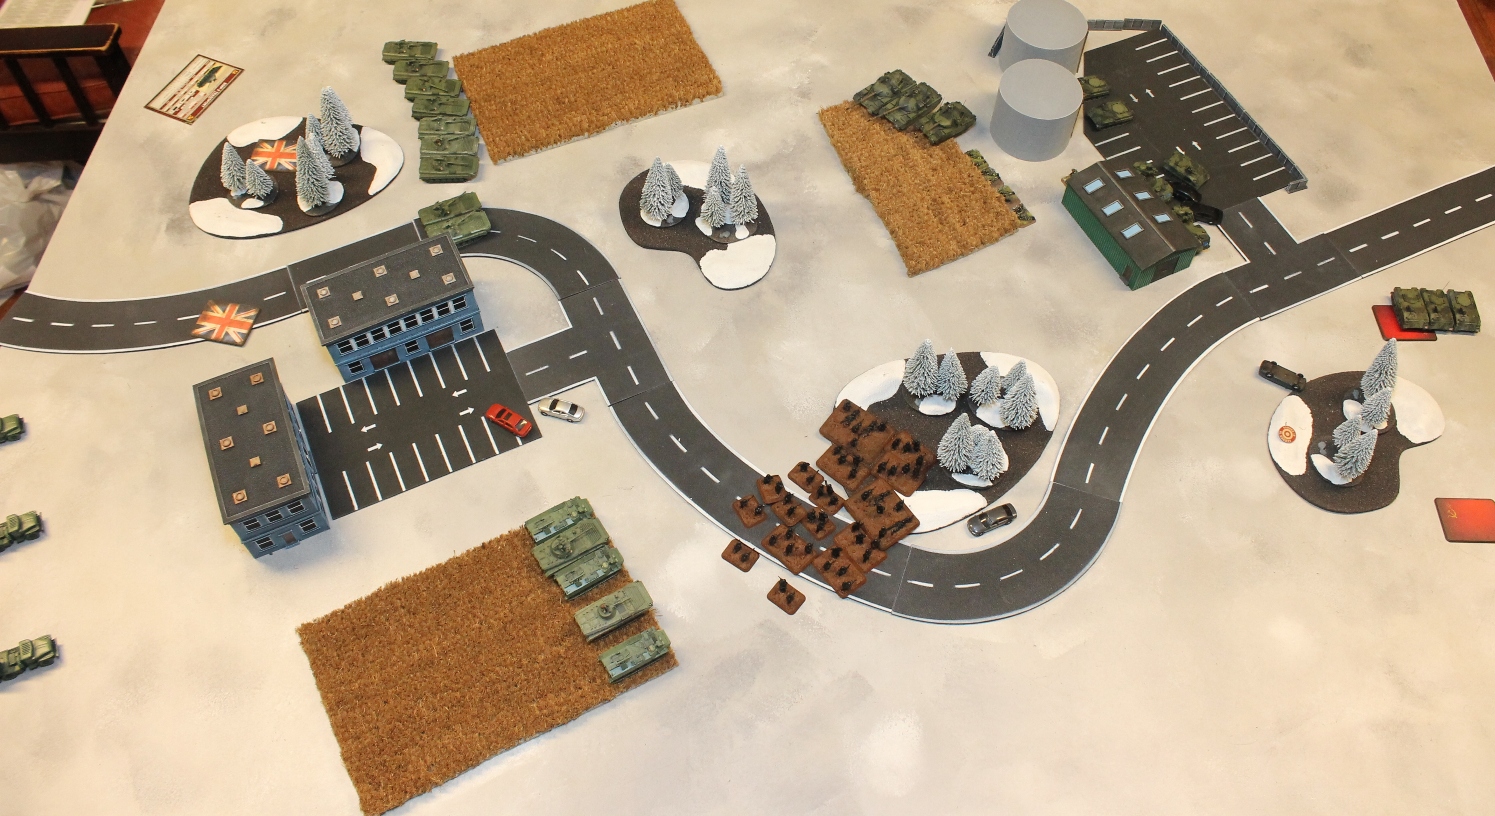
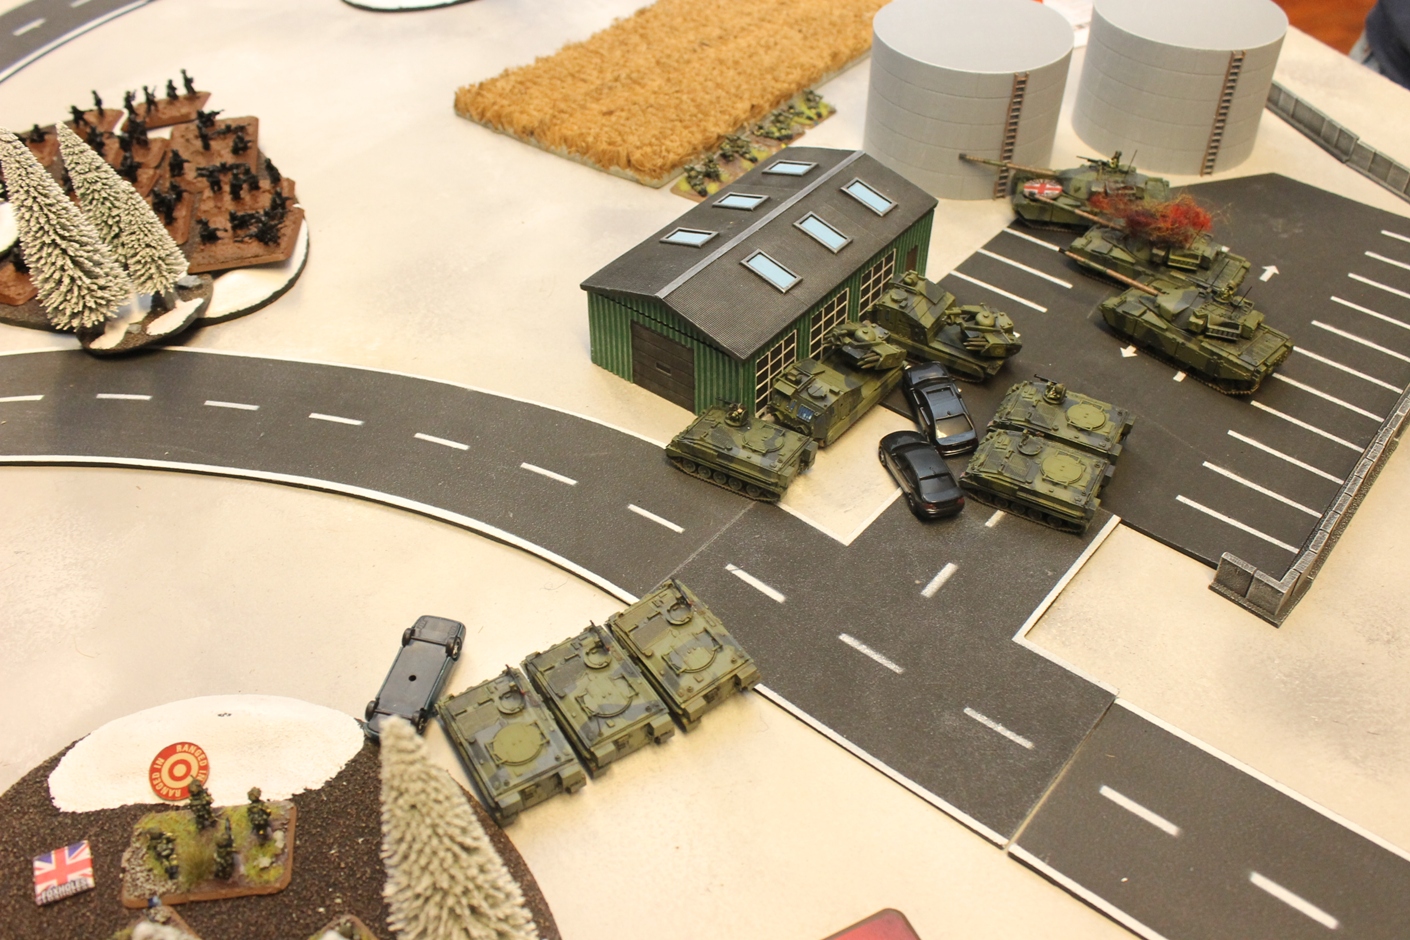
+++ BRITISH TURN 1
No Major Beaver and his assistant did two things, one clever the other not clever at all.
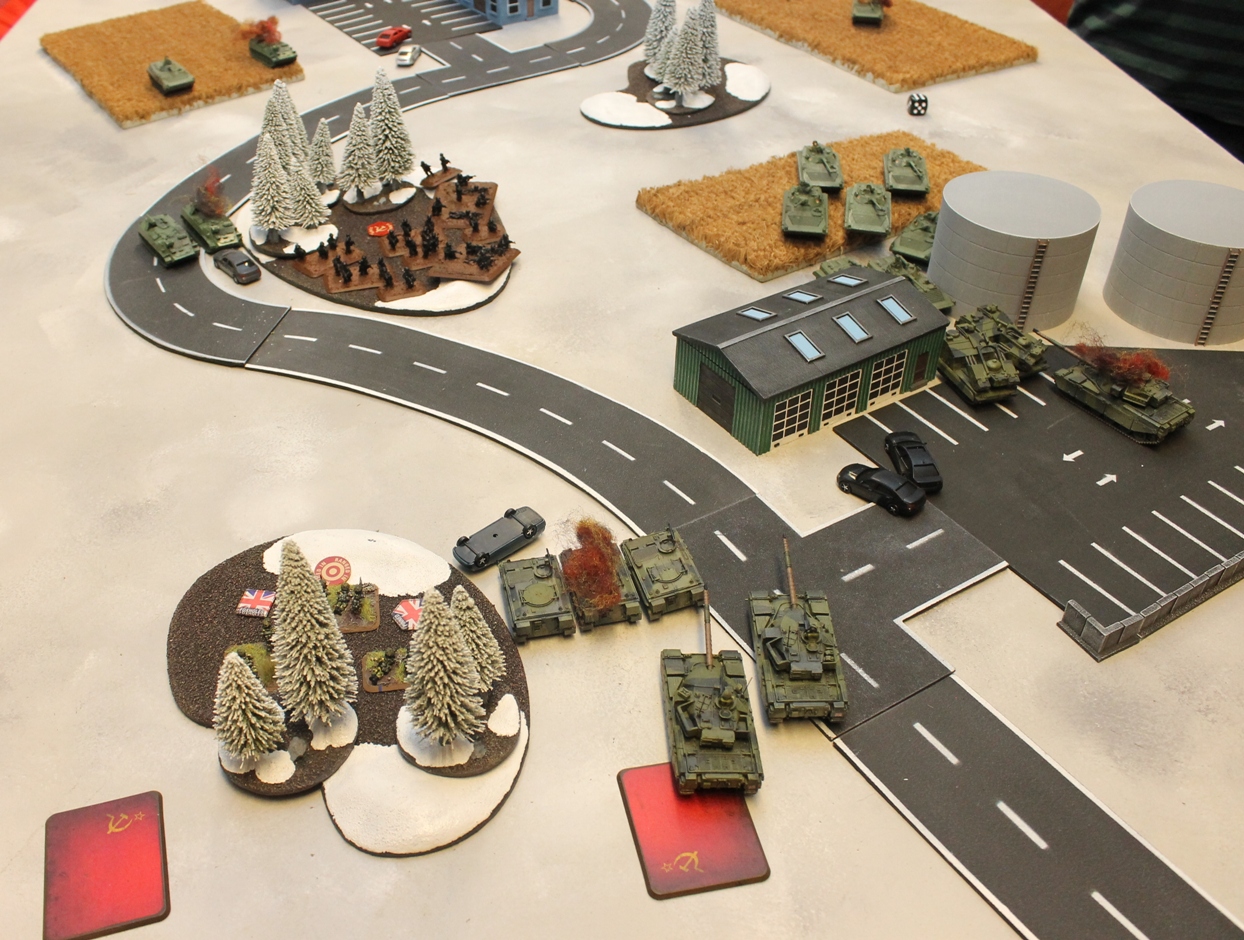
The British moved their Chieftains back limiting the LOS of the Soviet forces while maximising theirs. Then for reasons I cannot understand they moved their infantry into the forest I had ranged in on.
Admittedly my artillery has done very little in this campaign and I still had to hit and they could save, but it was a foolhardy move.
Since Chieftains aren't at their best when they move it was unsurprising to see only a single Storm lost, to MILAN fire.
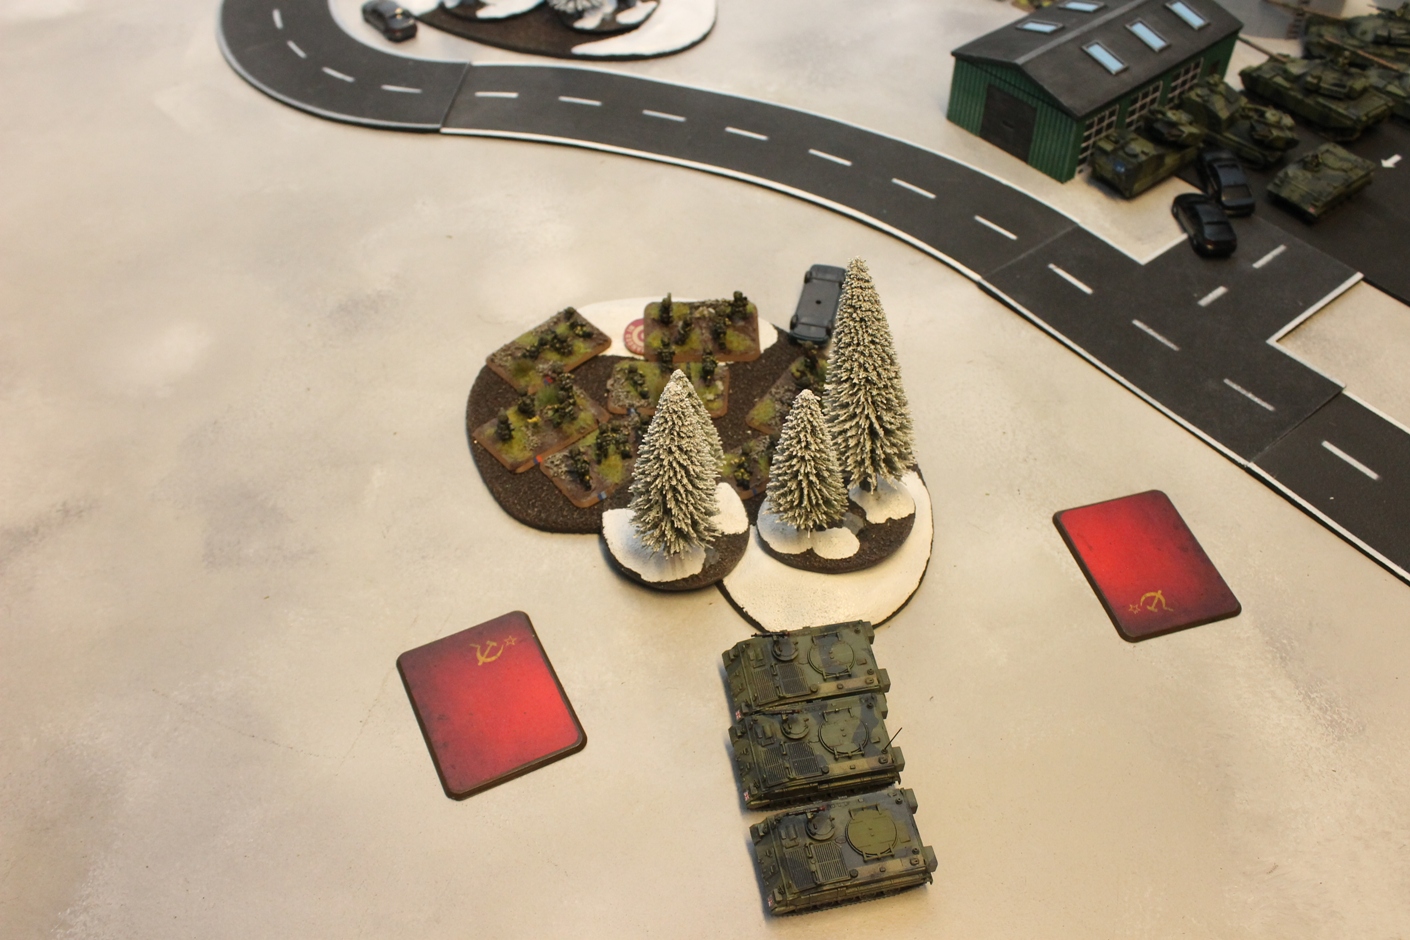
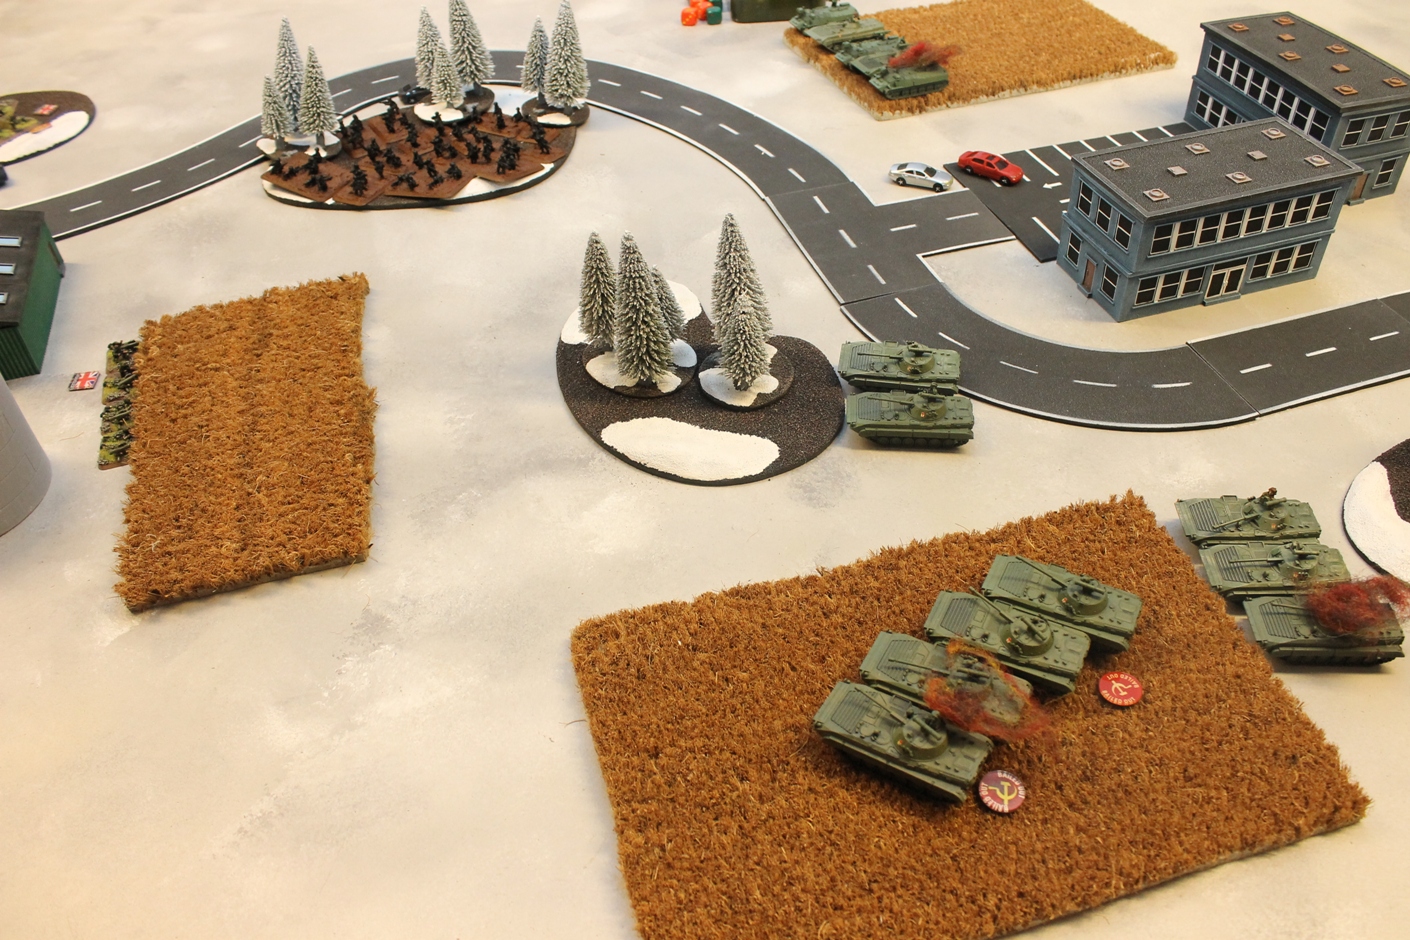
+++ SOVIET TURN 2
This time the Soviets had a field day. The Hail barrage destroyed 4 infantry teams with lucky hits and more so abysmal saves.
Then one Storm and three BMP-2s managed to fire their missiles at the Chieftains, destroying one and bailing the other.
+++ BRITISH TURN 2
It was hard to recover and the Chieftain remained bailed.
Fire was also ineffective, the 4 strong Milan Teams destroying a BMP-2 and bailing two others.
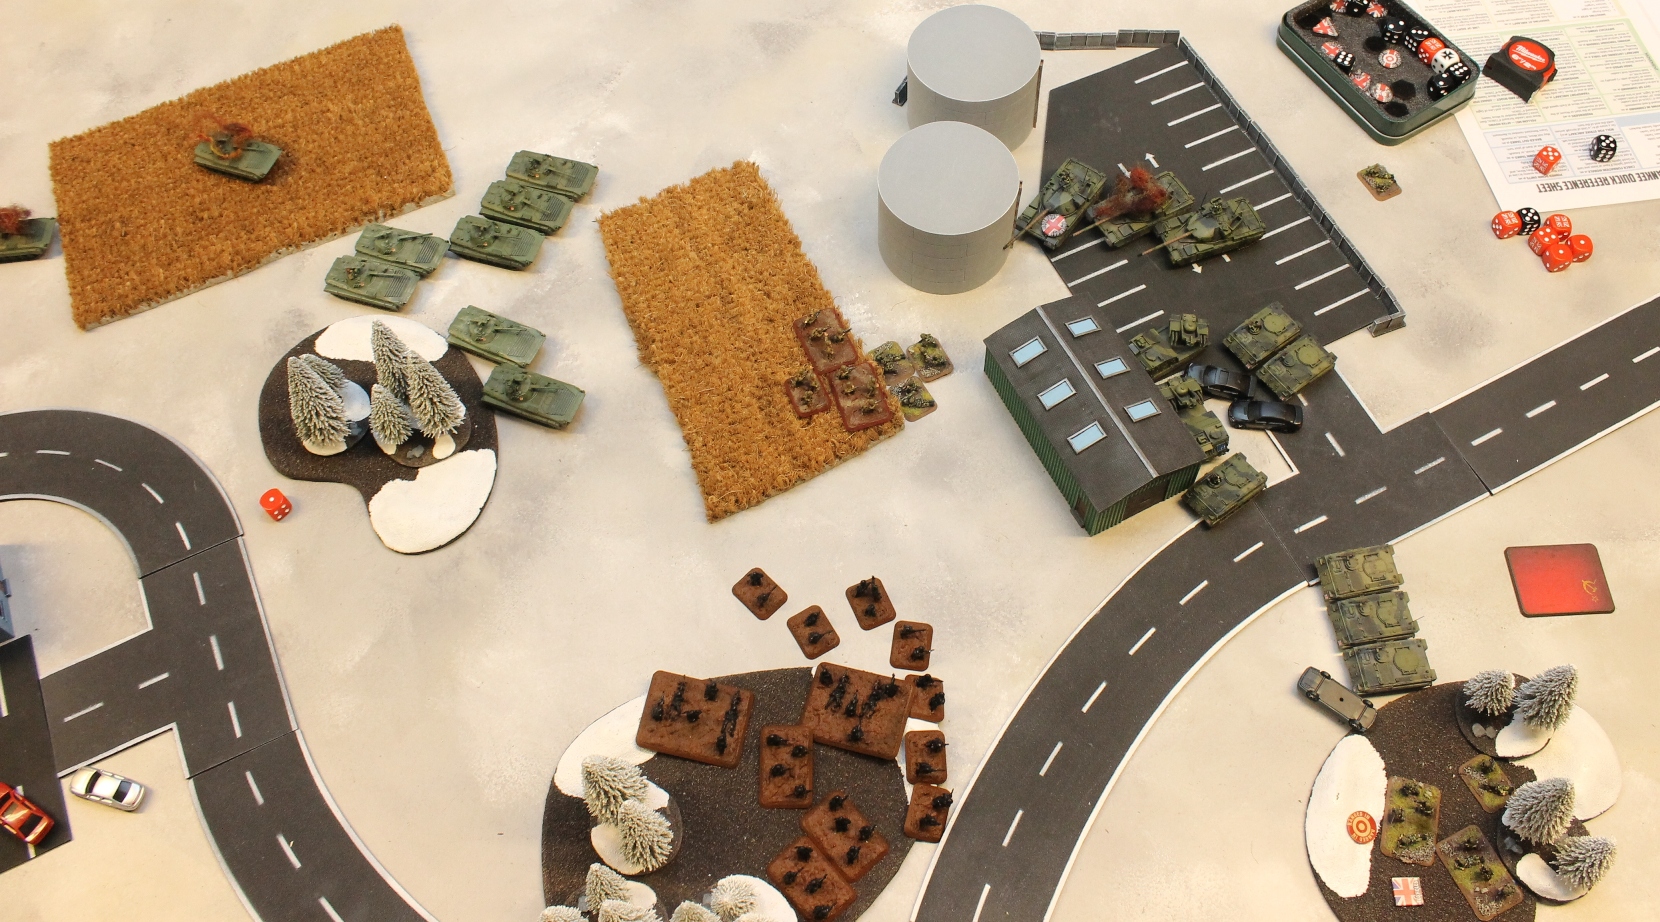
+++ SOVIET TURN 3
- No Reserves
The MILAN teams were becoming most troublesome and the infantry moved forward to engage them. Since the infantry moved the fire archs of the vehicles were largely blocked but the BMP-2s added their fire against the Milan teams and destroyed one team.
The Soviets could only get 4 infantry teams, including their Formation commander into contact and lost one team to defensive fire from the British Formation commander. Then they destroyed one MILAN team. The British infantry counterattacked and destroyed all remaining Soviet teams including the Formation commander. This success was short lived as the MILAN unit had to test morale and failed, taking the British Formation commander with them.
+++ BRITISH TURN 3
Major Beaver realised that if he got reserves the Soviets had left their objectives unguarded so there was still a chance to snatch victory. But alas Fortune had long abandoned him and he failed to get reserves and now the Soviets had realised their danger. There still was another chance if the Russian infantry could be brought down to bad spirits.
With the BMP-2s almost upon him Major Beaver moved his Chieftains further back and sacrificed the Rapiers to slow the BMP-2s down. The Storms had moved forward in the previous turn and the Chieftains fired at them destroying one and bailing the other but they remained where they were. The rest of the British tried to wither down the Soviet infantry, destroying a few teams but a lot remained.
+++ SOVIET TURN 4
Reserves - Small BMP-2 and infantry.
The Soviet Commander had hoped to secure the unguarded objectives, but instead the reserves arrived at the opposite end, to the rear of the British forces.
So the Soviets went in for the kill. The BMP-2s took out the Rapiers and the remaining FV432s, the reserves took out the Chieftains. The Hails and several infantry units attempted to take out the British infantry without success until the last Storm fired its heat missile at the dug in British infantry and managed to destroy one team, bringing the unit down to bad spirits. They did manage to pass their morale test, but this meant that the British started their next turn with no core Formation units in good spirits and lost the game.

This was actually a tighter game than it looks. In the end the Soviets had only lost one unit, their Formation Commander. Had the British been just a little luckier and received reserves at the crucial moment the Soviets had left their rear unguarded. But it was not to be and the Soviets won.
That is the ideal play with the Soviets, act boldly and win while you still have the numbers, while NATO most be more defensive and whittle down the Soviets with their superior skill until they have evened the odds and then engage them with force.
Battle Report Author
Army Lists Used In This Battle
Recommend Commander For Commendation
Share this battle with friends
Red AlertWins

+++
That is the spirit Major Beaver, there are many lessons in defeat.
Here lesson number one is not to walk into a Hail Salvo.
Another great victory comrade. Thanks for posting.
Great report as always. Congrats on the victory. Now get back to your sector.
Well done comrade
Welcome back
Great report, though it is had to read about once defeat. I’m also beginning to realise I’m not just unlucky, I am making a constant stream of bad moves. I’ll have to up my game next.
This game was hard to watch. Nice report
Very enjoybale read and great victory!
Good report and a fine outcome – fight on!
Hope you enjoyed your time in New York.
Don’t like the new Hamburg flag! To much Red?