Fought At Hamburg
2210 days 1 hours 58 minutes ago
Stone versus Paper at Eggersmuhlen
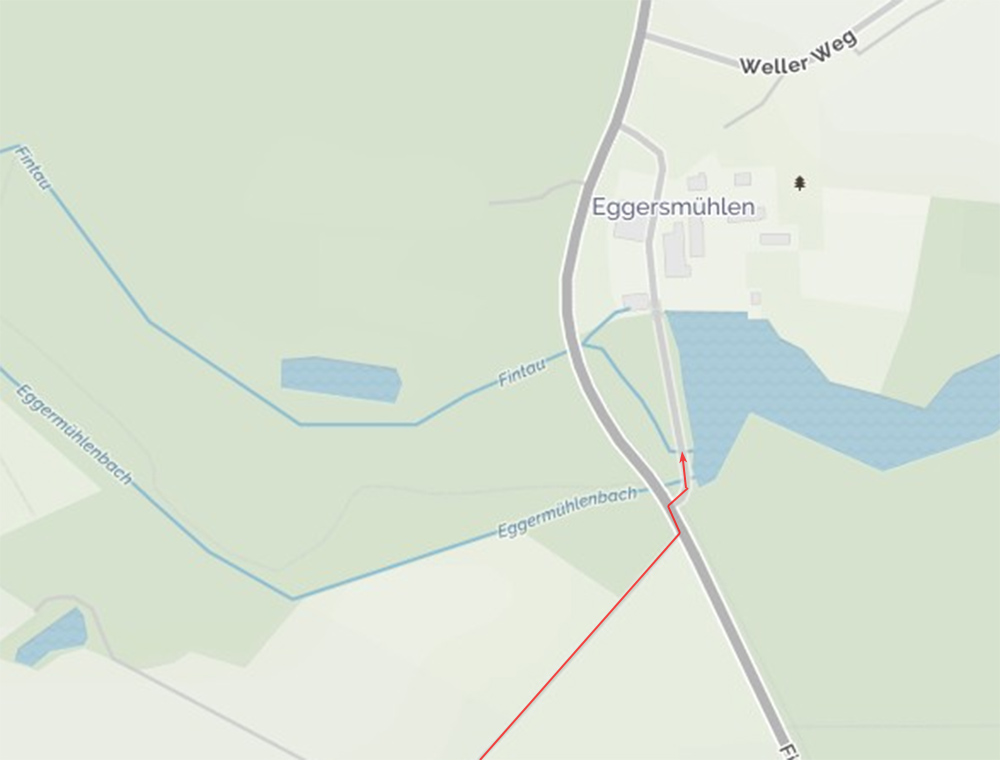
View Linked Report - CLICK HERE 70 POINTSThe 4th (T-64) Battalion of the 68th Guards MRR, reassembled from scratch after its destruction east of Unna, has been rushed north to the Hamburg sector with an attached MRC from the 68th Guards MRR to try to bypass a break in the British line holding the Eggersmuhlenbach, just south of Eggersmuhlen, about 50km SSW of Hamburg. The game was played with 64 points per side, with forces selected secretly before randomly selecting the Bypass mission from the Quick Missions booklet.
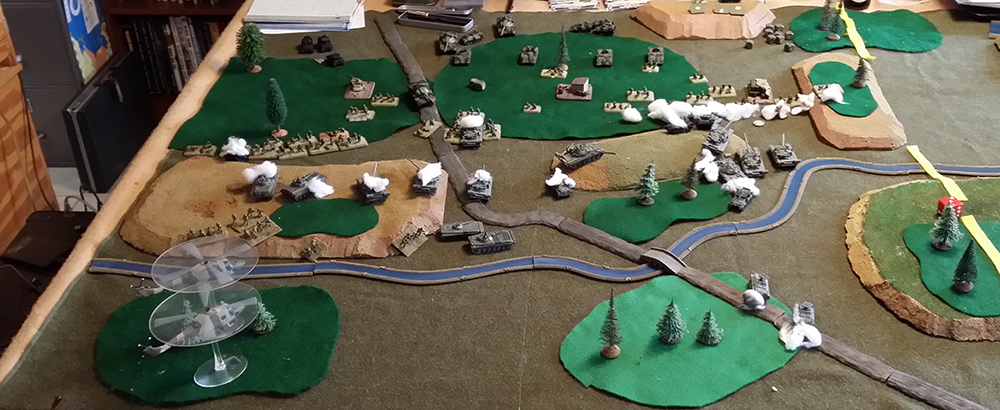
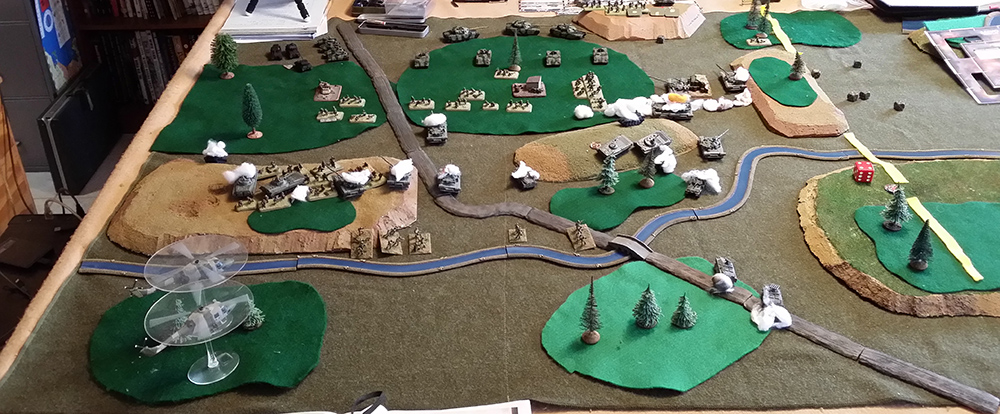
My opponent set up the terrain on a 4×6 table (we weren’t sure what mission we were playing when he set it up) and given the need for a 4×4 table we simply ran yellow indicators down one side of the table to mark the flank of the table. We randomly diced for attacker/defender and the British wound up as the defender. Note: All photos are taken from the south, looking north onto the British lines.
(Note: the 68th Guards MRR was previously misidentified as the 244th Guards MRR due to my apparent inability to tell apart a BTR and a BMP…)
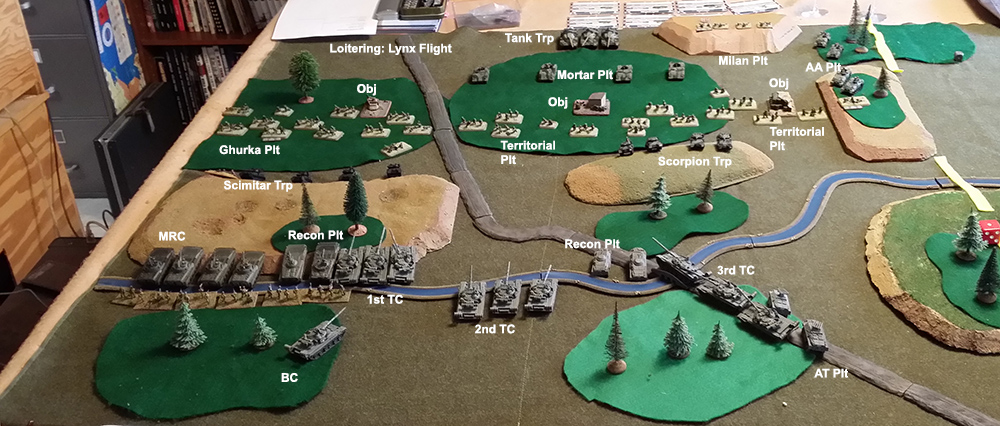
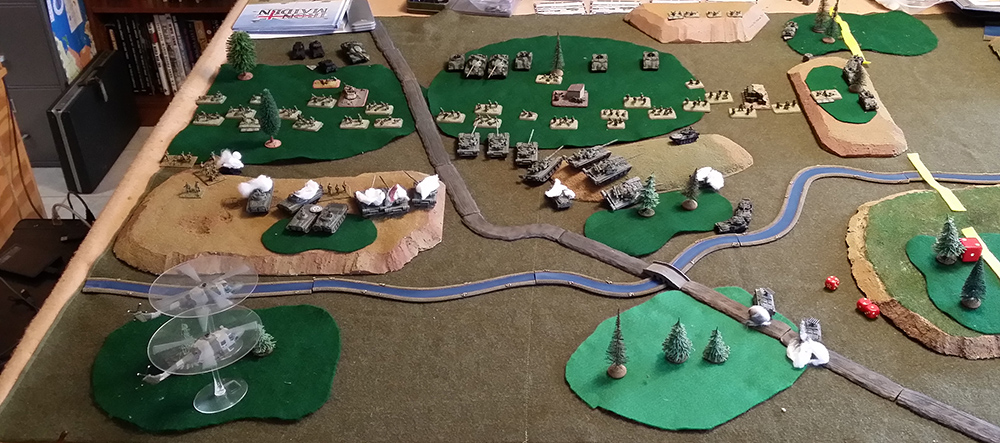
The British deployed a reinforced Territorial Company as shown below, with two platoons of Territorials, one of Ghurkas, a reinforcing Chieftain troop, a Milan platoon overlooking the natural kill zone on the Soviet right flank, along with a Blowpipe AA platoon deployed for anti-tank use. Deploying first, he ran a platoon each of Scimitars and Scorpions up into hull-down positions overlooking the Soviet left flank.
My force, seeing the kill zone on its right (and noting the convenient placement of the British tanks to reinforce that flank), thought to force the road to the left, to use that objective for unit exits so I deployed my MRC and a recon platoon forward, along with 1st TC across the river, hoping to blow the Scimitars out of my way, to gain the woodline to my front. On the right, the other recon platoon deployed forward but I couldn’t take a lot of advantage of it due to the 8” LOS to the Scorpions concealed in hull-down positions. 3rd TC set up on the road and 2nd TC set up to cross the river. Note that the river just required a crossing check to move across. The antitank platoon set up in the woods on the right, to engage the Blowpipes to my front.
The Soviet forces advanced, bogging down one recon BMP, and shot a lot, managing to destroy one Scimitar and bailing out one Blowpipe team. Period.
The British redeployed their tanks to cover the wooded road and their blowpipes destroyed the Soviet AT platoon. The Scimirars killed two and bailed out two BMPs, with the unit failing morale as a result. The Scorpions blitz-moved to fire into the flanks of Soviet advance and killed one BRDM from the second recon platoon, causing the other one to flee, and killed one T-64 each from the 1st and 2nd TCs. The Lynxes flew in and killed a third T-64. The Scimitars used a shoot ‘n scoot move to fall back into the woods, one of them failing its bog check.
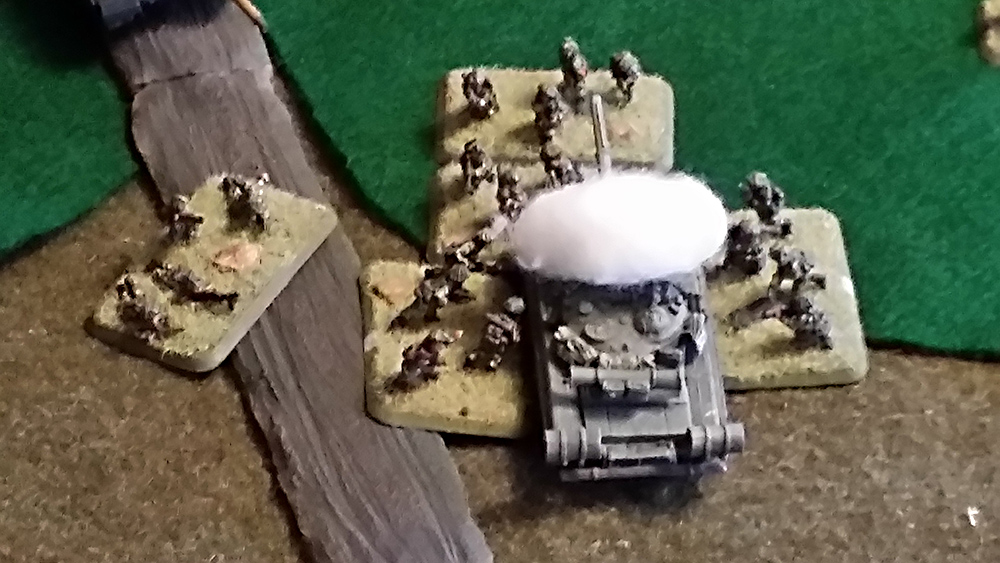
The Soviet advanced all along the front, killing a Scorpion and bailing another. The dismounted MRC assaulted the bogged-down Scimitar in the woods on the left. And lost (well, inflicted no casualties and then failed their counterattack roll), falling back. The 2nd TC fired on the infantry in the center woods without effect.
The British moved the lone Scimitar back out of harm’s way, their Blowpipes moved up, the Lynxes moved to the rear of the Soviet left flank, the Scorpions rounded the woods in the middle, and the Chieftains deployed into the woods. Mortar fire came in on the dismounted MRC, killing two RPG stands.
Realizing things were going nowhere on the left I redeployed my surviving two tank companies to my right flank, pulling everything back from the left. One T-64 bogged down while trying to leave the center woods and was left behind. T-64s killed one and bailed out two Scorpions at which point the remaining one fled the battle, and killed three of the four Milans on the hill in the British rear, causing the fourth one to flee (Note: This is a FIRST for my Soviet force!).
The British Blowpipes began to redeploy across the British rear, the Ghurkas advanced in pursuit of the Soviet MRC and the center Territorial platoon assaulted and destroyed the bogged-down T-64. Mortars laid a smoke screen across the front of the right objective in front of the defending Territorials.
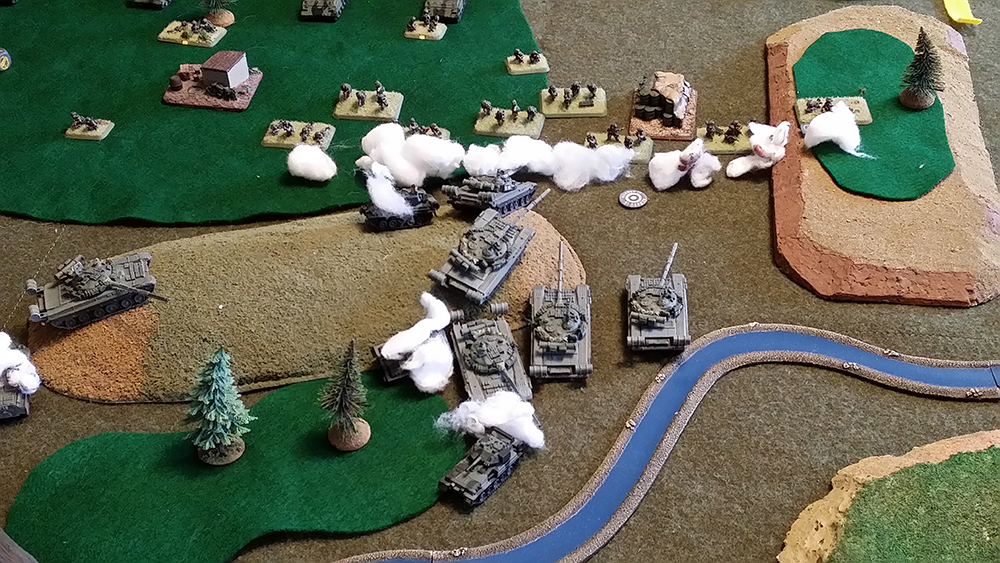
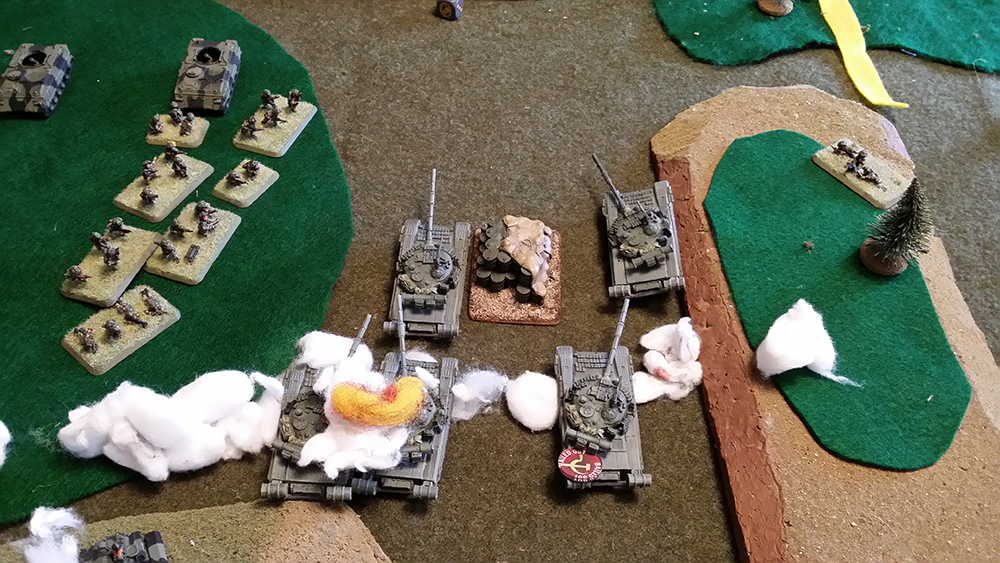
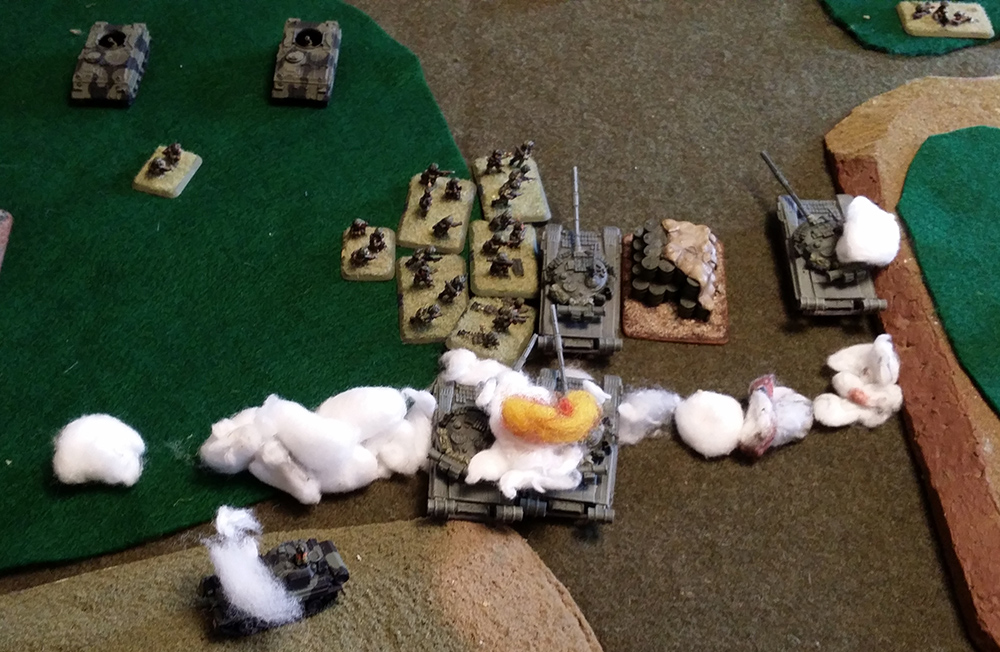
The Soviet 2nd and 3rd TCs assaulted the Territorials on the right flank, through the smoke. Defensive fire killed two T-64s and bailed out another but the T-64s killed one British team and the rest of the platoon disengaged (failed their counterattack roll) and fell back into the woods.
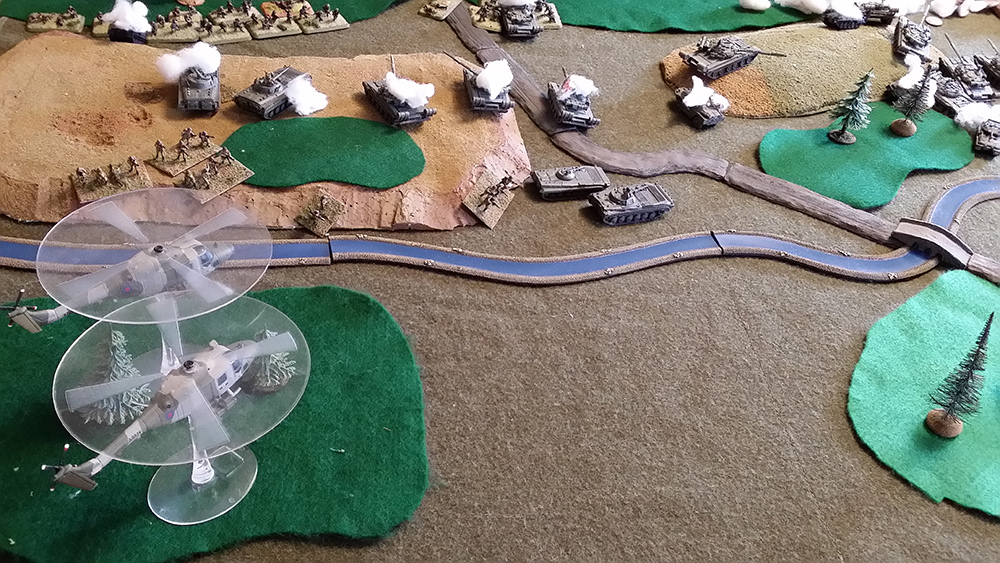
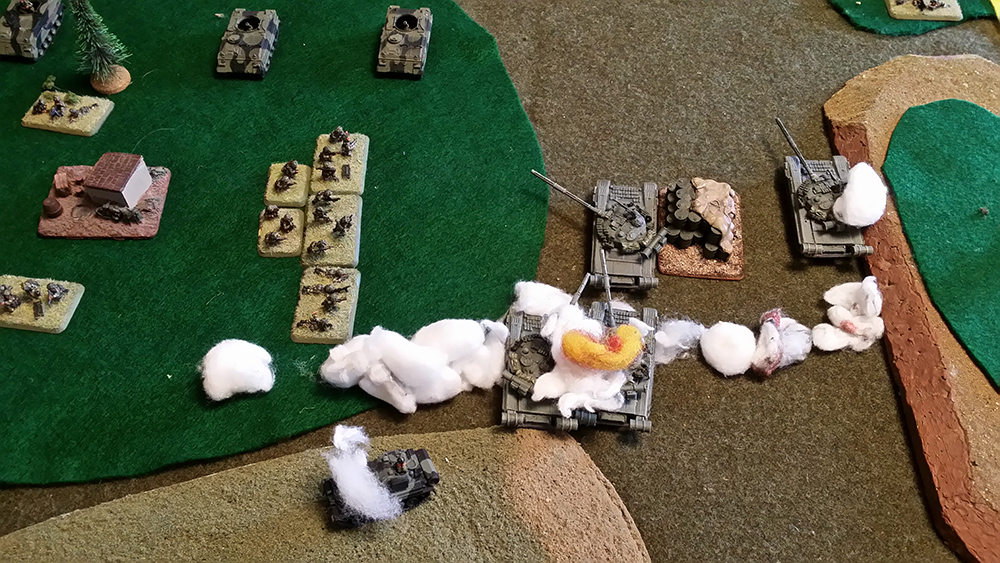
The Gurkhas continued their advance while the Chieftains redeployed around the back of the central woods to engage the Soviets on the rightmost objective, killing one. The Lynxes bailed out one T-64 and 3rd TC failed morale and fled. The Territorials close assaulted the remaining T-64 (the sole survivor of 2nd TC) but were driven off with two stands lost.
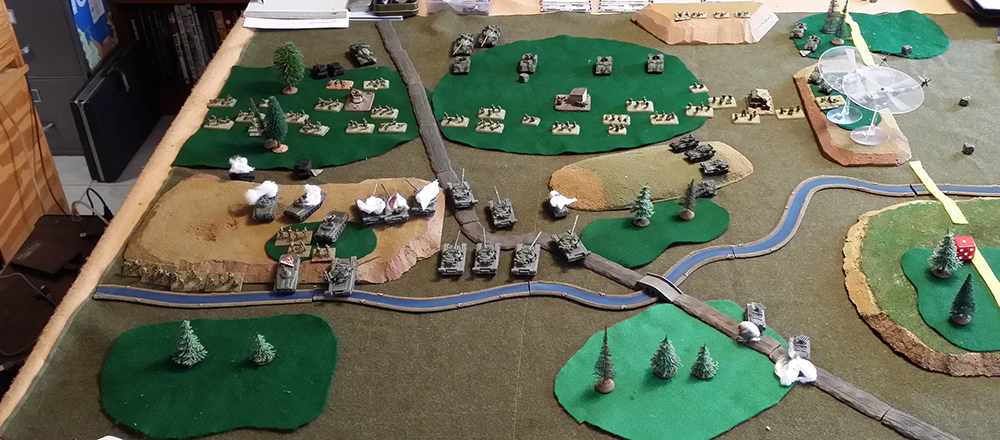
Note the smoke screen actually came up during the second (British) half of turn 4 - we simply forgot to remove the cotton...
The MRC and surviving recon platoon continued their race to the east (the right) and I realized I had two choices. Because I held the third objective with no British troops within 4” of it I could remove the remaining tank of 2nd TC, thereby exiting one unit from the table, but leaving only a dismounted MRC and a pair of recon BMP1s on the table, or I could try to hold out for another round or two, until the others could get to the objective. With the Chieftain troop rounding the bend and most of the British infantry racing my MRC to be the first on the objective, I reluctantly exited the 2nd TC and the game ended with a British 5 – 2 win. The British position was bypassed but at a very high cost.
OK – I got over my dislike of Milans.
I felt like I brought the wrong force to the table i.e. my supported tank force was faced with assaulting an antitank kill zone on the right flank and LOTS of infantry entrenched in the woods and everywhere else. Just gritting my teeth and going all-out on the right would, in hindsight (which for me, seems to be better than foresight) have worked better. I delayed one turn too long before realizing this and doing a general advance to the right.
I had stone but the British brought paper.
The river in front of my deployment area (given my historic ability to bog down in a mud puddle) informed my initial decision to advance on the left simply because I could, by forward-deploying my recon, get most of my troops across the river.
Whew!
I’m enjoying the smaller games – with slightly less troops to move, the games move right along!
Battle Report Author
Opponent
Army Lists Used In This Battle
Recommend Commander For Commendation
Share this battle with friends
kayjayWins

well done, different perspective from the soviet side
Great AAR, and to lose to the Brits is not the worst thing you can do.
Great report!
+++
Your assessments are good, this is a rock – scissors – paper game. A combined arms force is always best to have options and the key to winning is to concentrate more forces to the schwerpunkt than the enemy
AAR is good and worthy of commendation
So much cotton! Better luck next time comrade.
The good Tovarishch had asked for more wooded terrain in our next battle. Too much vodka perhaps.
And the Guards were openly disdainful of the territorials :).
Had I rolled the attack it would have been a different story.
Very nice report. Your force was doomed from the start with the terrain you were forced to attack. Keep at them. Thanks for posting.
Good report, keep pushing. Sorry for the loss.
Tough one. Great report and analysis!
Tough fight, Tovarische
Good battle report!
A good report. Dug in British infantry are a tough nut to crack. There’s a reason they’re popular.
Keep pushing Comrade.Nice report