Fought At Niederbayern
2234 days 7 hours 43 minutes ago
Australians* Return To Europe
80 POINTSAustralians* Return To Europe
* I use US lists to represent an ultra modern Australian force. Waiting on the Free World Book.
For the campaign I will be using the following model proxies
Australian Model Stripes equivalent
M1A1 M1/ 1PM1
ASLAV LAV
Bushmasters M113
F/A 18 Warthog
Euro / Tiger Helicopter AH-1 Cobra
70 years after the Great War, Australian forces are once again fighting in Europe.
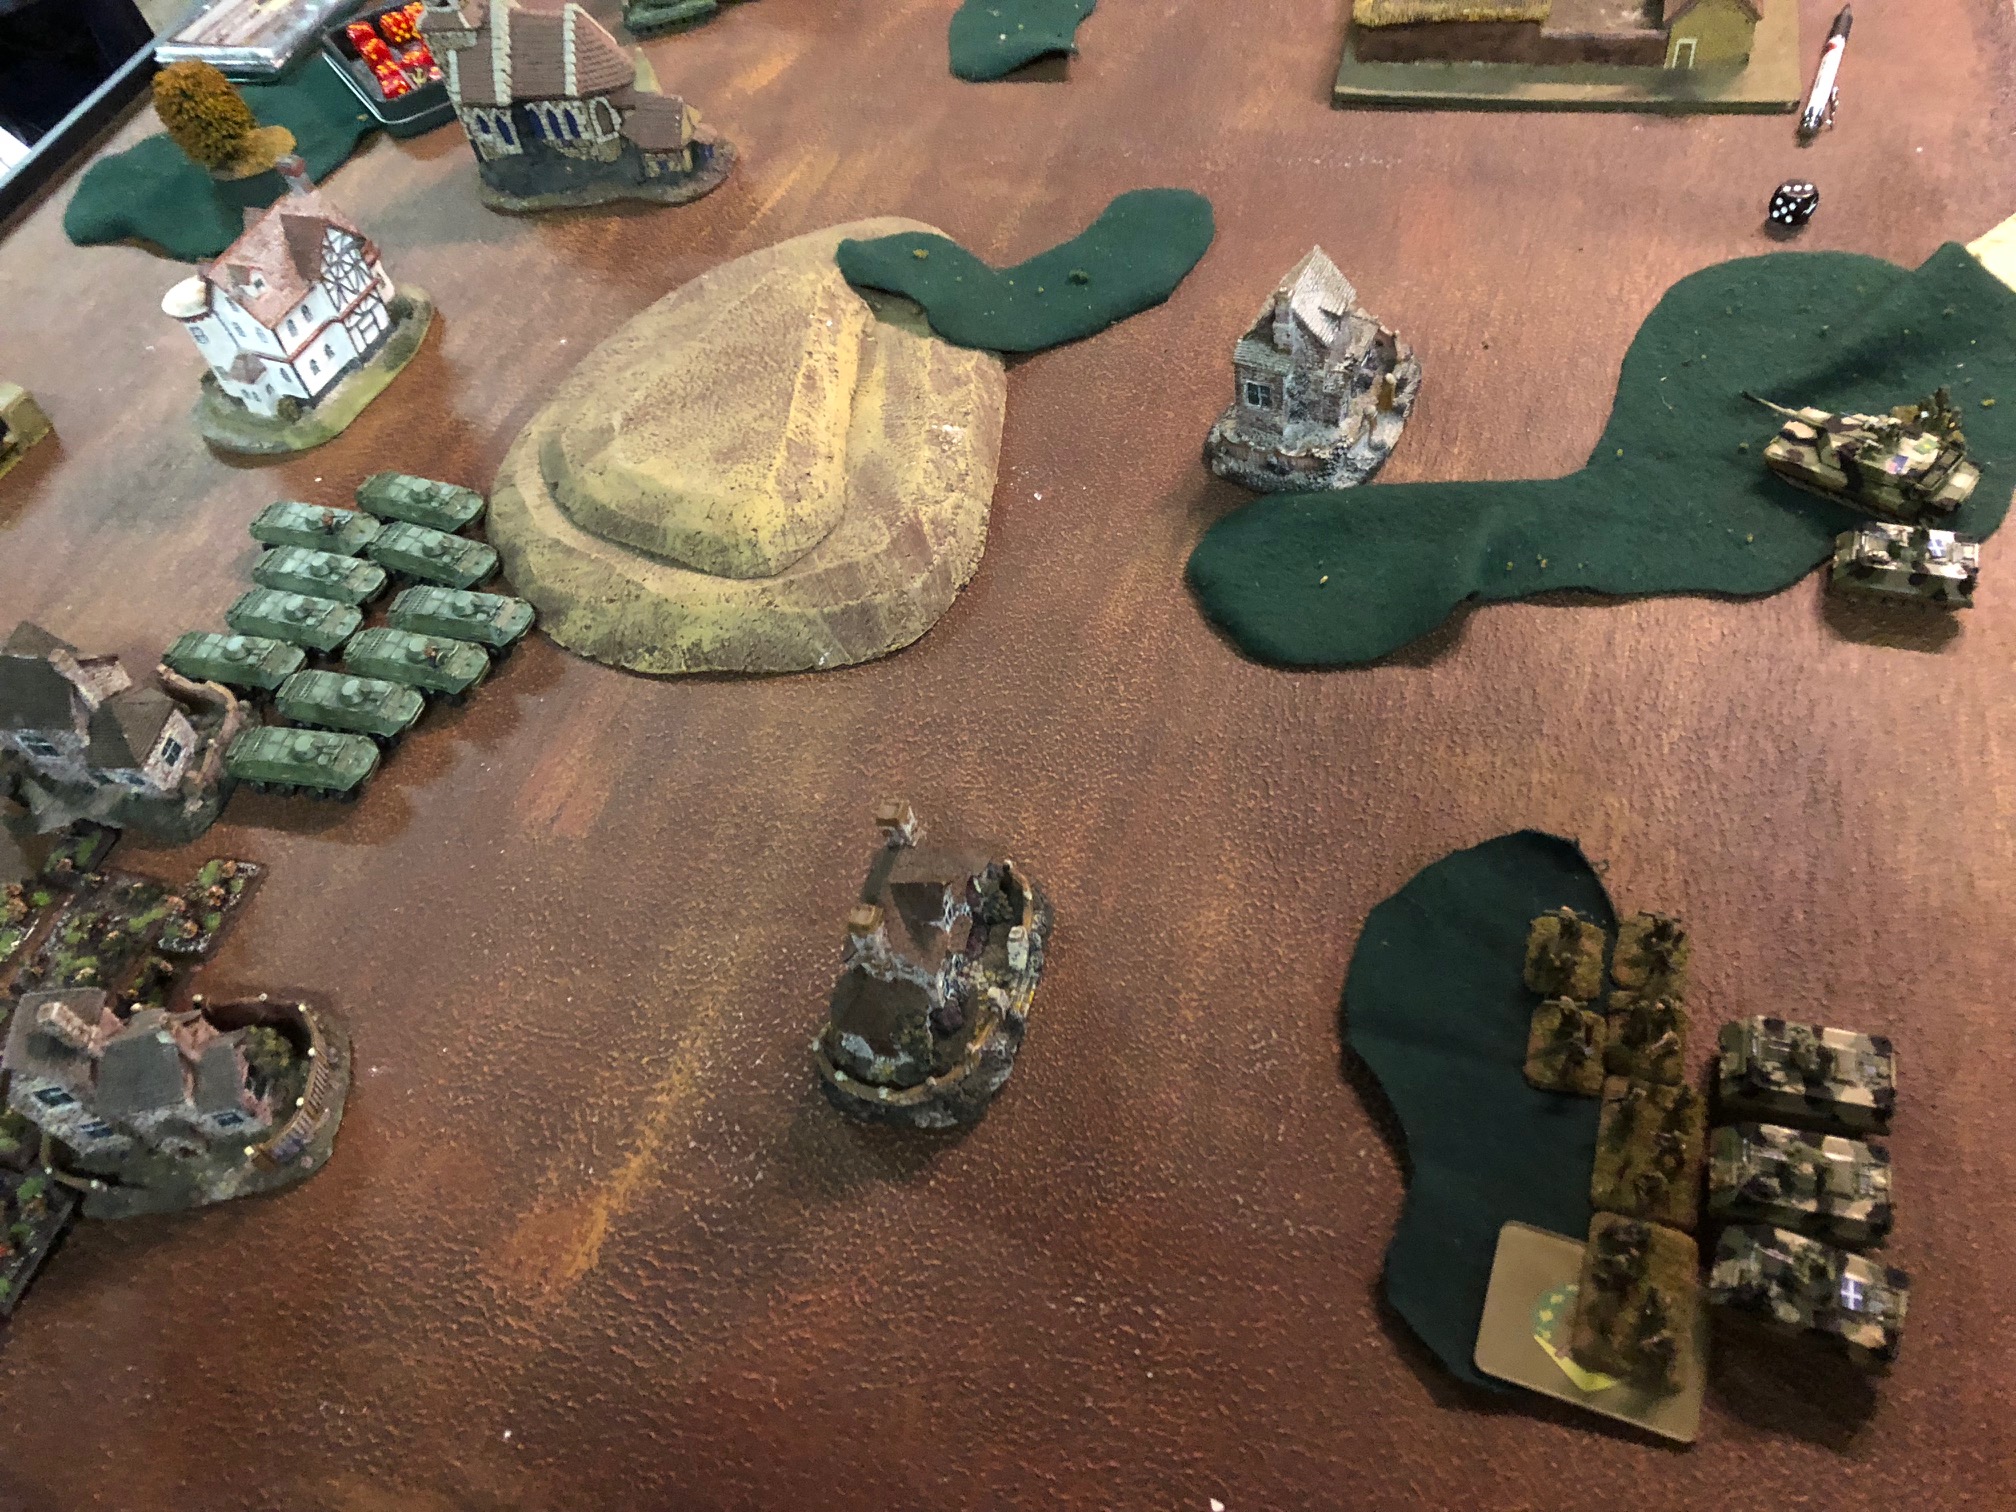
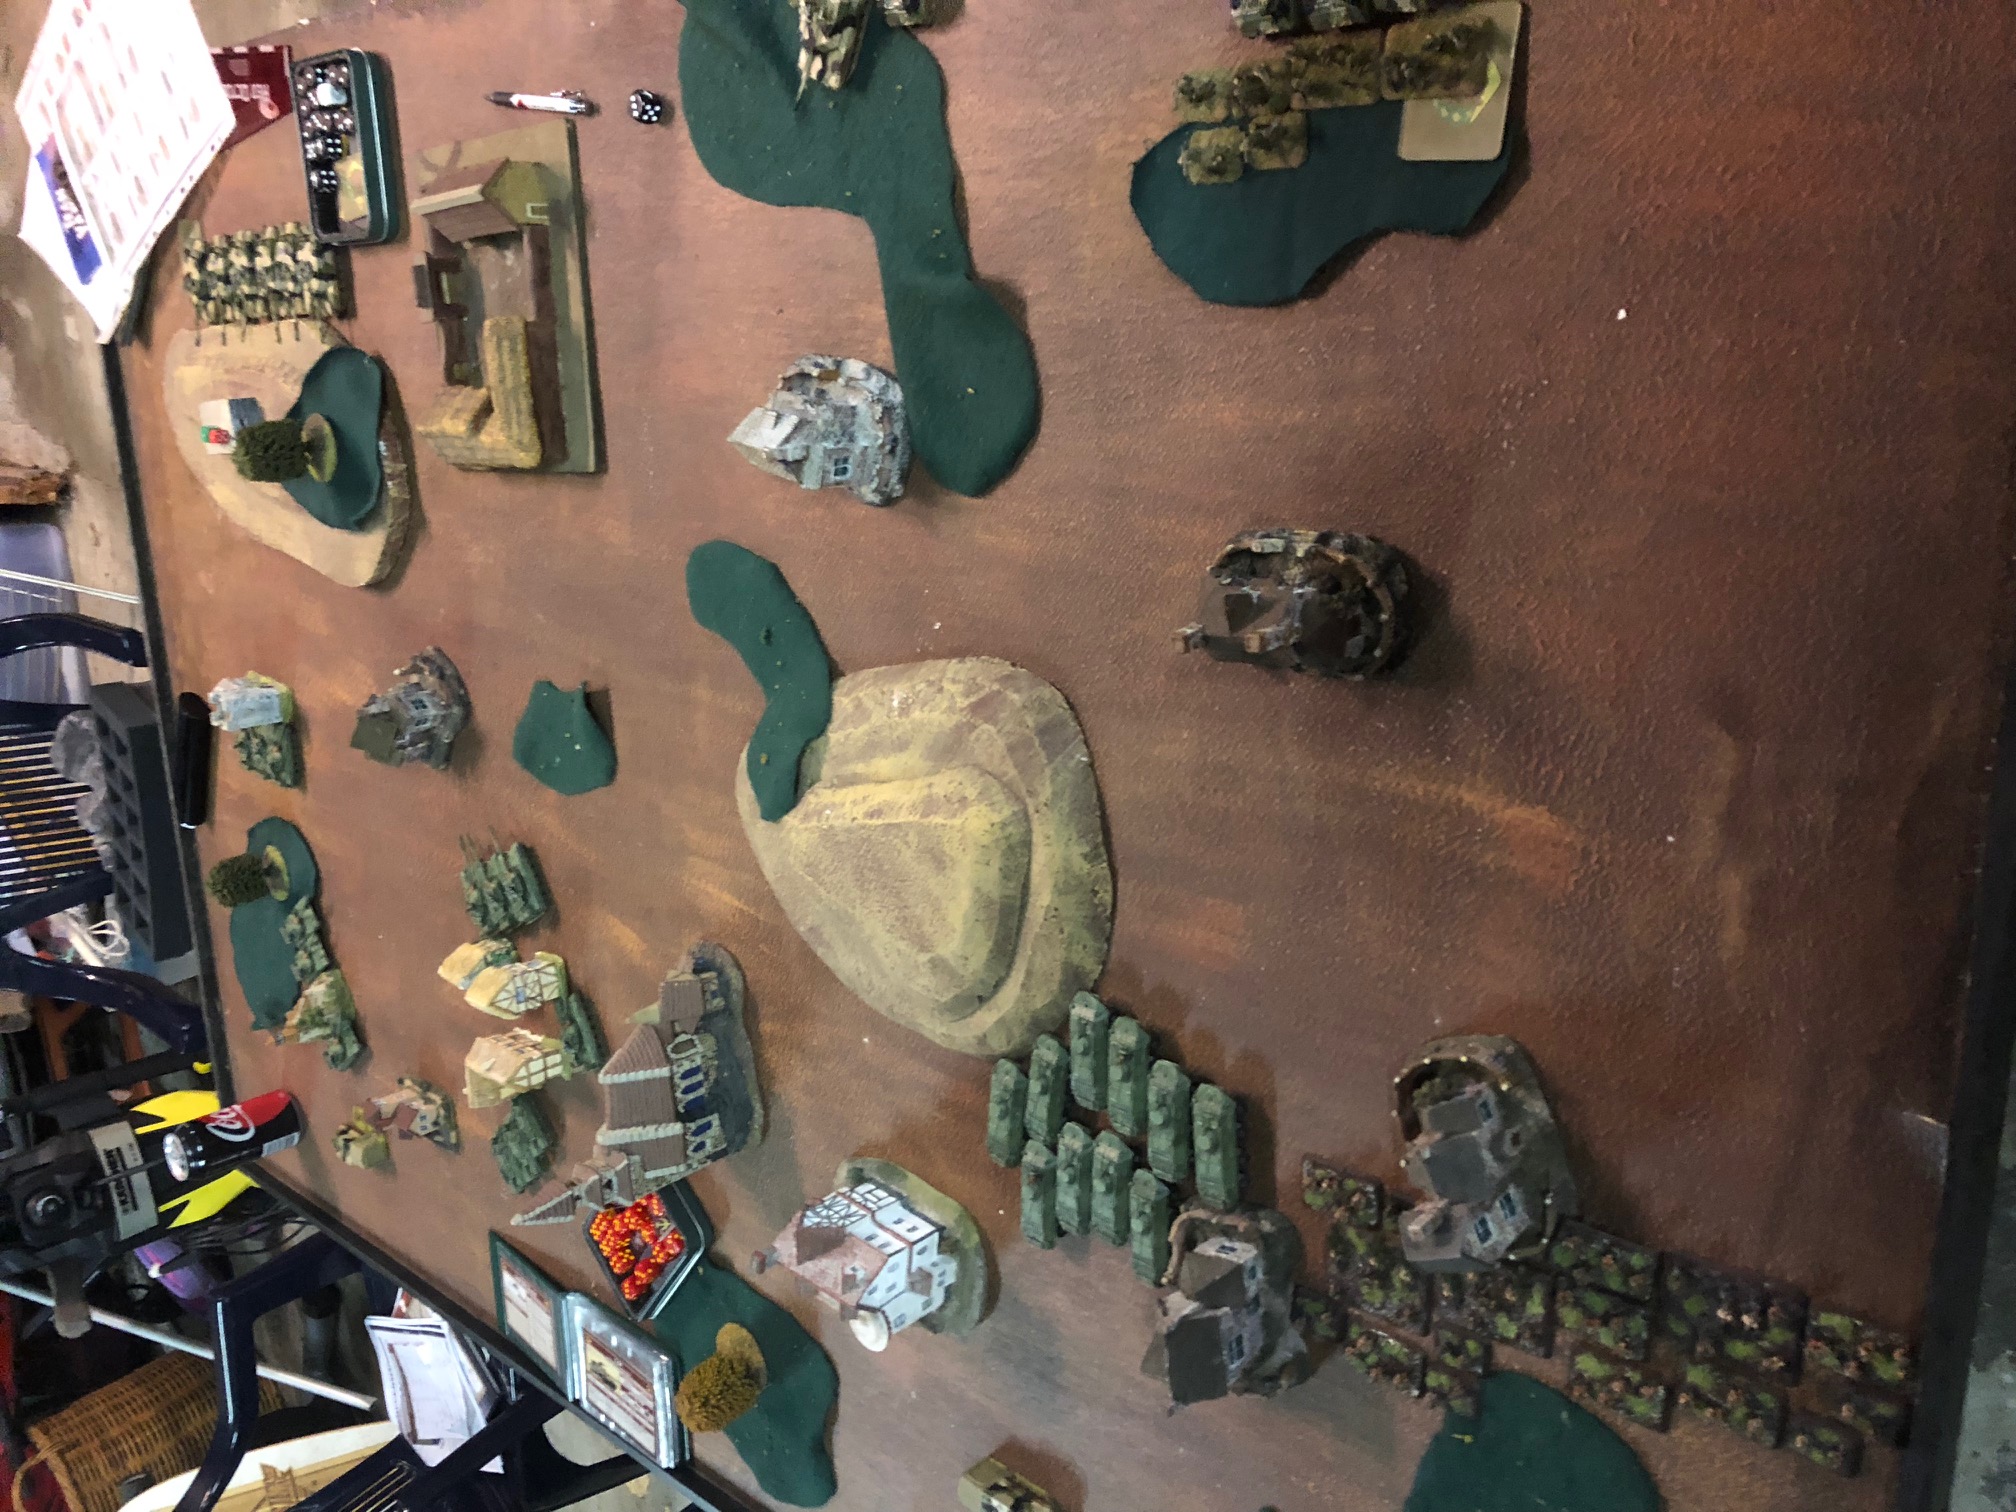
For their first battle, the Australians were assigned a sector in Niederbayern. A platoon of infantry and their M113s deployed in woods guarding the northern flank objective. The infantry formation commander setup nearby along with 1PM1 formation commander to provide some heavy support. The southern flank objective was being defended by 2 platoons of 3 1PM1s in a reverse slop e position.
Out of the darkness a large platoon of Soviet infantry and BTR-60s advanced on the northern flank and 10 T-somethings advanced on the southern flank. All the Soviets held their fire as in the darkness no Australians could be seen.
Hearing the rumbles in the darkness, the Australian infantry advanced to the edge of woods and the 1PM1s held their position behind the hill. The infantry held fire as not to give away their position.
The Soviet infantry and BTR-60s continued to advance to towards the northern objective. To the horror of both of the 1PM1 platoons, they realised the 10 T-somethings were actually T-64s and they move faster than the T-72s. (The platoon commander should have spent time re-reading “Red Thunder” and not painting some new ASLAVs) One platoon of T64s charged over the top of the hill while a second flanked the hill. The T64s were surprised to see the 1PM1s waiting for them. The combination of night and surprise had unsettled the T-64s gunners. Only 1 of 1PM1s was hit and destroyed.
The Australian Infantry heavily outnumbered wait for the oncoming Soviet assault, while a knife fight was developing between the 1PM1s and T-64s. After some minor movements the 1PM1s returned fire on the T-64s, destroying 2 in one platoon and 1 more in the second platoon. Knowing some more friends are on the way the single T-64 passed its morale check.
The battle was now involved into two separate fights, and infantry facing off in the north and the heavy armour fighting in south. The Soviet infantry and massed BTR-60 fire opened up the Australian infantry in woods. Again the Soviets suffered from night fighting, inflicting only a minor casualties on the Aussie infantry. The three remaining T-64s from the initial assault moved to flank the 5 remaining 1PM1s while the third T-64 platoon of three tanks crested the hill to add the fire to the fight. The T-64 Commander also moved into firing positions. The 1PM1s were in a desperate position out numbered 7 to 5 but with 3 T-64s in the rear. All the Soviet tanks opened up but in the confusion a night knife fight only 1 1PM1 was destroyed bring one of the platoons down to 1 tank. Knowing how critical the situation was and having the Anzac spirit, the single tank passed its morale check.
The Australian infantry began to fight back against the Soviet infantry. The infantry’s M1113 rushed from between the woods firing the 50cals into the Soviets. The 1PM1 commander finally got involved destroying some BTR-60s. The Soviets took some minor casualties but still heavily out numbered the Australians.
Now the 4 1PM1s guarding the hill manoeuvred expertly in darkness to confuse the T-64s. After firing , 5 of the remaining 7 T-64s were lighting up the night sky.
Dawn finally comes. The sun light shows the southern flank covered in burning T-64s. The Commander orders the last remaining T-64 to continue the fight, while he heads off to the northern flank to support his infantry. The single T-64 fired his last shot and missed.
The Soviets destroy the M113s with RPG fire, the infantry is reduced down to just 3 stands from AK and BTR-60 fire. The 1PM1 formation commander is bailed from missile fire. The Soviet infantry is on the verge of breaking through and taking the northern objective.
The 4 1PM1s quickly dispose of the remaining T-64. There are now no Soviets on the southern flank. The Australian armour have finally won the knife fight and for the first time in game can think about going on the offensive.
With daylight the first reinforcements have finally found the way to the front. A platoon of 4 Vads luckily for the Australians come out of the morning mist right in front the Soviet infantry. The Australians finally had some fire power that could begin to seriously threaten the Soviet infantry . For the first time the Soviet infantry suffered significant losses. The 1PM1commander destroyed some more BTR-60s. The 3 remaining stands of infantry fell back to safe positions in the woods.
The Soviet reserves arrived, a platoon of 3 T-72s. They moved to a position to defend the objective on the Soviet southern flank. The first of the Soviets infantry now move into the woods containing the objective that the Aussie infantry have been defending since the start of the battle. The infantry destroy some of the Vads.
For Australians, a ITOW unit arrives and moves to support the 1PM1s in south, while the 1PM1s position themselves to take on the T-72s. A unit of Australian infantry that must being following the Vads arrive in the same spot in front of the of Soviet Infantry. With the combined fire from M113s, fresh infantry and the 1PM1 commander decimate the Soviet infantry. For the first time, the Australians out number and out gun the Soviets in the north. The Soviets have now lost all their offensive capability. All that is in reserve are some light vehicles who got lost somewhere behind the Soviet lines. At this point the Soviet commander called it quits.
The Australians have held off the Soviets and won their first battle. The Anzac legend continues.
Battle Report Author
Army Lists Used In This Battle
Recommend Commander For Commendation
Share this battle with friends
thunderchildWins

Good job. Congrats on the win.
Aha! I knew it was TWotW, excellent taste 🙂
@Jagdpanzer I have seen a meme that says “If nobody from the future comes back to stop you. How bad can the decision you made be”. Something has seriously gone wrong if Australians from 2018 go back to 1985 Europe and they bring some 1970 Vietnam infantry with them as well 🙂
hmm nice to see aussie from the future!
“thunderchild” is from War of Worlds. I have been using it for 20 years on different sites.
The battle report was an after thought. I didn’t have a camera myself. It was a friend who took some random photos.
The next report has got some more photos.
The detail on the report was great, some more pictures would have been nice, however! Love the username by the way, is that a “The War of the Worlds” reference?
Huzzah for the Australians on a hard fought victory. Germany is greatful for you effort nad sacrifice.
Very nice write up, hope you bring more pretty pictures next time 🙂
Welcome to the front diggers! Although Nieder Bayern is a bit of a side show we need all the help we can get as Free World Forces (My Dutch are doubling as Germans).
excellent AAR with supportive (overview) pictures. Congratulations on the win and start pushing towards Berlin mate!
Nice report, looks like a good time
Heads up thunderchild, none of your proxies are suitable. Look out for the British II Corps pdf, which is a closer match to the upcoming Free Nations book.
Also stay tuned for some more Aussies taking the field shortly.
Now we’re in trouble, the Aussies are here. Anyone up for Gallipoli round 2?
+++
Free World is a misnomer
We are here to liberate you – resistance is futile
Good to see you back Thunderchild.