Fought At Brandenburg
2212 days 8 hours 44 minutes ago
Operation Yoyodyne
100 POINTS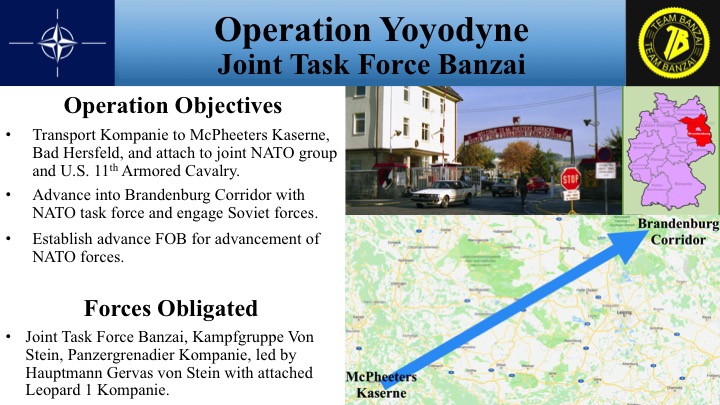
SECRET//ORCON
FROM: JOINT TASK FORCE BANZAI
TO: EUCOM
INFO: CENTCOM
NATO COMMAND
WHITE HOUSE SITUATION ROOM
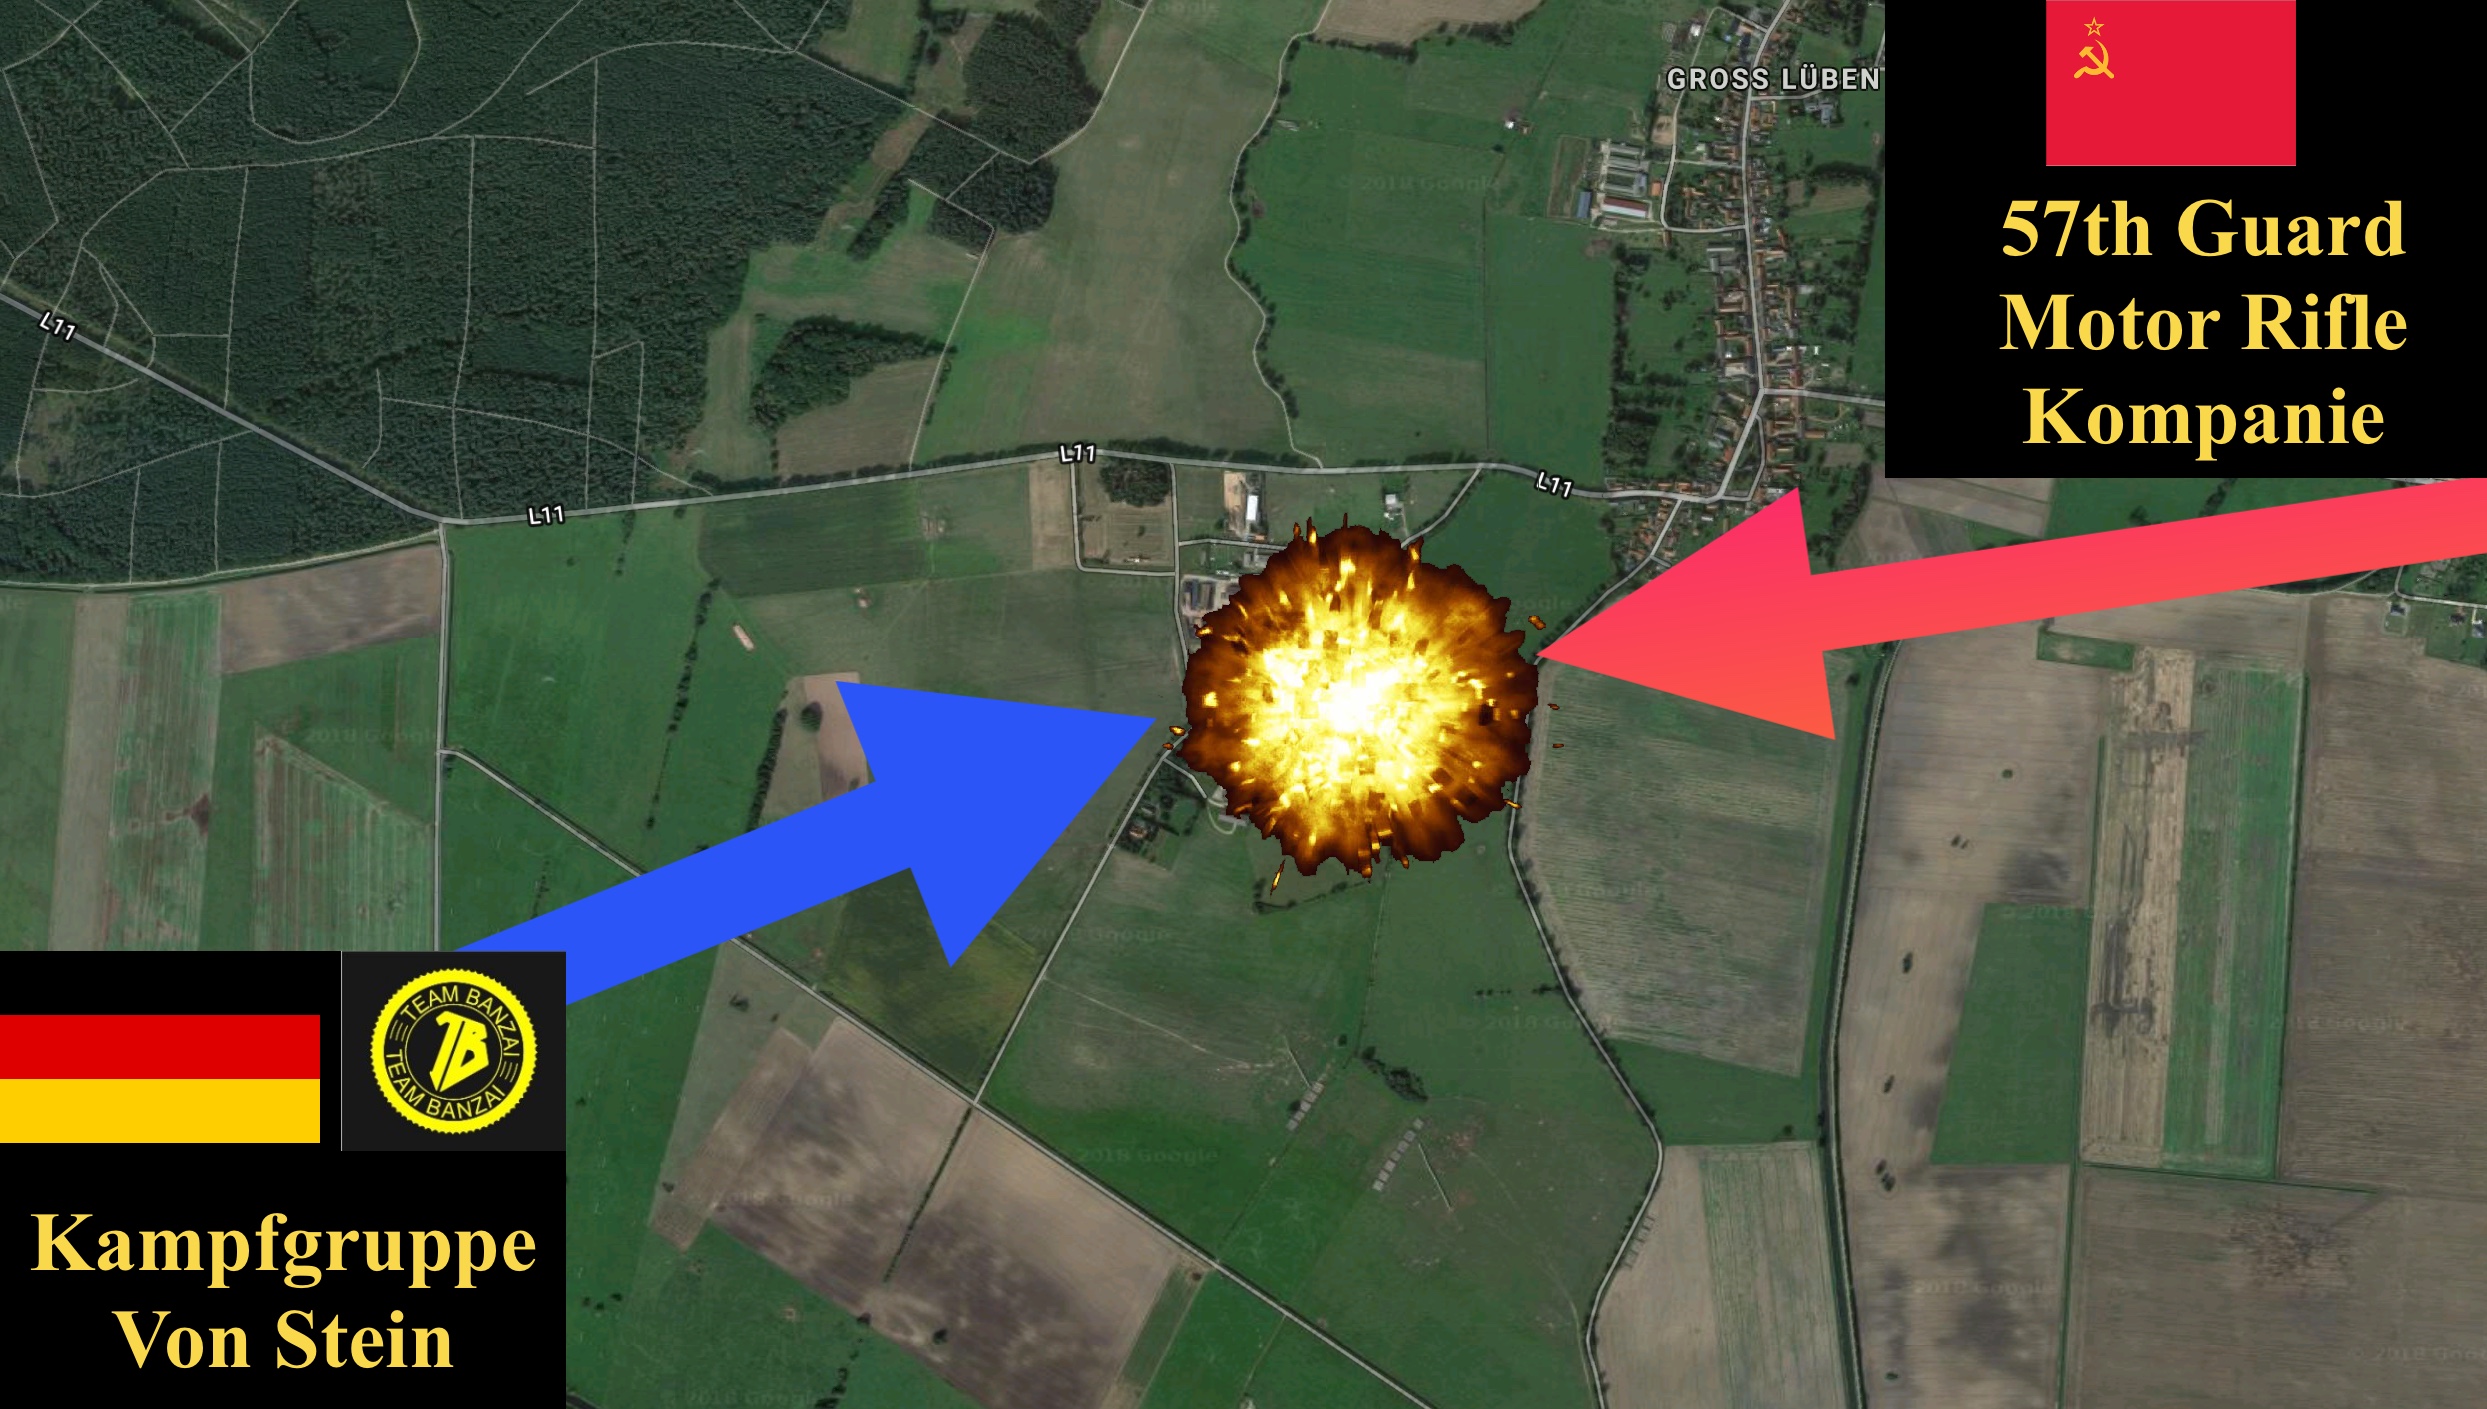
SUMMARY: (S) Joint Task Force Banzai reports insertion of Task Force elements into the Brandenburg Corridor and contact between Kampfgruppe Von Stein and 57th Guard Motor Rifle Kompanie, outside of Gross Luben.
DETAILS: (S) NATO command reports the opening of the Brandenburg Corridor. Intelligence assessment suggests operational control of Brandenburg by NATO forces would significantly hamper Warsaw Pact incursion into Denmark and allow for a secondary assault on Berlin.
(S) Joint Task Force Banzai has been assigned to muster with U.S. 11th Armored Cavalry at McPheeters Kaserne, Bad Hersfeld, to spearhead into Brandenburg and engage Soviet forces. Deploying forces have been advised to prepare for heavy losses and difficult resupply.
(S) Kampfgruppe Von Stein, upon conclusion of Operation 8th Dimension, rejoined the main element of Joint Task Force Banzai at McPheeters Kaserne. Hauptmann Gervas Von Stein was ordered by Commander Joint Task Force Banzai to secure the southern flank of the column upon entering the Brandenburg Corridor.
(S) After crossing the Elbe River, Kampfgruppe Von Stein reported contact in the outskirts of an industrial district outside the city of Gross Luben. Hauptmann Von Stein engaged what has subsequently been identified as the Soviet 57th Guard Motor Rifle Kompanie. The following engagement resulted in the near total loss of all elements of Kampfgruppe Von Stein. Hauptmann Von Stein, and the surviving members of Kampfgruppe Von Stein, returned to McPheeters Kaserne, many being aided by the German underground.
(S) Engagement between Soviet 57th Guard Motor Rifle Kompanie and Kampfgruppe Von Stein is photo-documented below along with the Operation briefing.

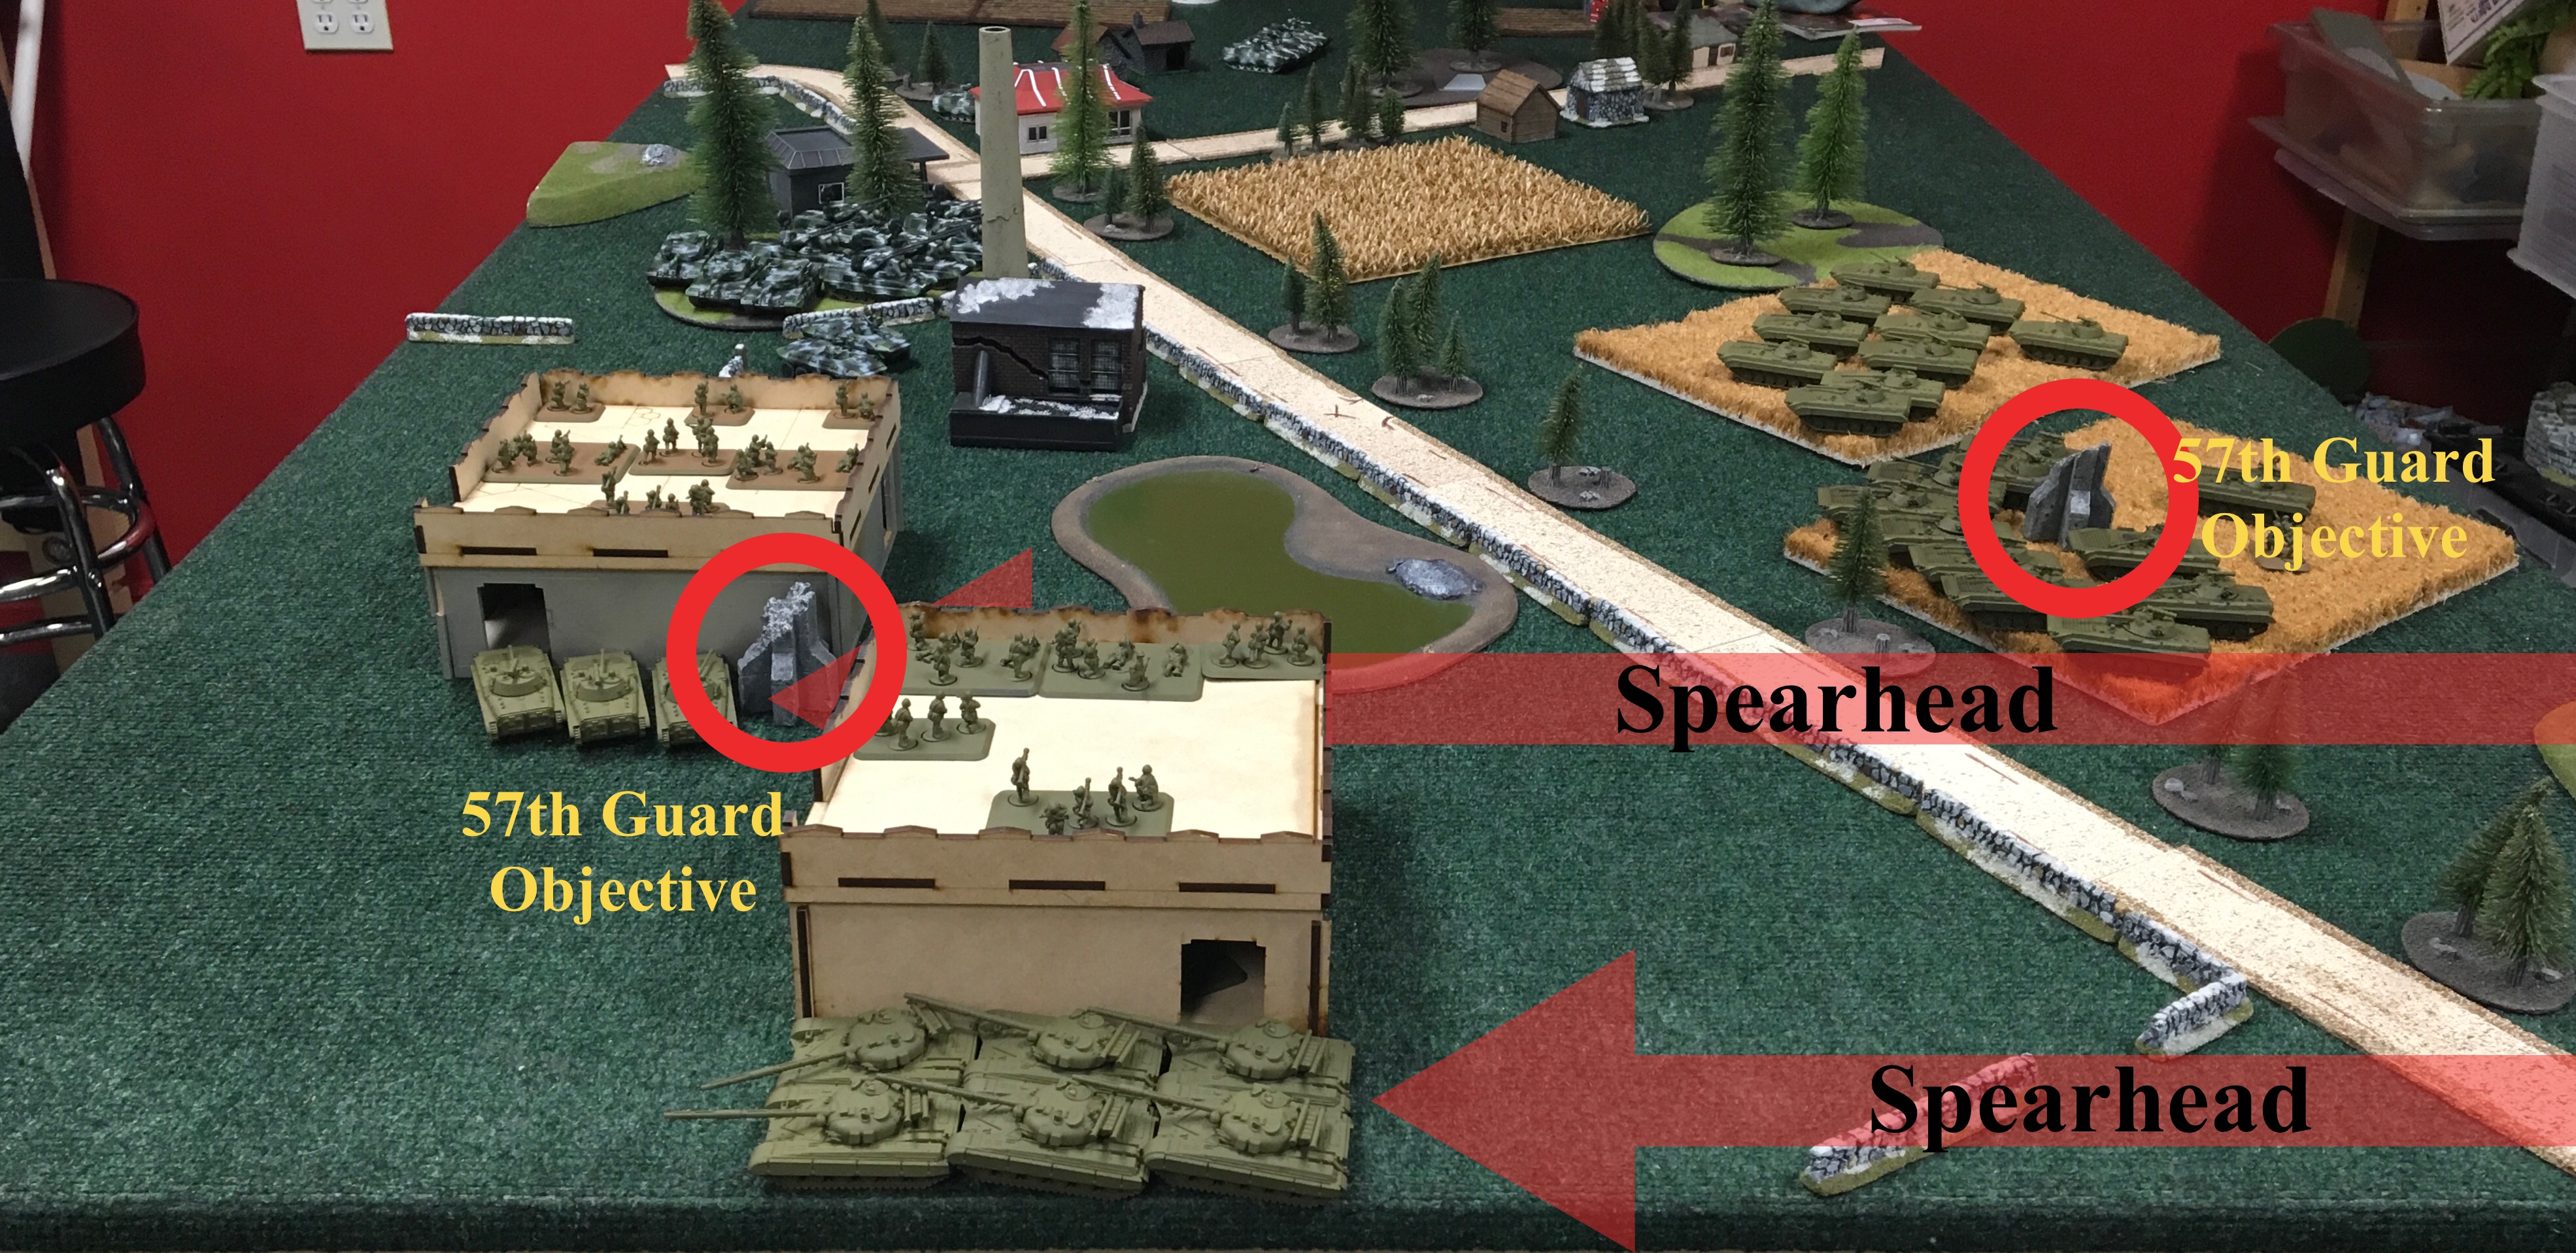
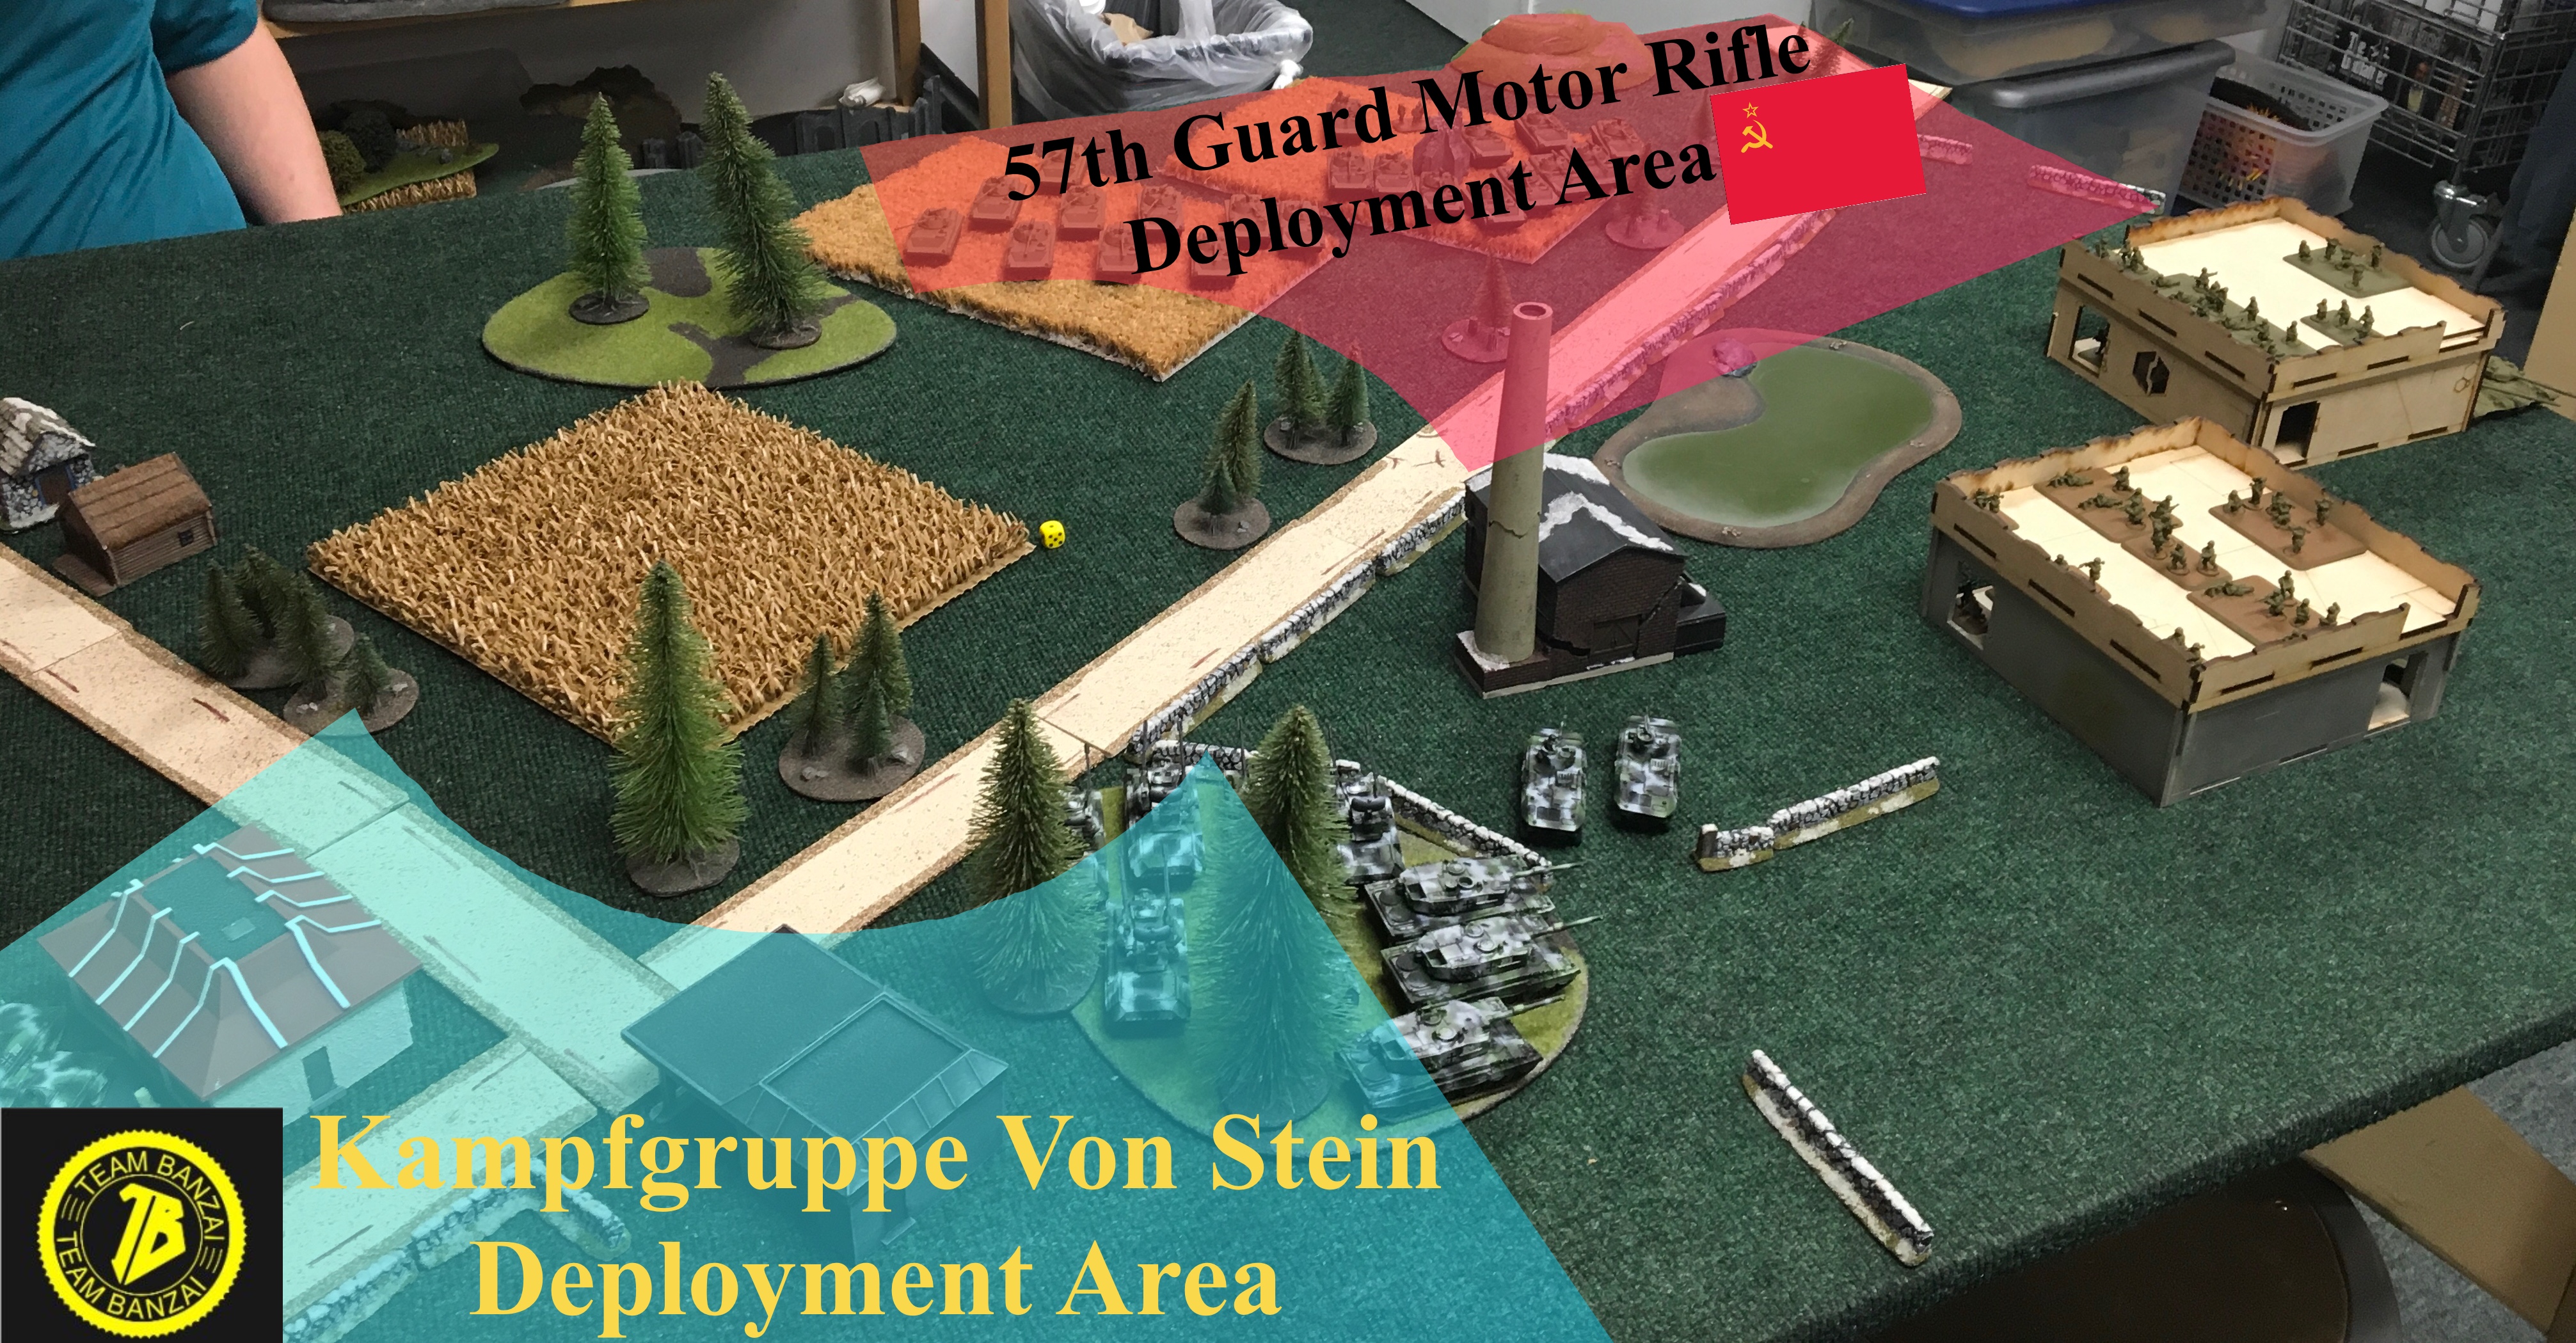 Kampfgruppe Von Stein establishes a defensive position while the Soviet 57th Guard prepare for their assault.
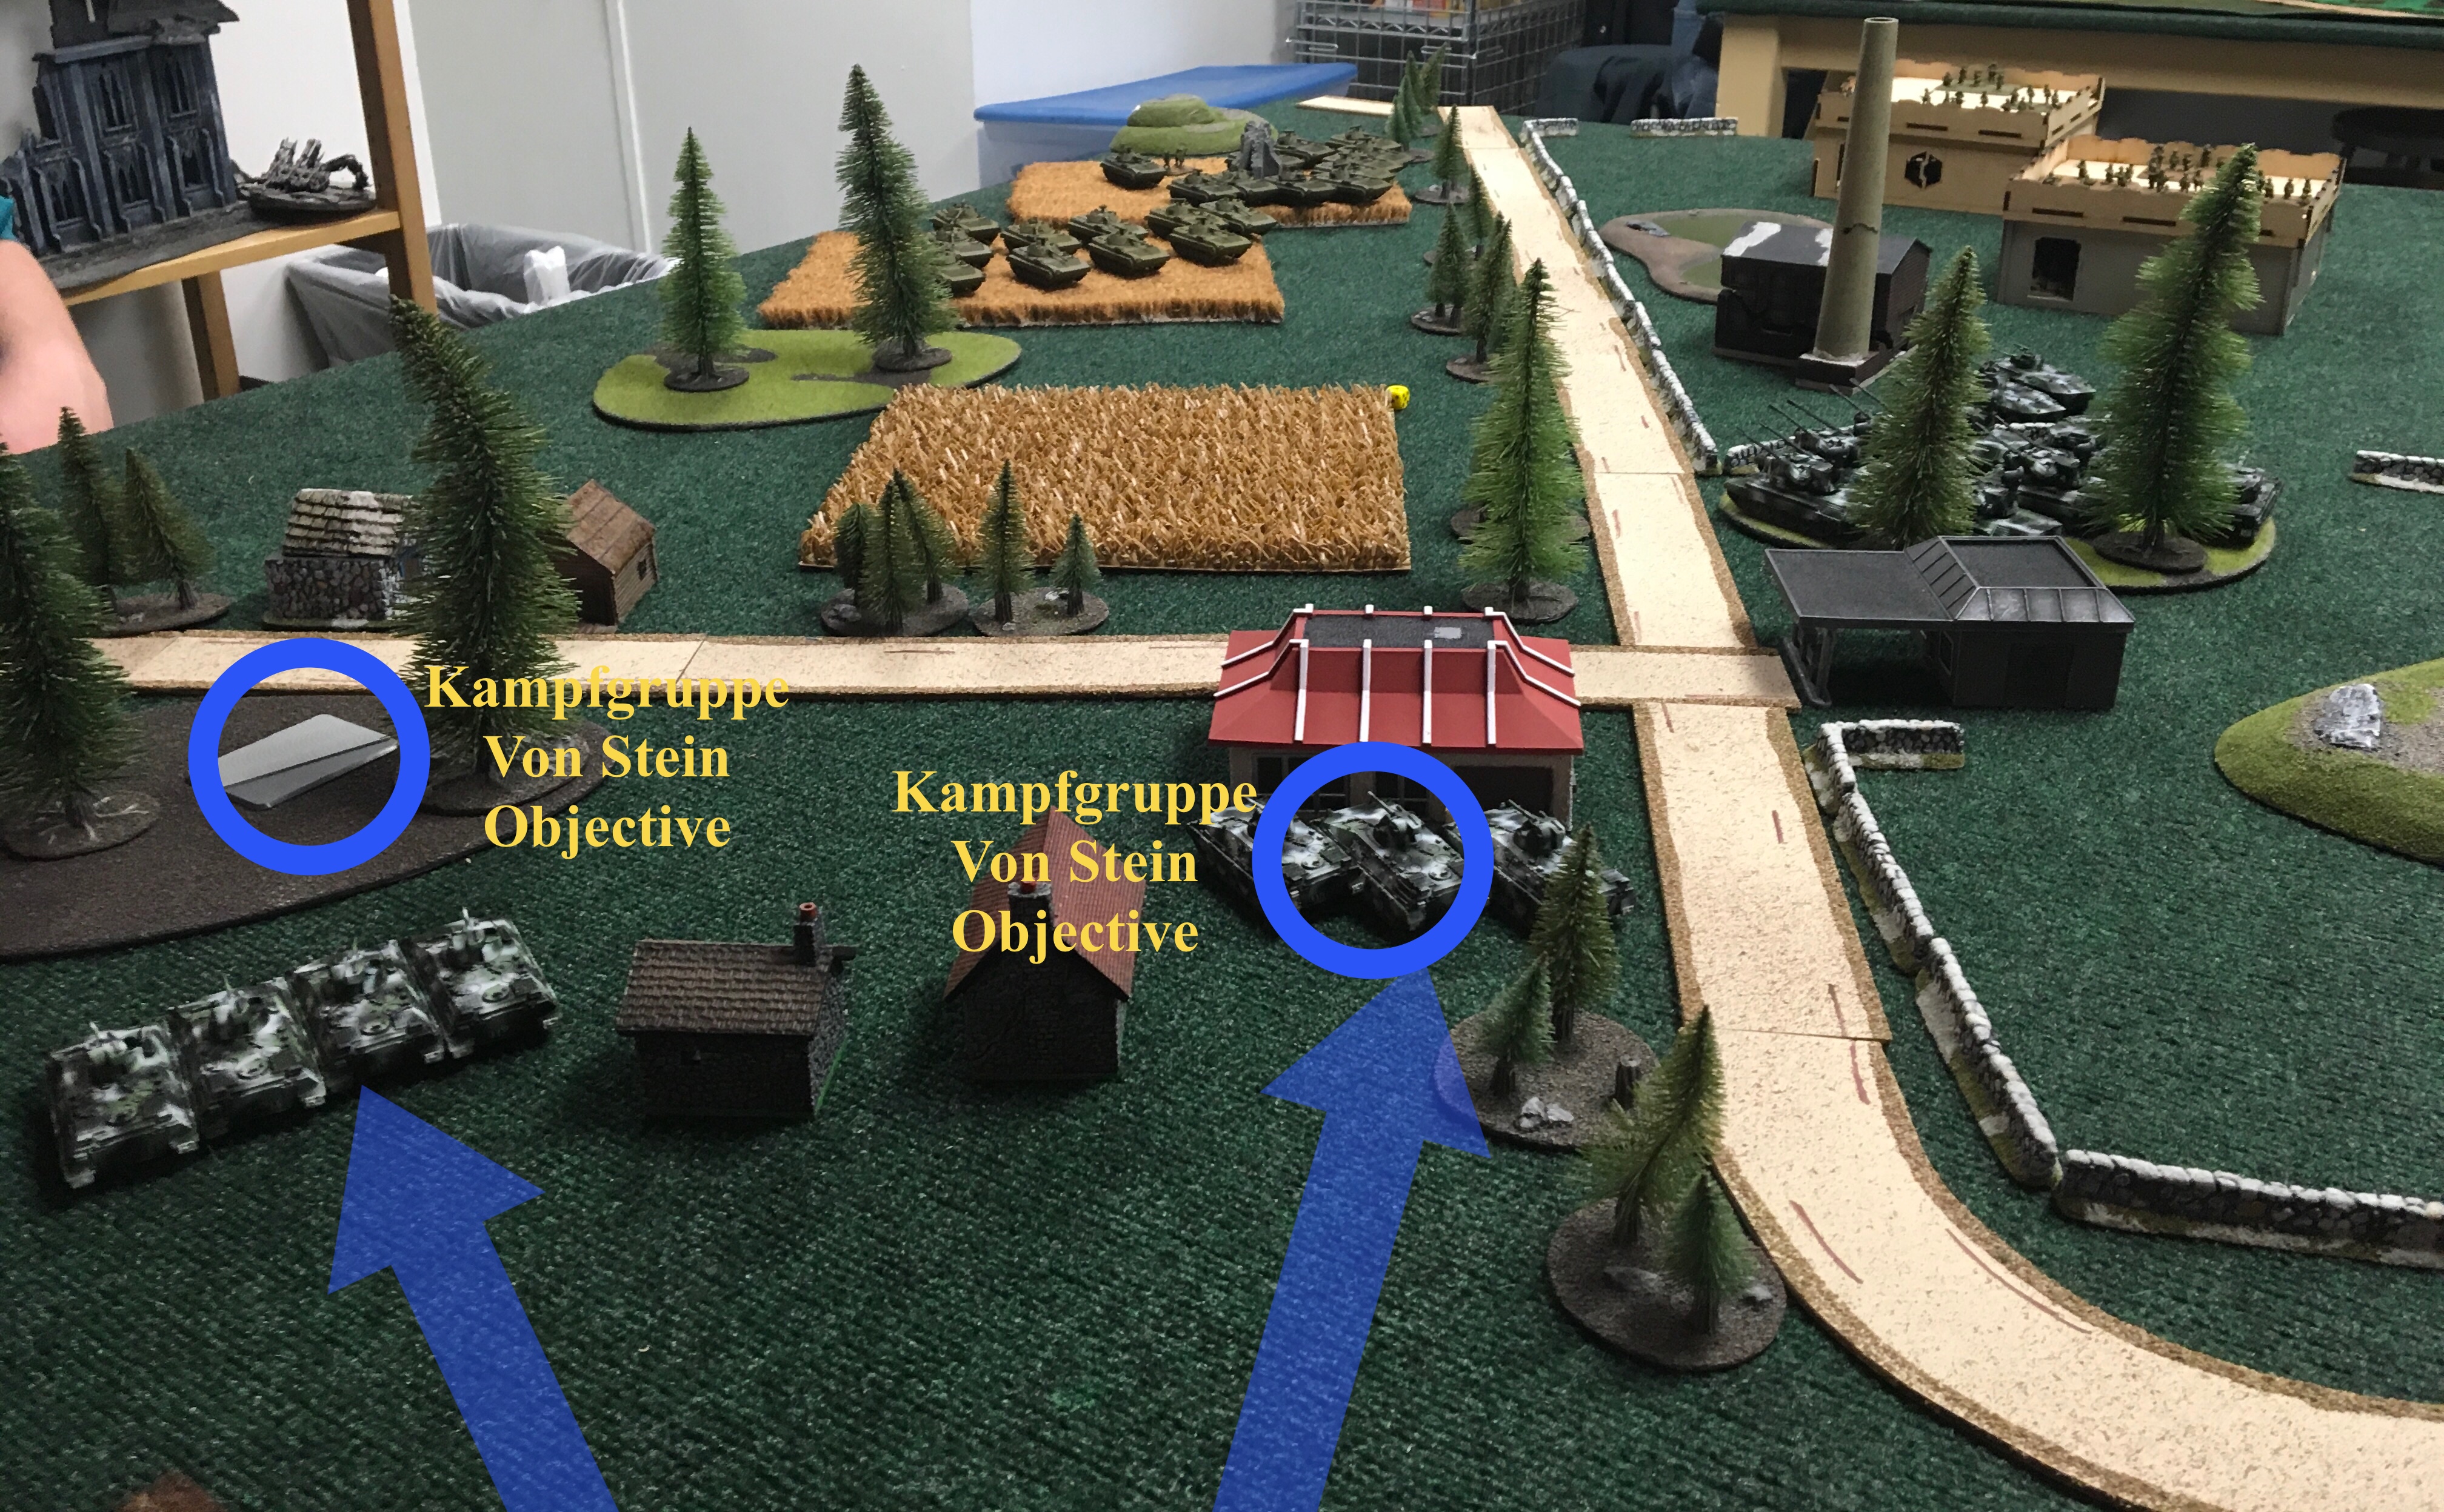 Kampfgruppe Von Stein Panzergrenadiers take up residence in the Ketwurst restaurant, prepared to defend the East German delicacy to the last man.
 Hauptmann Von Stein sends his Luchs to spearhead towards the Soviet line, clearing a path for the Leopard 2 platoon and Gepard platoon.
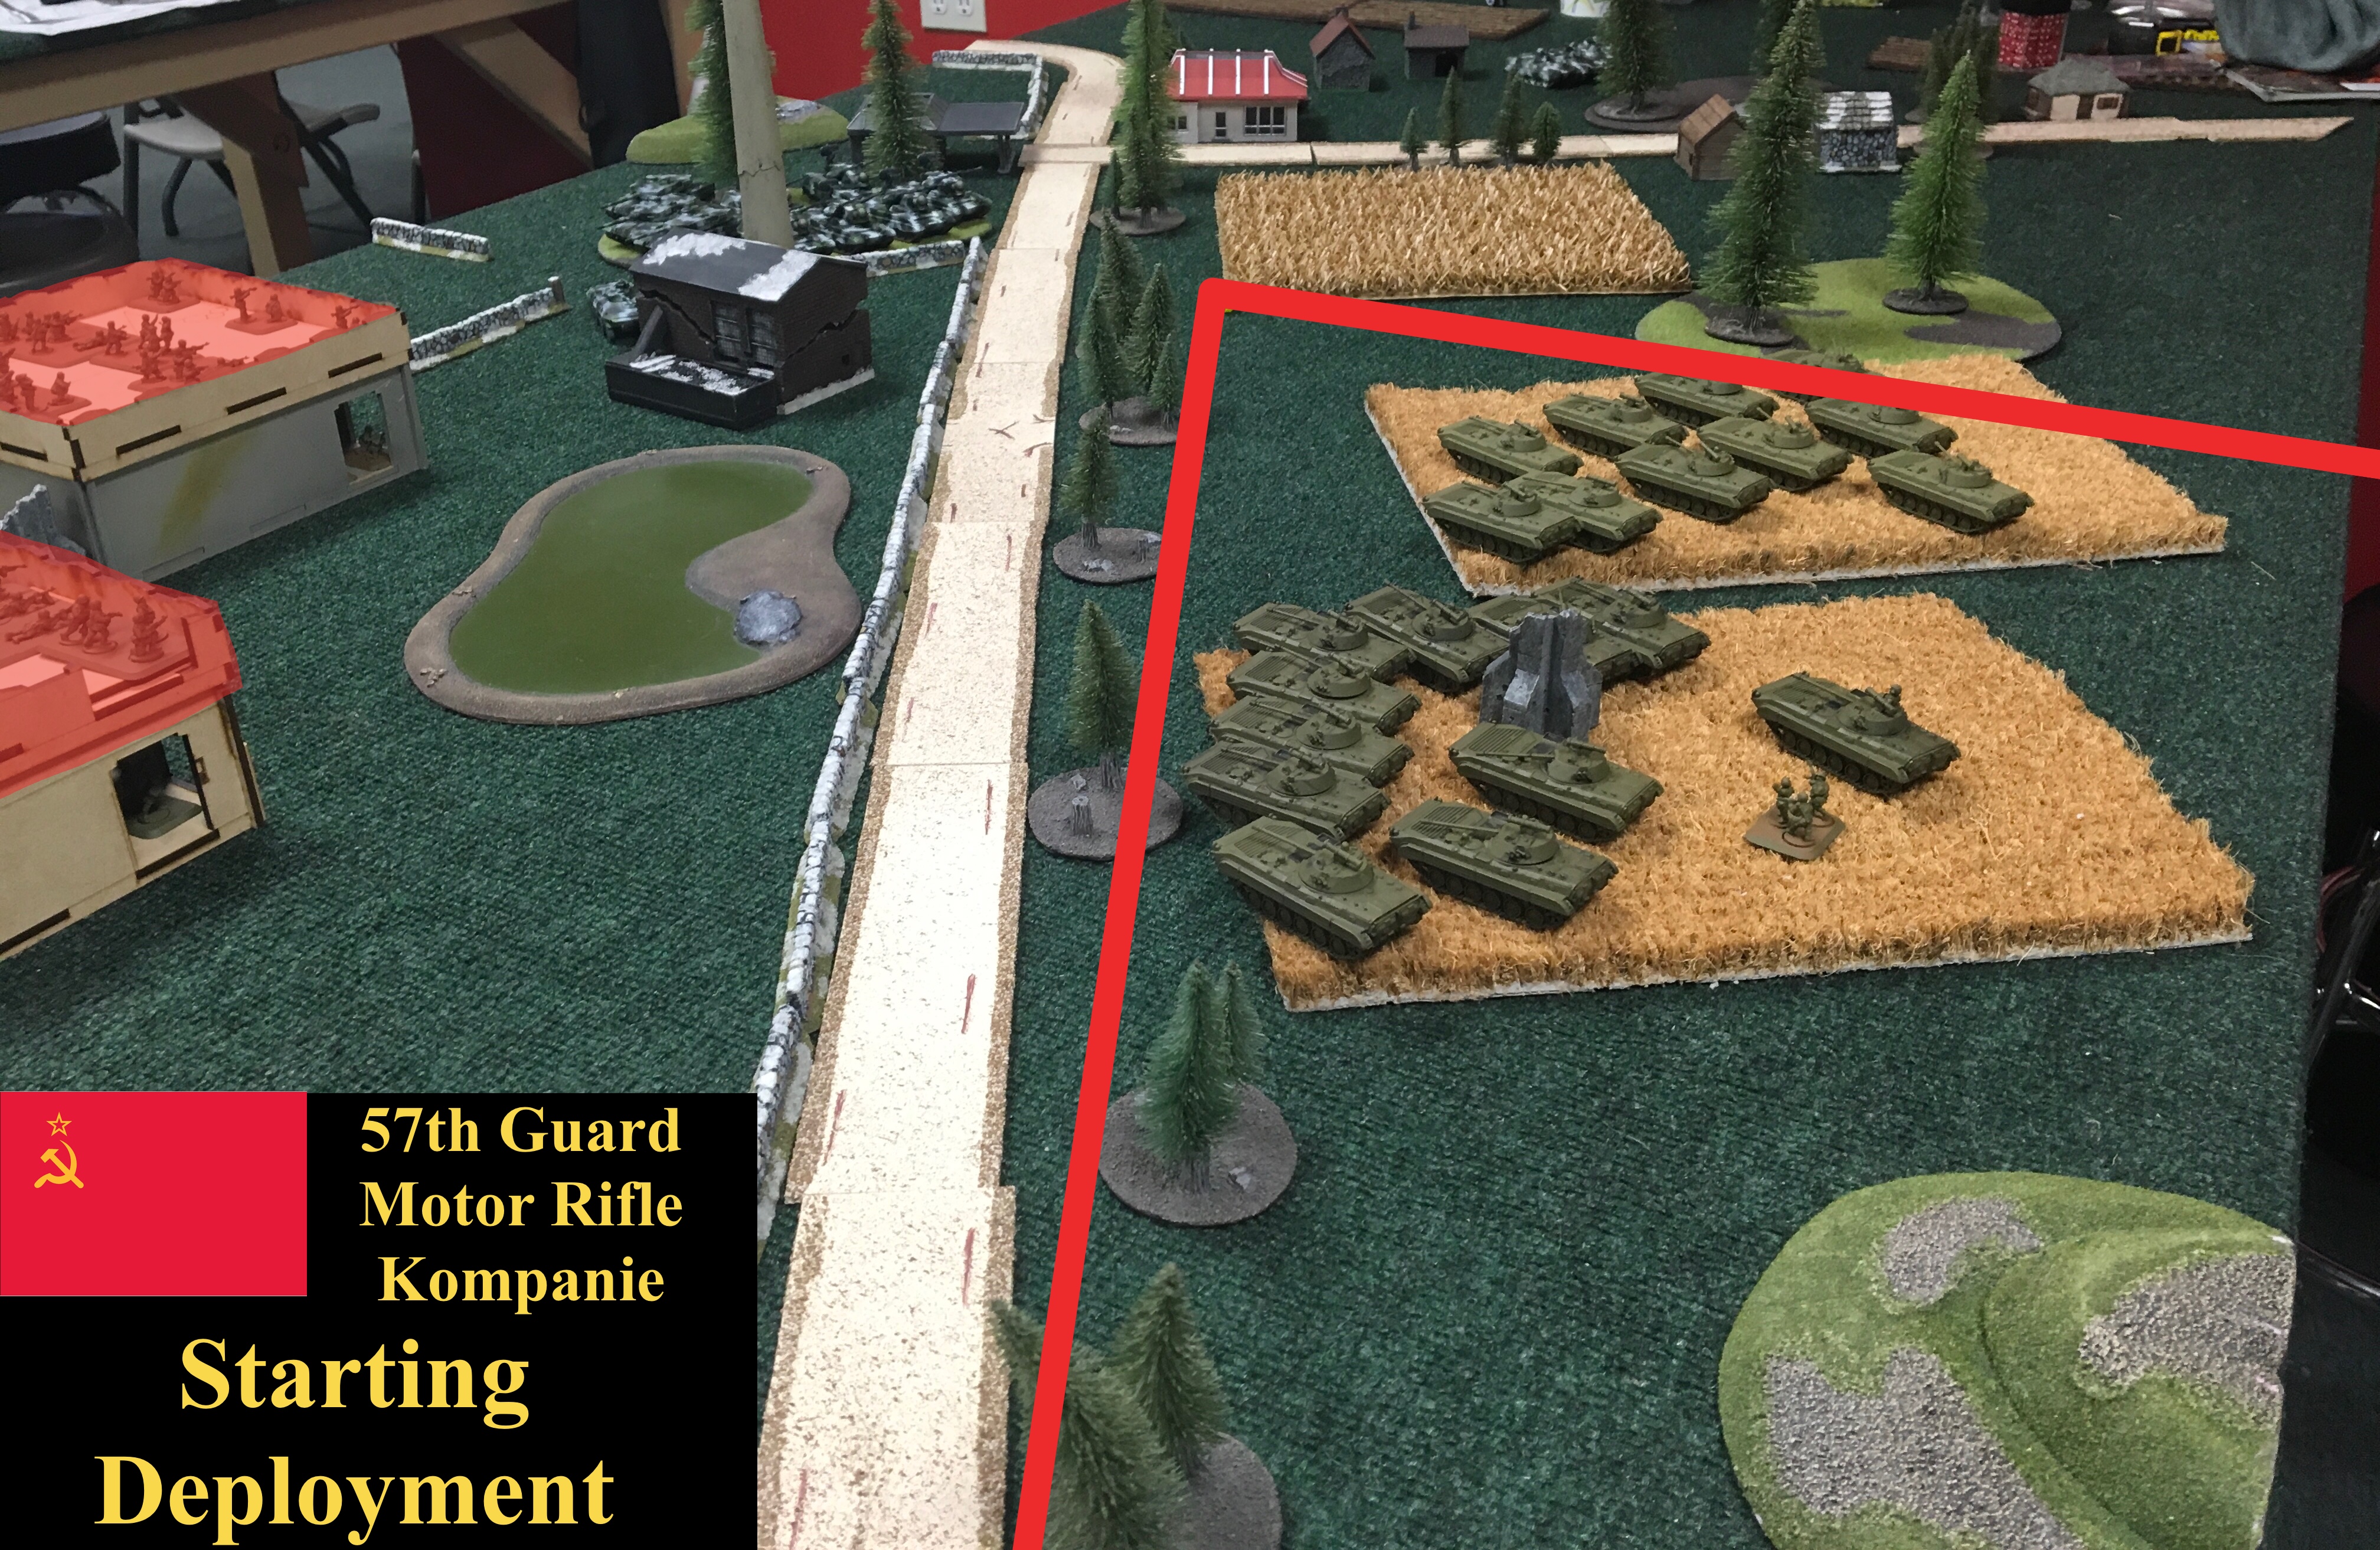
 Von Stein's forces execute an alpha strike on the Soviet infantry, unleashing 30 Gepards shots and 6 Leopard 2 cannon shots of pure hell, resulting in... absolutely nothing!!! The Soviets taunt the West Germans from the now flattened factory.
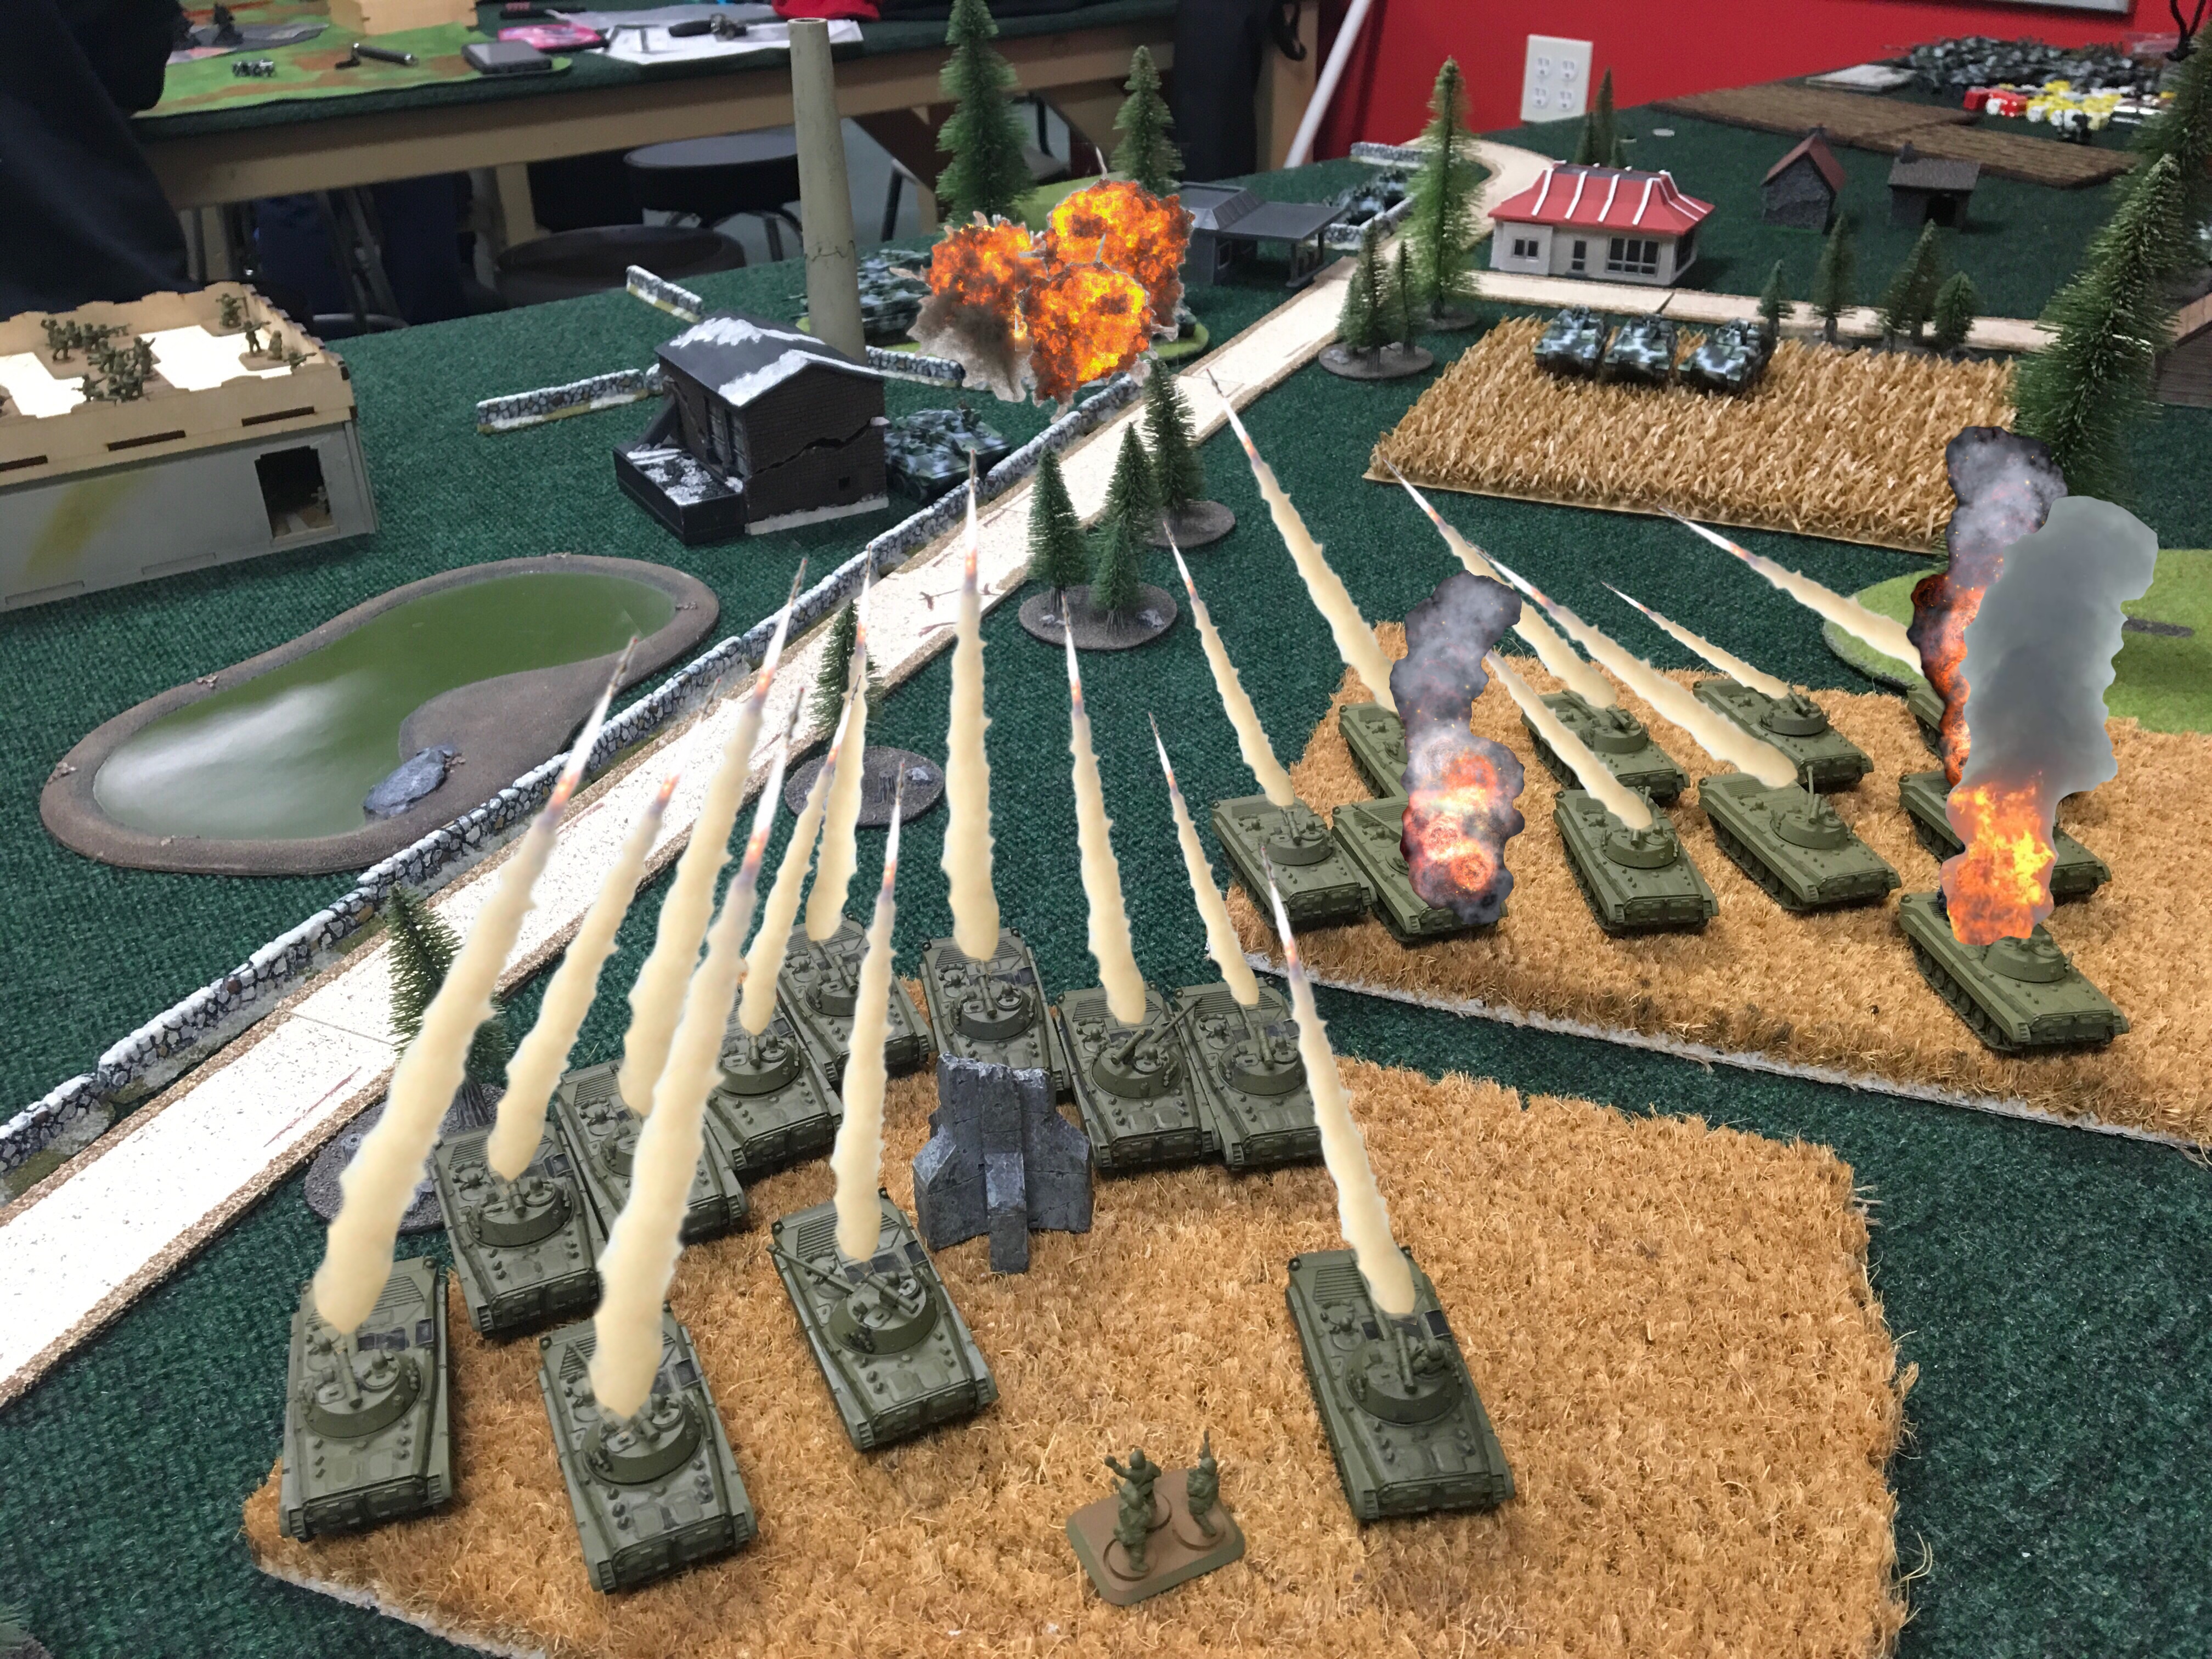 In retribution, two Soviet Guard BMP platoons rain Spandrels on the West German Gepards, evaporating the Task Force AA platoon.
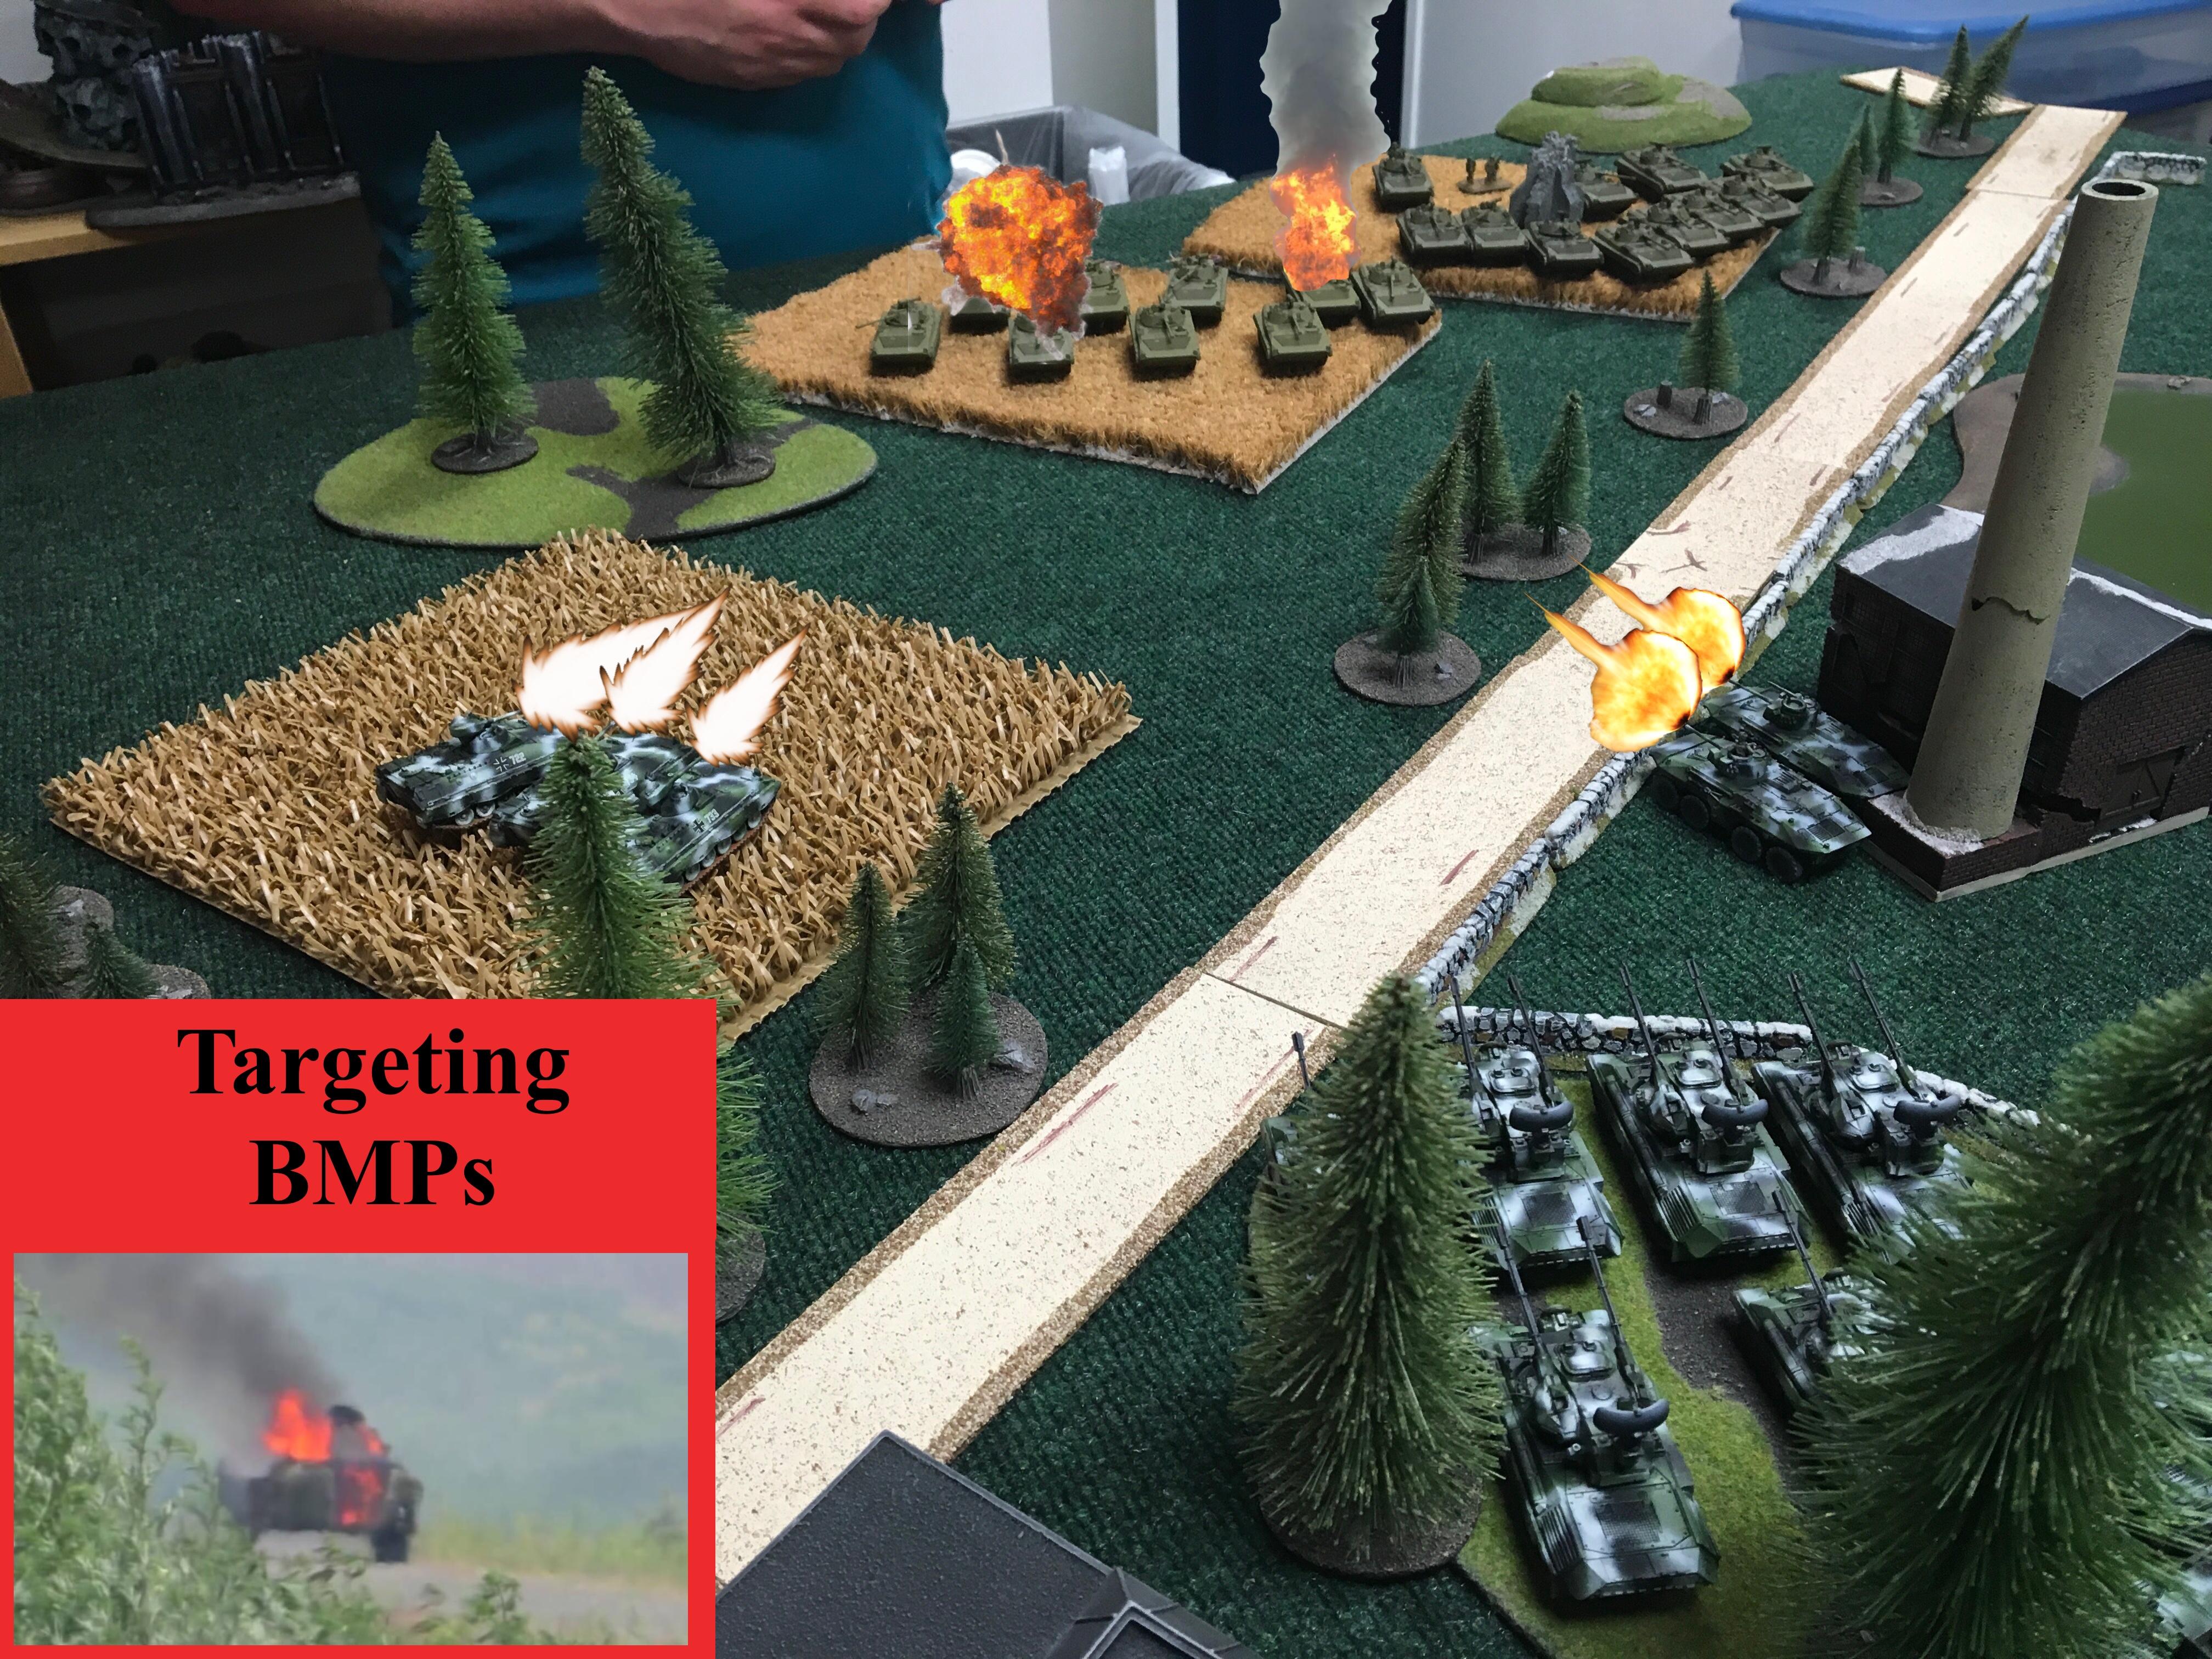
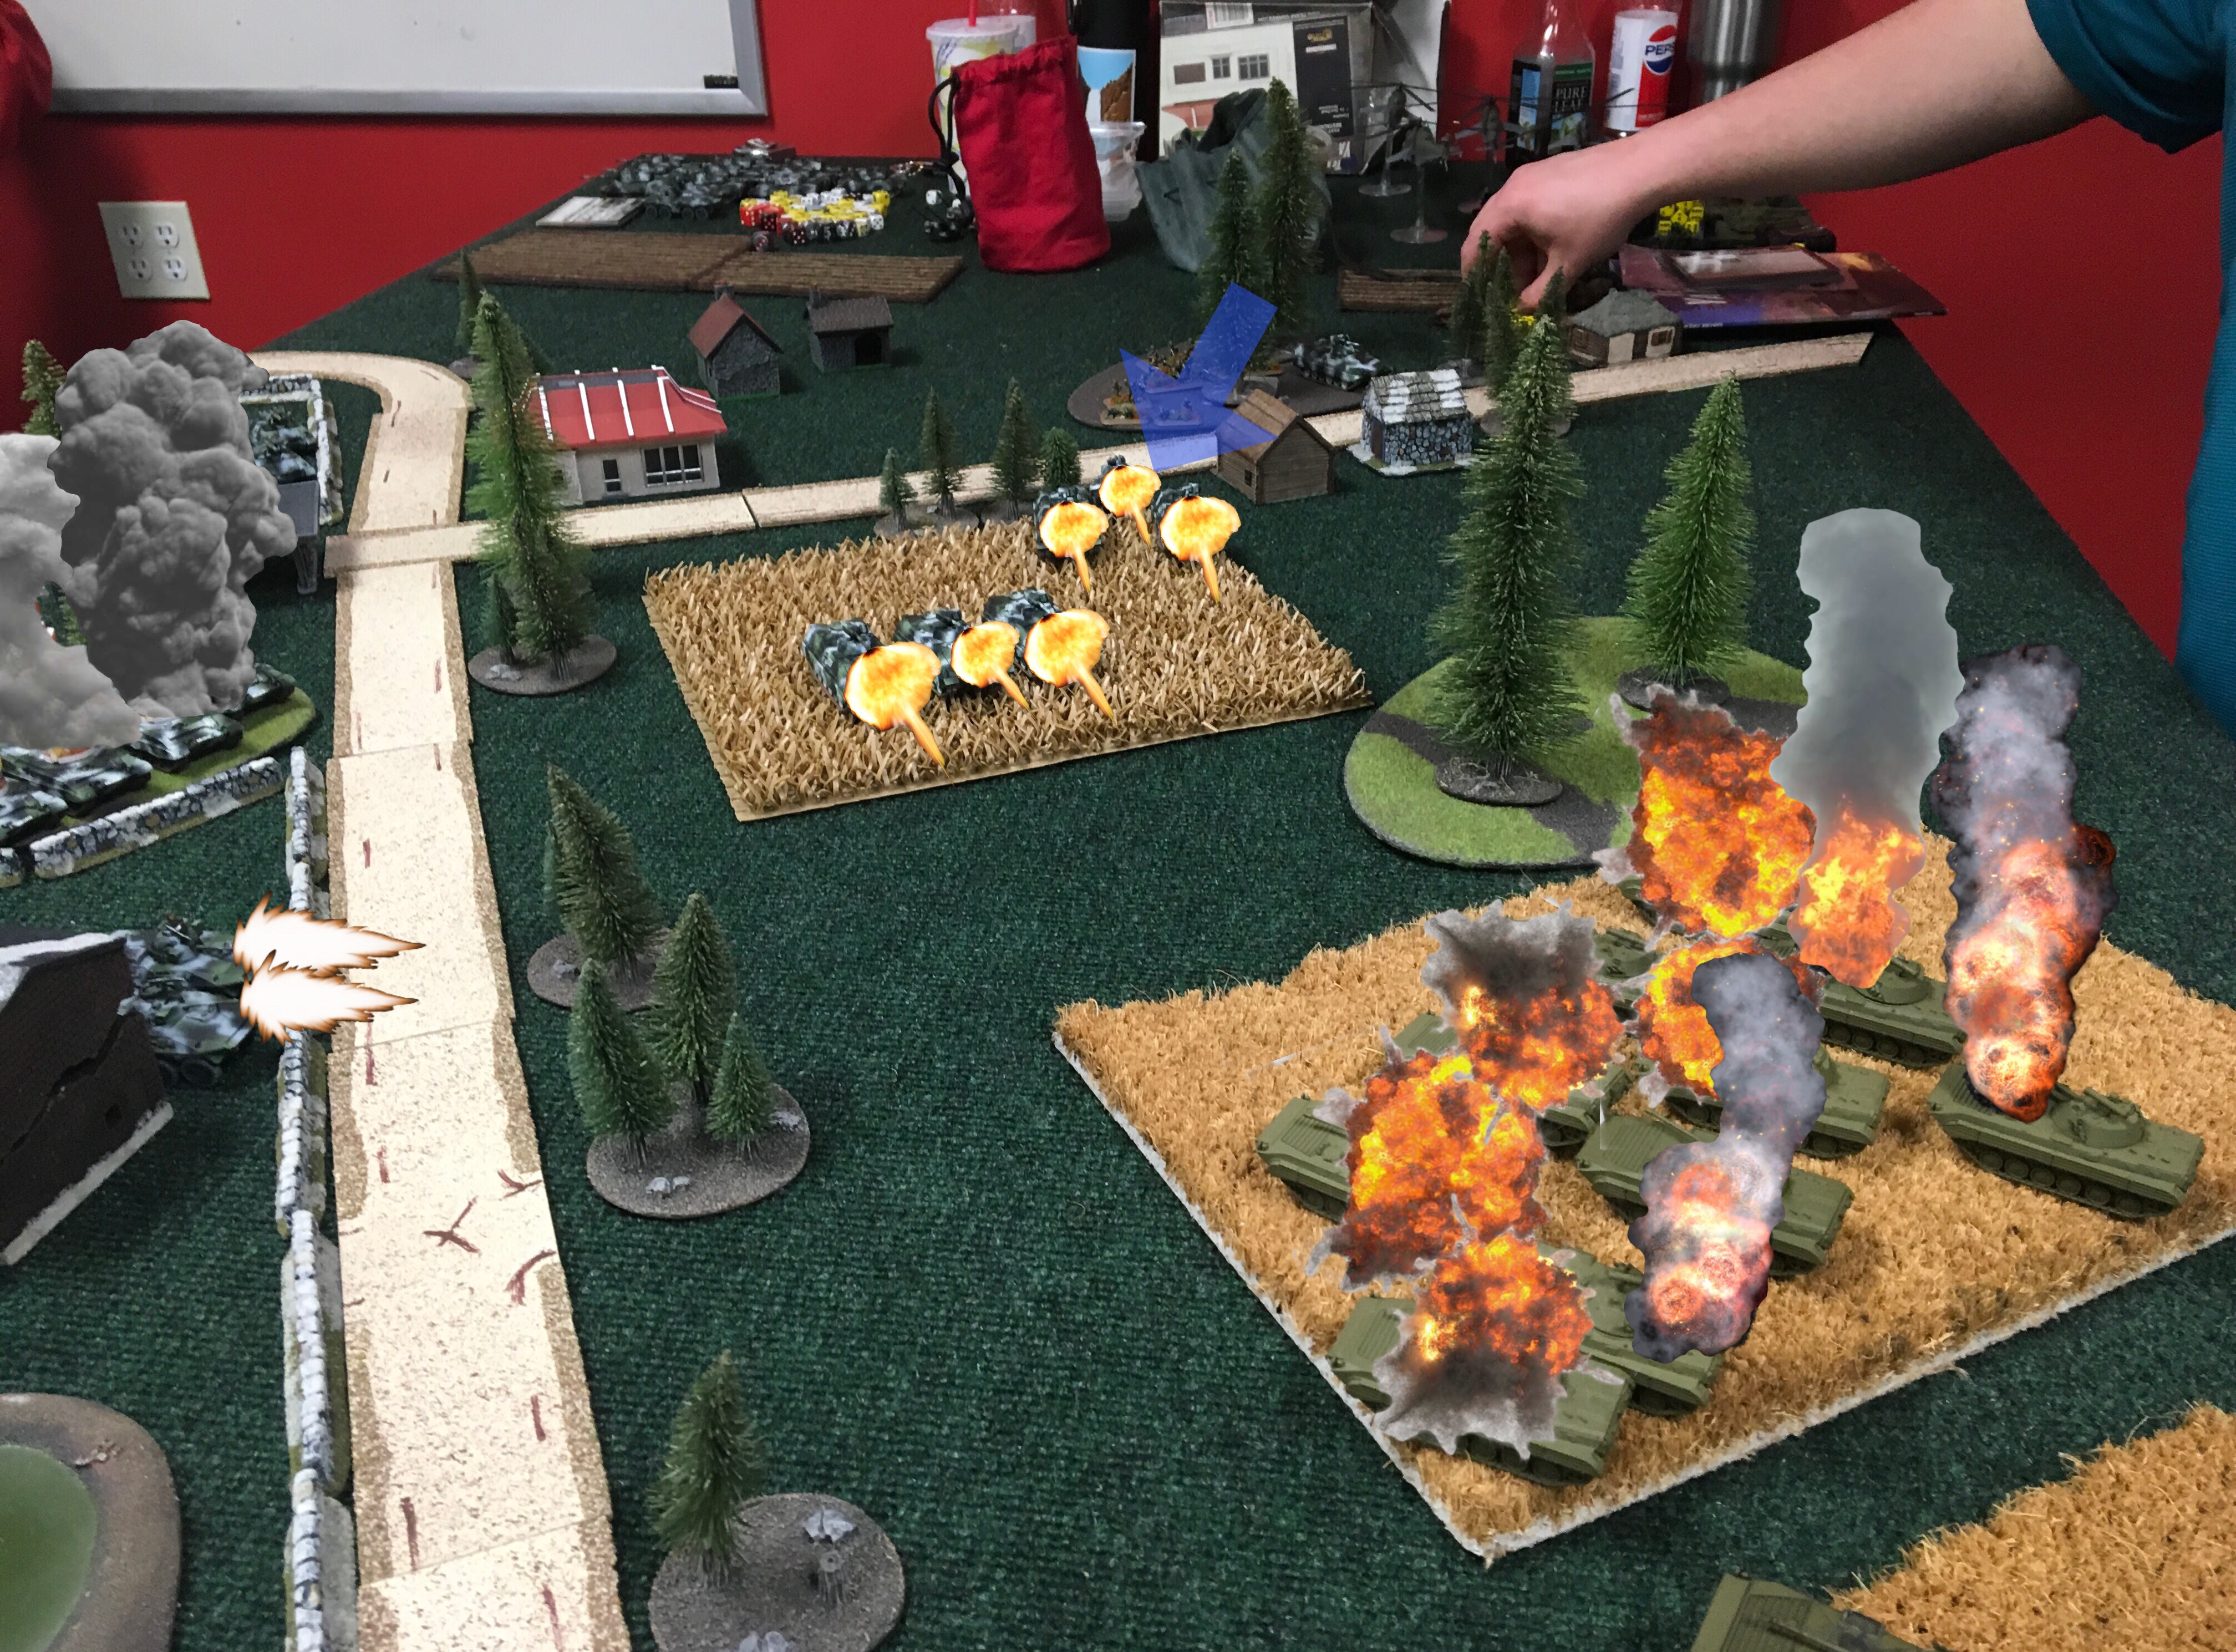 After unloading Panzergrenadiers, Kampfgruppe Von Stein Marders push forward into the cornfields. Marders and Luchs open fire into the advancing Soviet BMP horde. Taking heavy losses, the BMP platoon withdraws from the battle.
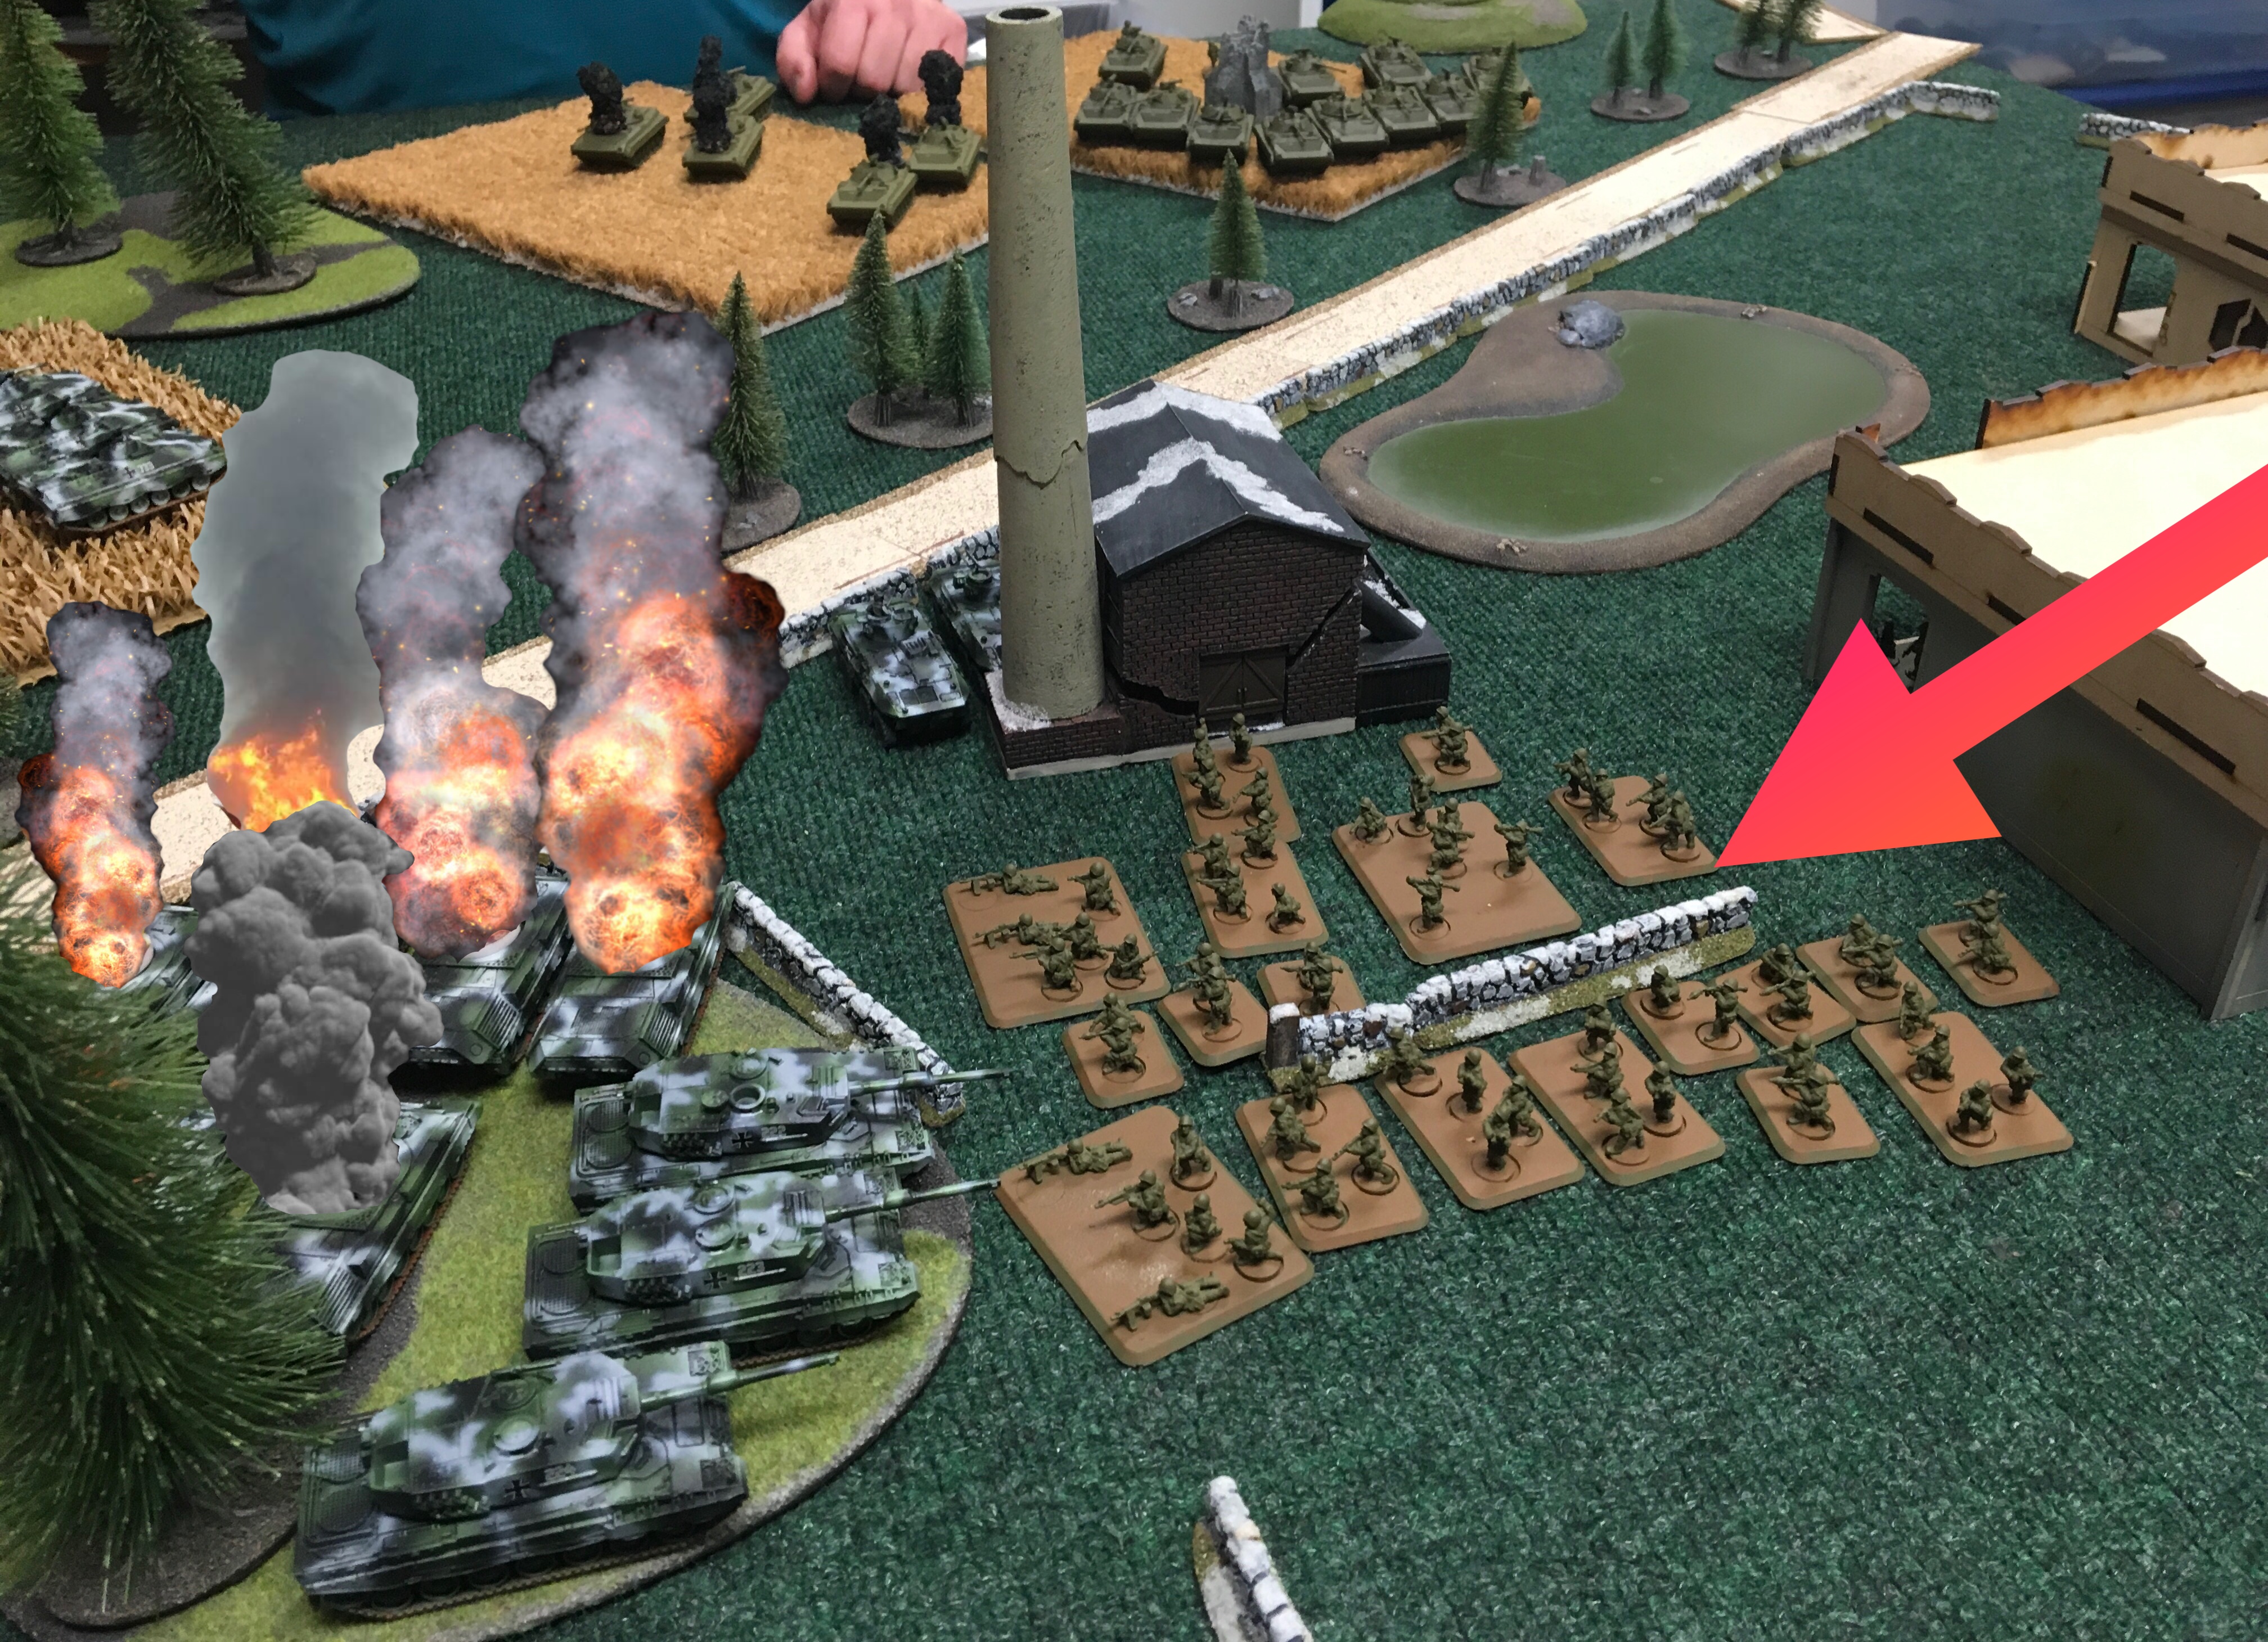
 Coming out of ambush, Task Force Banzai Jaguars take up a position of cover and take aim at the incoming T-64s.
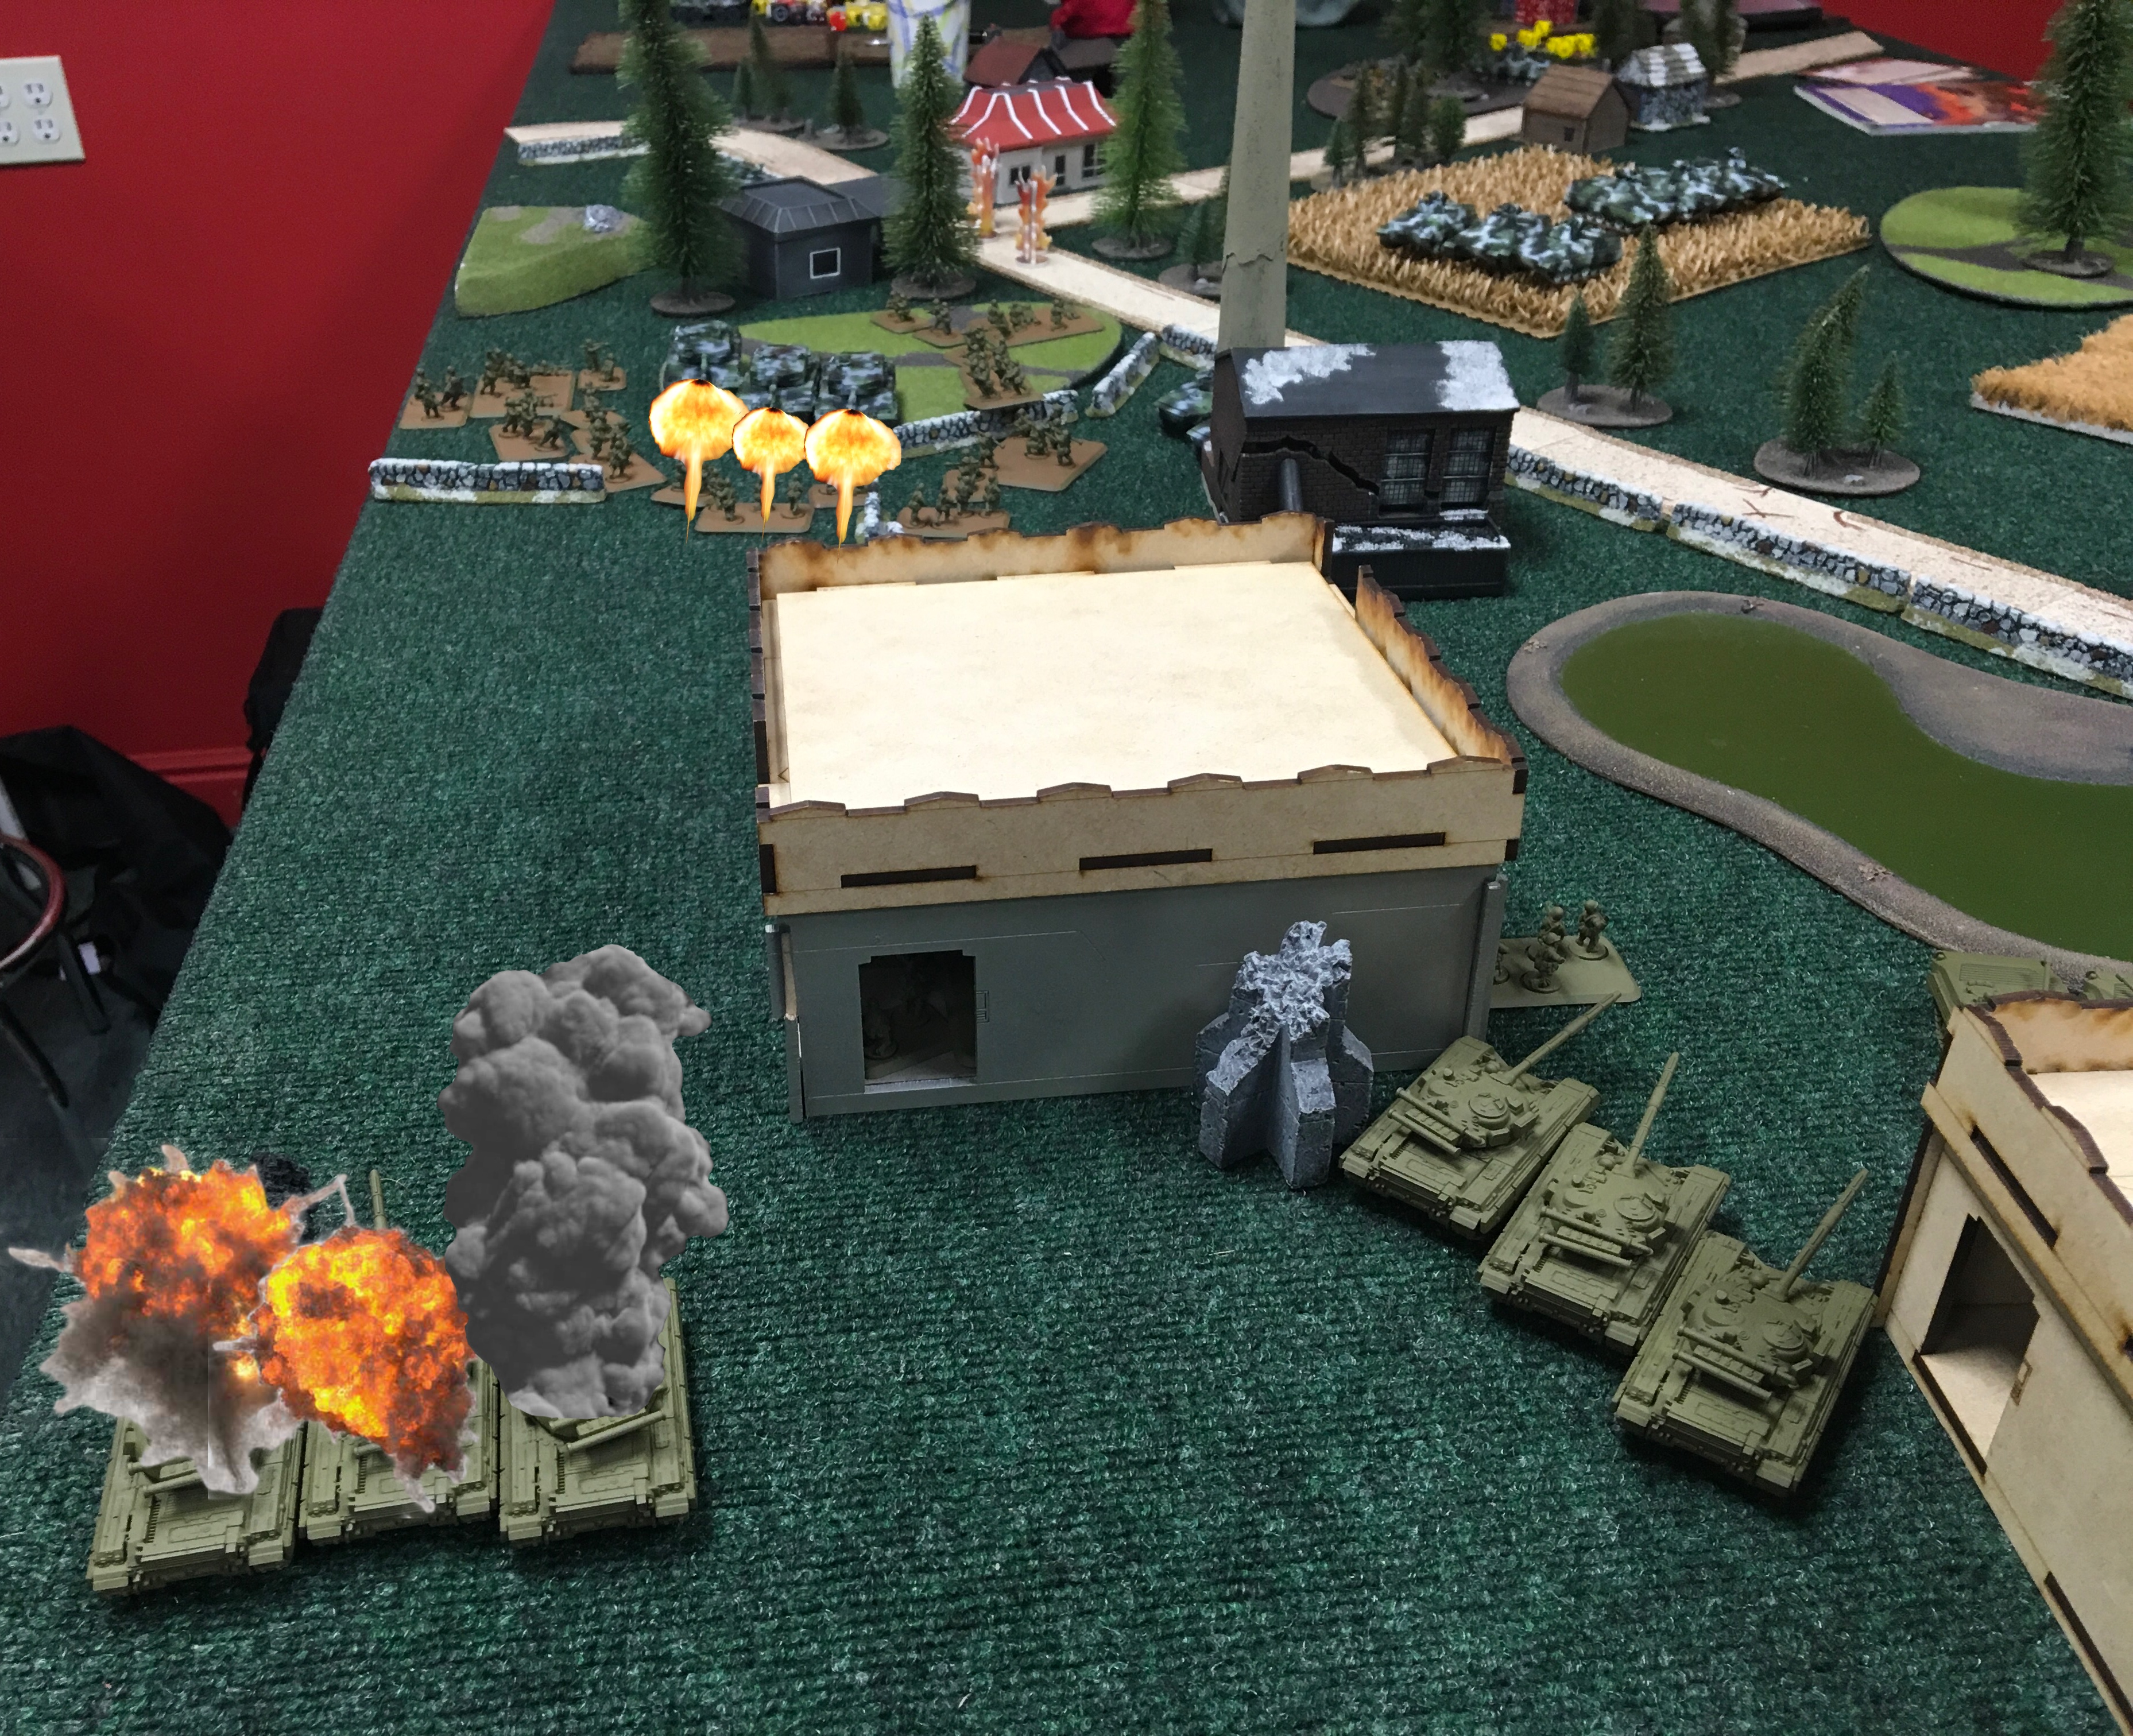 Looking to whittle down the Soviet armor, the Leopard 2s and Jaguars destroy two T-64s and bail a third.
 In attempt to stave off the rushing Soviet horde, a platoon of West German Marders and Luchs lay down machine gun fire. The Task Force manages to kill some of the infantry, but not enough to stop the wave.
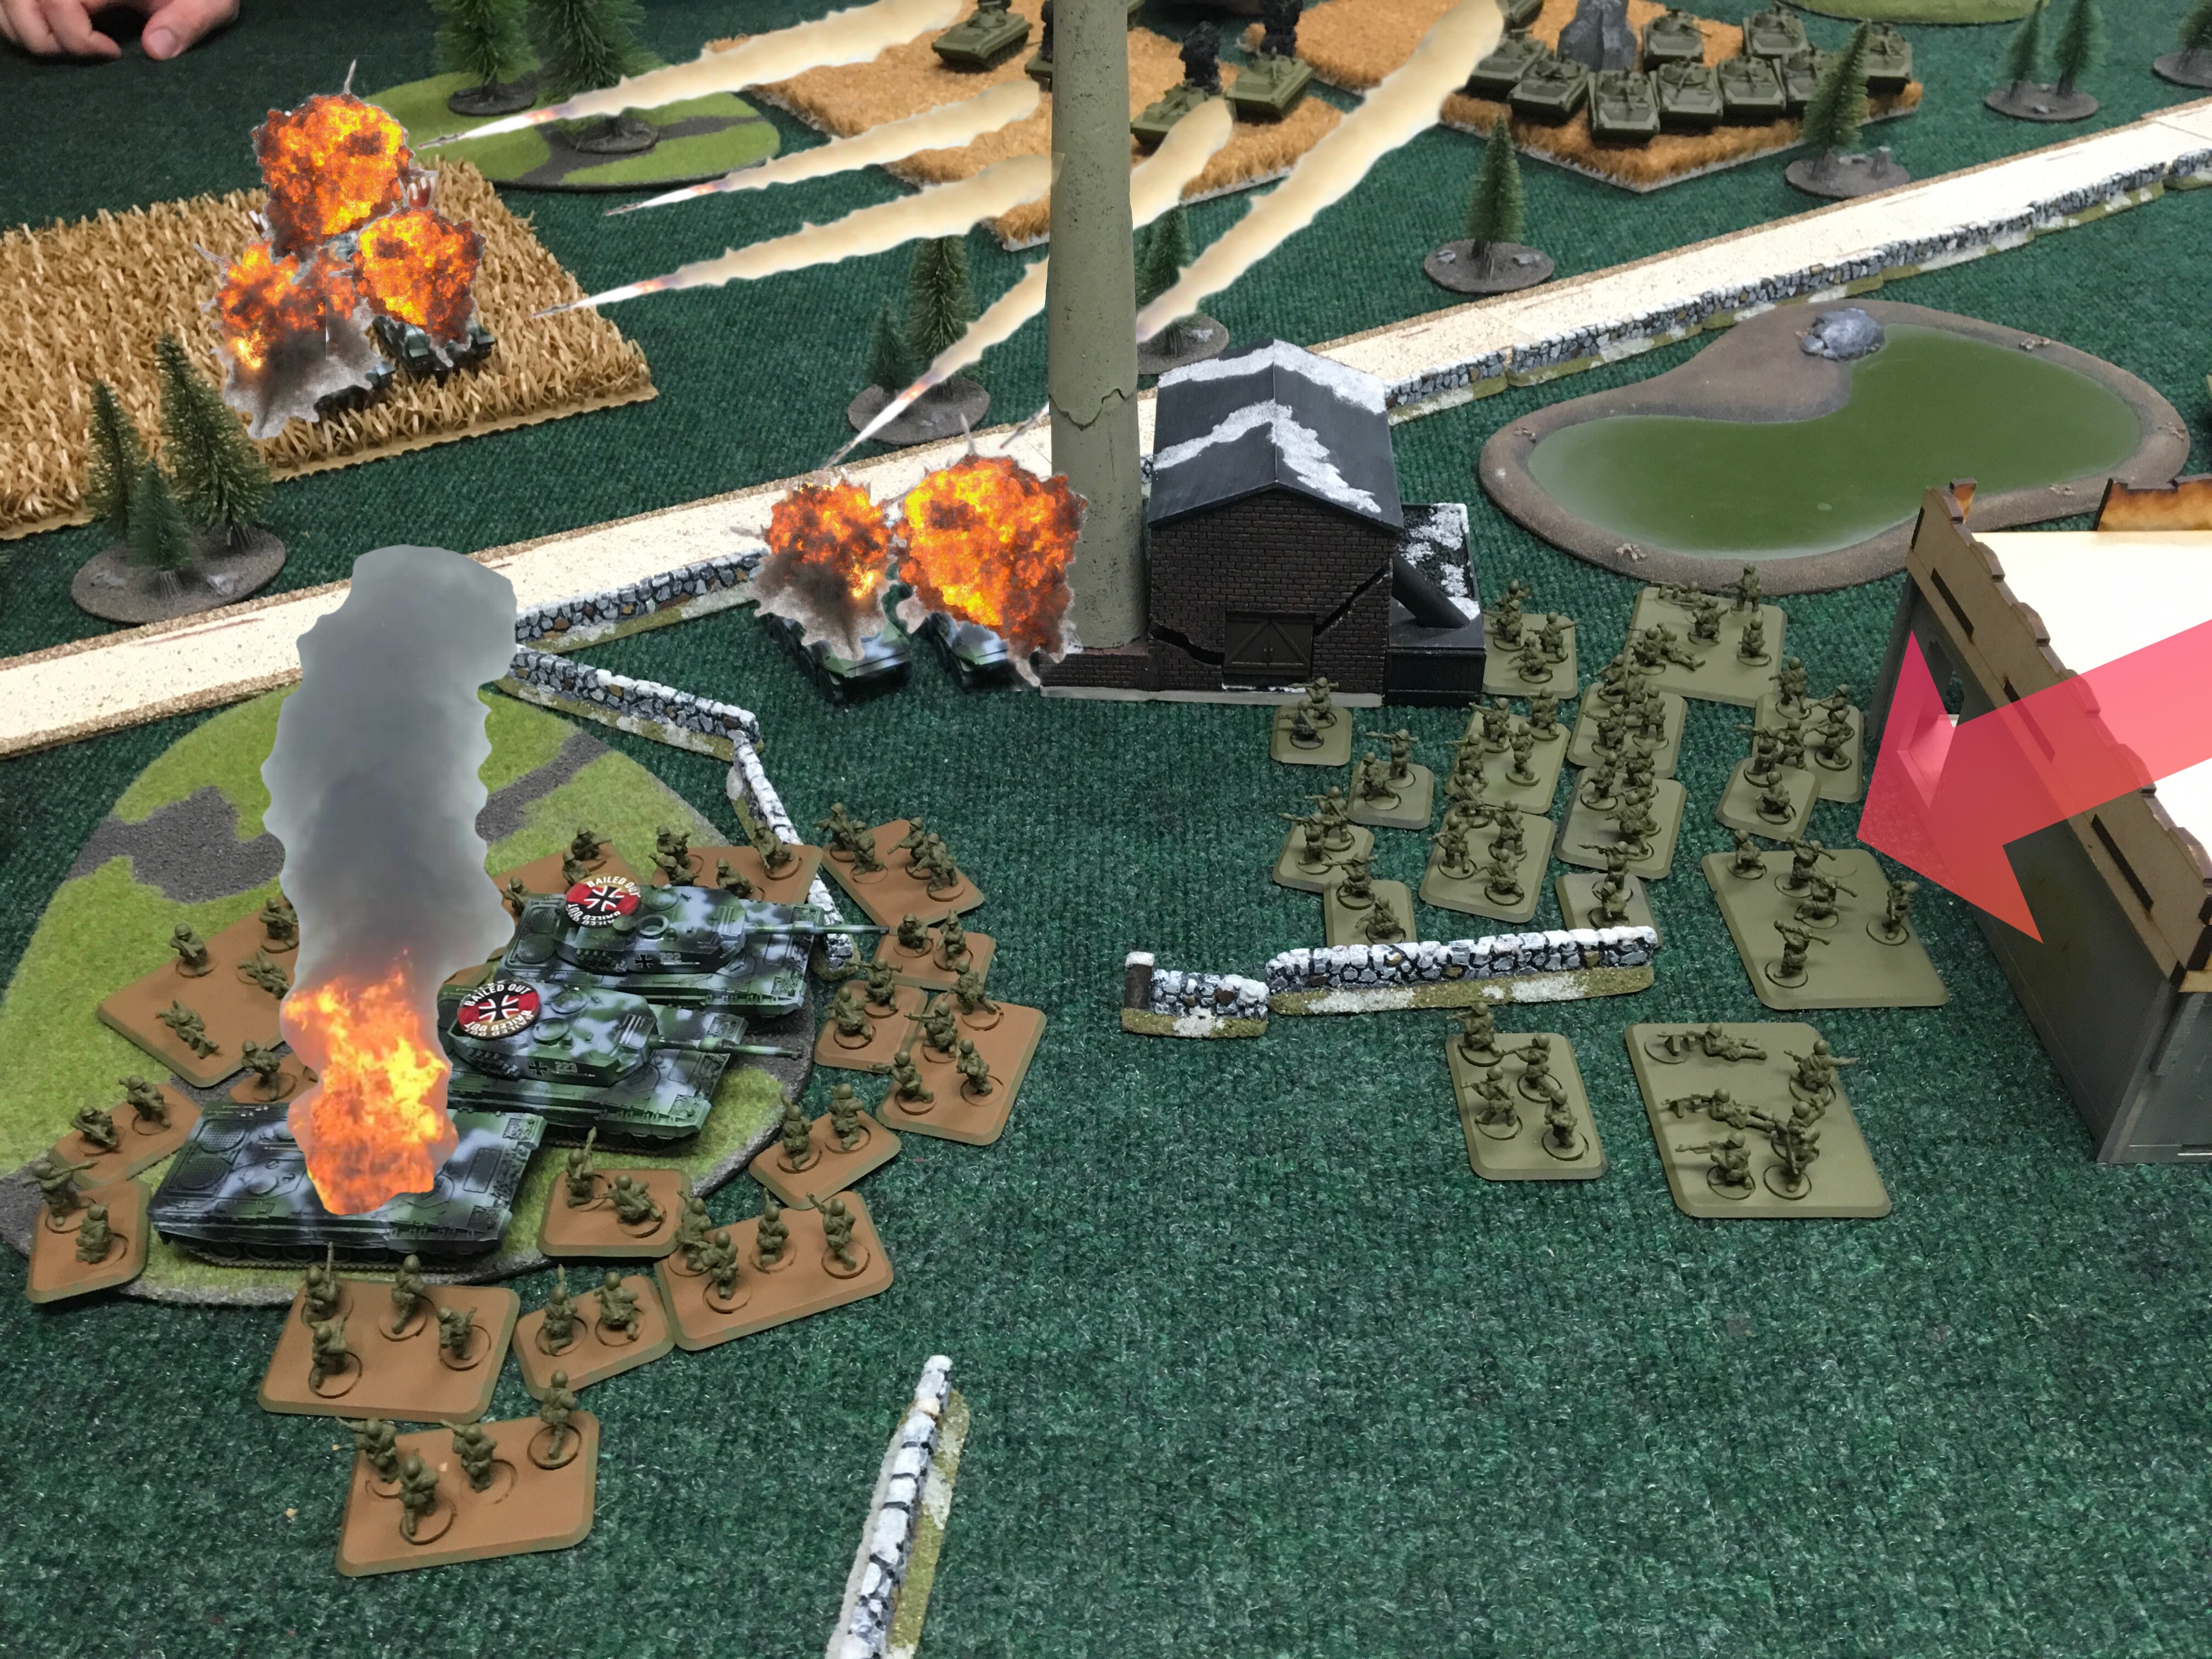 Soviet Guard infantry assault the Leopard 2s, destroying one and capturing the other two. The BMP hordes obliterate the remaining Marders and Luchs in one fell swoop.
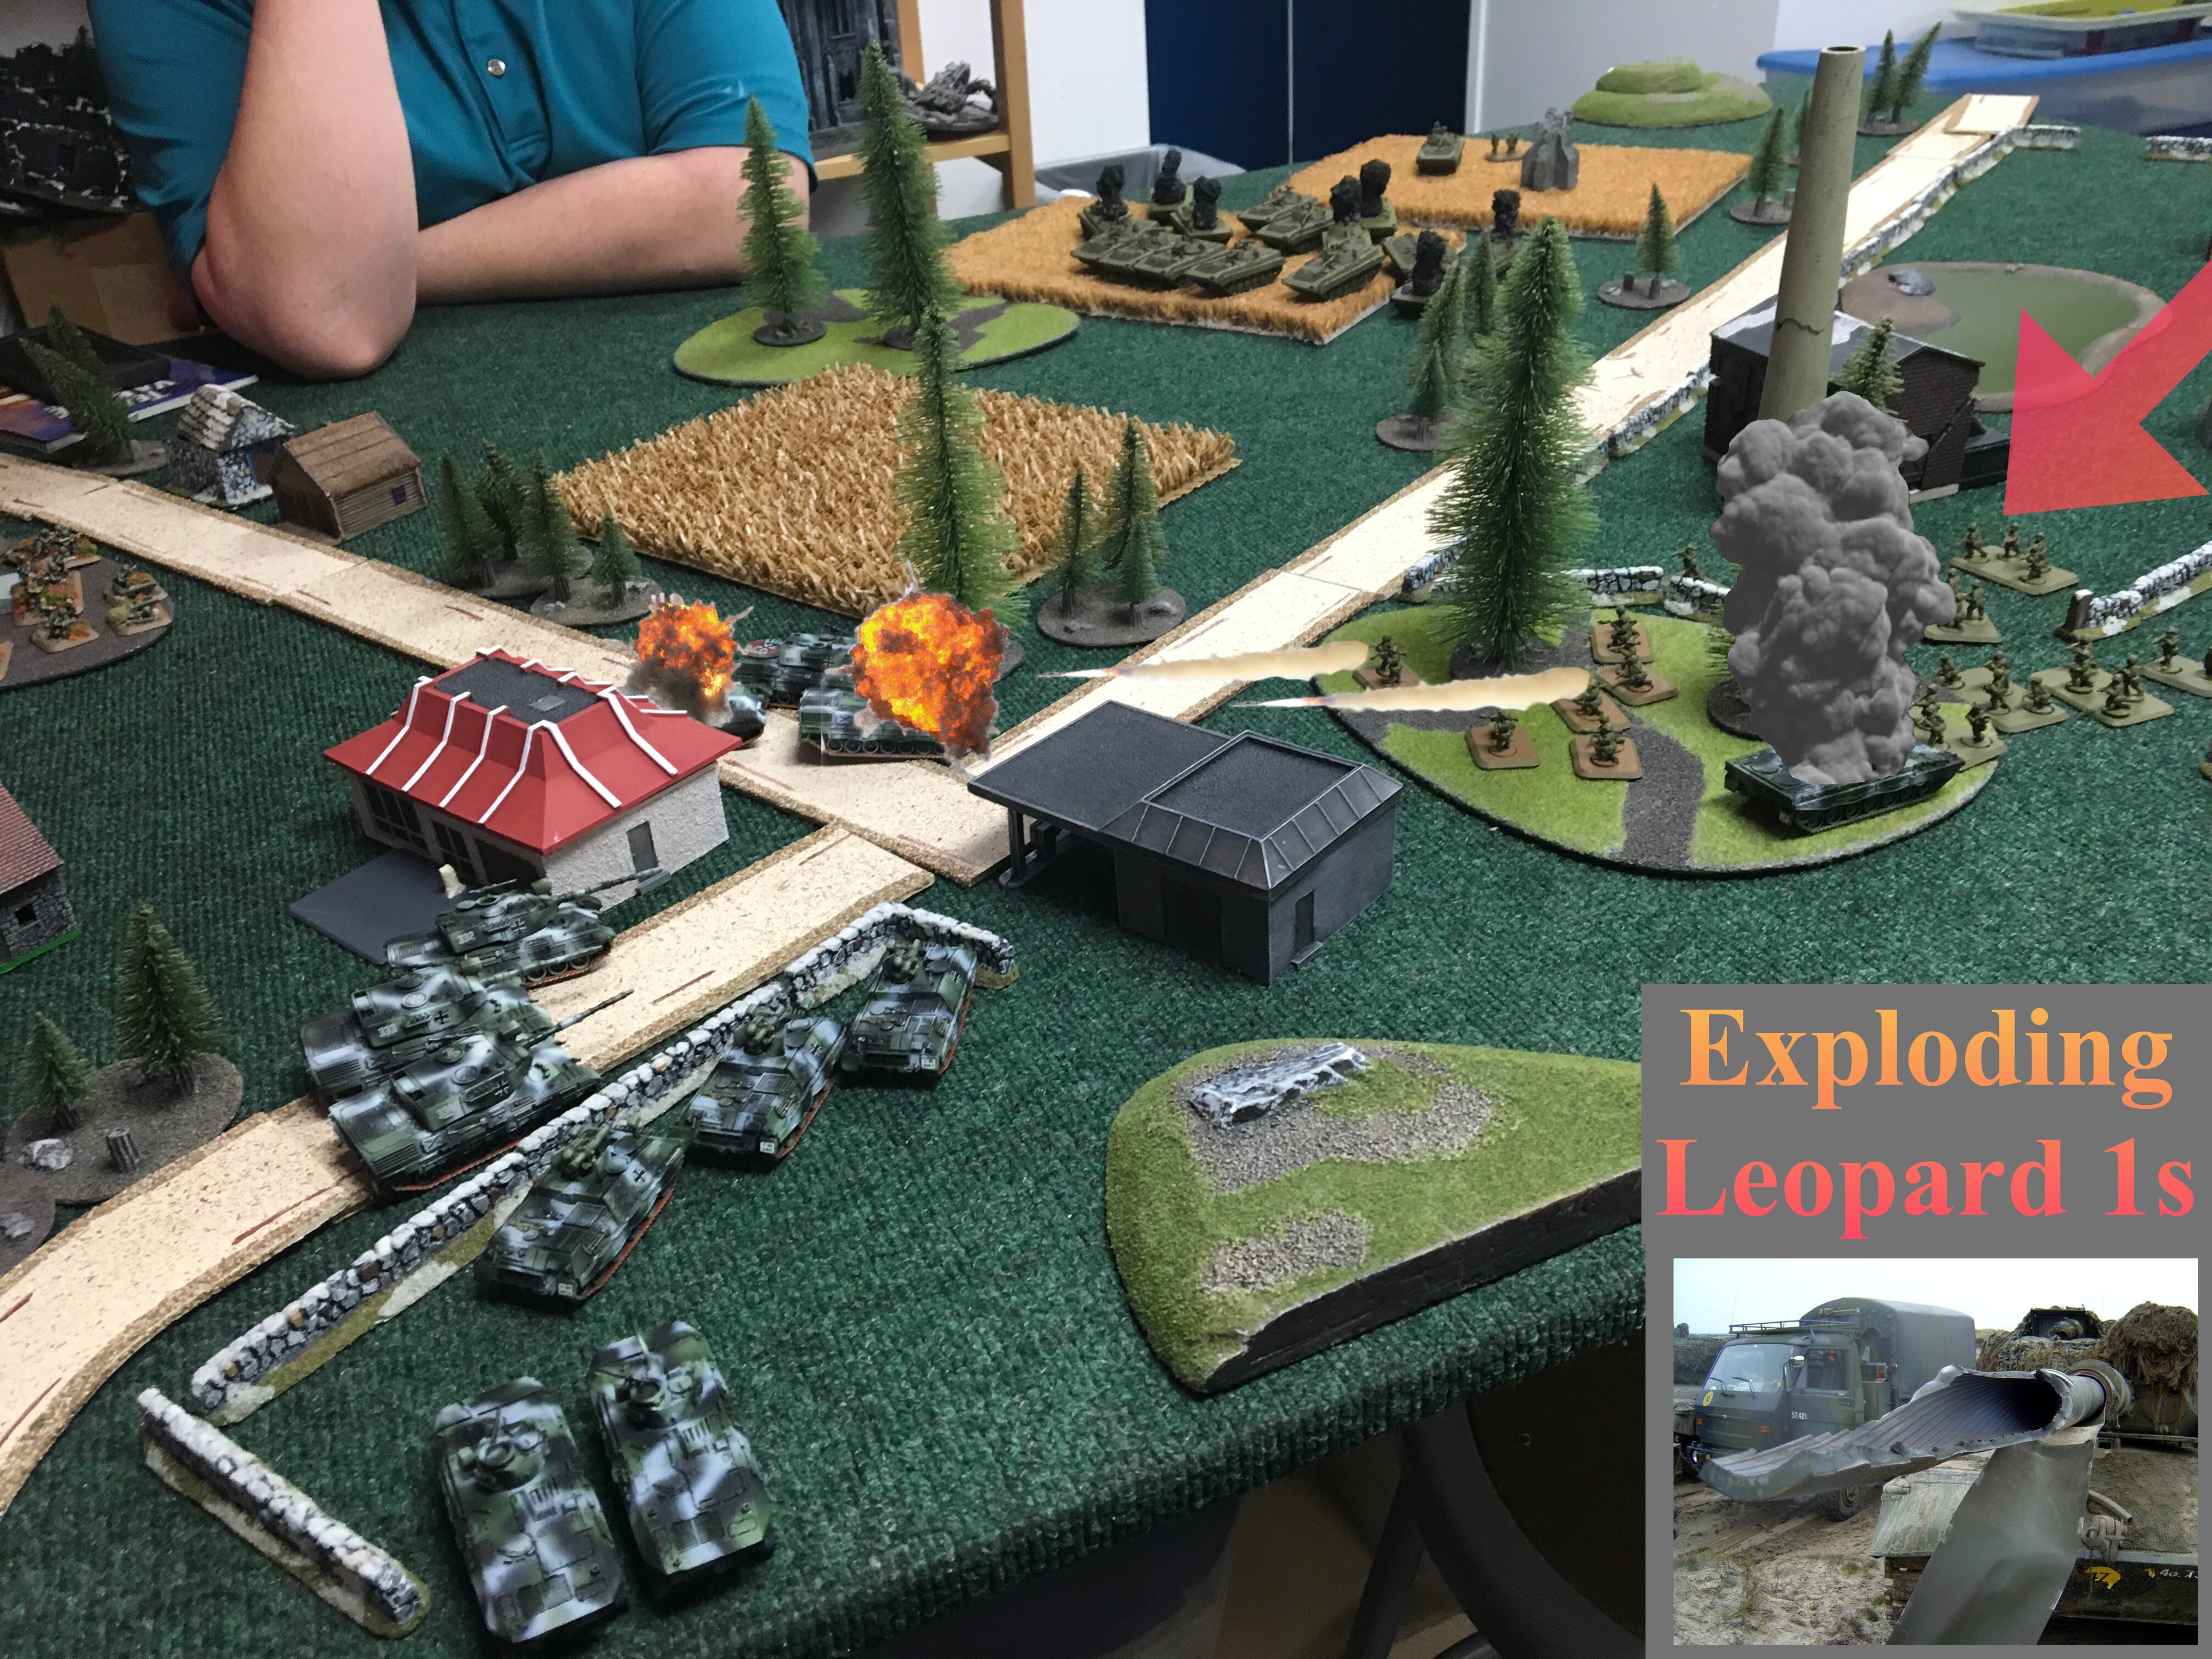
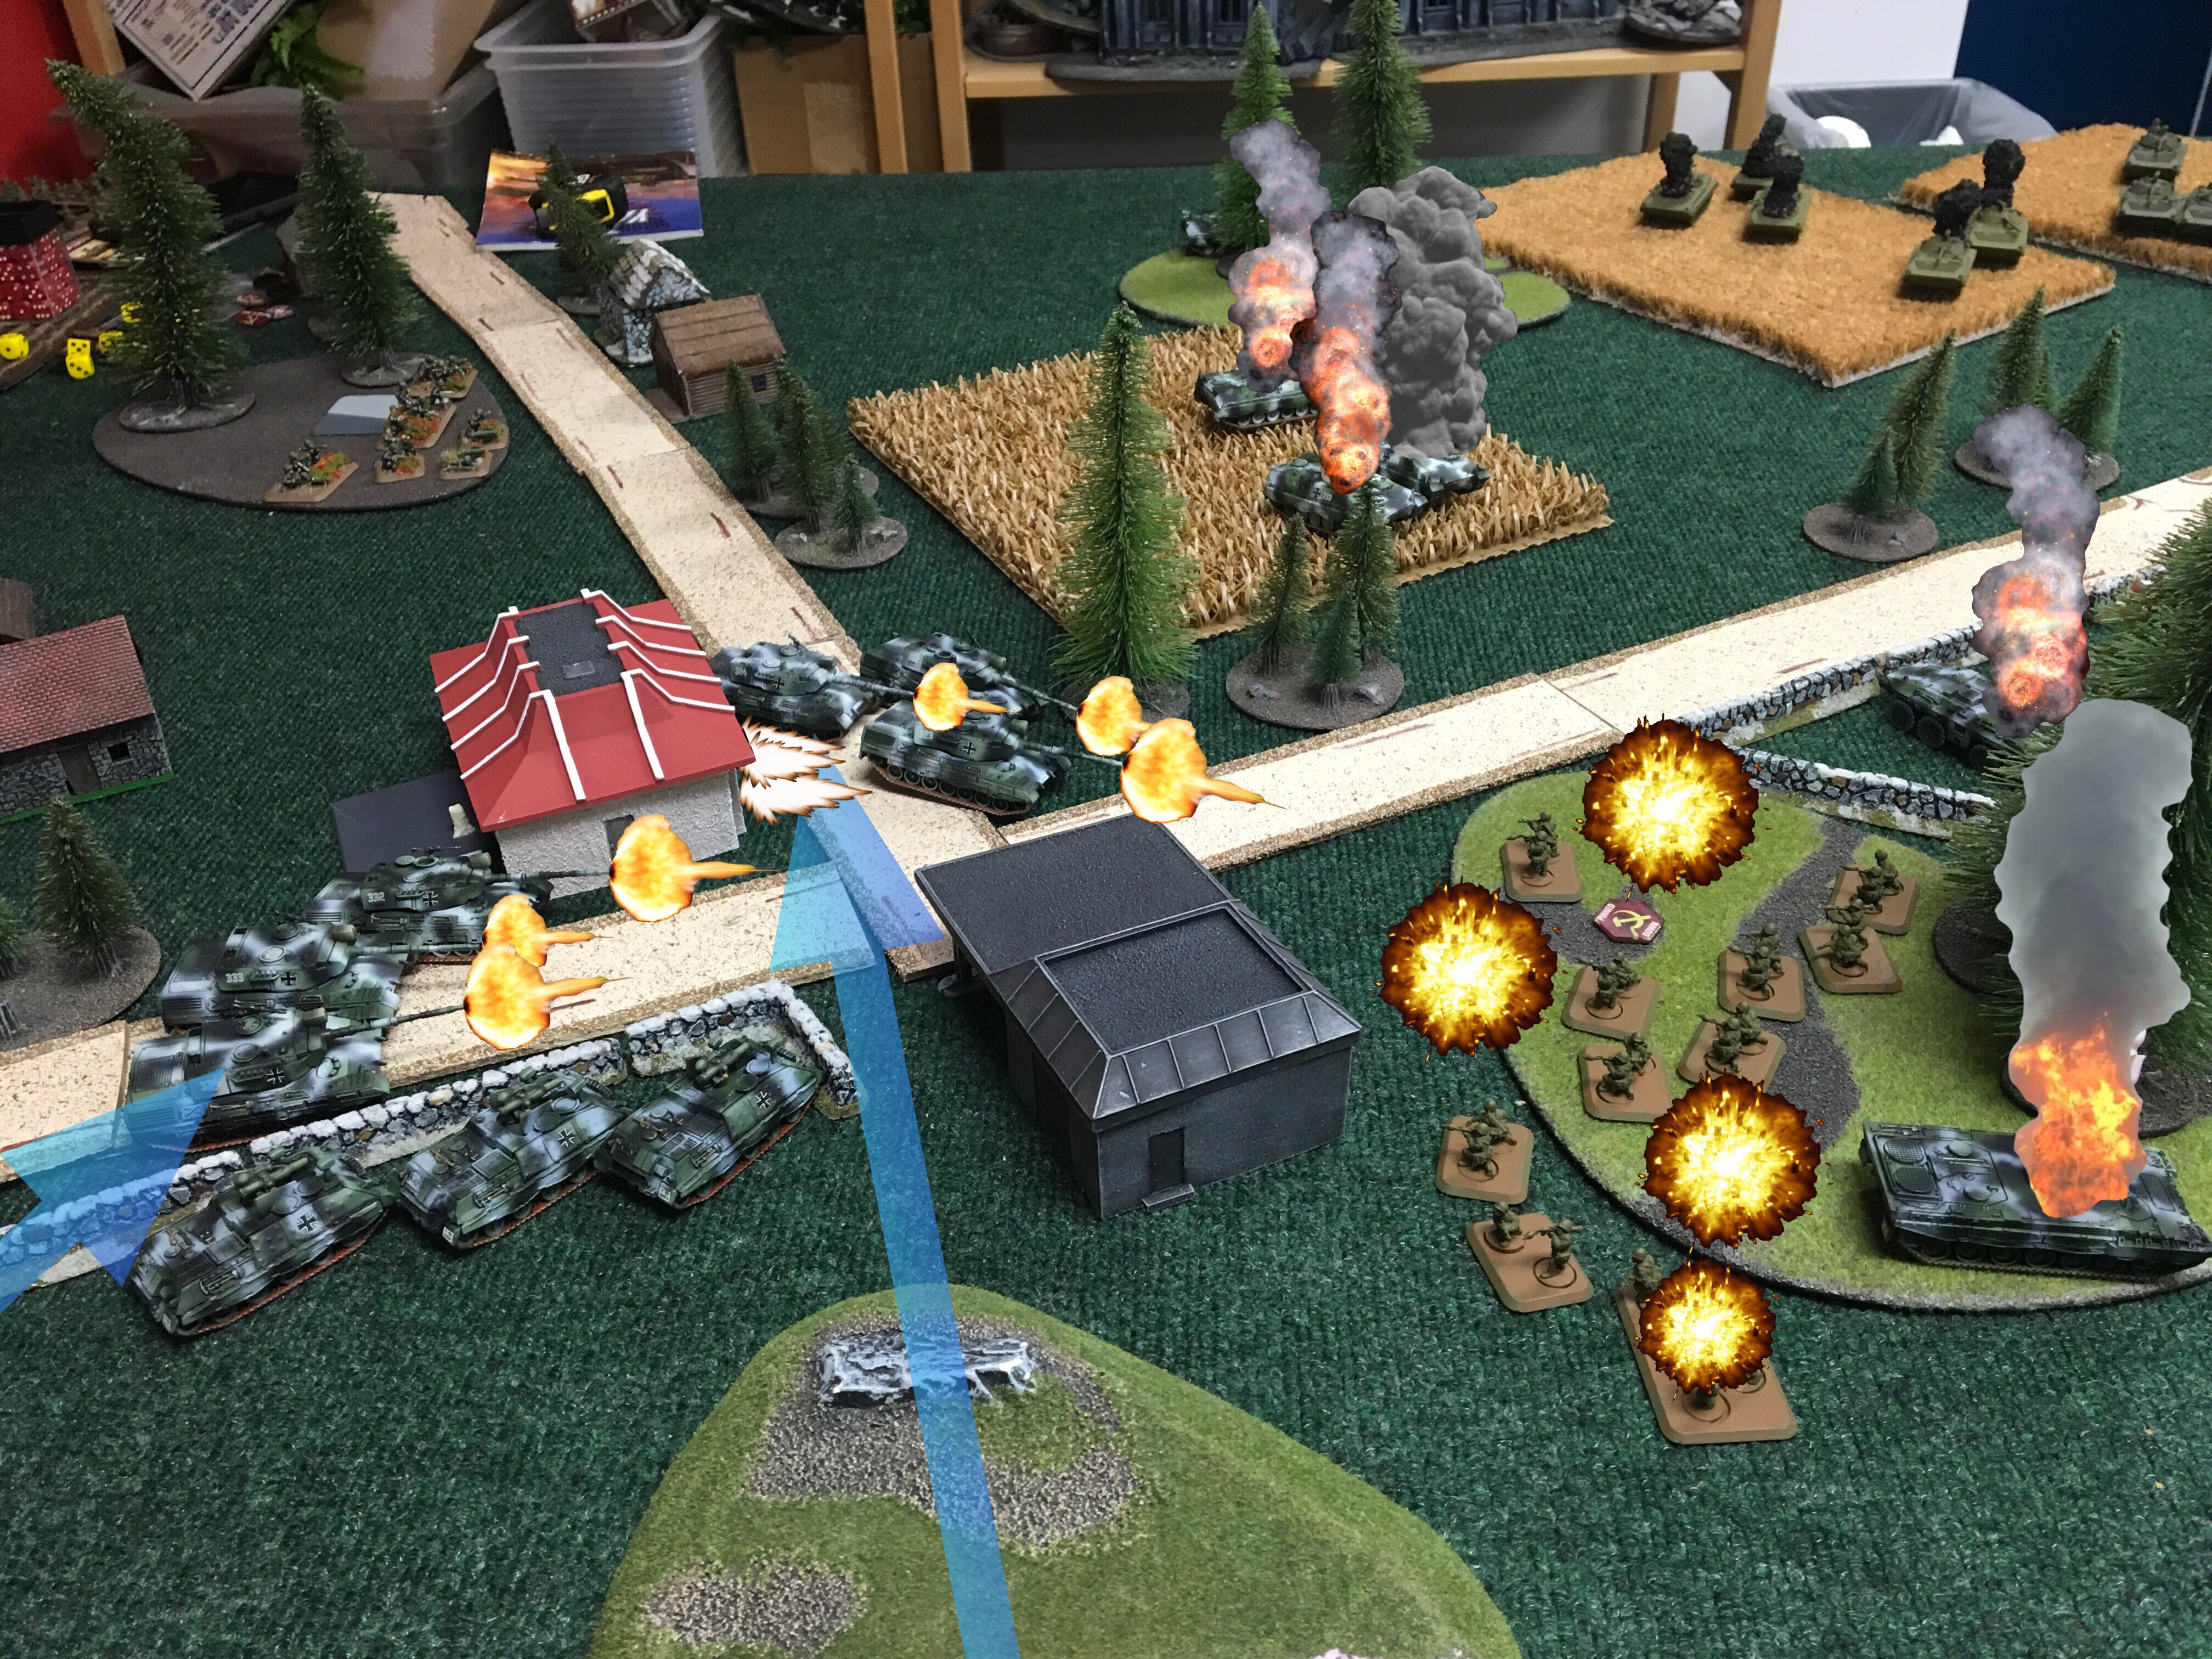 Two Leopard 1 platoons arrive to the battlefield, reinforcing the besieged Panzergrenadiers in the restaurant. The Leopard 1 platoons whittle down one of the Soviet infantry platoons. The West Germans will not relinquish the Ketwurst restaurant without a fight!!!
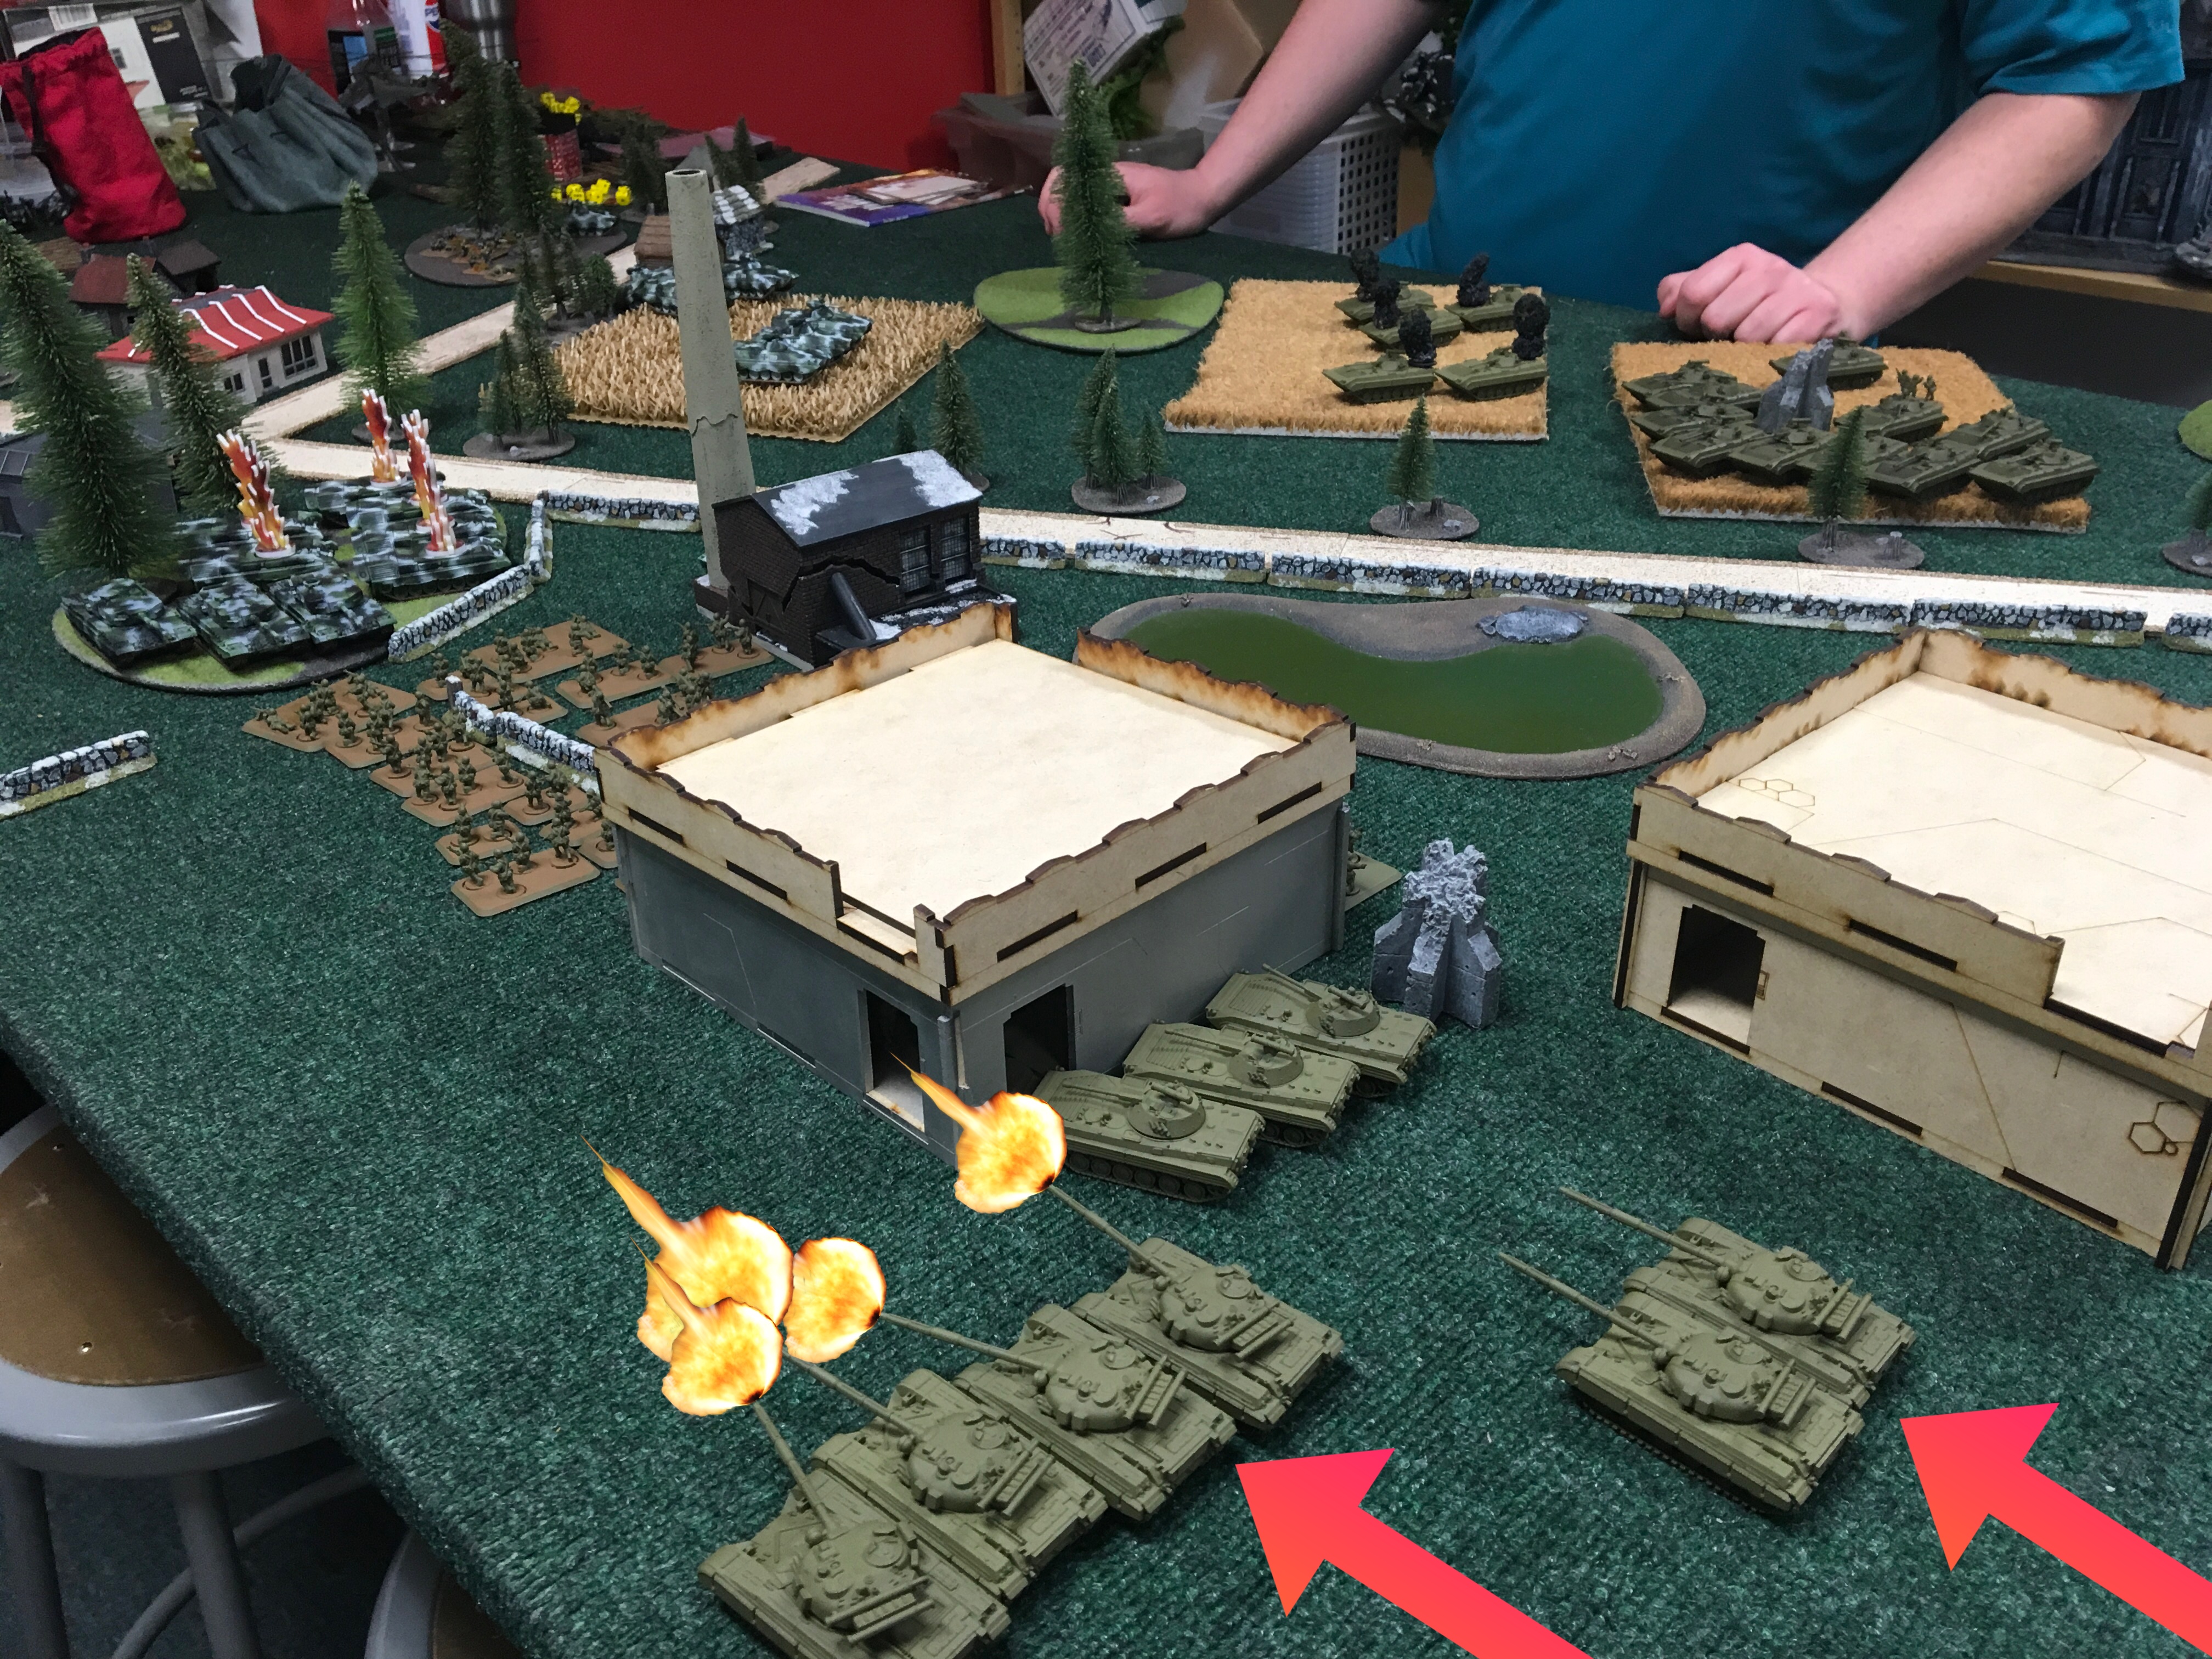
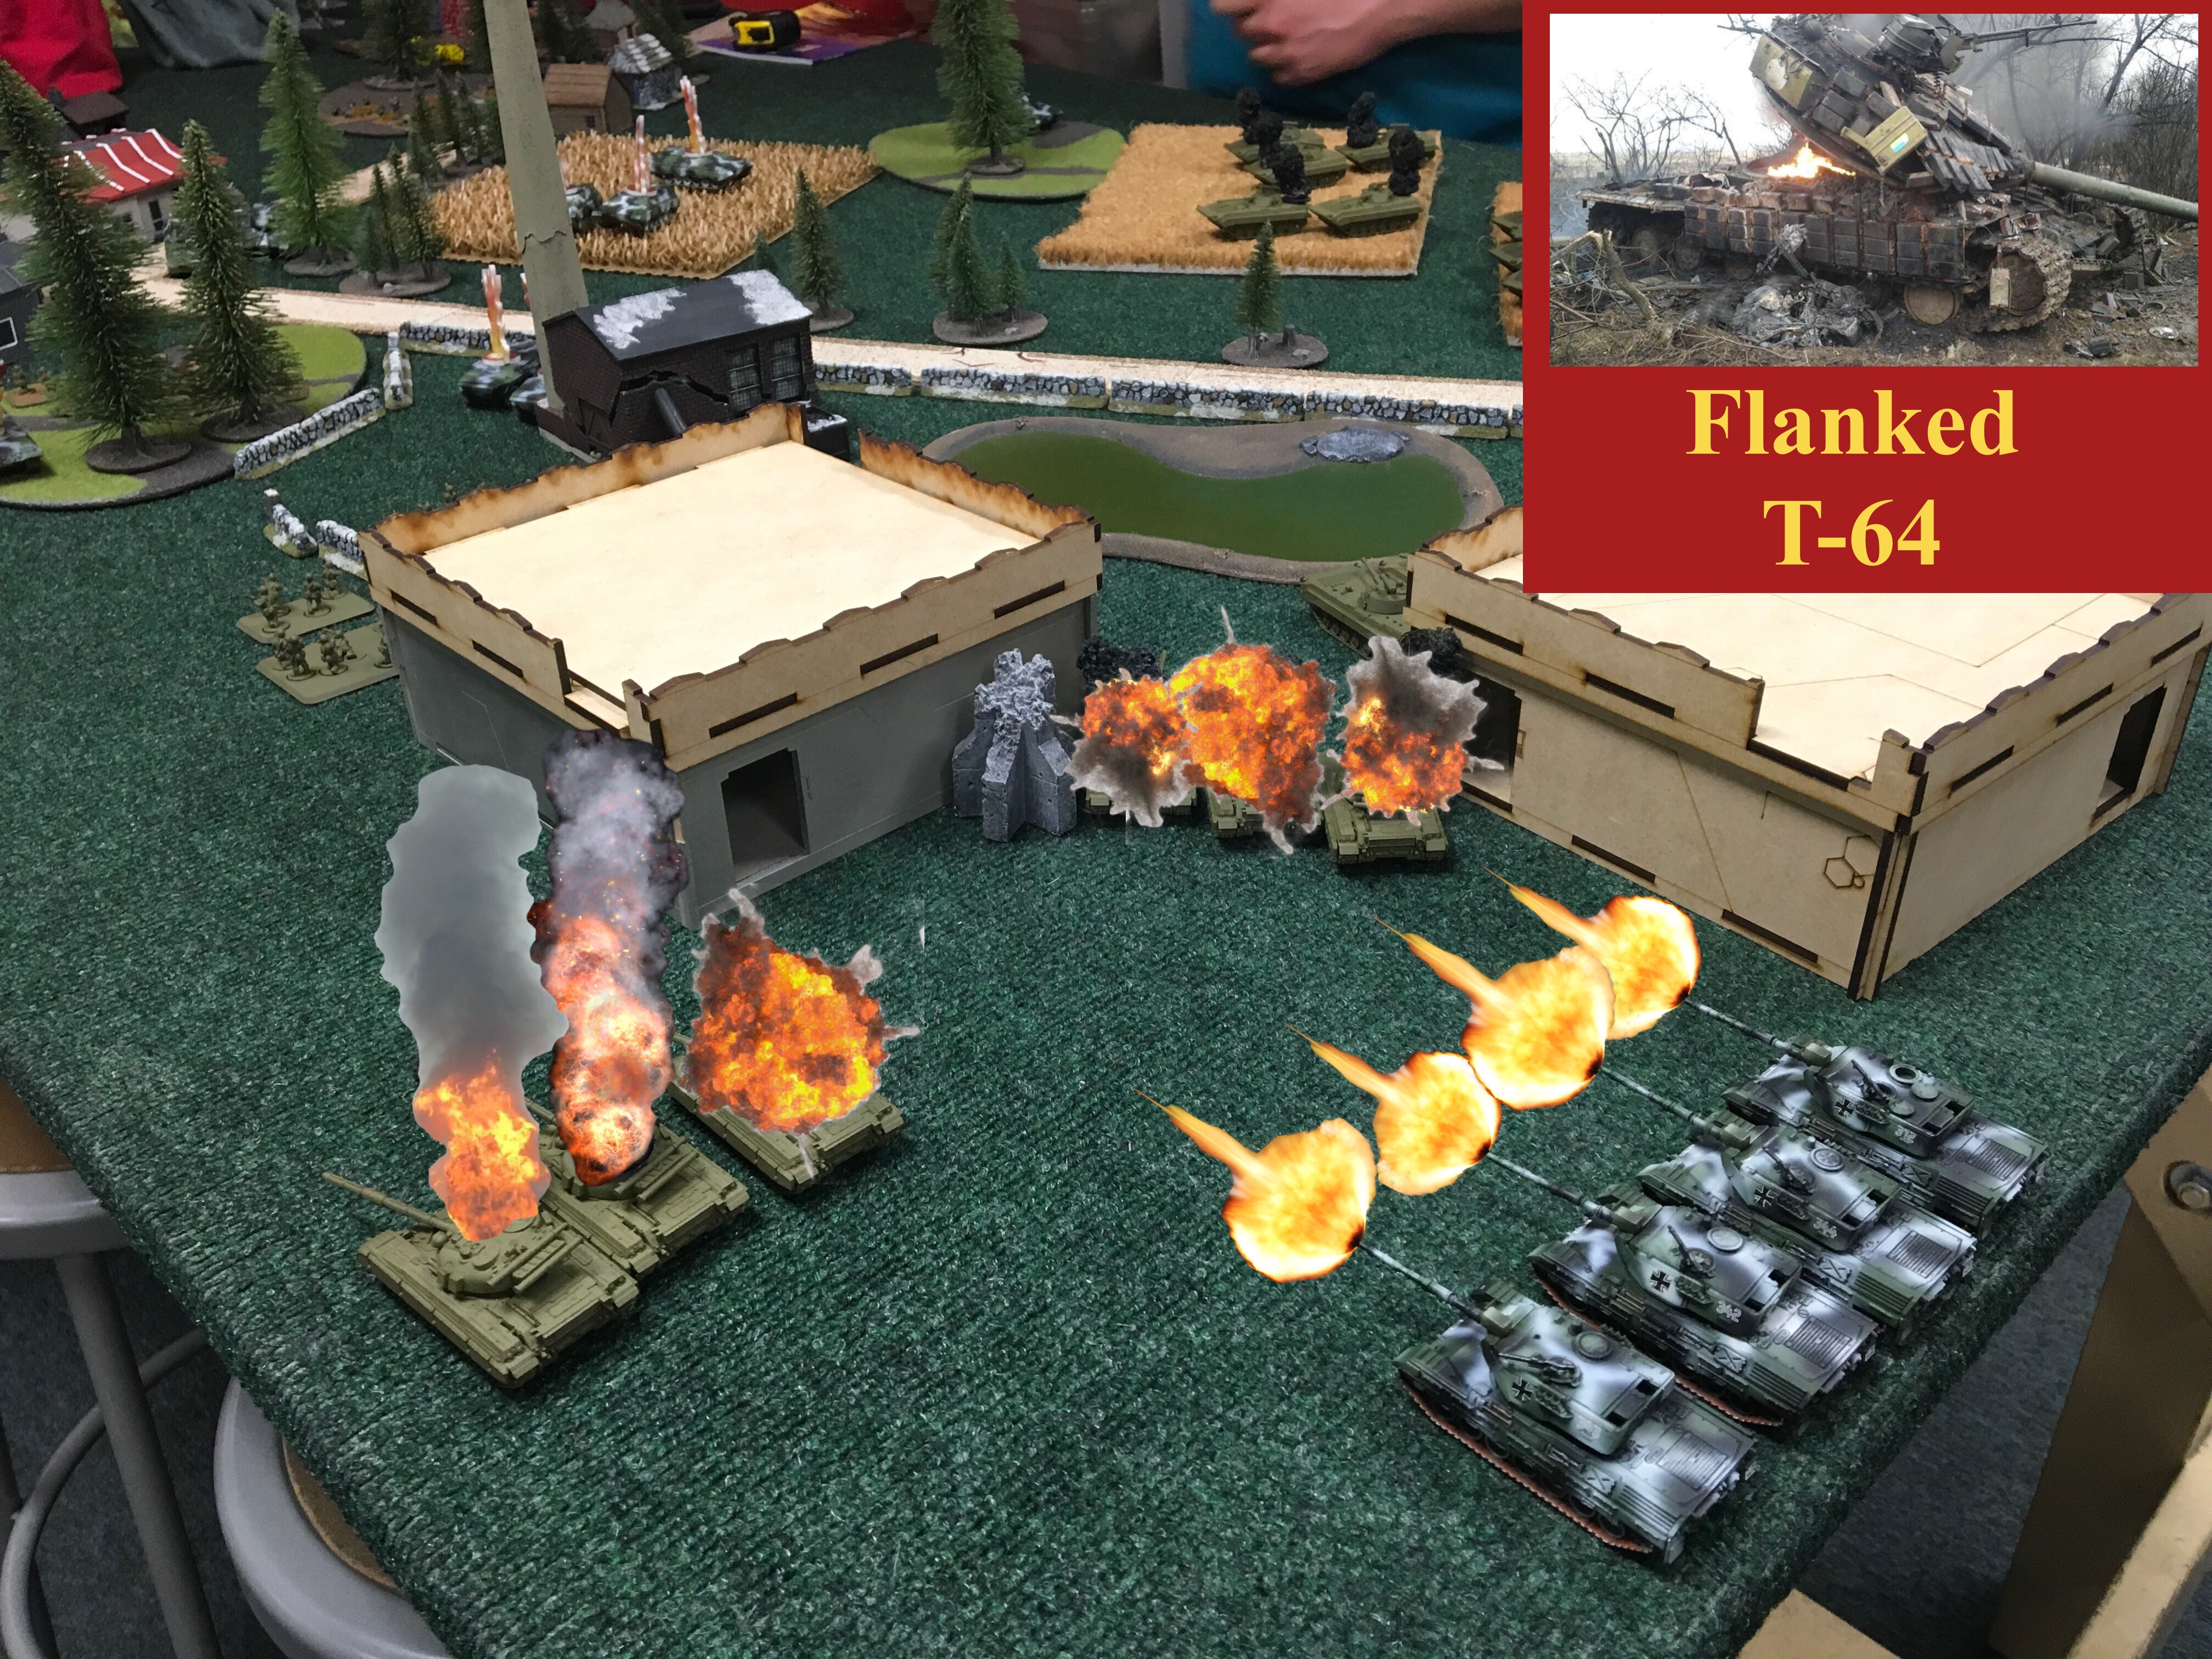 The Leopard 1 command platoon arrives from reserve and set up in position behind the Soviet T-64 armor. The Leopard 1s take advantage of the T-64 rear armor, demolishing the remainder of the platoon.
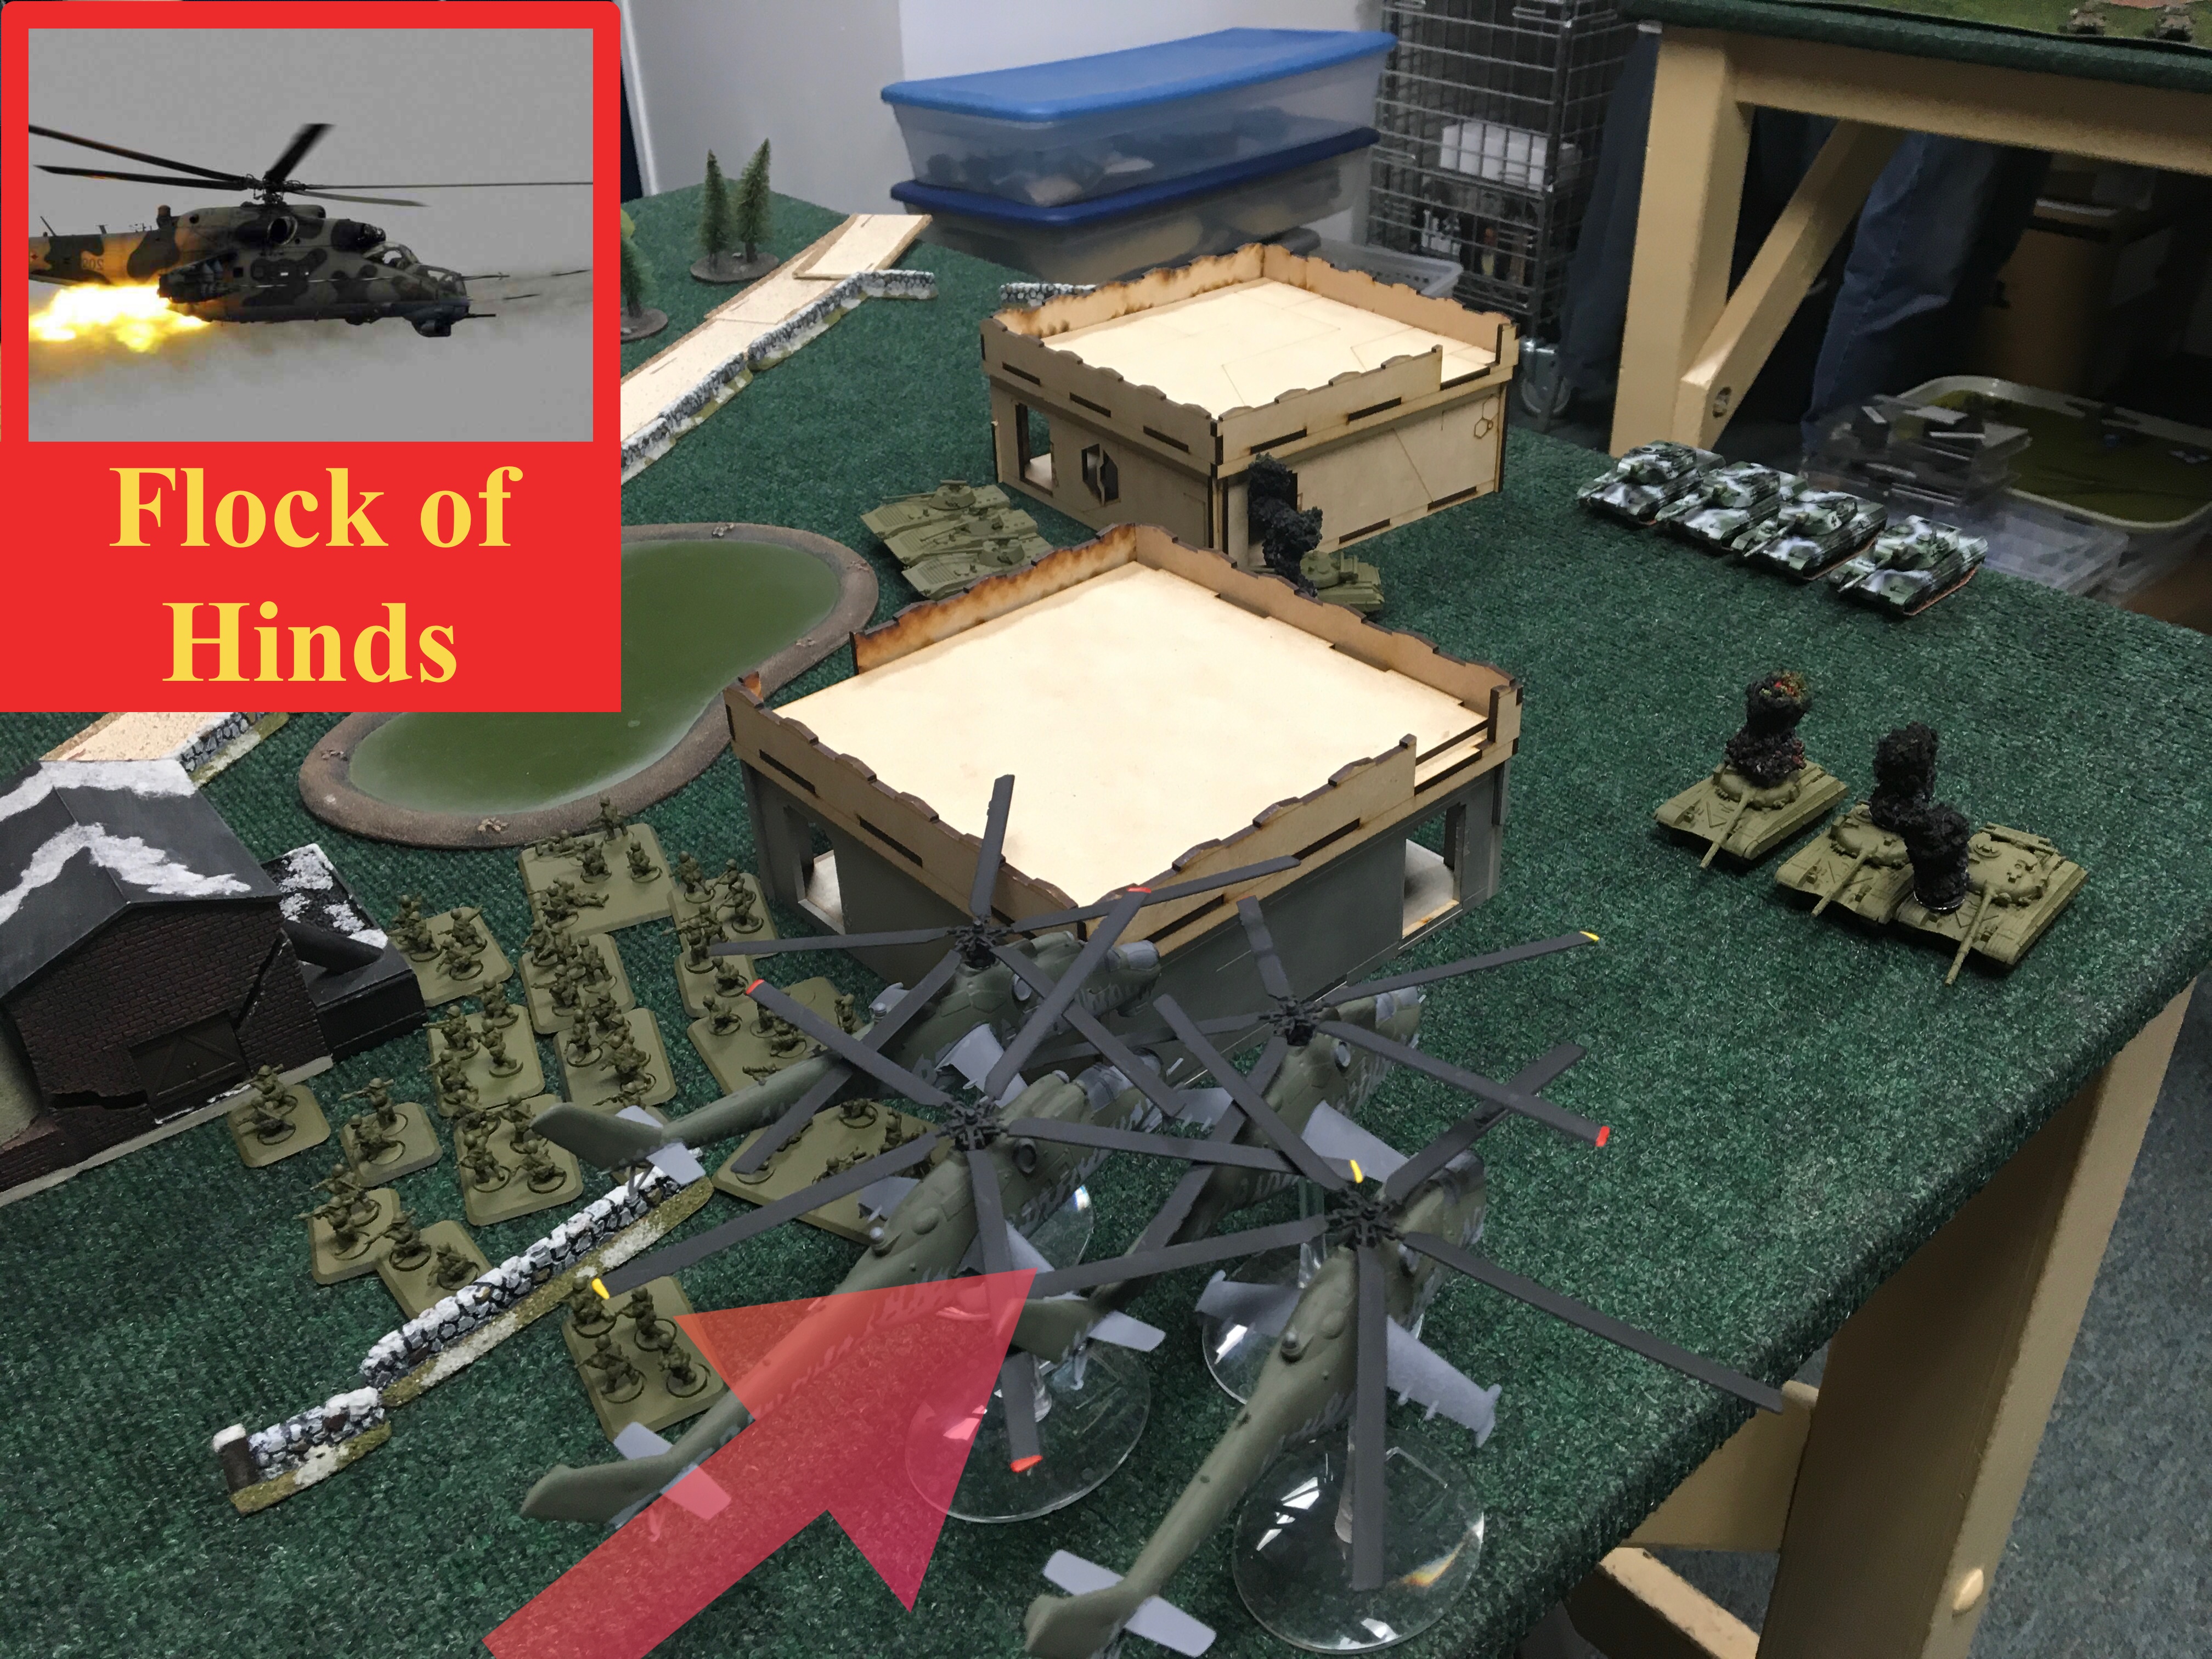 A Soviet Hind flight is called in by the Soviet commander to seek revenge for the loss of the T-64s.
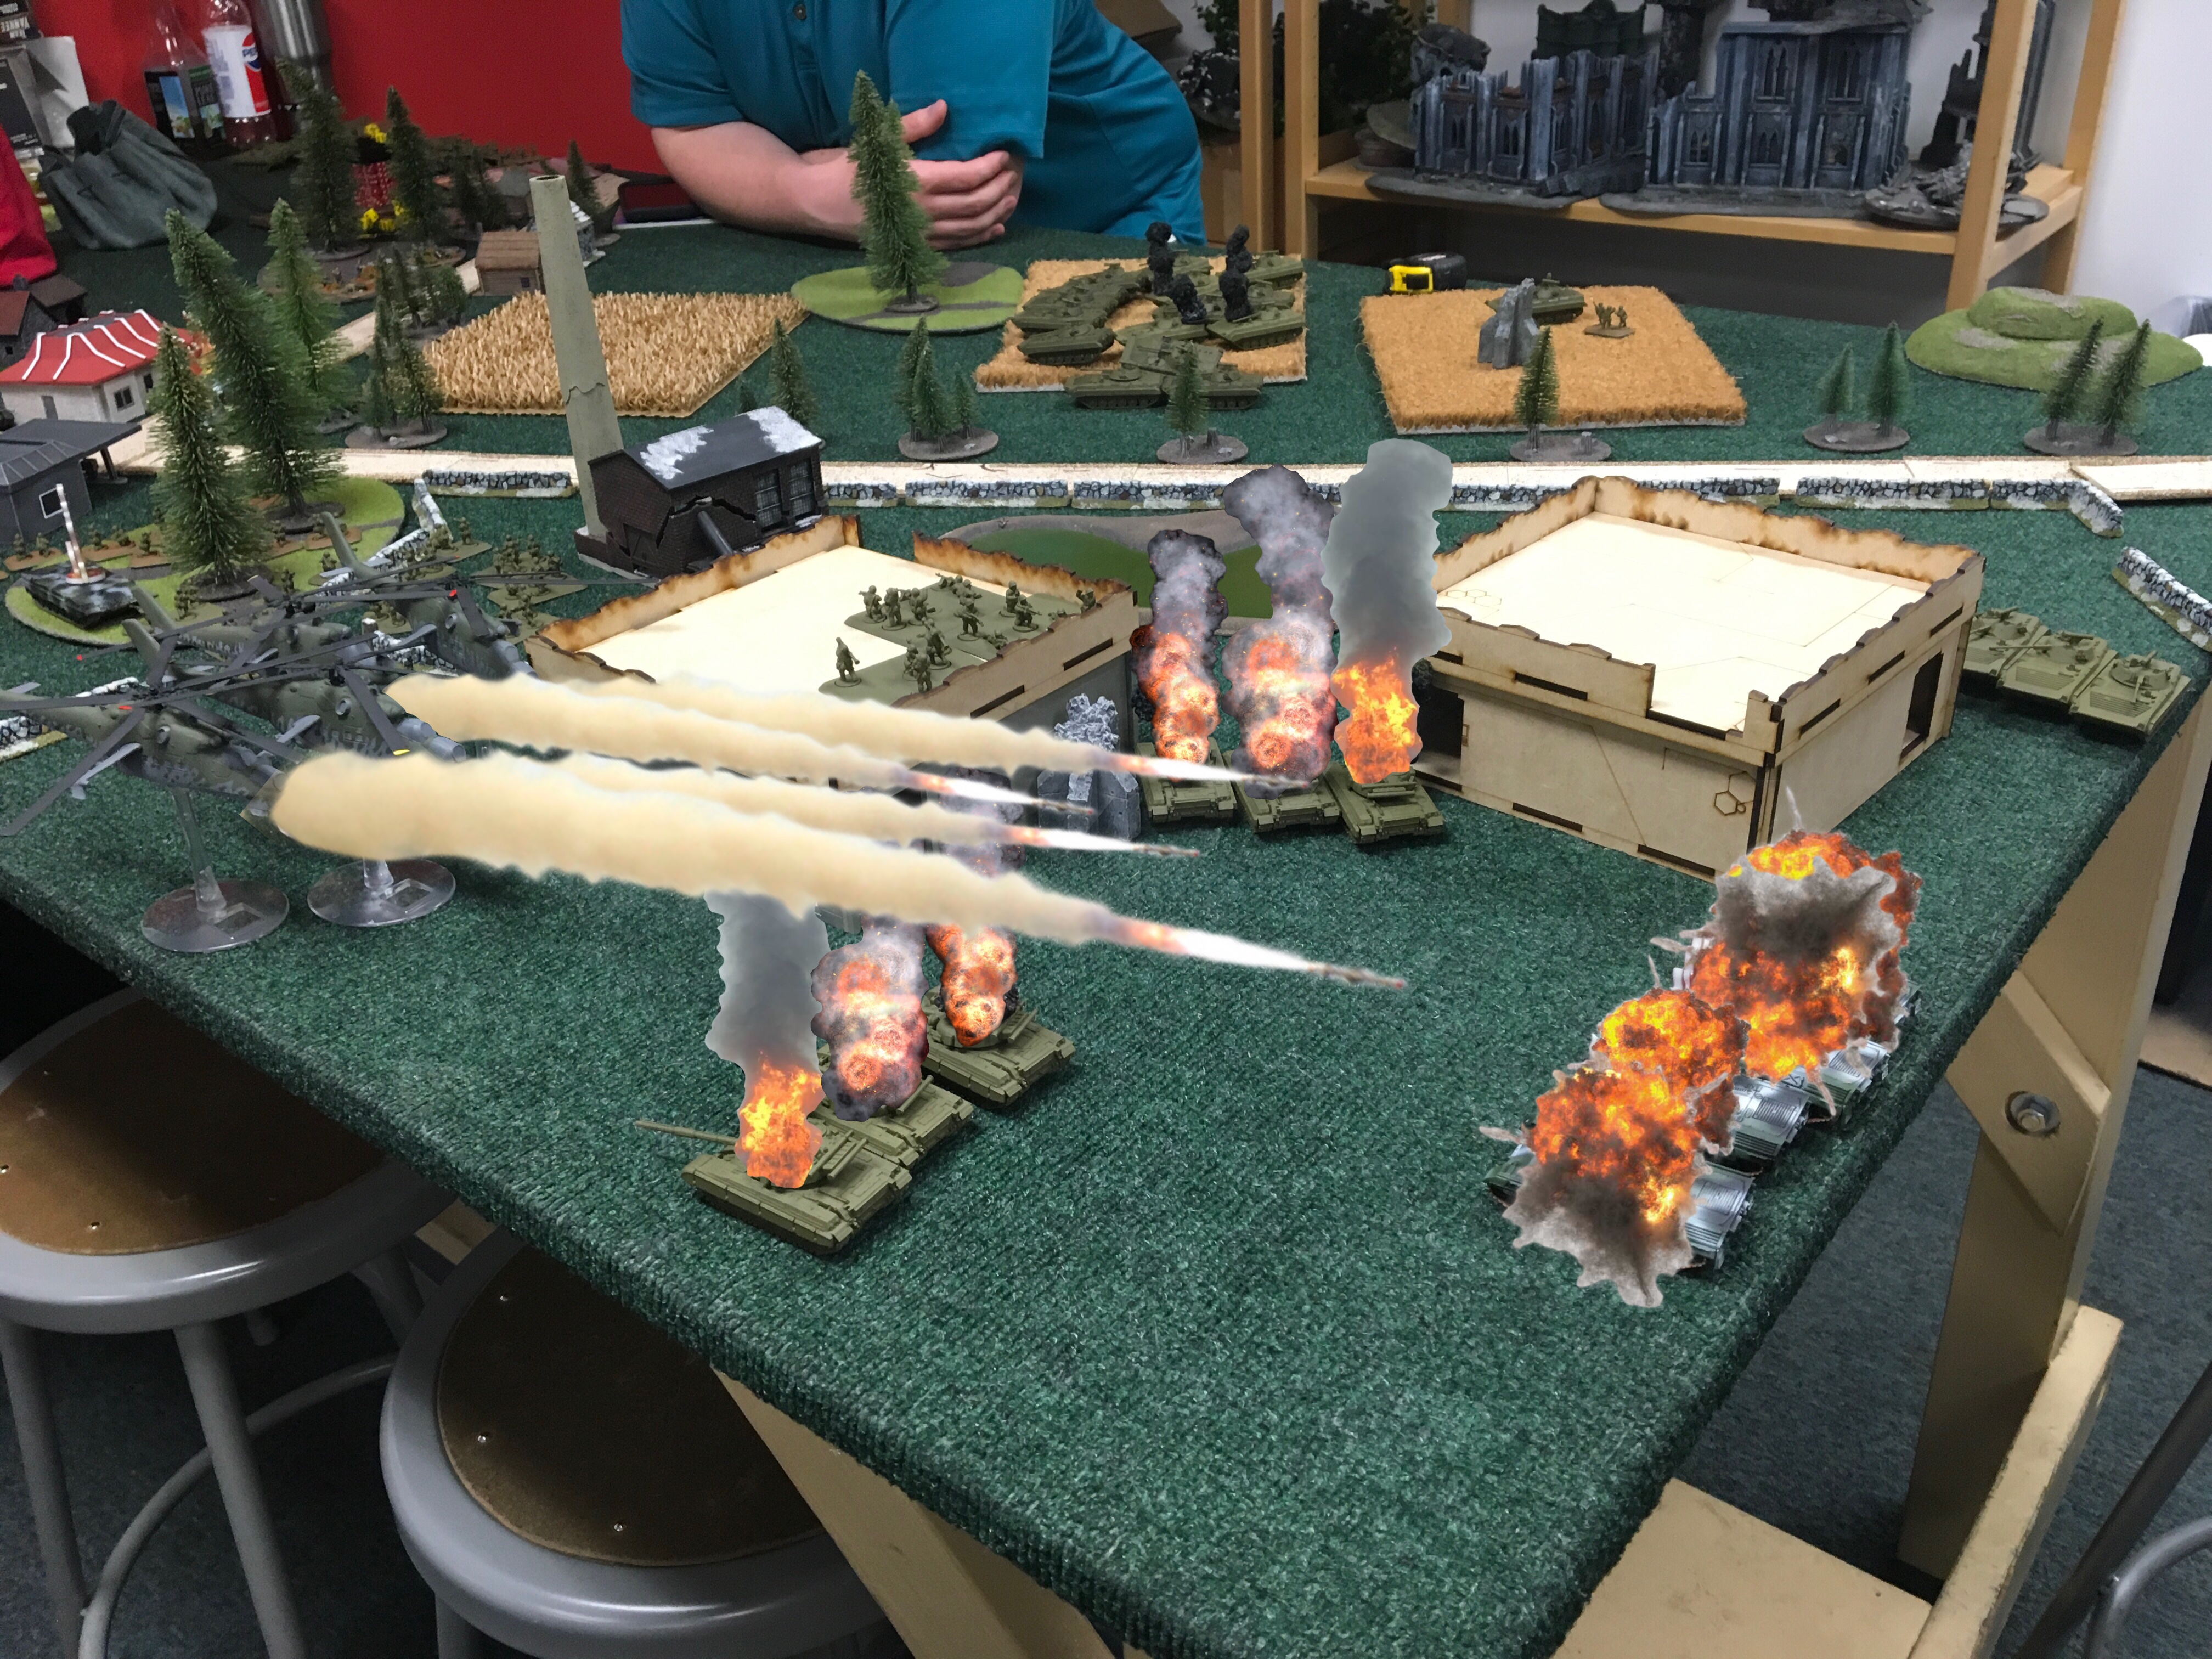
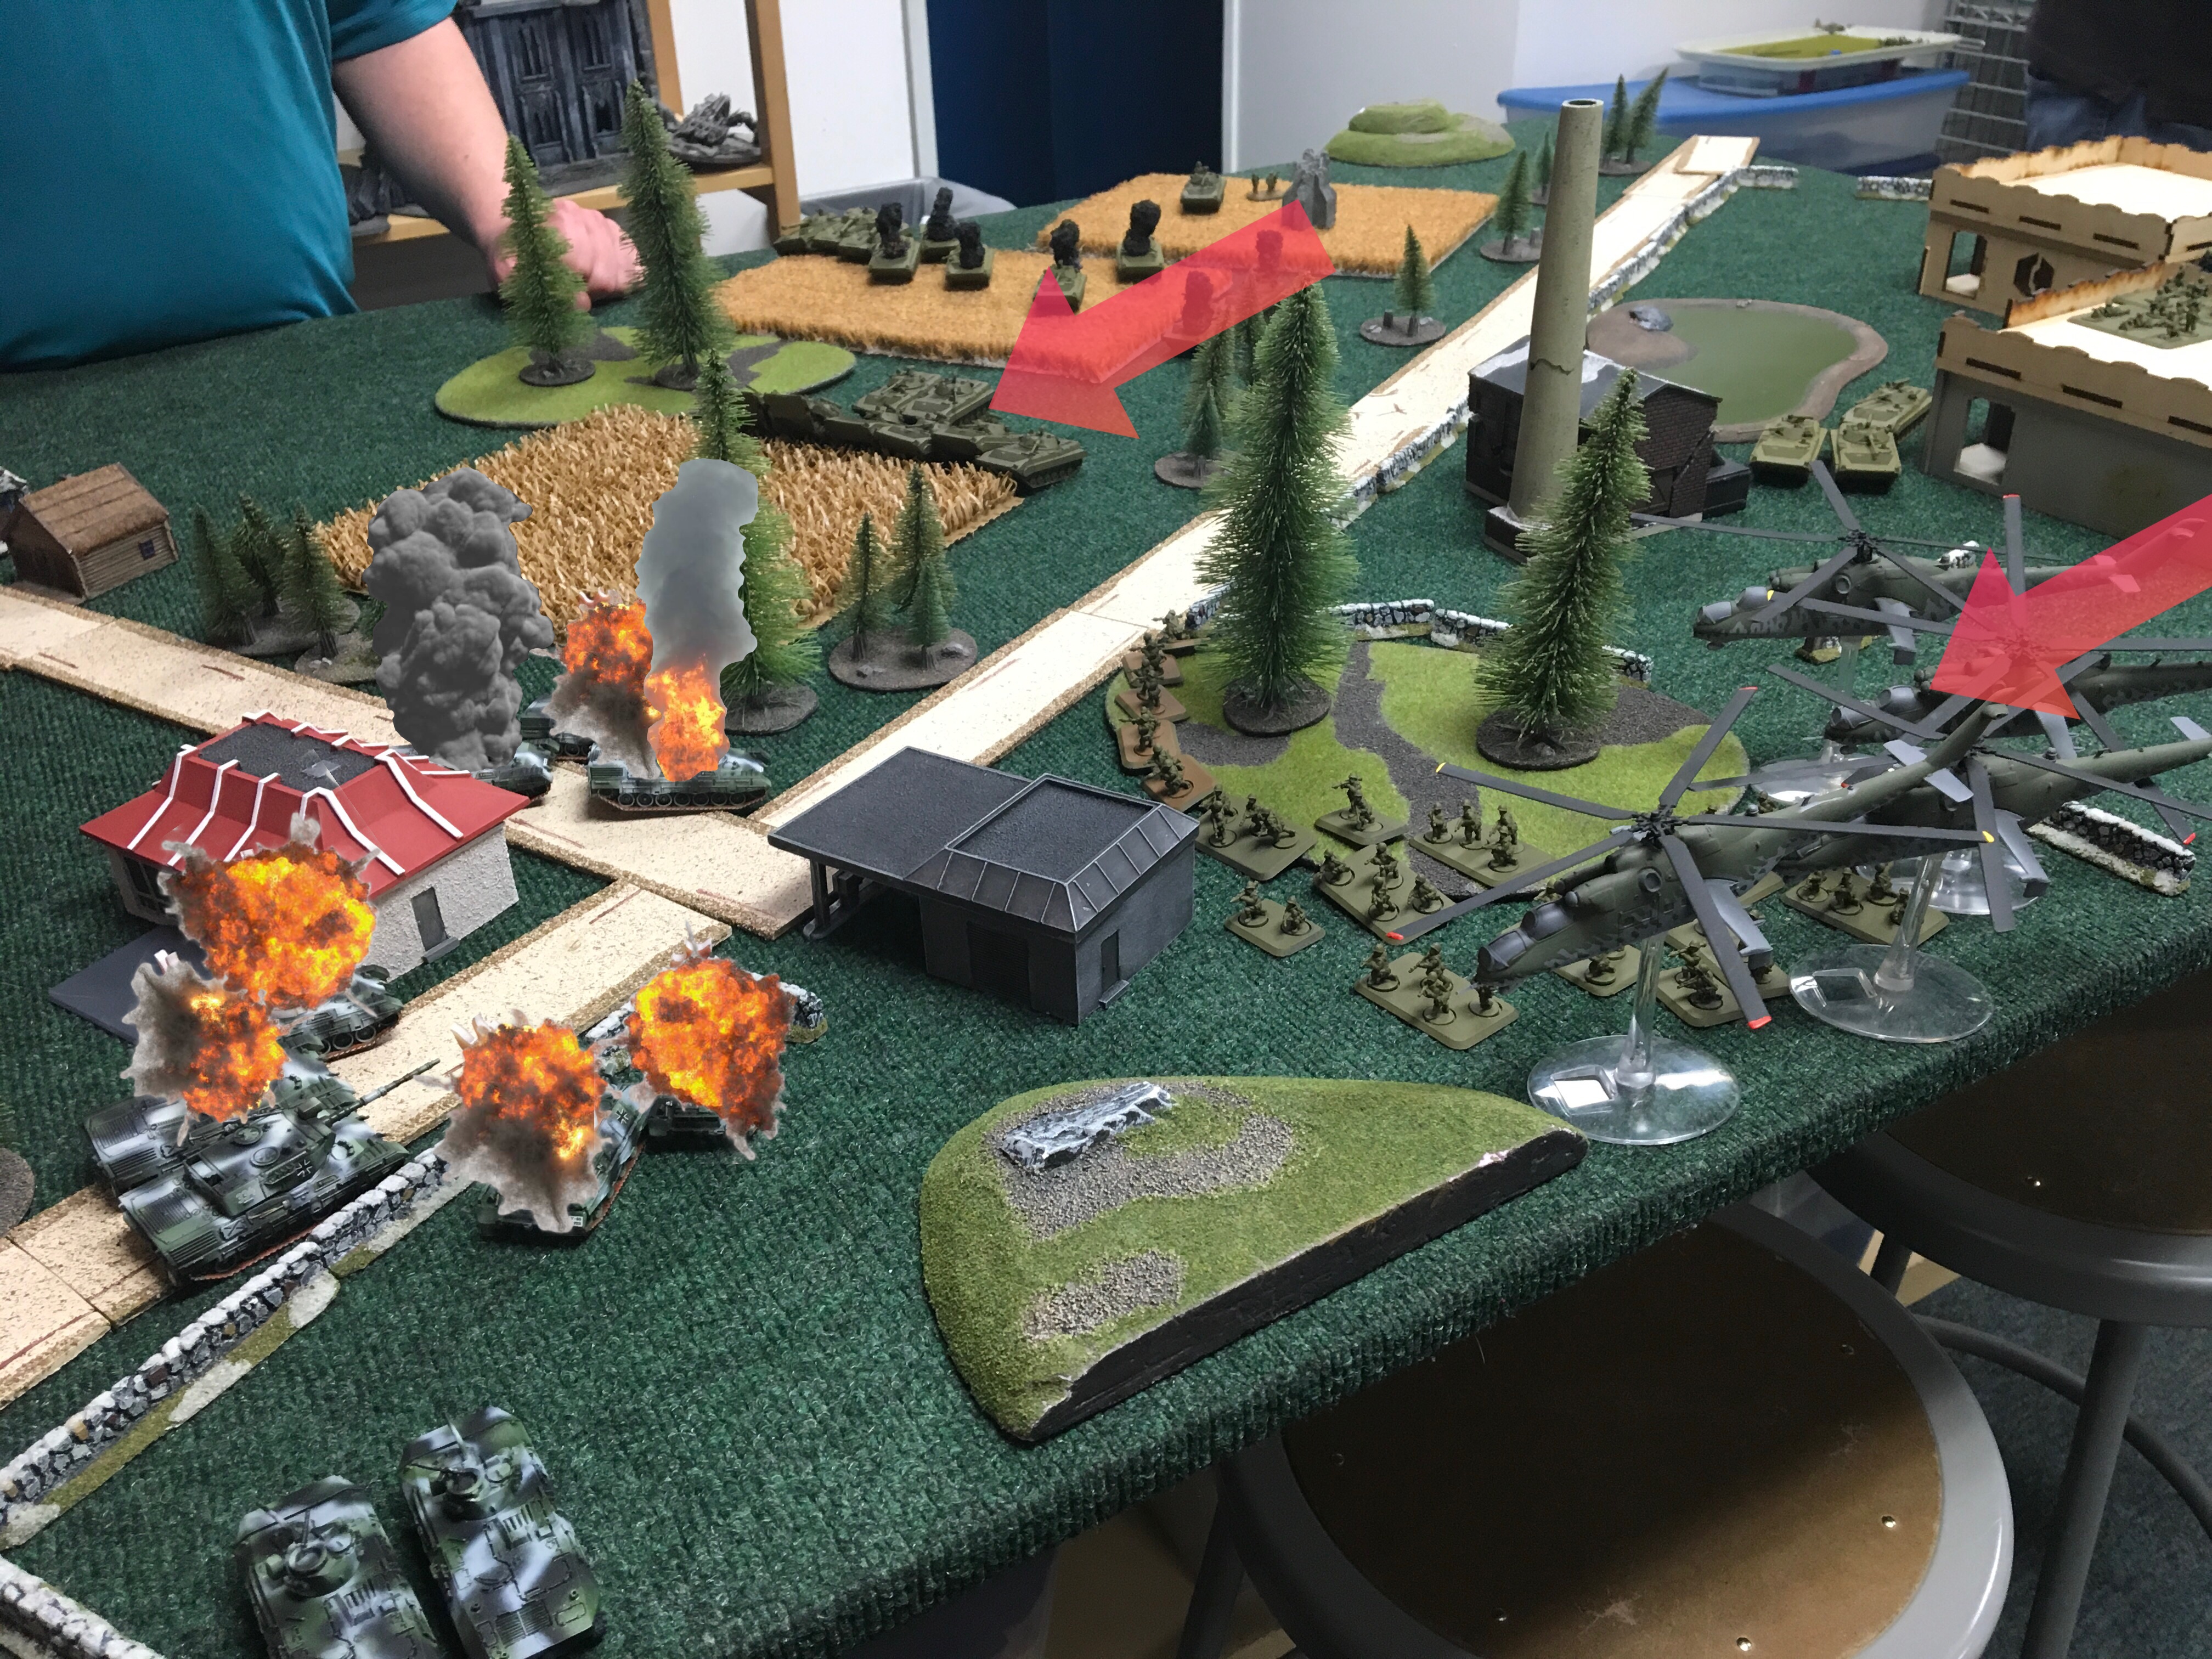 Hinds and BMPs clear a path through Task Force Leopard 1s and Jaguars, destroying much of the West German defenses.
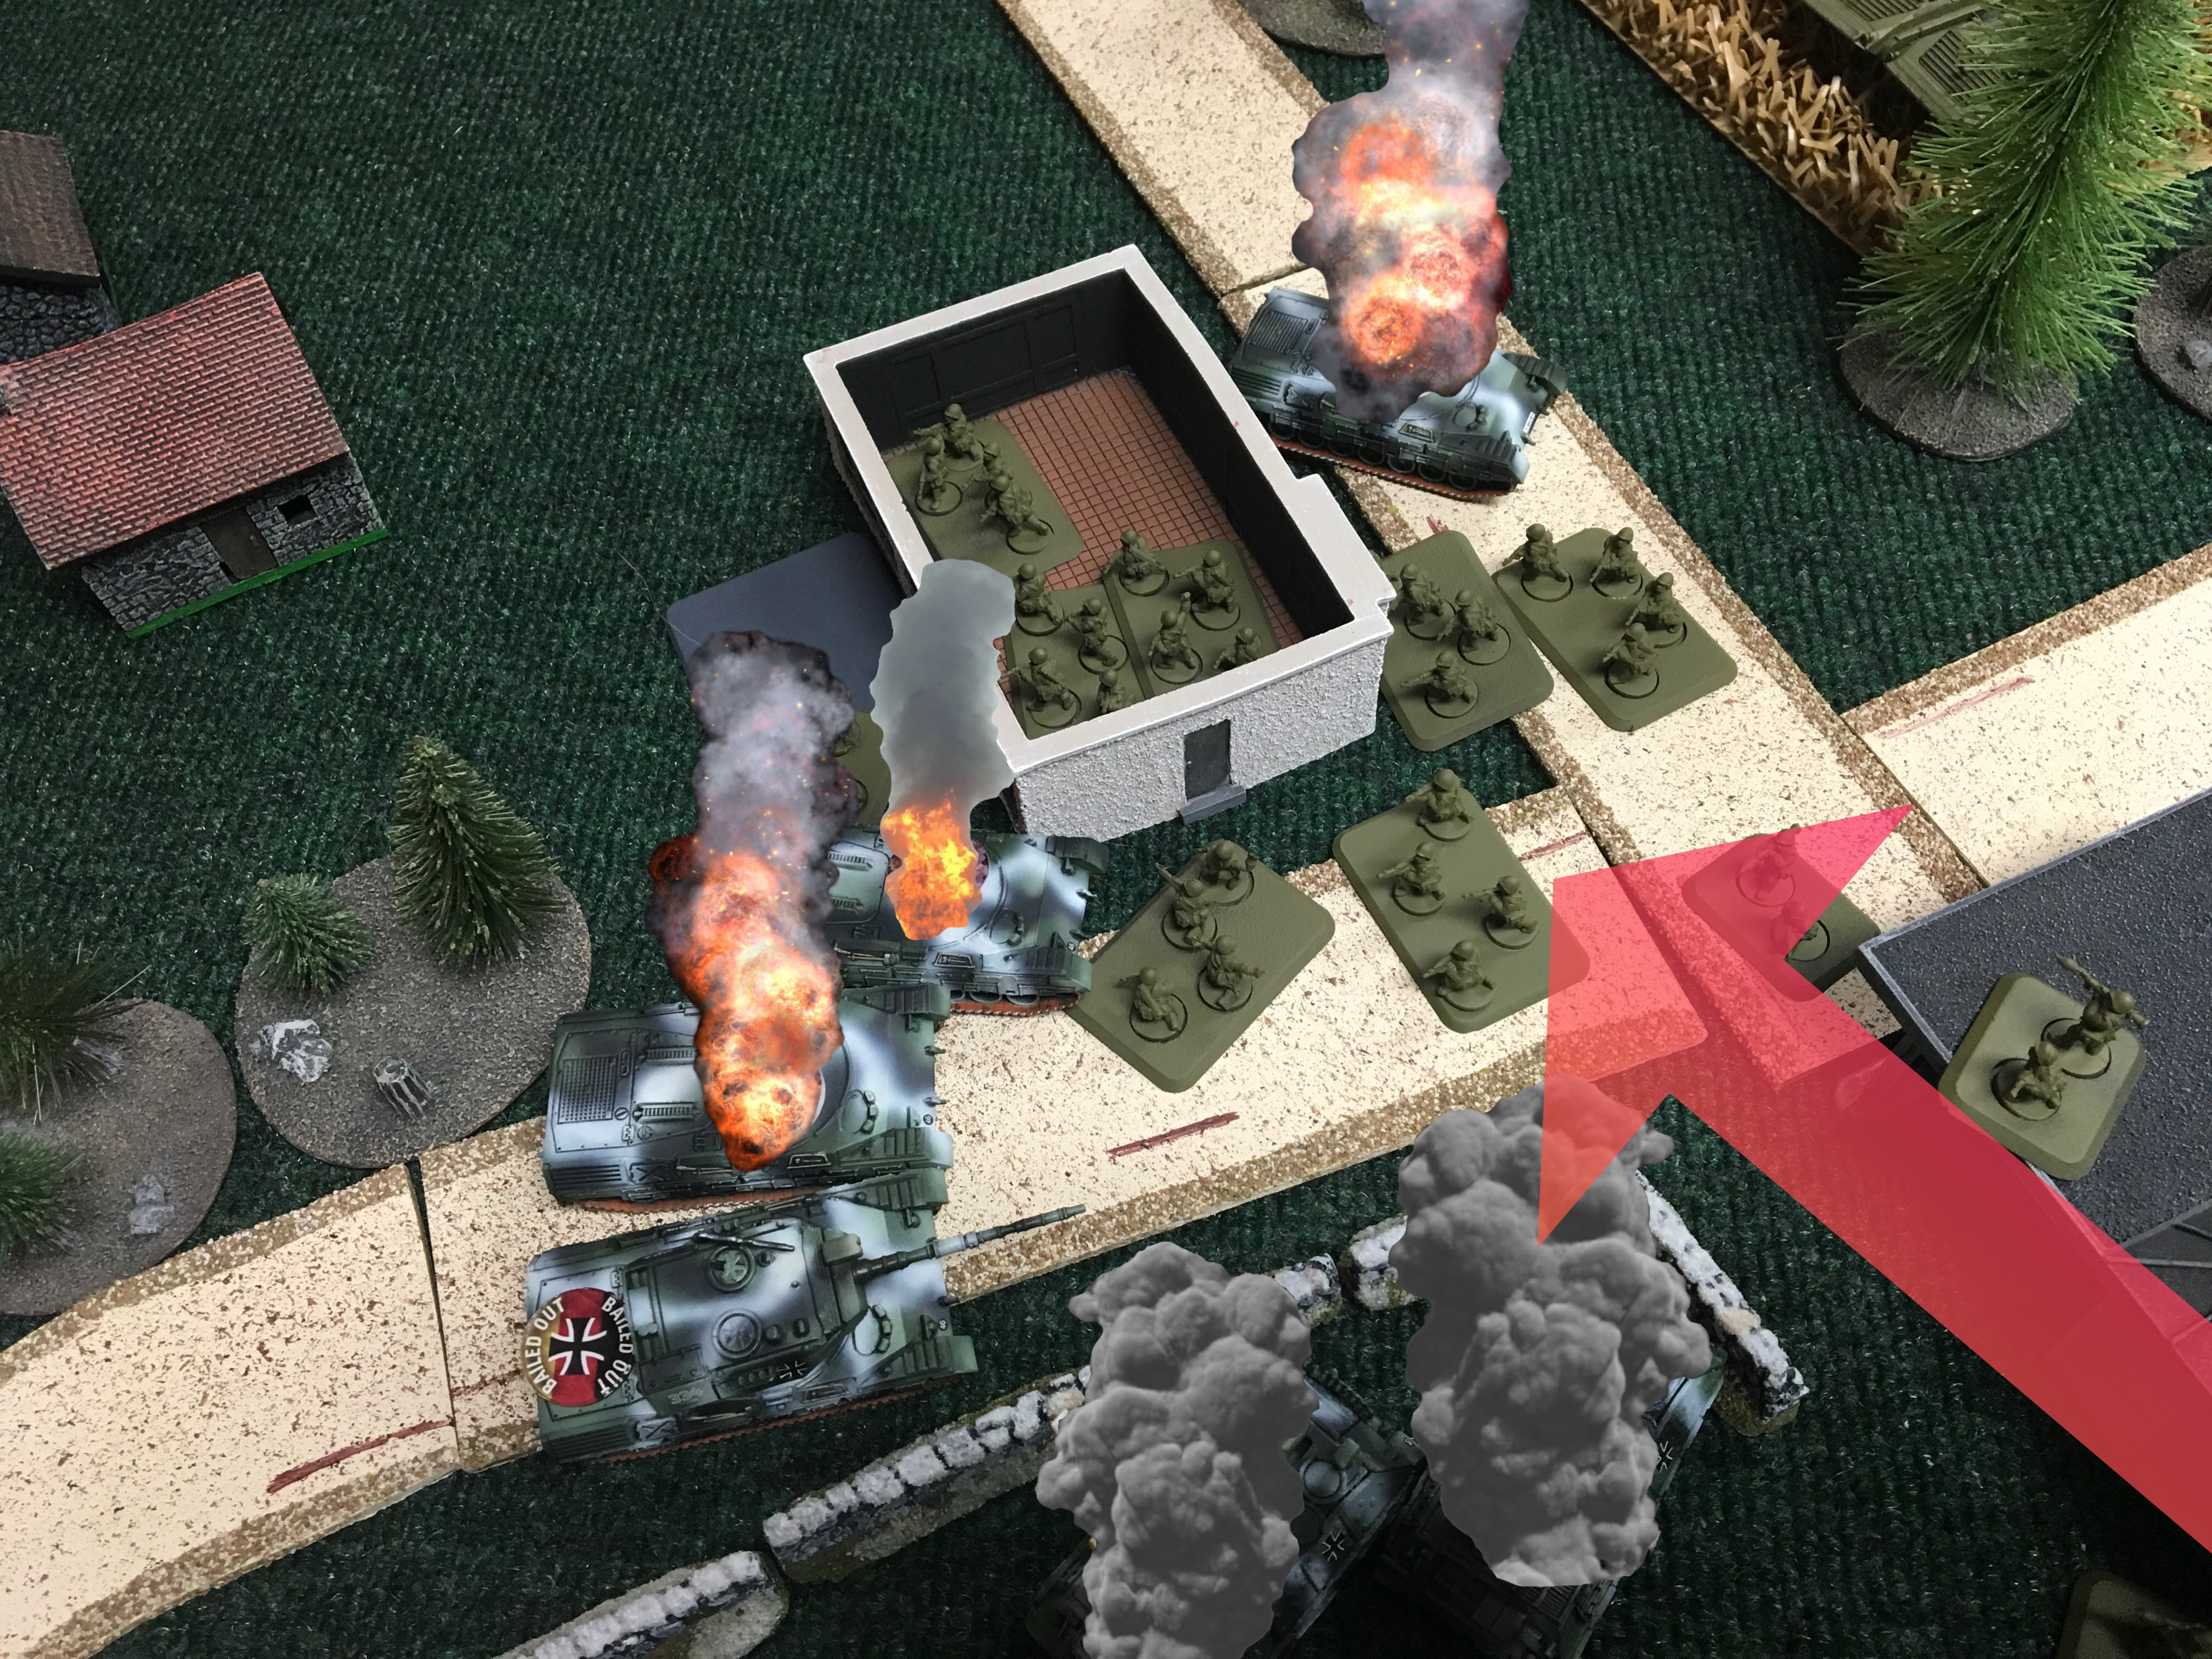 Guard Motor infantry sorm the Ketwurst restaurant, seizing it from Kampfgruppe Von Stein’s Panzergrenadiers. There was much rejoicing from the Guards infantry, knowing the Soviets will be eating well tonight.
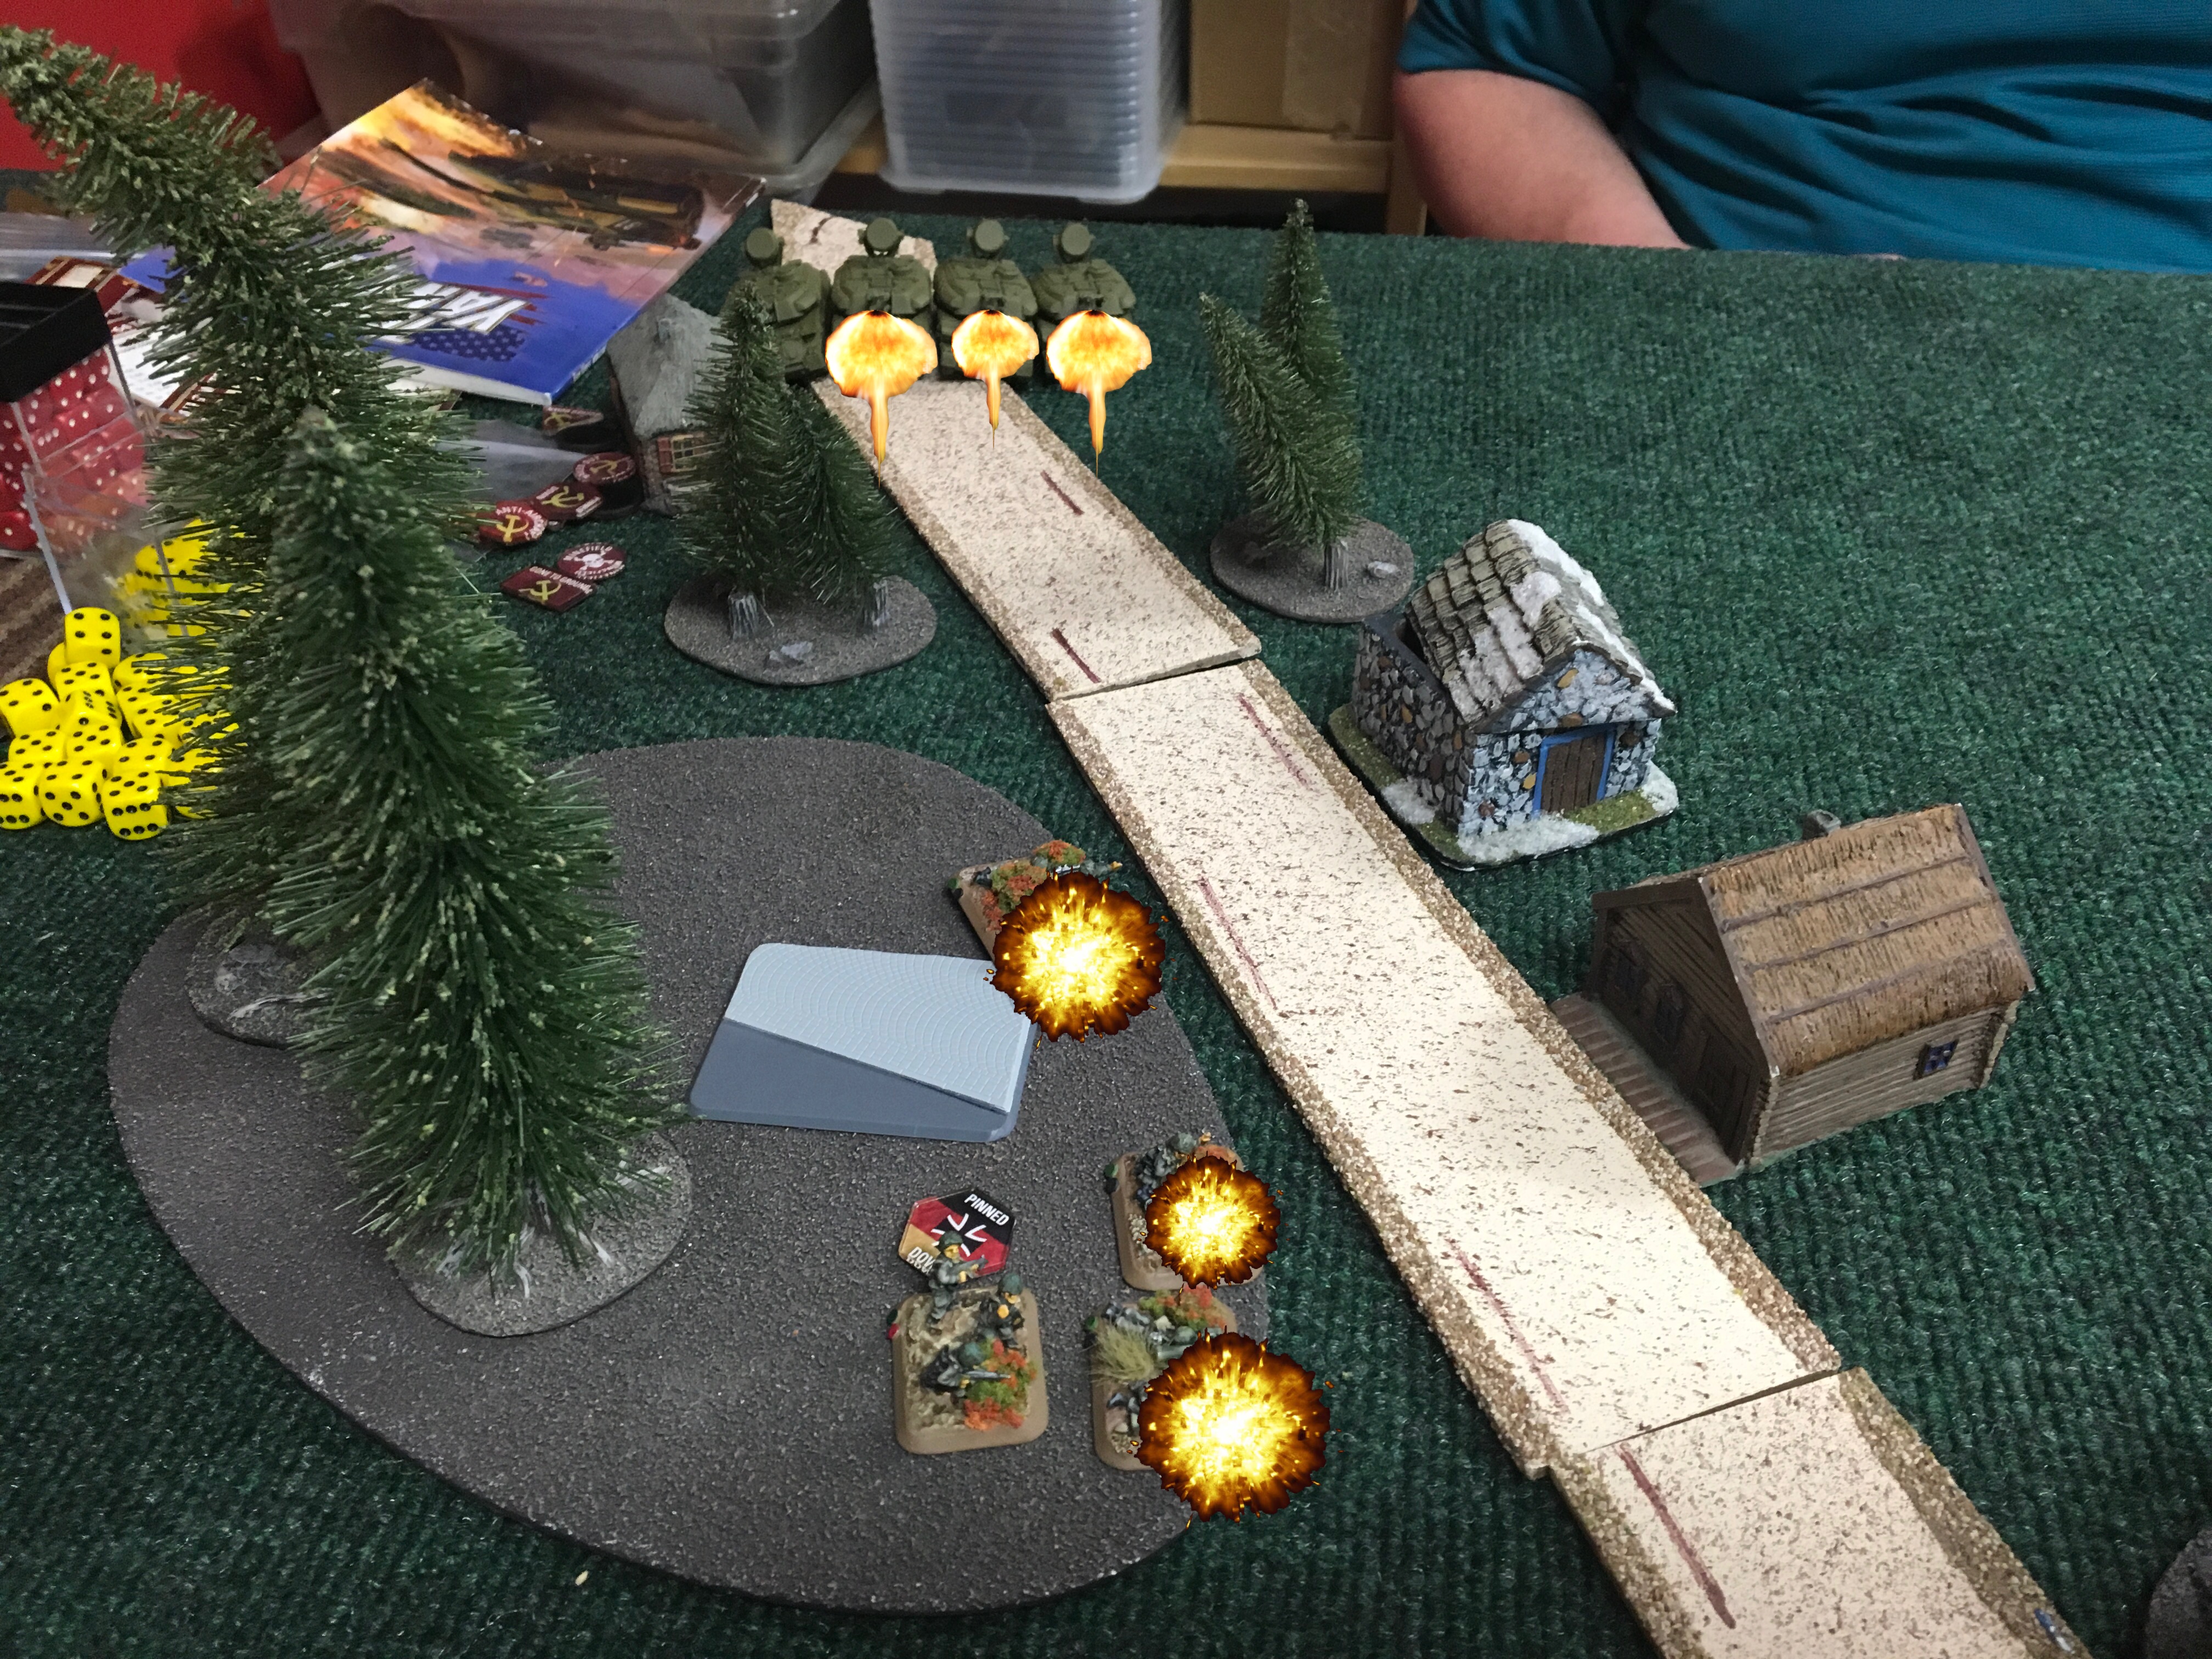 Russian Shilkas arrive from reserve and wipe out the remaining Task Force Panzergrenadiers who were defending the second objective.
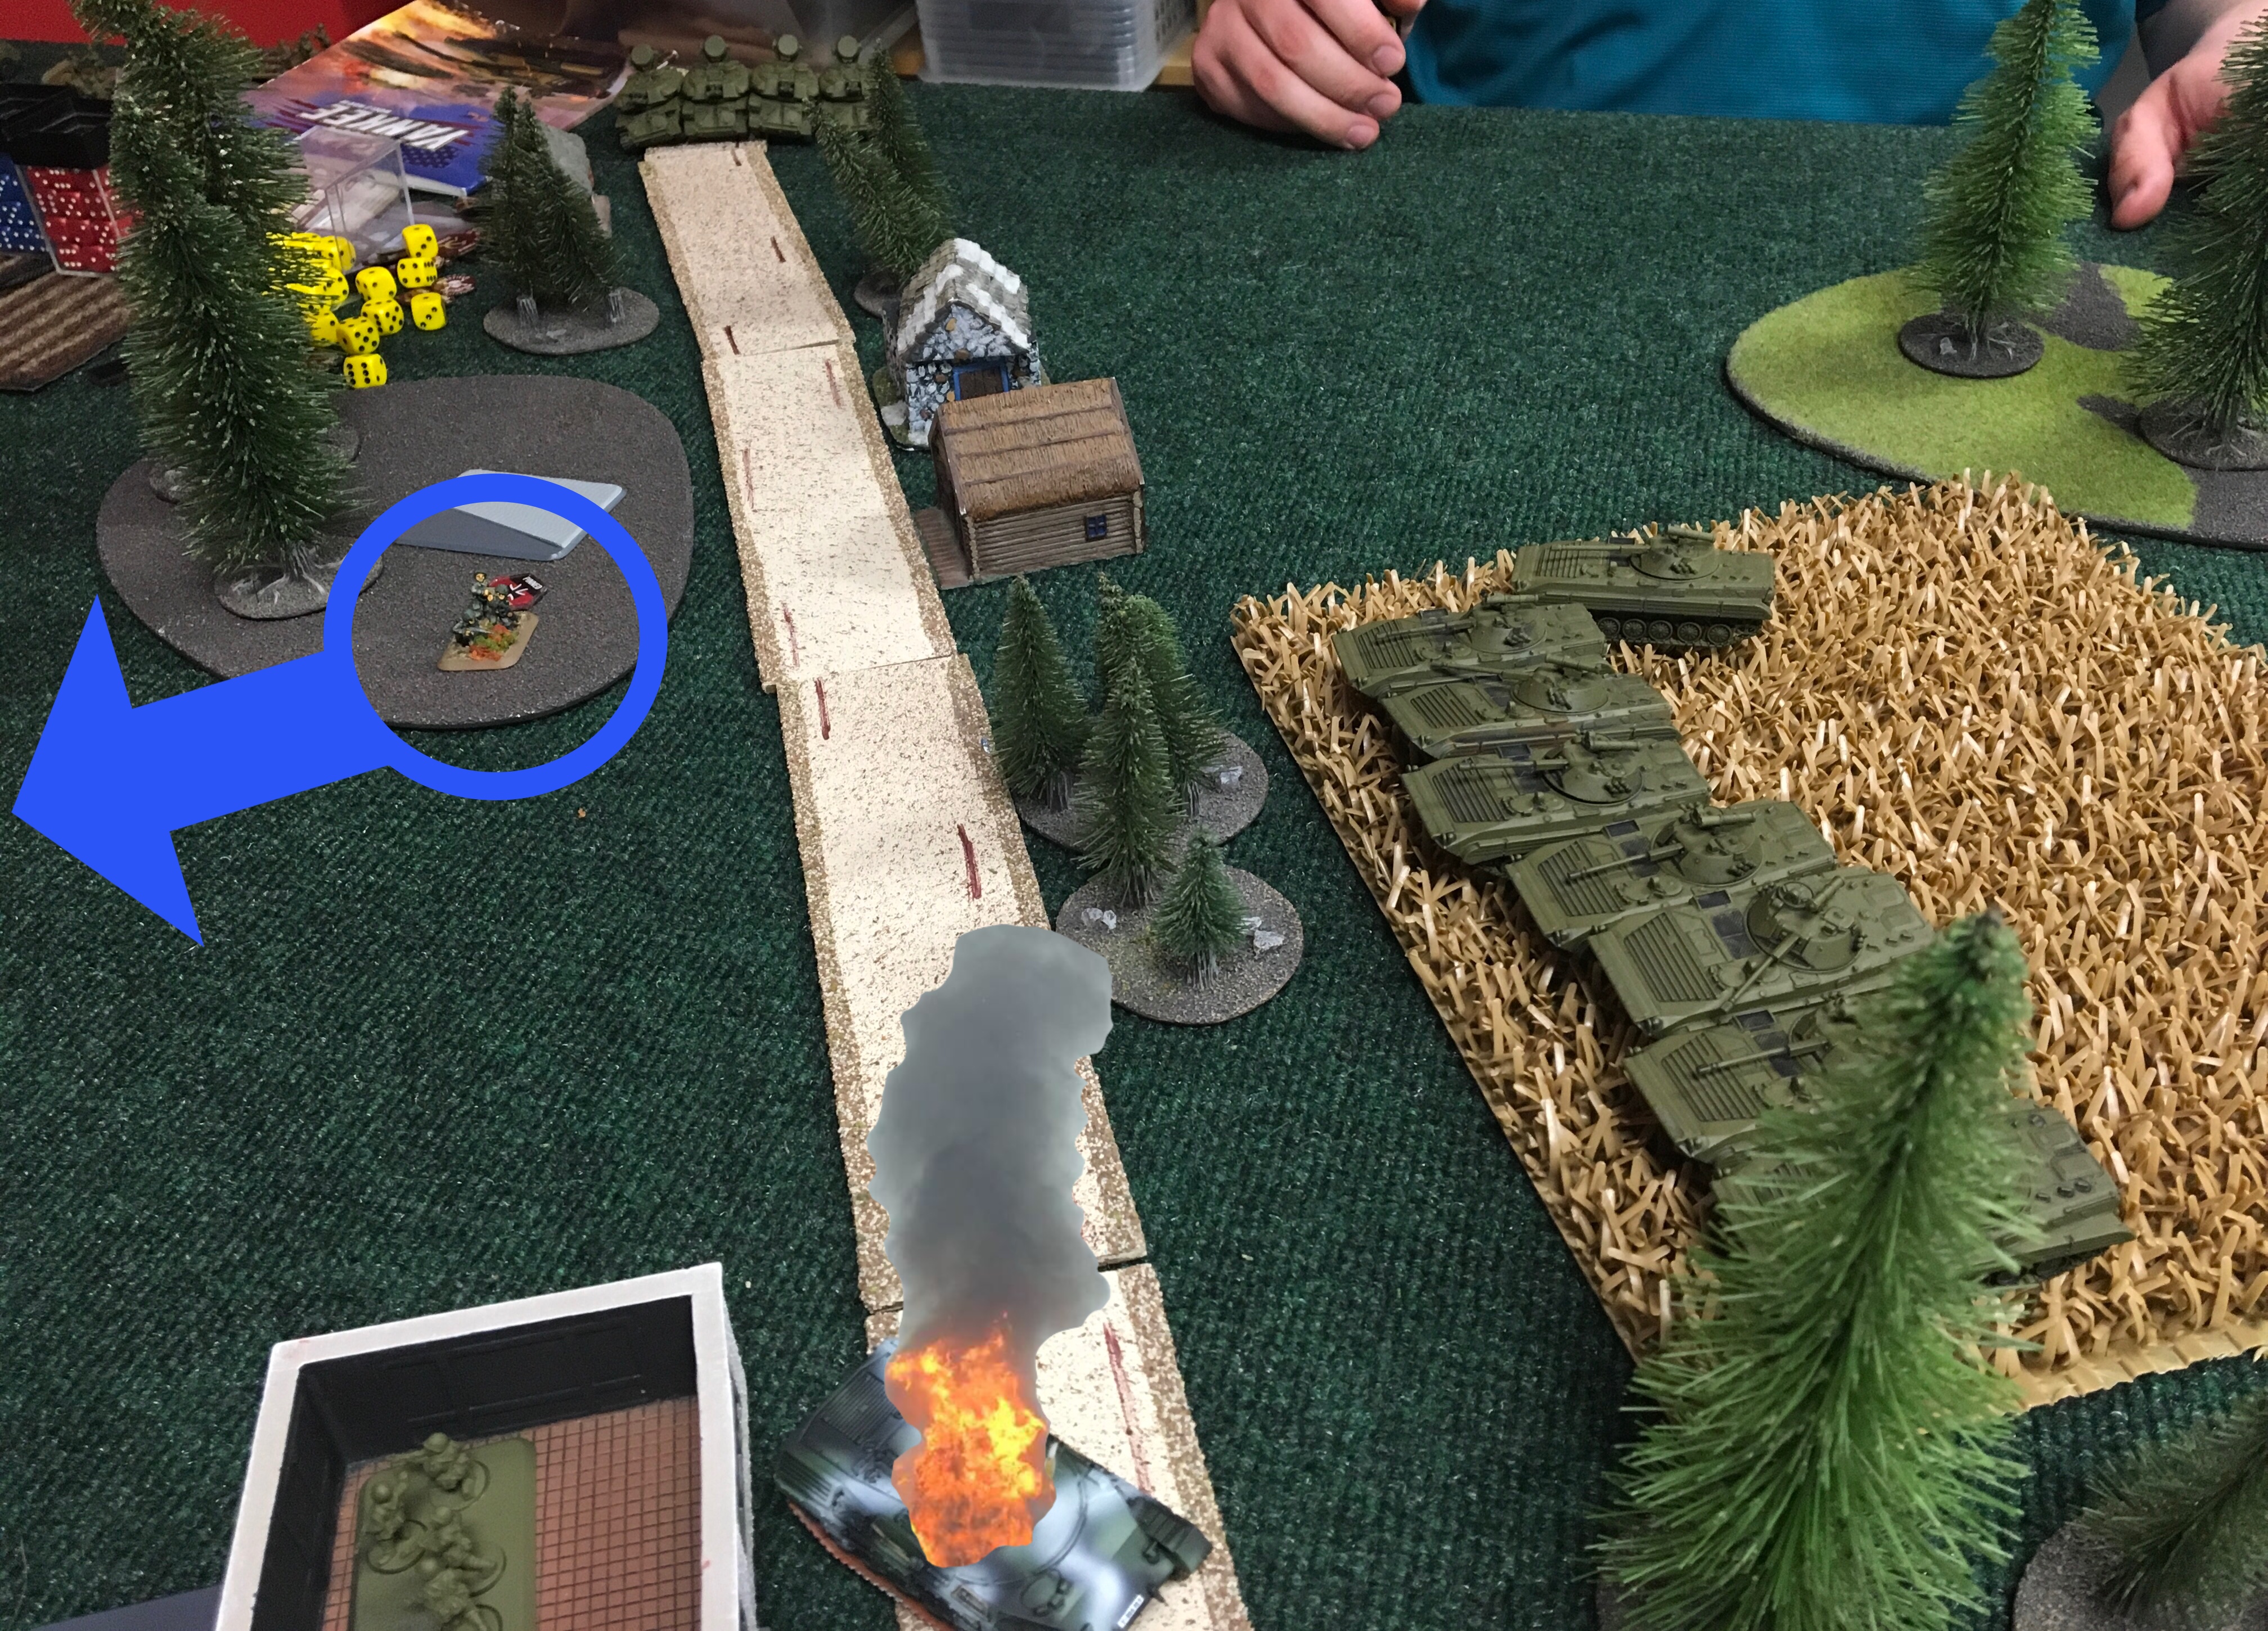 Hauptmann Von Stein and his command group remain the sole surviving members of the Kampfgruppe. Obtaining assistance from the German underground, Von Stein escapes Soviet operatives to return to NATO held territory.
Jimminy kriminey, that was a slog!!! This was my first 100 point game of Team Yankee and I walked away a bit exhausted. I never seemed to have enough firepower to actually turn the tide, and it always seemed like I was doing my best just to stay above water. I never felt I was truely losing, but it was difficult to see a path to victory. I had a number of turns where I dealt significant damage, as when the Marders and Luchs took out a BMP platoon or when I received the Leopard 1 platoon from reserve which showed up directly behind the T-64s. At the same time, though, having the Gepards removed the first turn was disconcerting, and no matter what I threw at the infantry hordes, nothing seemed to damage them significantly.
In retrospect, I believe I put too much faith in the Leopard 2 survivability and should have had them more mobile. Further, given my opponents penchance for Soviet hordes, I should have brought the LARs in this list, Using minelets against the BMPs, smoke to protect the Gepards, and artillery barrages to pin down the infantry, probably would have worked alot better. Also, a platoon of Fliegerfaust would have been great against the late game arrival of the Hinds. They could have stayed dug in for most of the game and discouraged Soviet air harassment of my objective defenders. Well, at least my commanding officer survived, if barely.
I will say this, though, after playing against a Soviet infnatry horde list I definitely want one for the Russian force I am building. They aren’t an instant win army, but they are demoralizing to an opponent when no matter how much they kill the horde just keeps coming.
Where are we going?
Brandenburg!!!
When?
Real soon!!!
Battle Report Author
Army Lists Used In This Battle
Recommend Commander For Commendation
Share this battle with friends
Enoch RootWins

Maybe we need to gang up on Enoch? Great report, as always!
I love the presentation, pity you couldn’t win
yeah agree with Mr Nisbet, but next time you will know and wont forget it, mistakes are the best way to learn… unfortunately
love the graphics, shame about the loss, oh well
great report, some cool graphics, shame about the loss.
Great graphics!
Don’t worry to much about the objective challenge, Each time we play we learn more!
Thanks M. Nisbet. I just went back and re-read the Spearhead rules and saw that in the last paragraph. Good catch.
Great report. The graphics are awesome. Bigger battles wear me out too.
excellent report
You lose, monkey boy!!
A really good report, Stone. But how did the Reds spearhead onto the objectives? You’re not allowed to come within 16″ of an objective that isn’t in your deployment zone.
Nice paint scheme on your forces Stone. Good report.