Fought At Niederbayern
2224 days 10 hours 23 minutes ago
+++ CAUTIOUS RECON
View Linked Report - CLICK HERE 60 POINTS
Points were set at 60 points, with the added restriction that only Main Battle Tanks (MBTs) and Recce units could be selected.
We rolled of to see who was defender and who was attacker and Frym3n was defender.
+++ ATTACKER SOVIET
1-я гвардейская танковая армия
1st Guards Tank Army
9th Red Banner Order of Suvorov Babruysk-Berlin Tank Division, Riesa (call sign – Strelka)
T-64 Tank Battalion 60 points
HQ
HQ – T-64 6
FORMATION UNITS 54
Tank Coy – 4x T-64 19
Tank Coy – 4x T-64 19
Tank Coy – 3x T-64 13
BMP-2 Recce 2x BMP-2 3
+++ DEFENDER WEST GERMANS
WEST GERMAN II CORPS
German 10th Panzerdivision
Marder Panzergrenadier Kompanie 60 points
HQ 11
HQ – Leopard 2 11
FORMATION UNITS 46
Leopard 2 Panzer Zug 2x Leo 2 22
Leopard 2 Panzer Zug 2x Leo 2 22
Luchs Spah Trupp 2x Luchs 1
Luchs Spah Trupp 2x Luchs 1
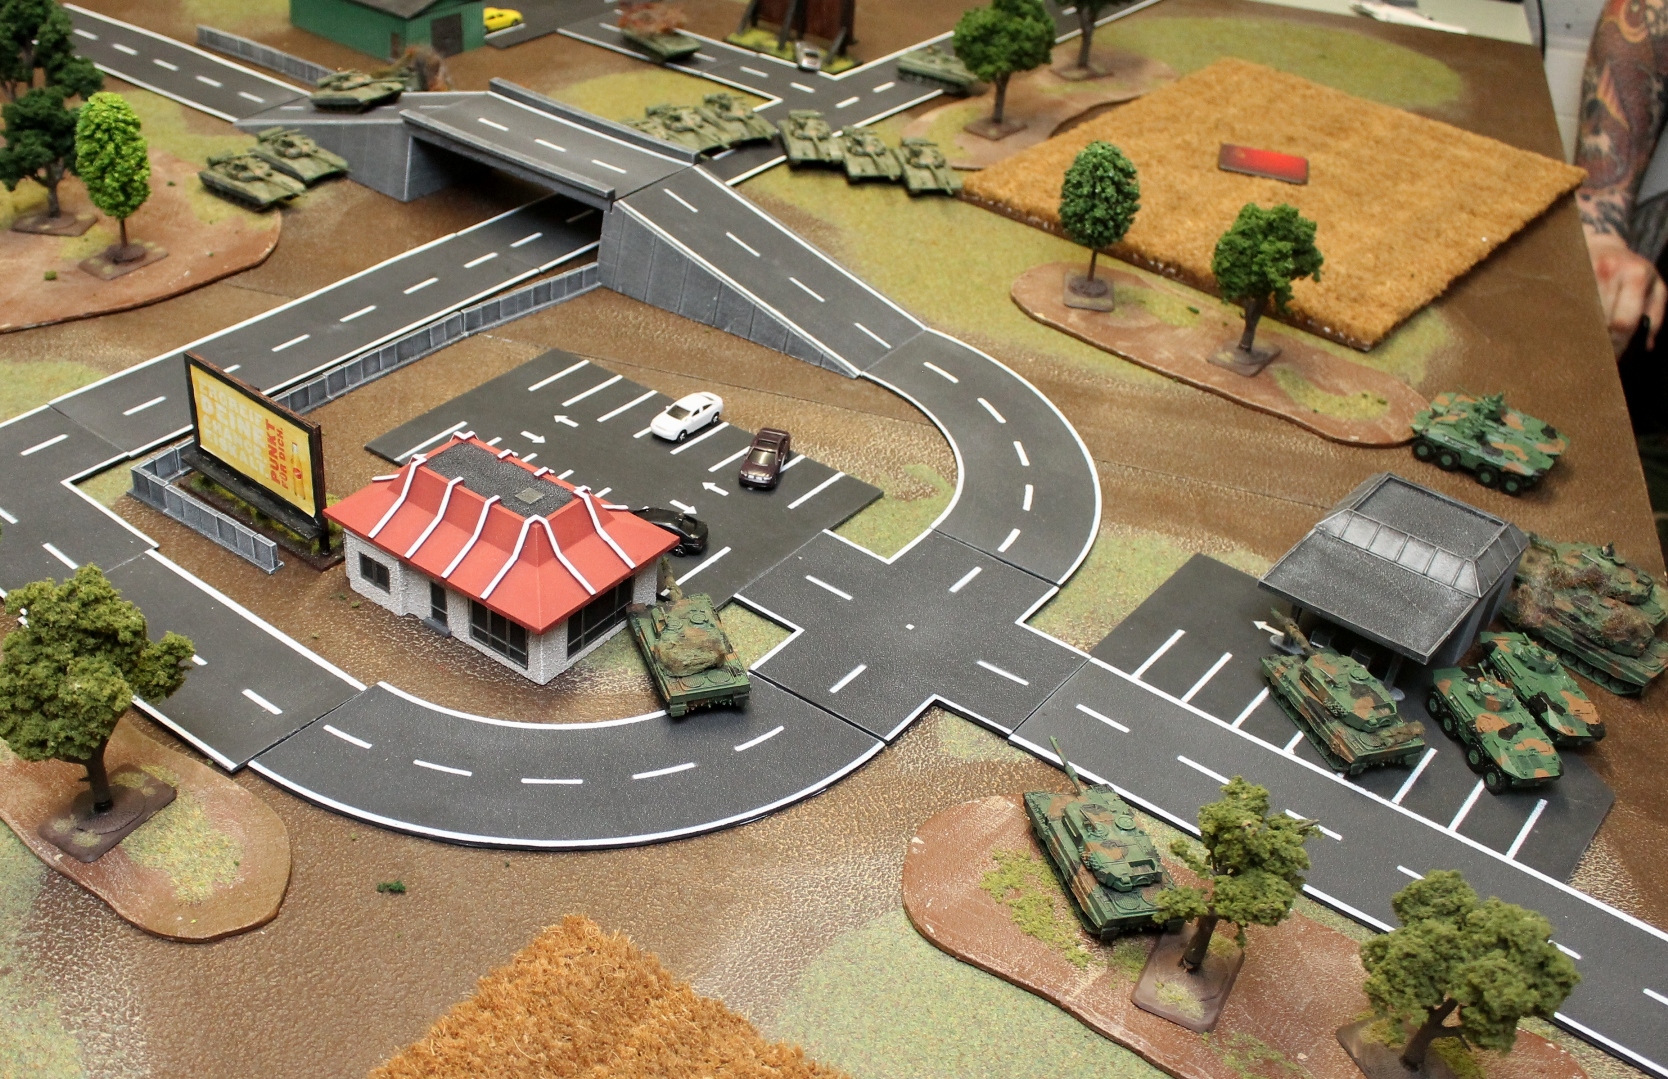
+++ WEST GERMAN TURN 1
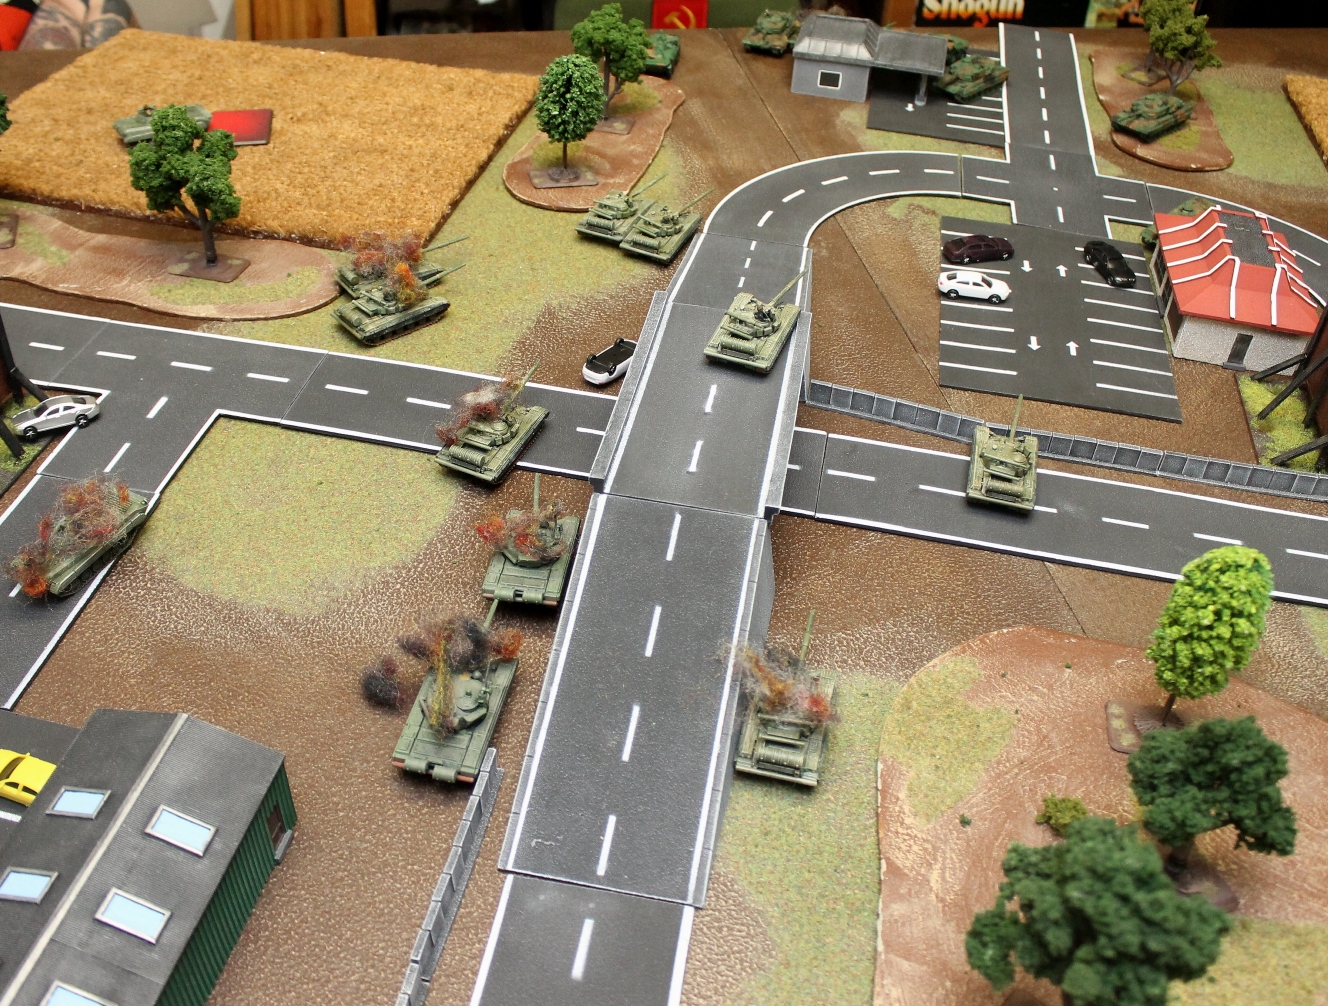
Defender gets 1st turn and this suited the German commander well as the Leopard 2 tanks are very good MBT.
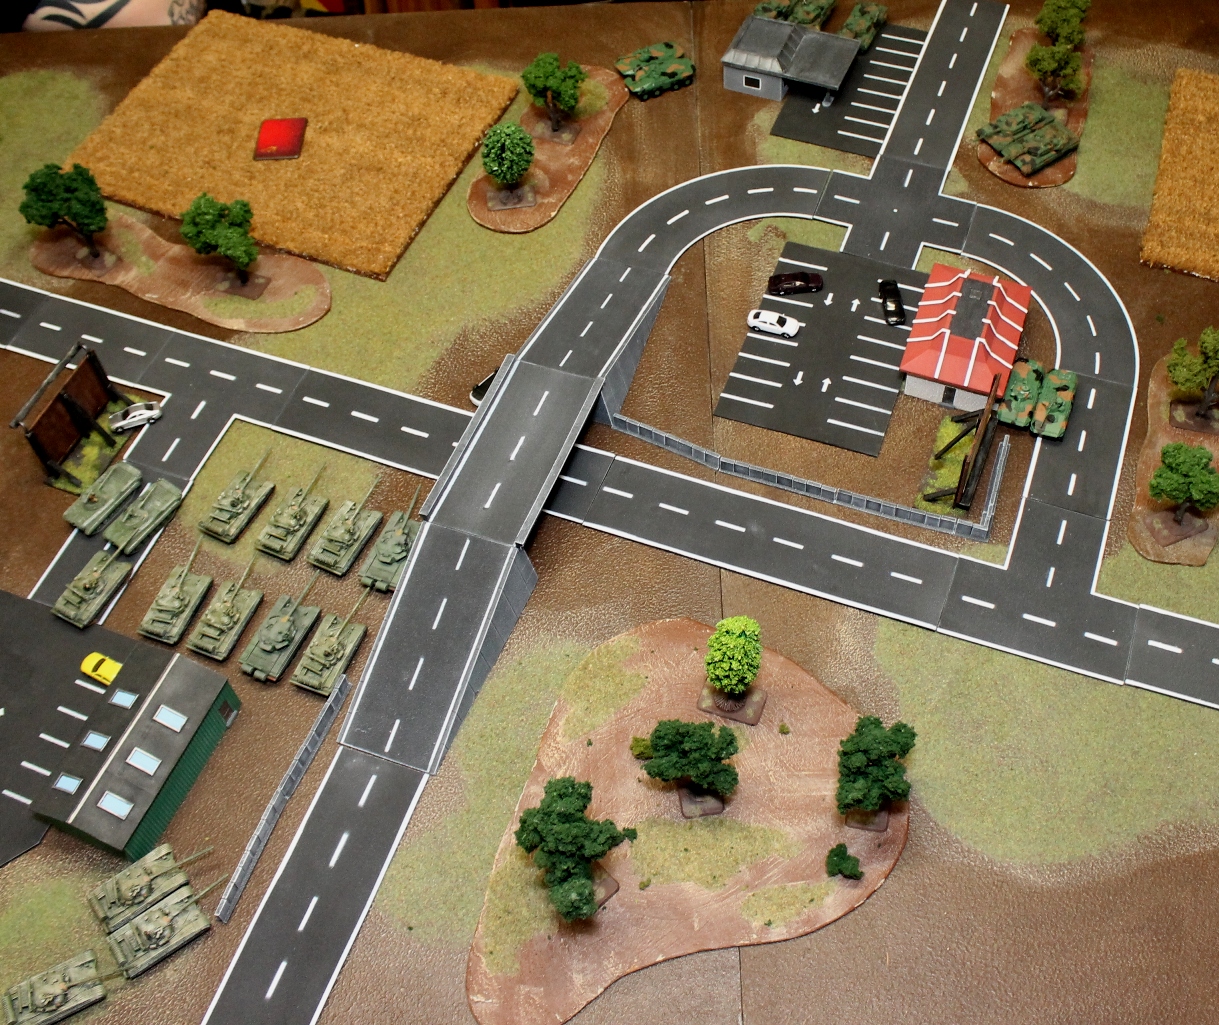
The Soviet's larger force had a hard time with terrain so all the Leopards managed to get LOS. Even one under the overpass.

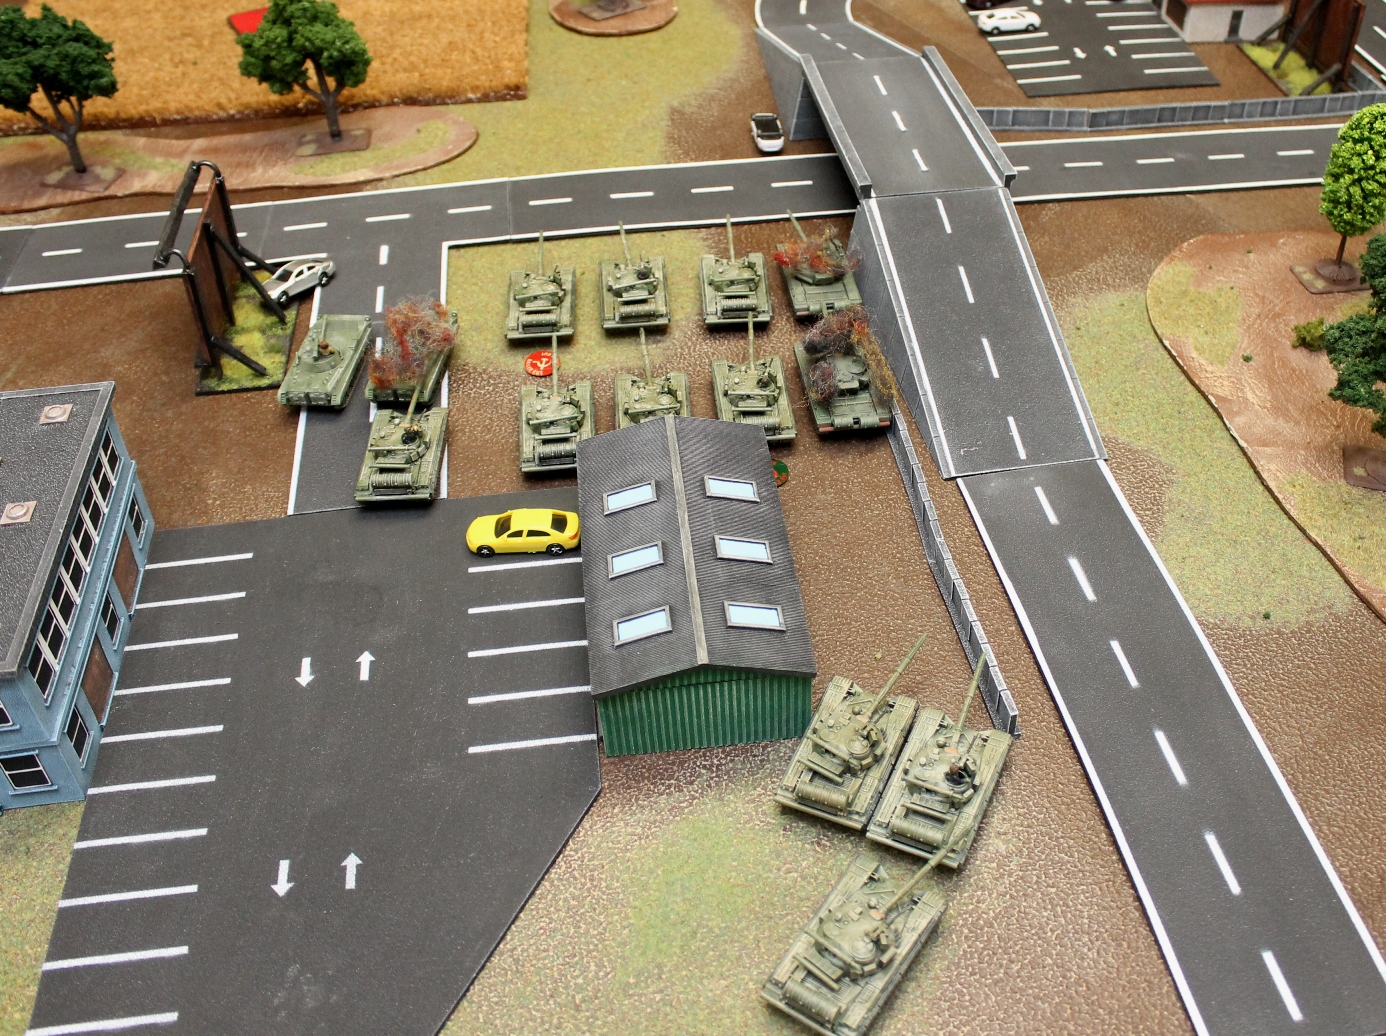
Shooting was relatively successful, 3 tanks destroyed and 2 bailed as well as one BMP-2. One T-64 unit had to test morale and the Formation Commander joined them as they had one active and one bailed tank remaining. The dreaded "1" was rolled, costing the Soviets an additional 3 tanks and their commander!
+++ SOVIET TURN 1
Down 6 tanks and 1 BMP-2 already, this was going to be hard.
Quickly redeploying the T-64's engaged the West Germans as well as they could.
But shooting was less than impressive, with only one Leo 2 destroyed. It did cause a morale test but the Germans easily passed their's.
+++ WEST GERMAN TURN 2
The Germans hardly needed to move and poured fire into the T-64's taking out three more of their number.
+++ SOVIET TURN 2
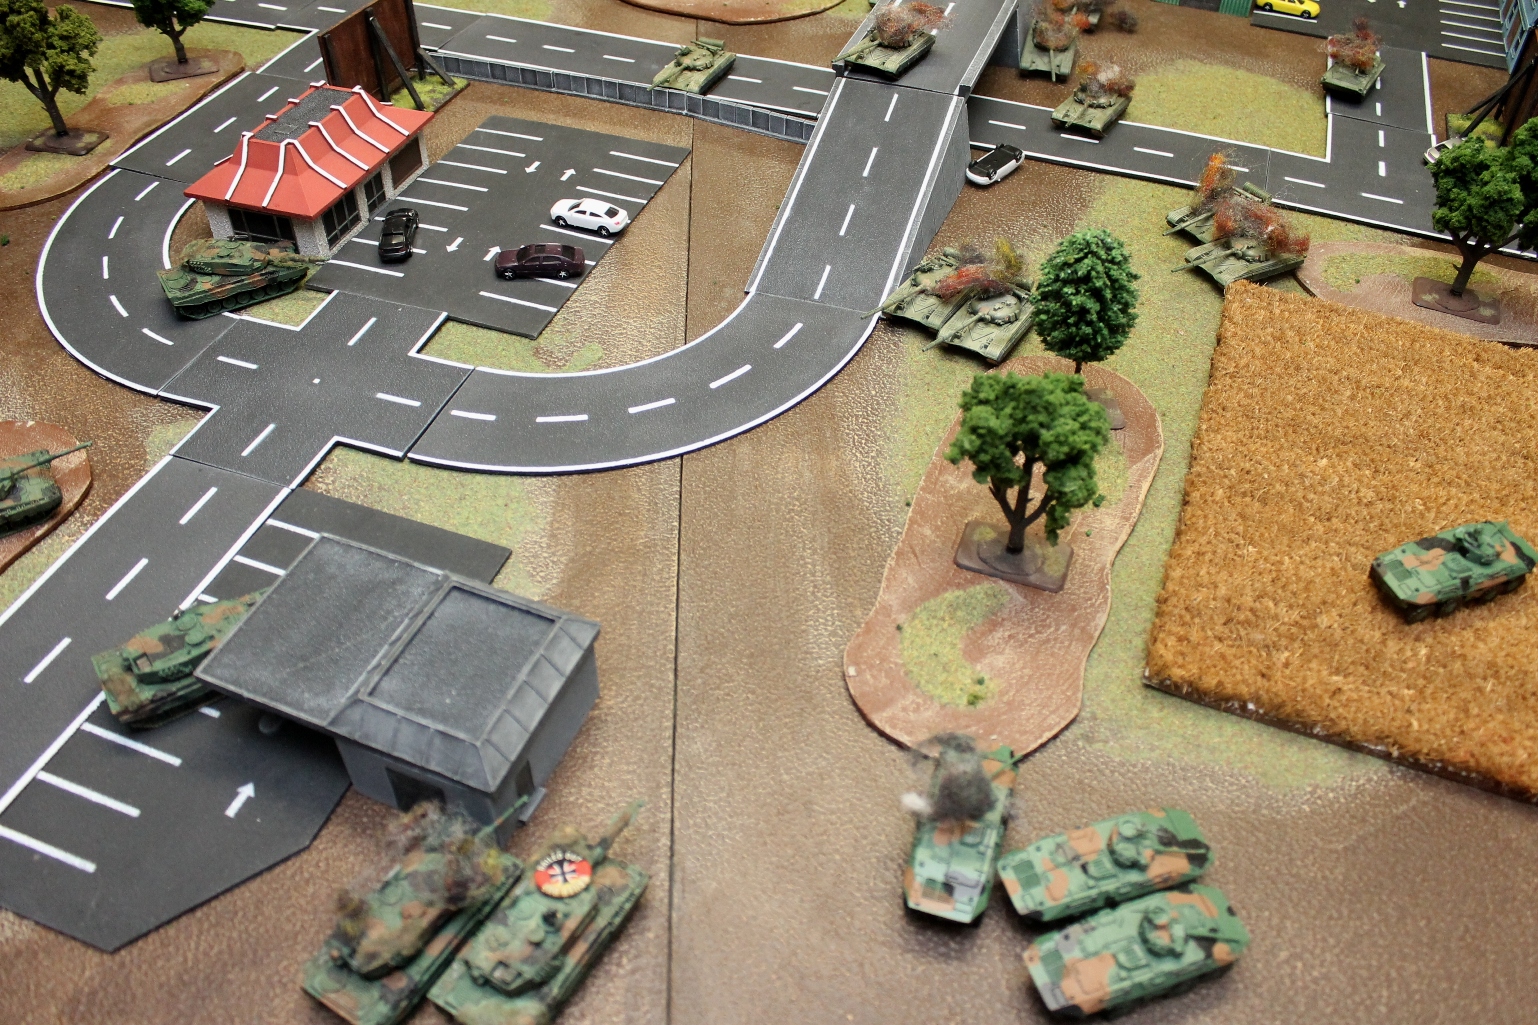
The Soviets had now 4 tanks and one BMP-2. The BMP-2 ended on the objective and destroyed a Luch but the other one remained. The T-64's poor shooting only managed to bail a single Leopard II.
+++ WEST GERMAN TURN 3
The bailed Leopard failed to remount.
The Germans moved their Luchs to deal with the BMP-2 while the three active Leopards 2 fired against the T-64's taking out every tank except a single T-64.
With no formation unit left in good spirits and the no formation commander the Soviets lost.
+++ Well that was a quick mission.
The first turn was a killer, with the added insult of the formation commander leaving the field and taking 2 other tanks with him. The Soviets never recovered from that.
With the smaller size of deployment it was impossible to concentrate on only part of the German forces so they had the advantage after the disastrous start.
Battle Report Author
Army Lists Used In This Battle
Recommend Commander For Commendation
Share this battle with friends
Frym3nWins

well presented AAR with complete information and supportive pictures
Great terrain set up (as familiar 🙂 )
Of course I am please with your fair play Red Alert 😉
What lies, up the top, controling faction WARSAW pact?? I think it’s NATO you will find. More Soviet propaganda
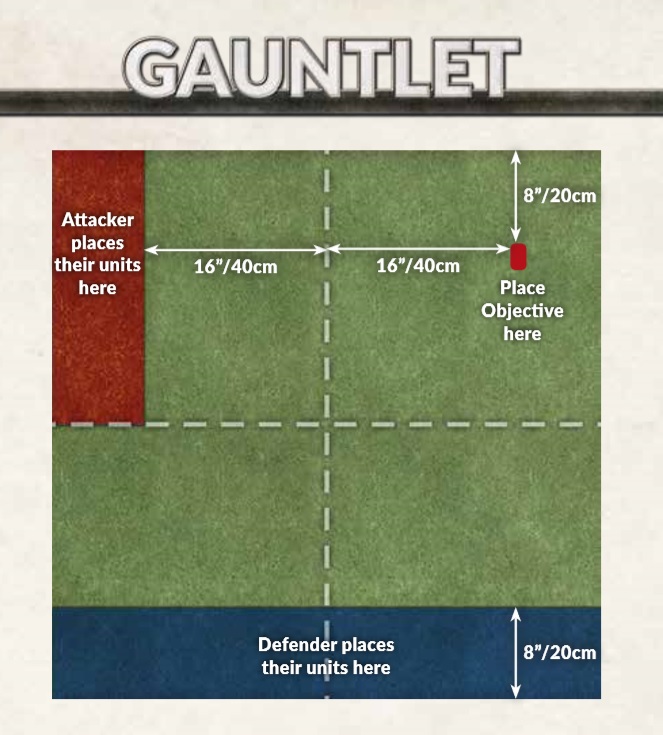
Gauntlet is one hell of a mission to try to win, unless you have a mass of terrain screening your advance.
Well fought Red!
I don’t think coming back was an option in that circumstance I’m afraid.
Did your best against a tough foe that doesn’t want a straight up fight. Salute
Tough loss, Comrade General
Nice report and great table set up, I need that overpass, yes hard luck on the first turn. But you fight on attitude has been commended
Man I love that terrain. Thanks for throwing one to the West Germans.
somedays you get the bear-somedays the bear gets you
Hard-fought, but a shame about the outcome! It’s a real challenge when you take significant losses before your first move. Fight on!
The Quick Missions have been fun to play. Great AAR. Thanks for sharing.
Very nice table Even better outcome Congratulations
Well fought commander. Keep the pressure on.