Fought At Hamburg
2228 days 14 hours 42 minutes ago
Hamburg by Daylight
80 POINTS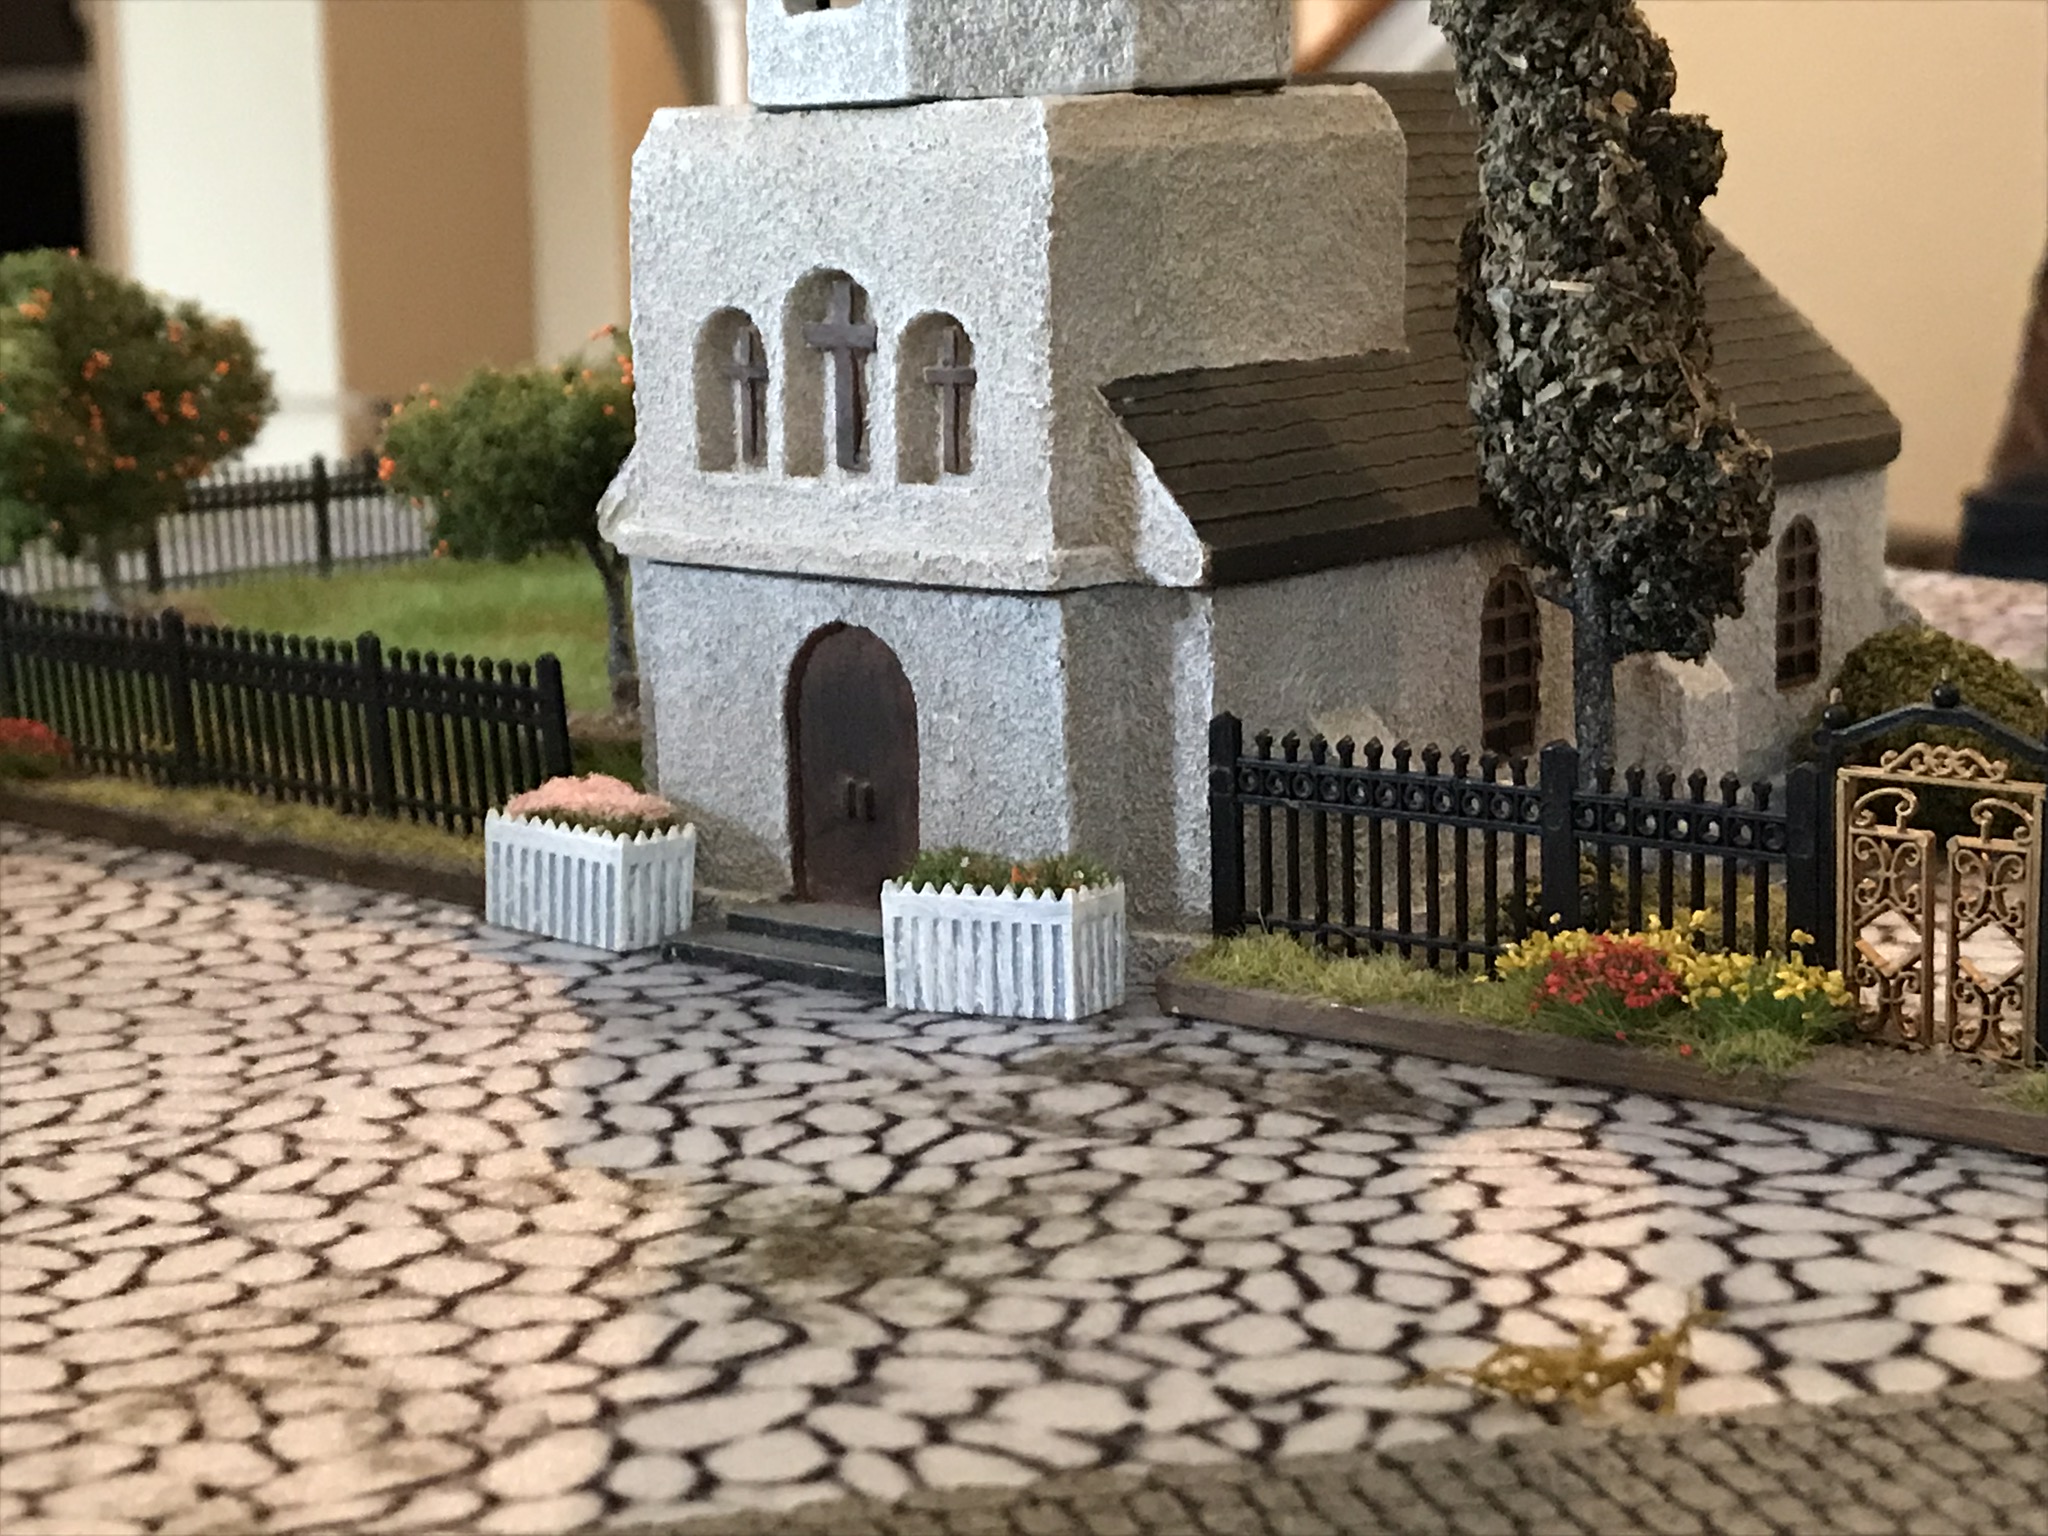
This was the second game we played and the successor to Hamburg by Night. The table stayed the same so we changed the Soviet list and changed the mission to the Amsterdam mission but played it in the Hamburg theater.
EDITORIAL COMMENT: Let me say at the outset that I am collecting WARPAC vehicles, but as it is taking some time, I proxied many vehicles for this game. If you're a purist I apologize, if you're an anorak, you'll just have to deal with it. Yes those are Panhards not BRDM's and yes those are SCW Int'l Brigades not Modern Soviets, but we managed a game none the less.
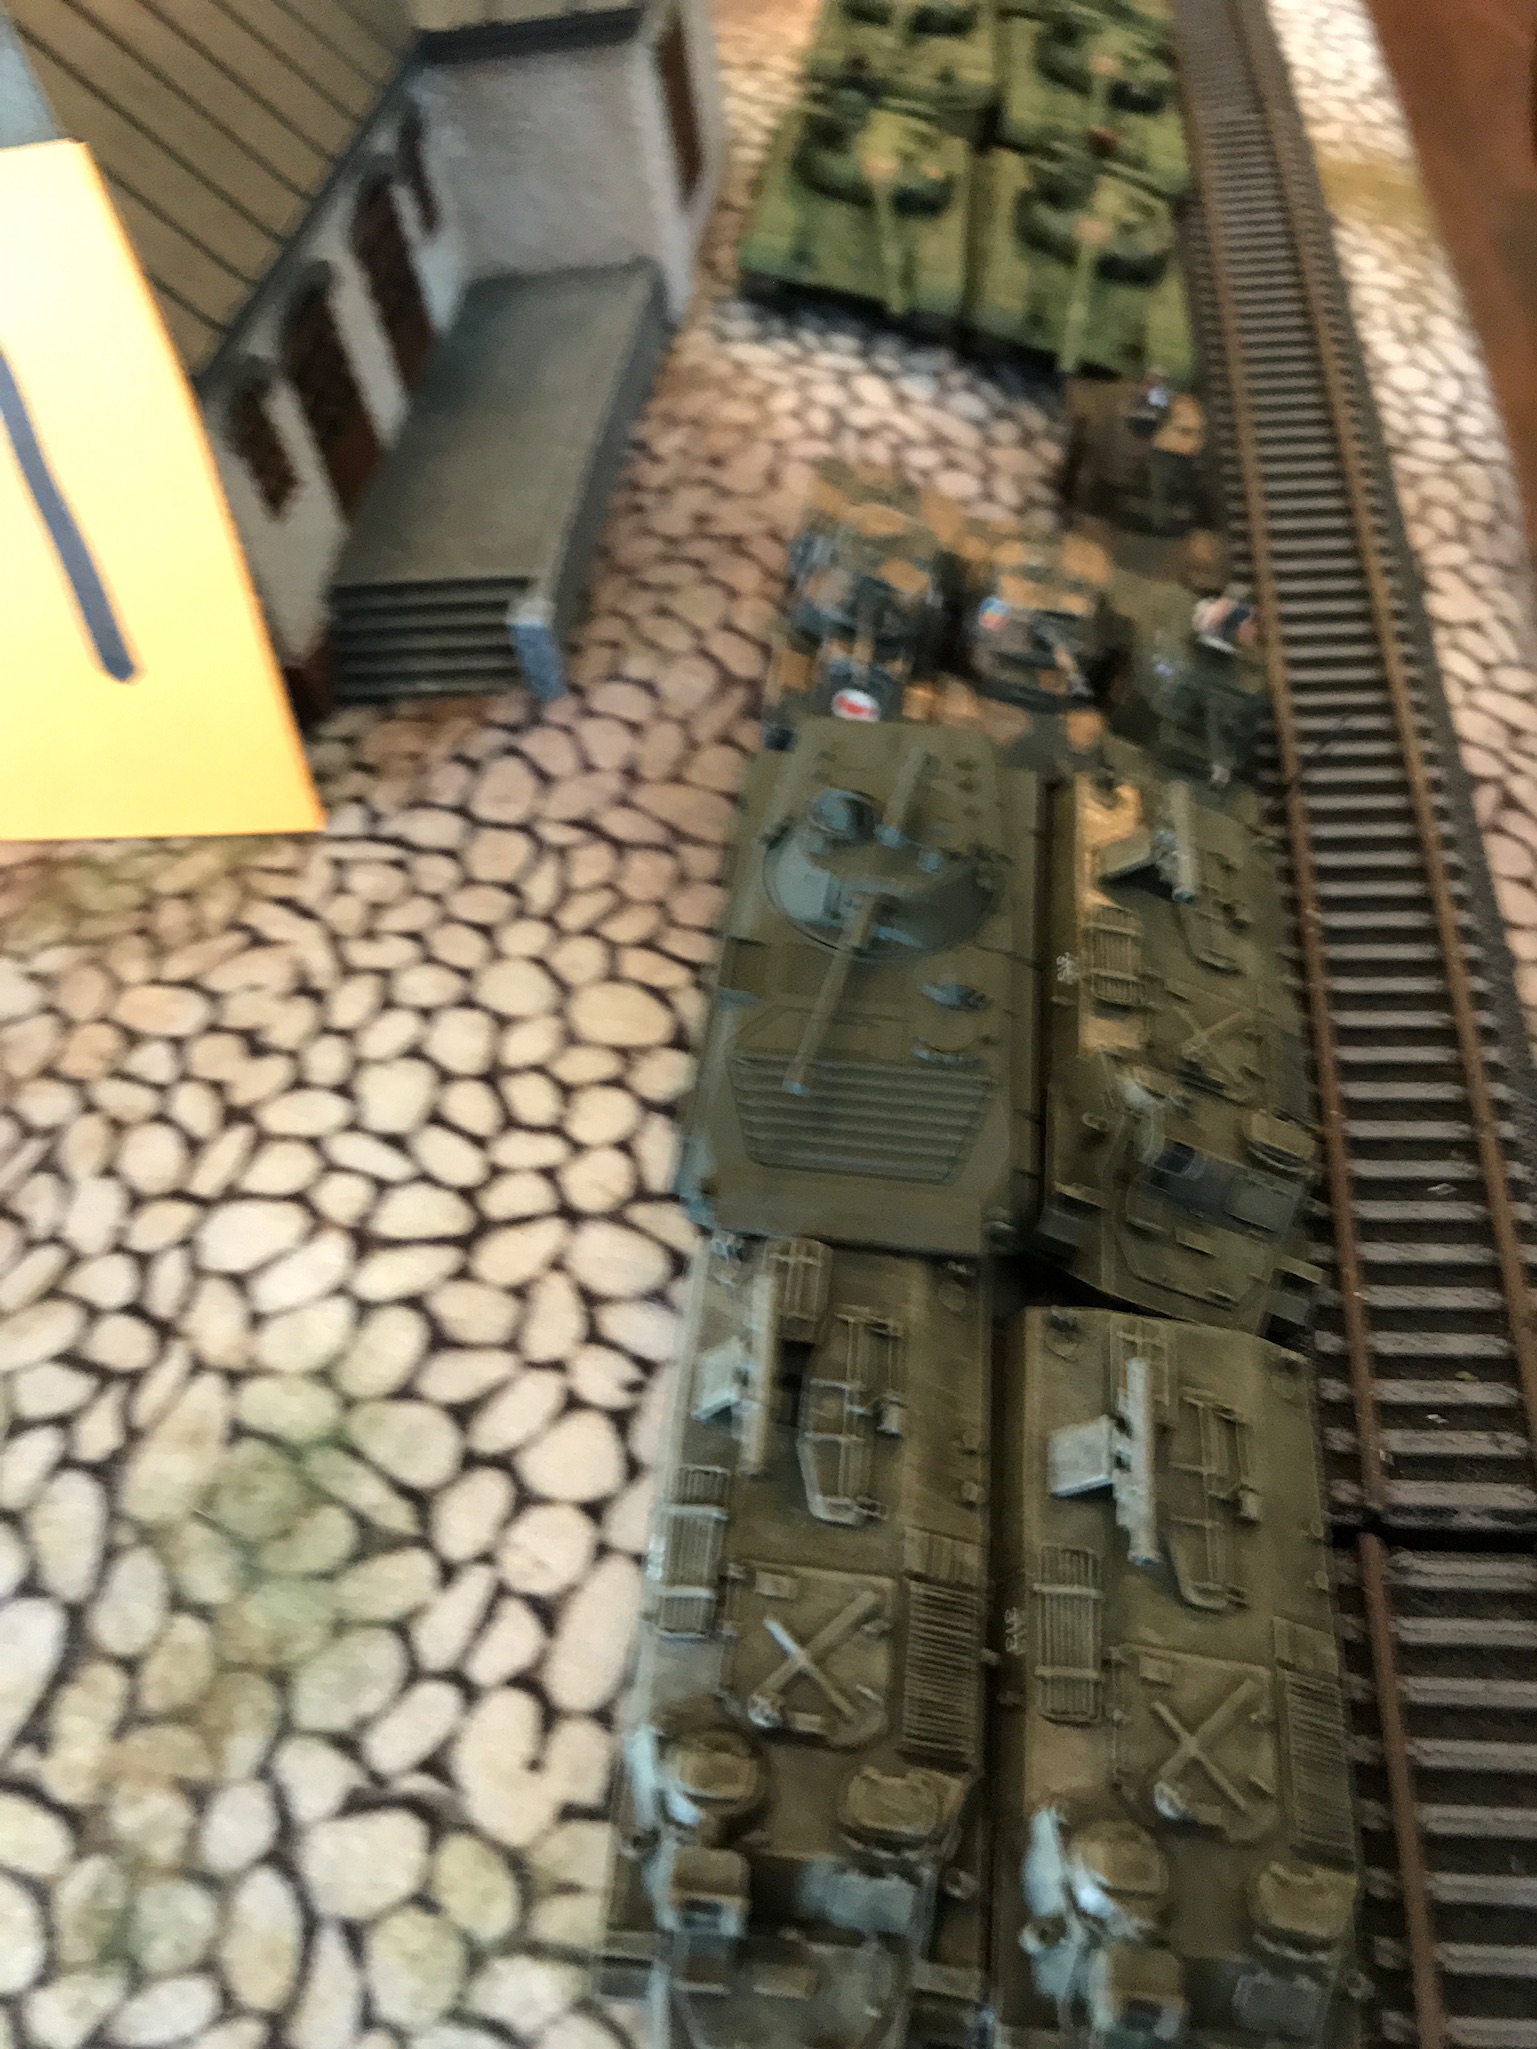
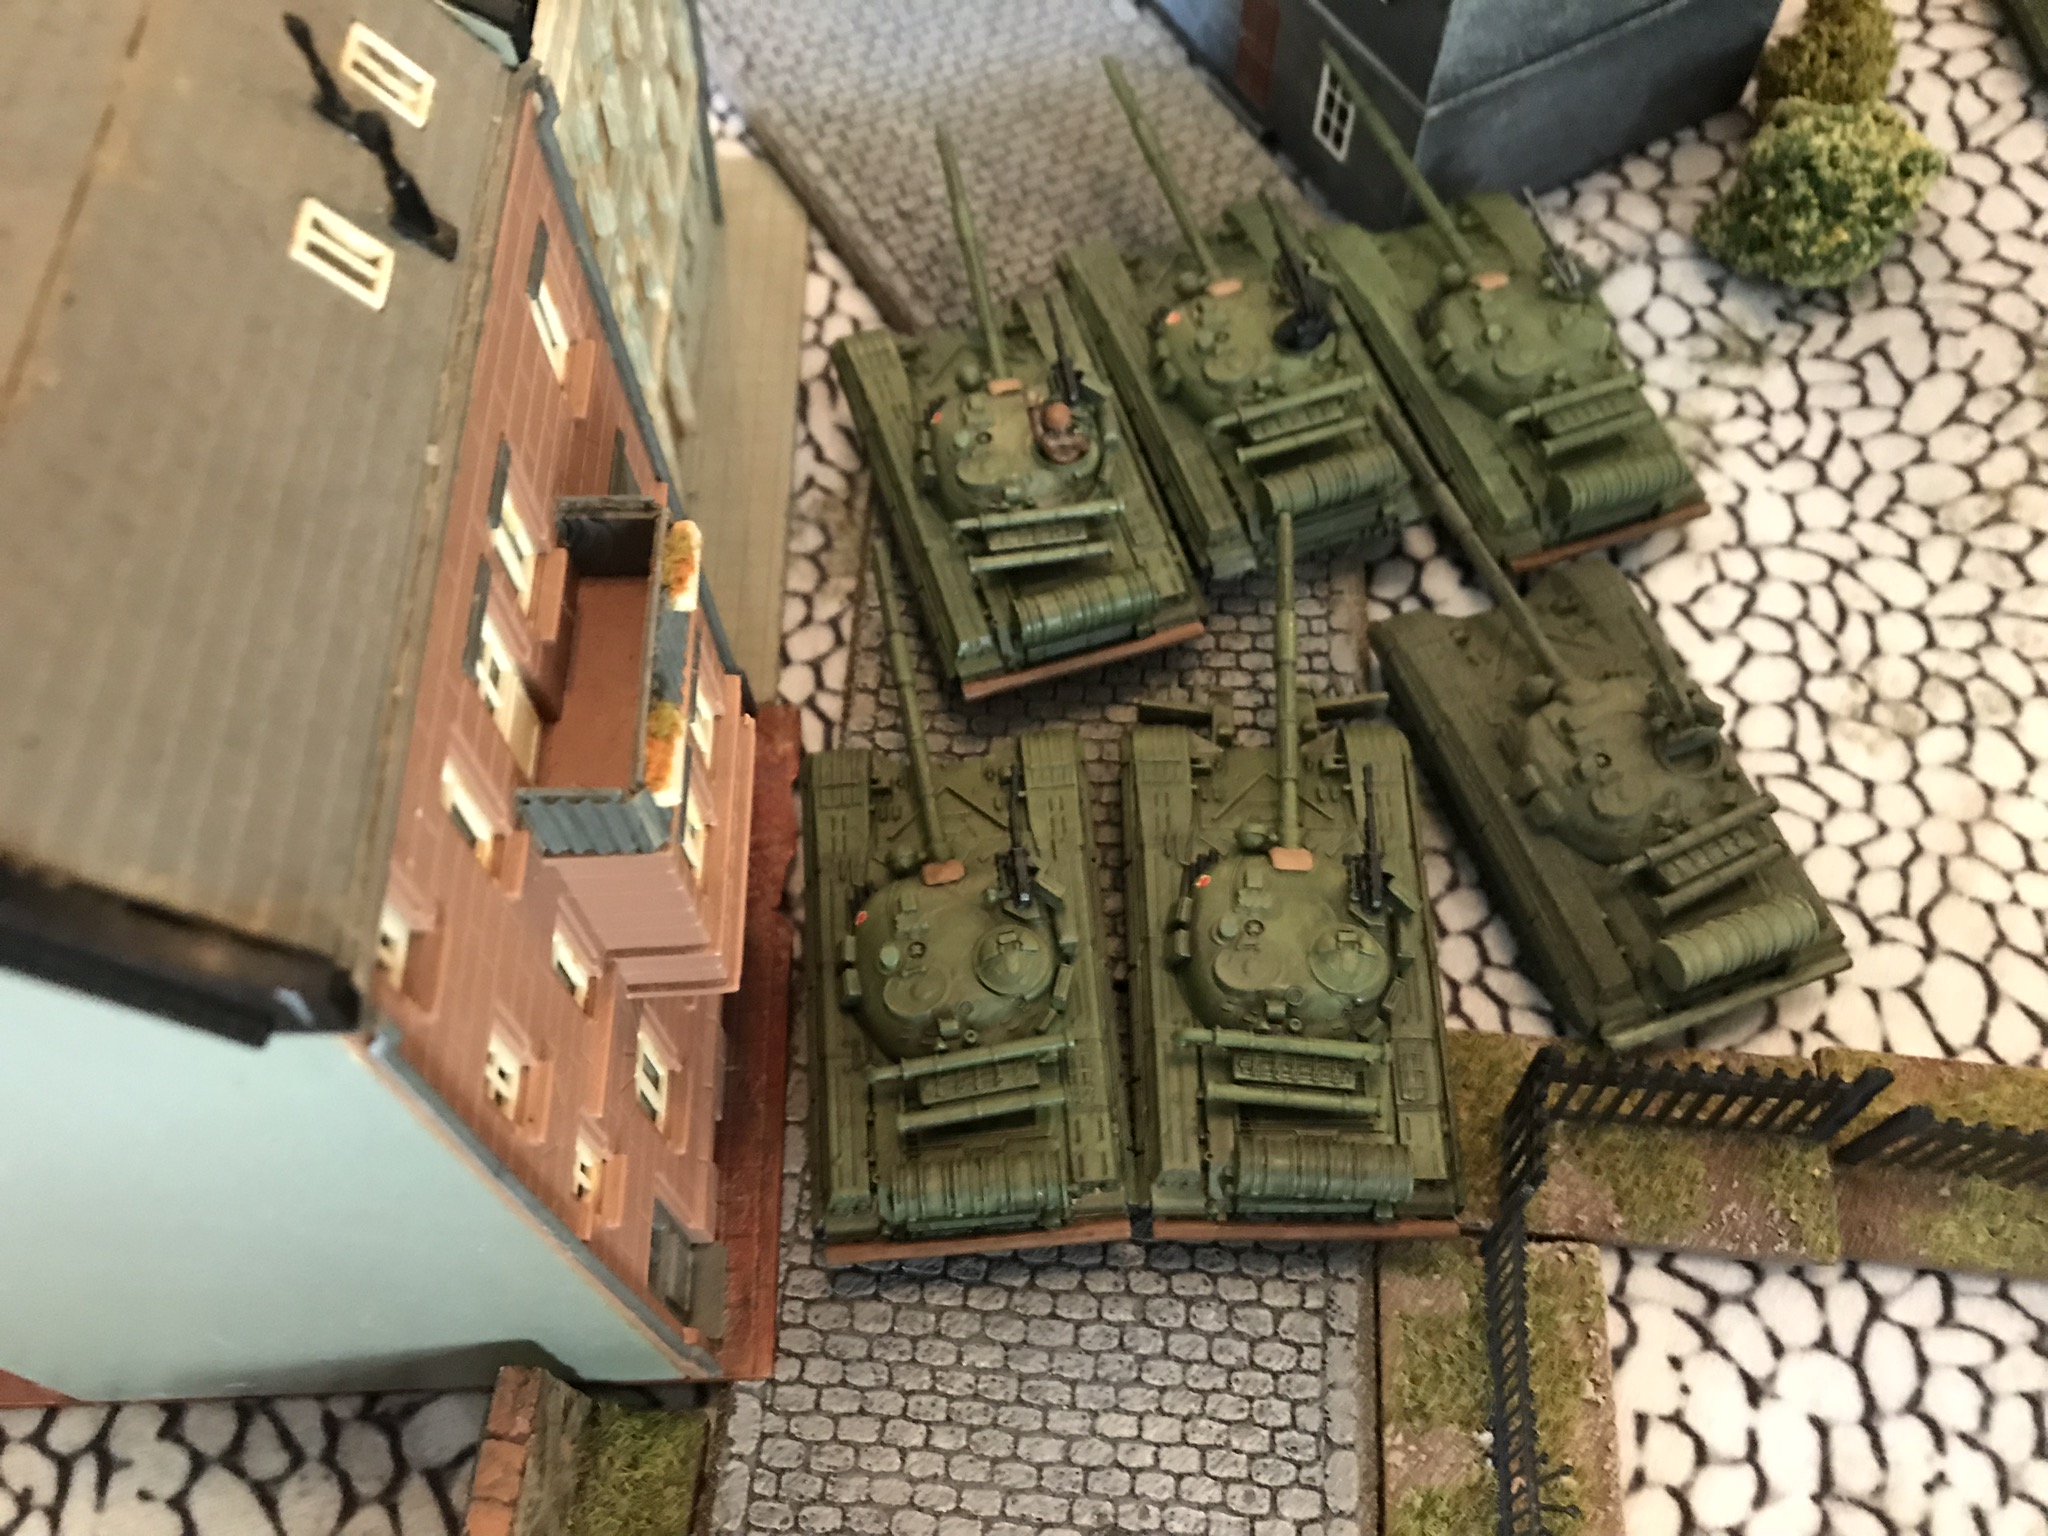
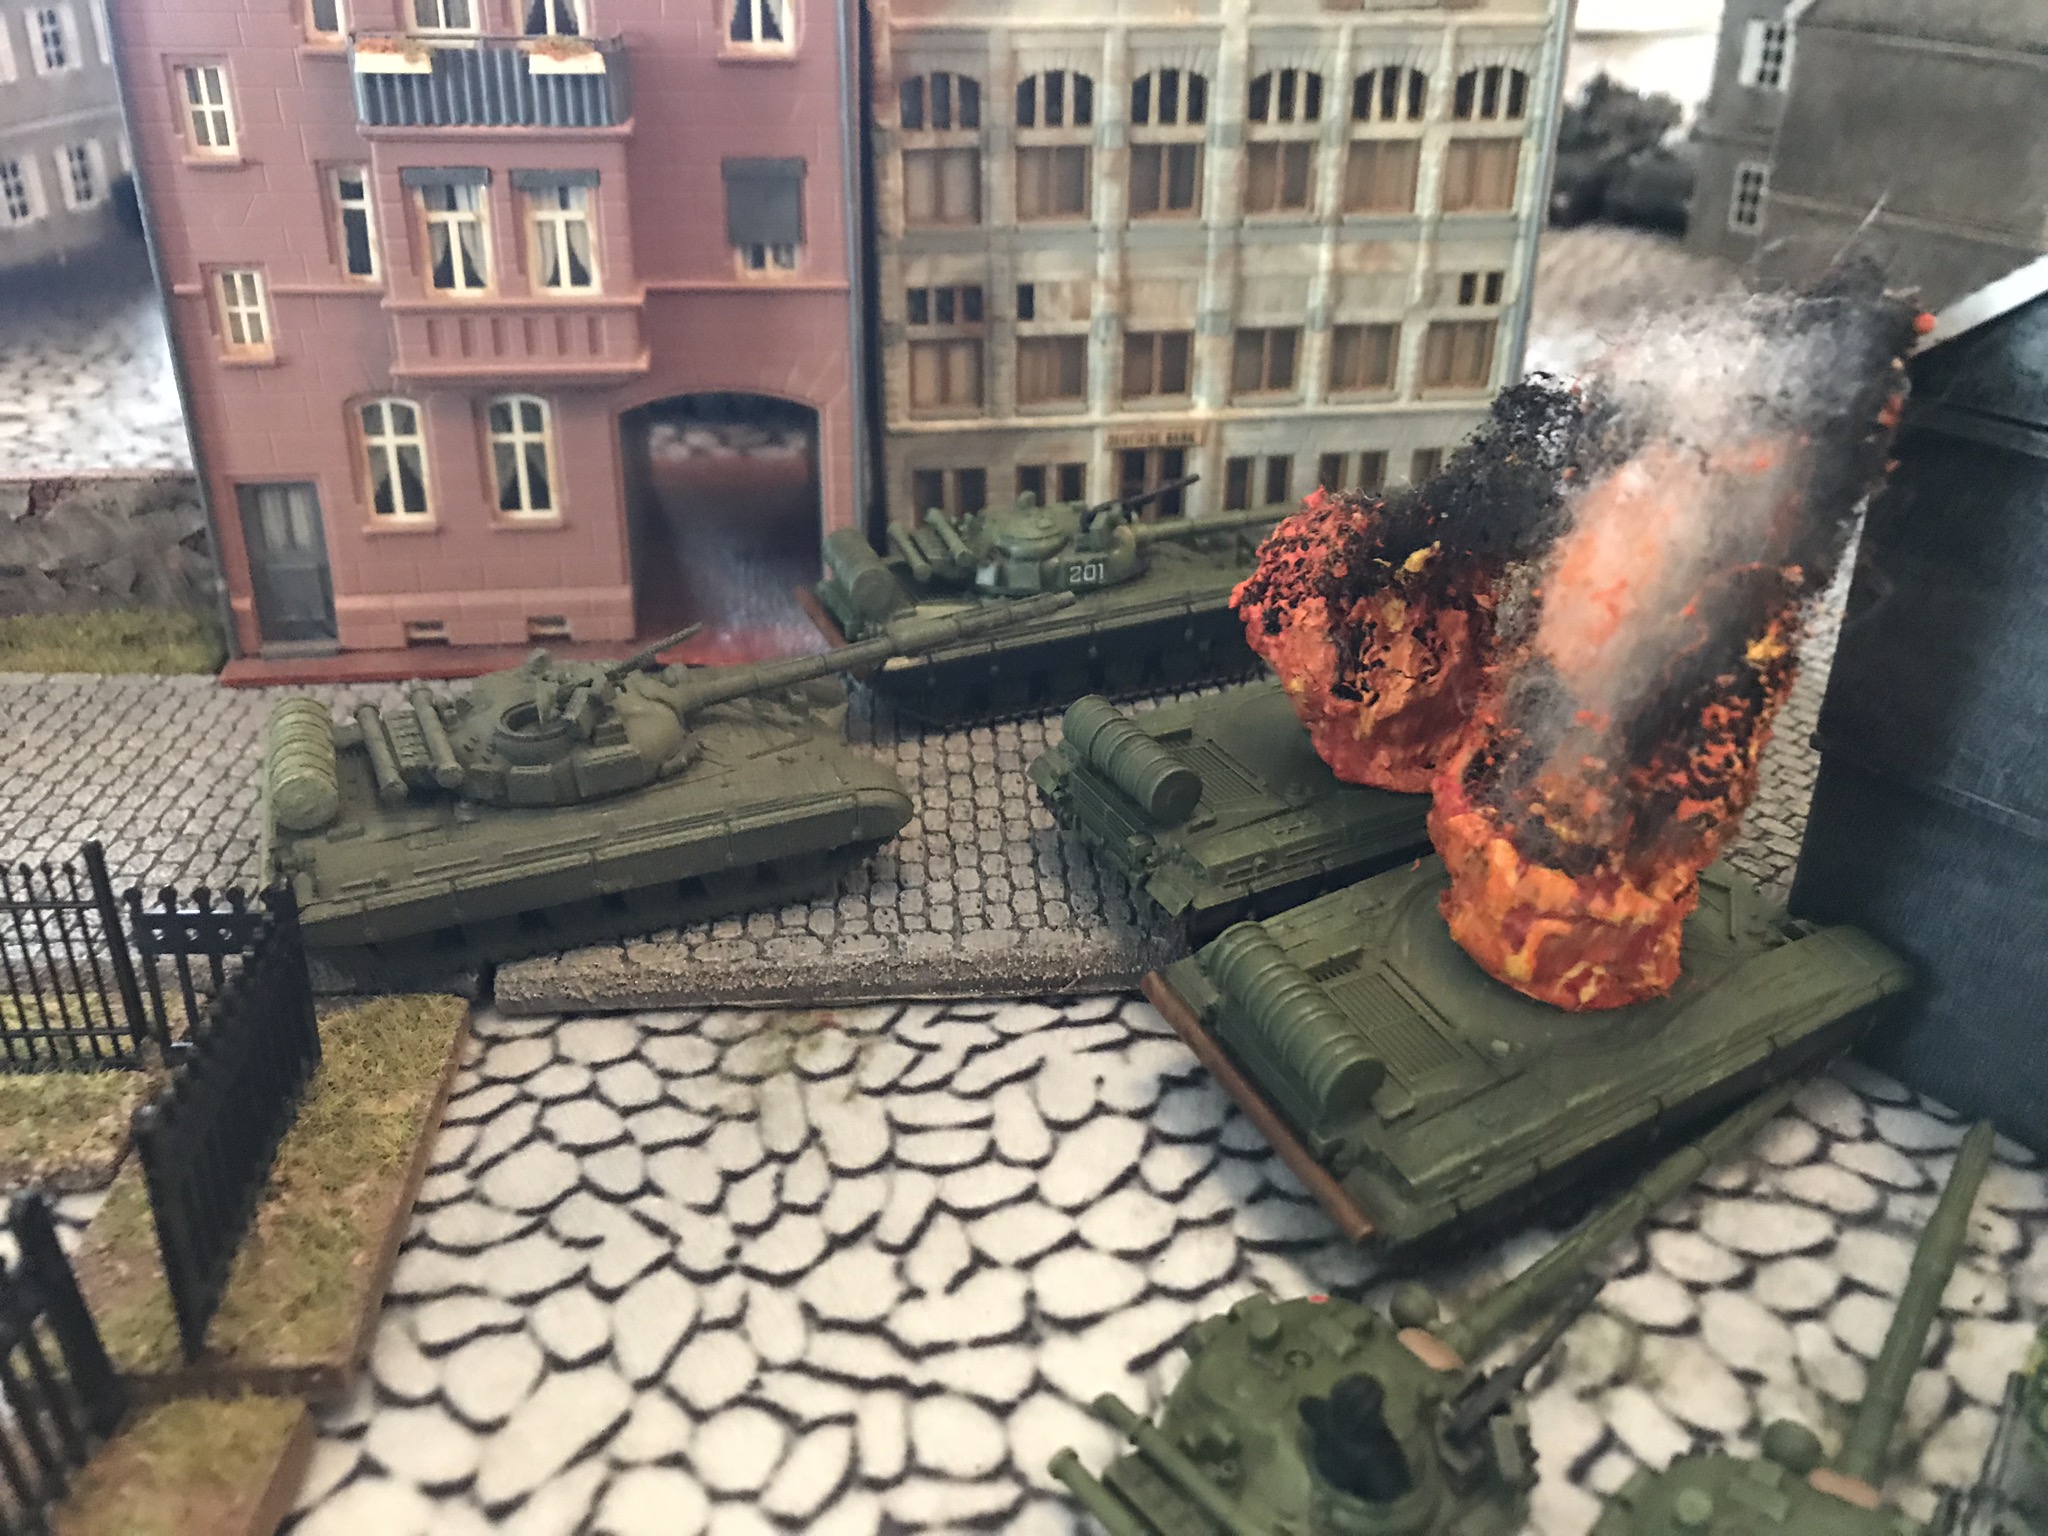
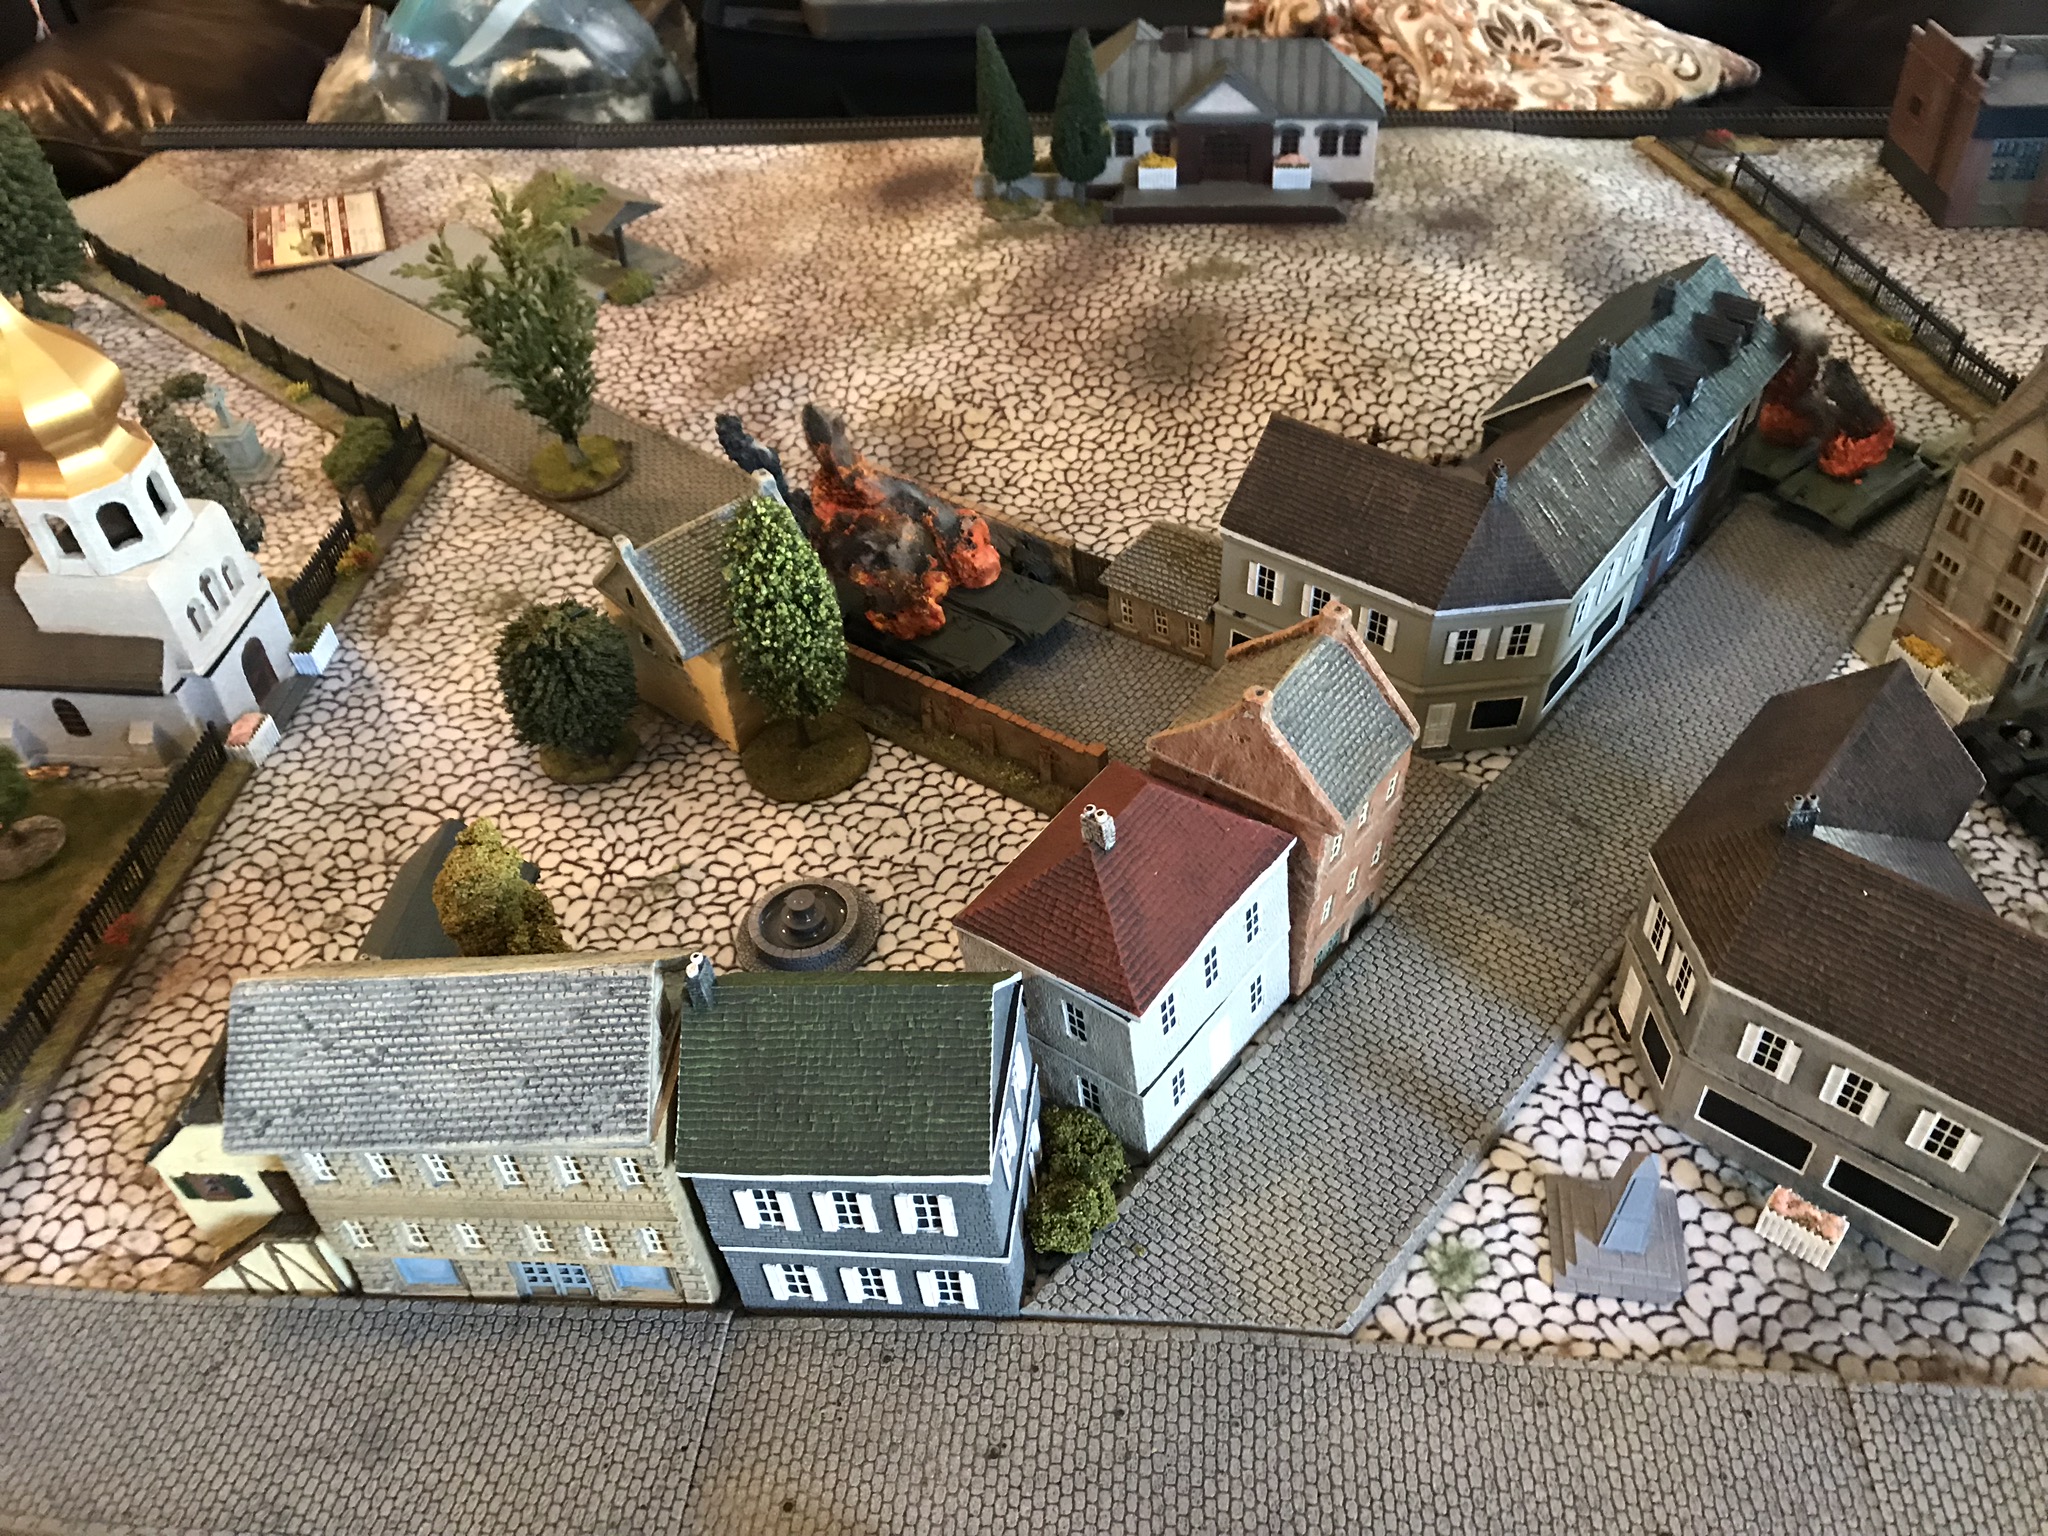
My Soviet opponent very cleverly exploited an oversight on my part. I had not read the Mission rules and did not realize that my deployment zone did not extend table edge to table edge. He did read them and above you can see his Spearhead move allowing him to move through the gap I left and move several platoons onto my side of the table on turn one. I was not happy with my oversight. He was able to find a gap between the buildings just large enough to rush vehicles through in single file. By the end of the Soviet turn he had managed to road dash a BMP-2 Platoon and the BRDM Platoon into my rear; literally into the FV-432 lager. He also chose to perform a strafing run with his Hinds on the FV 432's until he realized he couldn't do so given the proximity to his own troops.
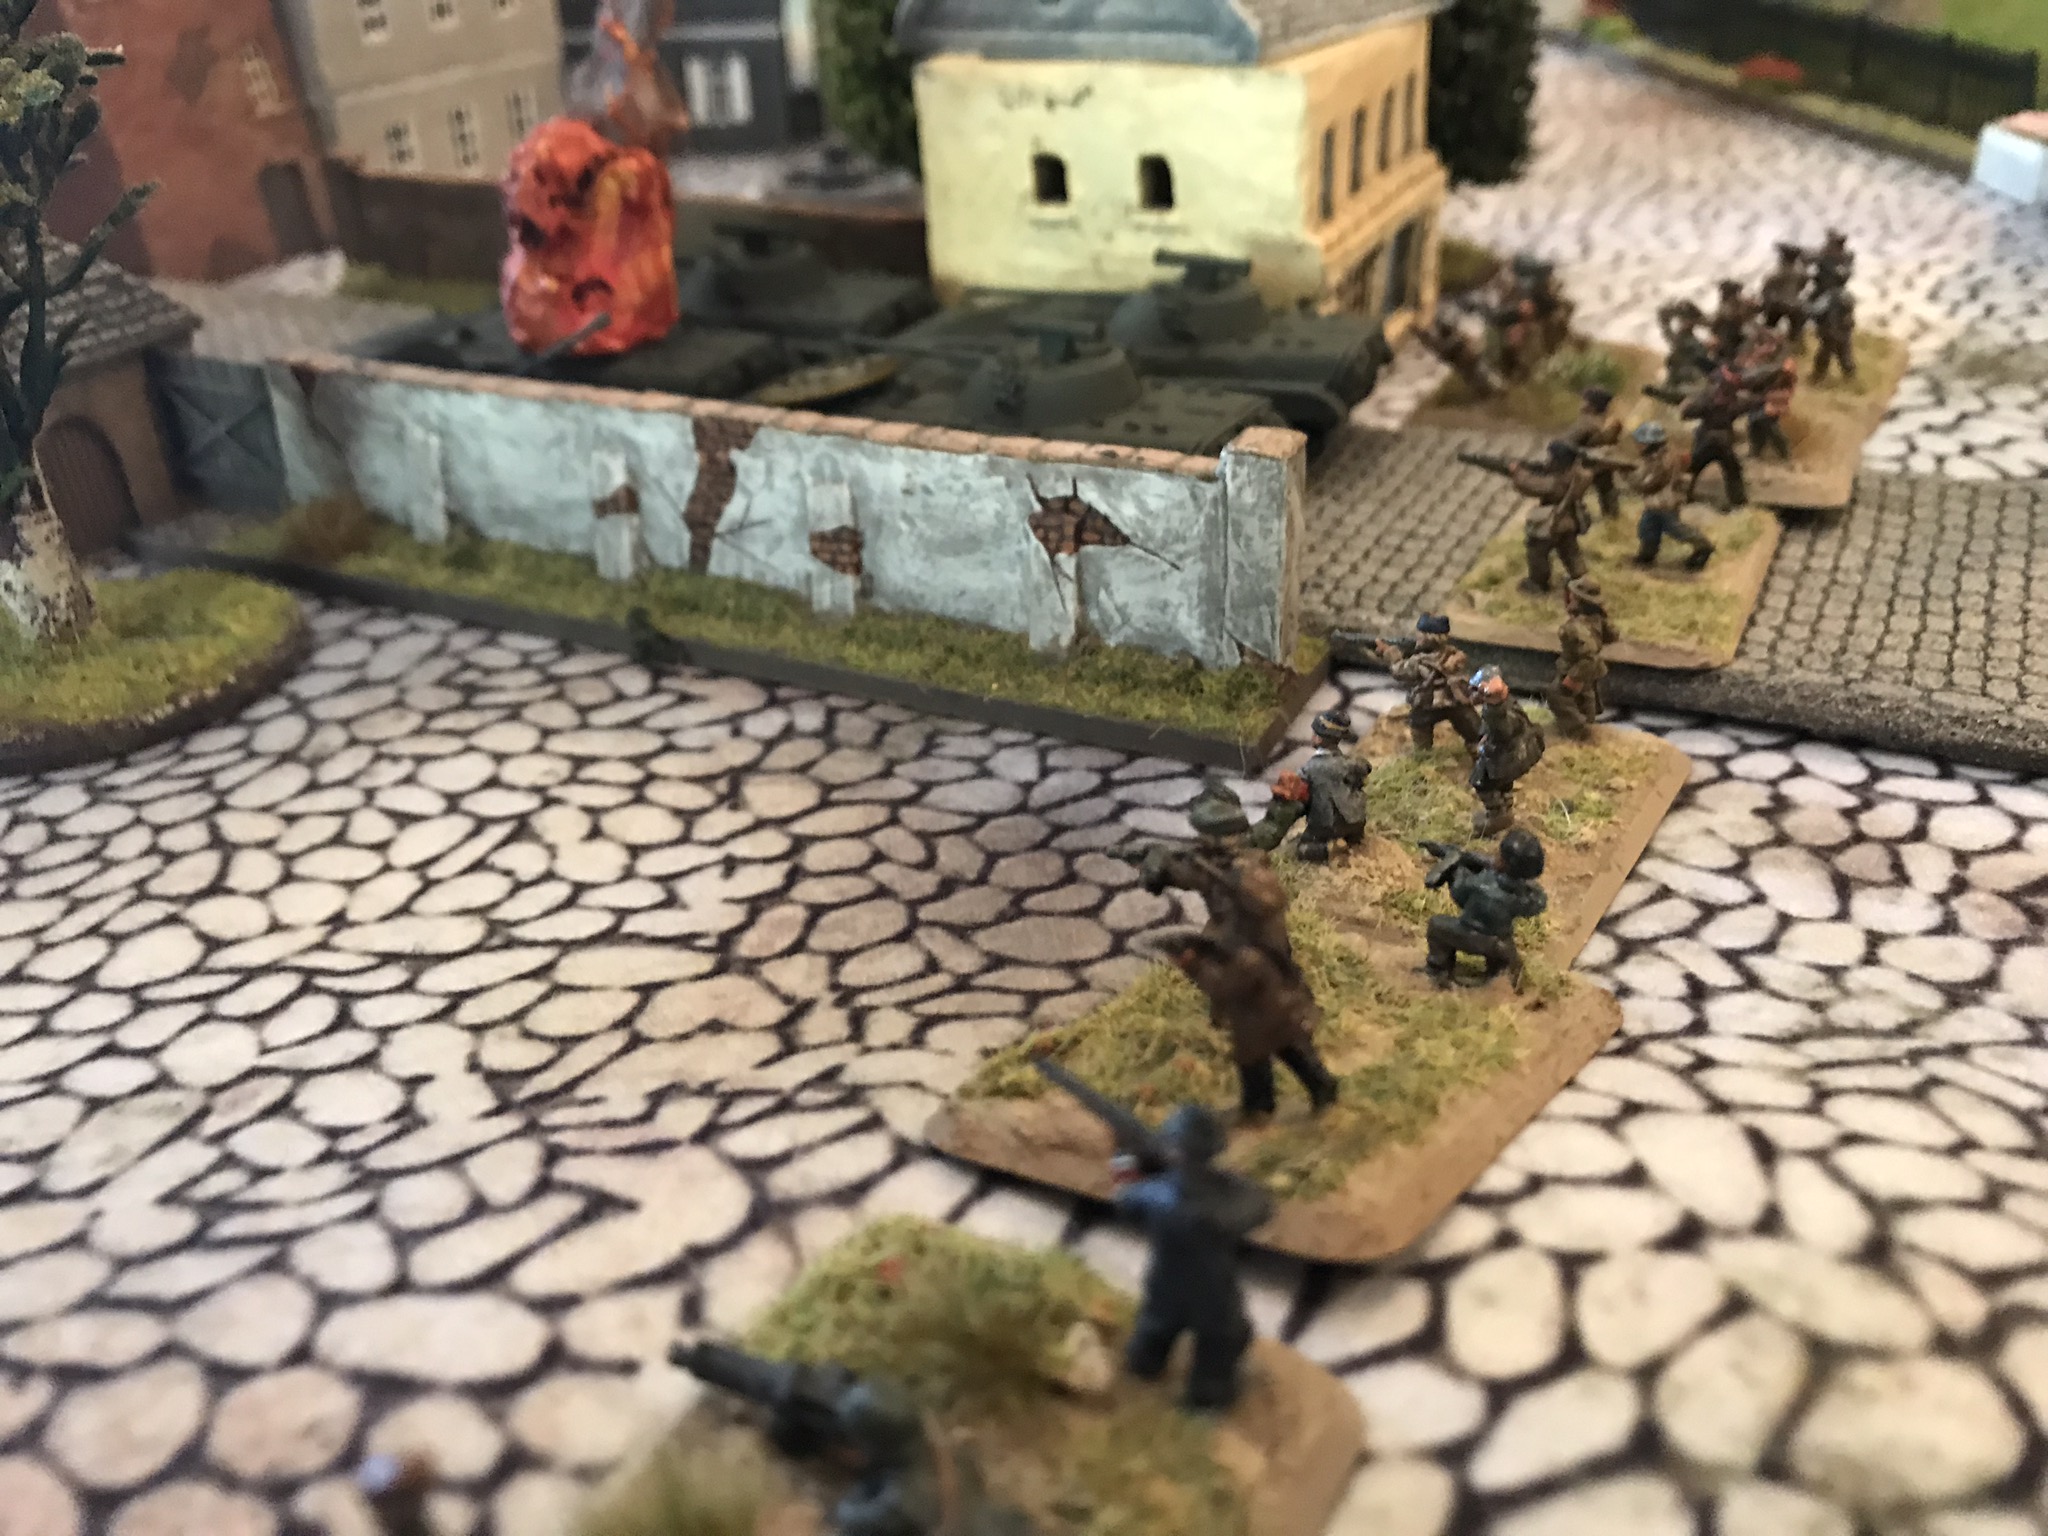
I had deployed my two infantry platoons (a) Plt 1 along with the MILAN Plt on the left to cover the objective in the open terrain and (b) Plt 2 in two buildings in the built up area creating a choke point on the main road in. The Spartans were left in ambush. (This would prove to be another mistake on my part.) When I chose to spring the ambush, I could literally not find an area in which to deploy in among the crowded city streets and alleys and still be within my original deployment area. The troops deployed on the left flank now ran from their foxholes into the town as fast as possible to redeploy into the buildings. The right flank platoon opened up on the loaded BMP's and destroyed all of them and subsequently the deployed infantry. Soviets lose 2 platoons.
The Soviet BRDMs and the FV 432's skirmished each bailing a couple of the other's vehicles and the Soviets began to push their battle tanks into the area of the objective, while simultaneously pushing a second BMP company down the main road in a pinning attack.
Despite destroying the first BMP company, the Welsh could feel the noose tightening and fought with the fury of the desperate. Milans, Charlie G's and 66mm rounds slammed into anything that moved, creating a charnel house.
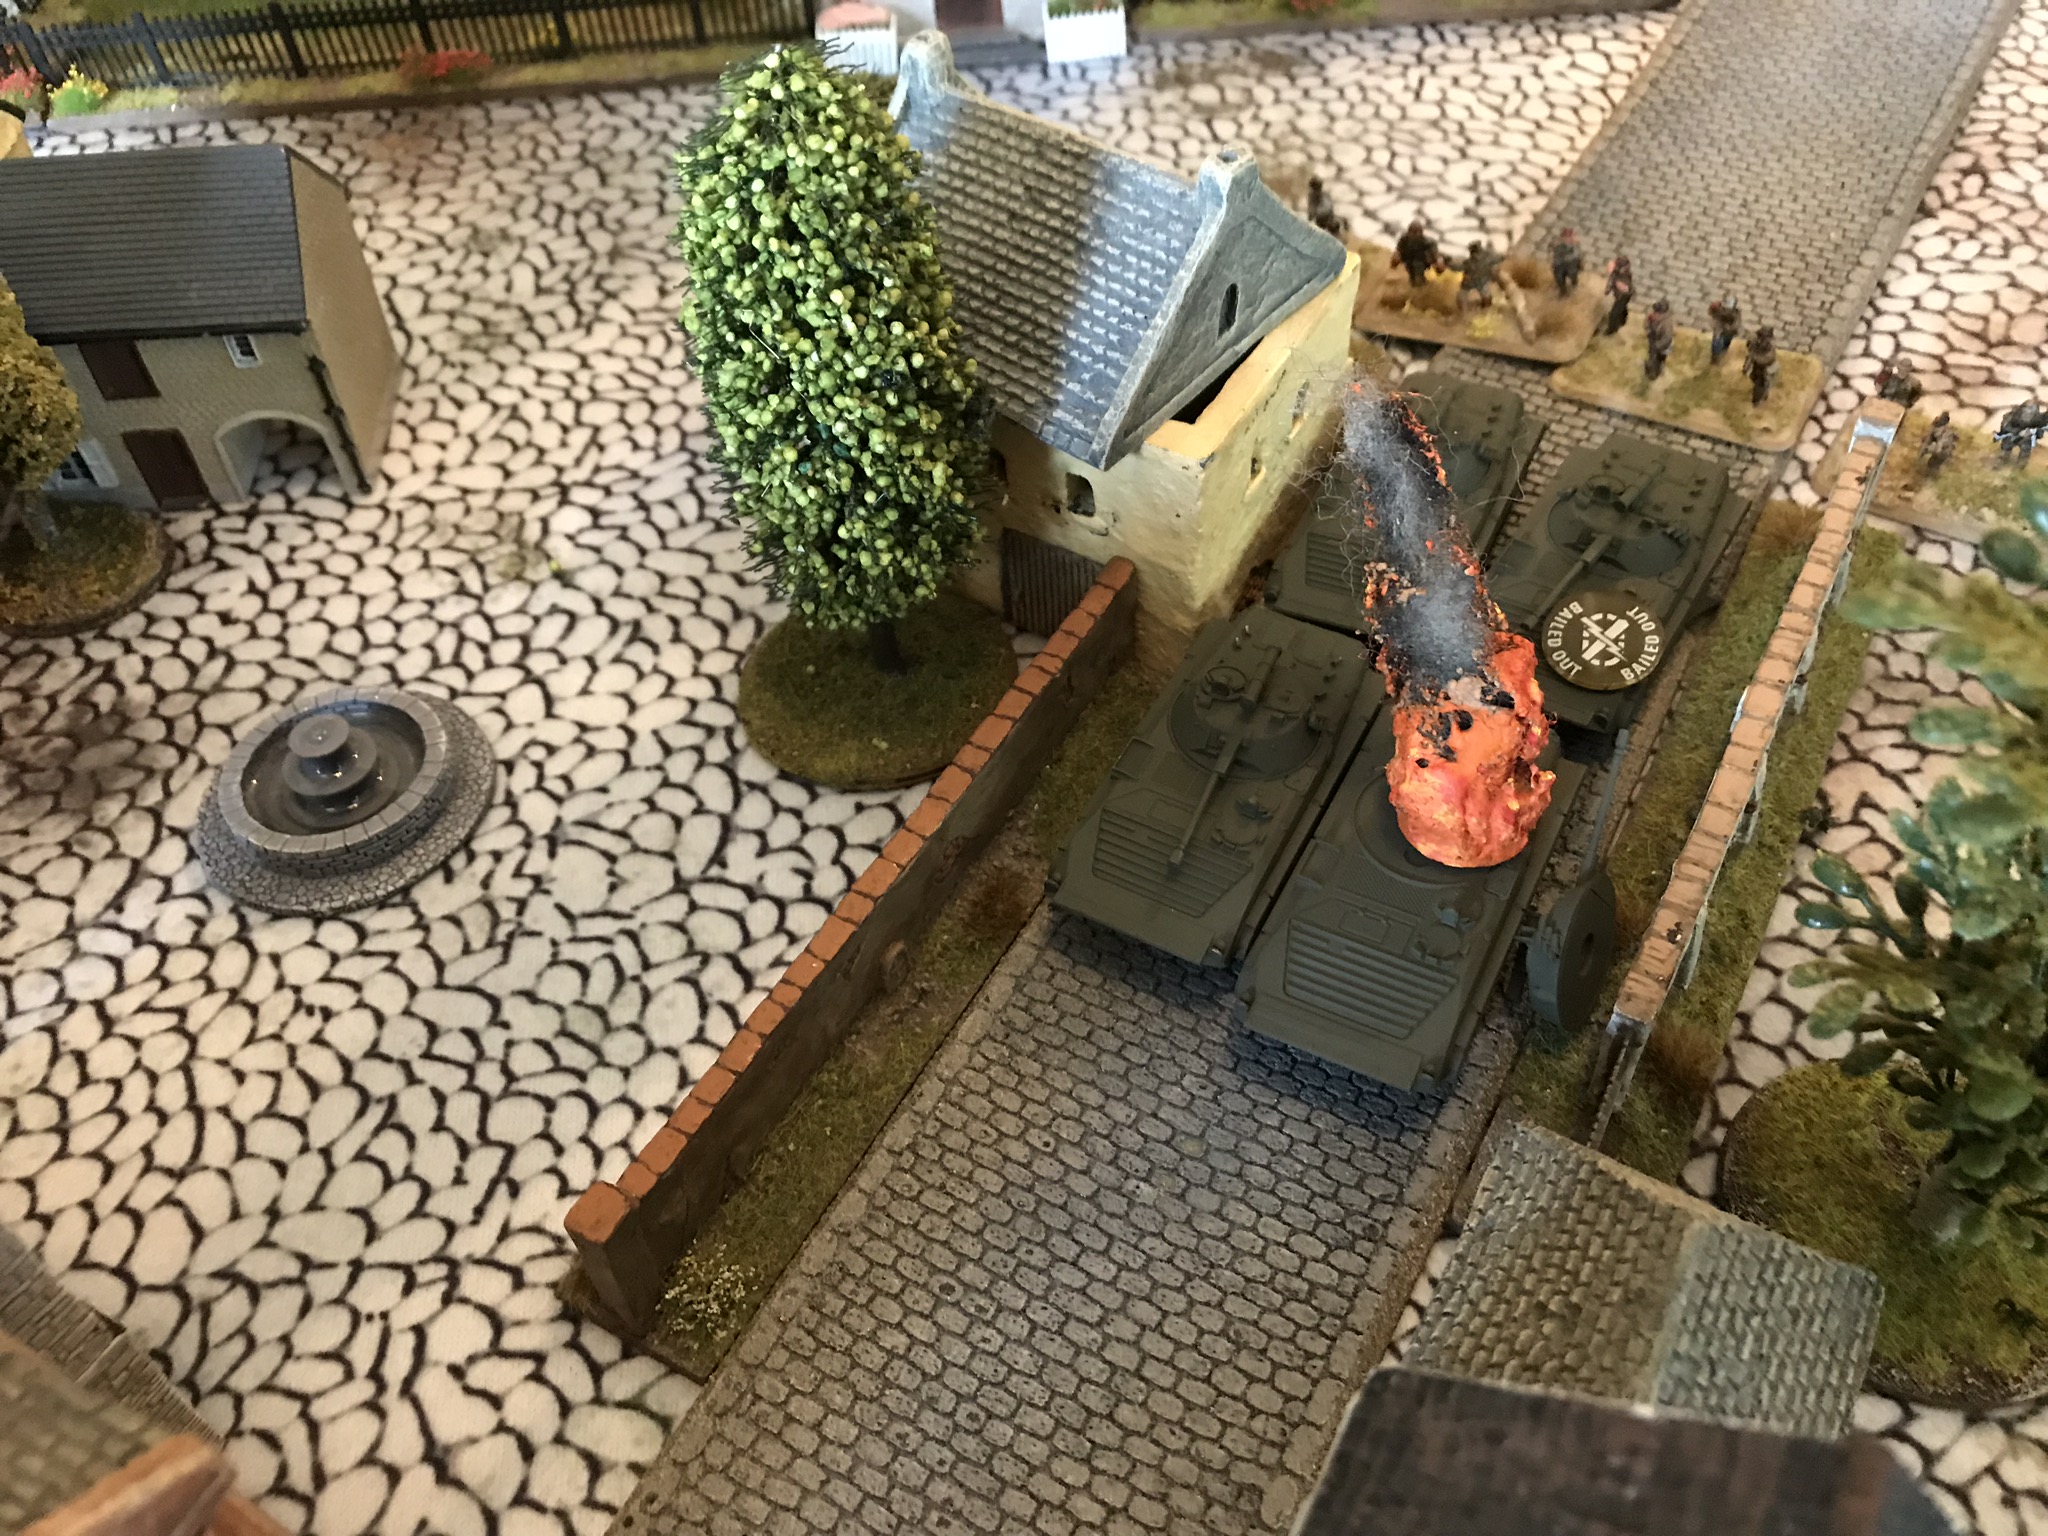
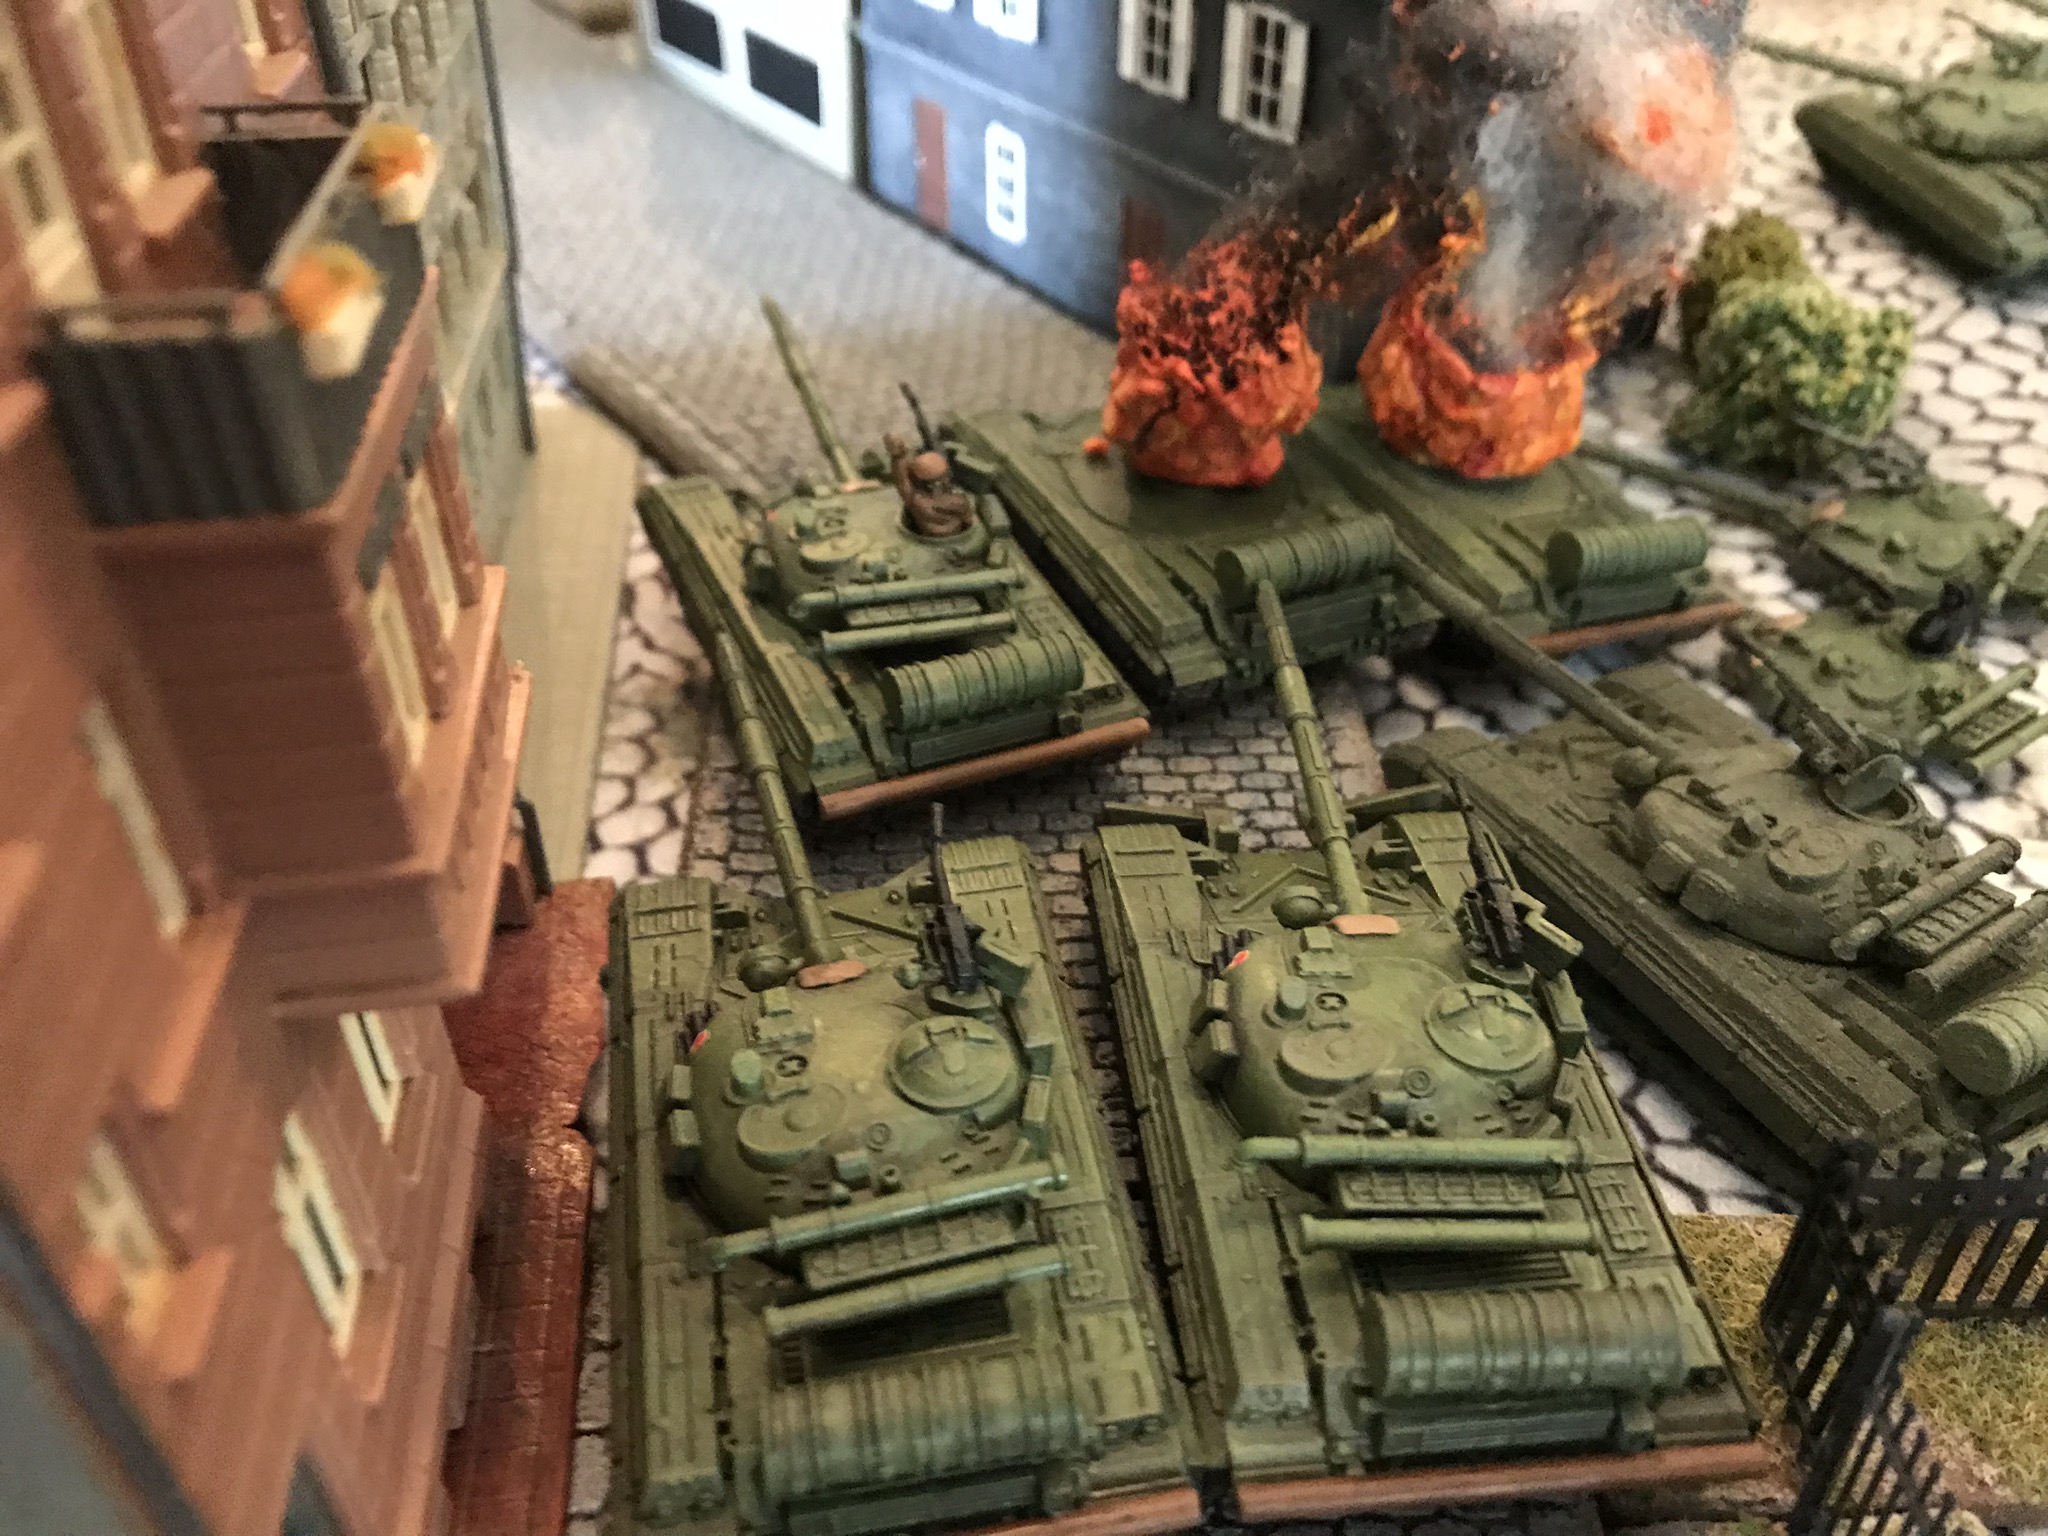
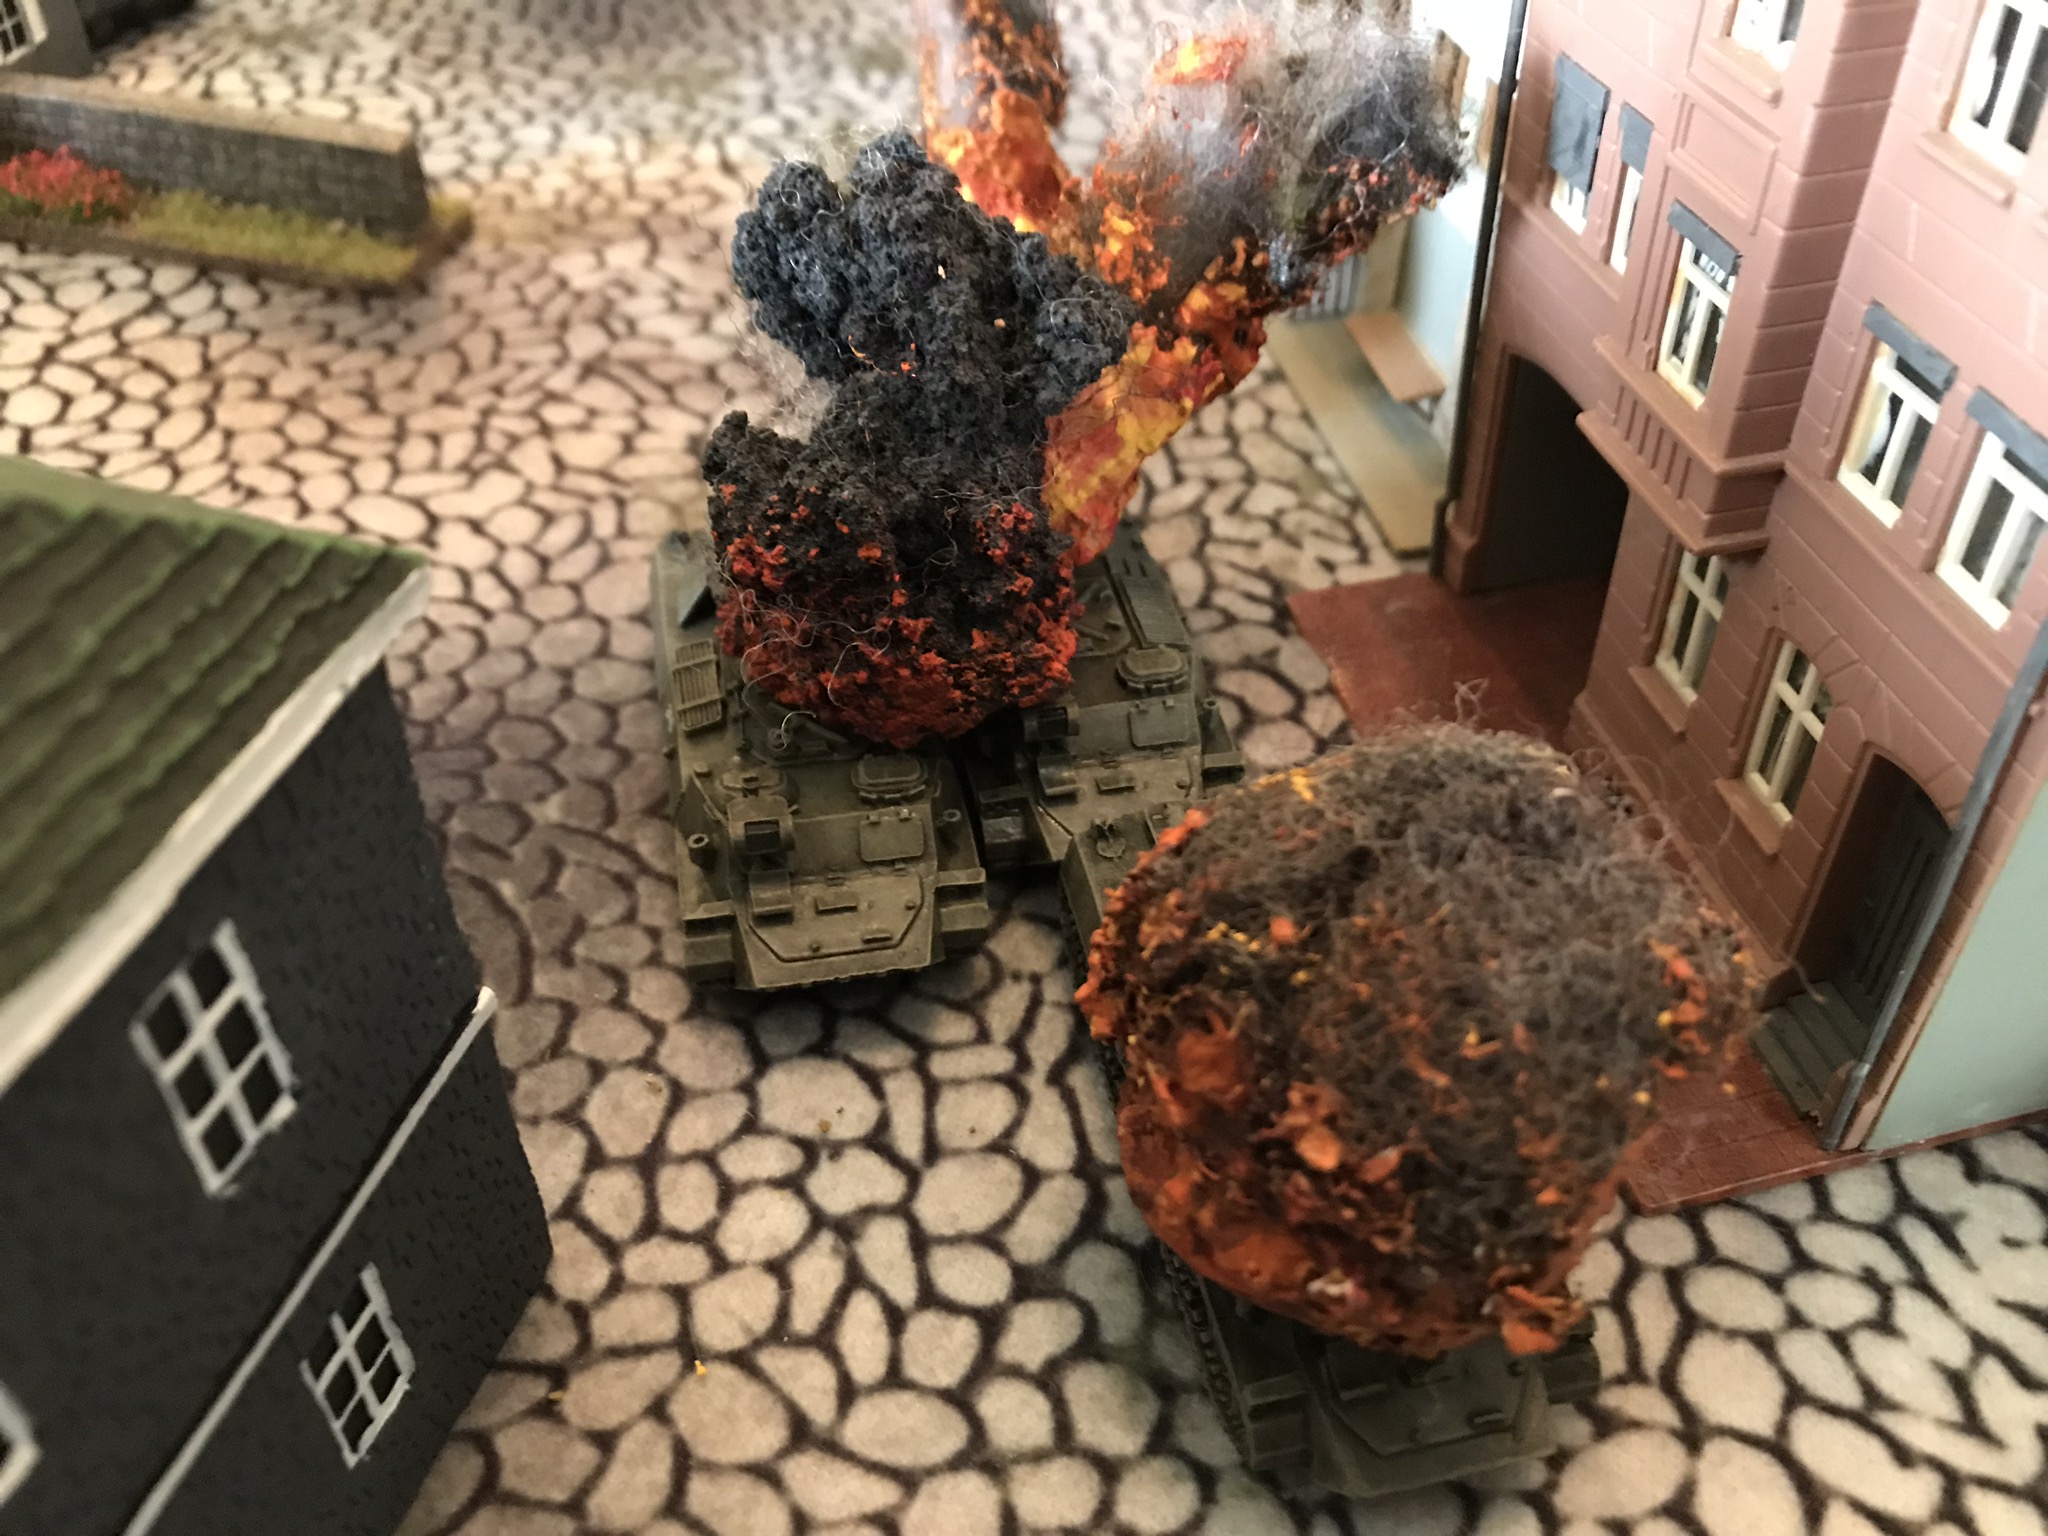
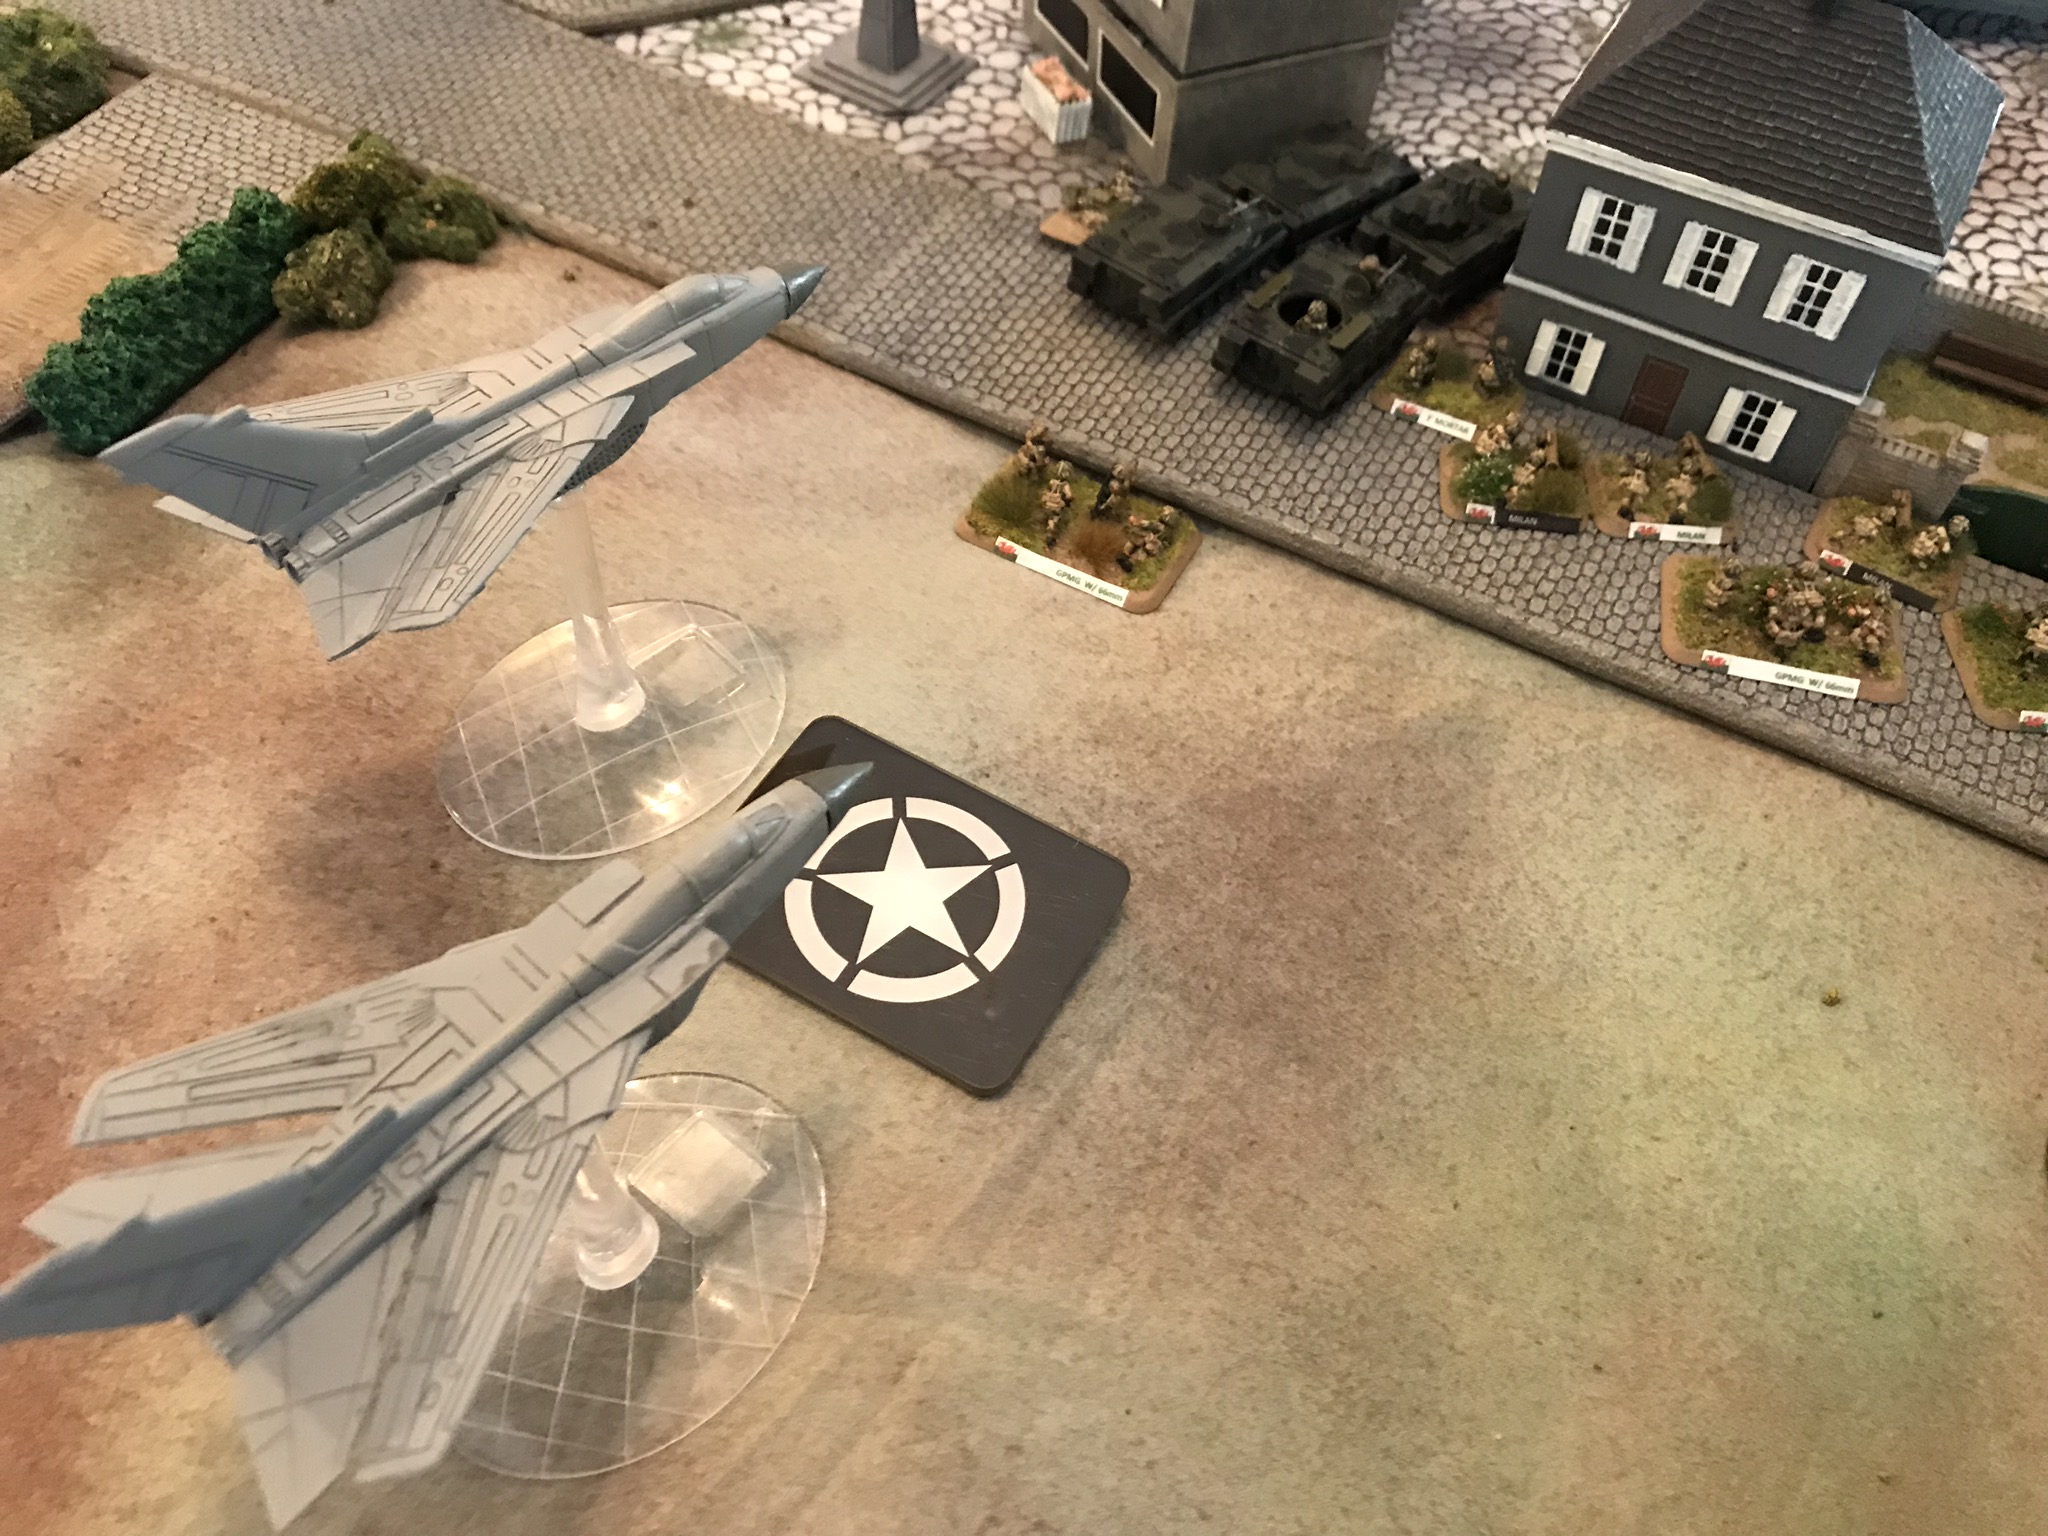
The Soviet tank gunners began targeting the buildings and the "brutal" feature of their 125mm guns was taking a toll on the Welsh. Once the Welsh were pinned the BMP company on the main road launched an assault which was thwarted; just. Eight hits exactly in defensive fire. In hindsight, this was the crucial moment of the game. The Soviet air force also strafed the Welsh platoon in the midst of re-deploying and killed several bases but the Welsh survived and made it into the buildings.
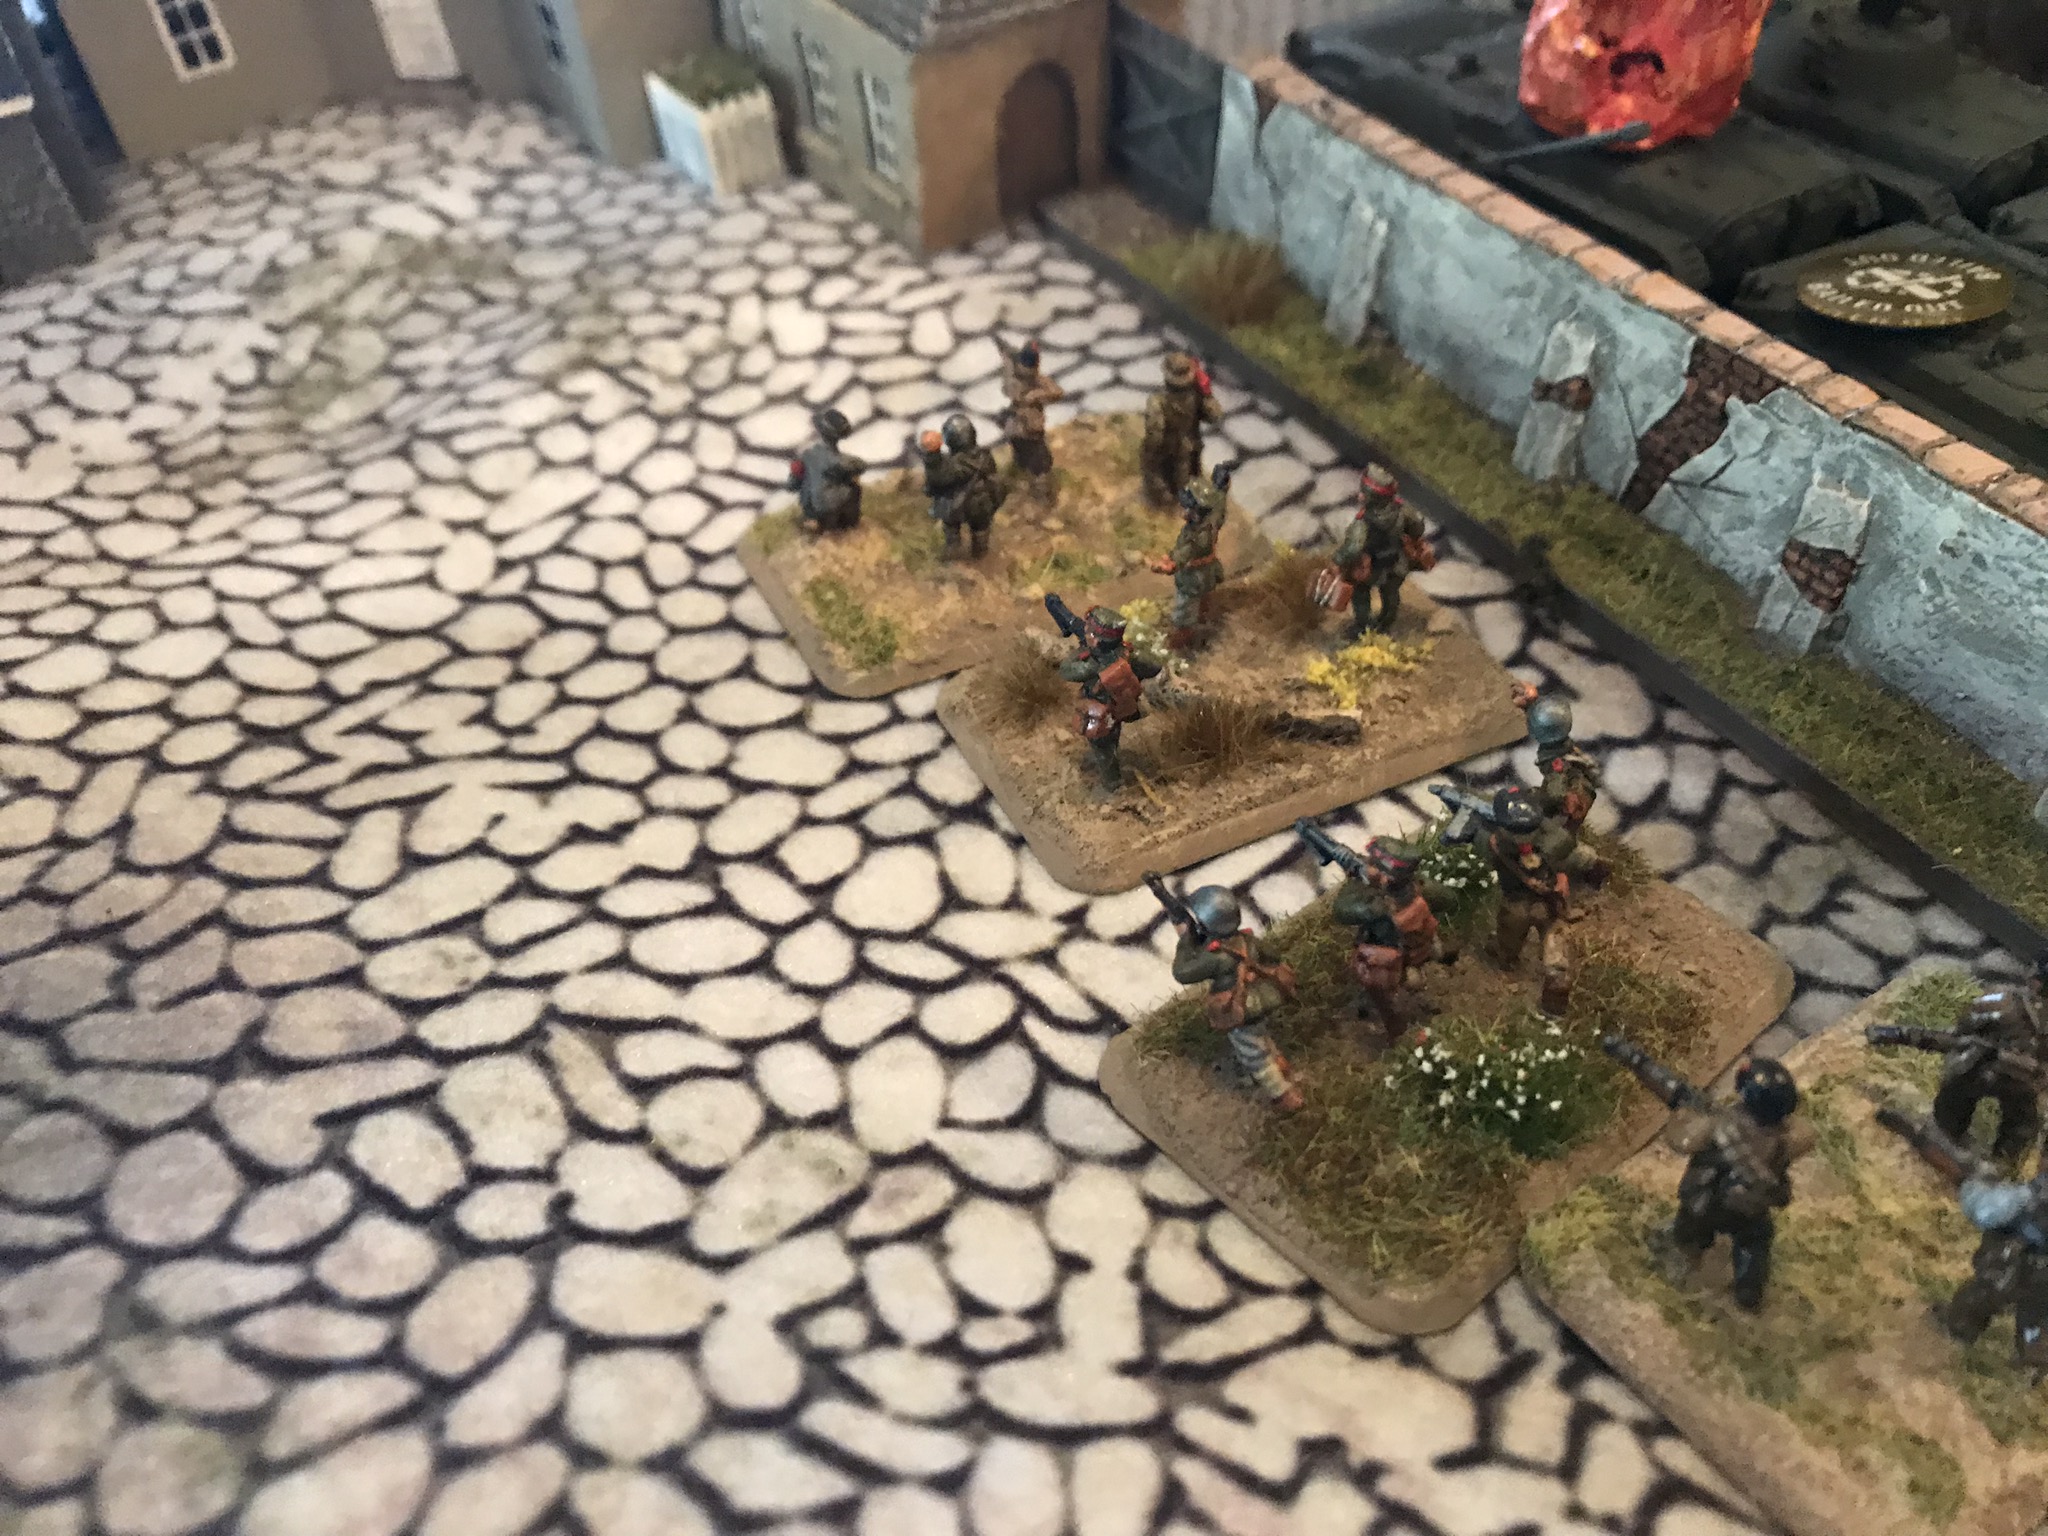
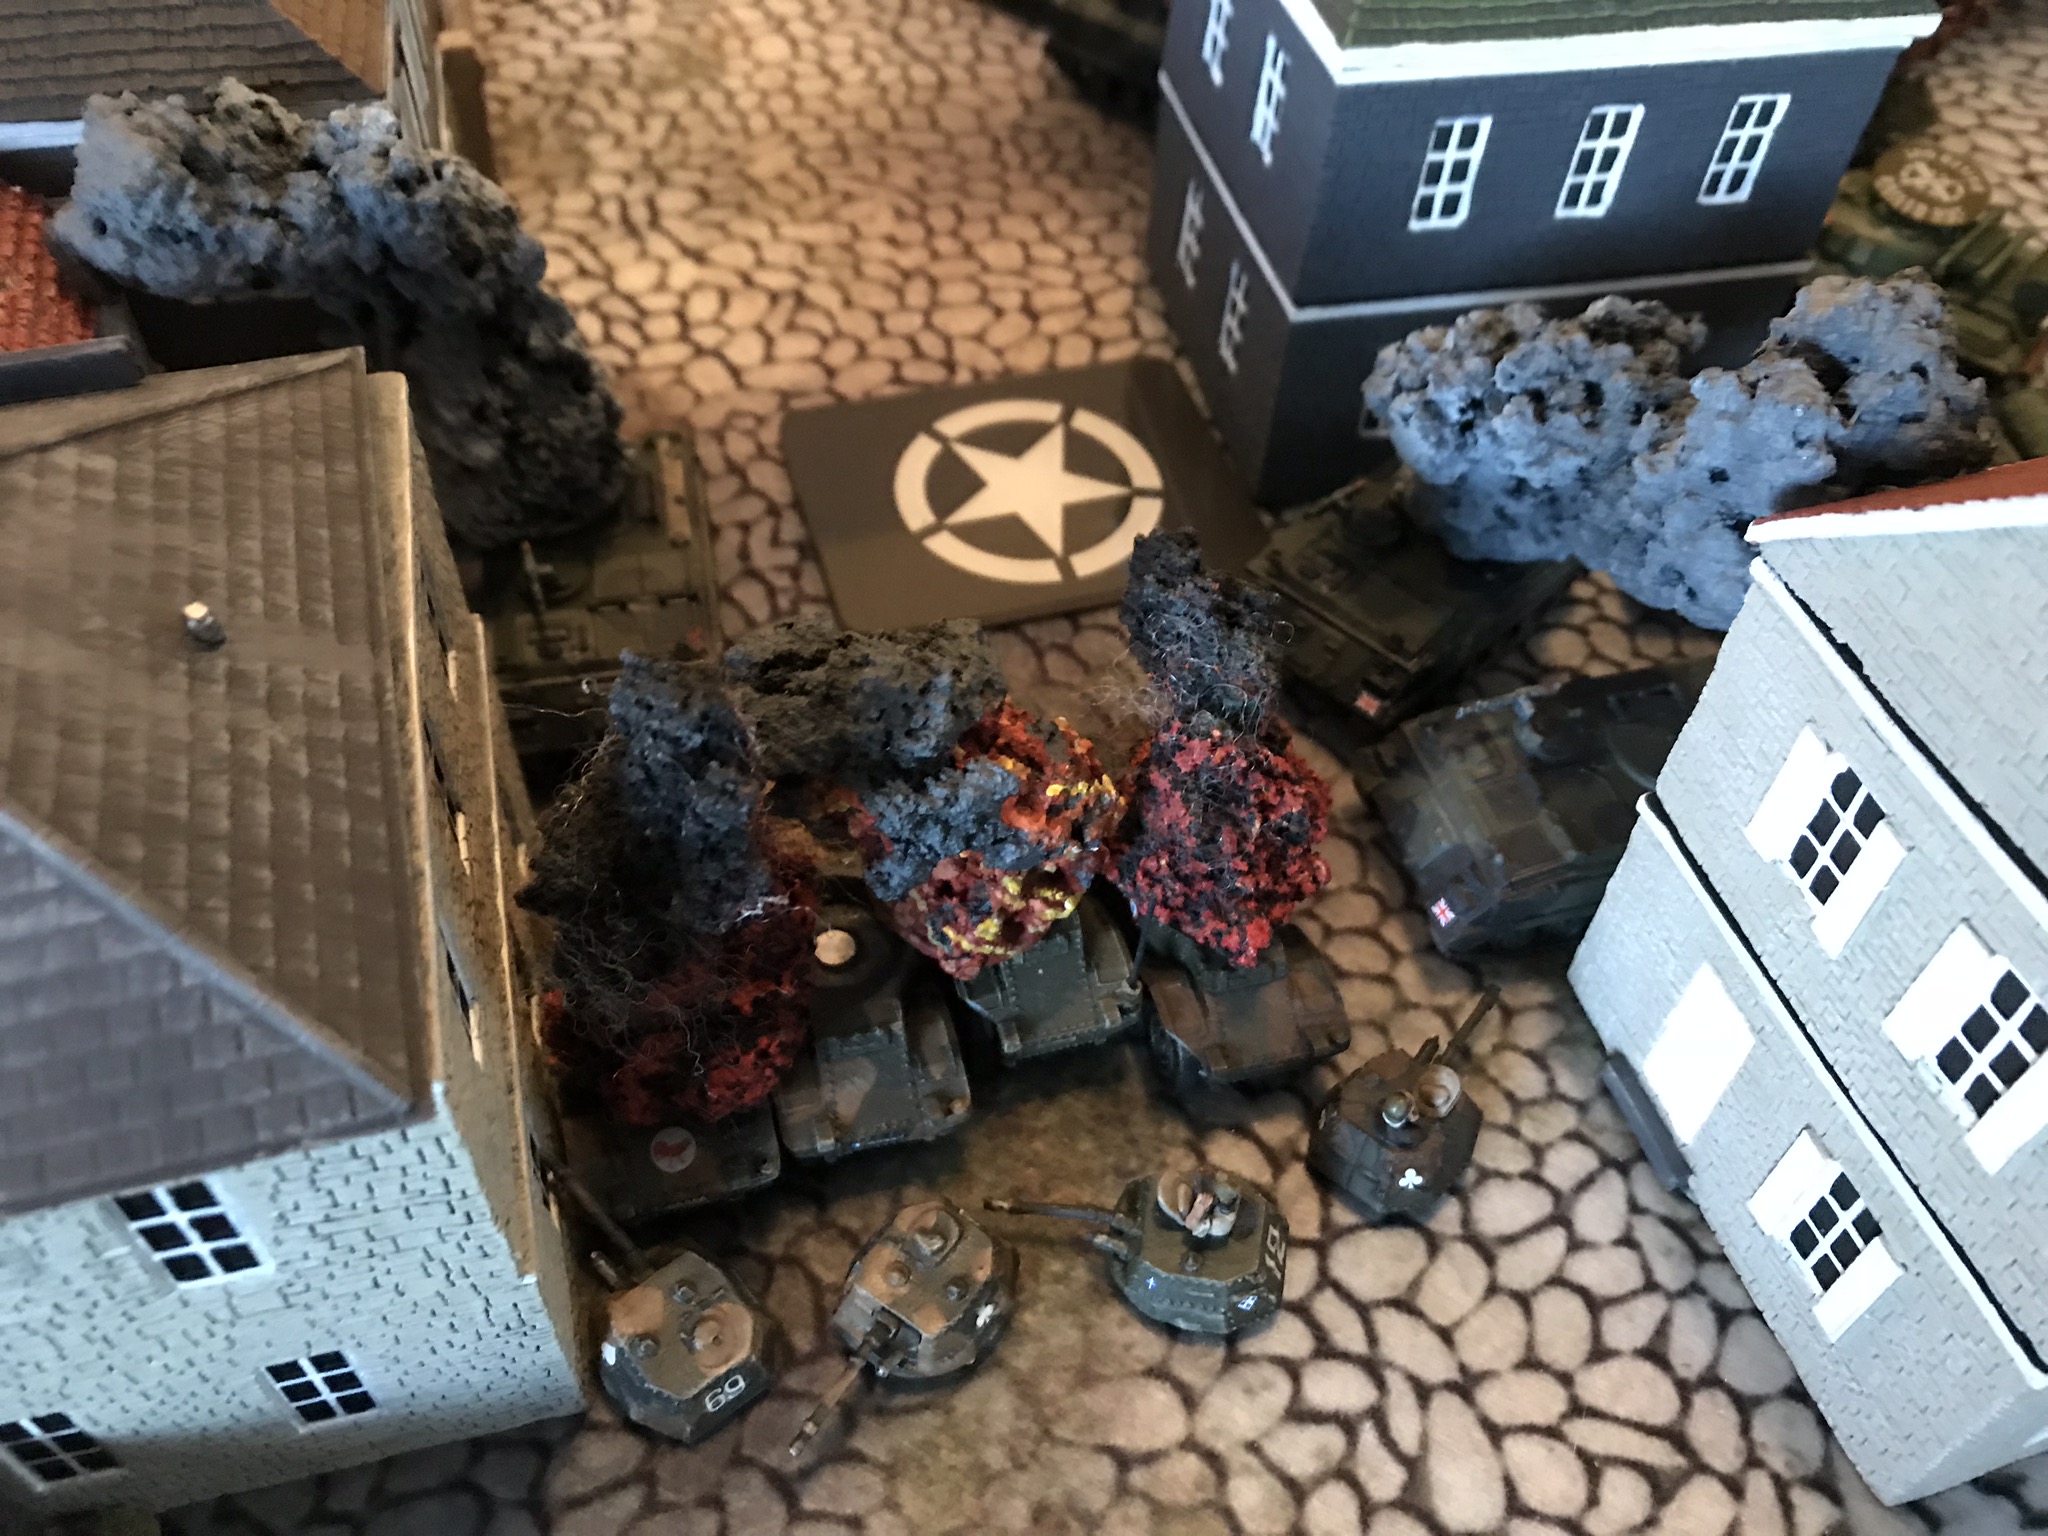
The added firepower of the now re-redeployed 1st and Milan platoons were brought to bear on the Soviet tanks is the close quarters of the Hamburg residential district. The Charlie G gunners unpinned and wrought death and destruction to the remaining BMP's on the main road. The full compliment of MILANS now found their targets. Soon most of the T-64's were burning.

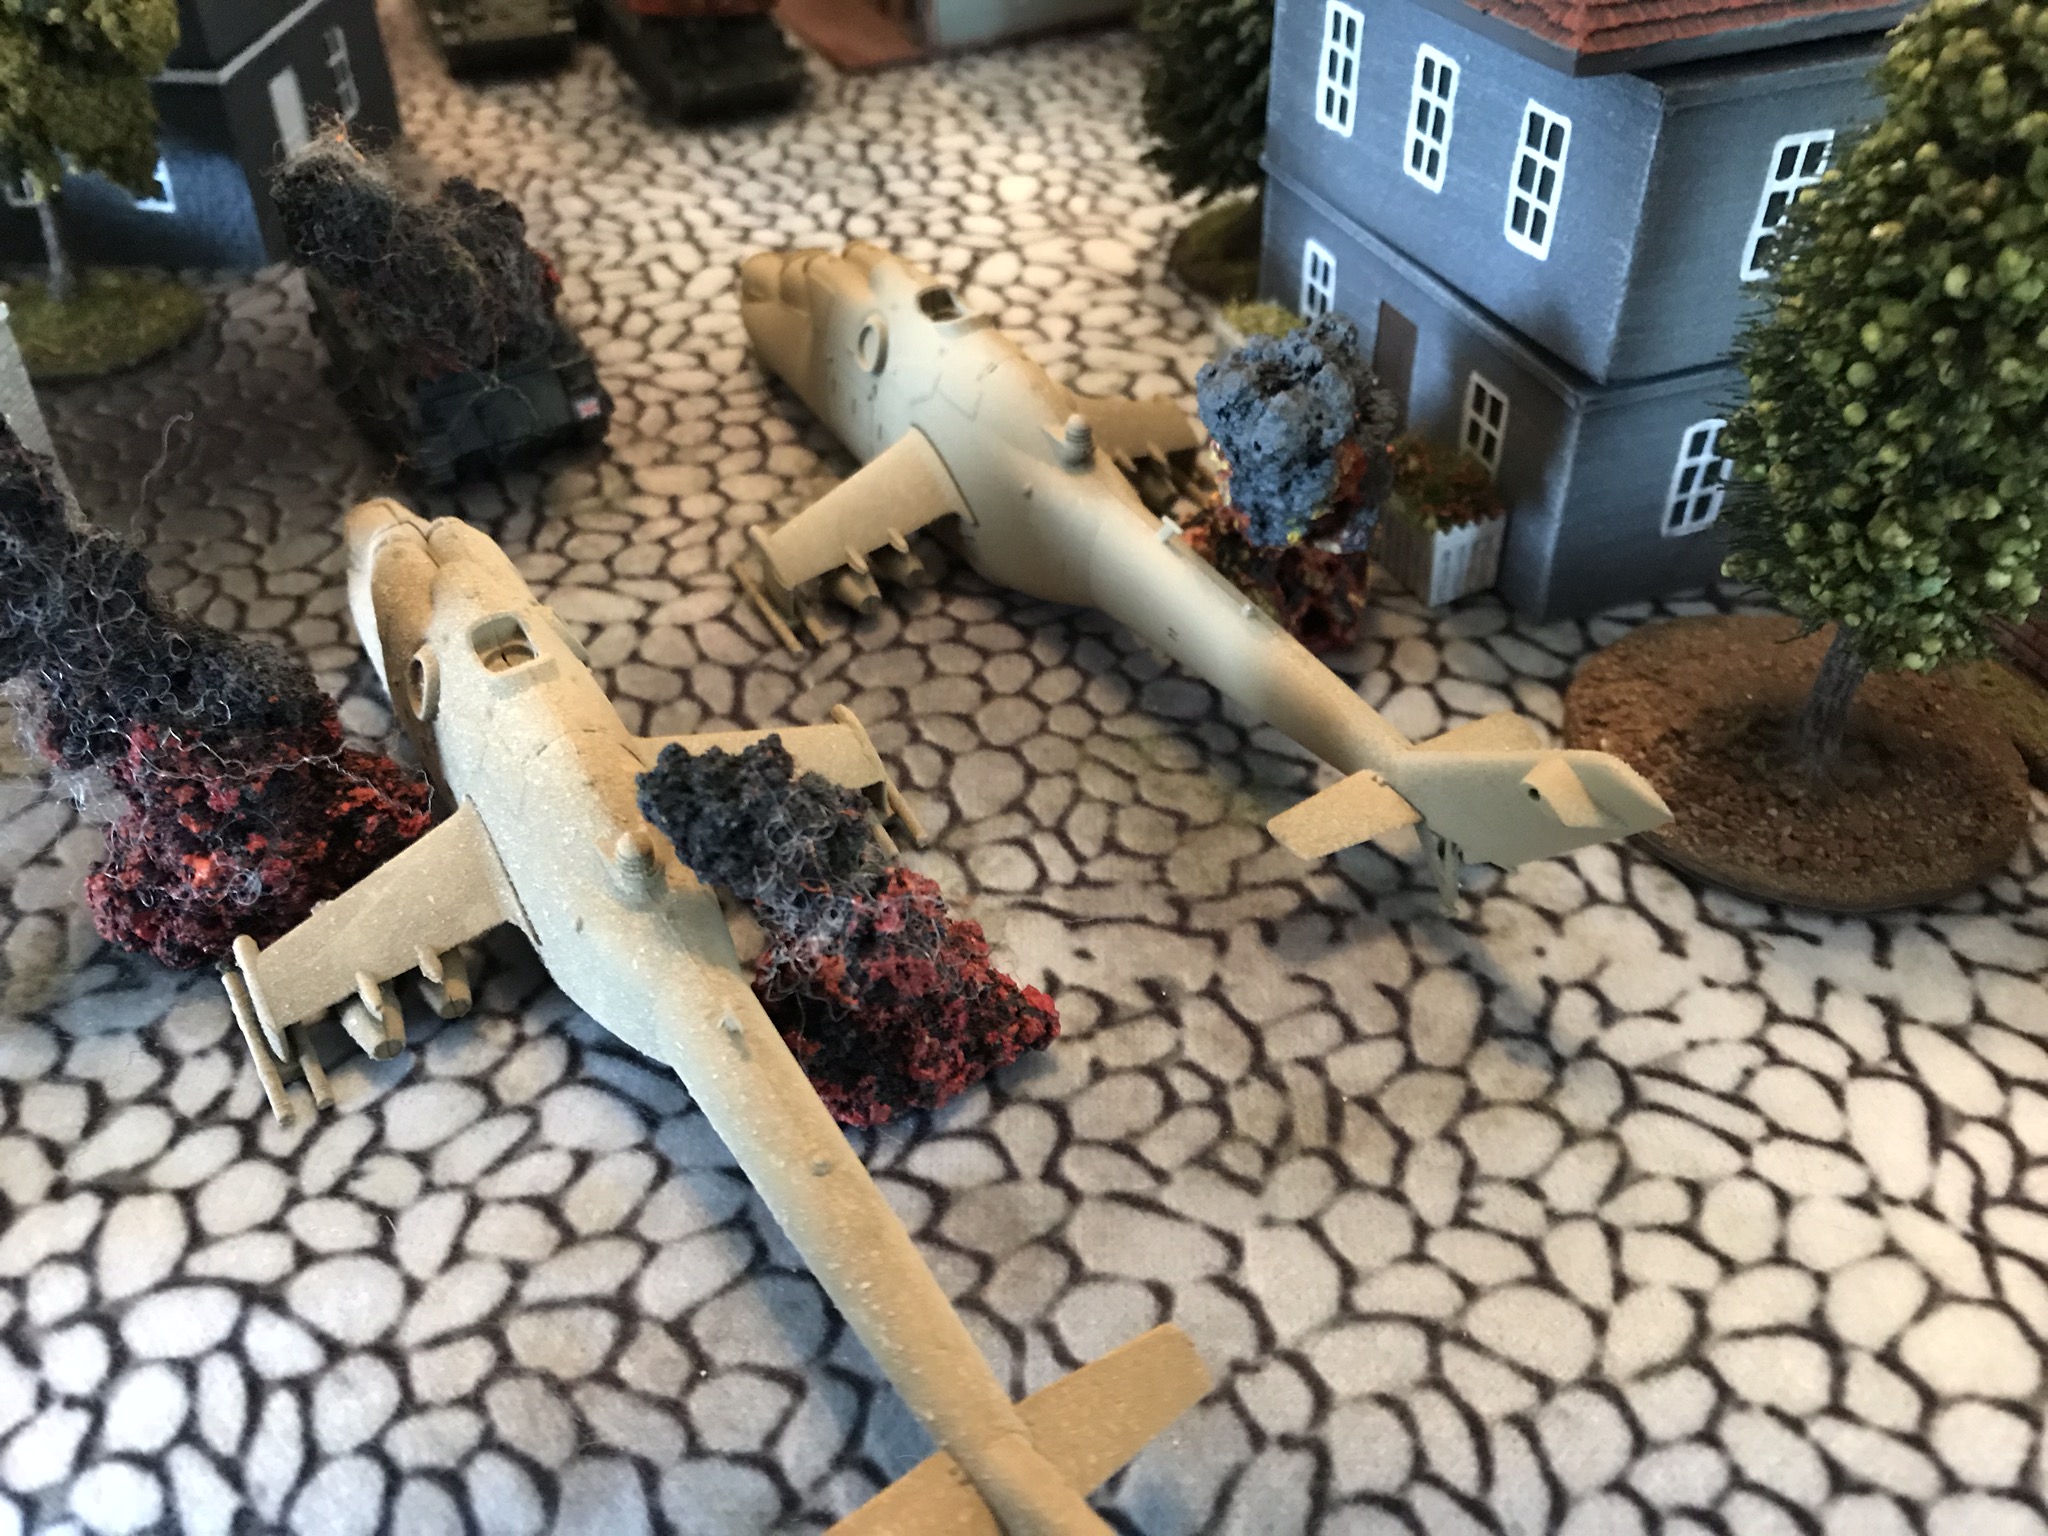
With their losses mounting the Soviets decide to land their Hind Air Assault platoon to move onto the now open objective and to throw the remaining tanks against the Welsh platoon moving back to the objective. The Hinds landed but one was destroyed by a long range Milan and both teams died with it. The second was destroyed by MG fire from an FV 432 but both crews survived but were pinned.
The tanks made kills but did not pin the Welsh.
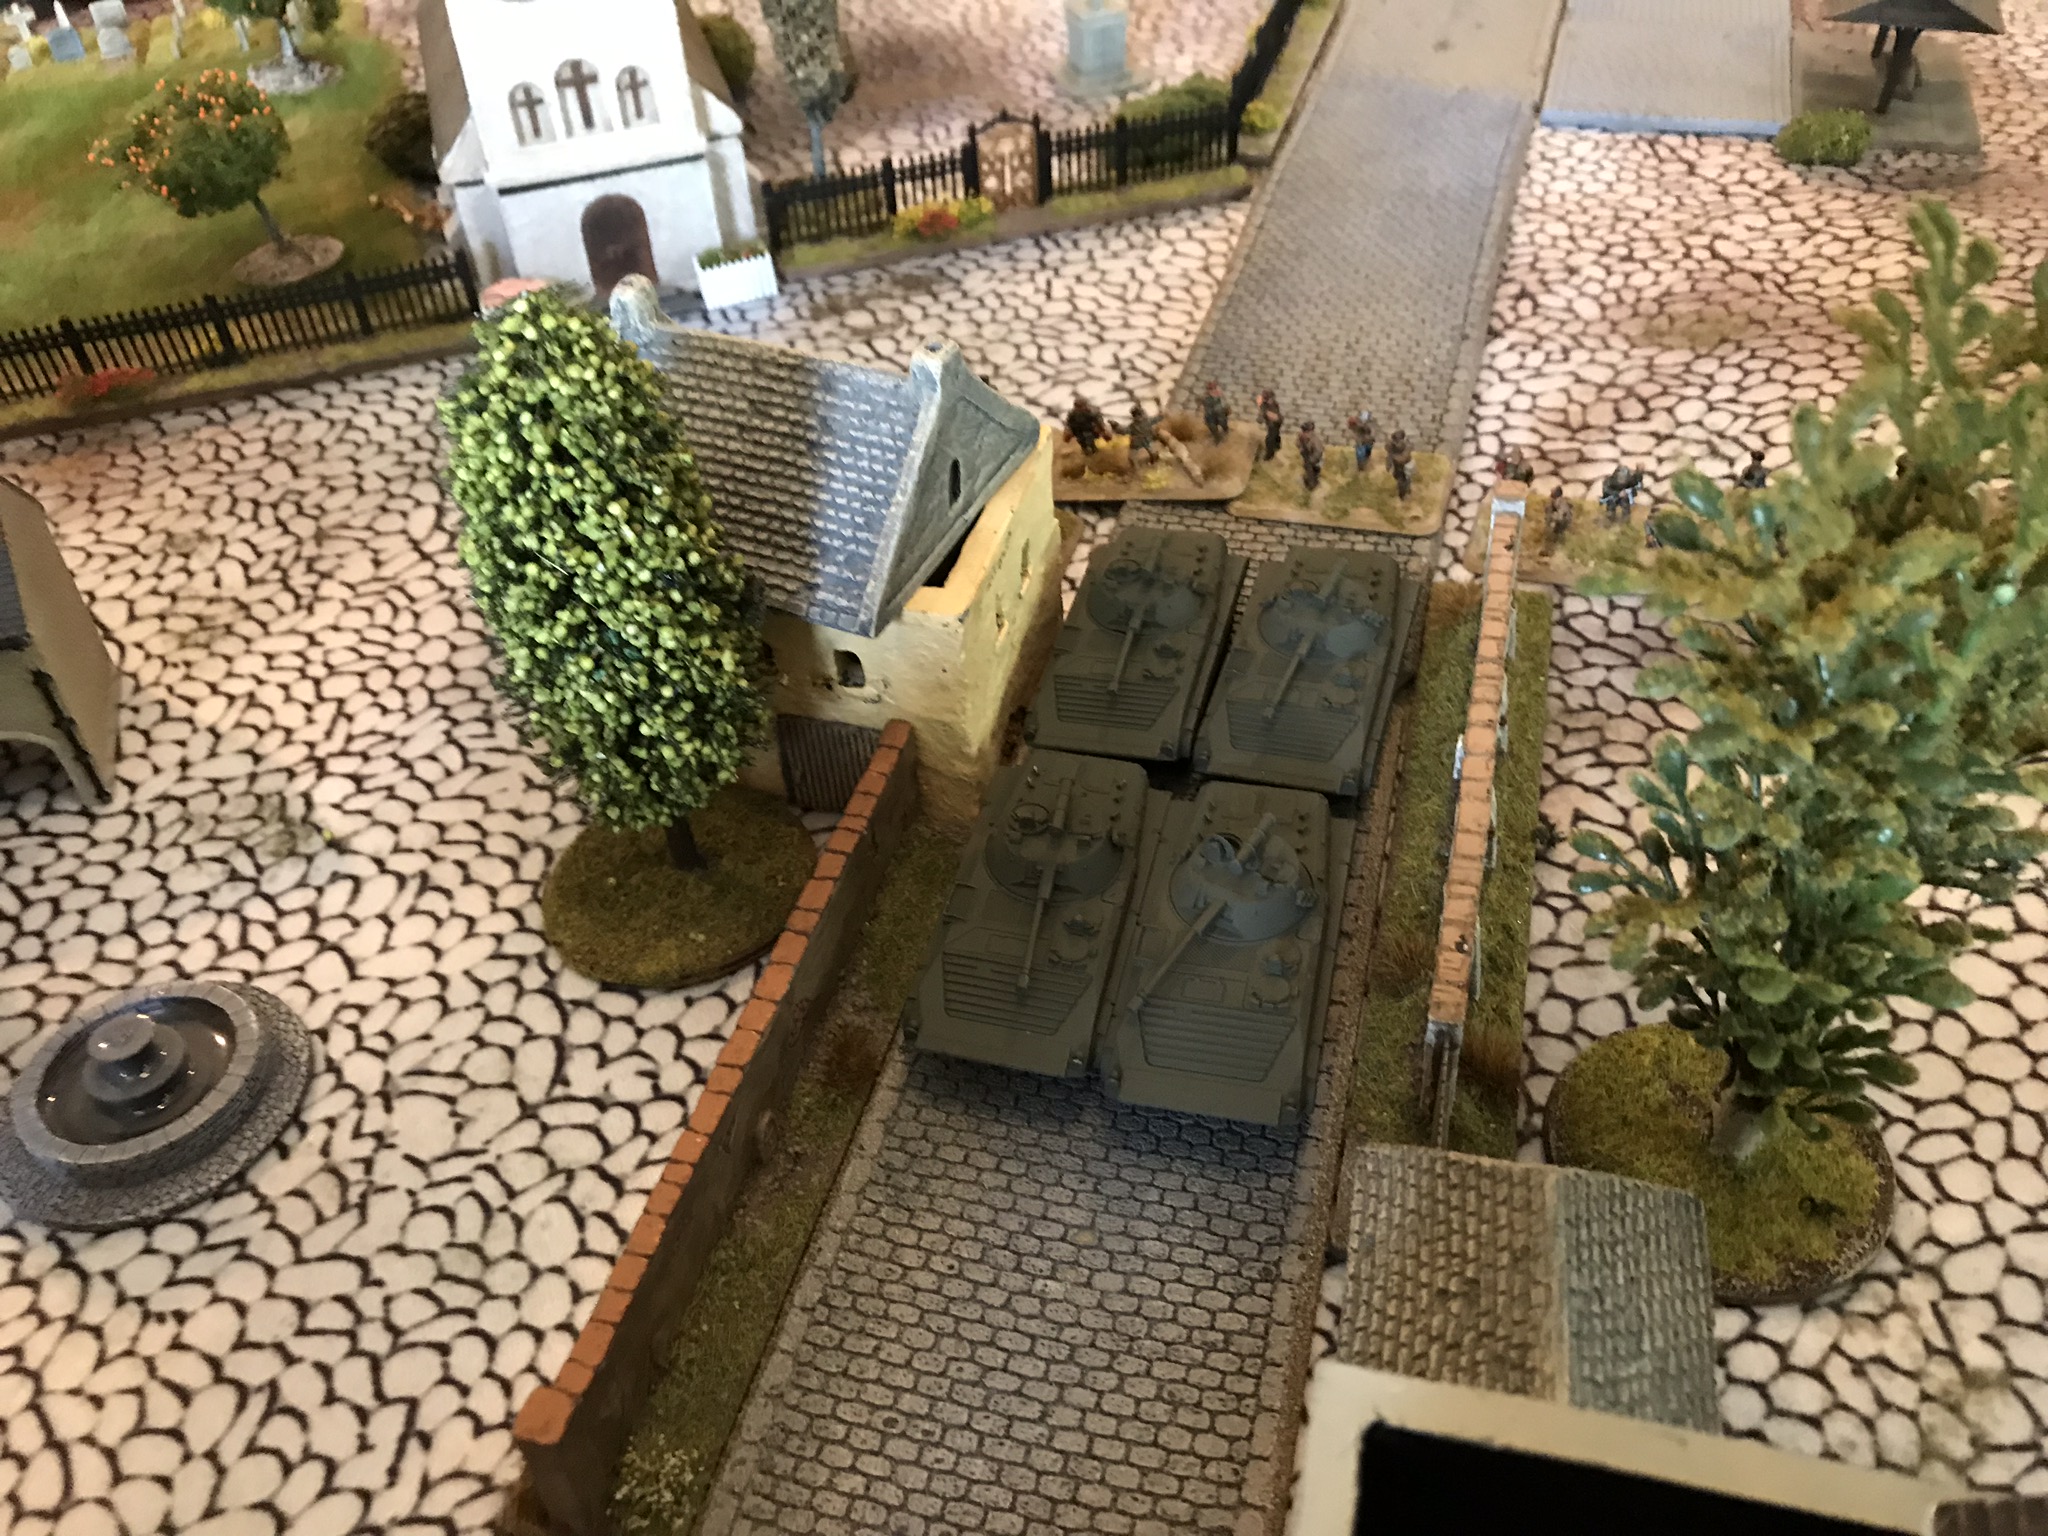
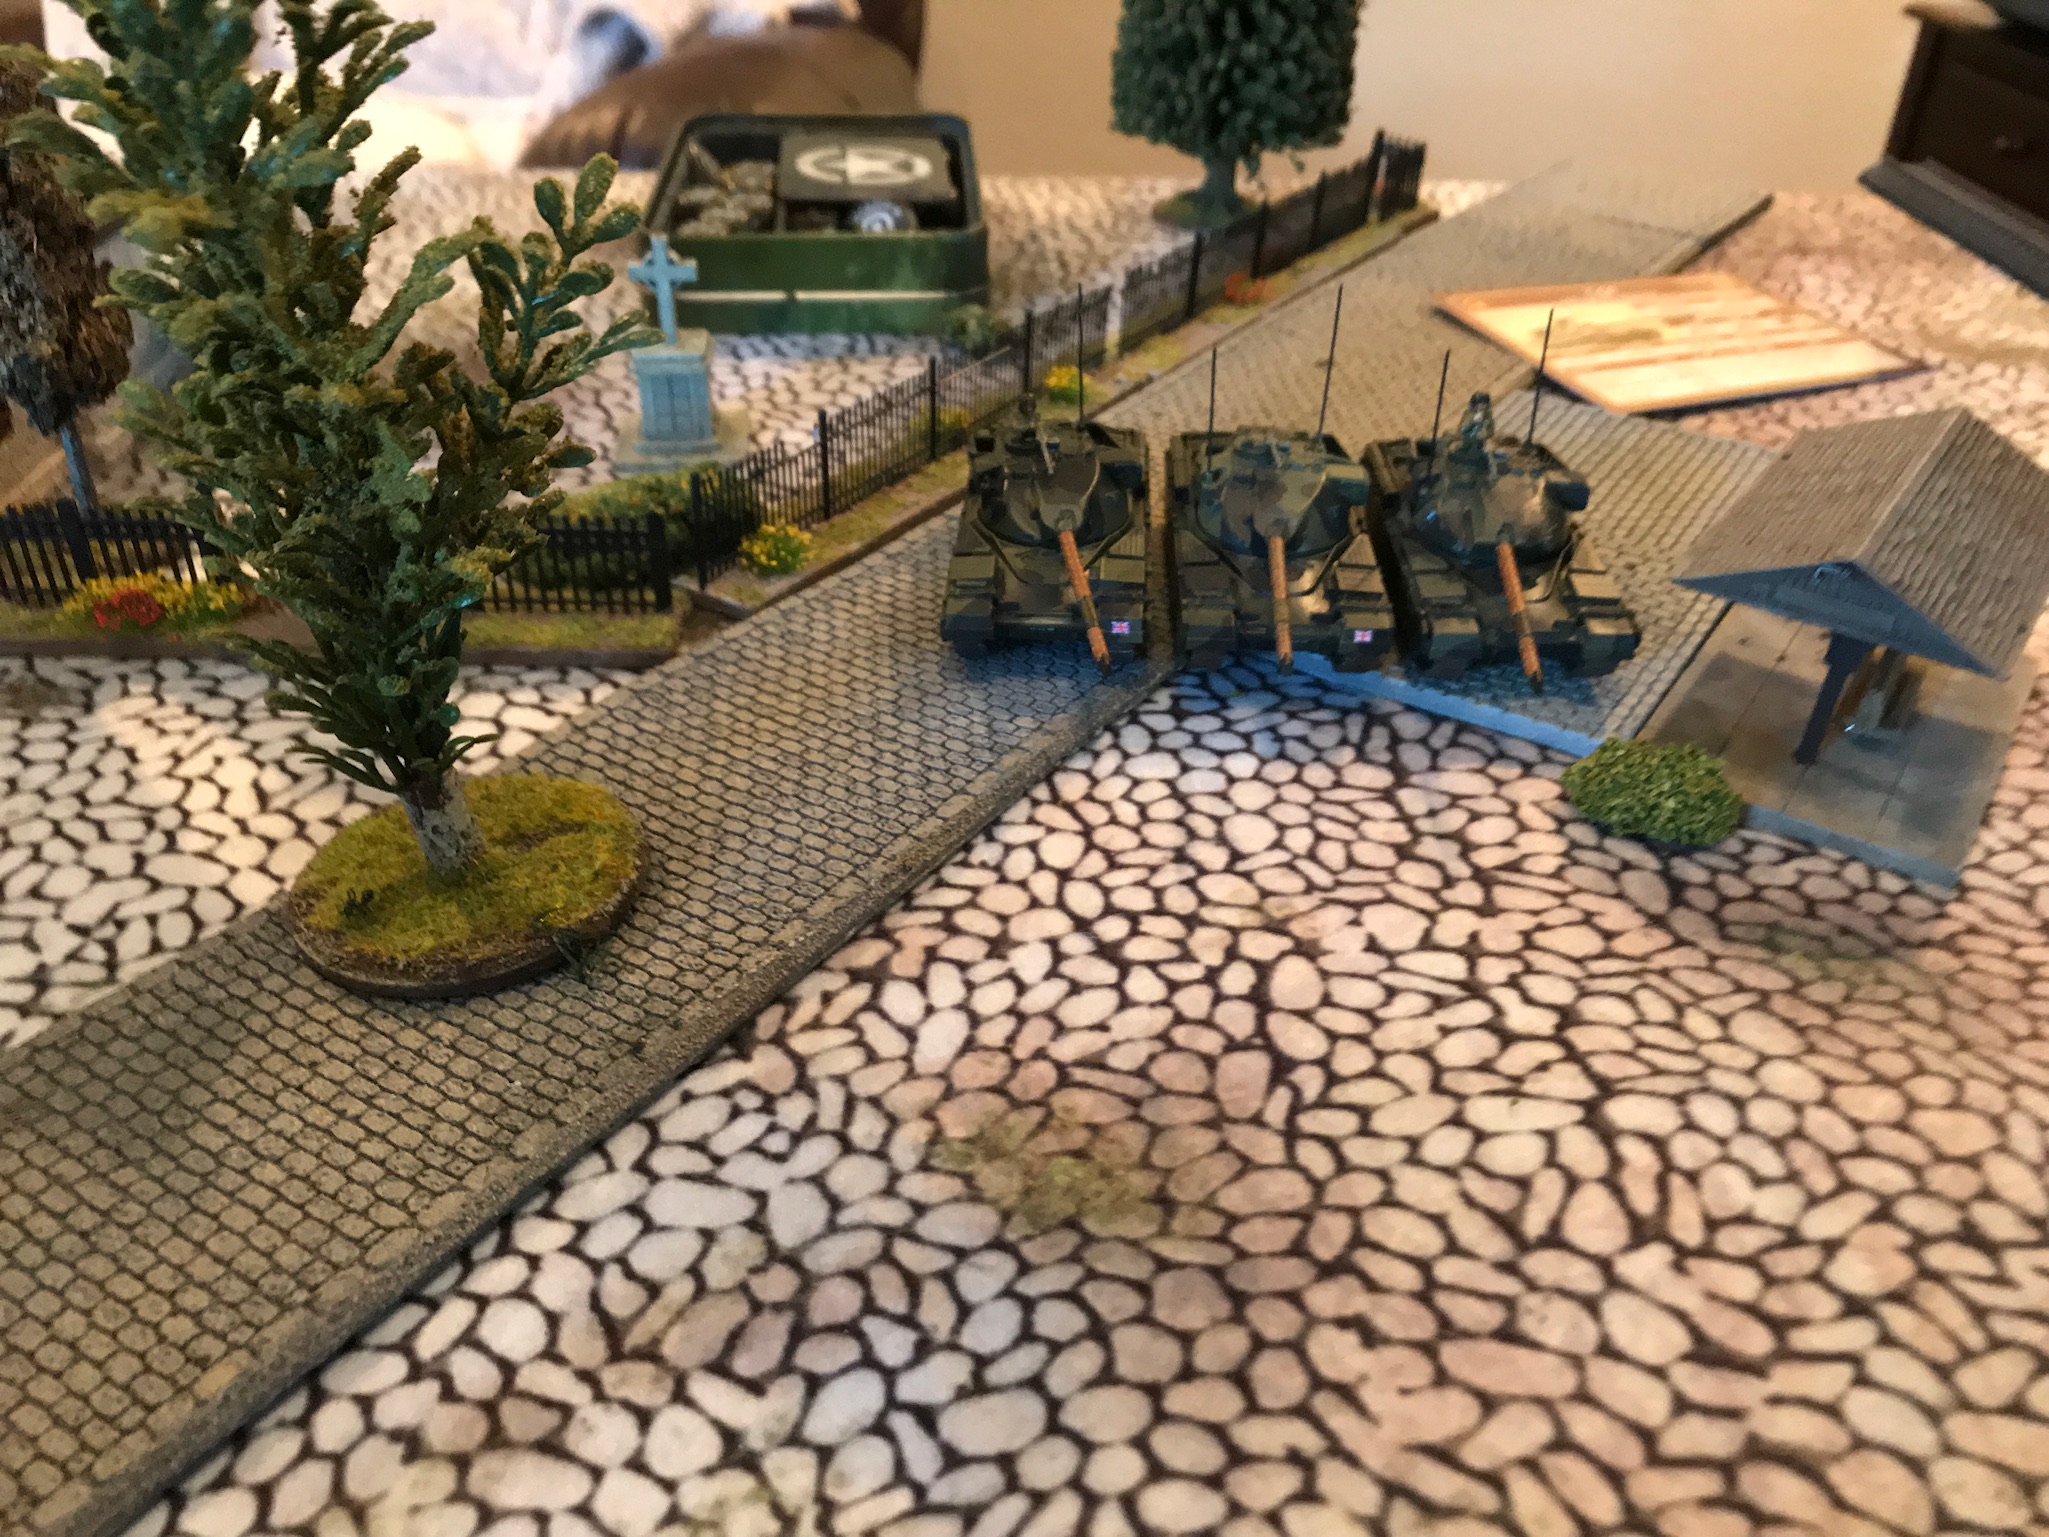
British reserves finally arrive, albeit as far away from the action as possible, in the form of a troop of Chieftains.
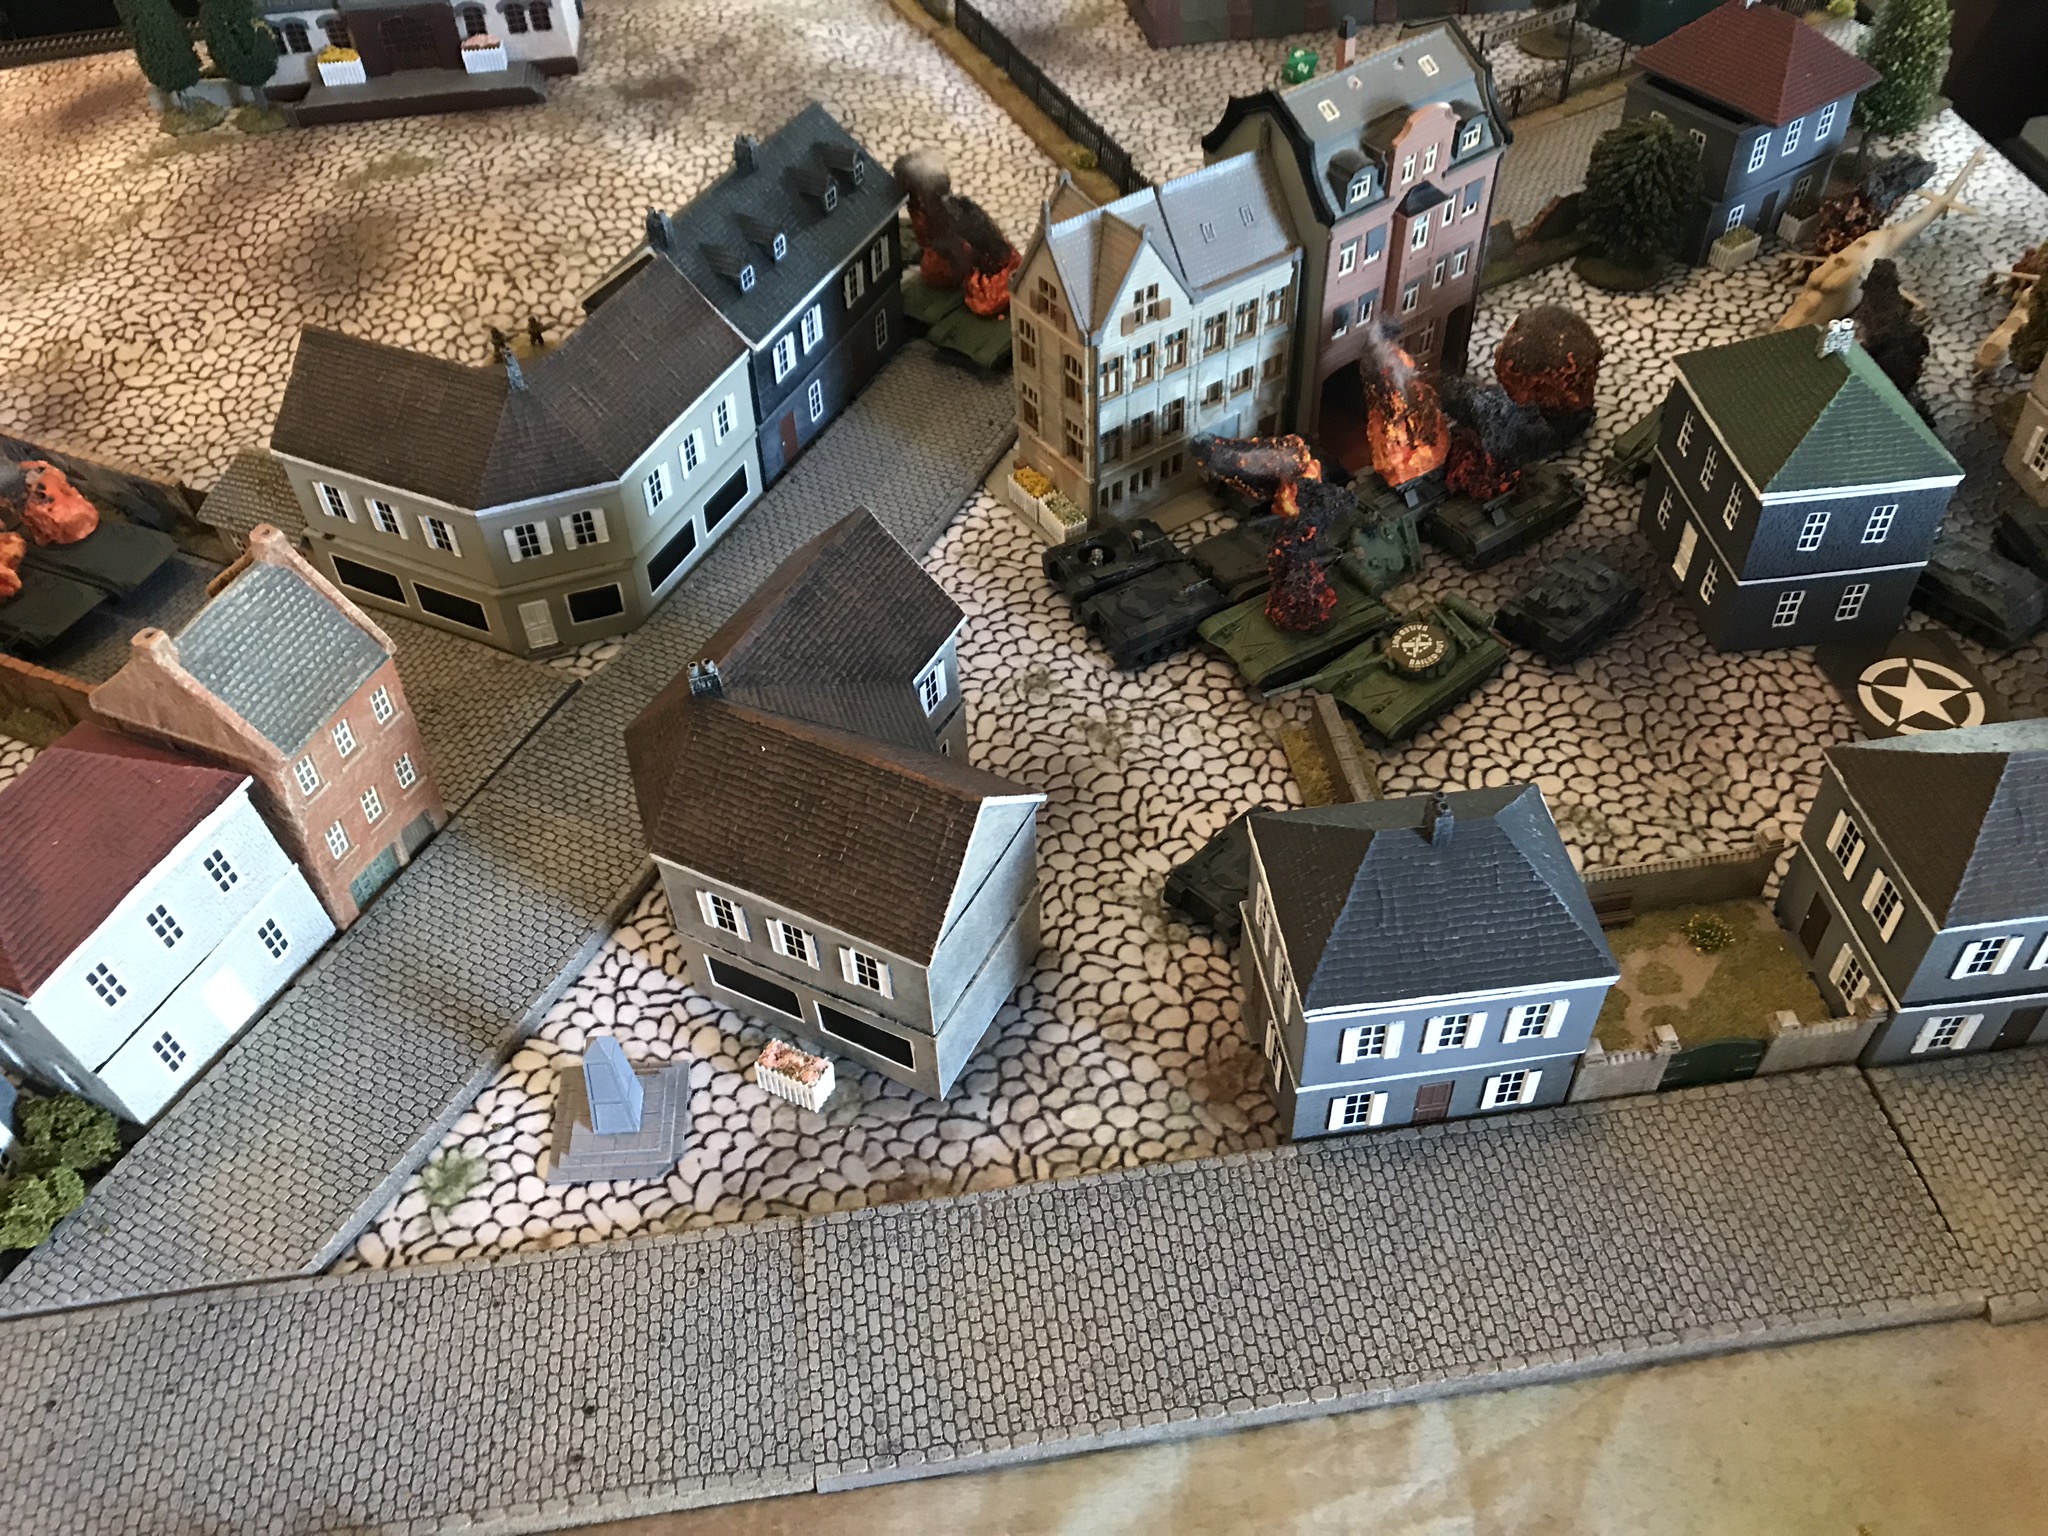
The knife fight in a phone booth continues near the objective. The last Soviet tanks are destroyed there. The remnants of the Soviet BMP company along with their BMP's are finally destroyed (what's with Soviets that never run?), and the two remaining bases of the air landing team are dispatched with Charlie G in the building into which they had sought refuge.
Although I won, candidly I played poorly from the beginning. Had the Soviet taken his time rather than go for a quick win, he could have had me.
I don't like this sort of game and my opponent knows it. That's why he forced me to fend off assaults and made me fight in close quarters. Kudos to him for wrong footing me.
It was a very good game from a sportsmanship perspective and after all a win. Better lucky than good I suppose.
Battle Report Author
Army Lists Used In This Battle
Recommend Commander For Commendation
Share this battle with friends
Major H. JonesWins

Great Terrain, en envy you guys, to fight over you know this Comrade reagan-o’ is a sly dog
don’t tempt him;
great win,
Another excellent win. You’re turning into one of our best assets, Jones, keep it up.
All that cobblestone must have made for a very bumpy ride!
Commended.
Simply outstanding!
Eight star and recommend
Love that terrain. More of a diorama look than a game table.
Congrats on a tough win
Nice report
Well done and congrats on the win. Your armies and the table looked really nice too.
Sounds as tough a fight as Goose Green, glad you got through it and won the day Jones.