Fought At Frankfurt
2217 days 6 hours 27 minutes ago
a close run thing near frankfurt
60 POINTSI’m still new to this whole online campaign thing, and I got a little excited starting up the very first tabletop wargame our newest Soviet player has ever played and forgot to take any pictures until Turn Four. I think the story’s pretty easy to suss out from the few photos I did get though.
Leutnant Josef Reisender breathes in deeply and tries to savor the fresh air blowing the diesel fumes of his idling Leopard 2 away across the fields of the small farming village. Reassigned to a Leopard 2 Panzer Kompanie after losing his Panzeraufklärungs Kompaniechef to a T-72 in a brutal, and mostly ineffective defensive action in a Soviet bridgehead in the Ruhr Valley, he really just savors being alive. He spends a few precious seconds enjoying the beguilingly pristine look of the village, knowing it won't look nearly so pristine in the coming hours, and returns to scanning the terrain stretched out on the other side of foliage covered stone wall he is using to hide his tank. A tall hill obscures much of his view and he determines to reposition his Zug to take advantage of its height. As he reaches for his microphone, he makes one last sweep with his binoculars along a treeline across the road. Some slight inconsistency tickles his mind and he pauses. A moment's watchful concentration rewards him with seeing the long, wicked snouts of three Soviet Carnations creep into view just inside the trees.
"Ah, Ivan," he thinks, "Don’t you know I can’t let you park there?"
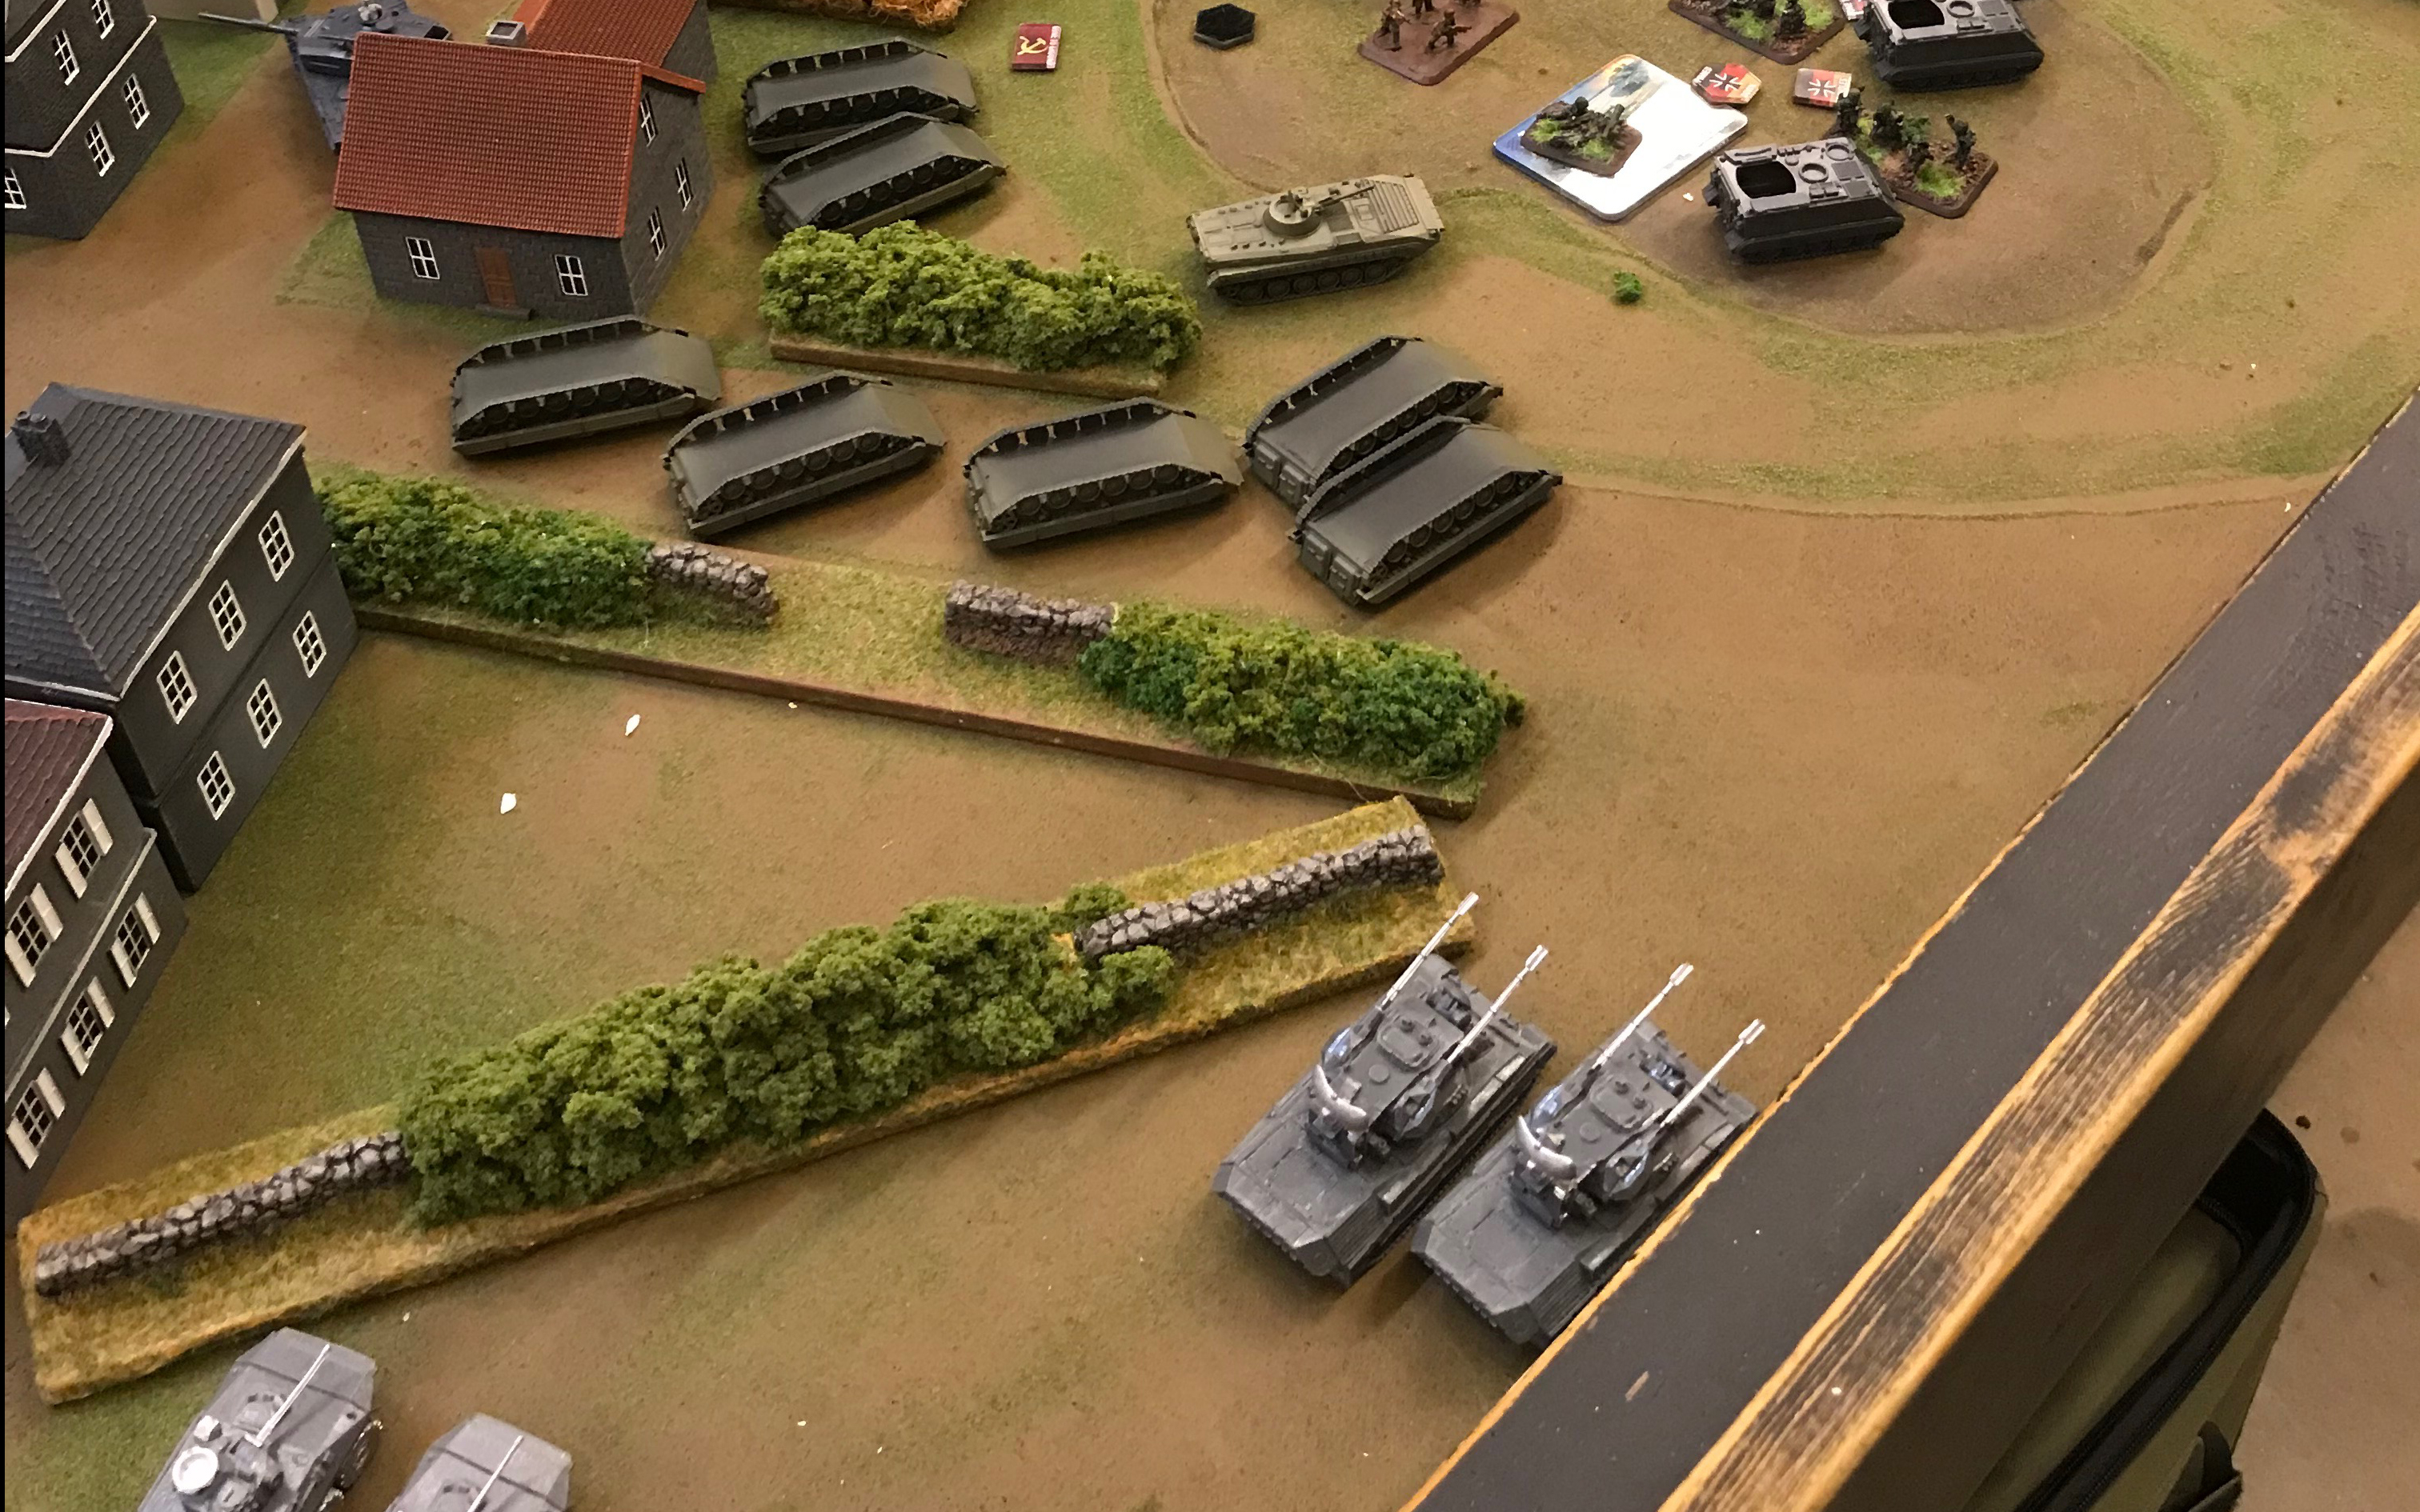
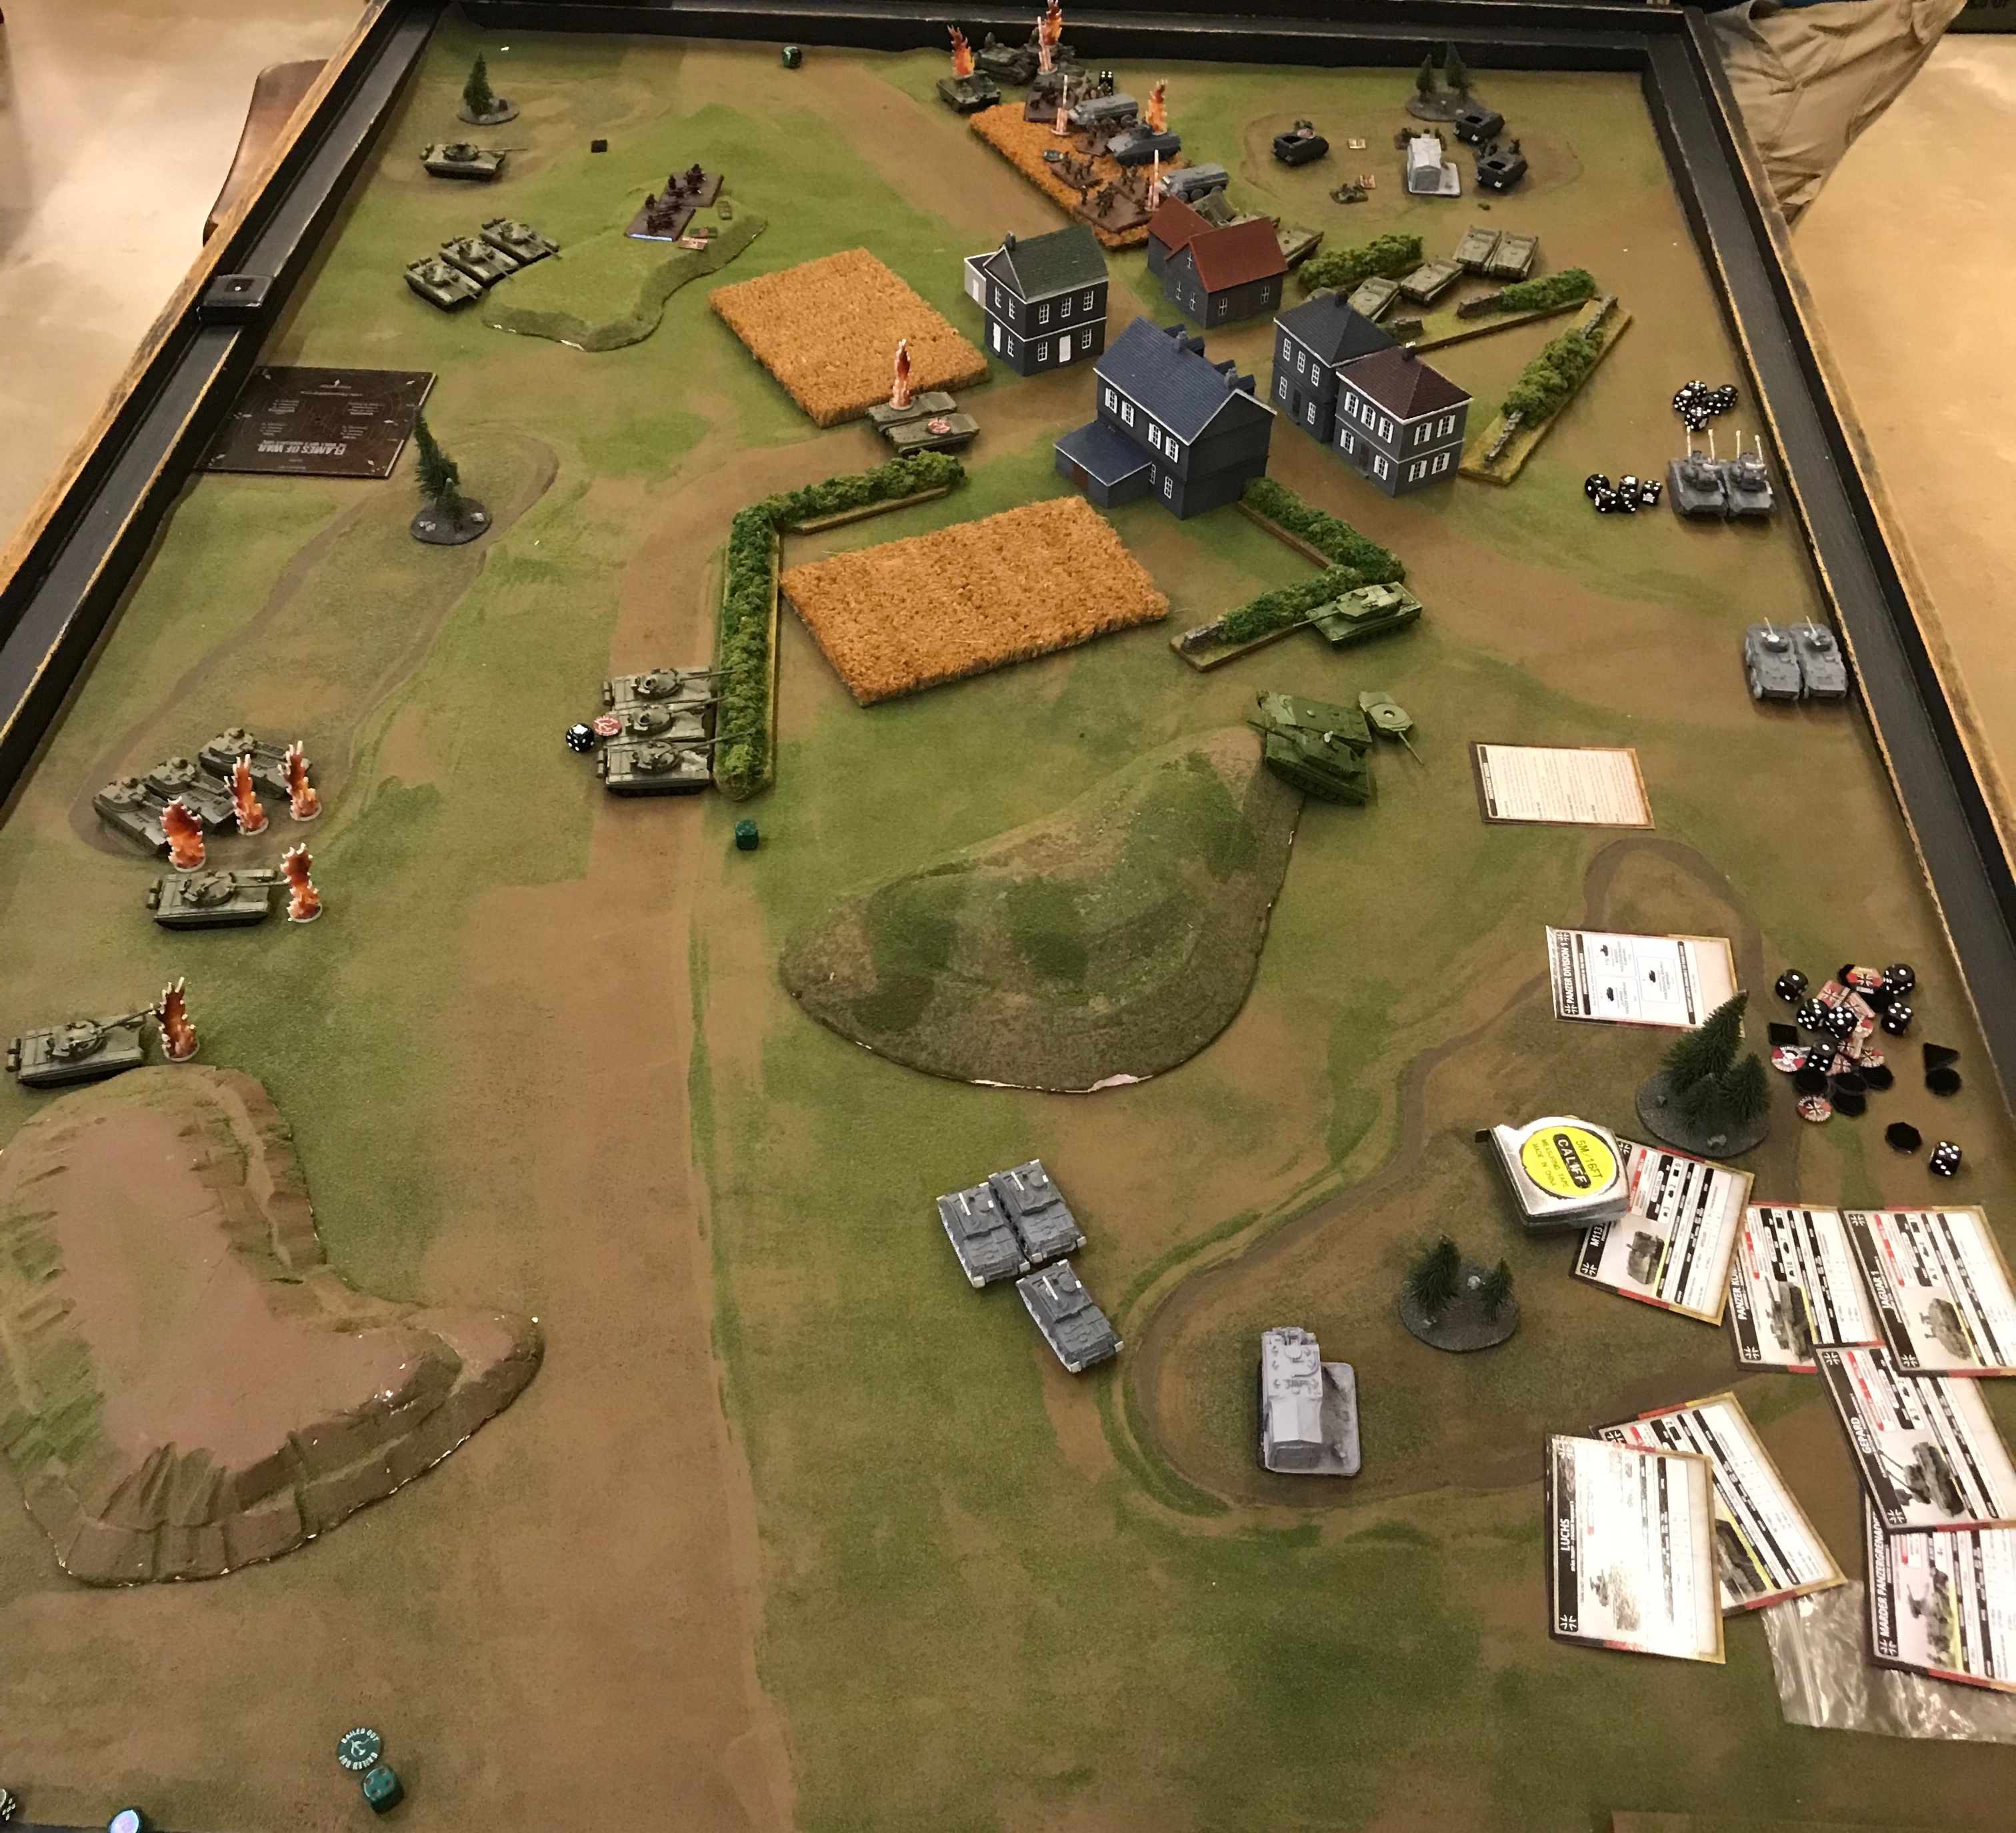 Battlefield (spoiler alert: this is Turn 4). The Germans deployed top right, and the Soviets top and bottom left.
In response to the Soviet push into the Frankfurt area through the Fulda Gap, a Leopard 2 Panzer Kompanie of the counterattacking West Germans has established a defensive position in and around a village and a wooded area containing one possible Soviet objective, and near another possible objective in another wooded area off their own left flank. Panzergrenadiers with a few Panzerfaust 44s and a couple of Milans are dug in around the objective within the German deployment area, and their Marders (two proxied by Fuchs) are deployed forward, concealed in a crop field, to provide the infantry a cushion, and perhaps soften up any unescorted Soviet Motor Rifle BTRs or dismounted infantry with their 20mm main guns and 7.62mm MGs. Also in the woods, intermingled with the infantry around the objective are the three M113 Panzermörsers of the Kompanie’s only available artillery. The Panzermörsers are without their customary M113 OP but have already ranged in on a likely area of Soviet advance at their maximum range. The Kompanie’s two Luchs Späh Truppen, with two Luchs each, the two Gepards of the Flakpanzer Batterie, and the three HOT missile-armed Jaguar 1s of the Jagdpanzer Zug are all in reserve off the German left flank, somewhere beyond or behind the woods containing the second possible Soviet objective. The main punch of the Kompanie, the three Leopard 2s of its Panzer Zug are somewhere in ambush, and the Kompaniechef in his own Leopard 2 is at the far edge of the village from the secured objective. He is idling next to a building from where he can observe the crossroads in the middle of town and still see most of the center of the anticipated battlefield.
When the first units of the Soviet force arrive, they are fairly evenly distributed across two distinct areas to the West German front and front left oblique. Four T-72s poke their noses out of the woods directly across the road from the field concealing the Marders. A small horde of BTR-60s (proxied by turretless BMP chassis) roll up behind a low hill near the woods hiding the T-72s, but their passengers, a slightly lean Motor Rifle Company with a heavy weapons section of two Spigot teams and an AGS-17 grenade launcher team, are already dismounted and intermingled with the Soviet main battle tanks. A trio of amphibious 2S1 Carnations poke their brutal 122mm noses out of the far end of a long thin wooded section stretching across the far side of the middle of the battlefield, no doubt ready to direct fire on any Leopard 2s ignorant enough to roll by. Their OP in a BMP-1 sets up hull down on the hill concealing the massed BTRs. Another four T-72s, accompanied by the Polkovnik in his own T-72, pull up on the back side of a rocky hill right where the Panzermörsers have ranged in. Intel suggests the Soviet force includes two SA-9 Gaskins in a dedicated anti-air platoon, an air defense artillery battery of two ZSU 23/4 Shilkas , a couple of 9P148 Spandrels in an anti-tank platoon, and a reconnaissance unit of two BRDM-2s, but these units are nowhere to be seen.
The opening dance of the ball is short and loud. No Bundeswehr reserves arrive. The Leopard 2 Zug moves from its ambush position just to the left of the Kompaniechef’s own Leopard 2, and takes up positions against and alongside the stone field fencing, and on the extreme right wing of the tall grassy hill that dominates the center of the battlefield. At the report of T-72s under their mortars, the Panzermörsers excitedly fire off a barrage, only to realize too late that, in their excitement, they have fired off all their smoke rounds needlessly. The veterans of the Leopard 2 Panzer Zug perform much better. They combine their fire with the Kompaniechef and concentrate on the Carnation battery, using their laser-rangefinders and four 120mm L/44 main guns to good effect. One Carnation is destroyed, one crew bails out, and the third crew, clearly green conscripts, has had enough and flees.
The Shilka ADA battery arrives from the Soviet reserves, and moves up to flank the Marders on their right and position themselves to easily address one of the two infantry Milan teams positioned to shoot out of the woods concealing them. Confident that, between the T-72s facing them from the woods and the Shilkas hard up against their flank, the Marders will not be around long enough to endanger them, the Russian infantry heads straight for the five German infantry teams securing the nearest objective, leaving their two heavy-hitting AT-4 Spigot anti-tank teams to dissuade those randy Germans from having molesting the exposed rear of the lean main body. Their BTRs swing out from behind the hill concealing them, slip between it and the long, thin woods concealing the blazing Carnation battery, and move onto the road that cuts through the middle of town. In no hurry to press the objective off the German left flank, the Polkovnik and the four T-72s near him patiently wait for the smoke to clear. The T-72s in the woods demonstrate their perceived artistic dominance of good communist workers over decadent capitalists by shooting very well and painting stripes in the sky with inky black smoke rising from three shattered Marders. The Shilkas pour buckets of expended munitions into the only visible infantry team, a Milan, but to no effect.
Appalled by Shilkas already firing on the small infantry unit holding the objective, the horde of BTRs rolling into town likely bent on putting that same infantry in a pincer, the loss of the Marders, and the fact there are still no reserves in the fight, the Kompaniechef moves his Leo 2 to be across the street from a big grey building from where he can shoot along the long axis of the town, and be ready to address the BTR issue rapidly approaching. Having no other viable targets at the moment, the Kompaniechef aims at infantry moving towards the burning Marders, but is too far for machine gun fire and is ineffective at taking out an RPG-7 team with the main gun. The Leo 2 against the stone fencing paralleling the road down the long axis rotates his turret far to the right for a shot past his Kompaniechef at the Shilkas. Feeling the need to shift fire may be imminent, a Panzermörser moves close enough to the treeline to be able to see out and spot for the Batterie. The Zugchef, against the stone field fencing, and the Leo 2 on the wing of the hill succeed in taking out the Polkovnik’s T-72 now visible through the dissipated smoke barrage, but the wily Red simply takes a shot of vodka and jumps in another. The Leo 2 on the road through town succeeds in knocking out a Shilka, and, like their comrades in the Carnation, the remaining Shilka crew torch their ride and hoof it out of the battle.
A pair of Spandrels and a two-strong BRMD-60 recon platoon arrive from the Soviet reserves and immediately move to take up positions near the burning Shilkas and smoking Marders from where the Spandrels can shoot over concealing crops and along the long axis back towards the two Leo 2s parked on the road through town, and the BRMDs can shoot at a Milan team concealed in the woods. Eager to get out of the sights of the Kompaniechef’s Leopard 2, the Soviet infantry continues its advance toward the German infantry, moving into the crop field fertilized with dead Marders. T-72s move from the woods to the low hill that originally concealed the BTRs so they can enfilade the Panzer Zug, but two bog in the process. The BMP-1 OP moves straight over the hill towards the objective, paralleling the path the BTRs are about to take through town. The BTRs roll into town, the lead elements passing right in front of the Kompaniechef as they move through the crossroads in the middle of the village. With the two T-72s from the woods positioned to put enfilading fire on the Leo 2 Panzer Zug, the Polkovnik and the other 4 tanks slide to their left, out from under the mortars and park between the burning hulk of the Polkovnik’s old tank and the wrecked Carnations. The Polkovnik tries for a side armor shot on the Leo 2 with its turret rotated far to the right, but bounces it off the hull frontal armor. The enfilading fire manages to bail the Zugchef, but he simply runs to the Leo 2 on the wing of the hill.
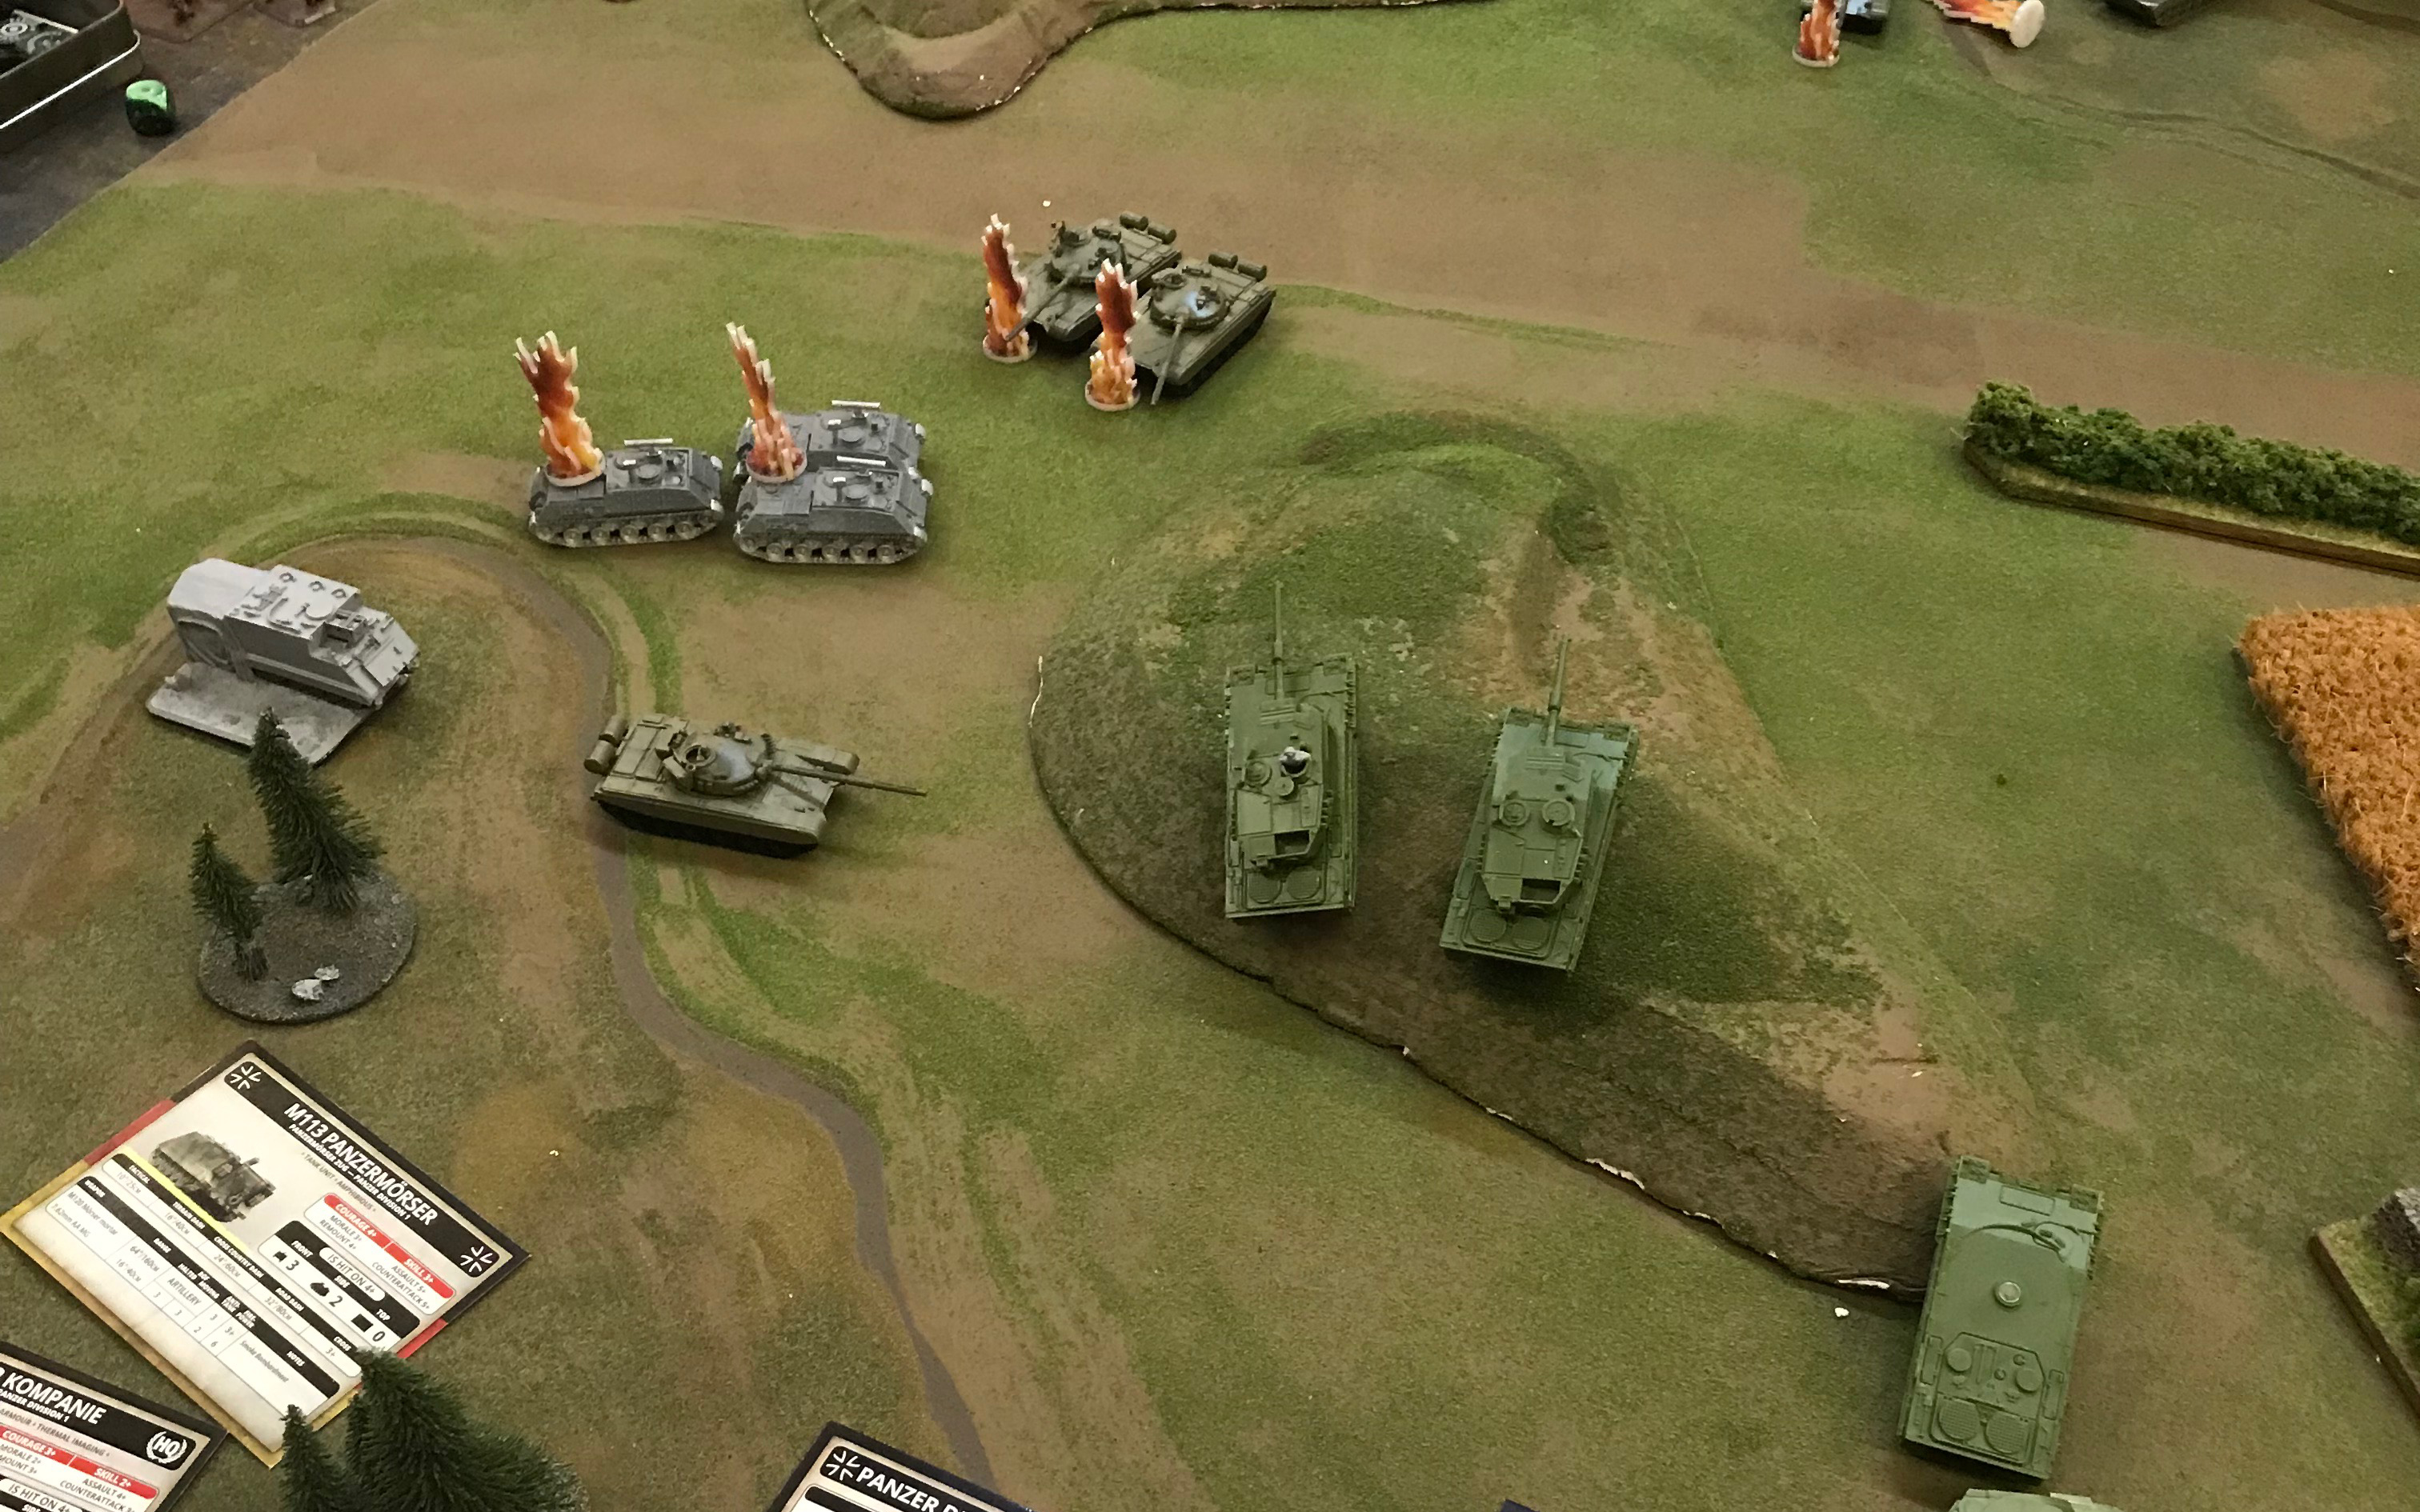
Bundeswehr reserves finally arrive in the form of a pair of Gepard Flakpanzers that race at top speed cross country to try to relieve the growing pressure on the Panzergrenadiers. The Zugchef’s abandoned crew remount their tank, and the Panzer Zug shuffles around slightly to be able to put more fire along the long axis of town without giving up the ability to shoot the Polkovnik and his nearest comrades. The Kompaniechef destroys one BTR and bails another, creating a bottleneck for about half the BTRs to file through. The Leo 2 already on the street with the Kompaniechef takes a long shot at the BRMD platoon and punches right through the thin armor to something vital in one of them. The other BDRM crew scuttles their little wheeled boat and goes out “zu fuss”, as the Germans say. The Leo 2 which shifted to put more fire down the street takes out a Spandrel. The other Spandrel crew, surrounded by the twisted, flaming output of Soviet industry, adds their vehicle to the general wreckage and follows all the other lone surviving Soviet crews out of the battle area. The Leo 2 on the wing of the tall central hill, takes a couple of shots at the Polkovnik, and succeeds in destroying his second T-72. Of course, the Polkovnik climbs from the burning tank swilling vodka, and hops a little less steadily into another tank. The Panzermörsers rain mortars down on the Motor Rifle Company using wrecked Marders as concealment, pinning them but managing to eliminate only one PKM LMG team.
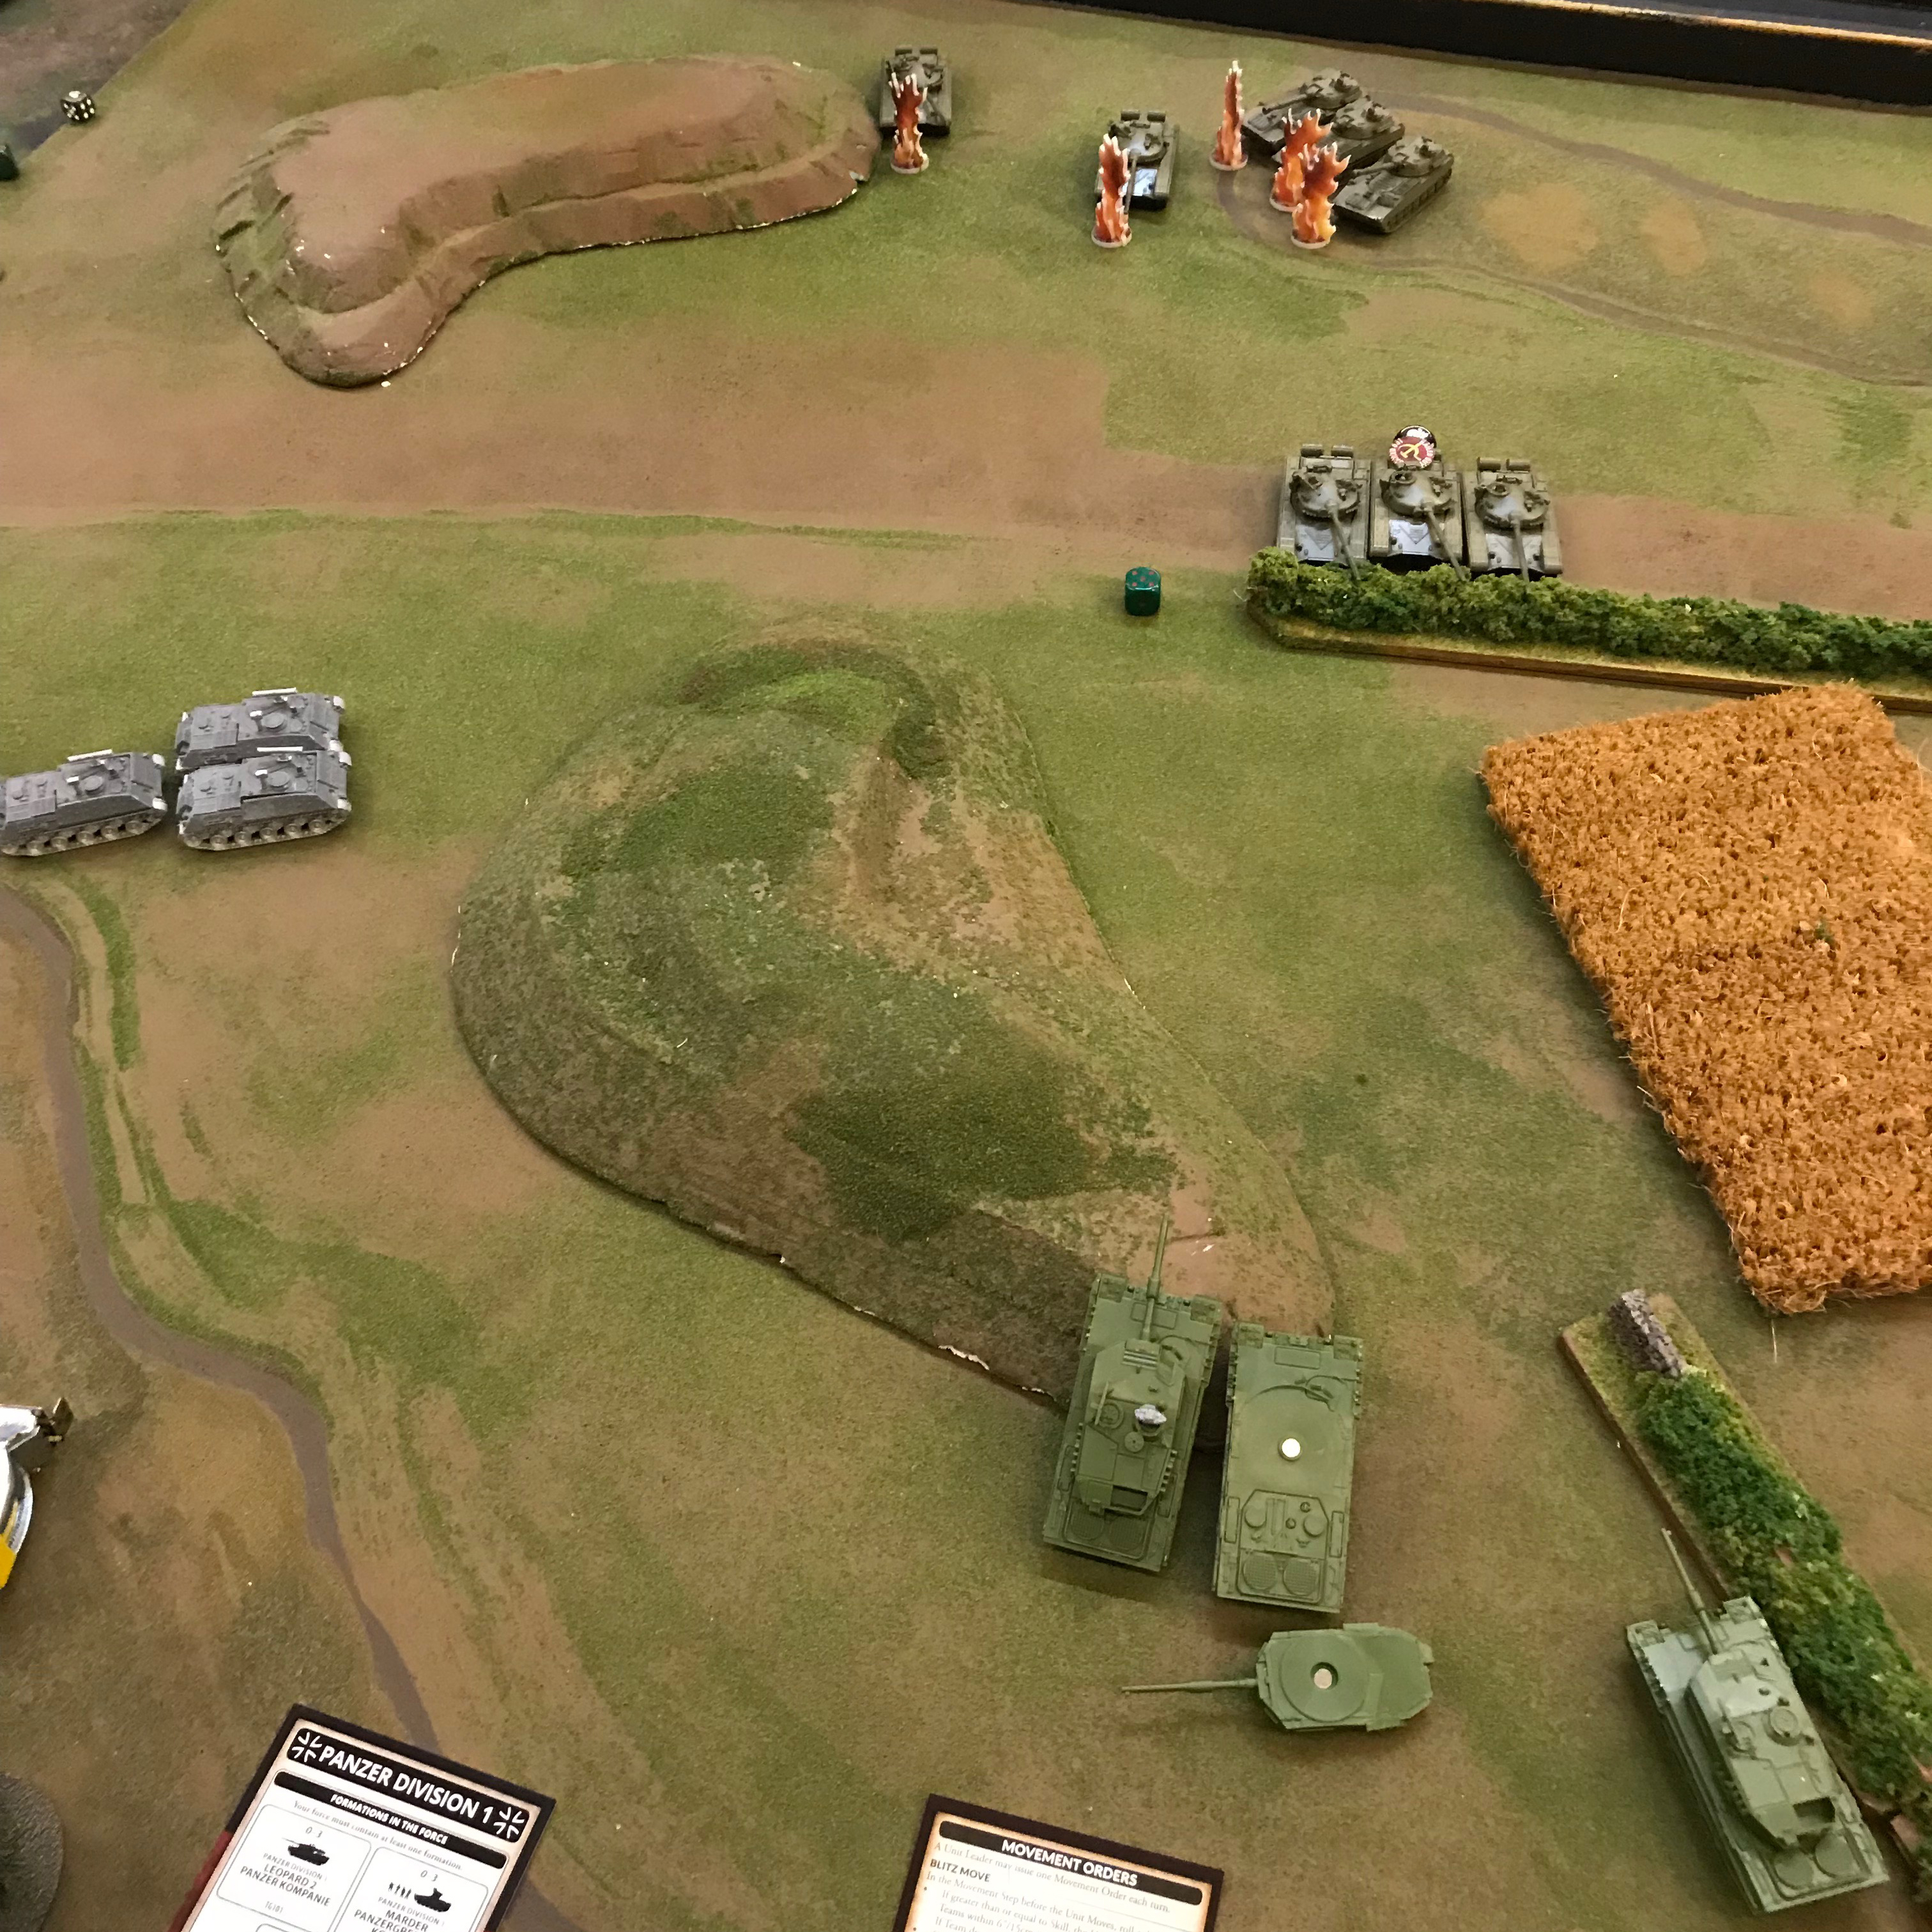
Though it hardly matters to either side, the last of their reserves, a pair of dedicated AA Gaskins, do not arrive. The bailed BTR fails to remount. The two T-72s remaining in the woods try to rejoin their unit, and one bogs down again in the process. The Polkovnik and the two surviving T-72s of the tank companying following him around push toward the Leopard 2 Panzer Zug and take up a position behind the concealment of a foliage covered stone fence bordering the crop field in the center of the battlefield. The BTRs, strung out by filing past their still bailed comrade, dash through town and end up in a semicircle facing the German infantry and Panzermörsers within easy striking distance of the objective, and the BMP-1 OP dashes to join them, in preparation for pinning the German infantry so the Soviet infantry can assault them. Meanwhile, that Soviet infantry recovers from having been mortared, and unleashes a flurry of RPG-7s and 18s on the Panzermörser they can see. Though struck, the M113 is not destroyed, but the crew does take cover outside the track. Proving the old adage, that line of sight works both ways, the six T-72s that have the Panzer Zug in enfilading fire manage to destroy the Zugchef’s Leopard 2 elevated on the slope of the tall hill, but, fortunately, he is just barely close enough to make it to another tank.
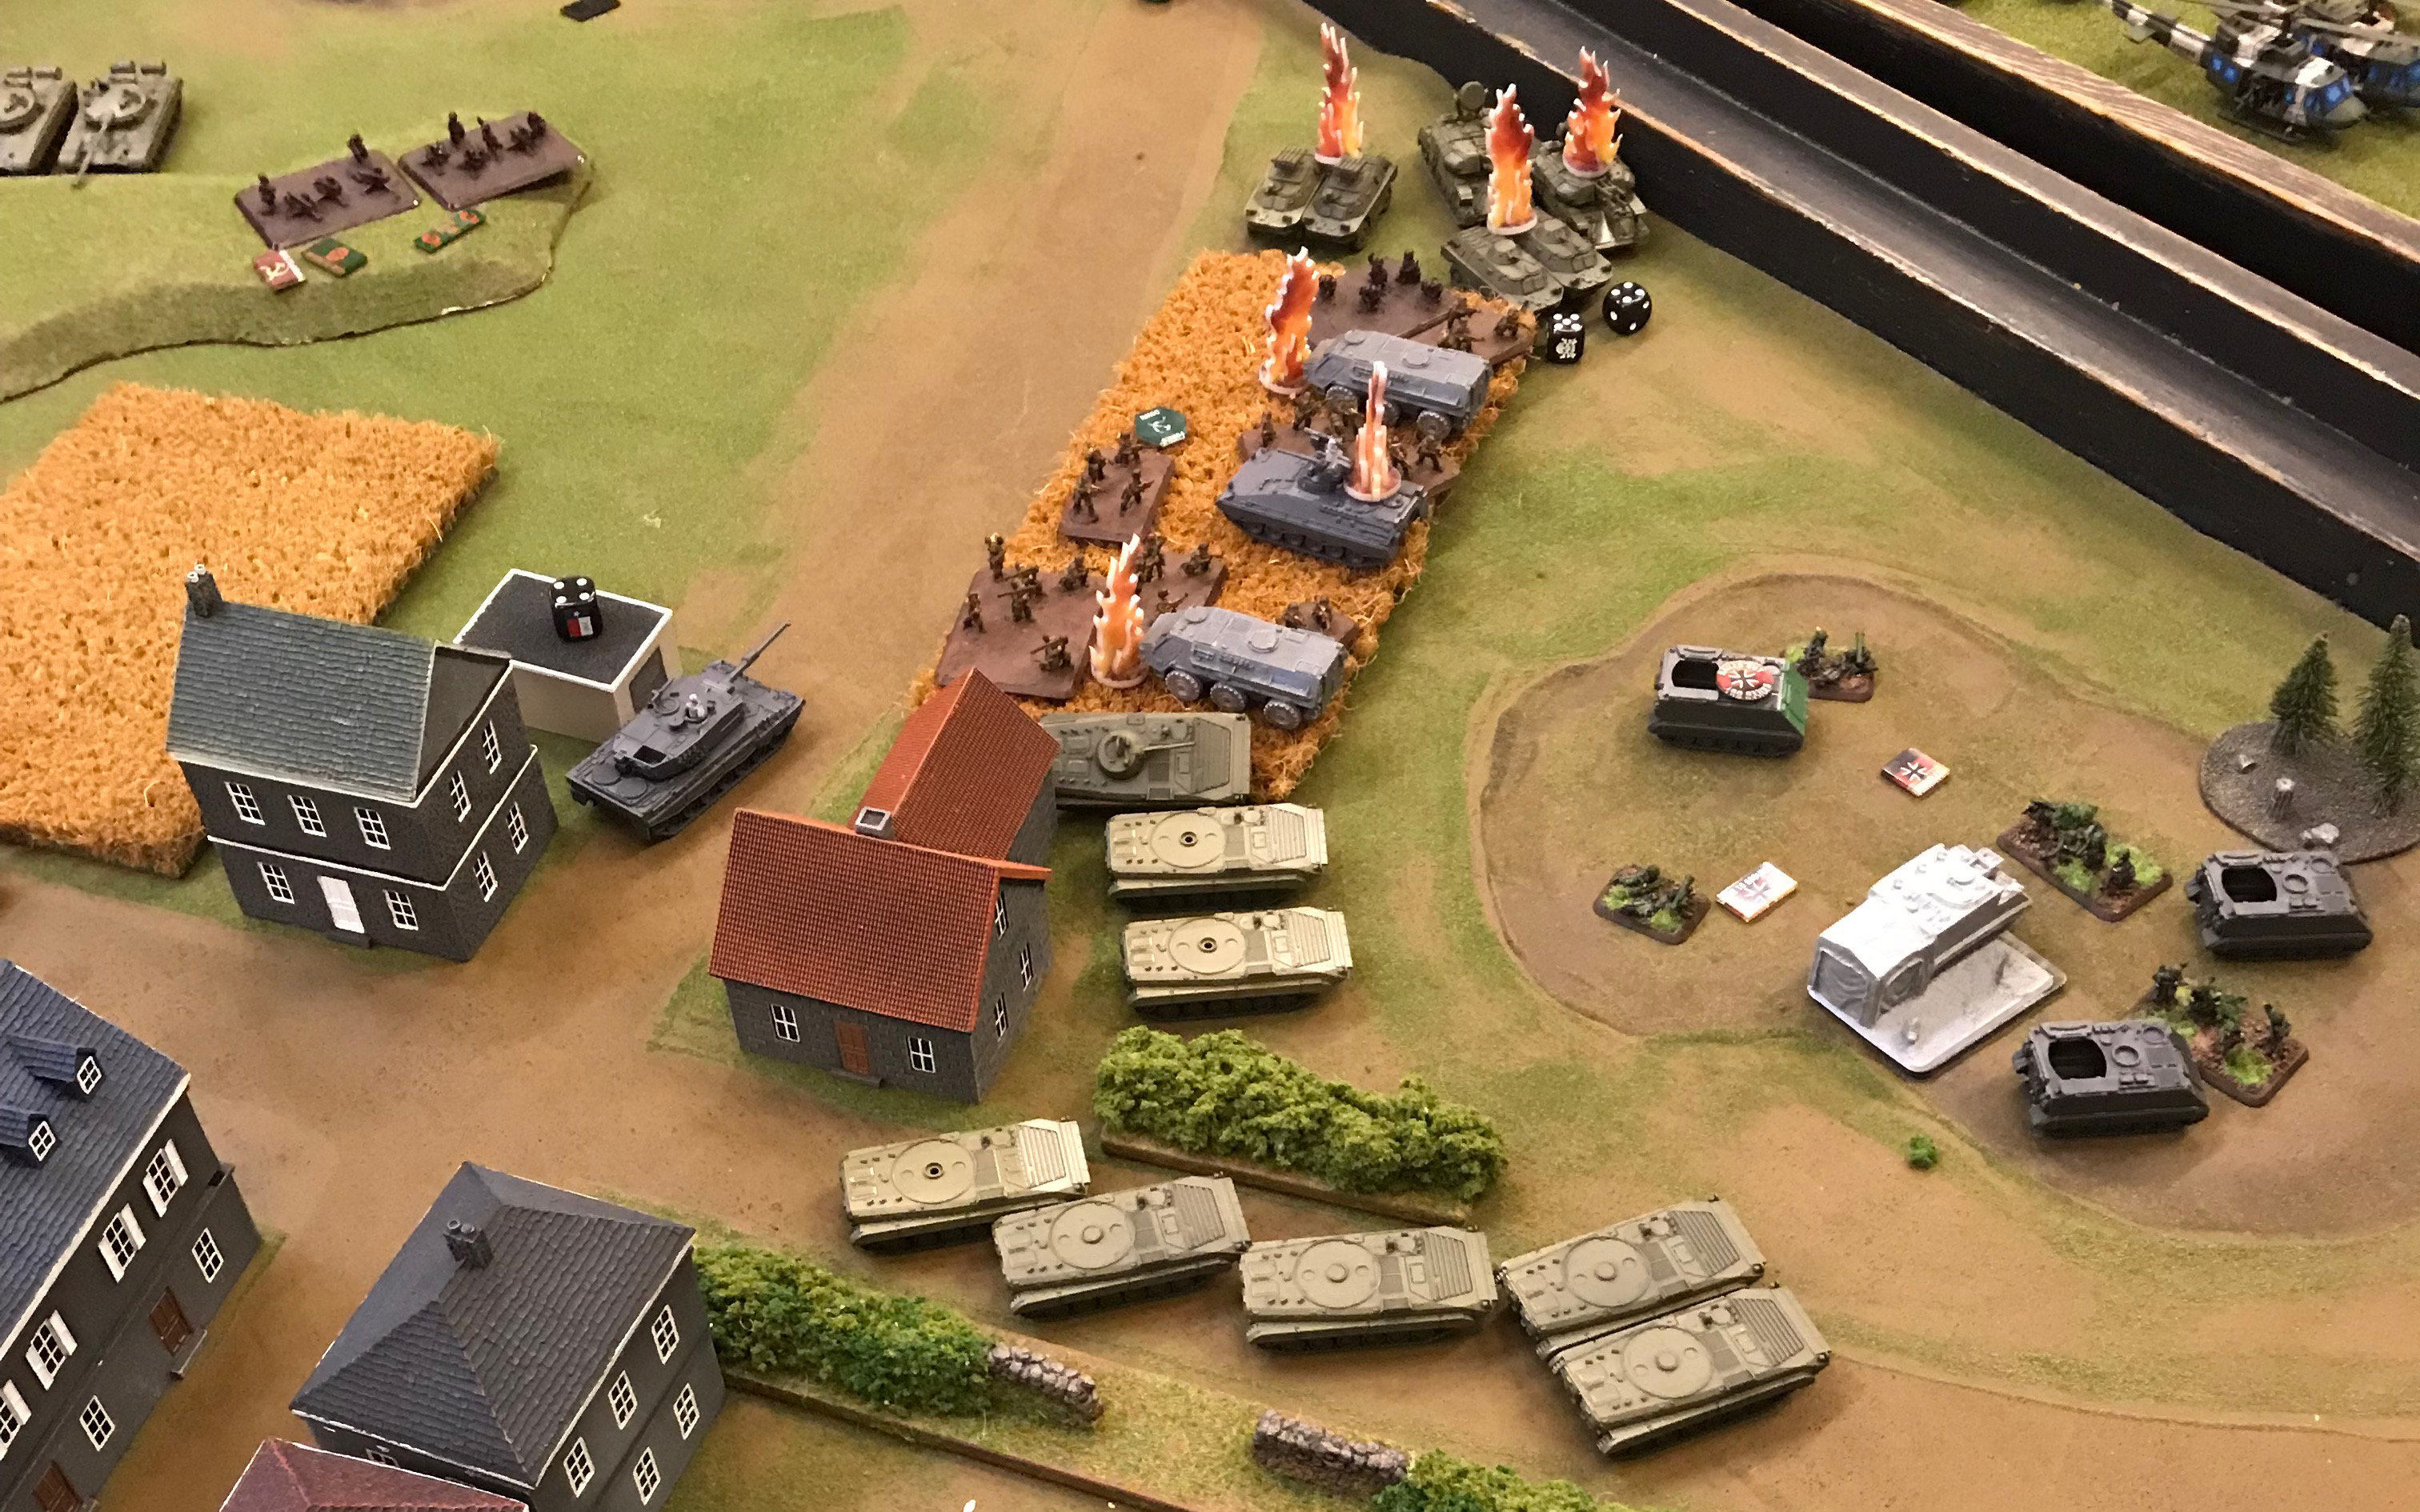
Finally, the last two Bundeswehr reserve units arrive, but the bailed Panzermörser crew stay that way. The Spä Trupp dashes at top speed straight toward the besieged Panzergrenadiers. Knowing that the Polkovnik and the half smashed tank company puppy-dogging him now pose a credible threat to the unsecured objective, but can’t ignore the Leo 2s in front of them, the Zugchef of the Jagdpanzer Zug makes the first serious German tactical error, choosing not to attempt to move his Jaguar 1s into the concealing woods around the objective, but to rather move past the woods and to a position out of sight of the Polkovnik, hoping to blitz at the first opportunity and take one or two of the Soviet tanks out with HOT missiles. The Kompaniechef moves across the intersection towards the rear of the infantry massing to assault his Panzergrenadiers, intent on laying into them with his coaxial and AA MGs. The two remaining Leo 2s of the Panzer Zug give up the entire right side of the battle to deal with the Polkovnik and his comrades, and move to positions on the elevation of the hill and the concealment of the stone crop fence. The Flakpanzers sit still and prepare a full rate of fire barrage. Foregoing the chance to fire on the Ivan’s infantry, the Kompaniechef calls in a mortar barrage, pinning the Reds and taking out two AK-74 teams. The Leopard 2s fire on both the Polkovnik and the tank unit with him, and succeed only in bailing one crew. The Gepards unleash their pent up fury, and, in the silence following, a sigh of relief is heard from within the woods, as every single BTR pressing the Panzergrenadiers is destroyed outright. The crew of the previously bailed BTR, as is this battalion’s tradition, destroys their track and flees. The T-72 company with the Polkovnik isn’t in good spirits either, but becomes the battalion’s first unit in this battle, to break with their tradition and remain in the fight instead of breaking.
The Gaskin platoon comes into the area from reserves, but remains hidden in the woods, useless. Reeling from the devastation of the BTRs, the Polkovnik detaches his hopes of victory from solely resting on securing the objective inside German lines, and sweeps to the German left with two T-72s in tow. The final T-72 that started in the woods opposite the German front finally clears the woods and moves to follow its comrades pushing straight towards the Panzer Zug. The BMP-1 OP moves up to where it can shoot any Panzergrenadiers in the immediate vicinity of the objective. The Soviet infantry takes its final shots, trying to pin down the Panzergrenadiers before wading in for the assault, as one of their woefully out-of-command heavy-hitter Spigot teams takes as swing at the Kompaniechef’s barely exposed hull. The main body of the infantry fails to kill any, or pin the Germans, and the Spigot team whiffs. The Polkovnik and company murder two Jaguars, and the third crew burns their track and flees. Four Soviet infantry teams assault the Milan team and bailed Panzermörser. The assault draws in one German MG3 team, and their lone defensive shot takes out a Soviet RPG-7 team. The Soviets take out the Milan team. The MG3 team fails to scare up the courage to counter-assault, and withdraws, thereby abandoning the M113 Panzermörser track to be destroyed. The whole Soviet infantry company, except the out-of-command Spigots, consolidates, forcing the remaining Milan to fall back from its foxhole and go to ground on the objective, directly under the gun of the BMP-1 OP.
Now the only thing on the left flank preventing a Soviet victory via seizure of the left objective, the two-panzer Leopard 2 Panzer Zug, moves even further from its beleaguered infantry brethren, and takes up a position on the tall hill dominating the central battlefield to enable shots on the Polkovnik and the depleted T-72 company. The Gepards move at tactical speed straight along the back of the village trying to bring their high rate of fire into the mix before the Panzergrenadiers are overrun. The Luchs move up to where they can get concealed shots on the BMP-1 OP threatening a Milan team near the objective. The Komapniechef backs up just a touch, safely out of the line of fire of the Spigots, from where he can shoot between two buildings at the bulk of the unscathed T-72 company that has his Panzer Zug, exposed on a tall hill, in its sights. The Gepards fire on the visible infantry left in the field with the Marder hulks, and in a bit of mild irony shoots down the Gremlin team. The Kompaniechef misses both his shots on the unscathed T-72 company. The Späh Trupp shoots at the BMP-1 OP, but misses. The Panzer Zug destroys one T-72 from the previously very much scathed company, and bails the other. The Polkovnik chooses not to intervene in the company’s affairs, and the bailed crew’s nerve fails them, so they spike their gun and exfil, hopefully reestablishing the battalion’s old tradition of fleeing.
The BMP-1 OP’s crew decides their track may still be unsafe, while the Polkovnik leaves the burning wreckage of his constant companions behind and moves to a flanking position between the Leo 2s and the left objective, of which he now has uncontested control. Two of the T-72s from the remaining company move towards the Panzer Zug, improving their likelihood of killing one of the Leopard 2s with their turrets swiveled left. The other two T-72s close in on the Kompaniechef in the middle of town, one parking in the crossroads and the other moving to the right edge of the village, and both reaching positions giving them a 50/50 chance of hitting side armor. The two remaining AK-74 teams and the lone remaining RPG-7 team of the Soviet move into the woods with the Germans in preparation for a last push. Their AGS-17 team moves up on their left flank but doesn’t enter the woods. The remnants of the M fire but fail miserably while the Gaskins hide in the woods. The combined fire of the Polkovnik and two T-72s suffices only to bail one Leopard 2. One of the other two T-72s bounces a shot off of the front of the Kompaniechef’s turret. The other misses completely. The Soviet infantry kills one MG3 team and succeeds in pinning the Germans with the help of the auto-grenade launcher, but the Bundeswehr infantry holds the line. However the Reds do not push their luck by assaulting into the combined defensive fire of the two Panzermörsers and remaining MG3 team. The Zugchef also maintains his courage, and does not flee in the face of being the only functional team in his unit.
The bailed Leopard 2 crew still finds it prudent to remain outside their panzer, but the Panzergrenadiers shake off the effects of coming under fire from the AGS-17. The Zugchef moves to contest the left objective and flank the Polkovnik. The Kompaniechef moves out of town to the right to enable side shots on the nearest T-72, the one that missed at point-blank range, and deny side shots by the remaining T-72s. The Gepards move tactical around behind the woods containing the broiling infantry fight, placing themselves within range of contesting the objective should the infantry and mortars fold. The Luchs move up tactical as well, prepared to shoot any Reds it can. Eager to end the threat, instead of calmly going about the business at hand, the Zugchef misses his shot on the Polkovnik. The Kompaniechef destroys the nearest T-72 on right edge of town, successfully ending any threats of side shots on his tank. The Luchs succeeds in hitting the bailed BMP-1 OP, but fails to destroy it, and its crew choose to remain despite their comrades’ penchant for running away. The Gepards are without visible targets, but the Panzermörsers and Panzergrenadiers have a forest full of them, all close enough to see. They open up with AA MGs and kill the last RPG-7 team and one more AK-47 team. The remaining infantry breaks and runs.
While the OP crew climbs back in its BMP-1 and bogs down in an attempt to move into the woods and away from the Luchs and Gepards, the Polkovnik decides to remain in place instead of moving away from the objective, or risking bogging, in an attempt to get side shots on the Zugchef. The two T-72s of the remaining tank company that are nearest the Leopard 2 Panzer Zug continue closing the distance and swing around the field fence to enable hitting the bailed Leo 2 in its vulnerable side armor. The Last T-72 repositions in the crossroads to hold the Kompaniechef at bay. The Polkkovnik gets two hits but, though there is a chance to hit the bailed Leo 2 in its hull side armor, both shots bounce off frontal armor. The two T-72s shooting at the bailed Leopard 2 get one hit, but succeed only in frightening the crew again, but not enough for them to leave. The T-72 in the crossroads also gets a hit on the Kompaniechef, but it fails to penetrate.
The bailed Leopard 2 crew remount, drive along the crest of the hill, and turn around. The Zugchef stays put, while the Kompaniechef moves into the field of broken Marders. The Luchs move to where they have a clear shot of the BMP-1 OP bogged at the treelin, while the Gepards reverse direction and move a position on the from where they can shoot along a foliage covered stone fence into the rear armor of the two T-72s stalking the Panzer Zug. The combined fire of the Panzerzug knocks out the Polkovnik, who has no more T-72s within running distance, and the battle is suddenly over.
Leutnant Reisender looks down from watching the flames of the burning Soviet tank snap and flutter around the thick, black smoke roiling up into a haze grey sky, and focuses on his right hand still tightly clutching his microphone. He mentally forces his fingers looser, and transfers the mic to his left hand. He flexes the right out flat, and when he relaxes it again, it starts to tremor. He makes a fist and moves it in a quick circular motion, popping a joint somewhere in his wrist. He repeats the gesture five or six more times until he stops feeling the pop in the joint, and finally feels a bit of relief.
“That,” he thinks, “is what this is going to take. Going round and round, doing this same damned thing over and over again, until the Communists finally go away.”
He looks at the husk of the Leopard 2 shot out from under him earlier in the engagement, and wonders if he can survive going around enough times to see it.
Battle Report Author
Army Lists Used In This Battle
Recommend Commander For Commendation
Share this battle with friends
JoeTravellerWins

Thanks to all for the kind words and especially the commendations.
I appreciate the compliments on the table, but I had only a little to do with this one. All the tables we play on are truly a team effort of shared mats and terrain we keep at the store we use as our “clubhouse”, and joint efforts of setting up tables when we game.
I apologize for the lack of paint and pictures and the unreadable list. I kept forgetting to take pictures during the game, and I don’t think I got any where you can see the infantry actually is painted. A combination of factors has put me way behind in painting vehicles, but I’m hoping to get that going again very soon. And I think I got a readable list up. I don’t know what happened there.
And finally the series of die rolls that wiped out the Soviet transport section in one shooting step was one of my most enjoyable experiences wargaming. I loved watching that happen.
Really cool report!
congrats on the win. Great narrative, but more engaging if you break it up a bit with more photos. Still, great table and well fought battle. Commendation!
The picture with a score of burning BMPs was worth the commendation 😀 !
Nice report
Congrats on the win. Great looking gaming table. THanks for sharing.
i cant read your list? oh wow, you brought Fuchs! love it
nice win, well done mate
Congrats on the win. Way to stand firm against the Red aggression.
well done, congratulations on the win.
Your men deserve a cost of paint after that impressive win
Well done! Congratulations! Great BATREP!