Fought At Hanover
2239 days 20 hours 13 minutes ago
Stampede at Hanover
View Linked Report - CLICK HERE 70 POINTSIn the bright daylight of a sunny German day a Soviet Tank low strength Tank Battalion meets a equally low strength British Armoured Company with recon support
The lists
Soviet: T-72 Tank Battalion
HQ-1 x T-71
T-72 Tank Company 3 x T-72
T-72 Tank Company 3 x T-72
BTR-60 Motor Rifle Company Mid Strength with 2 AT-4 Spigot ATGM Teams
Shilka AA platoon 4 x ZSU-23-4 Shilka
Support
T-64 Tank Company 3 x T-64
Storm Anti Tank platoon 3 x Storm
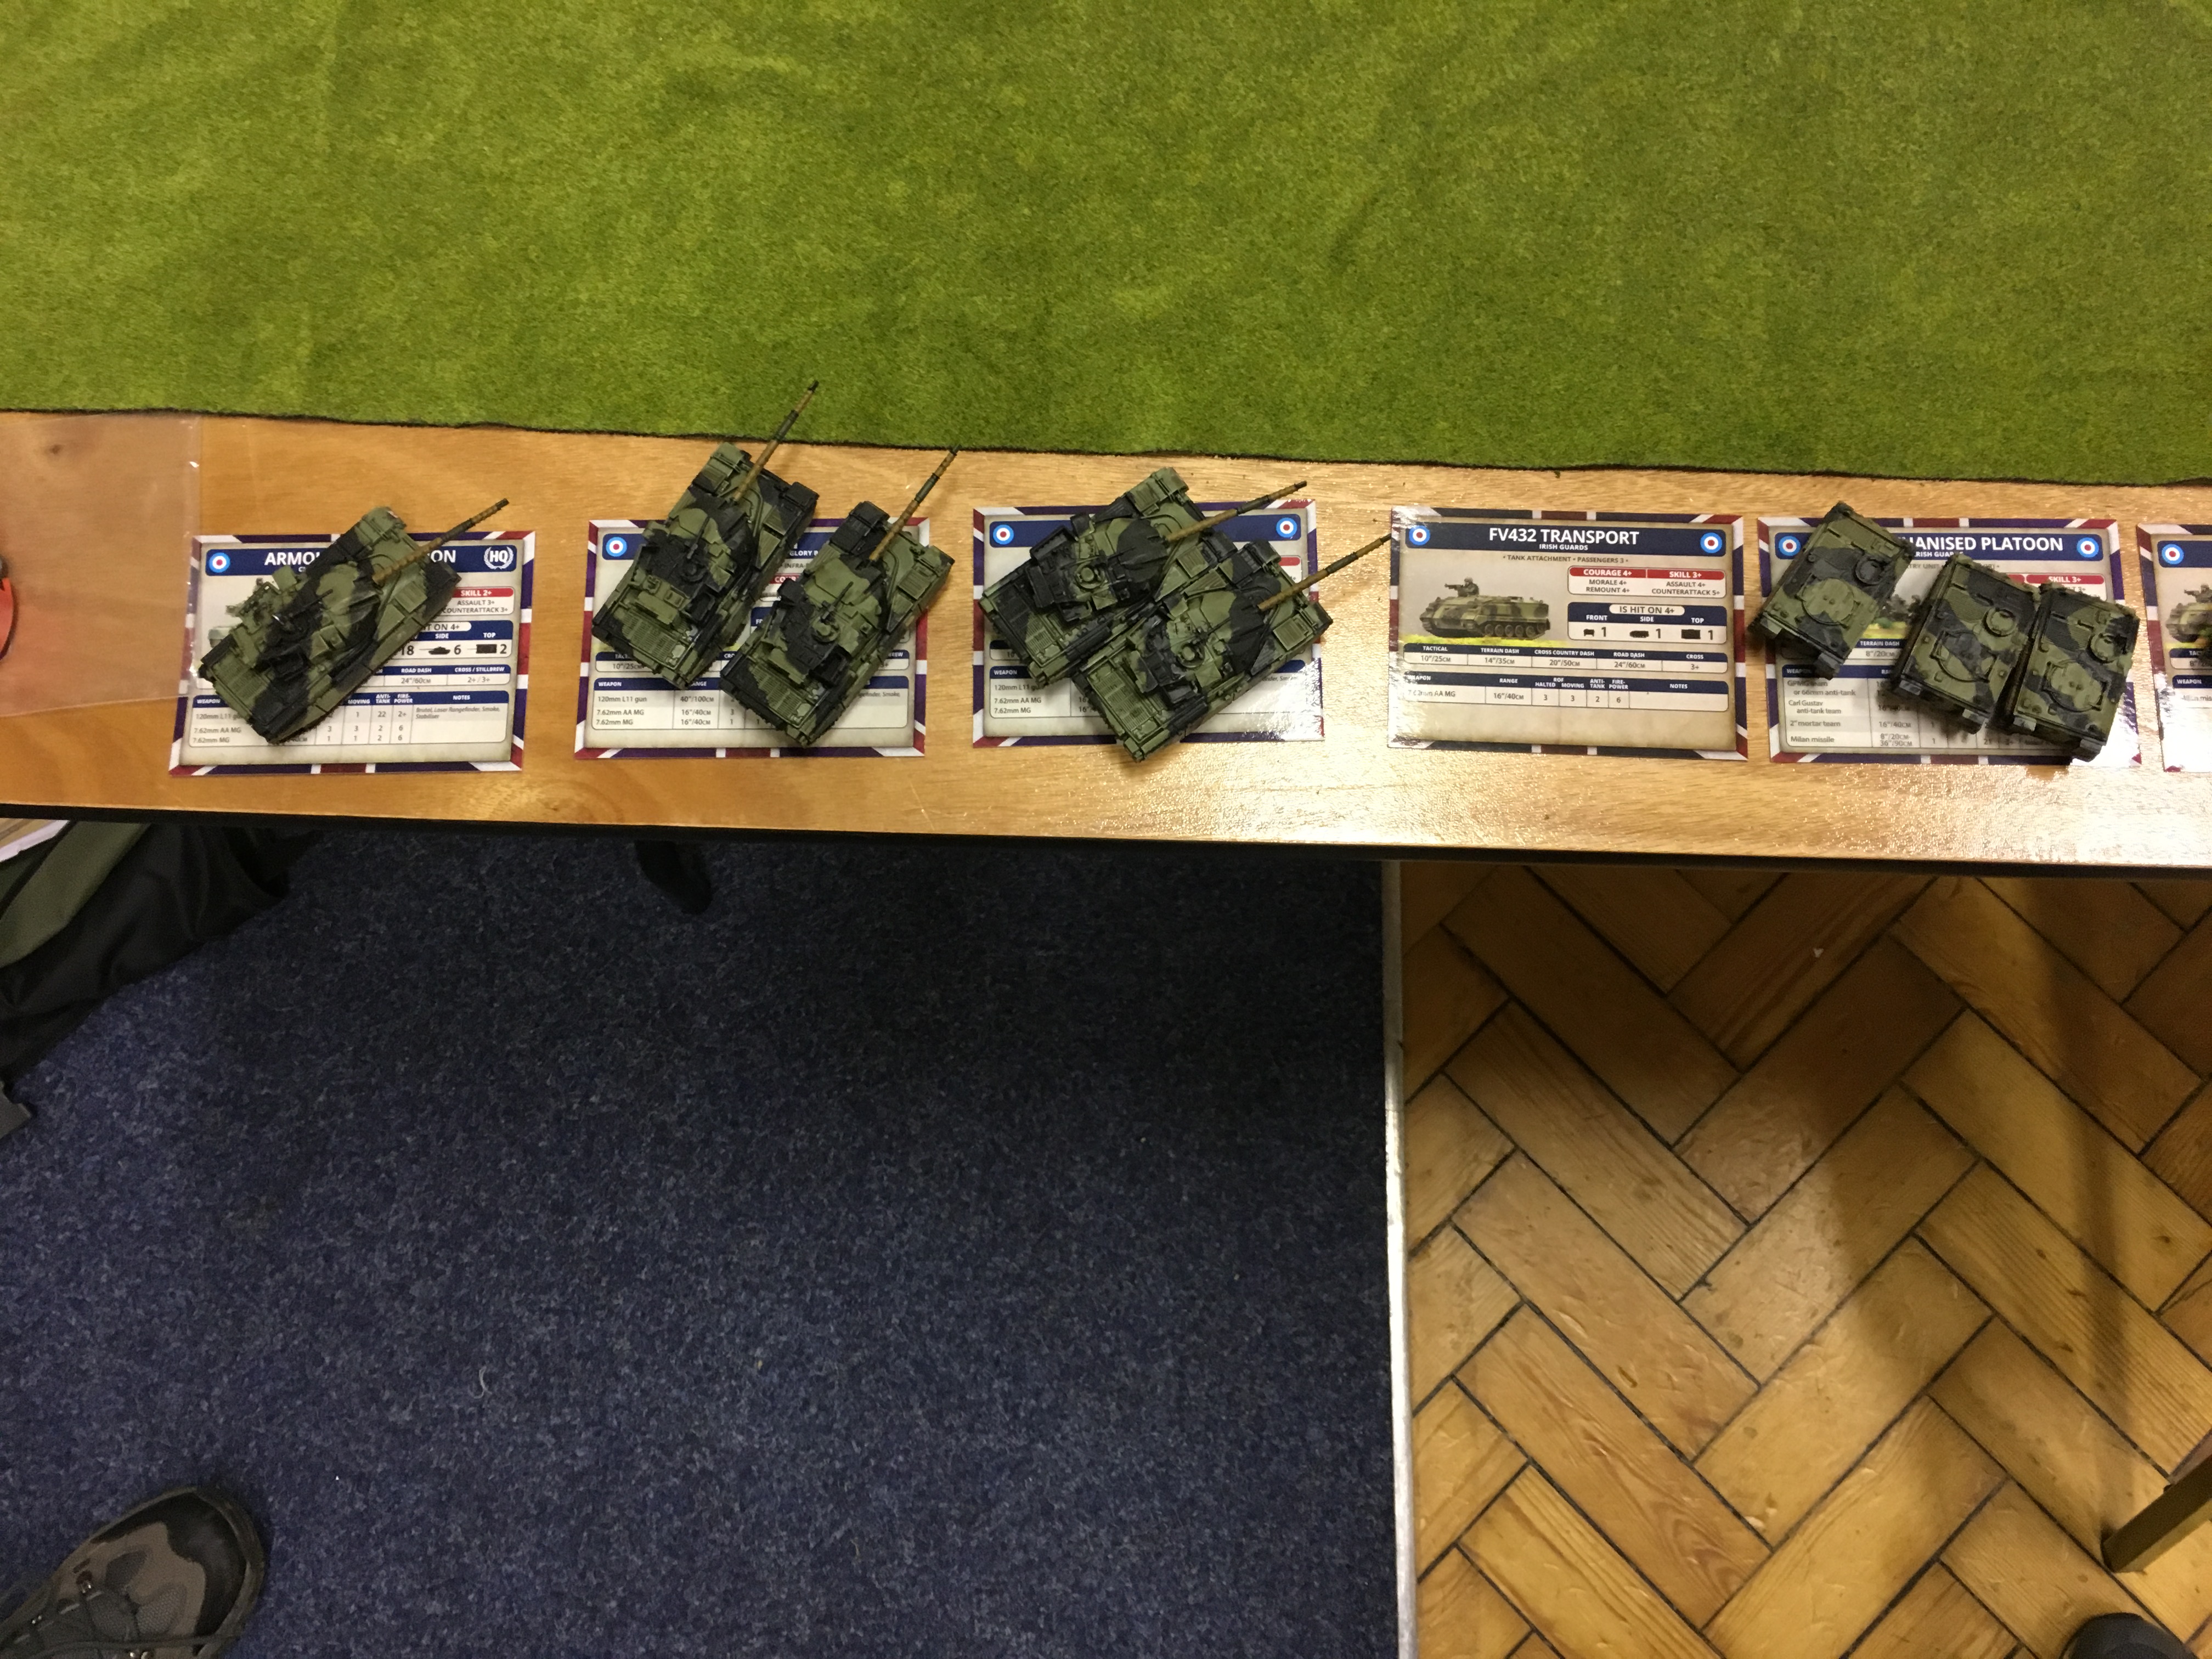
British: Chieftain Armoured Squadron
HQ- 1 x Chieftain with stillbrew
Chieftain Armoured Troop 2 x Chieftain with stillbrew
Chieftain Armoured Troop 2 x Chieftain with stillbrew
FV432 Mechanised Platoon low strength with added Milan missile teams
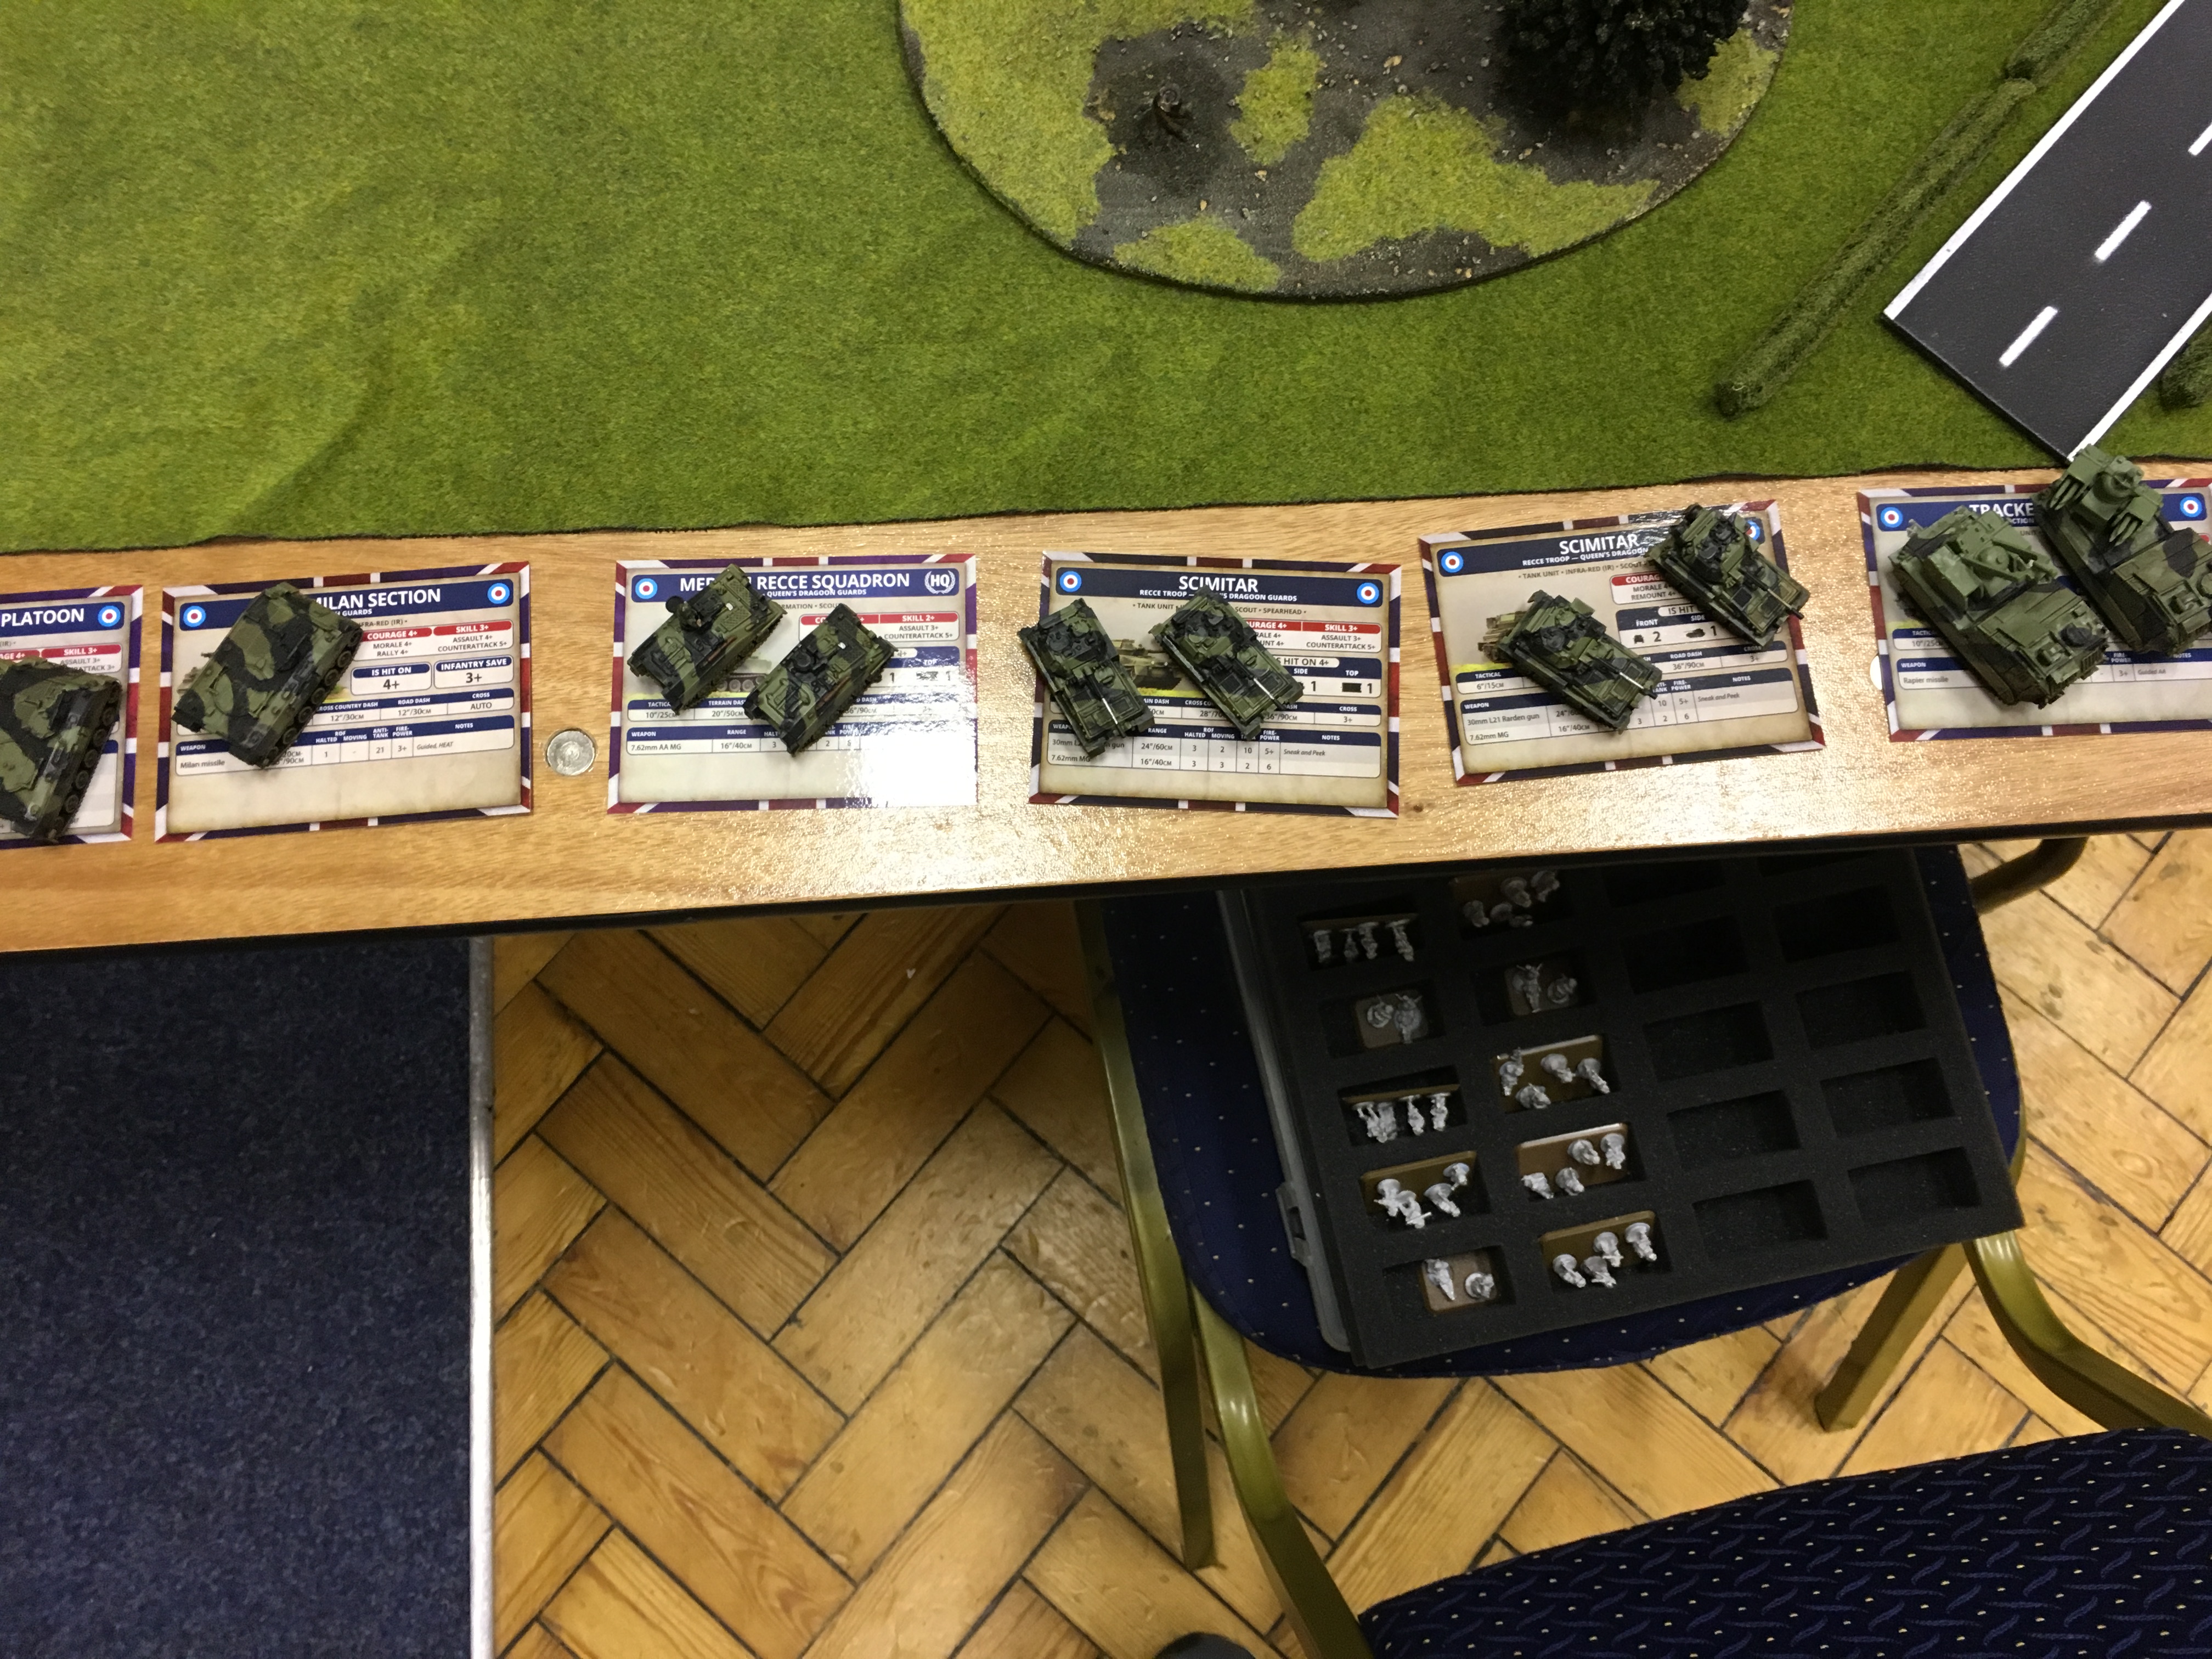
Medium Recce Squadron
HQ- 2 x Spartan
Scimitar Recce Troop 2 x Scimitar
Scimitar Recce Troop 2 x Scimitar
Support
Tracked Rapier Sam Section 4 x Tracked Rapier
Lynx Helarm flight 2 x Lynx Helarm
Harrier Close Support Flight 2 x Harrier
The Battle:
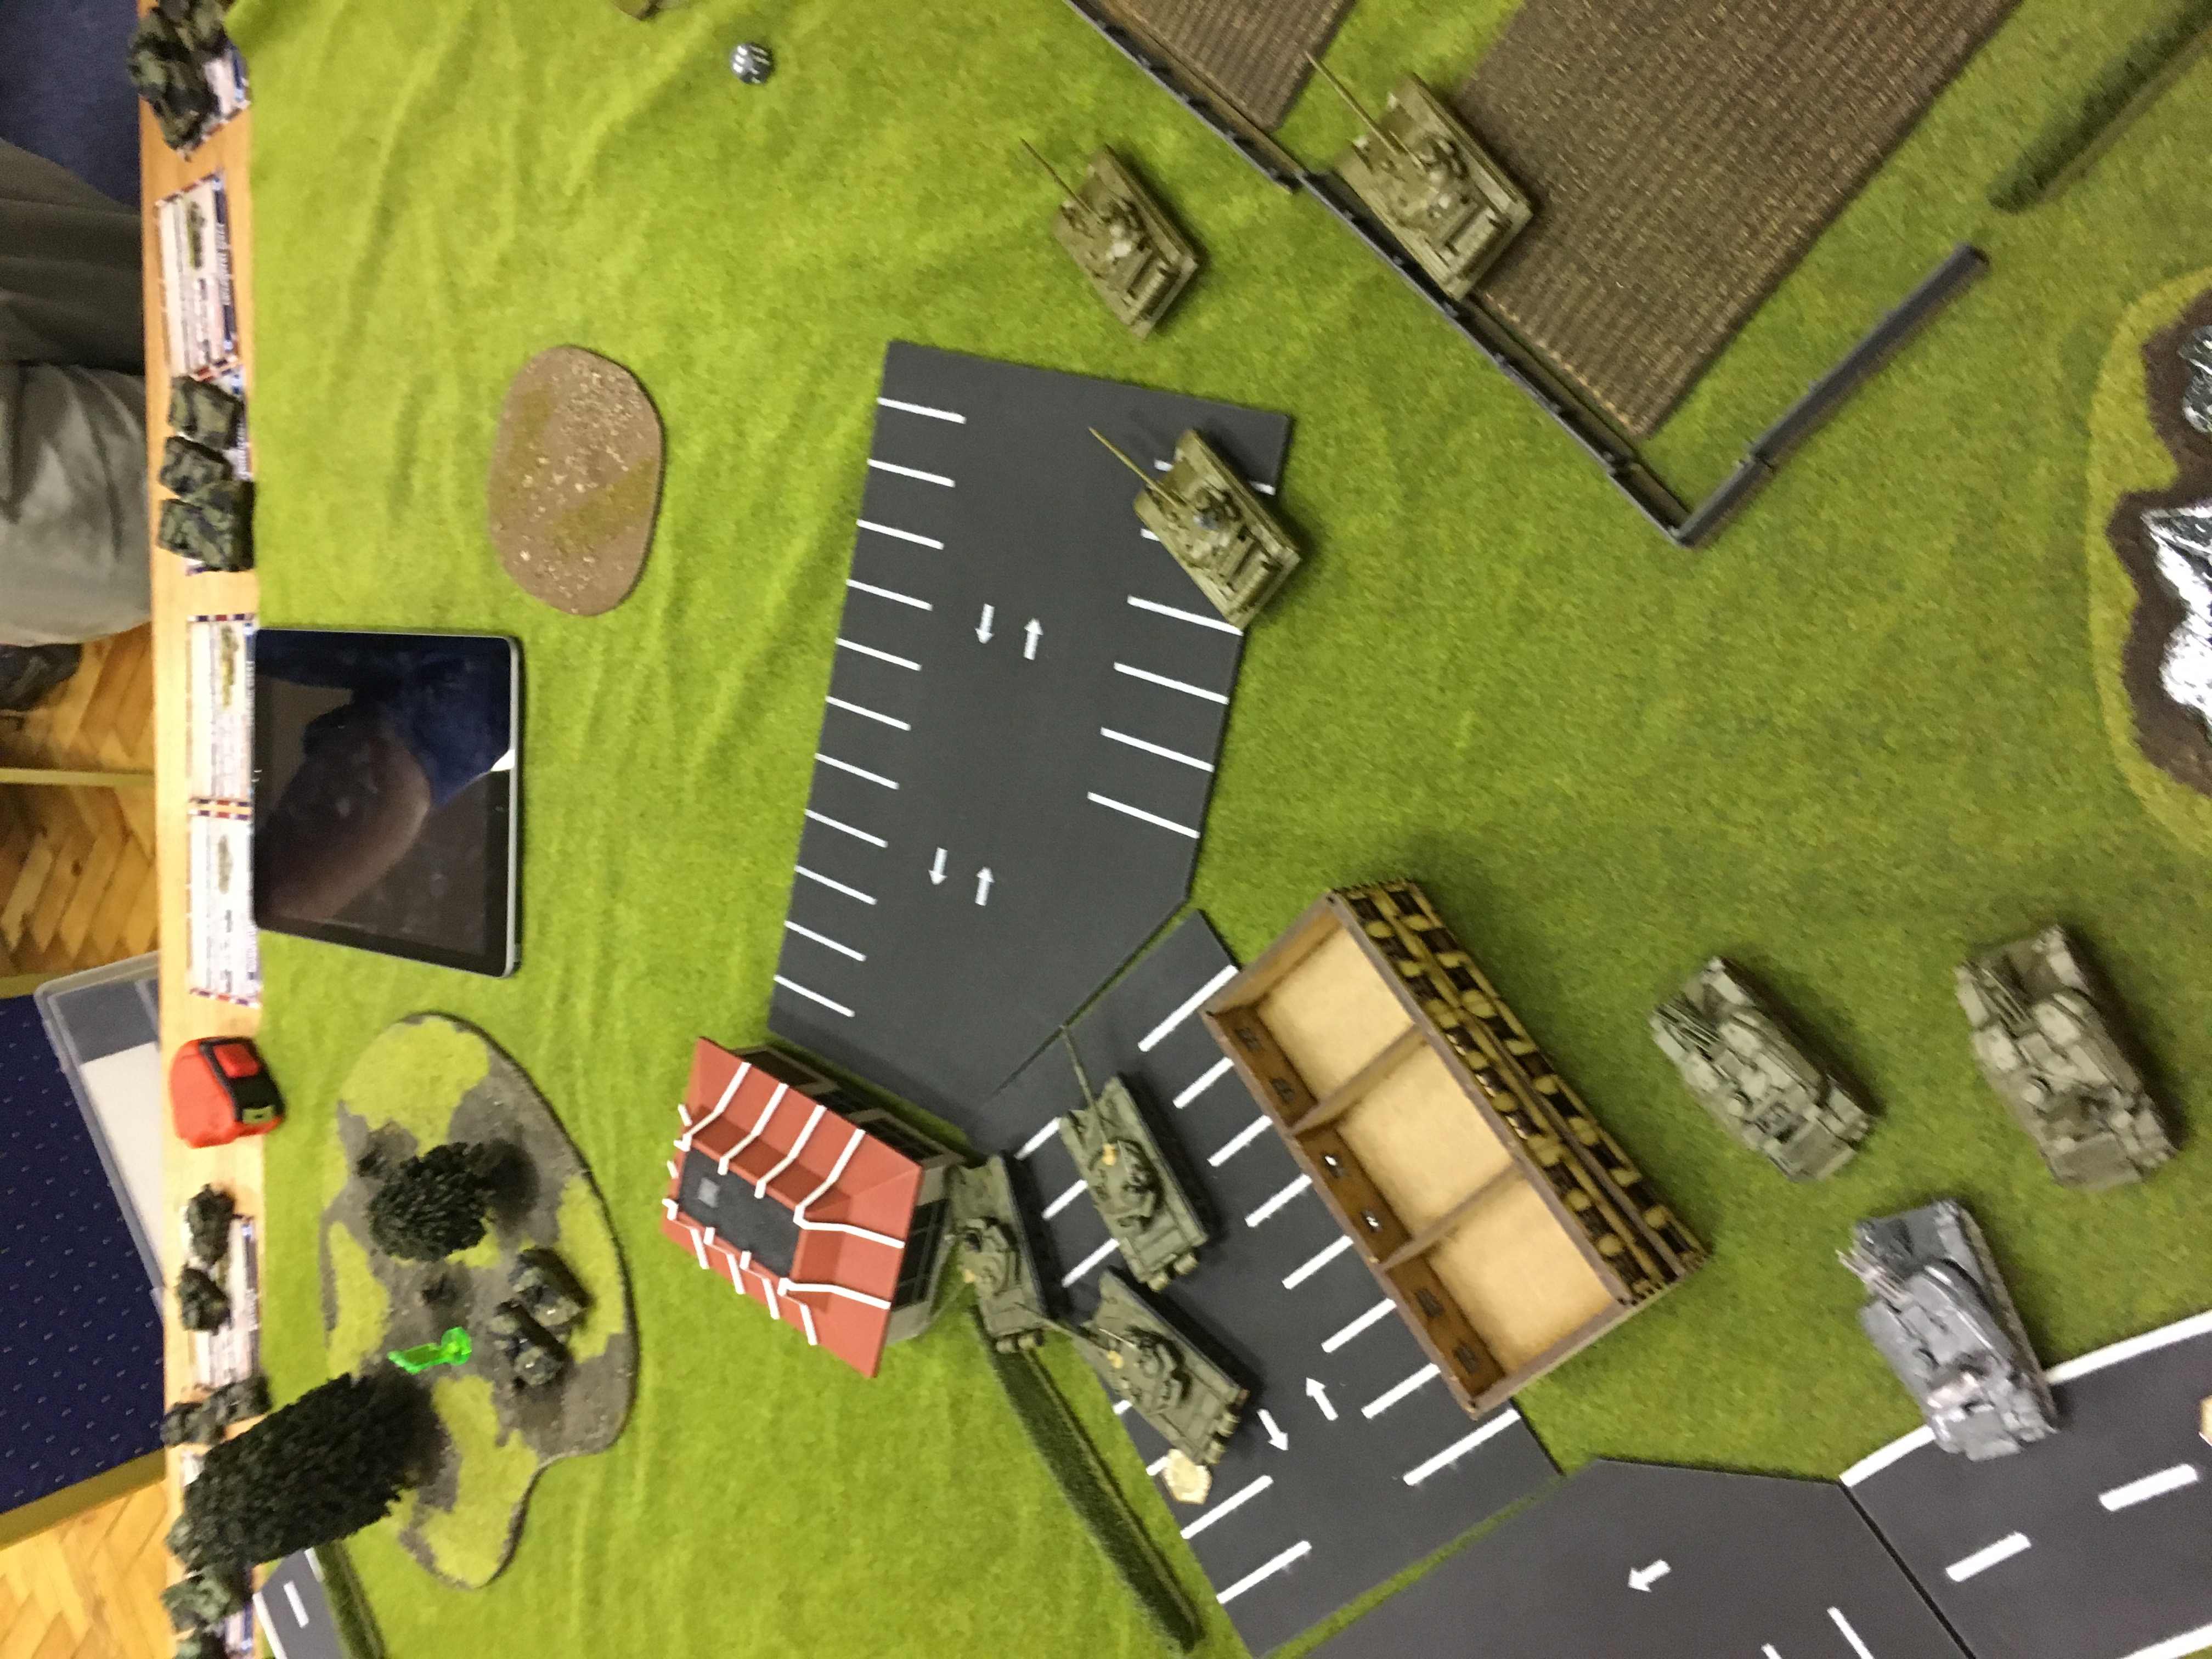
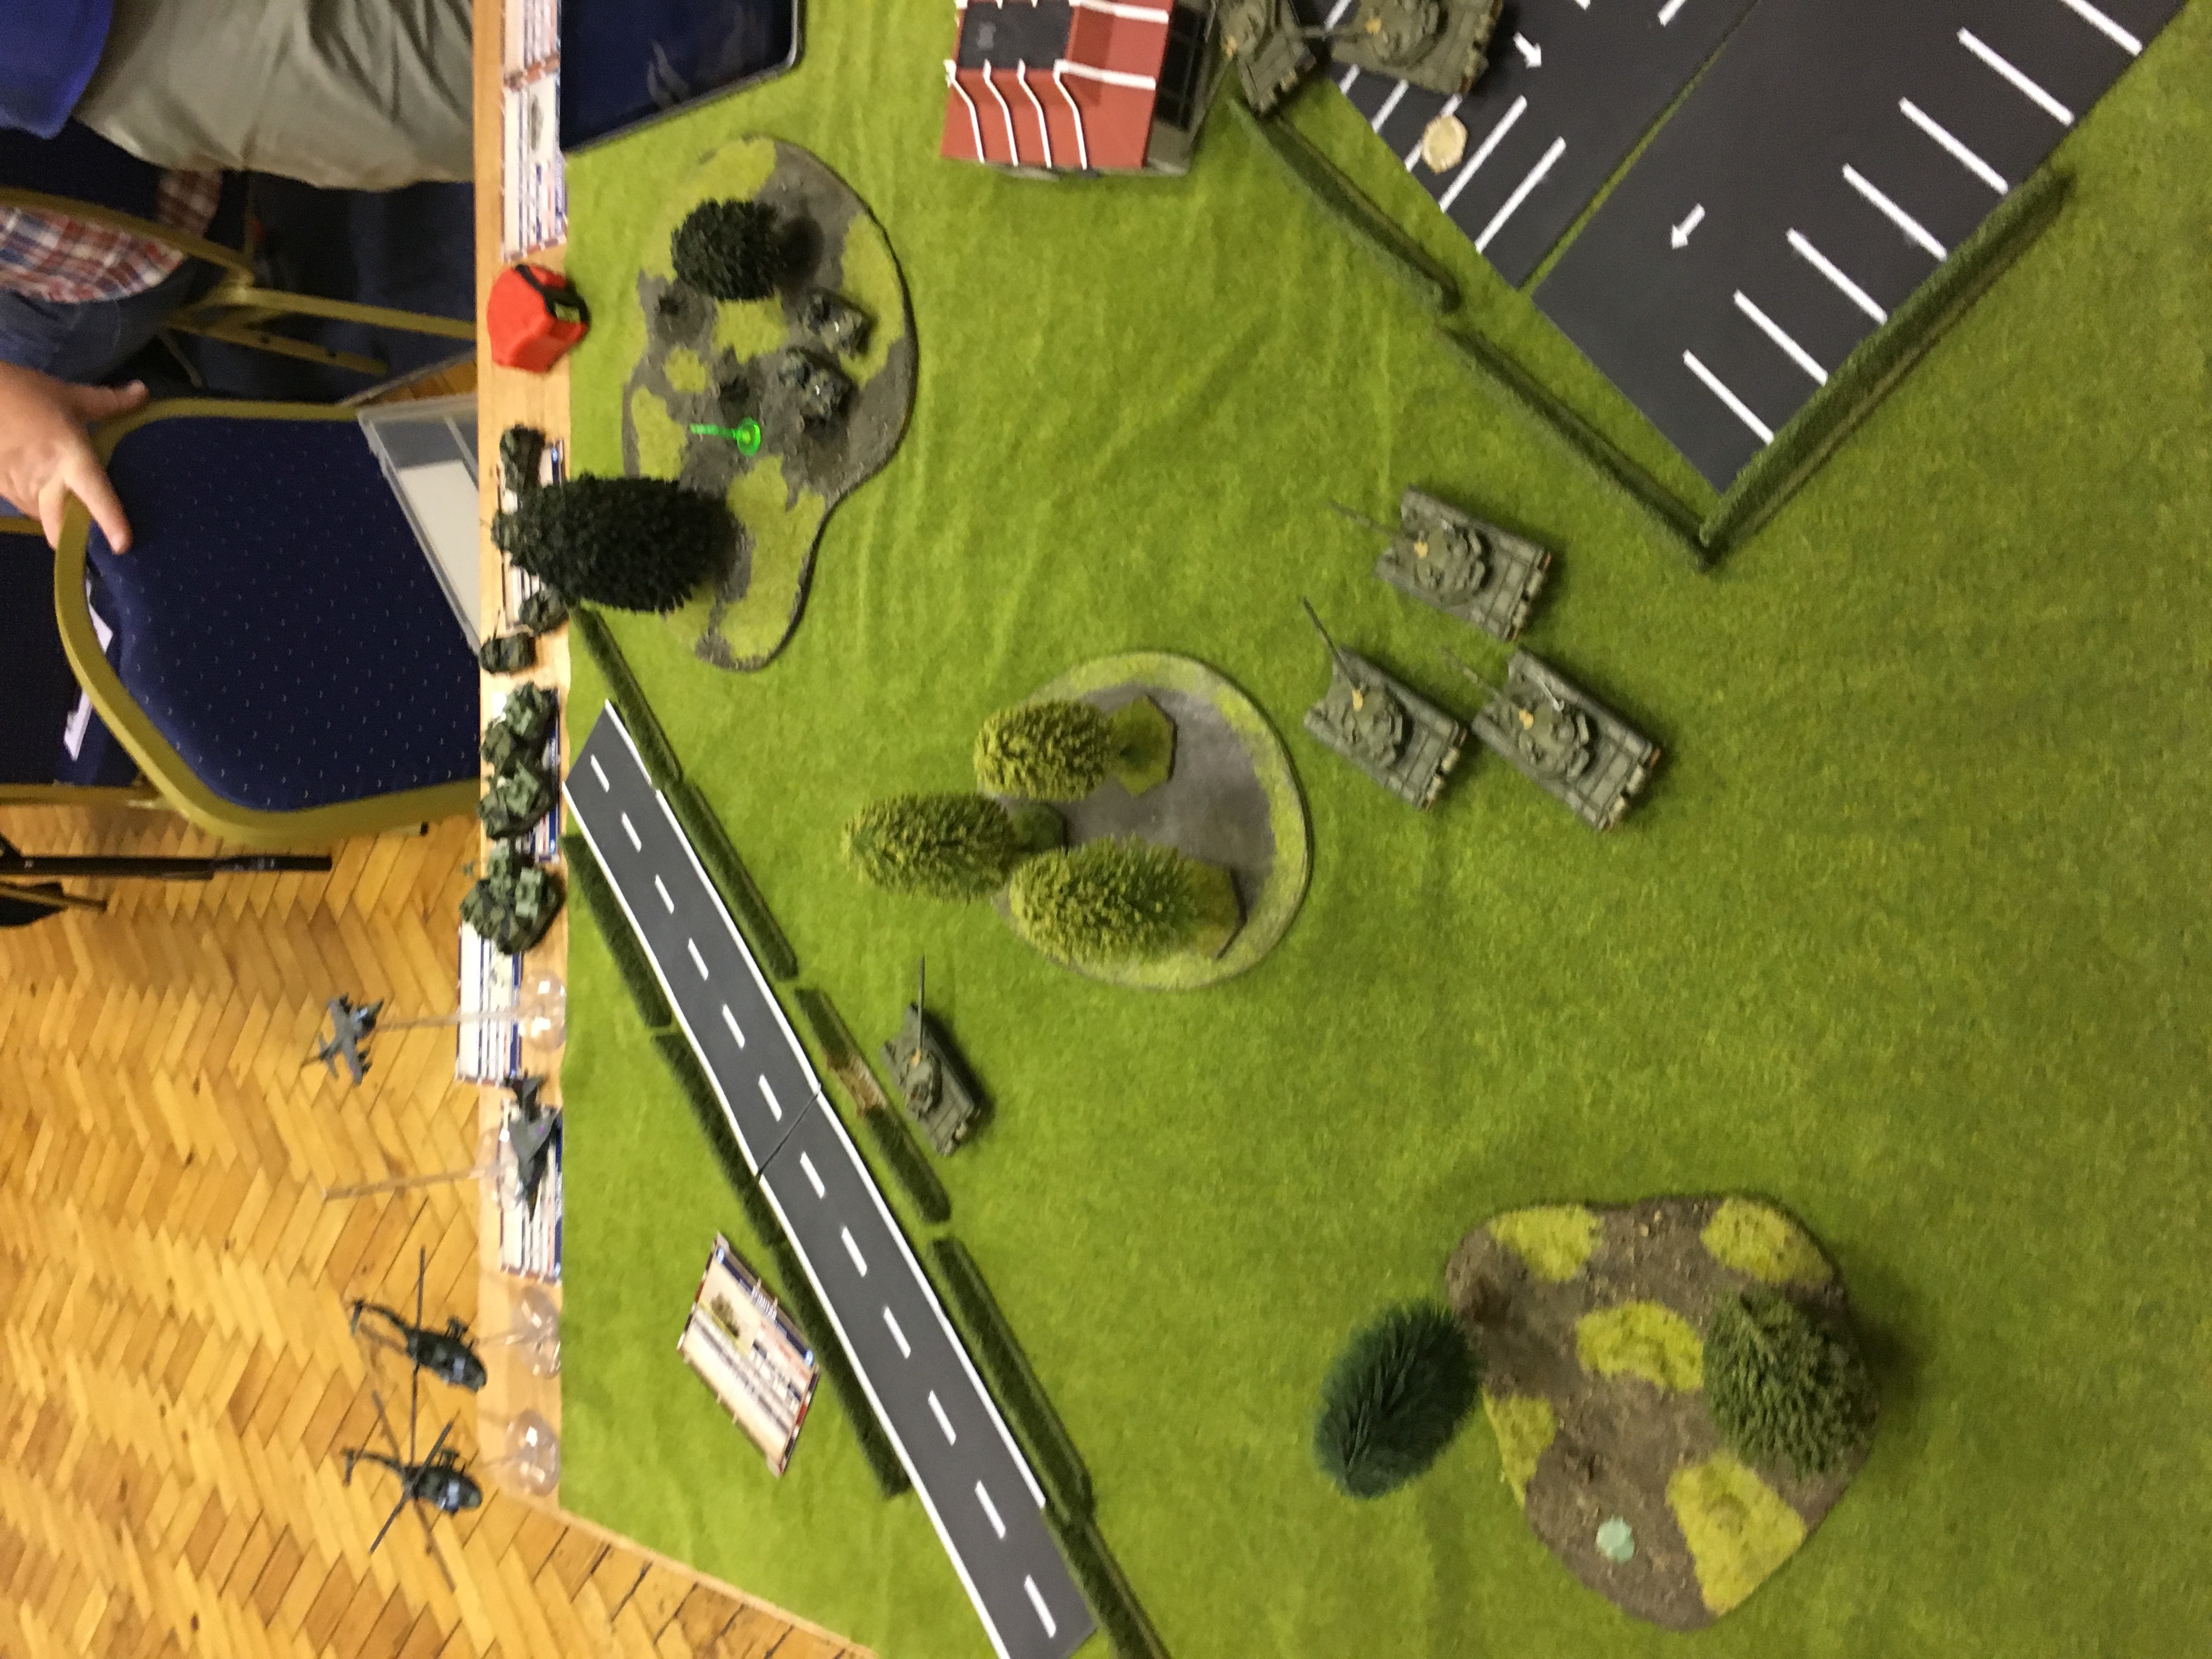
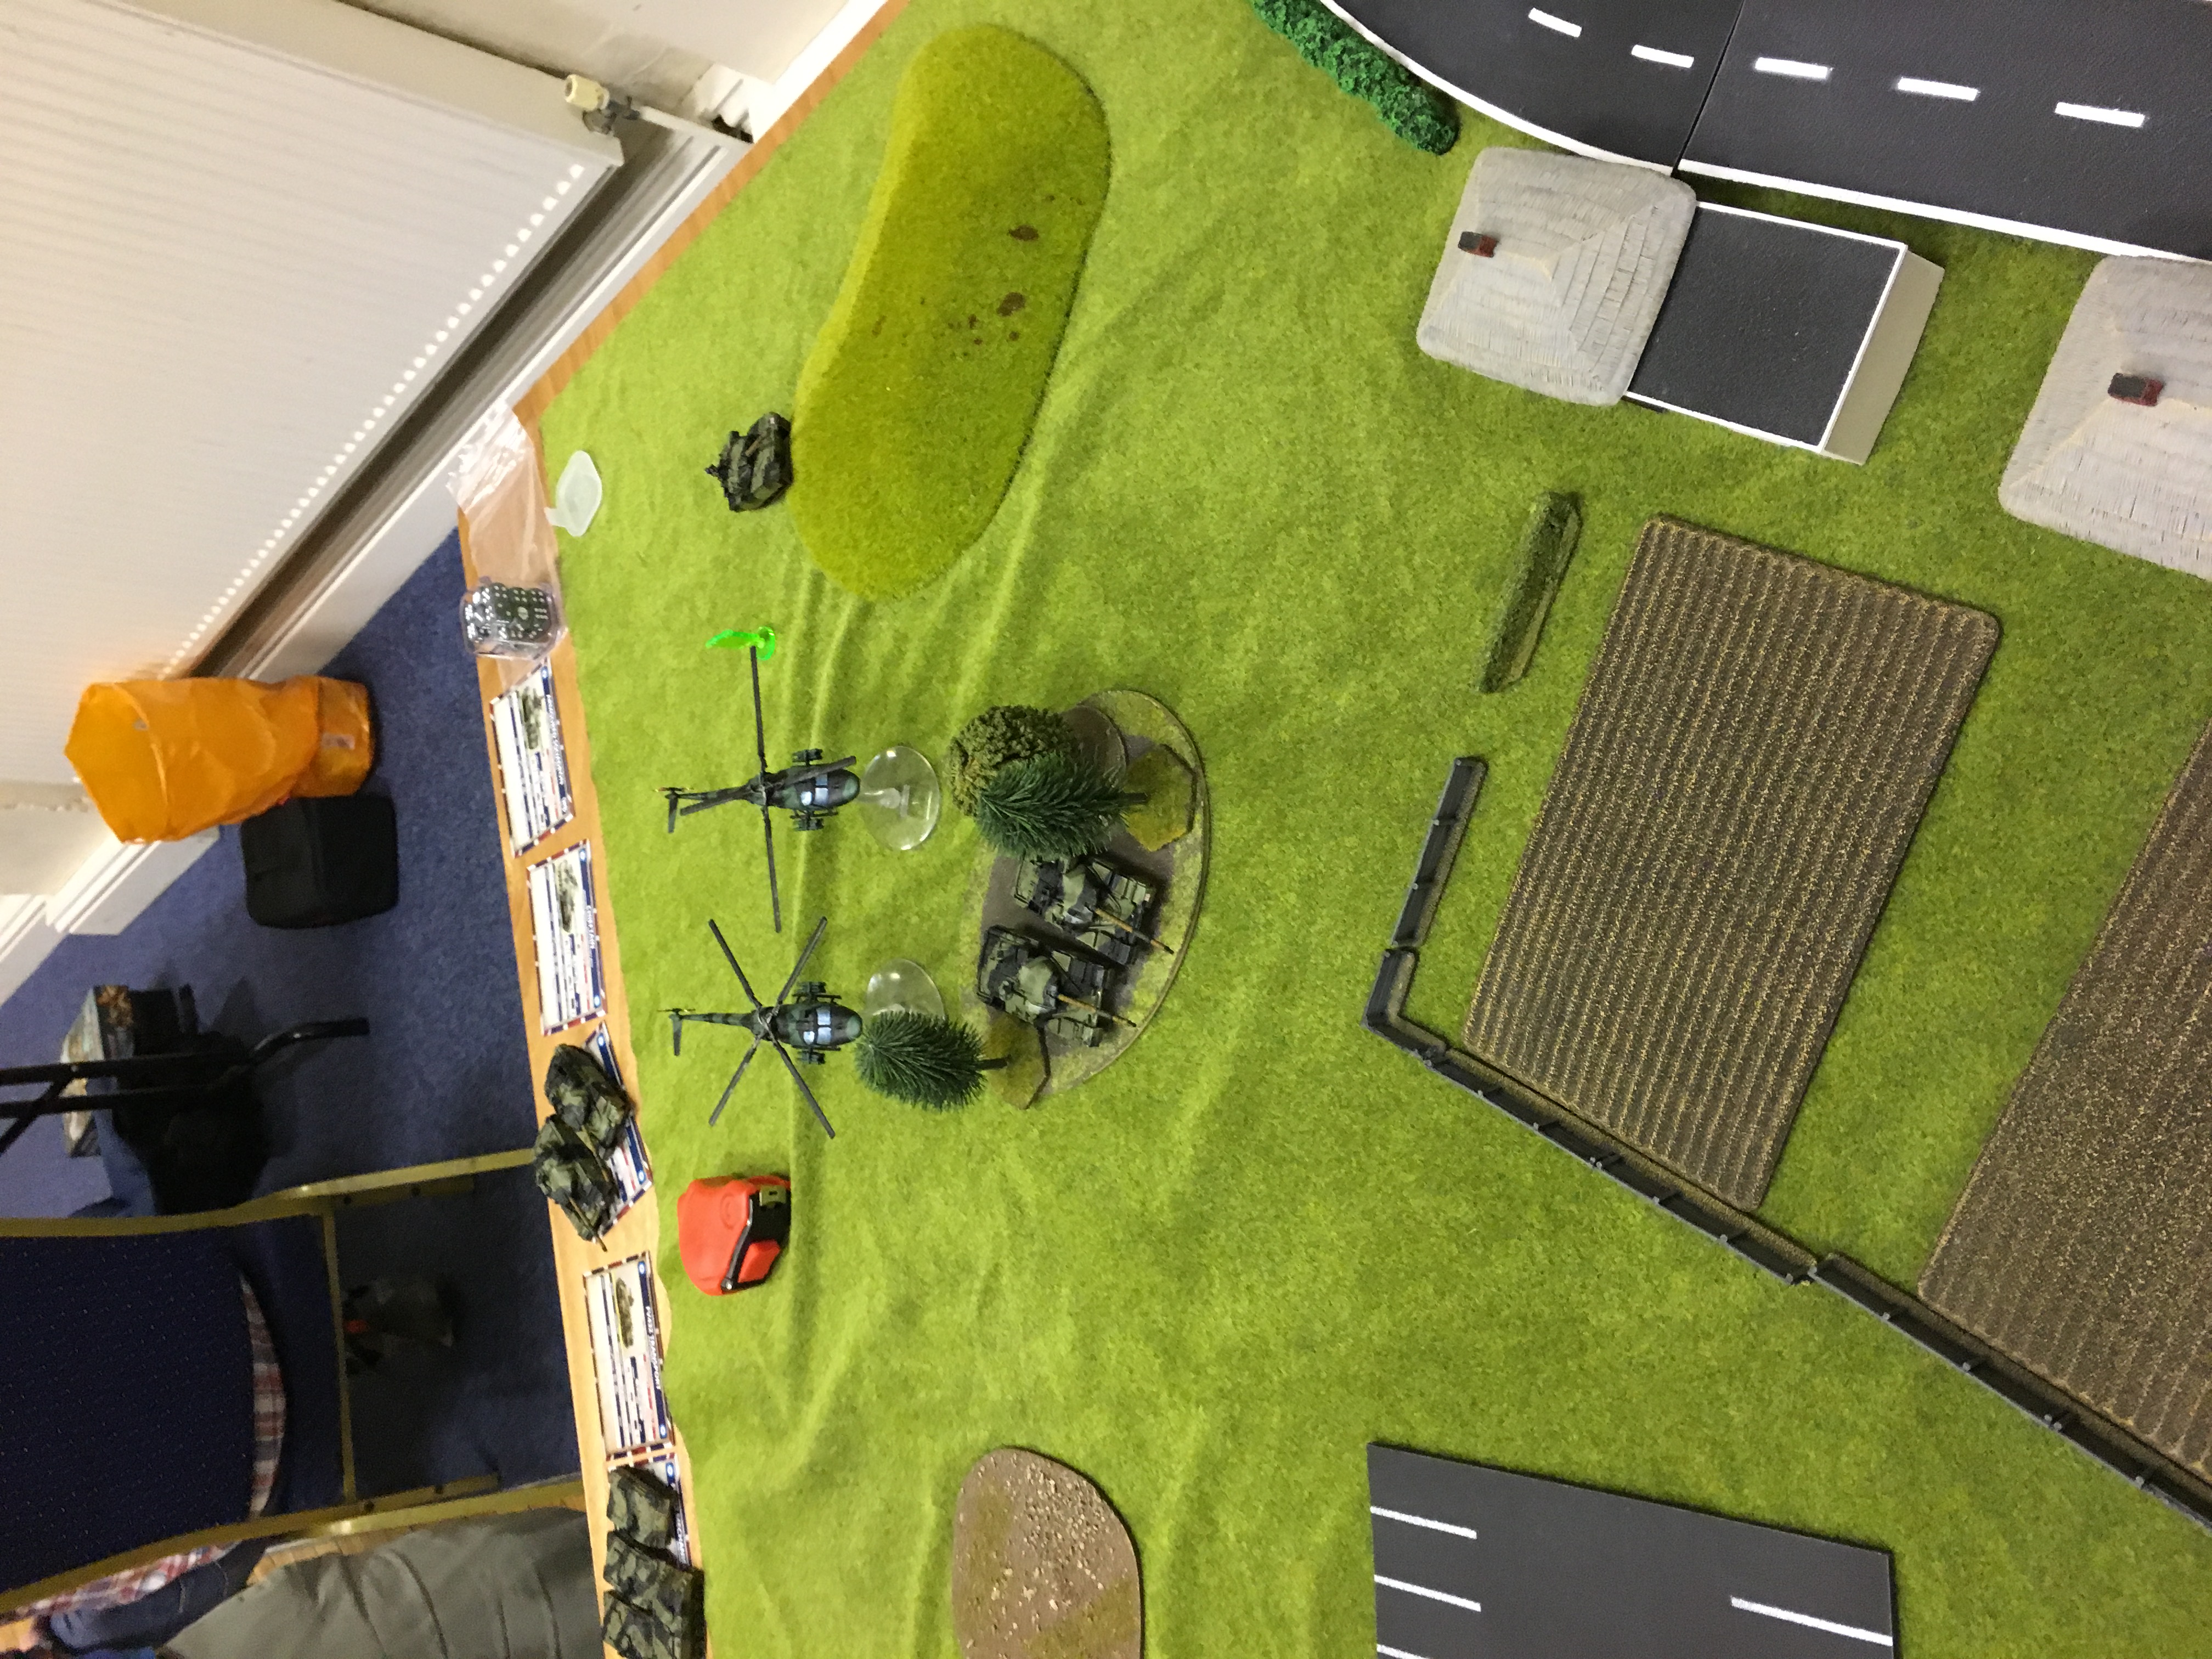
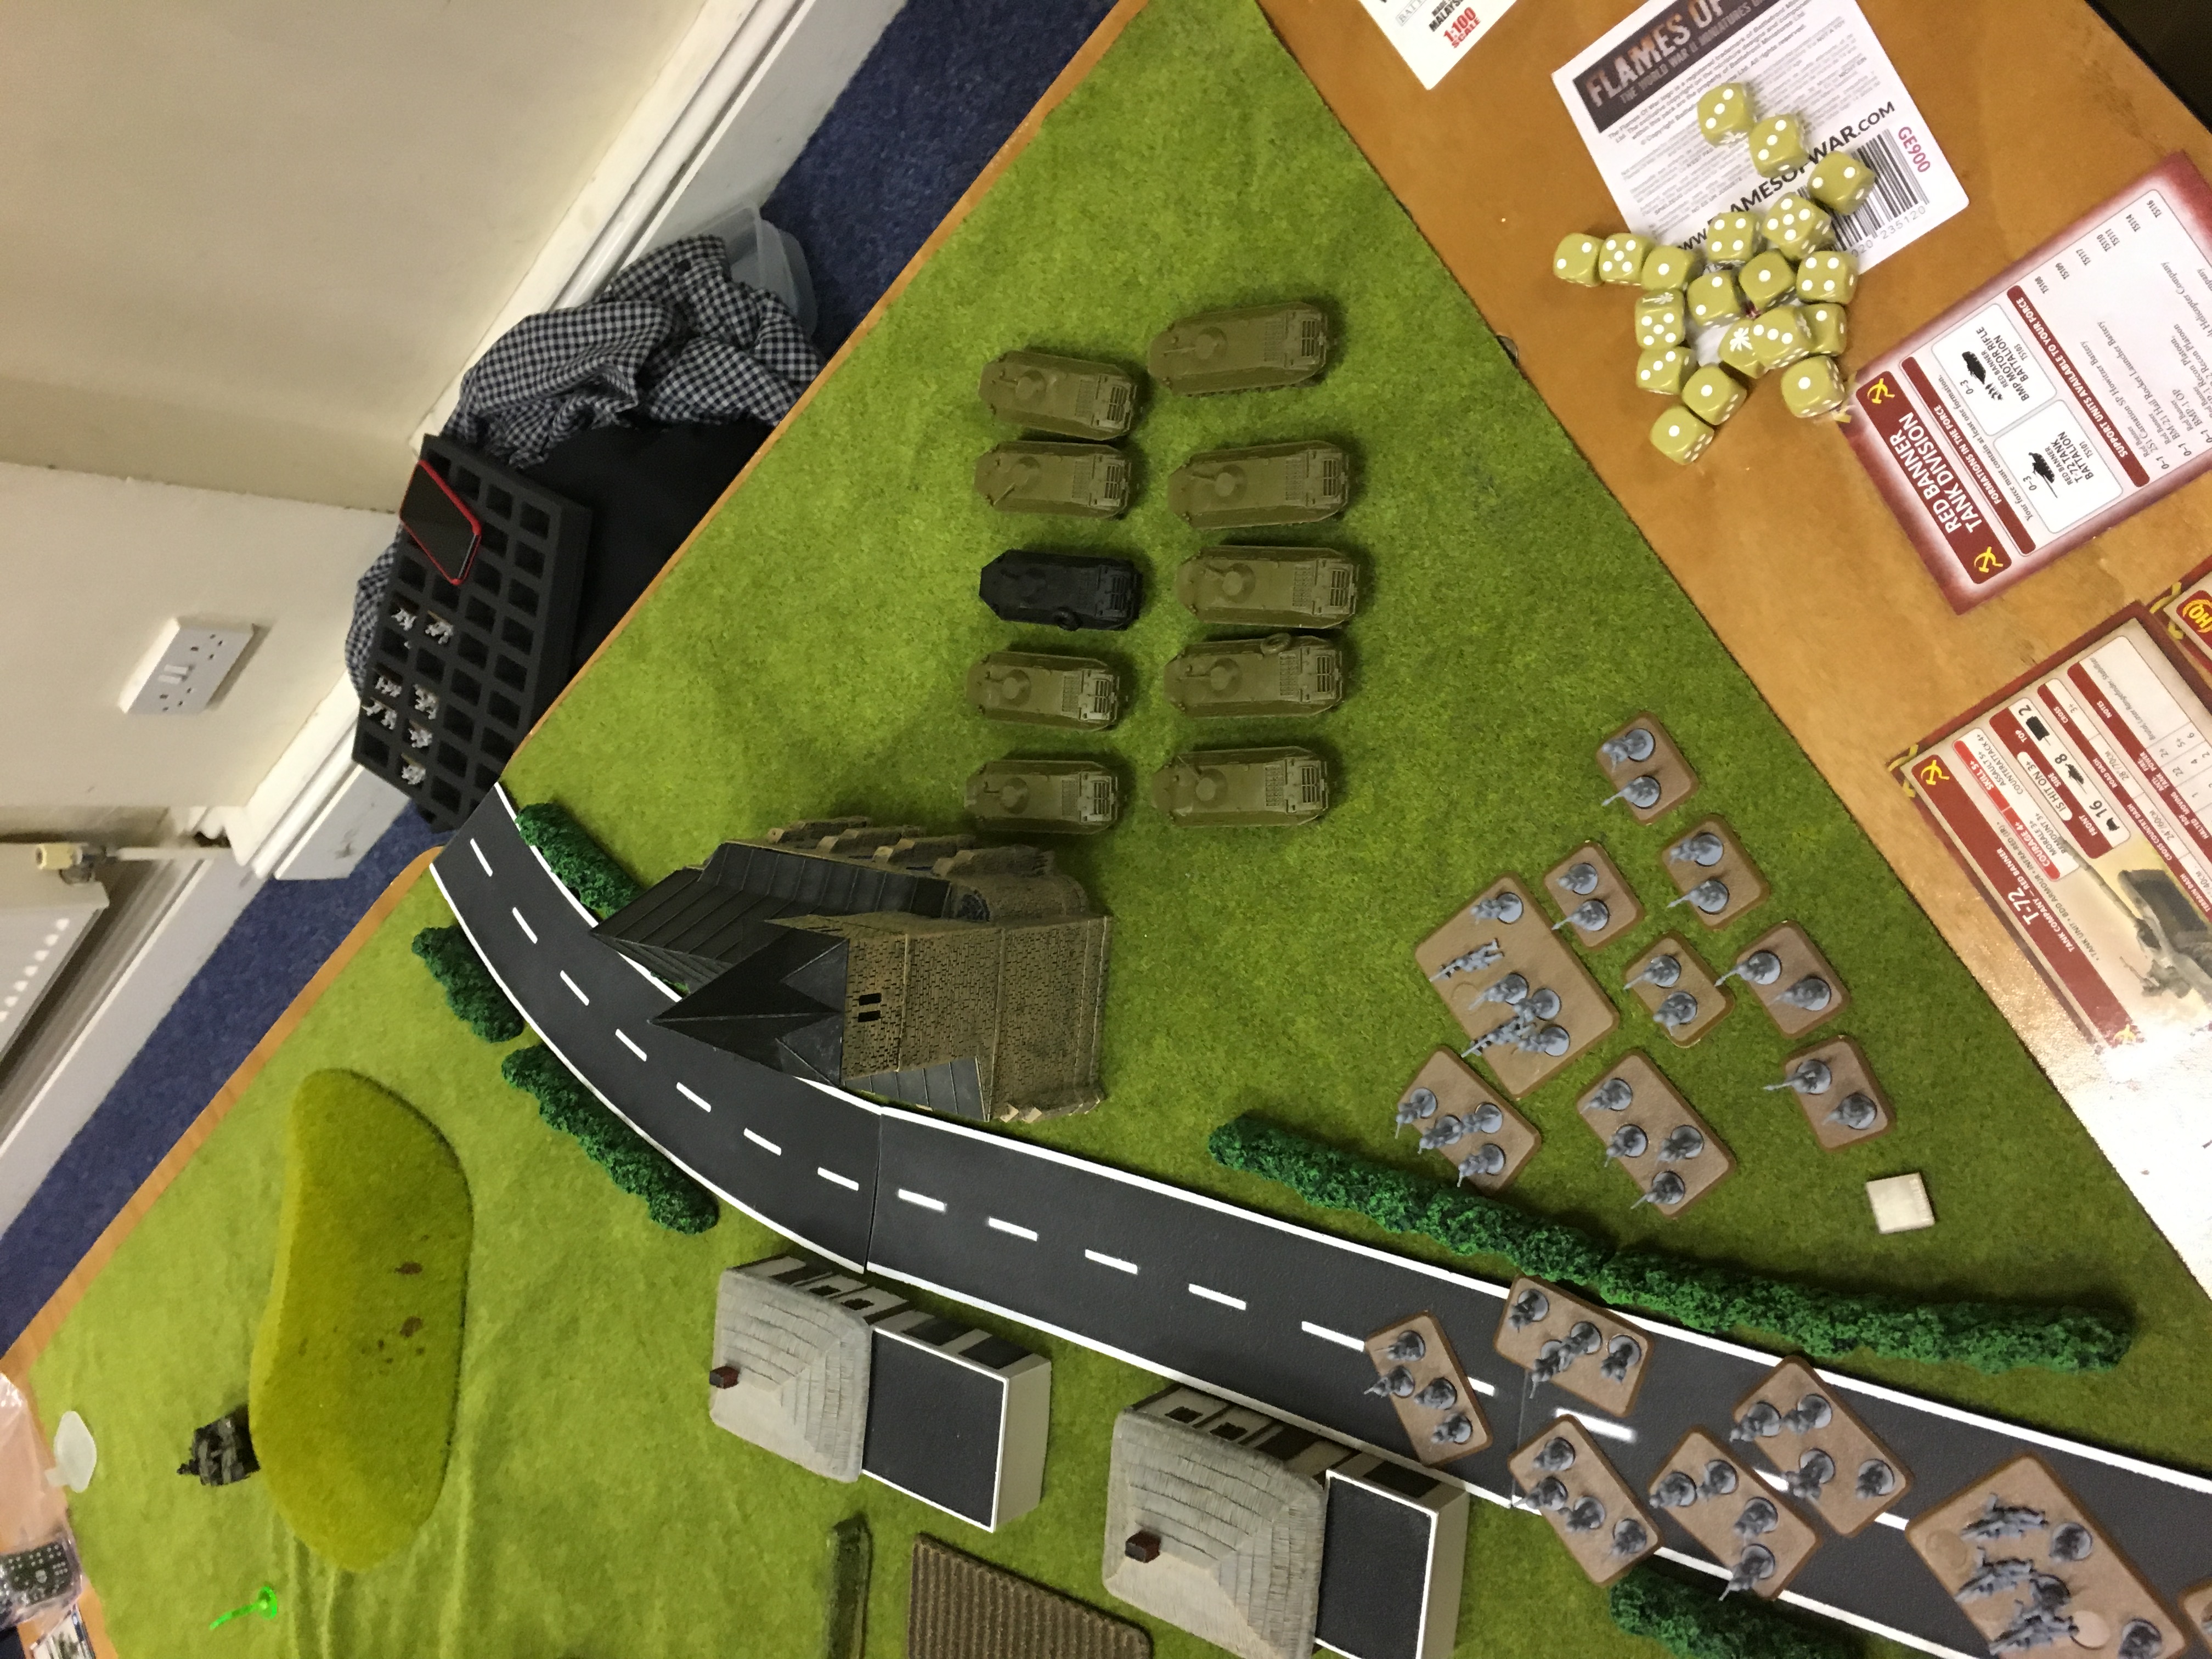
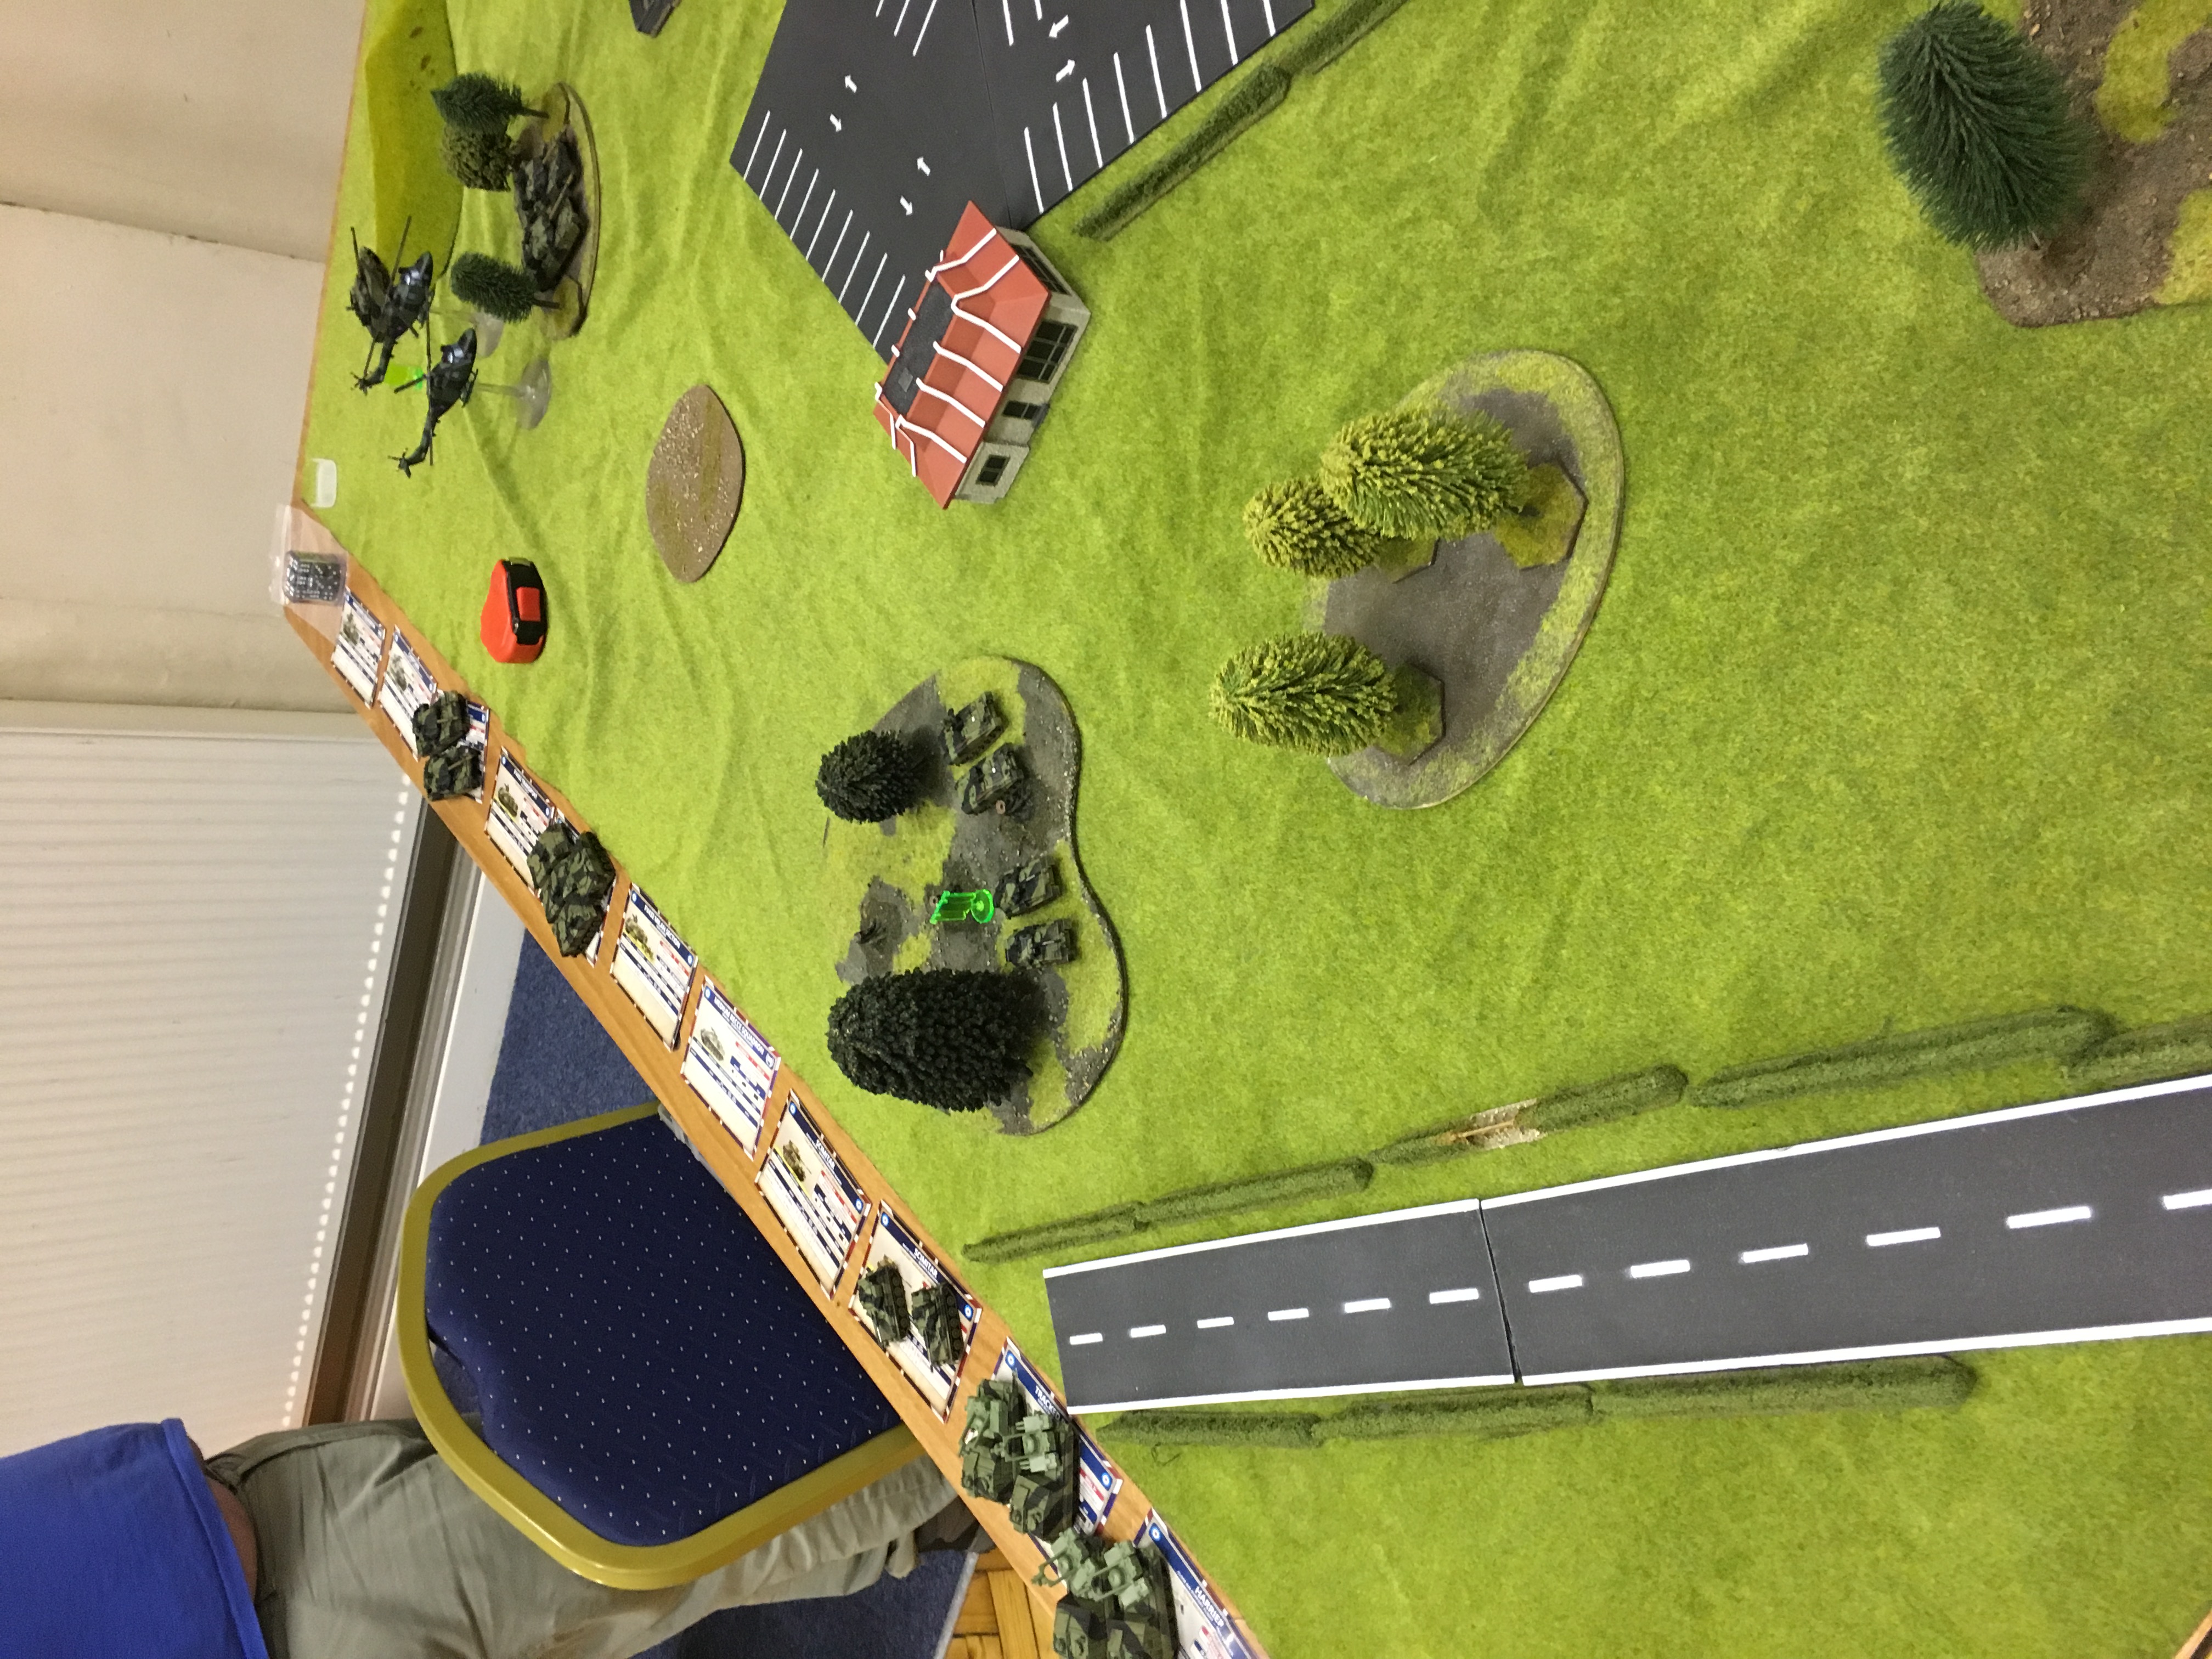
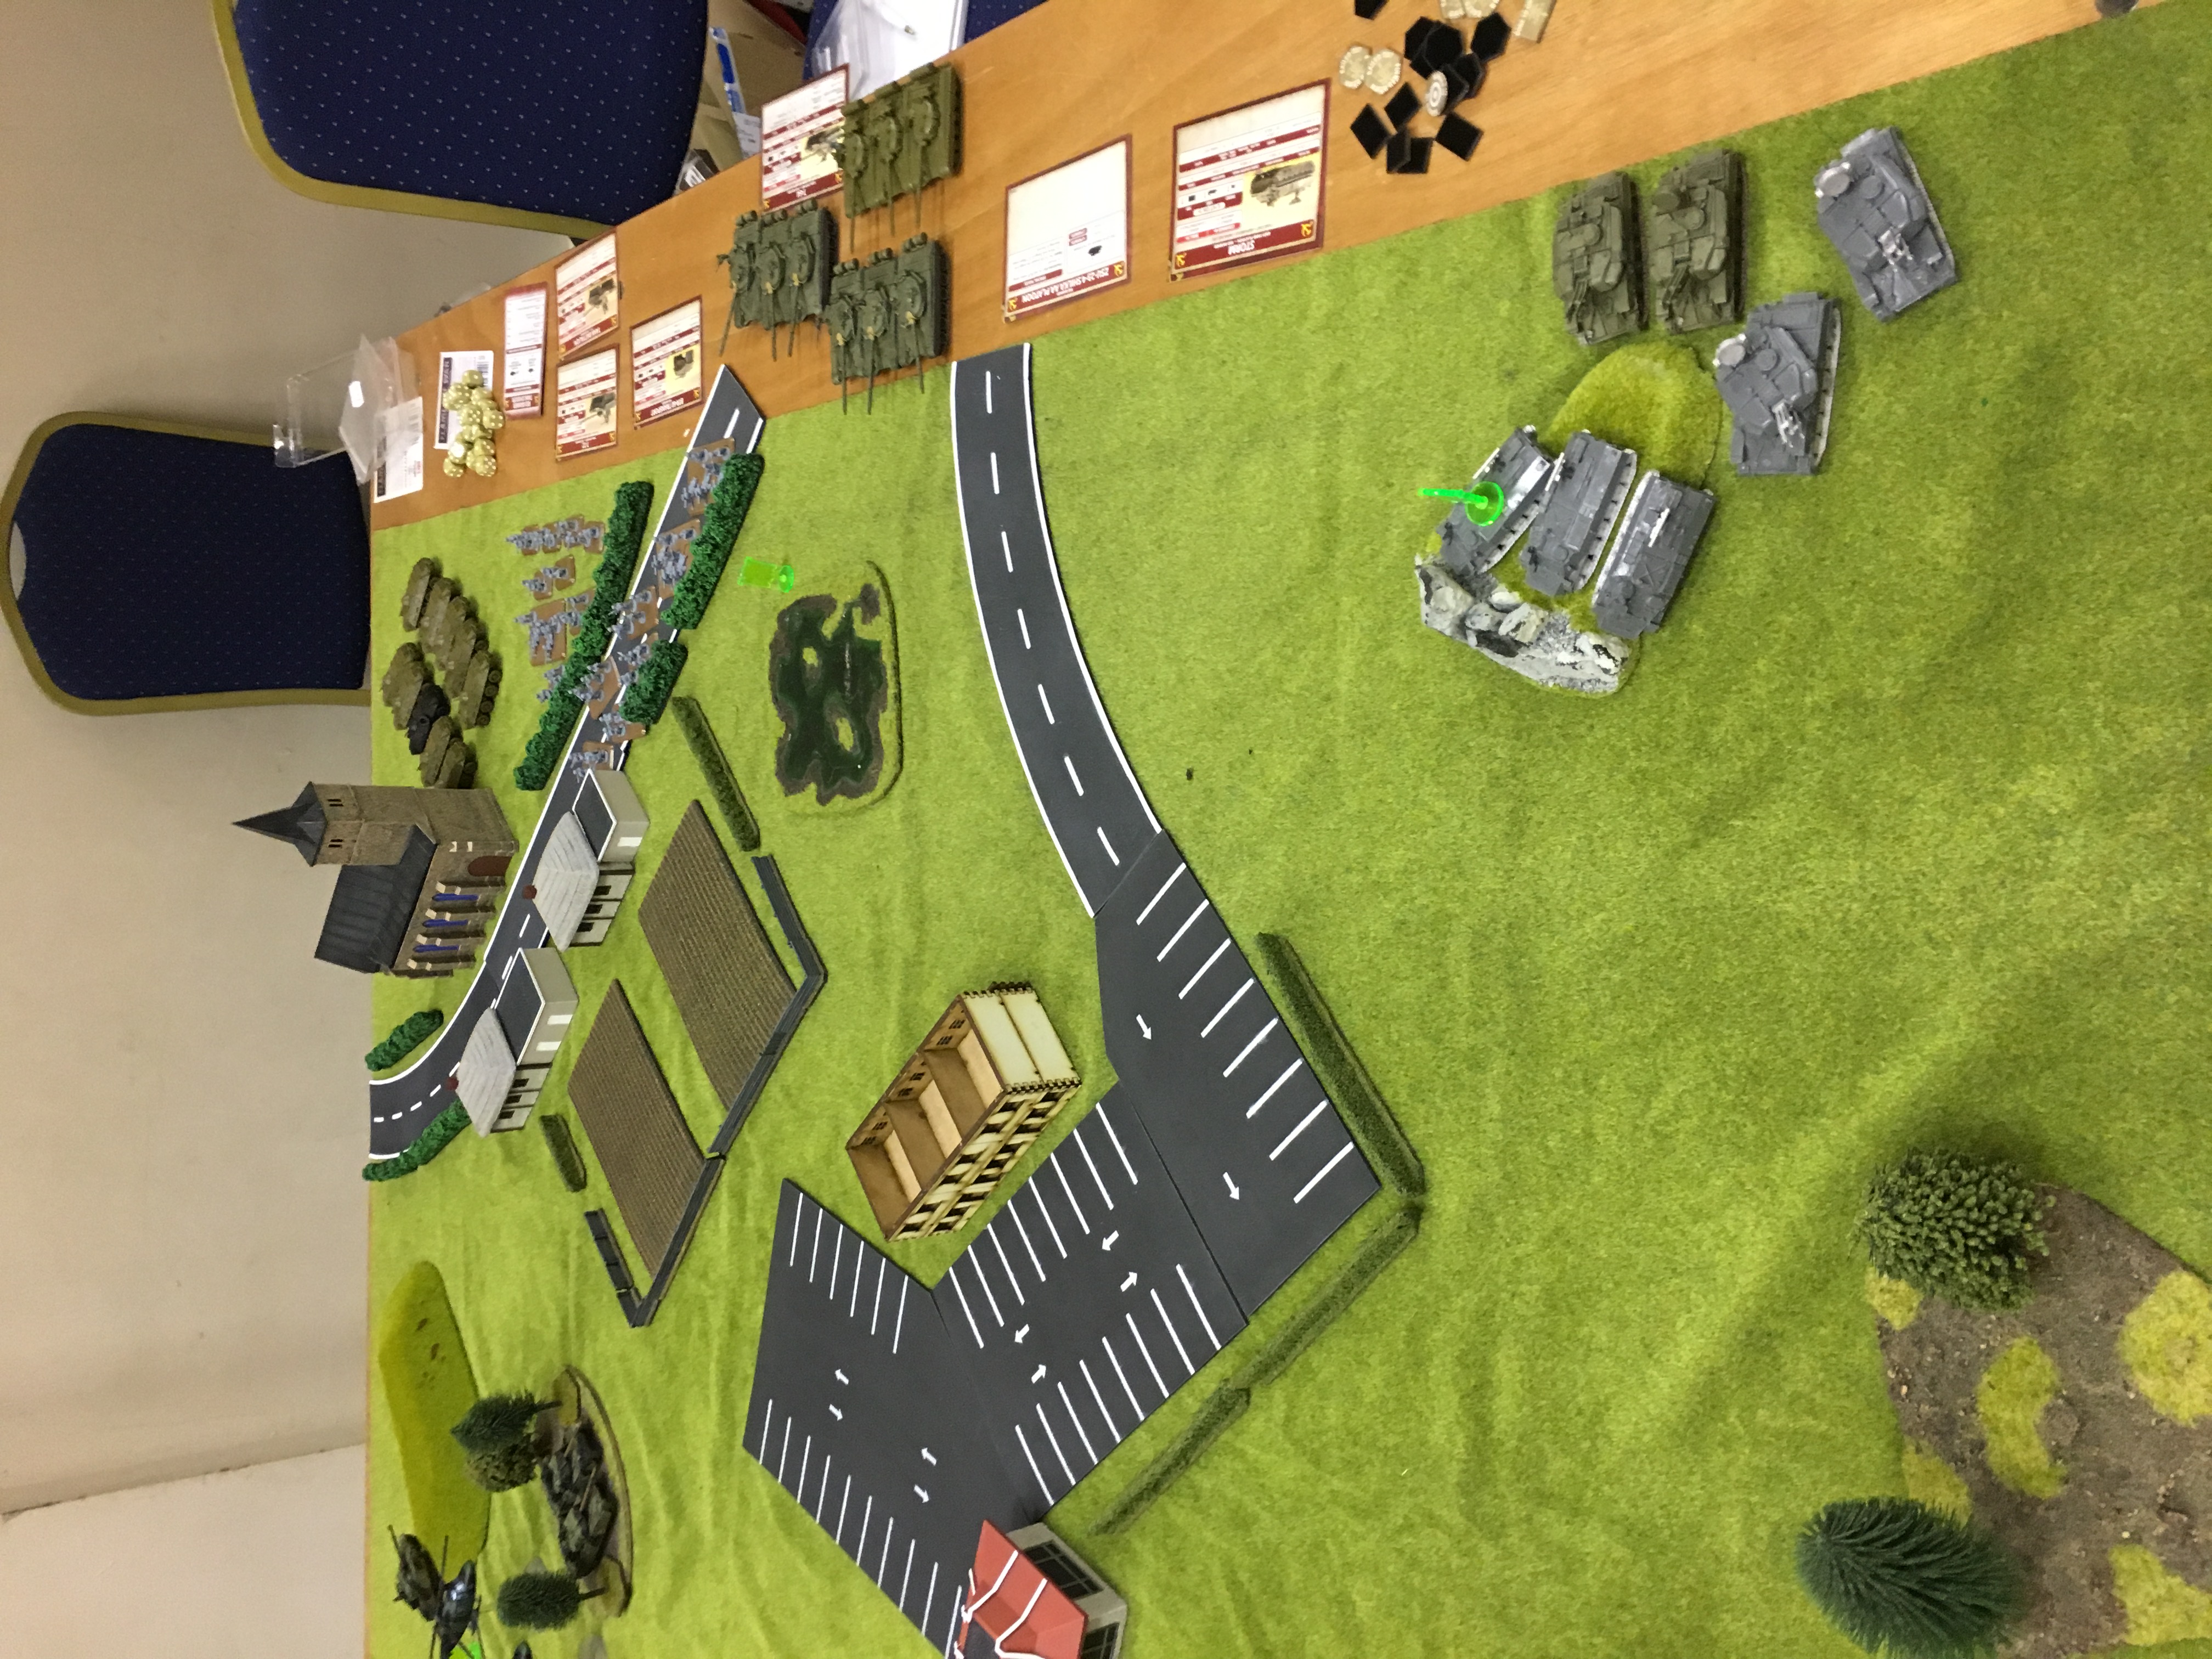
Deployment- My main aim was to take the objective on the tight by the hill, with this in mind I deployed my infantry in the fields near the church and small houses to make a push through the dense terrain, Storms were placed on a hill in overwatch position, shilkas behind the storms to stop a turn 1 airstrike on then the infantry’s BTR’s behind the church to act as a distraction/ counter attack force in case British Infantry appeared finally I deployed my Battalion Commanders Tank of the far left to stop a Flank of recce tanks. The British Deployed 3 of their Chieftains on or around my planned objective, 2 in the woods in front of it and his command tank on the hill right next to the obj, next he placed his lynx behind the forest to act as a AT screen onto the obj, finally he placed 1 of the scimitar units and recce HQ on the far left woods to stop a quick push onto the other obj, his harriers started as part of his deployed force. Everything else from both sides was in reserves
Turn 1
I started my first turn by moving my infantry into the small houses and fields just past the church while leaving the ATGM teams behind to support, the BTR’s moved to the right of the church to draw his attention and the Battalion Commander moved forward to get a shot into the scimitars in the woods. In the shooting phase the spigots got lucky and downed a lynx, the Battalion Commander knocked out a scimitar and the storms bailed one of the HQ spartans however all of these units passed their morale. In the British turn 1 his harriers appeared on station and set up near my BTR’s and he elected not to move any units, the harriers dropped their bombs on the BTR unit killing 3 and bailing 3 more, his command tank then killed another BTR, the 2 Chieftains in the woods machine gunned the infantry removing 2 stands finally the lynx fired at my storms but missed. Turn 1 over
Turn 2
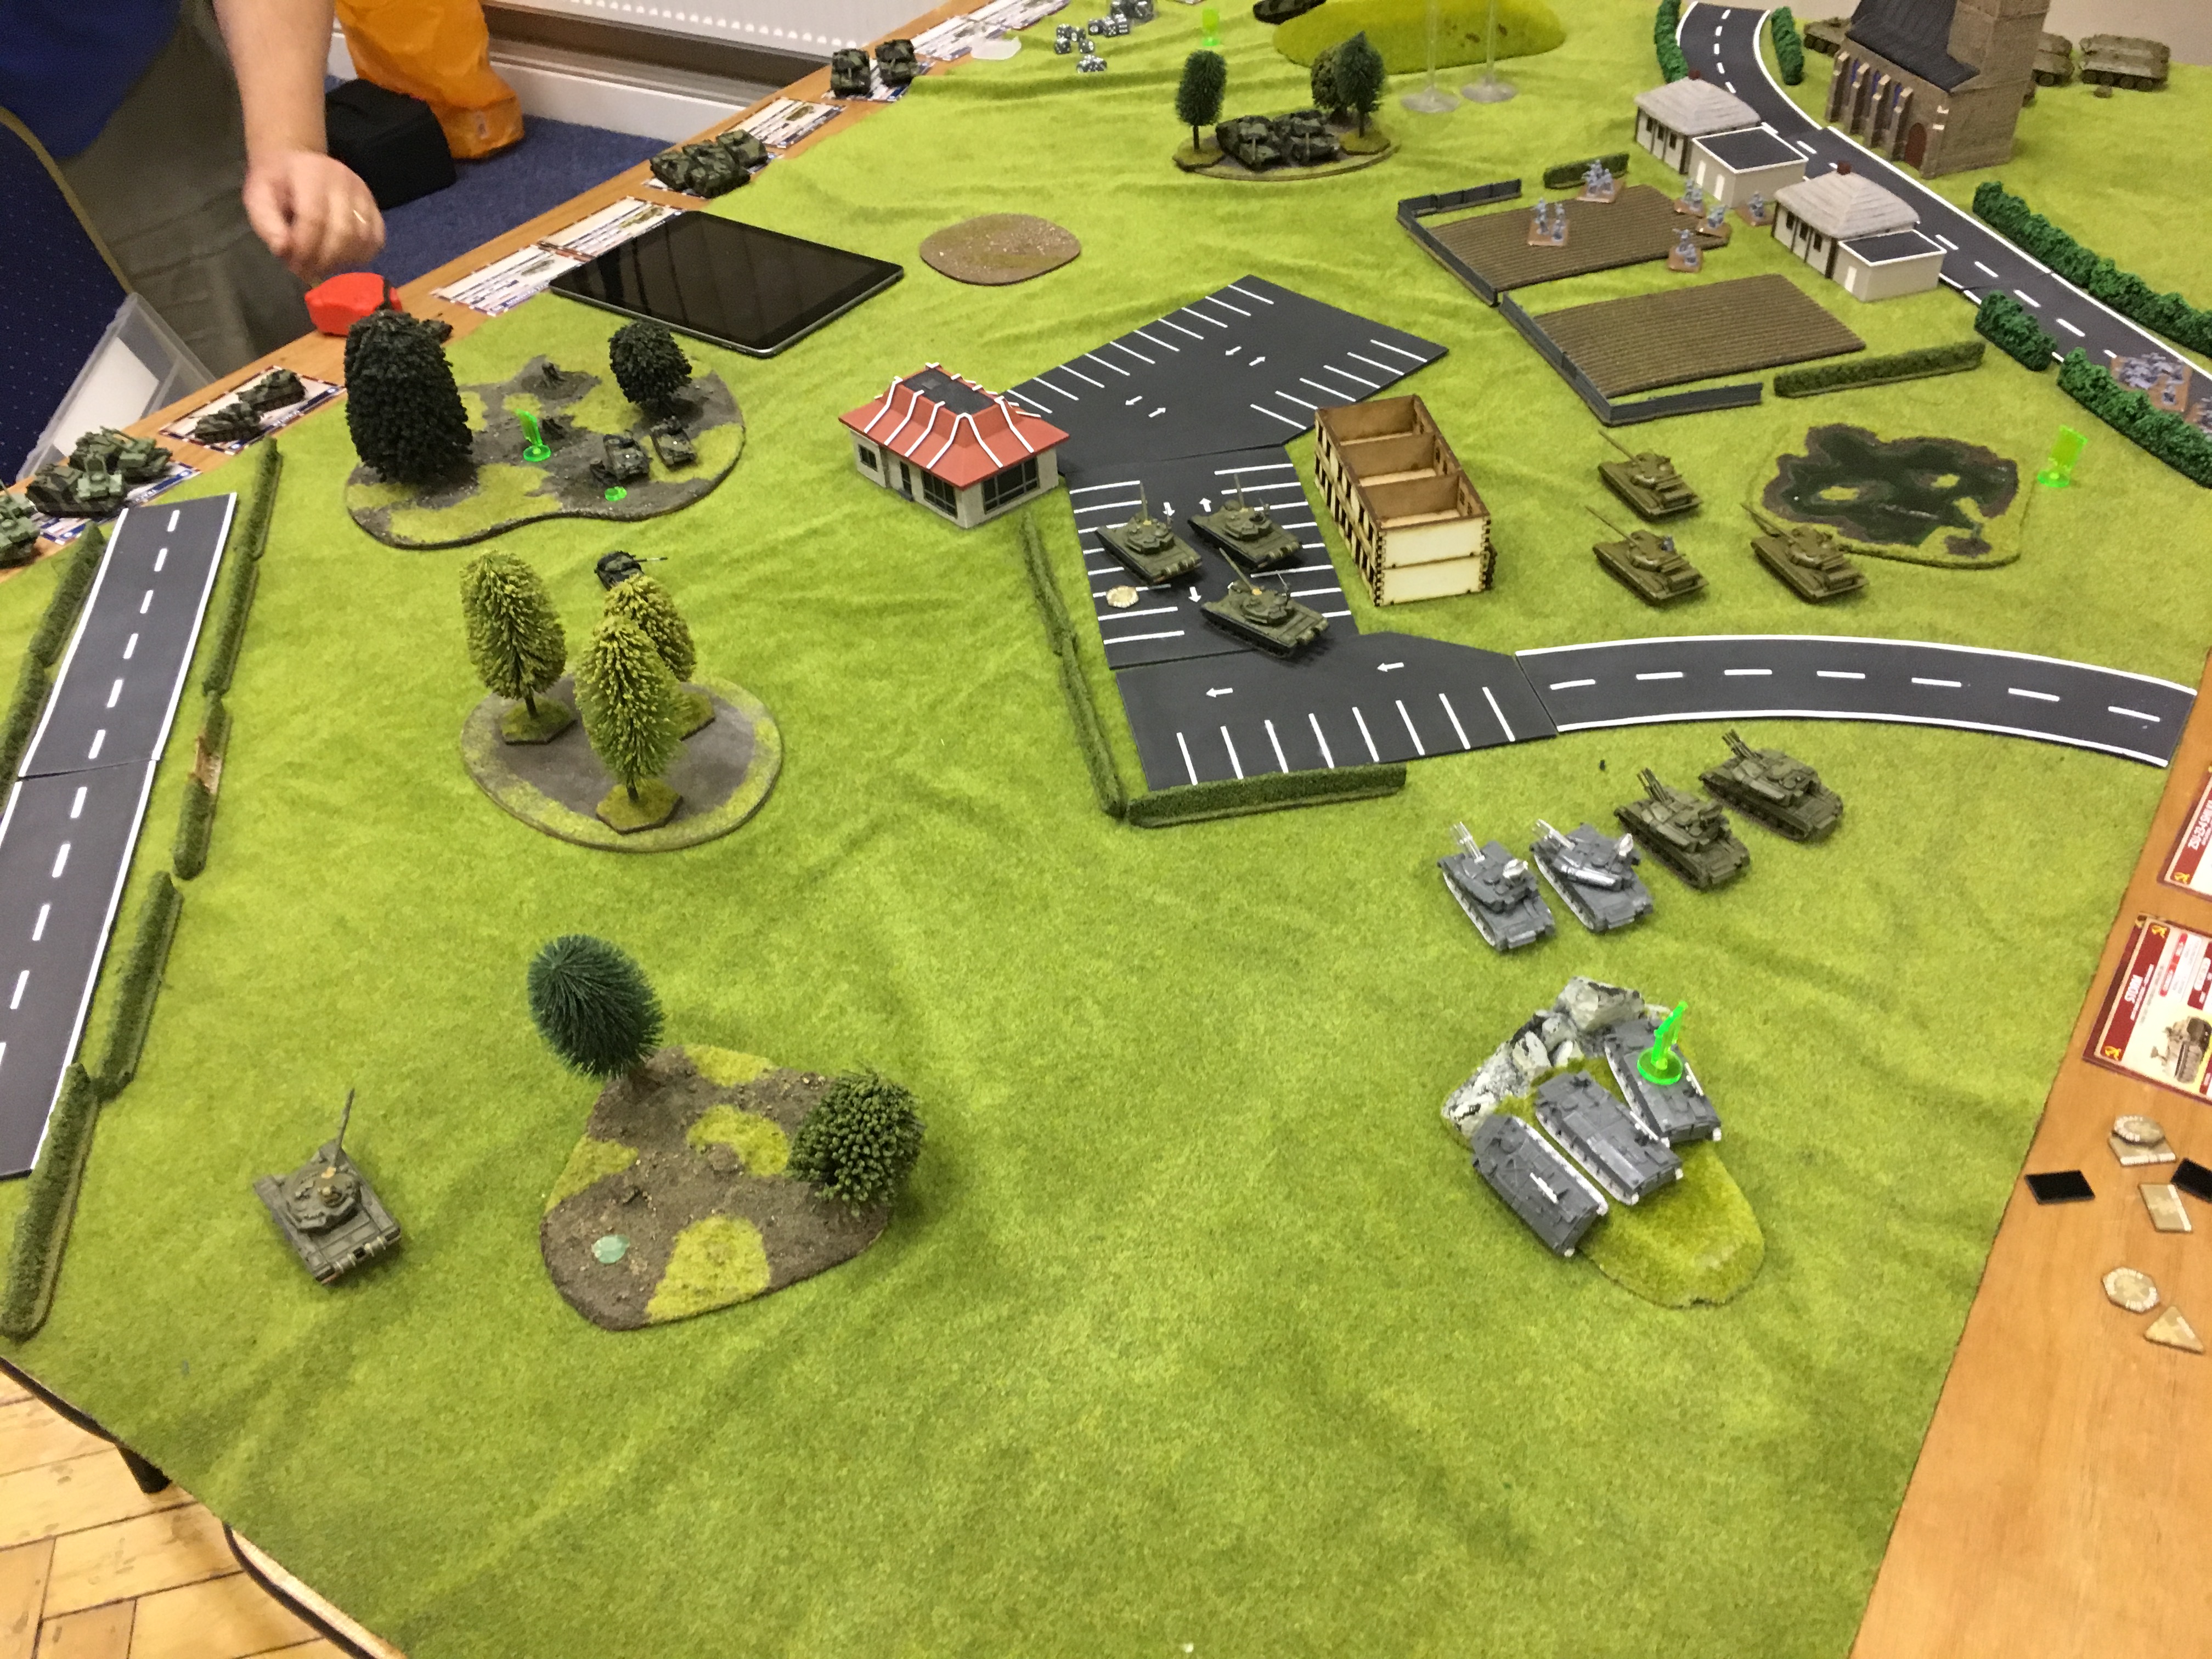
At the start of my 2nd turn I made my reserve roll and with the re roll of one dice in the mission special rules got 2 units in, I elected to bring on 1 unit of T-72’s and the unit of T-64’s, I had the T-64’s make a direct push for the Chieftains and the T-72’s dashed up to the fast food joint, my infantry carried on moving up and finally I moved the shilkas behind the 2 tank units for a better AA bubble. In my shooting phase the storms bailed 1 of the spartans again and the spigots got the 2nd lynx (best AA is apparently ATGM’s? haha). In the Brits 2nd turn the harriers arrived again and lined up for a run on my infantry and the remaining scimitar moved for a side shot on a T-72. In his shooting phase the russian infantry was slightly too close to the chieftains for the harriers to drop bombs on them so they opened up with cannon and killed a few bases, the 2 chieftains in the woods opened up on the T-72’s but rolled 4 2’s!!, finally the scimitar scored a hit on a T-72 and bailed it. Turn 2 Over
Turn 3
My last unit of T-72’s turned up and I decided to move them to the left side with the HQ tank in case any British reserves turned up in that corner. The bailed T-72 failed to remount so I moved the other 2 tanks in the unit into cover from the chieftains, the T-64’s continued their push against the forest while the infantry moved up for flank shots on the chieftains and a potential assault, finally the Battalion Commander moved for a shot against the scimitar. In the shooting phase I concentrated against the 2 Chieftains in the woods, first to shoot were the T-64’s but missed, then the 2 T-72’s in cover which scored 2 hits blowing up 1 Chieftain and bailing the other, the infantry finished off the bailed tank with a few RPG-7’s, the Battalion Commander blew up the scimitar and the storms knocked out one of the spartans forcing the remaining one to take a morale test which he passed. In the British turn 3 he failed his reserve roll so was a bit up against the wall, the harriers appeared for a run against my tanks but were demolished by the shilkas and his HQ chieftain fired machine guns at my infantry for a kill. Turn 3 Over
Turn 4
I moved my T-64’s to get a shot at his HQ tank and moved all the T-72’s to finish off the last spartan. In the shooting phase I bailed the spartan and knocked out the HQ Chieftain. The spartan then failed his morale which meant the British had no units left on the table.
Victory to the Soviets 6-1


Battle Report Author
Recommend Commander For Commendation
Share this battle with friends
Jackhunter464Wins

Hard fought battle and congrats on the win.
yes very unlucky of your opponent, but oh well there is always next time
Good report; the text was a little difficult to follow descriptively without the pictures in amidst the text. Do that and you’ll have a winner on your hands, good job.
enough said, is this the stuff BF puts on their FoW Front page? – Still great reading 🙂
Ack!!! The NATO dice were obviously made in East Germany. Beware the subversion by the Pact.
Congratulations on the victory Comrade!
Nice and descriptive text, but as Major Beaver said, break it a little up with pictures as well as the text (at least give the brit a enter when his turn begins 😉 )
+++
Spasibo for the win.
Report could be a little better, you might like to read this – https://firestormstripes.warconsole.com/briefing/topic/how-to-write-a-good-battle-report-and-save-yourselves-a-lot-of-frustration
A little better and it would become very good 🙂
Excellent AAR Jackhunter with great supporting pictures.
next round change dice please 😉 THy were not with the luckey 🙂
Nice AAR. To bad the NATO forces couldn’t stand their ground.
One thing with the report. Try to put the pictures in between the text. It makes it a lot more interesting to read. Good luck in your future battles.
I keep saying – at least 6 NATO divisions – 12,000 tons of ammo and 8 million liters of petrol a day plus 500 tons of food – plus feed about a million German civilians, another 2,000 tons….all together about 2,000 rail cars a day – just one double track rail line – within artillery range from two directions for 250 kilometers. Like the AMEX adds say, priceless
Nice battle
NATO must be having supply and training issues to fail all those rolls! A very well done AAR and congrats on the victory Comrade!
Sounds like your opponent needs a new set of dice. Those rolls seemed horrendous.