Fought At Leipzig
2199 days 21 hours 52 minutes ago
Amsterdam shuffle
70 POINTS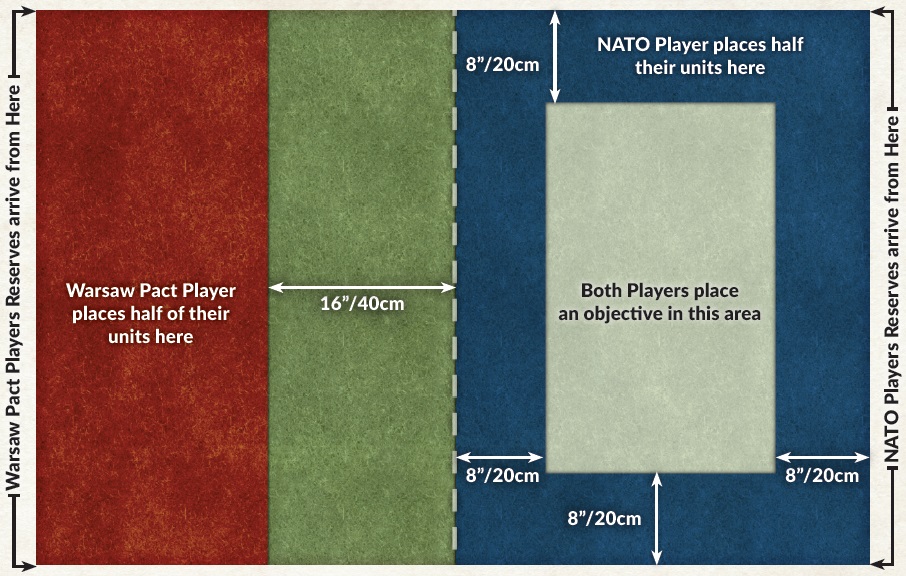
NATO on the defensive, close reserves (from the second turn), one ambush, mines for every 25 points of the roster (2 pieces total). The WP has fast reserves (with the first turn) and start the game.
By the result of throws the mission passes in the daylight.
I play for NATO (BAOR), Philip WP (Soviet Union). The format is 65 points.
British 3rd Armoured Iron Division
Main formation:
1. FV432 Mechanised Company HQ - 1x SLR Rifle, 1x FV432;
2. FV432 Mechanised Platoon - 3x CPMG with 66mm anti-tank, 2x Carl Gustav anti-tank, 1x 2" mortar, 3x FV432;
+ 2x Milan, 1x FV432.
3. FV432 Mechanised Platoon - 3x CPMG with 66mm anti-tank, 2x Carl Gustav anti-tank, 1x 2" mortar, 3x FV432;
+ 2x Milan, 1x FV432.
4. Abbot Field Battery - 4x Abbot; [Reserves]
5. Spartan Mobile Milan Section - 2x Spartan MCT;
6. Scimitar Recce Troop - 4x Scimitar; [Reserves]
7. Chieftan Armoured Troop - 3x Chieftan; [Reserves]
3x Upgrade Chieftan with Stillbrew;
Support:
8. FV432 FOO - 1x FV432 FOO;
9. Tracked Rapier SAM Section - 4x Tracked Rapier; [Reserves]
10. Scorpion Recce Troop - 4x Scorpion; [Reserves]
11. TOW Lynx Helarm Flight - 2x TOW Lynx. [Reserves]
Total: 65 pst.

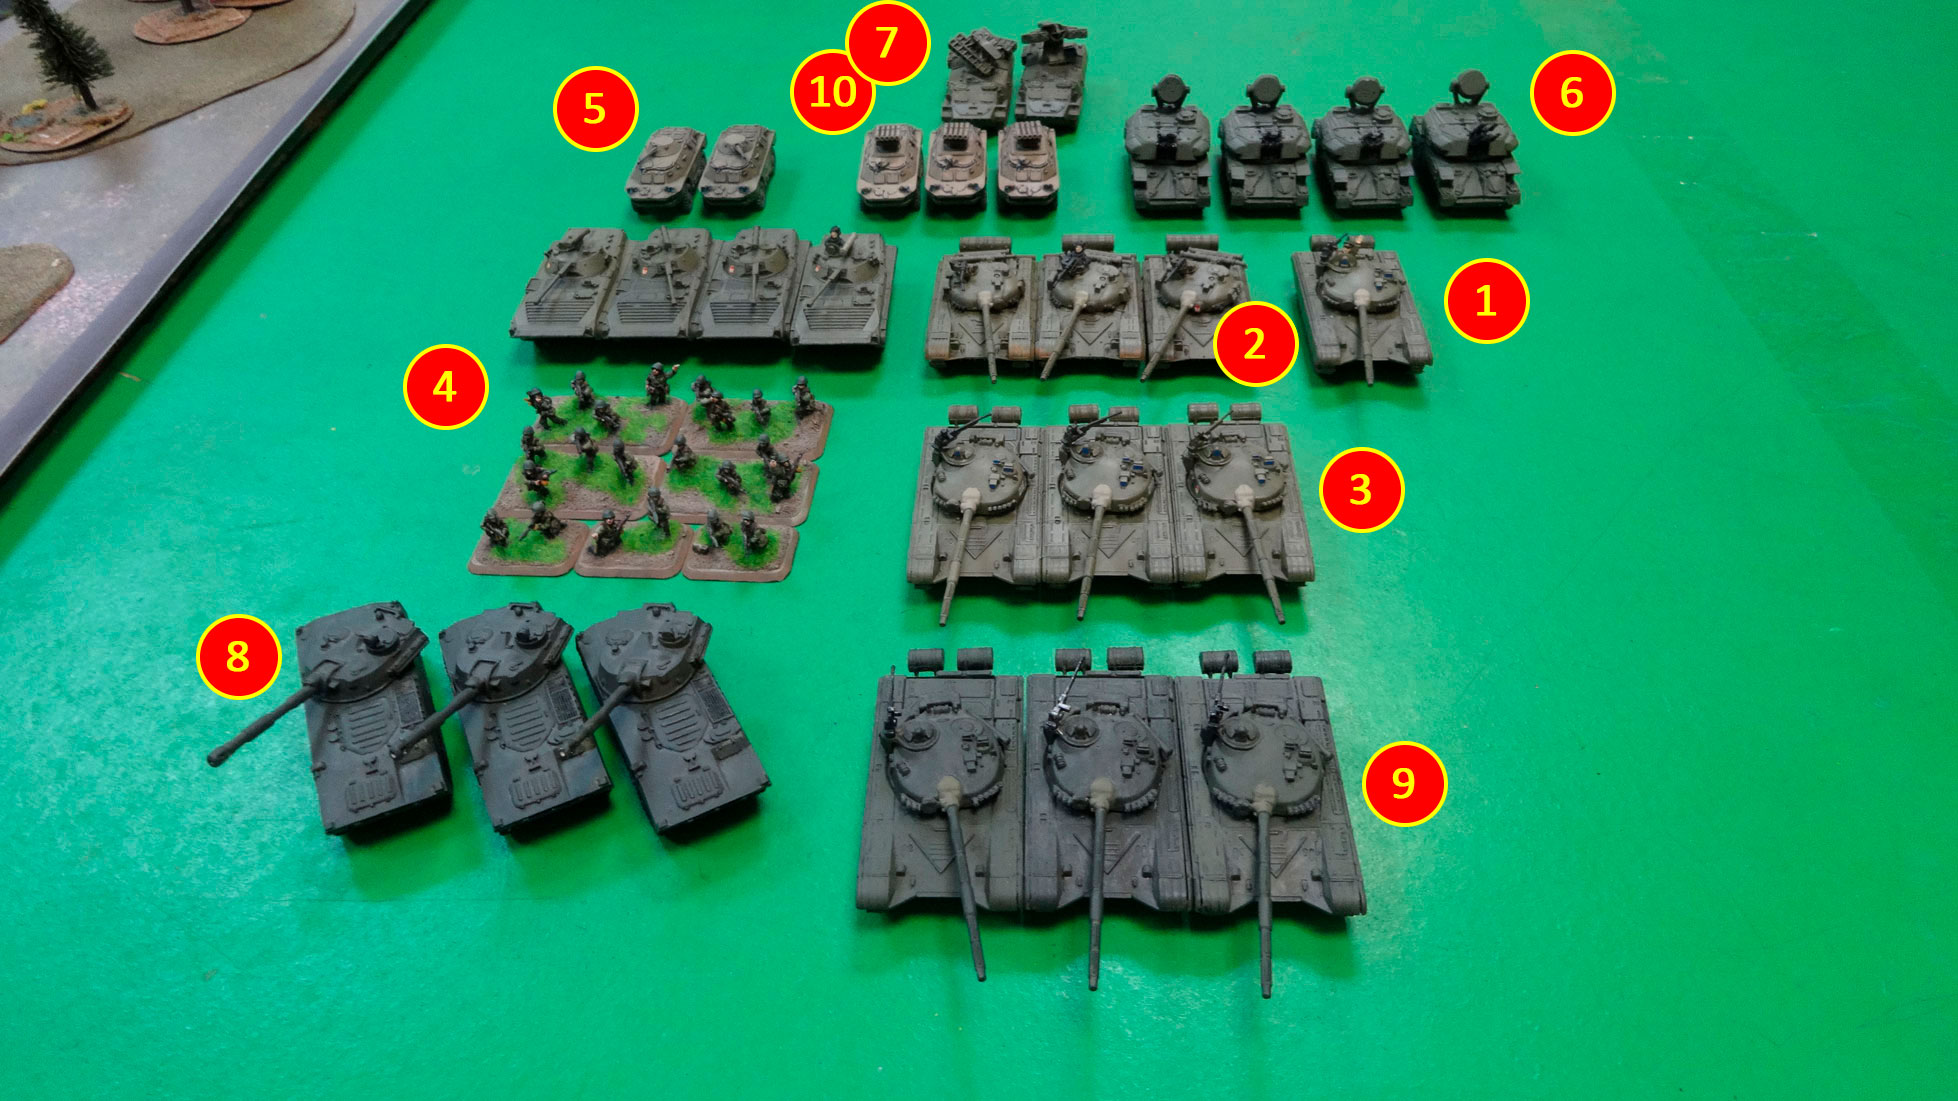
Soviet 94th Guards Motor Riffle Division
Main formation:
1. T-64 Tank Battalion HQ (p.19) - 1x T-64;
2. T-64 Tank Company (p.20) - 3x T-64;
3. T-64 Tank Company (p.20) - 3x T-64; [Reserves]
4. BMP-2 Motor Rifle Company (p.31) - 4x AK-74 with RPG-18, 3x RPG-7, 4x BMP-2;
5. BRDM-2 Recon Platoon (p.22) - 2x BRDM-2; [Reserves]
6. ZSU-23-4 Shilka AA Platoon (p.22) - 4x ZSU-23-4 Shilka; [Reserves]
7. SA-13 Gopher SAM Platoon (p.21) - 2x SA-13 Gopher;
8. 2S1 Carnation SP Howitzer Battery (p.24) - 3x 2S1 Carnation;
Support:
9. T-72 Tank Company (p.35) - 3x T-72; [Reserves]
10. Spandrel Anti-Tank Platoon (p.24) - 3x Spandrel; [Reserves]
Total: 65 pst.
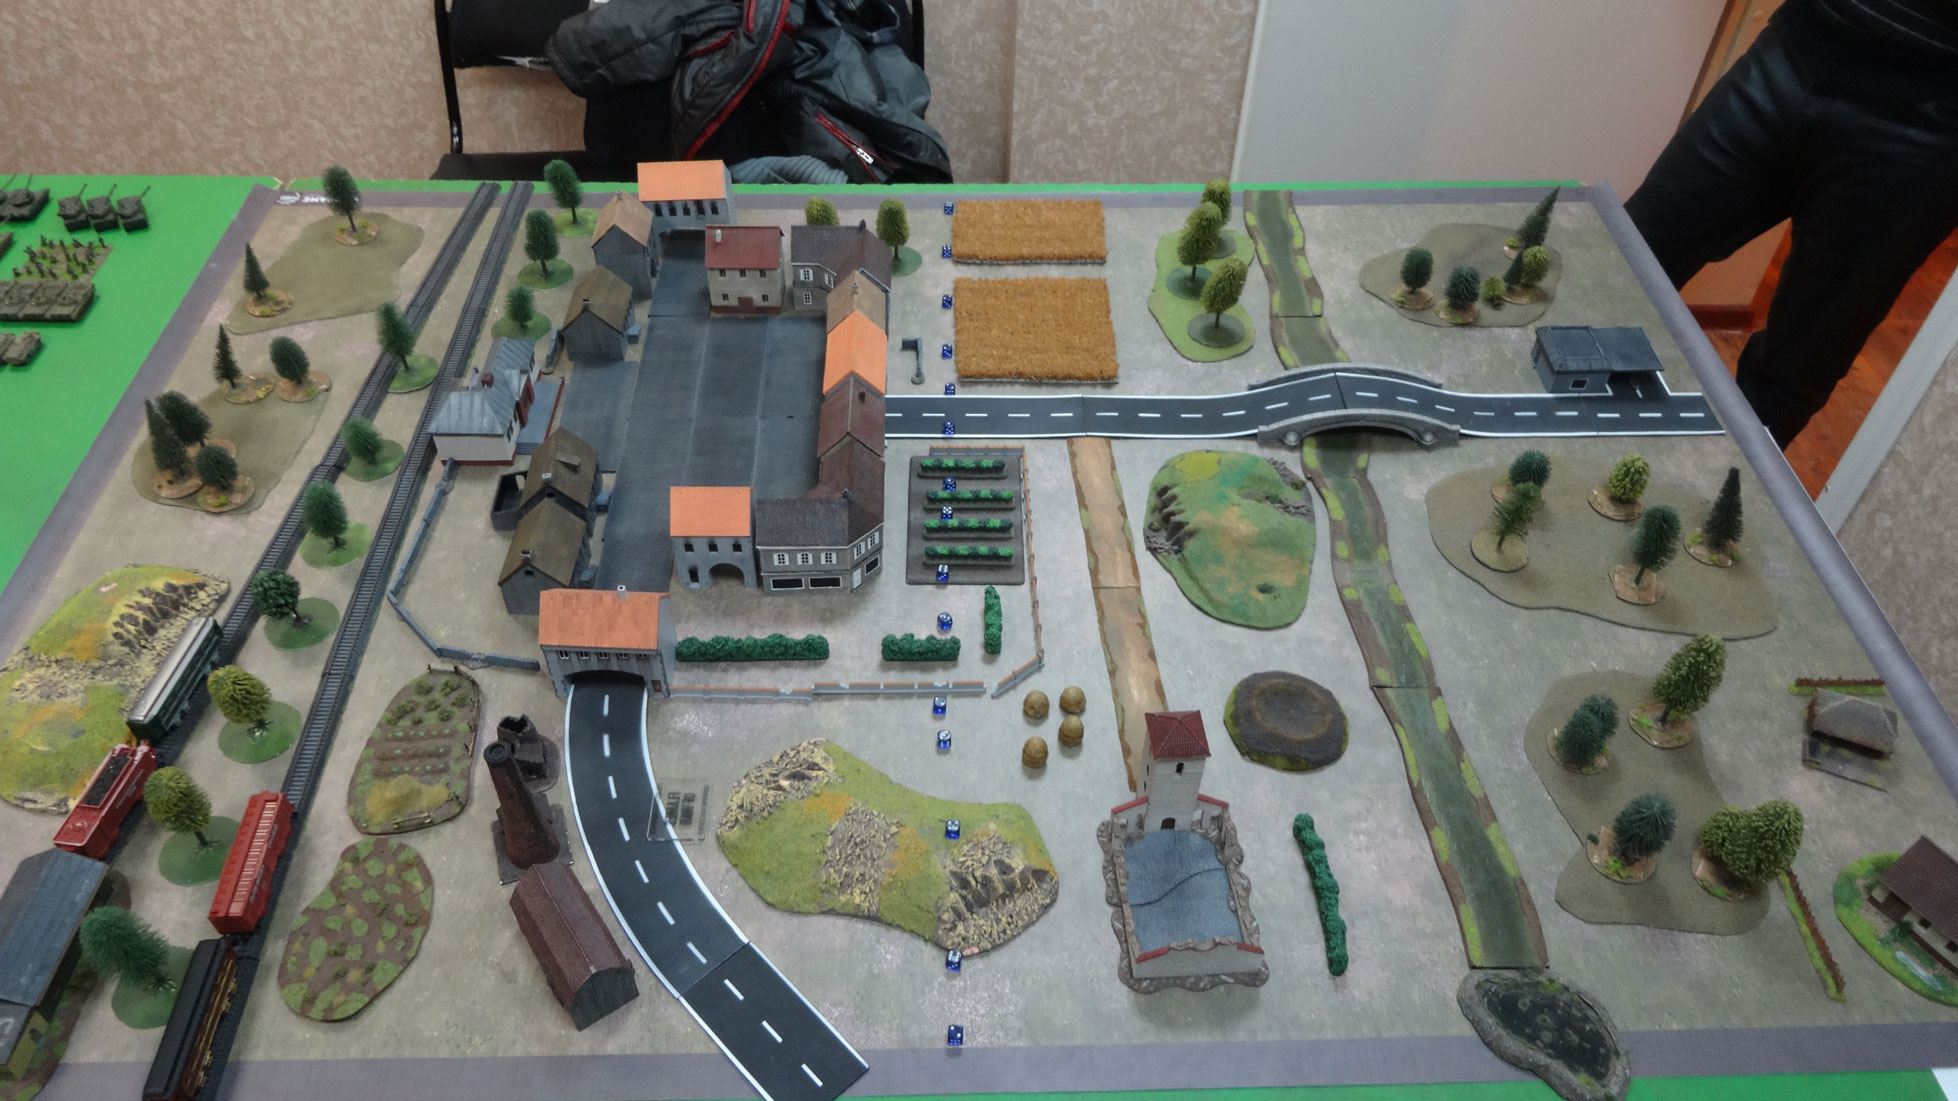
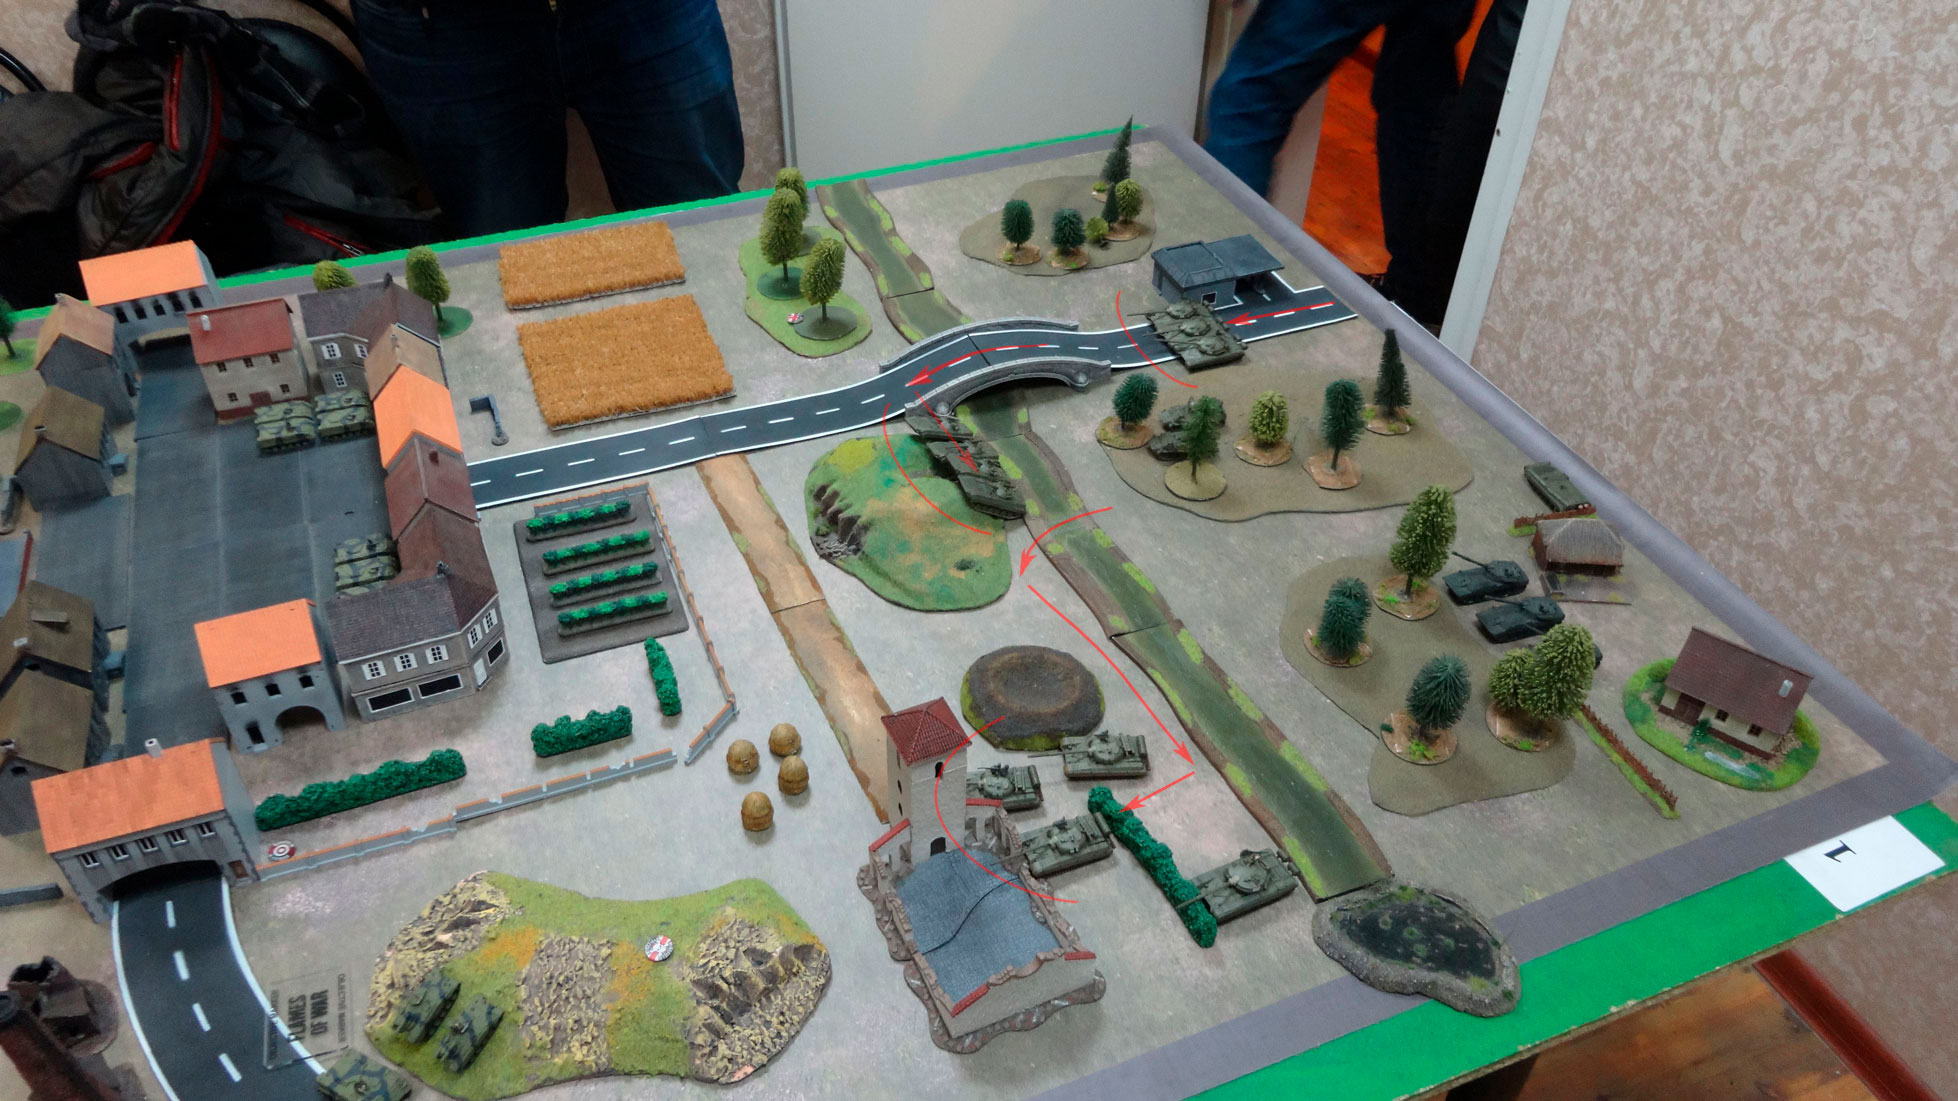
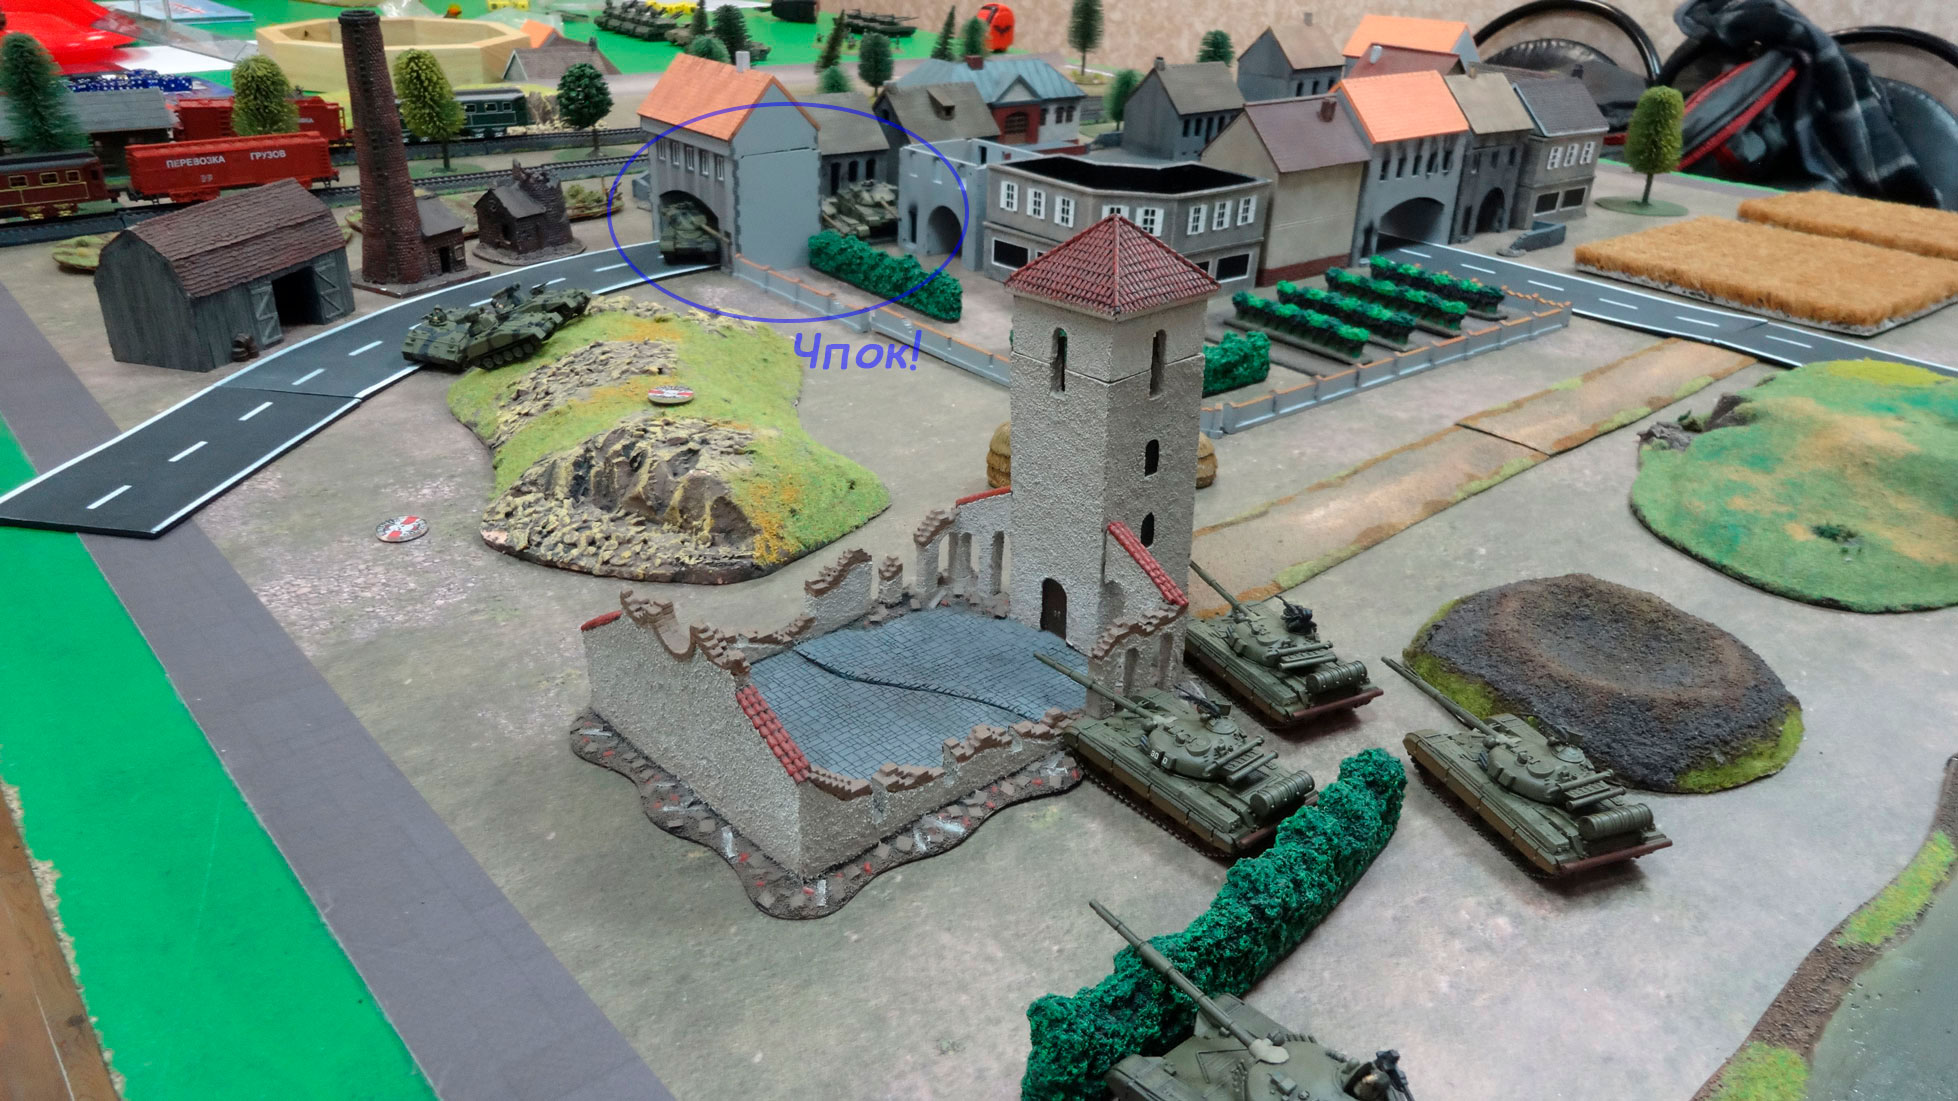
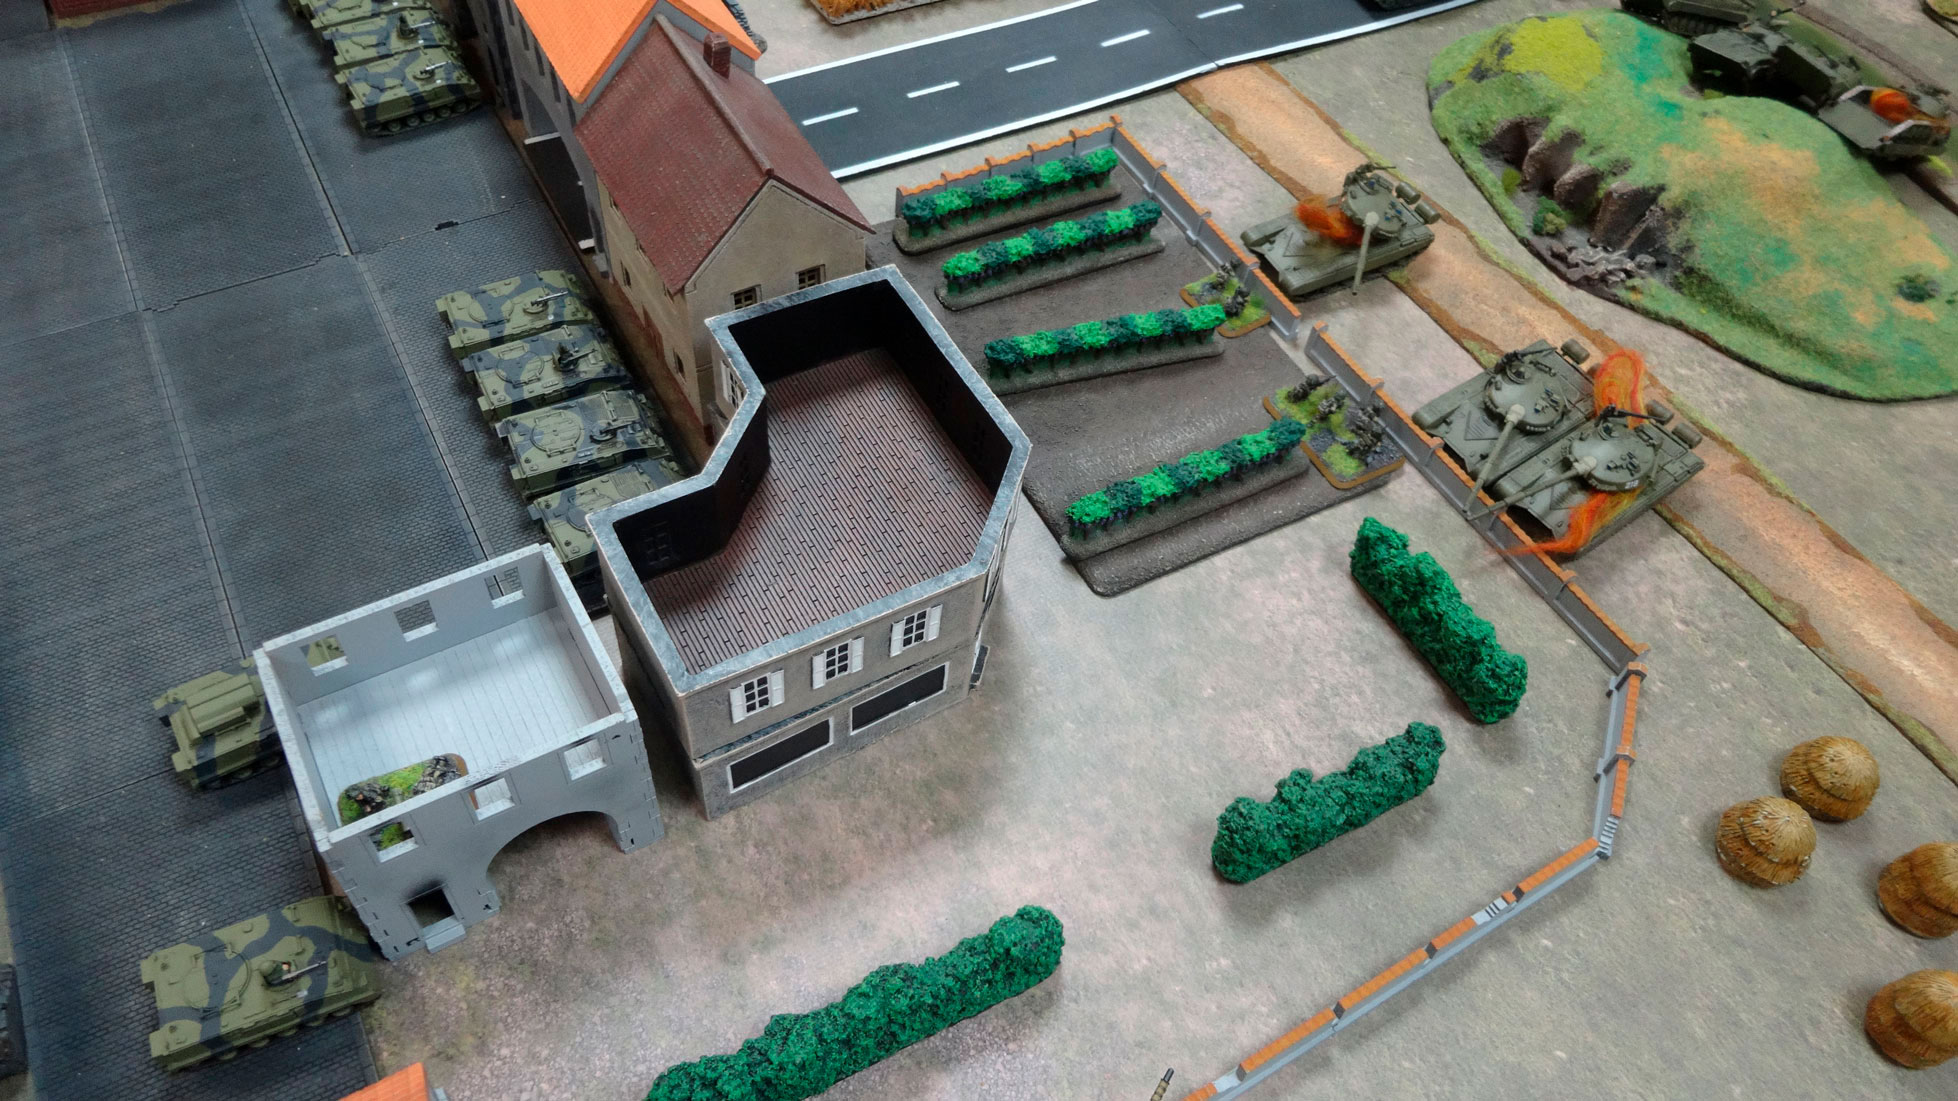
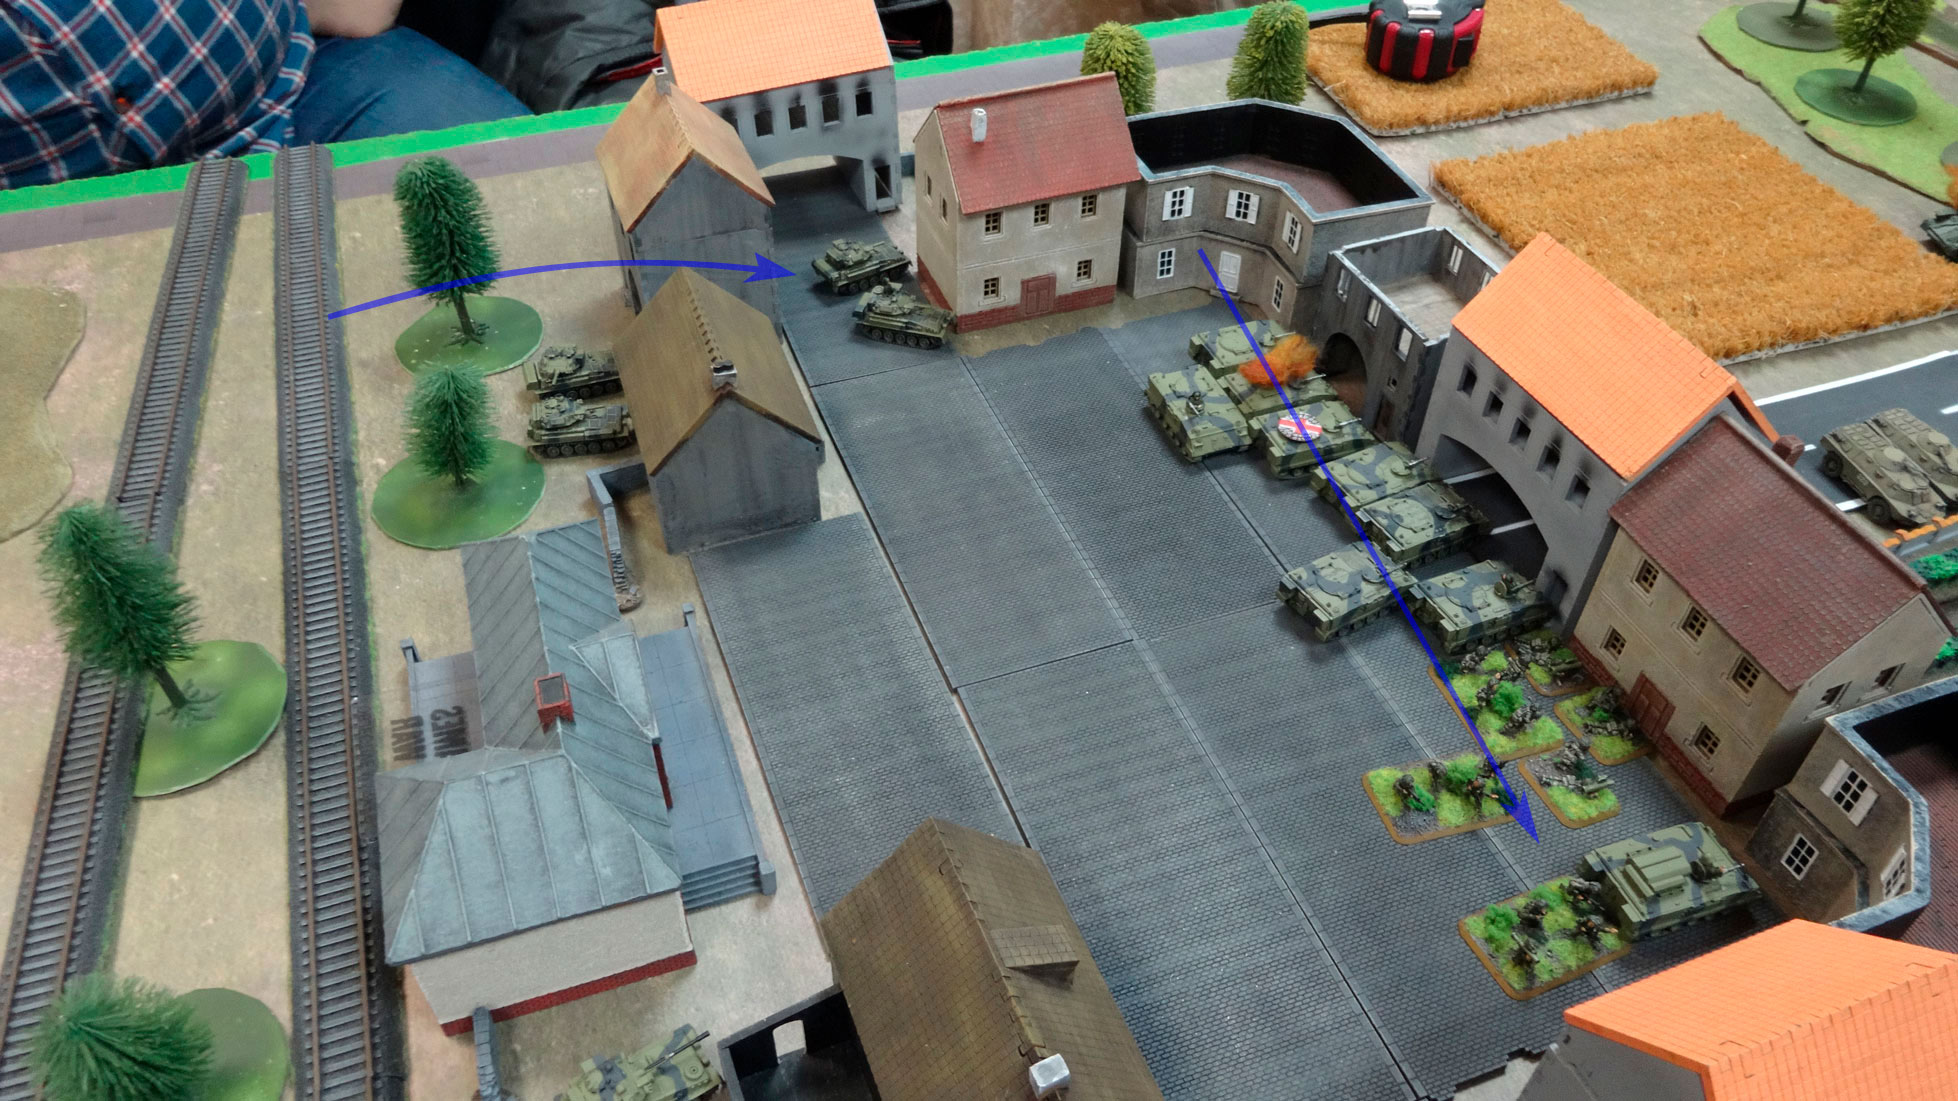
The battlefield is a small cluster of buildings near the railway station on one side and a wooded area beyond the river on the other side. NATO forces will defend the first control point at the railway station itself and the second at the southern entrance to the city.
NATO
I begin with four units on the table. One of which I can send in ambush. So I do, in the ambush, of course, will be the Chiftains.
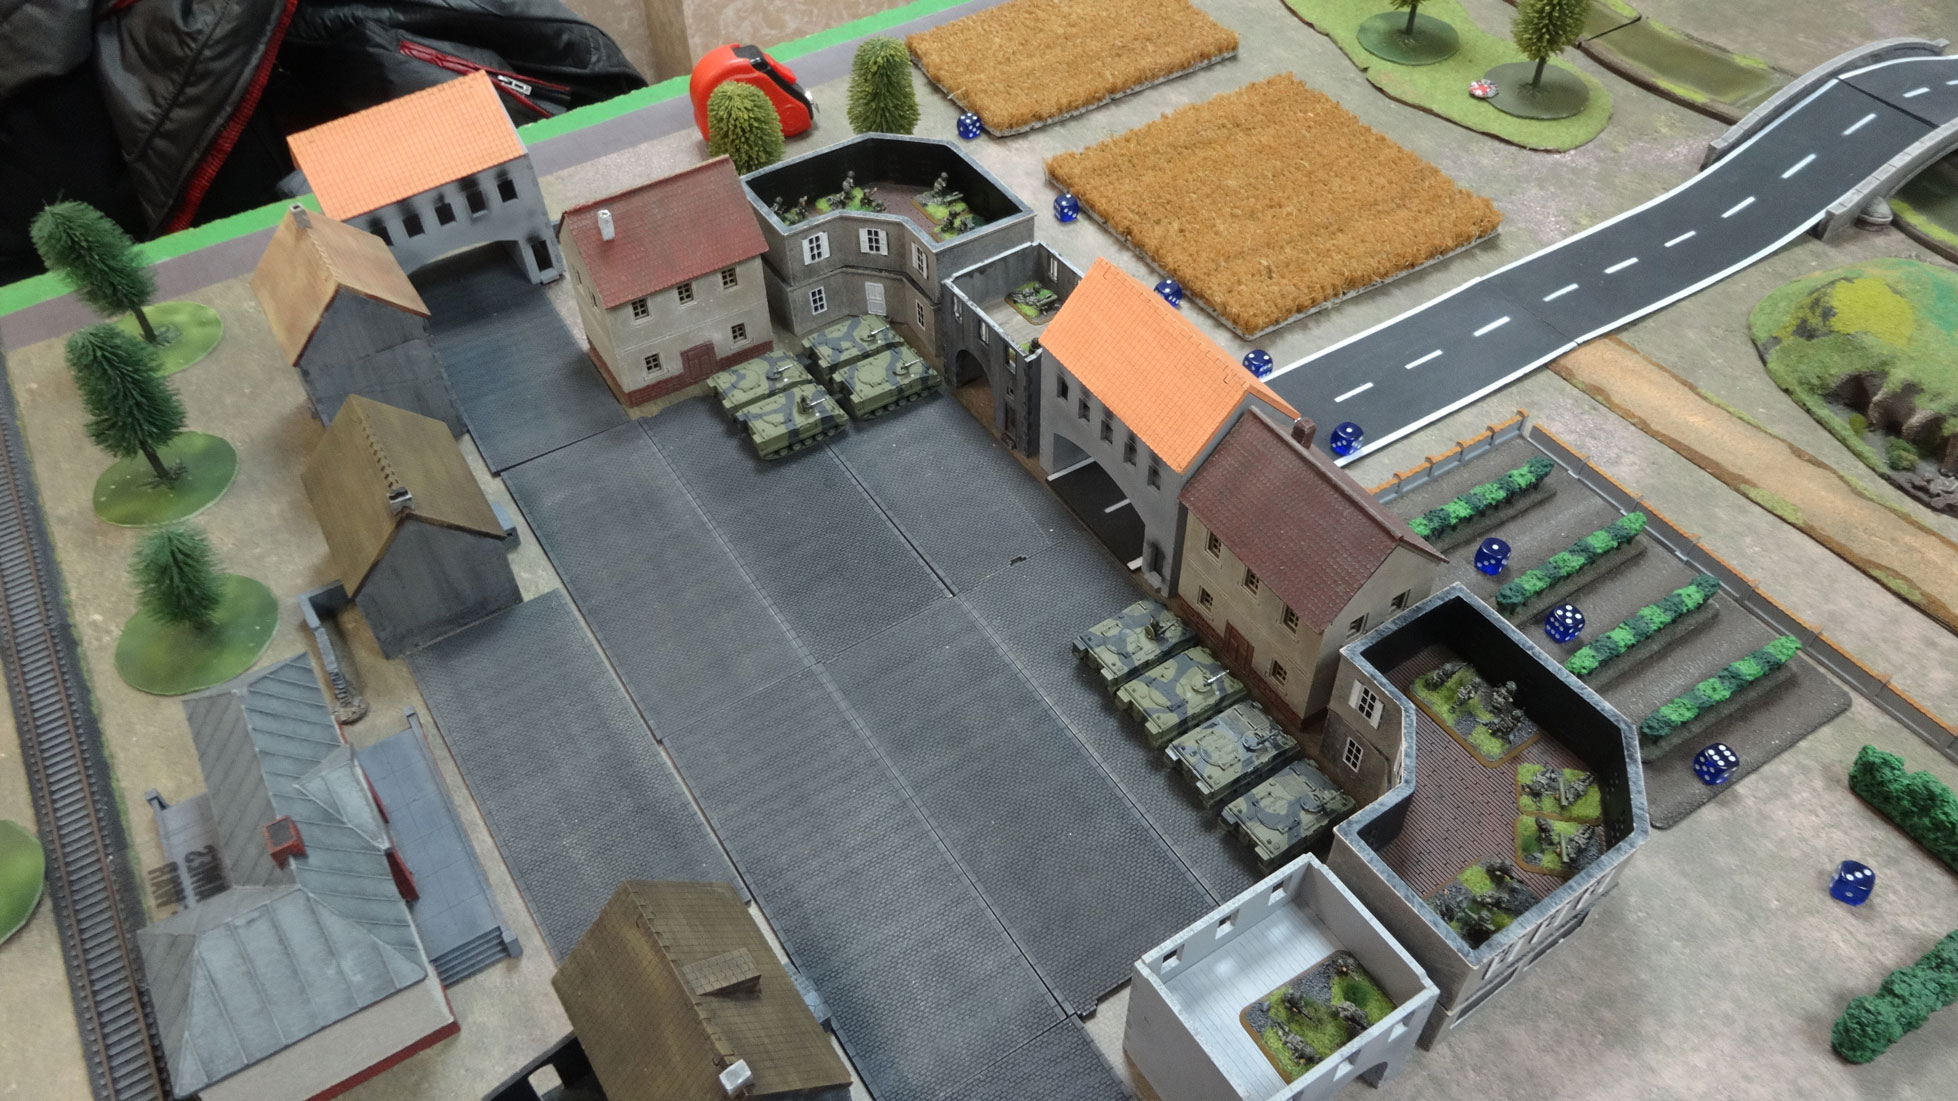
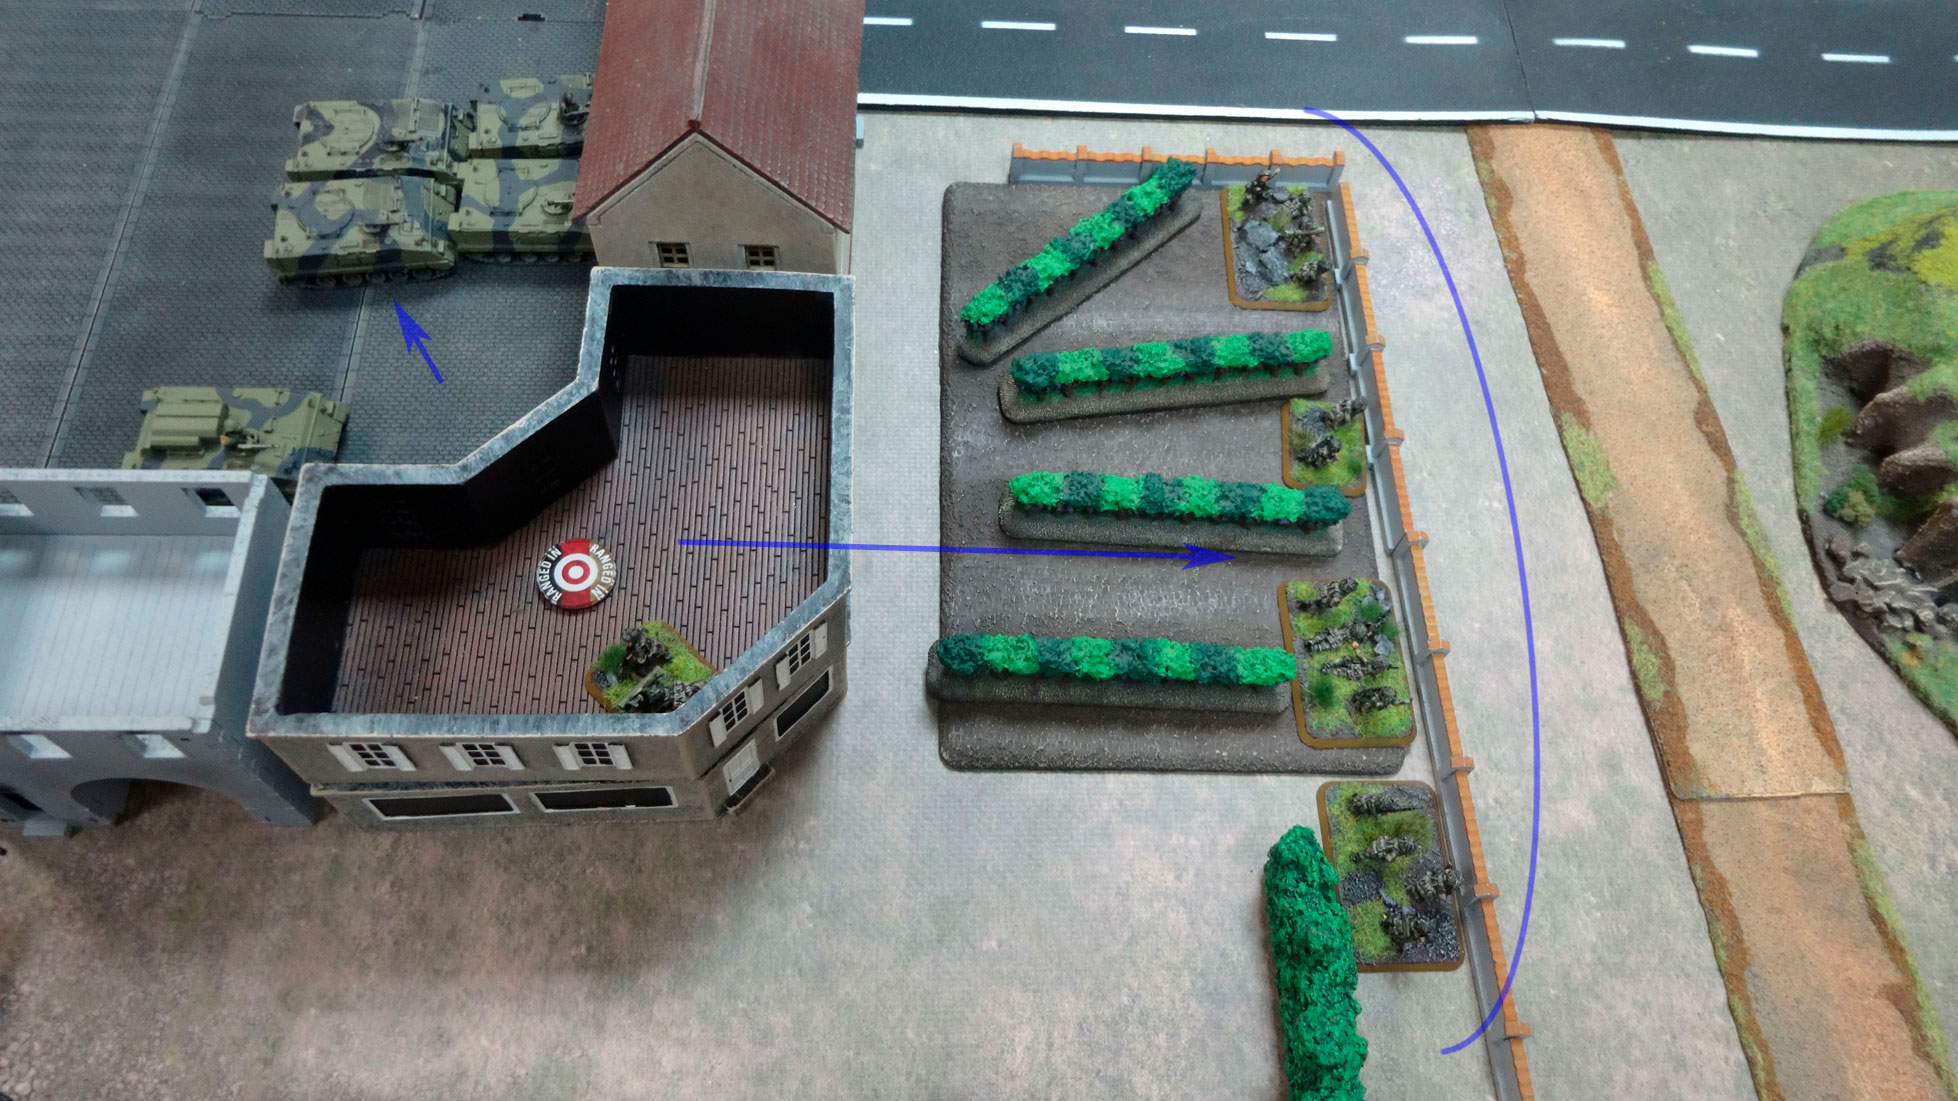
Two detachments of mechanized infantry are stationed in the city, so that Milans can cover maximum space.
Last unit left, which one it will be? Certainly not light tanks. Firstly, it is pointless to increase the deployment zone, all the best positions are already on my side; secondly, the Soviet MBTs are likely to arrive first, so that the Scorpions and the Scimitar are in reserve. Helicopters are also in reserve, in the opponent's air defense in the form of four Shilkas and two Grophers, so I will hold the Lynx. There was a variant with artillery or Spartan Milan.
I decide to strengthen the southern direction with Spartan Milan at the same time cut the very edge of the table with mines, in the hope that this will greatly complicate the tank attack from that side.

At the end I place the commander of the formation next to the Spartan Milan, and the OP in the southern part of the city.
WP
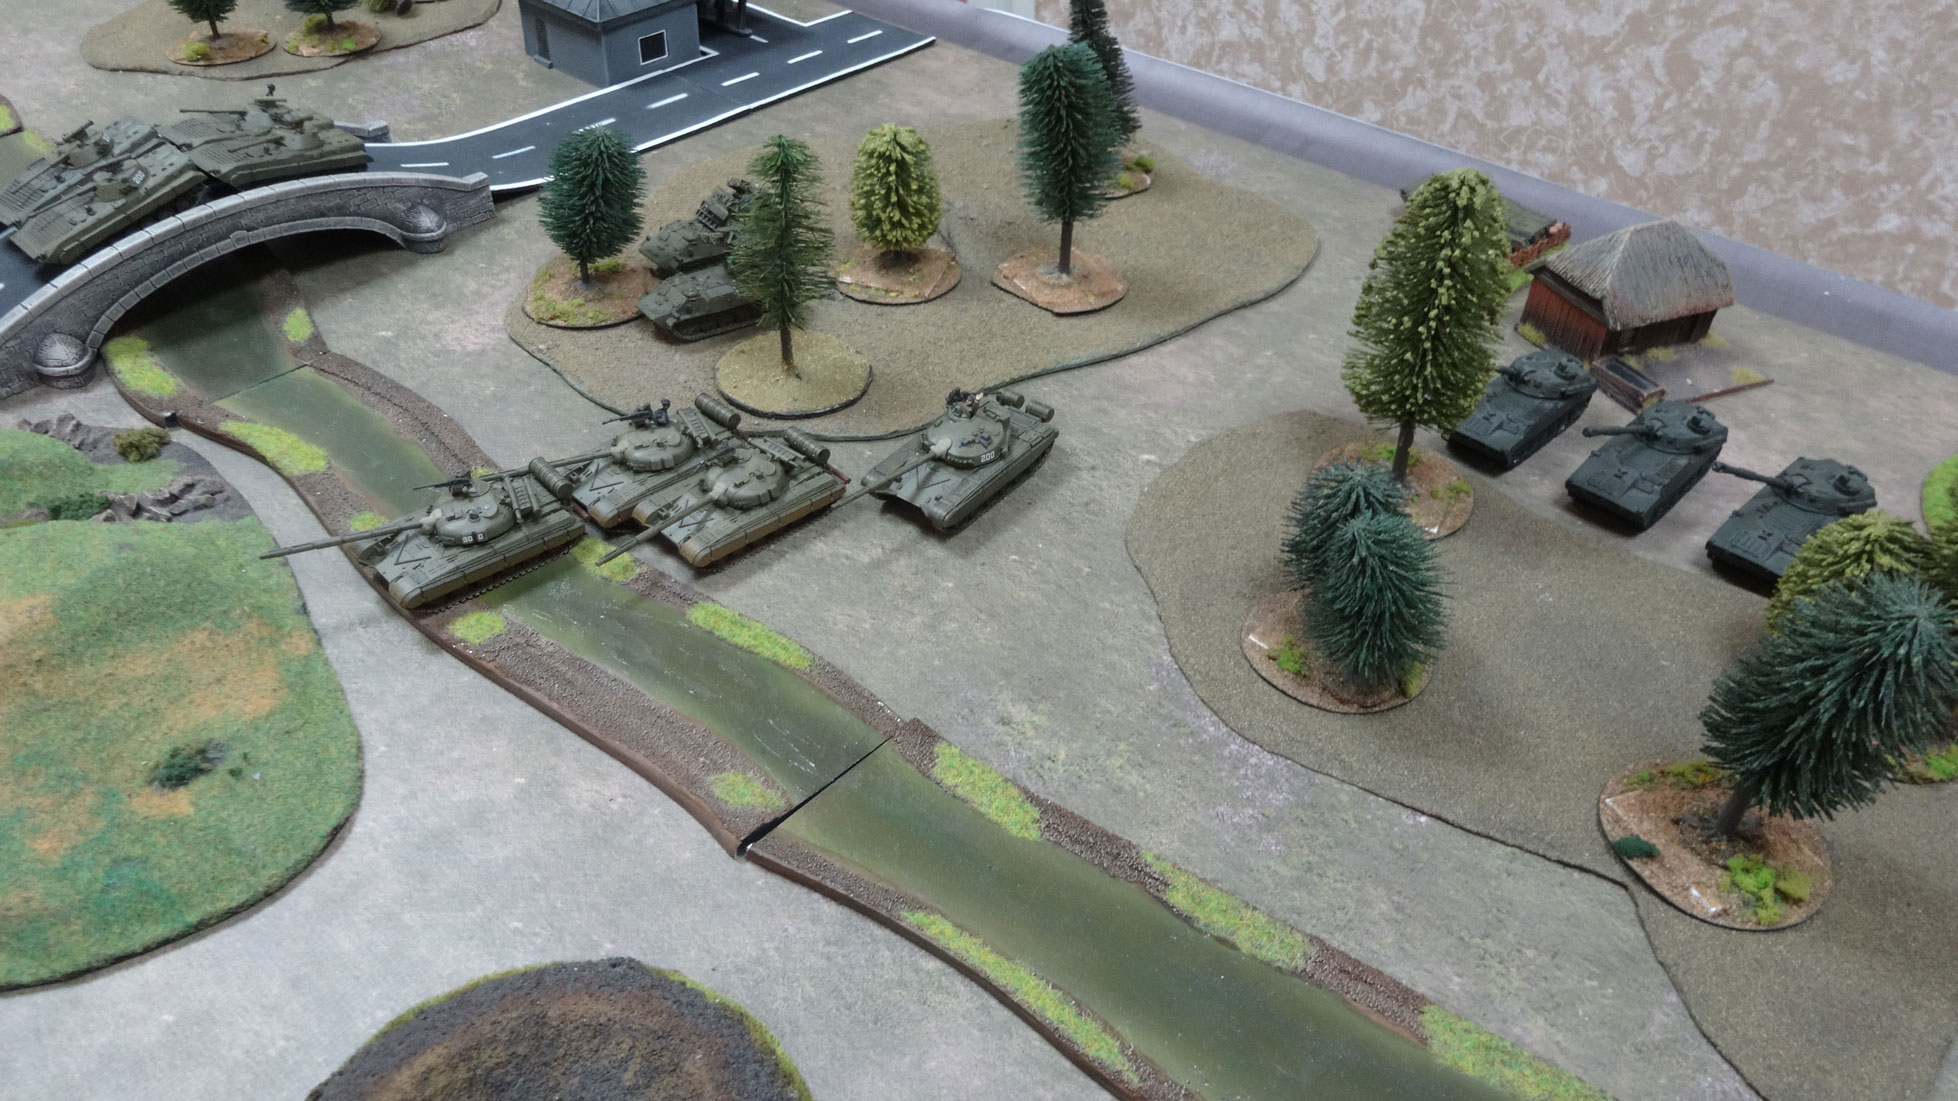
The Soviets placed their T-64 tanks with formation comander near the ford of the river. Grophers are located on the edge of the forest. Carnations in the woods near the village.

The Soviets start the game.
The second group of T-64 comes from reserves.
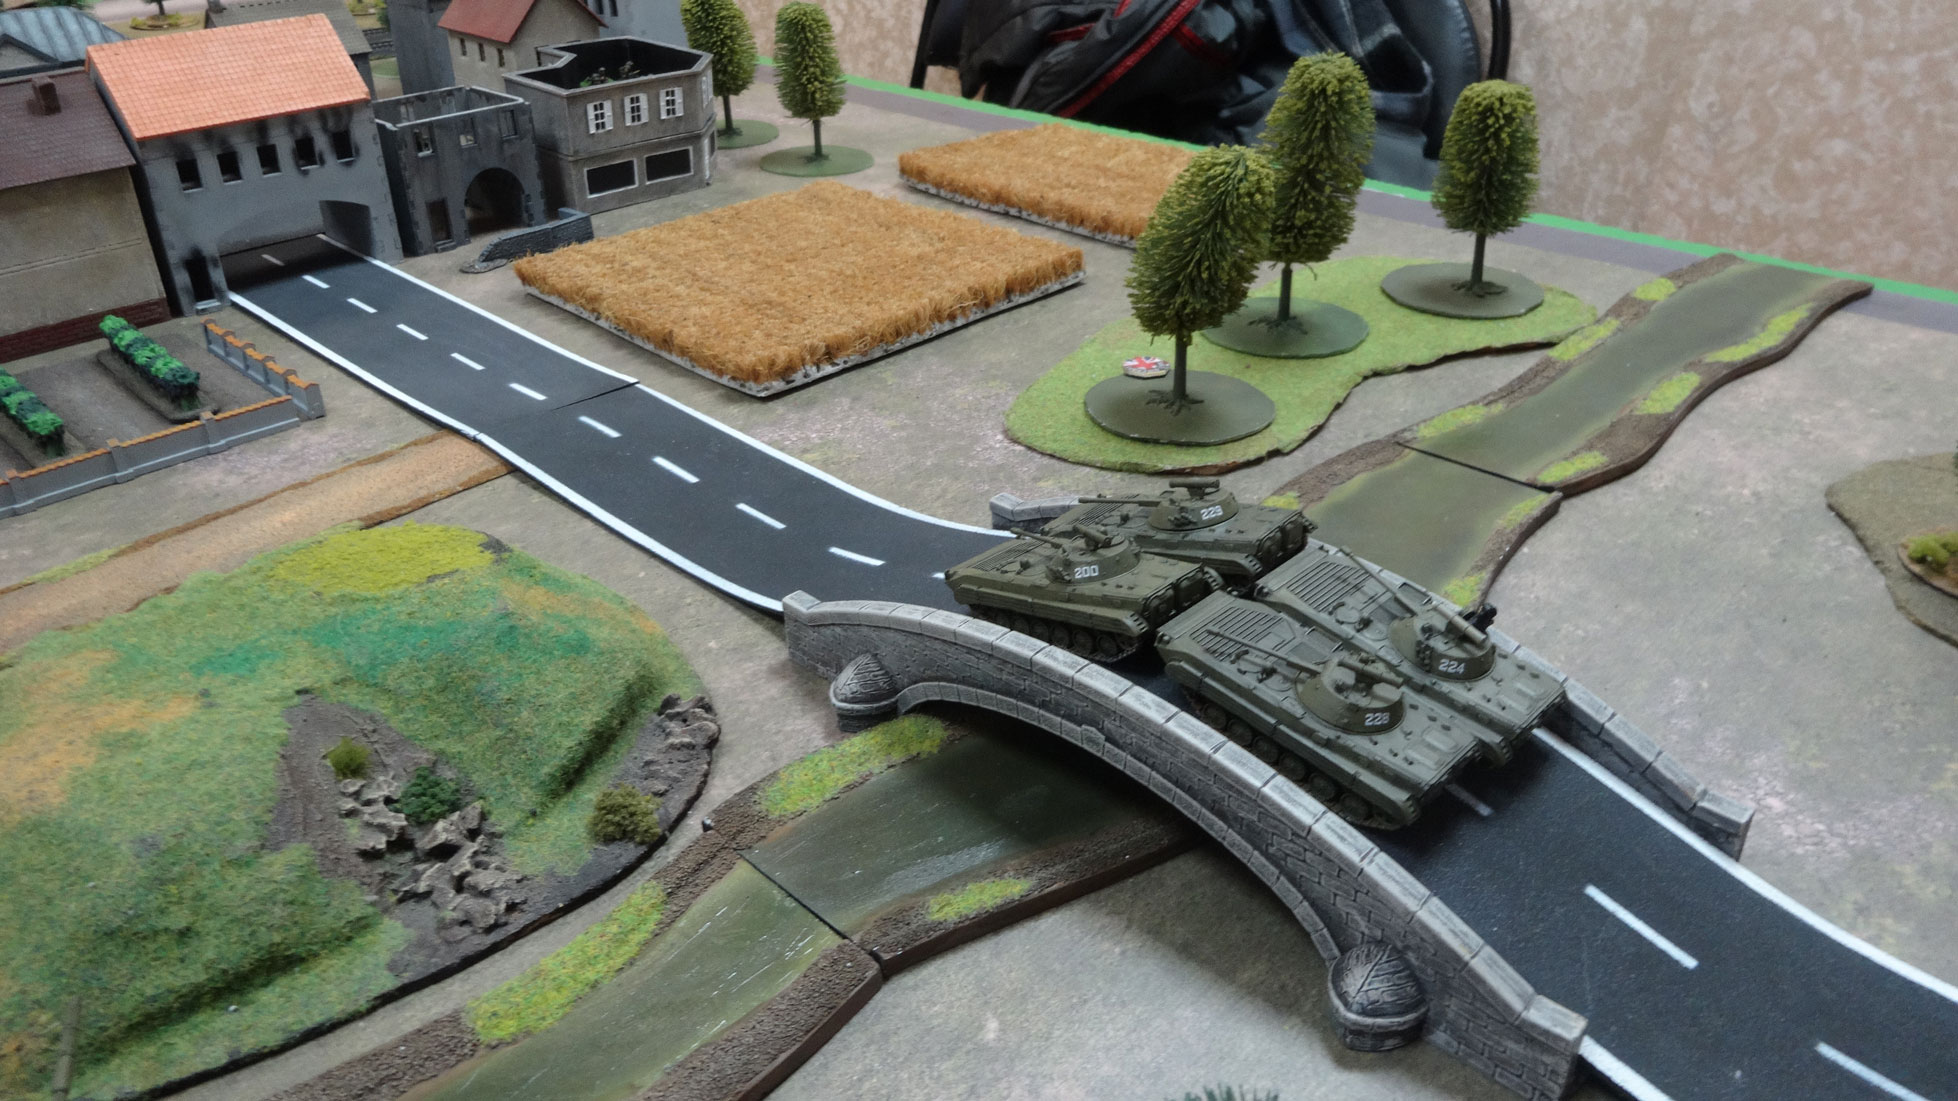
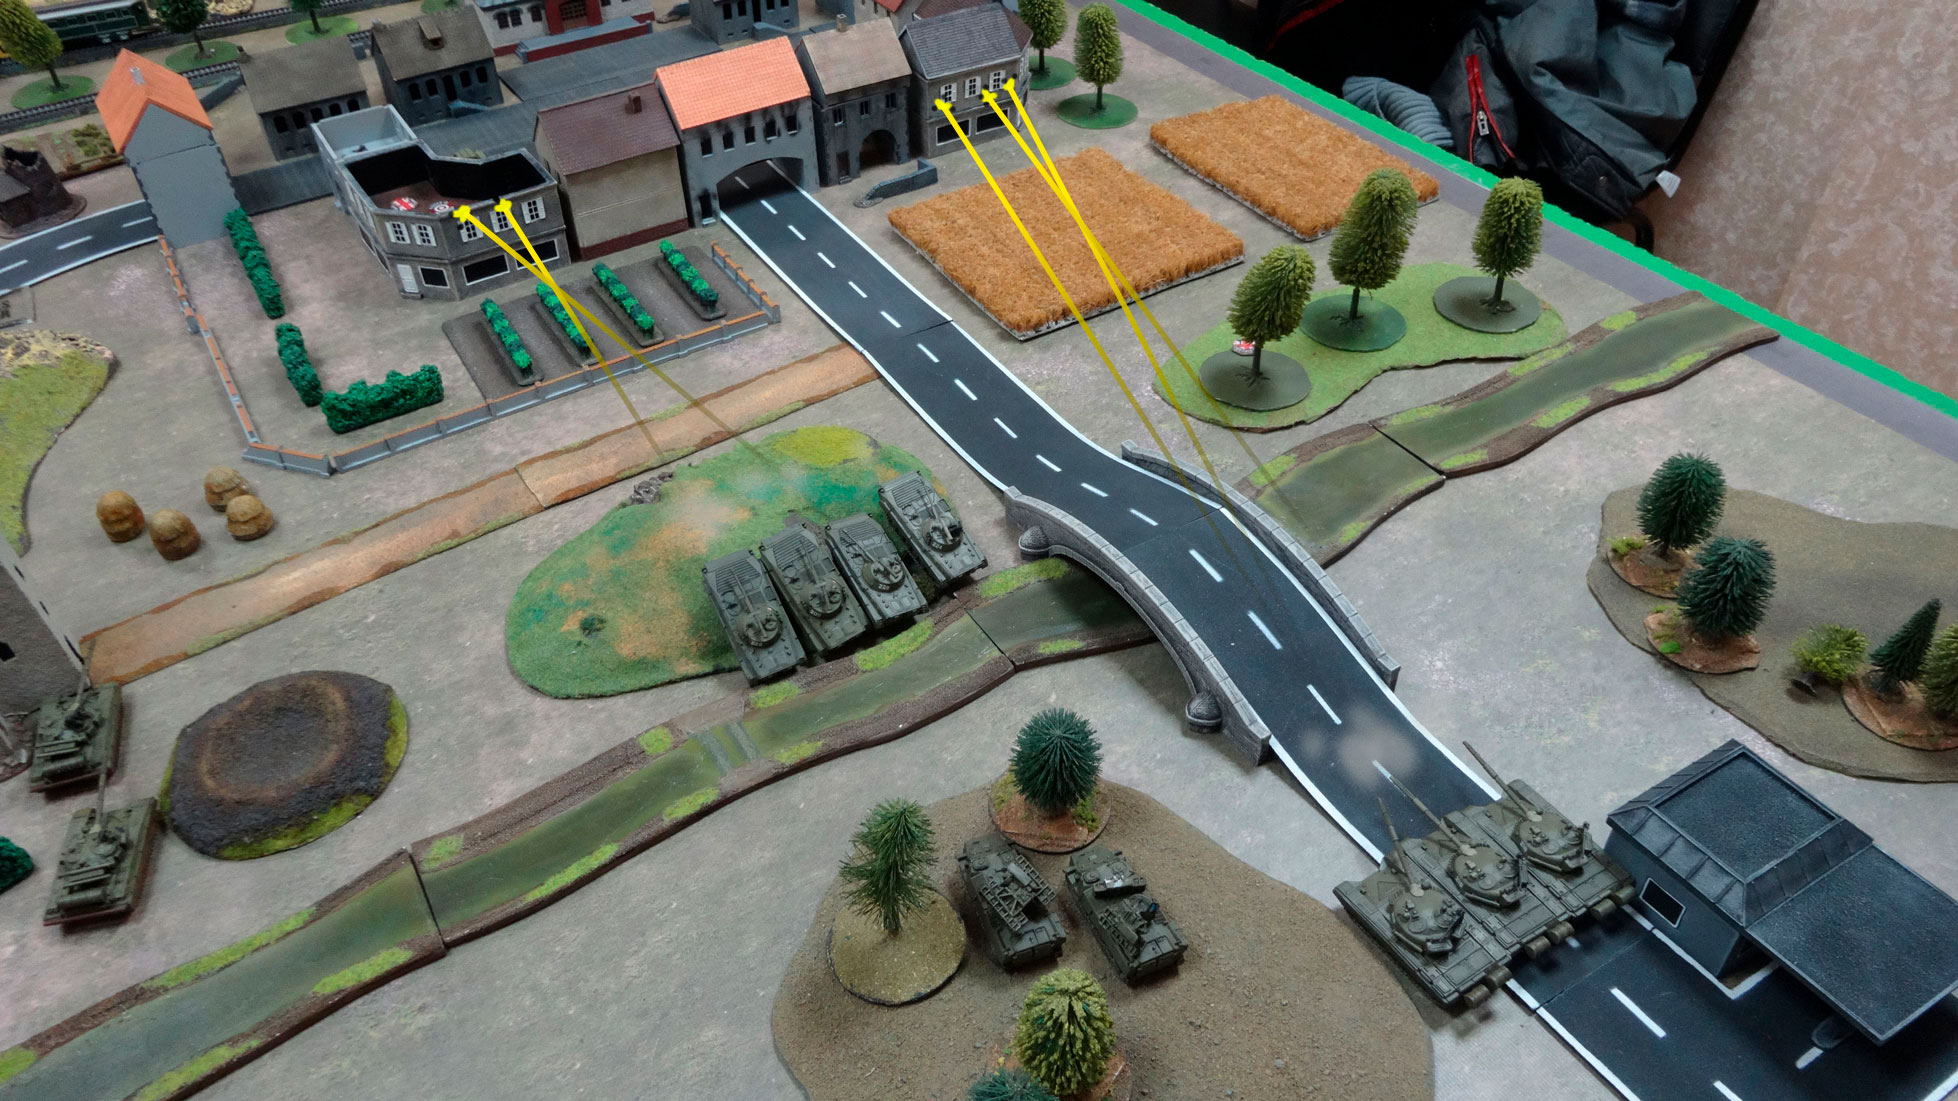
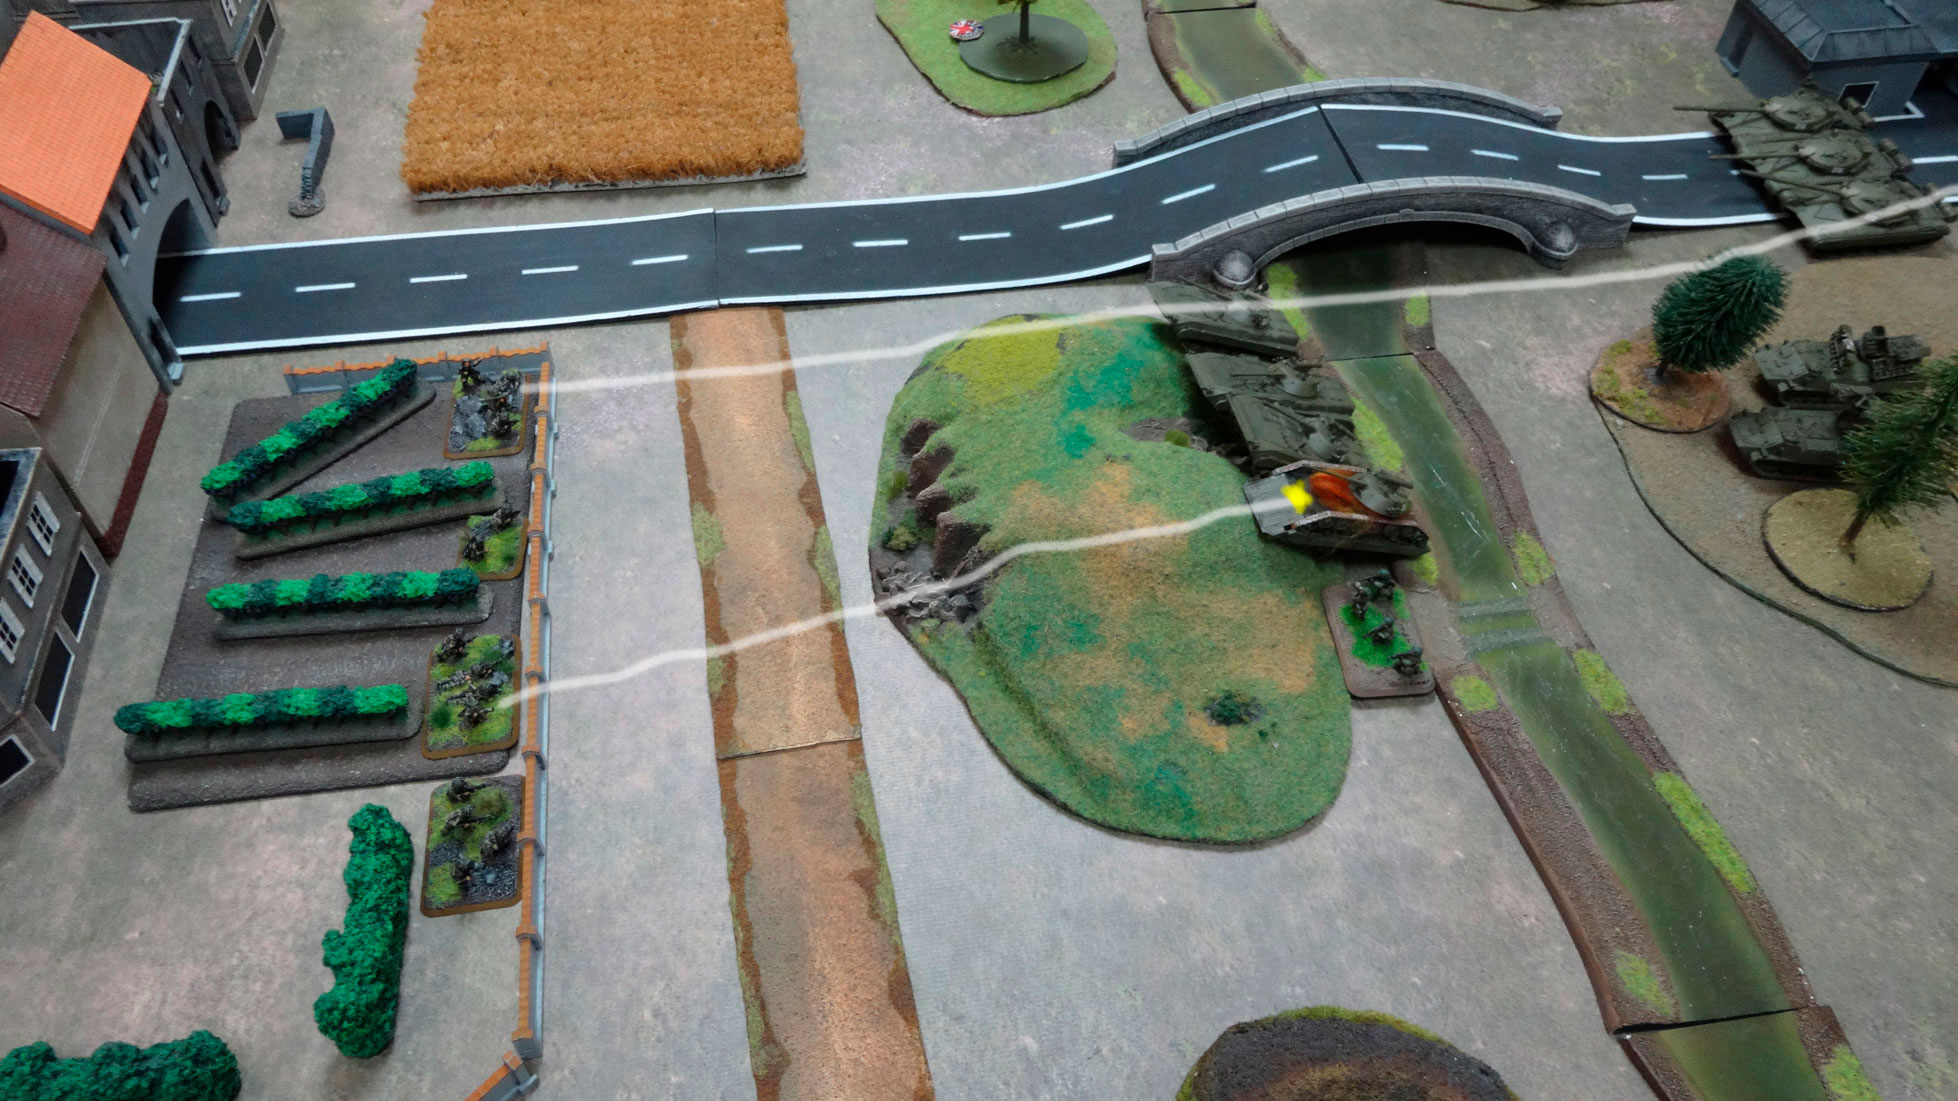
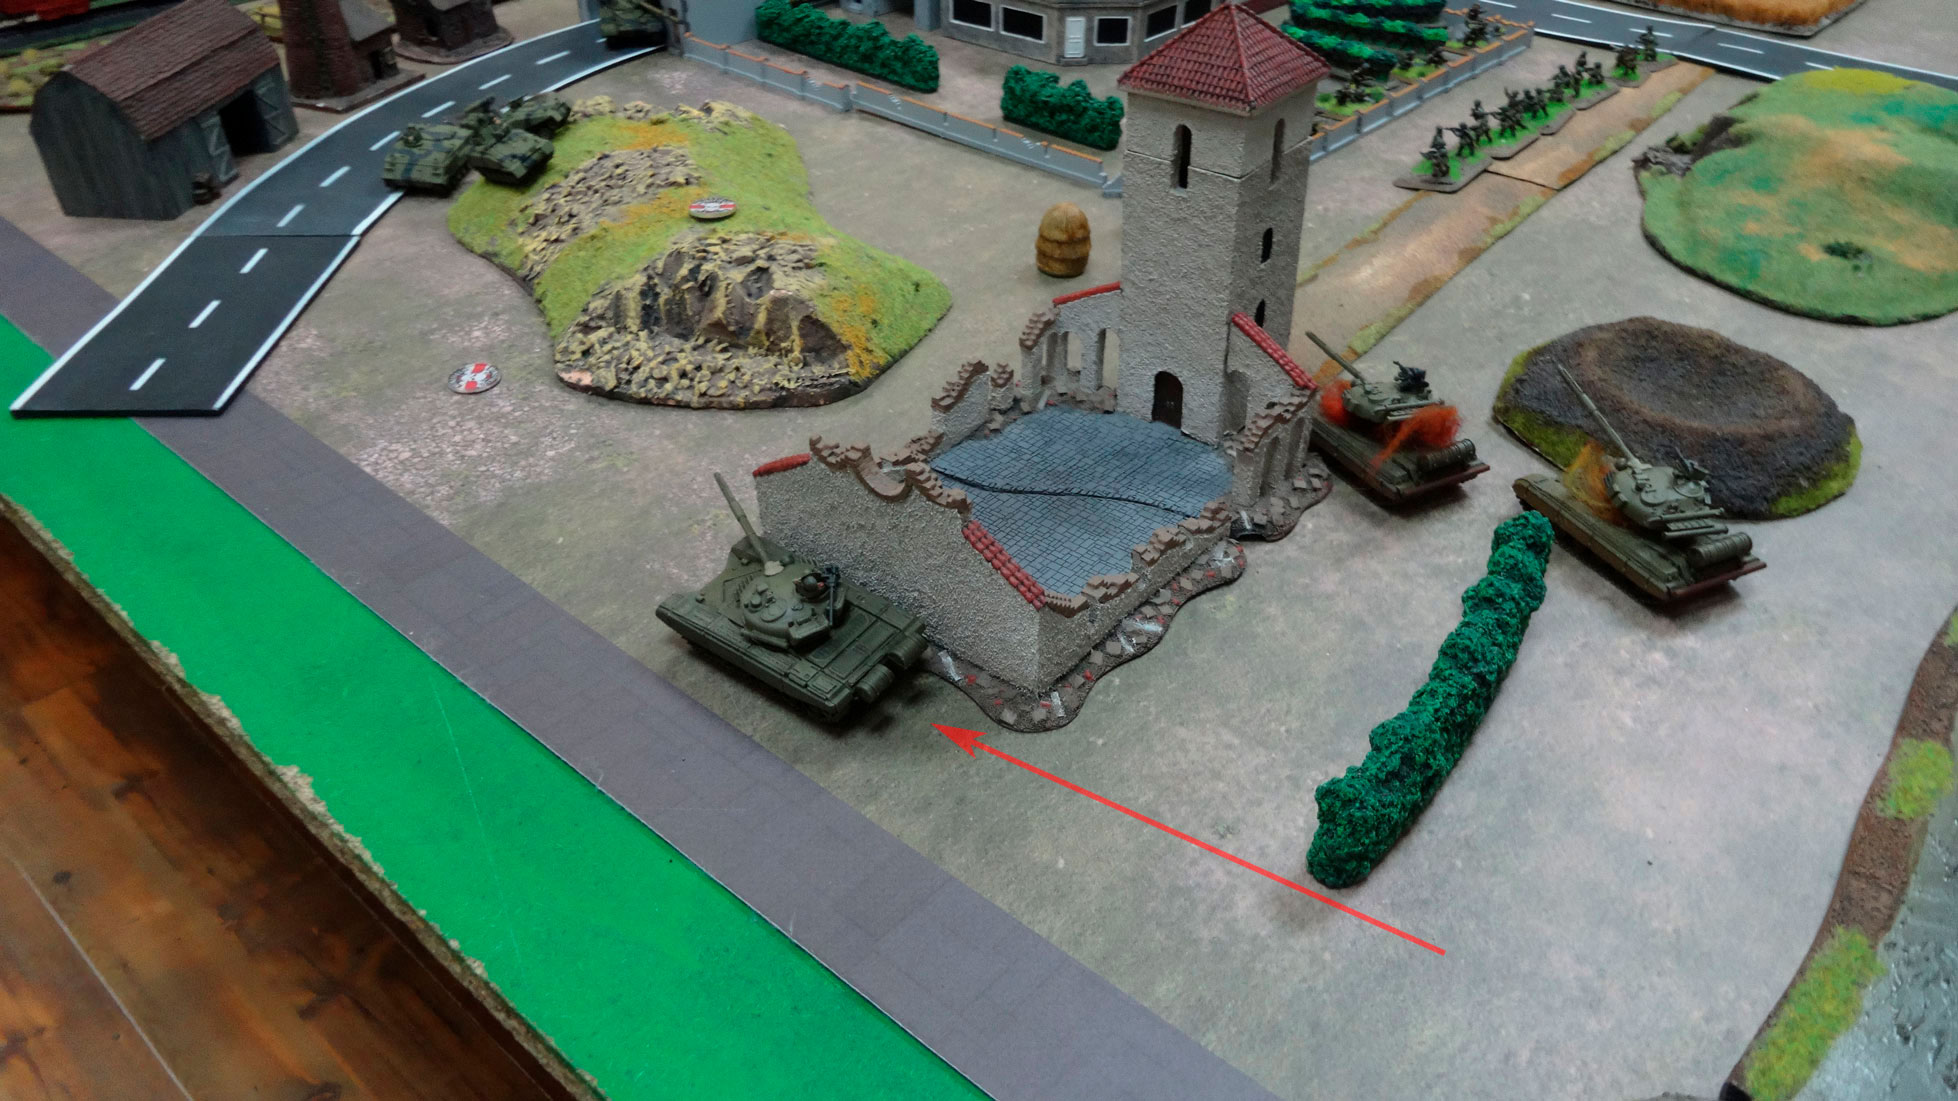
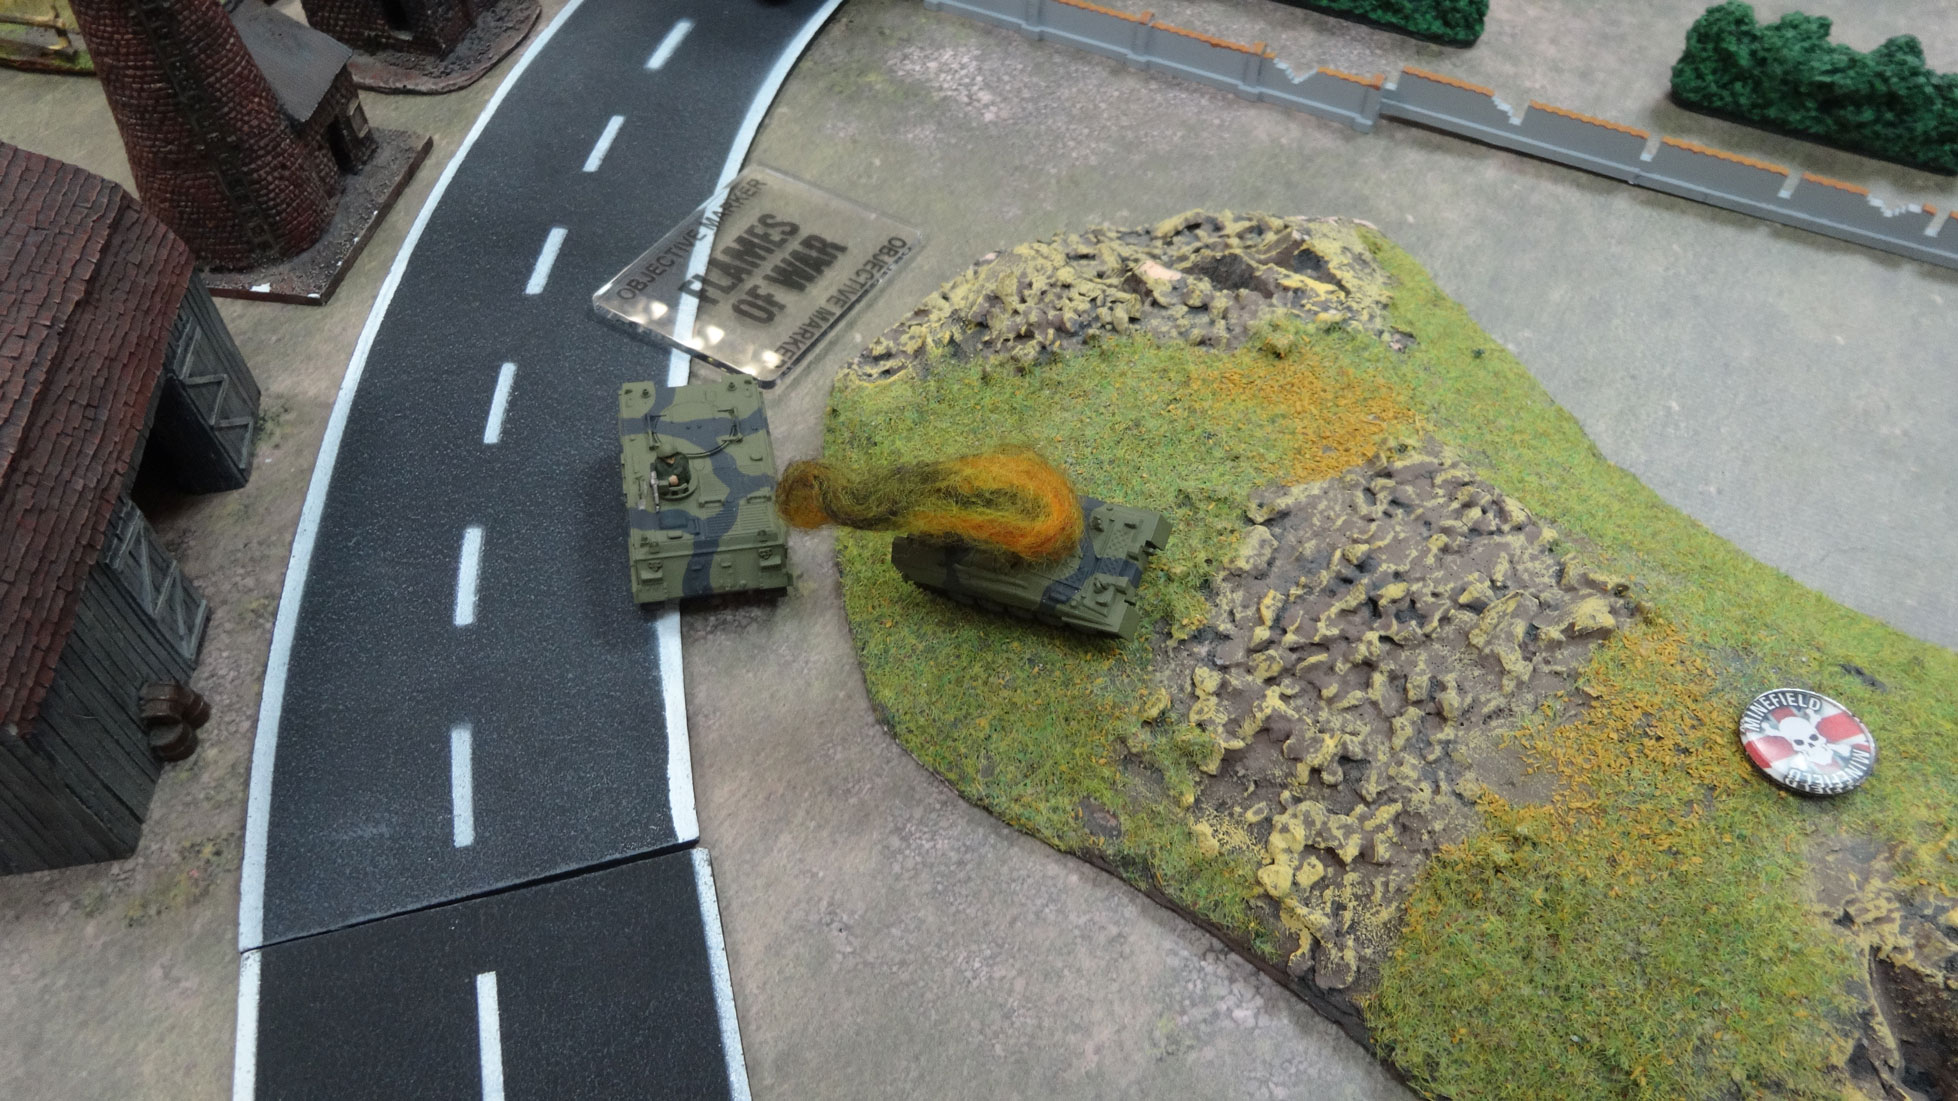
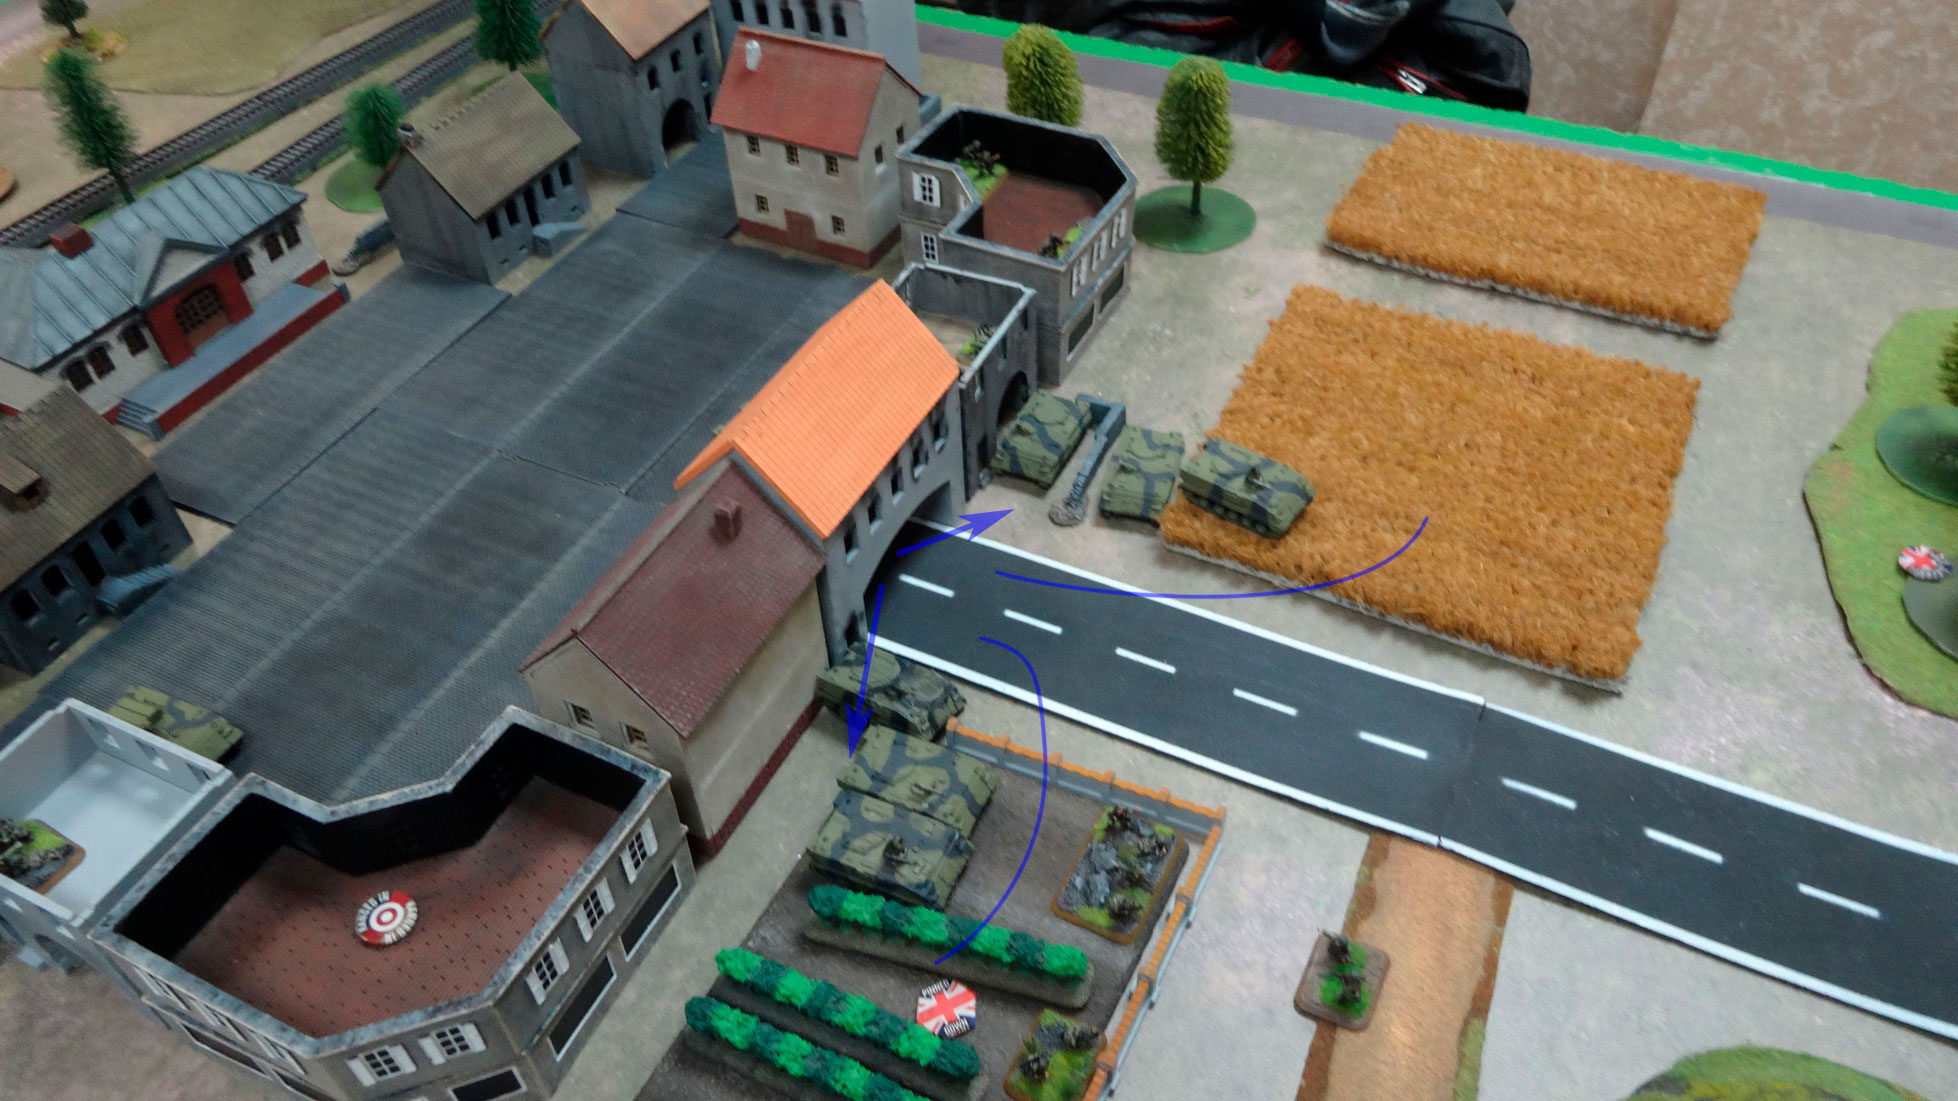
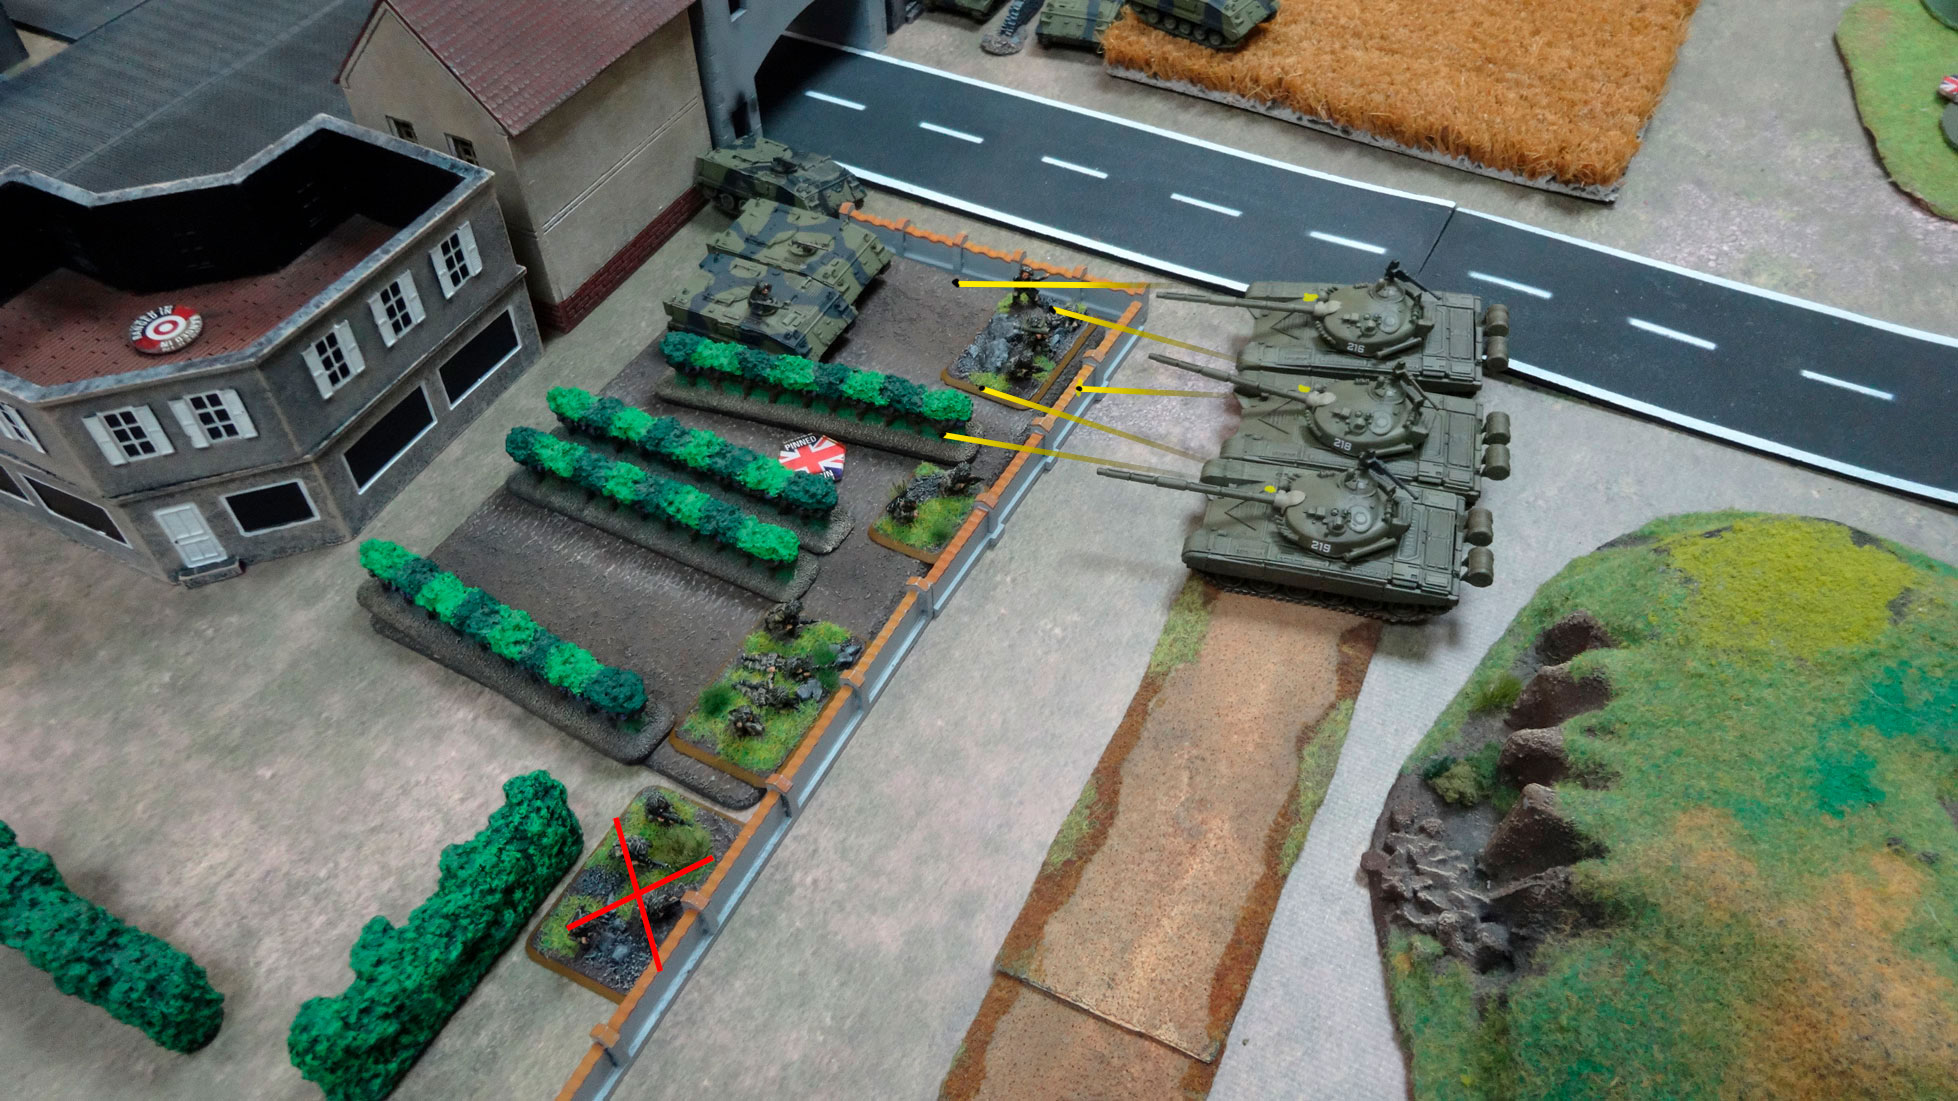
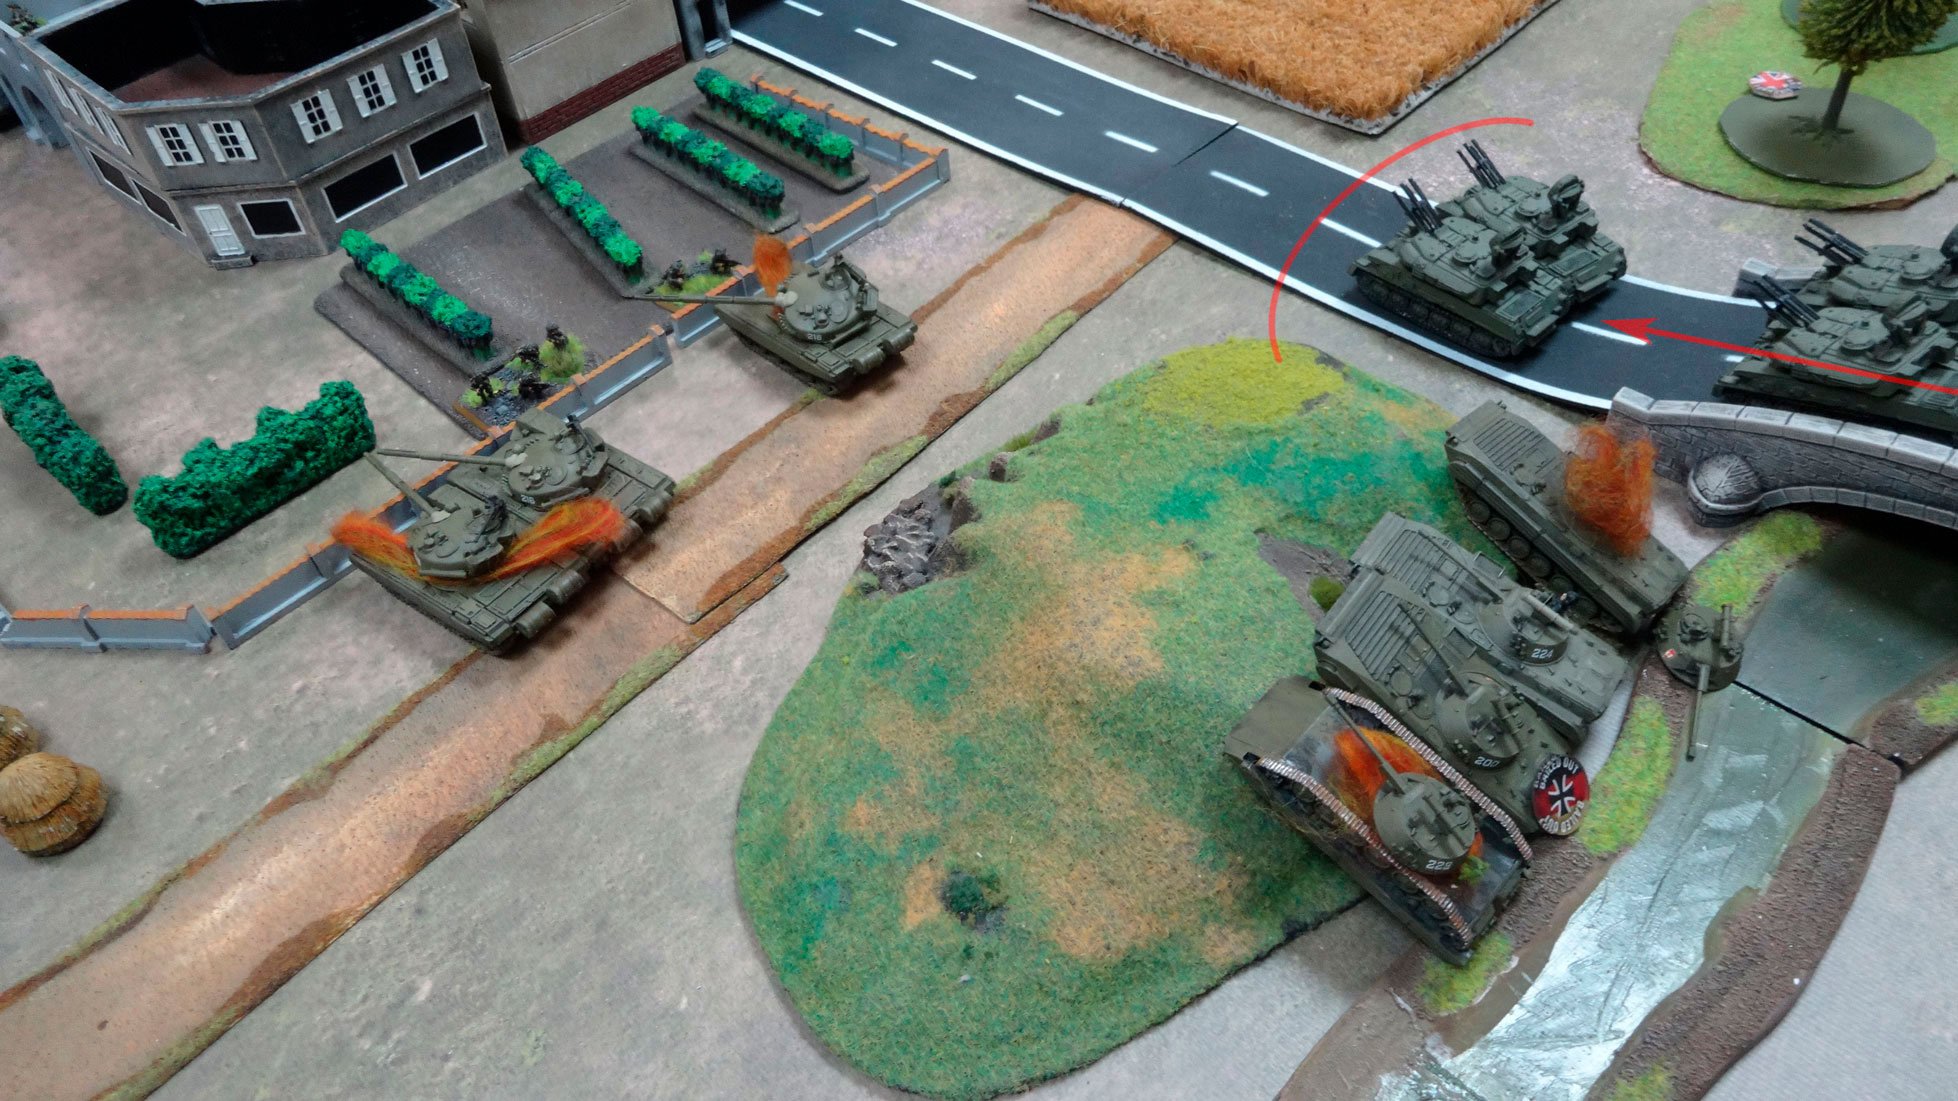
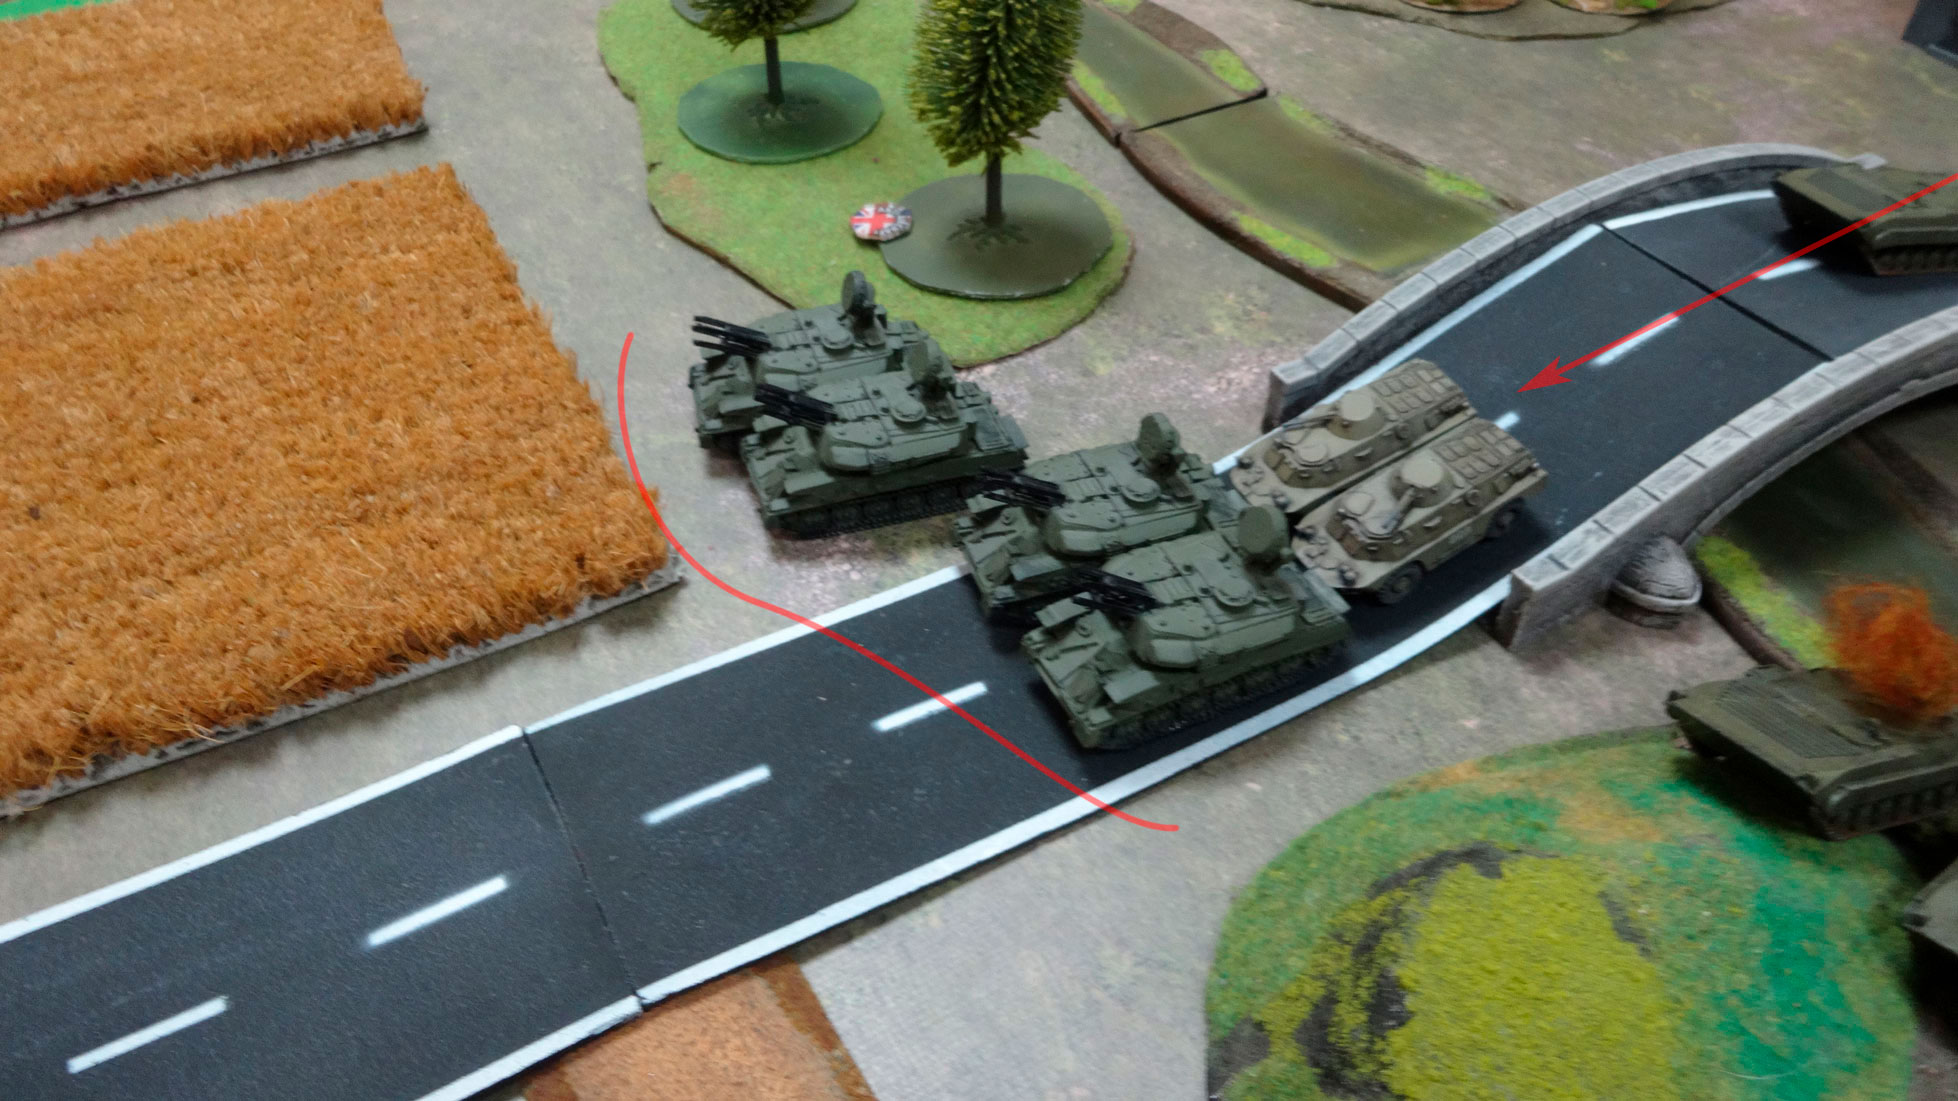
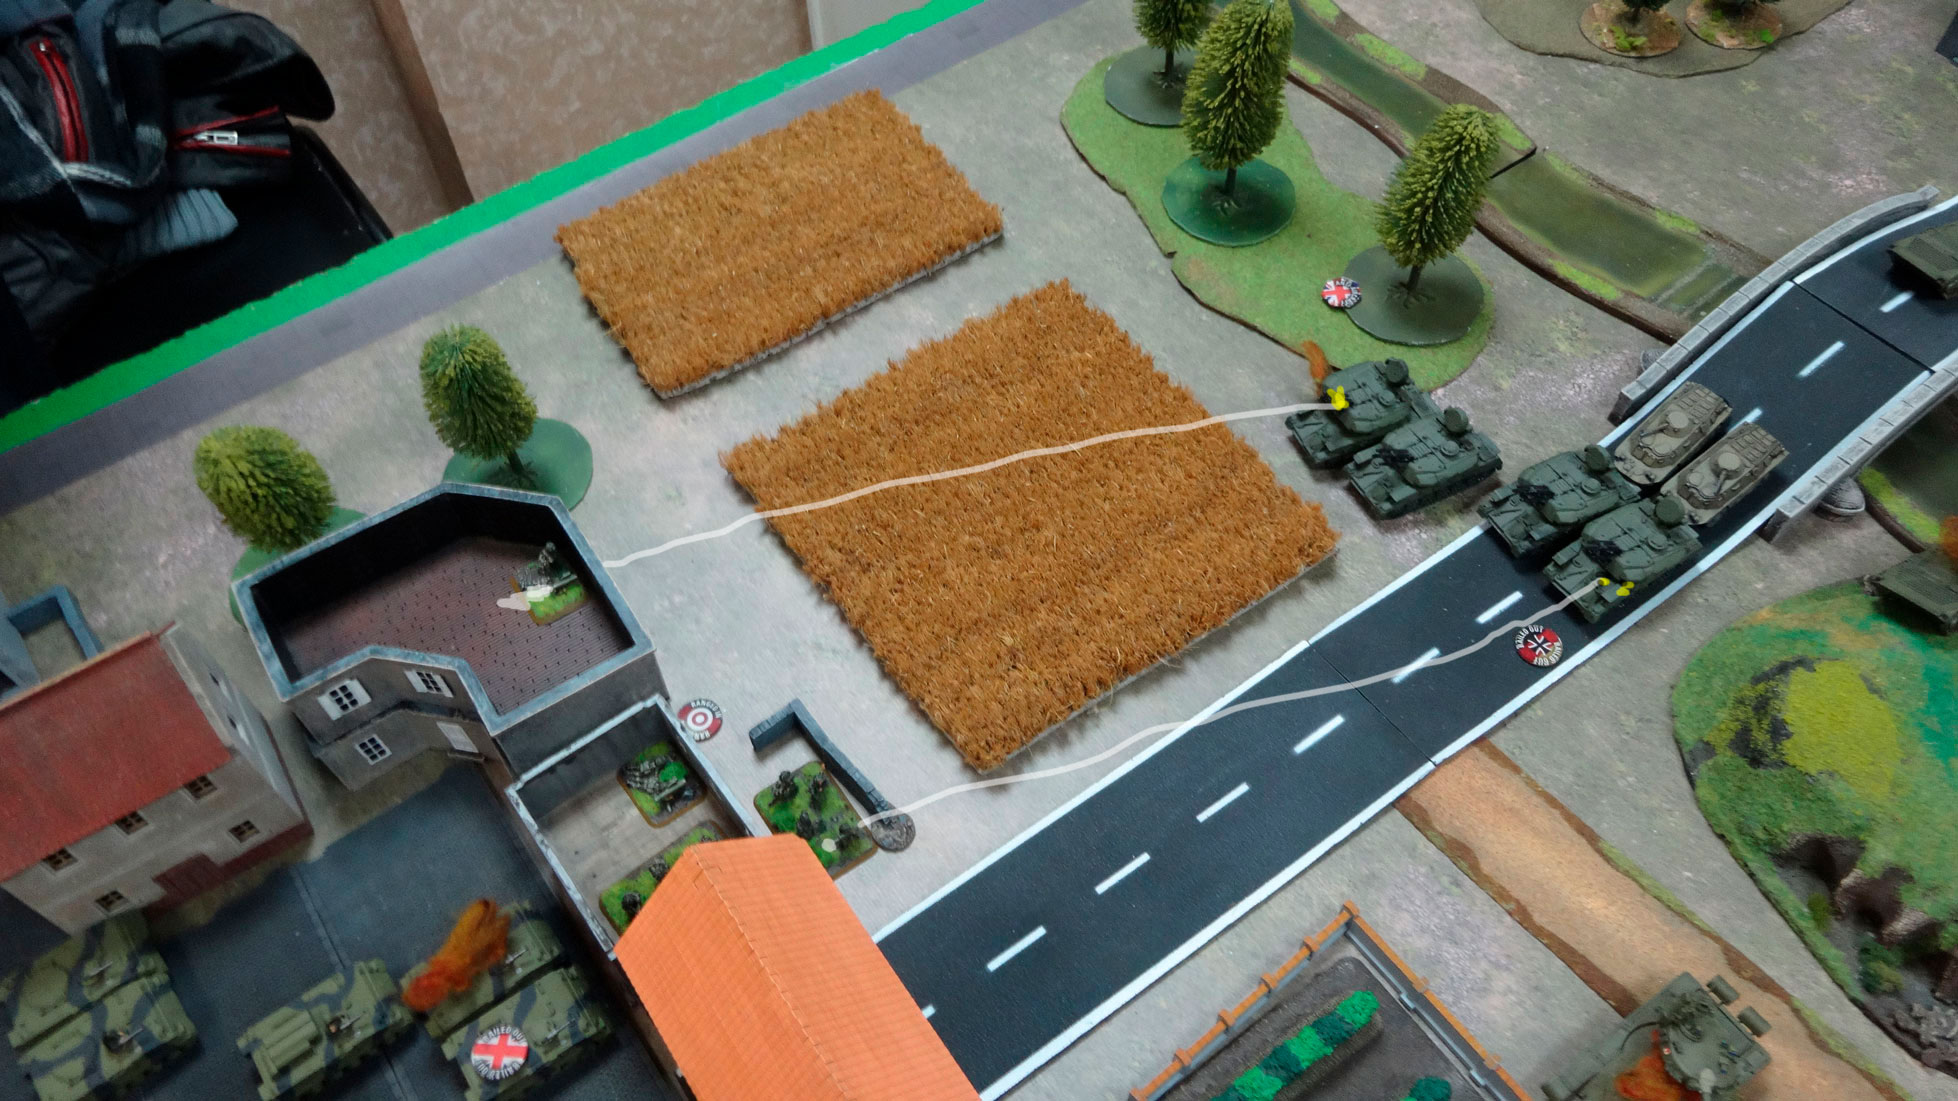
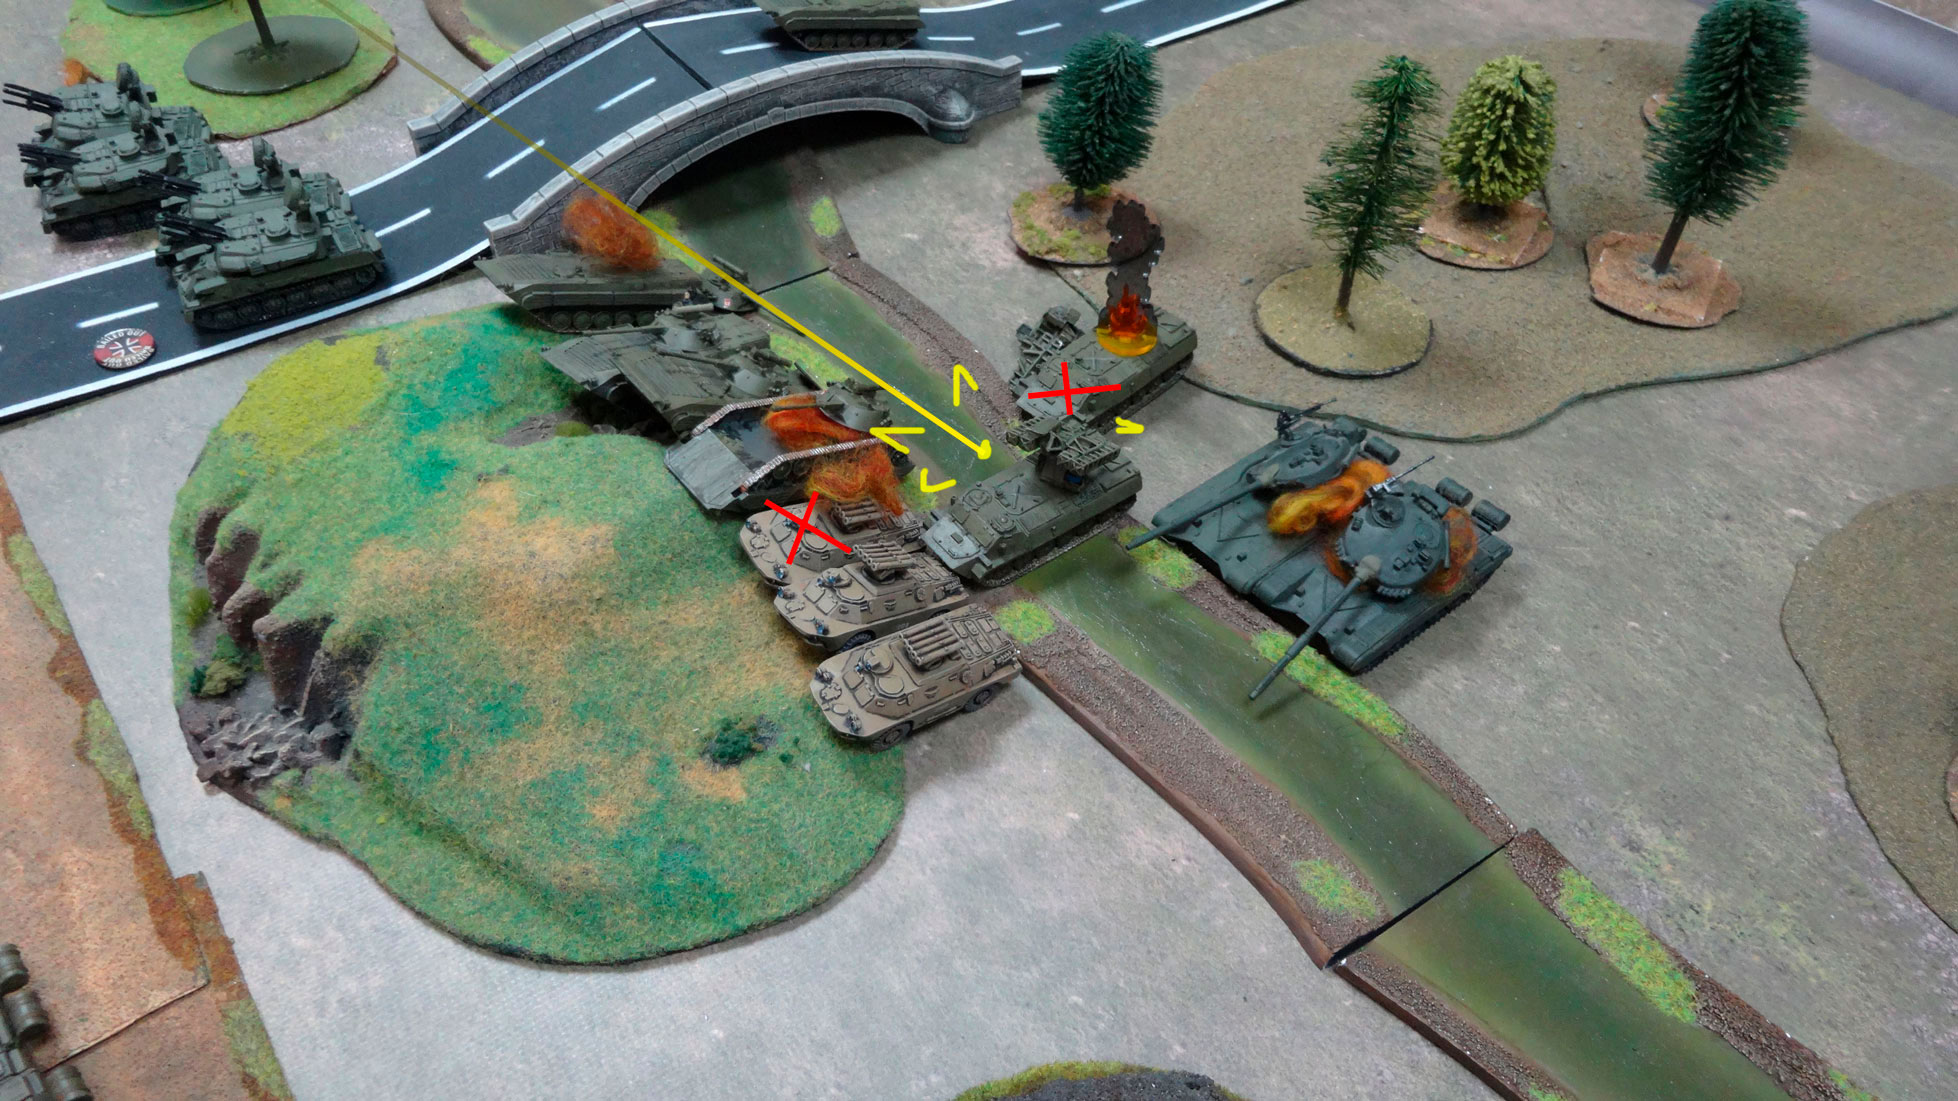
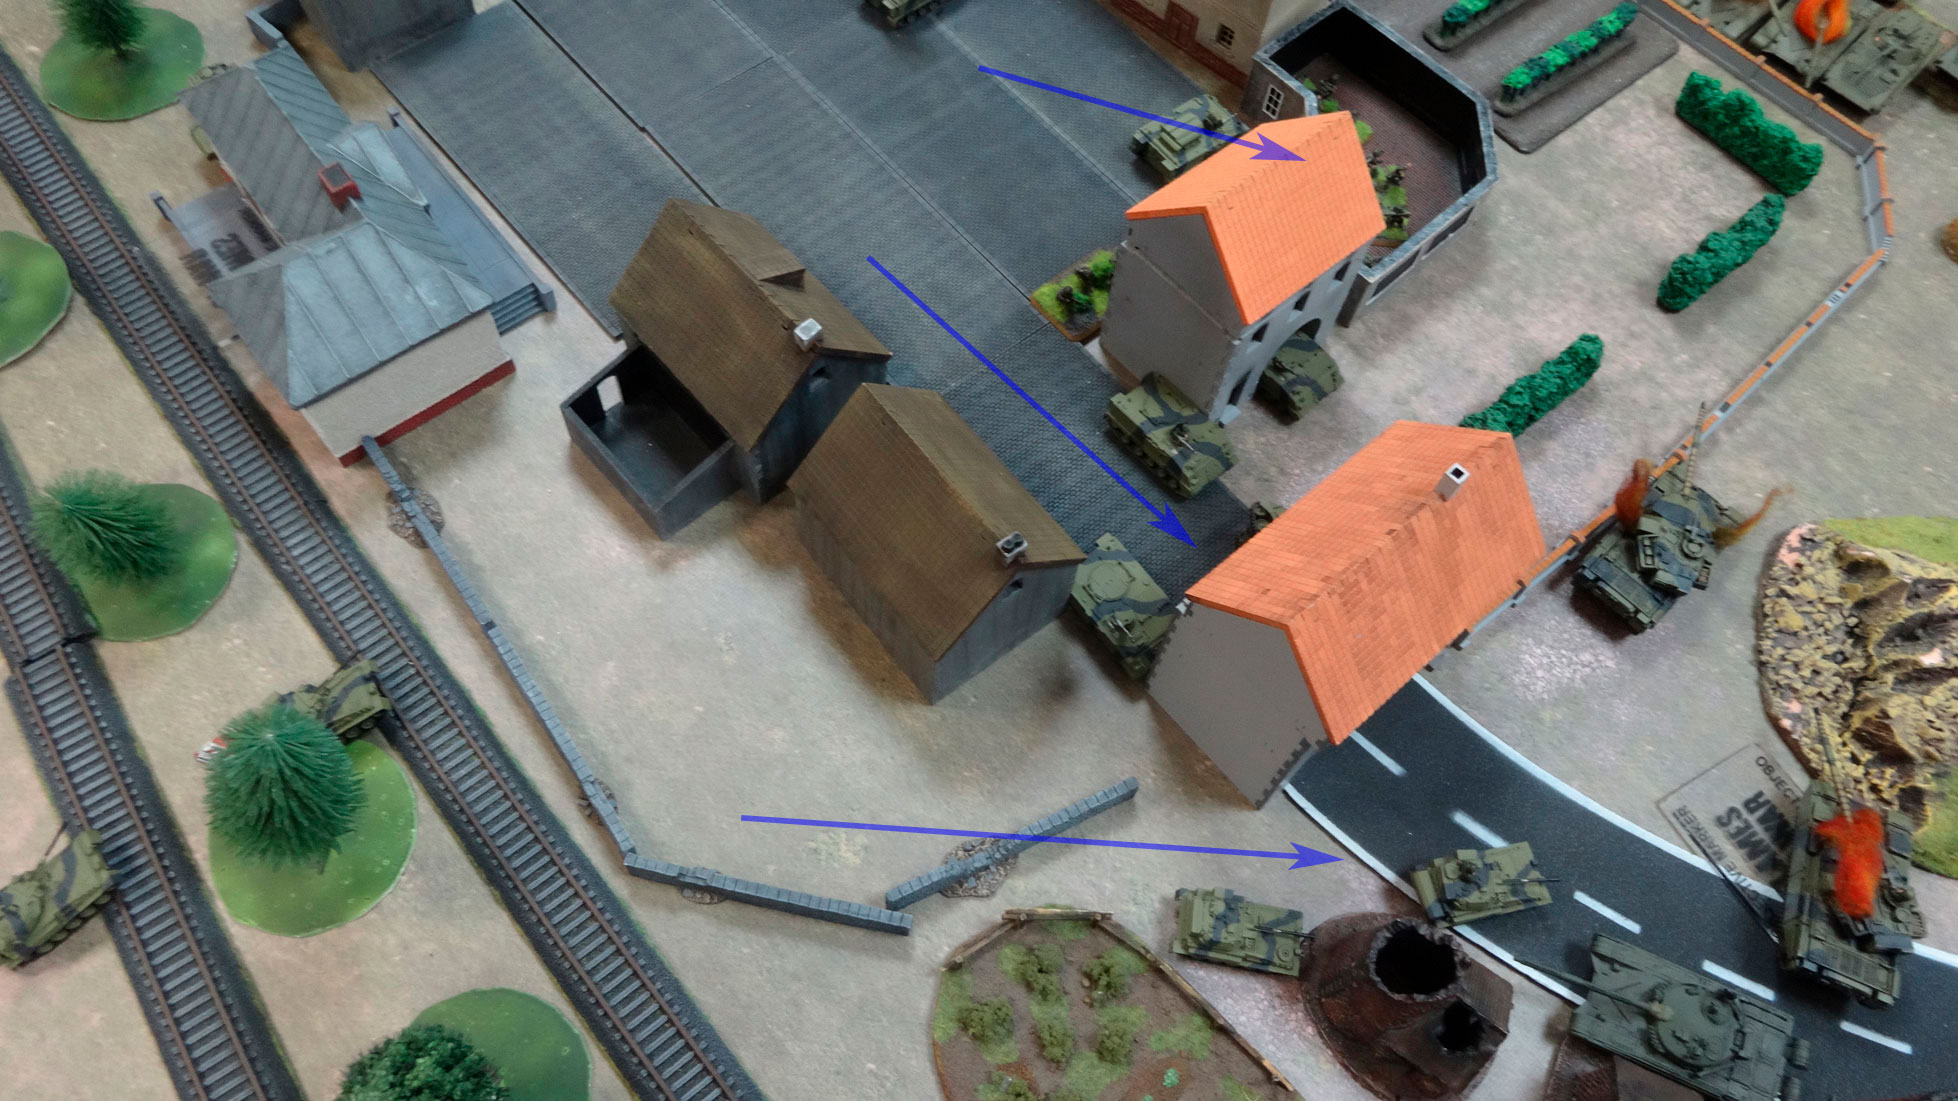
The BMP-2 pulls out of the bridge and takes a position for shooting at the back slope of the hill. Tanks overcome ford and are located behind the church.
The Carnation battery begins to fire. Once in the house you can destroy two infantry bases on the second floor and pins the detachment.

Tanks failed to hit the Sparten Milan, but successfully het infantry in the building. I managed to swap a hit from the Milan to another team.

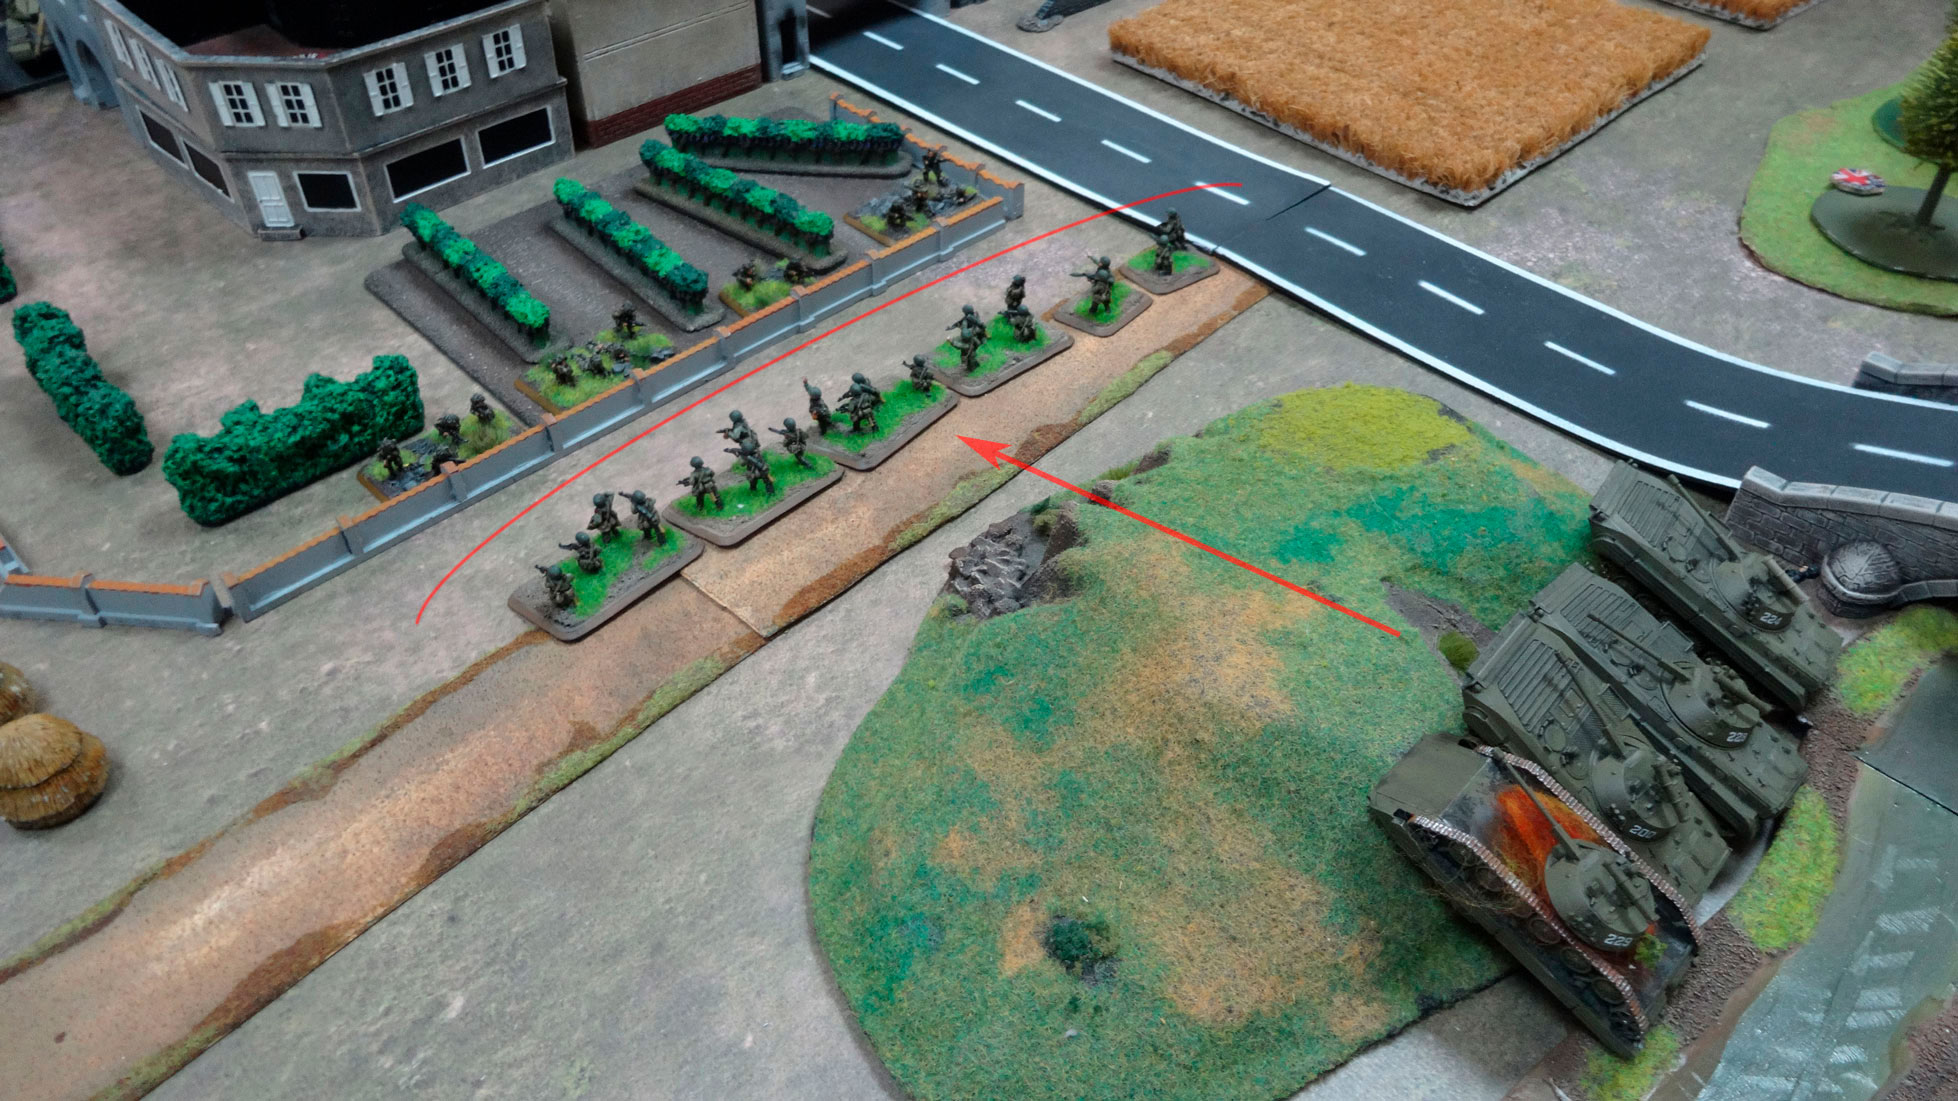
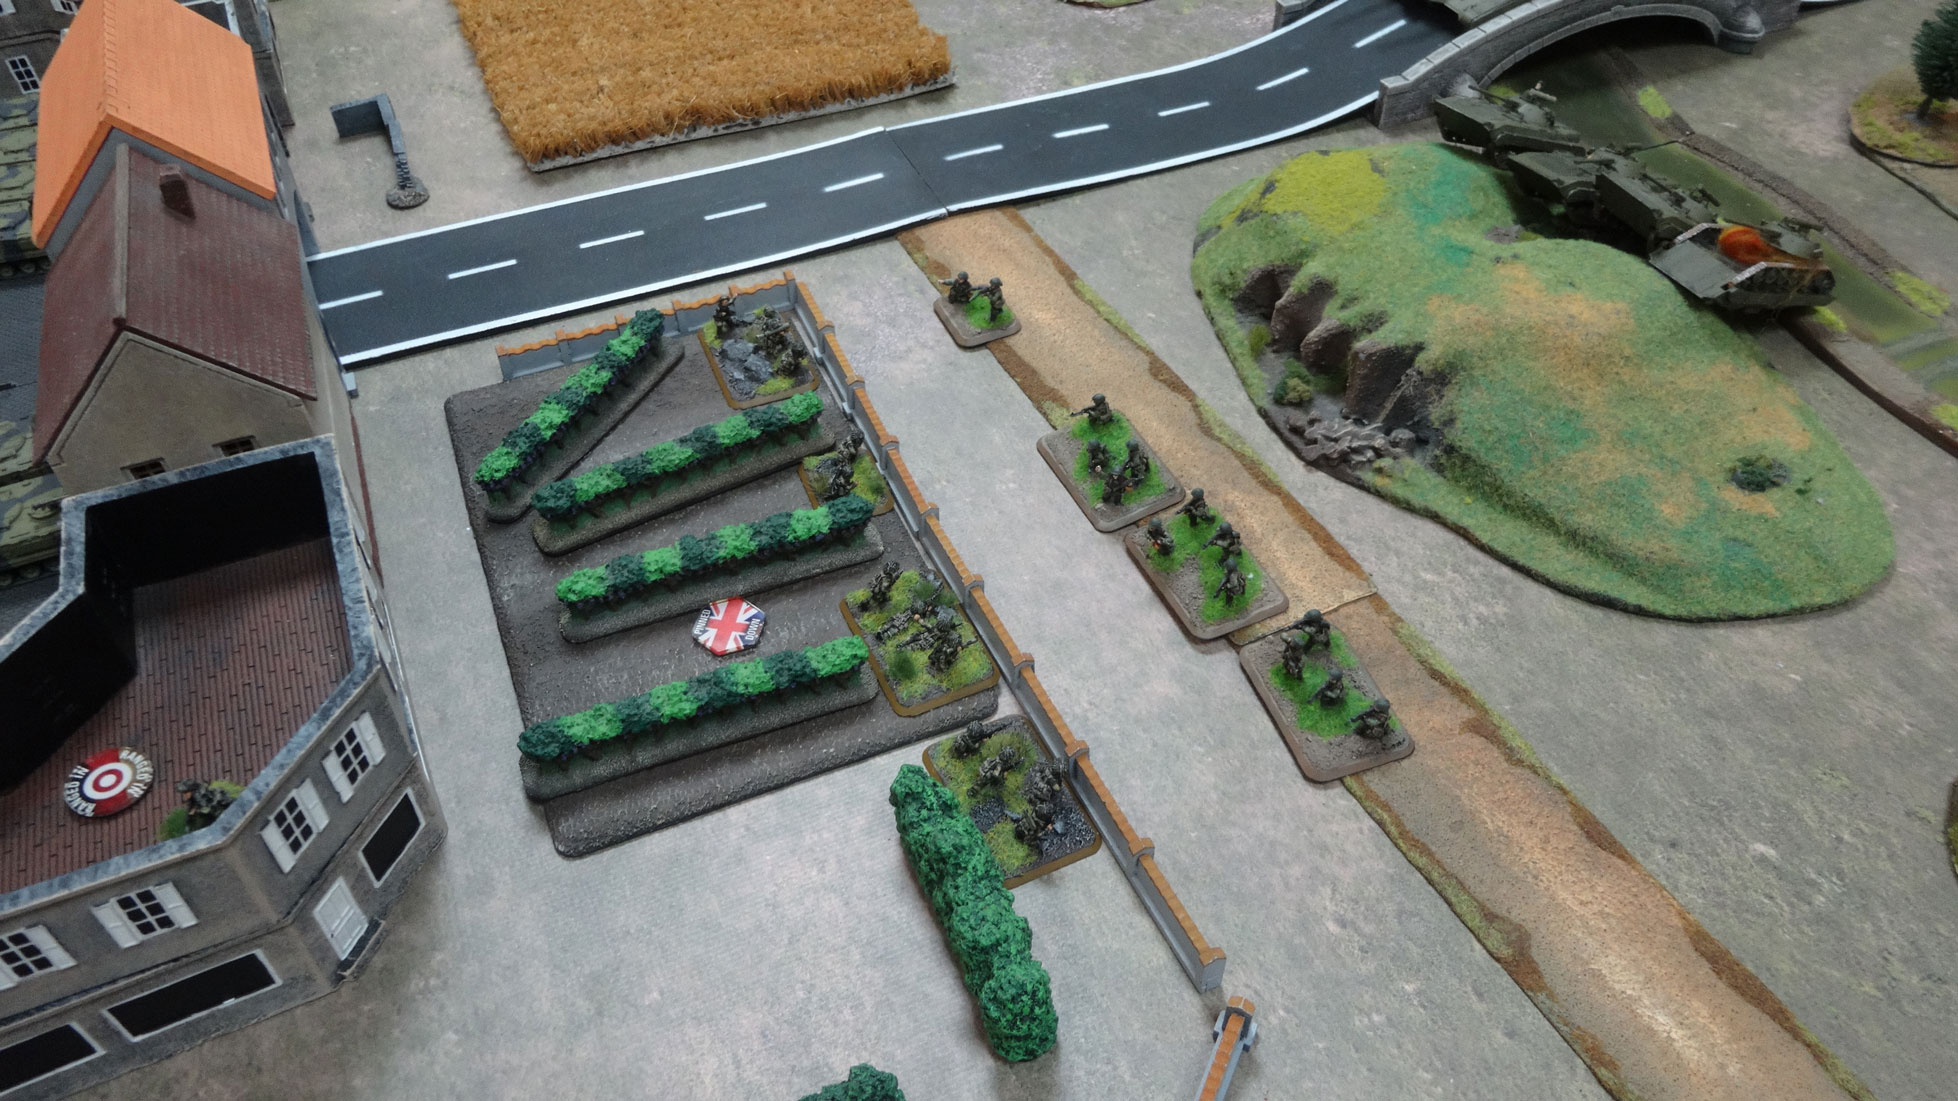
The infantry that survived the artillery fire was able to unpin and advance towards BMP-2. AT teams remain in place.
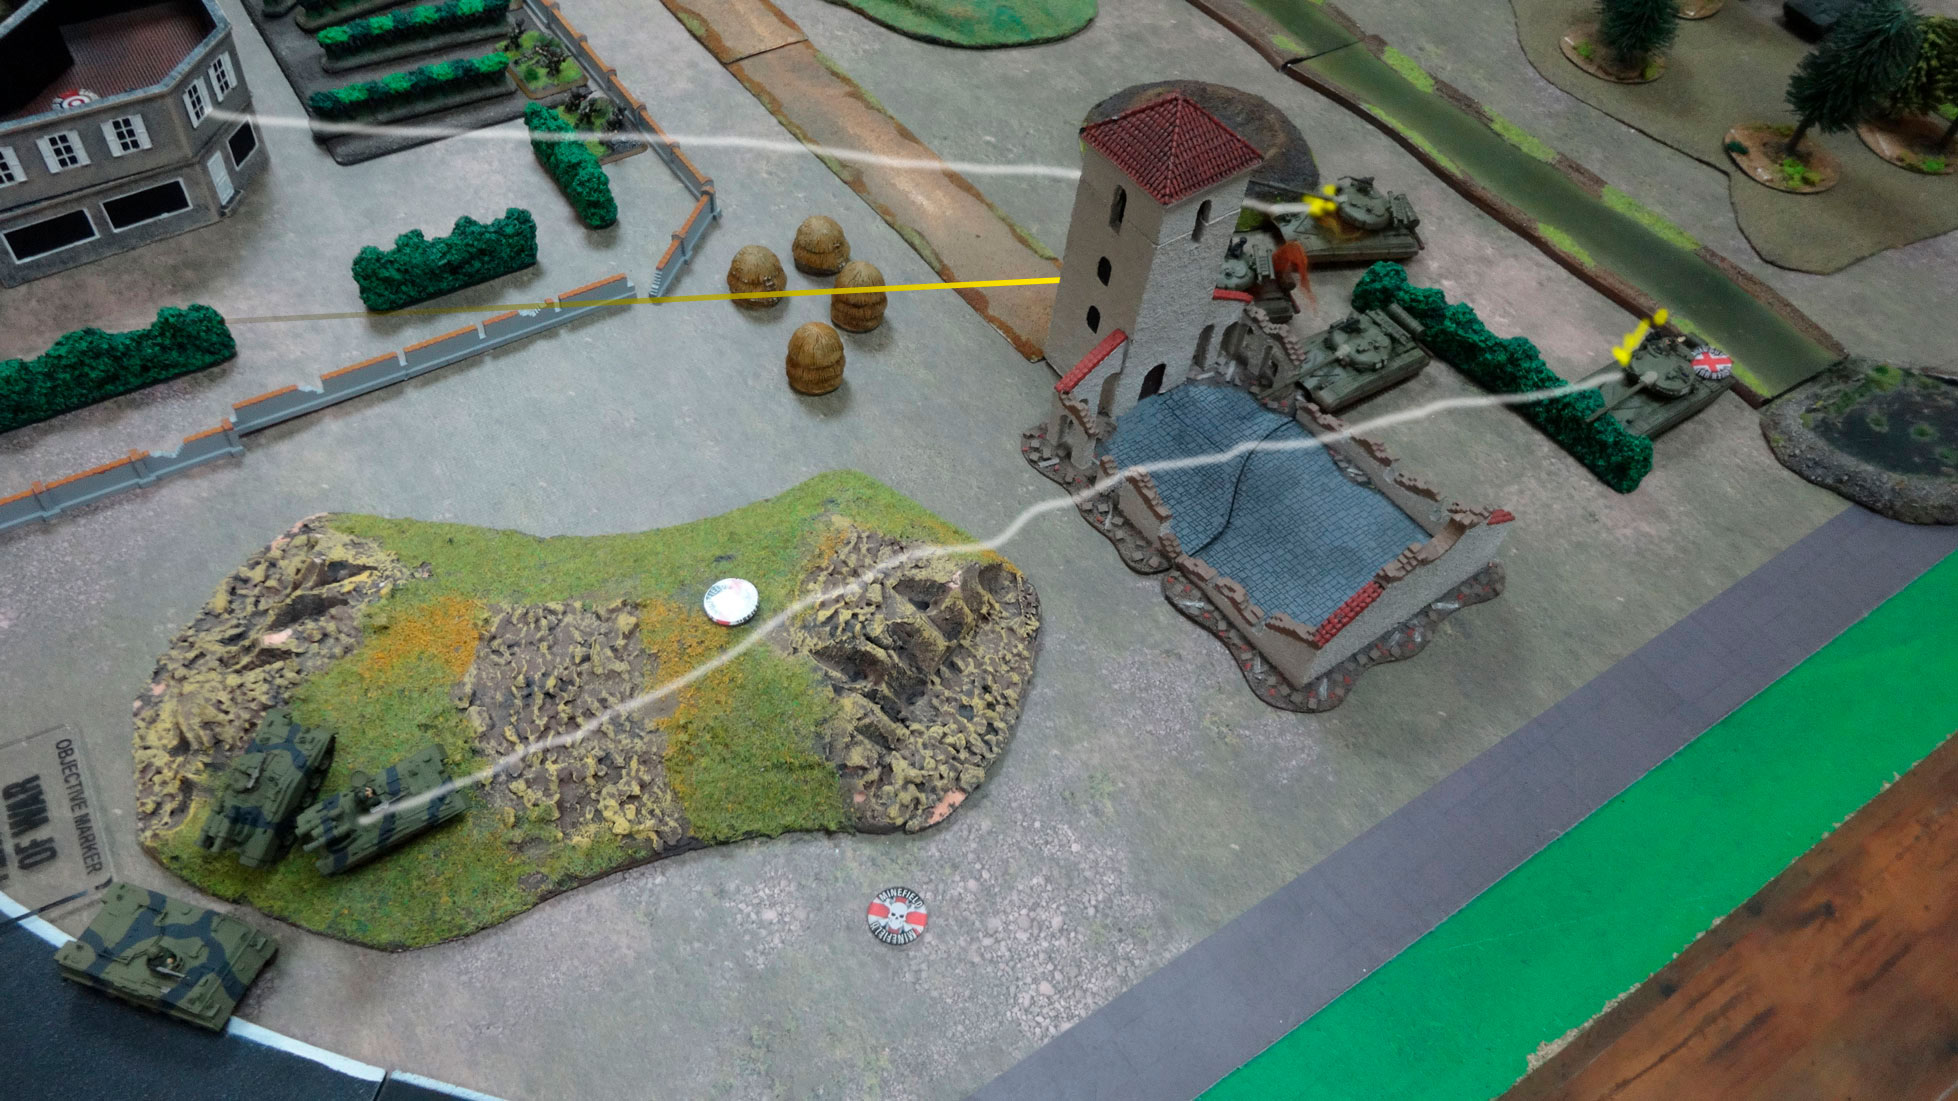
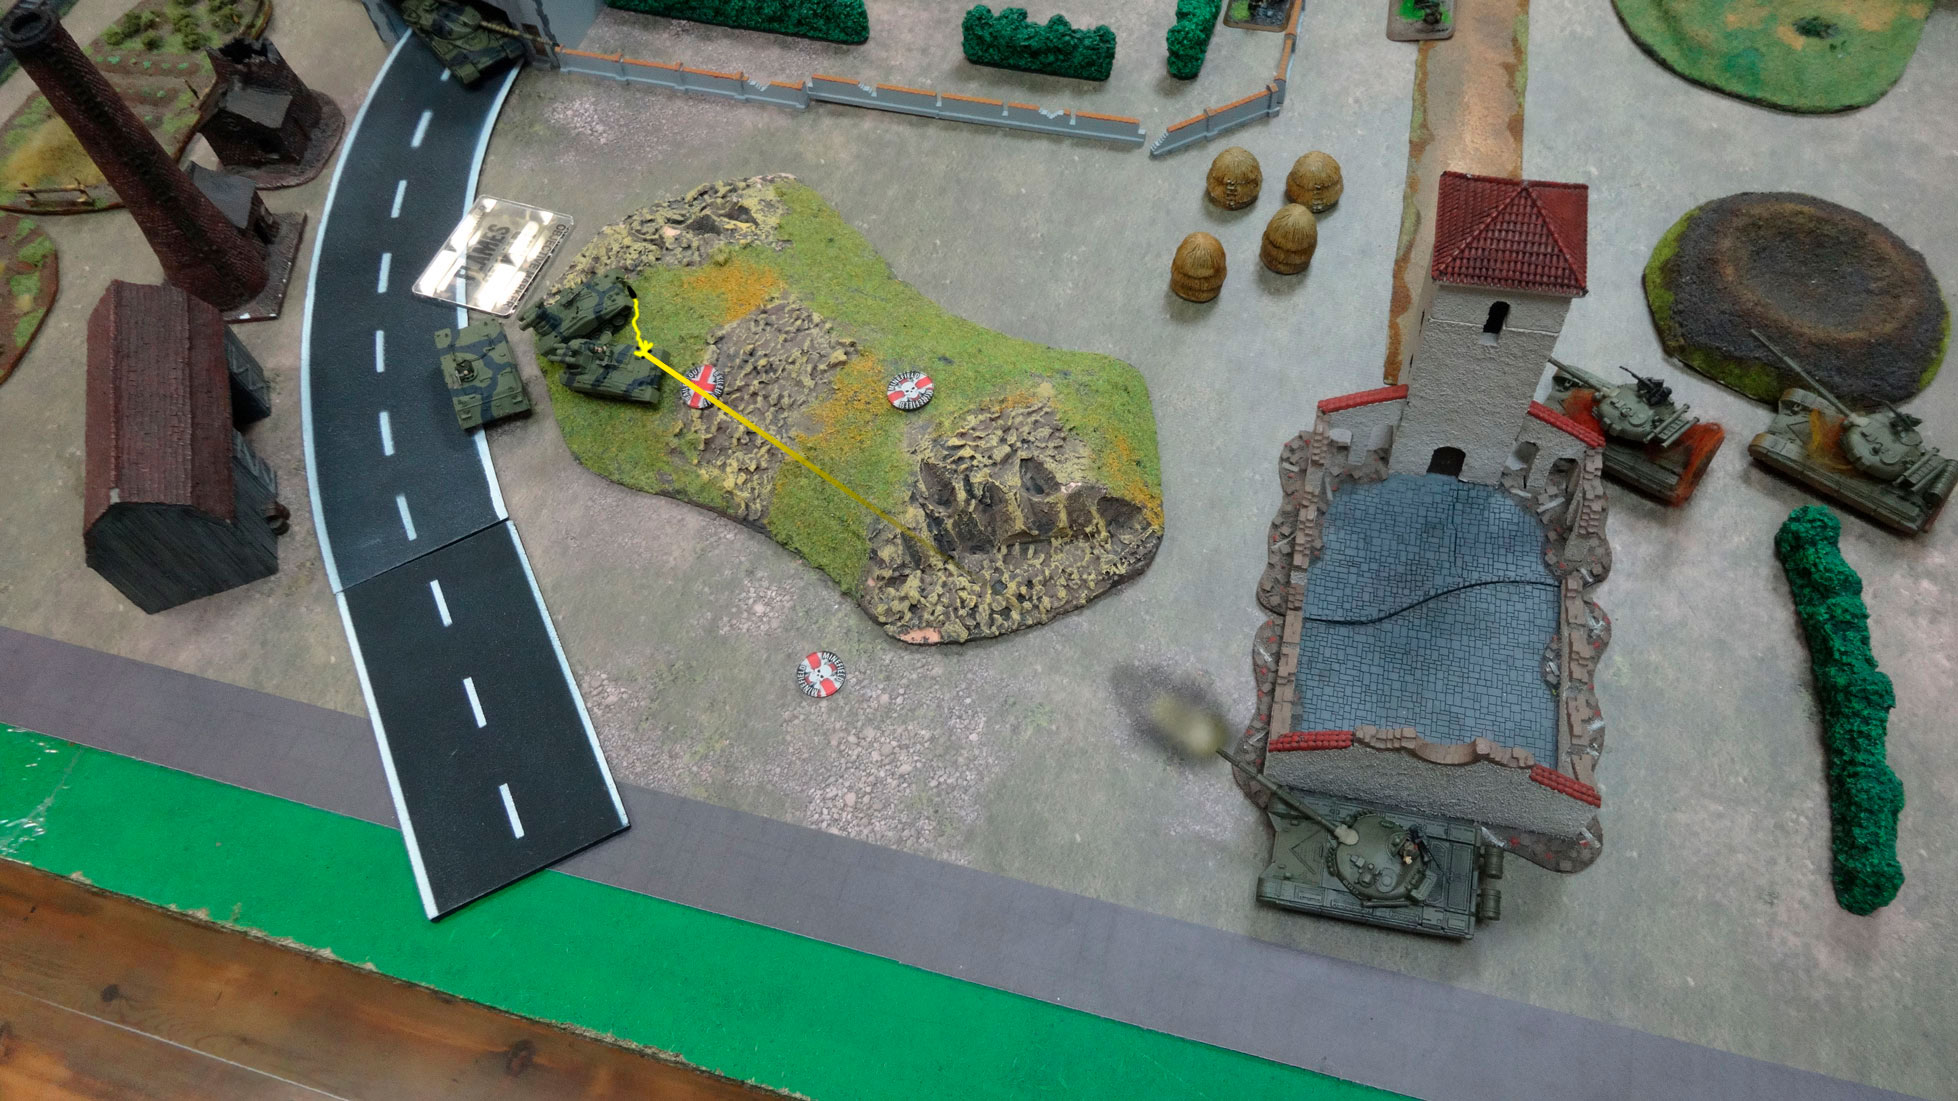
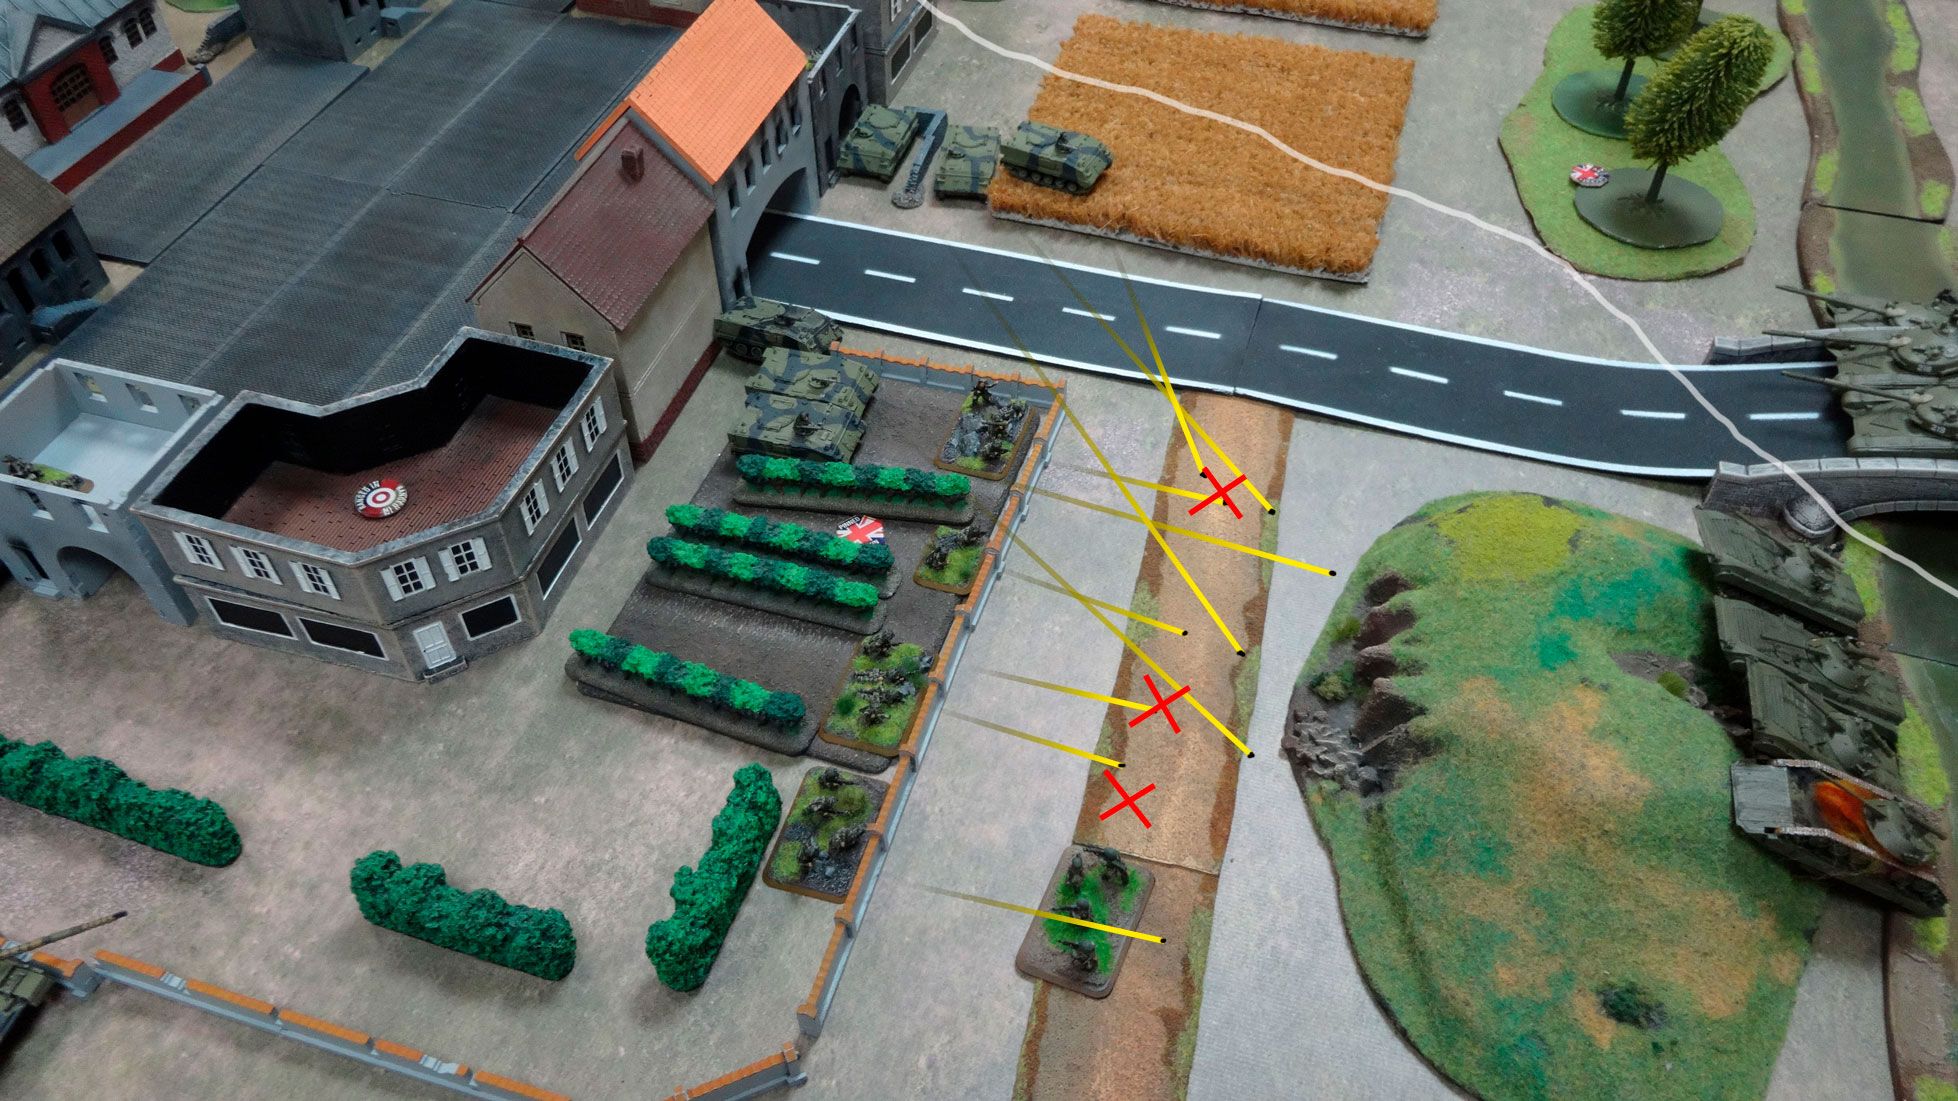
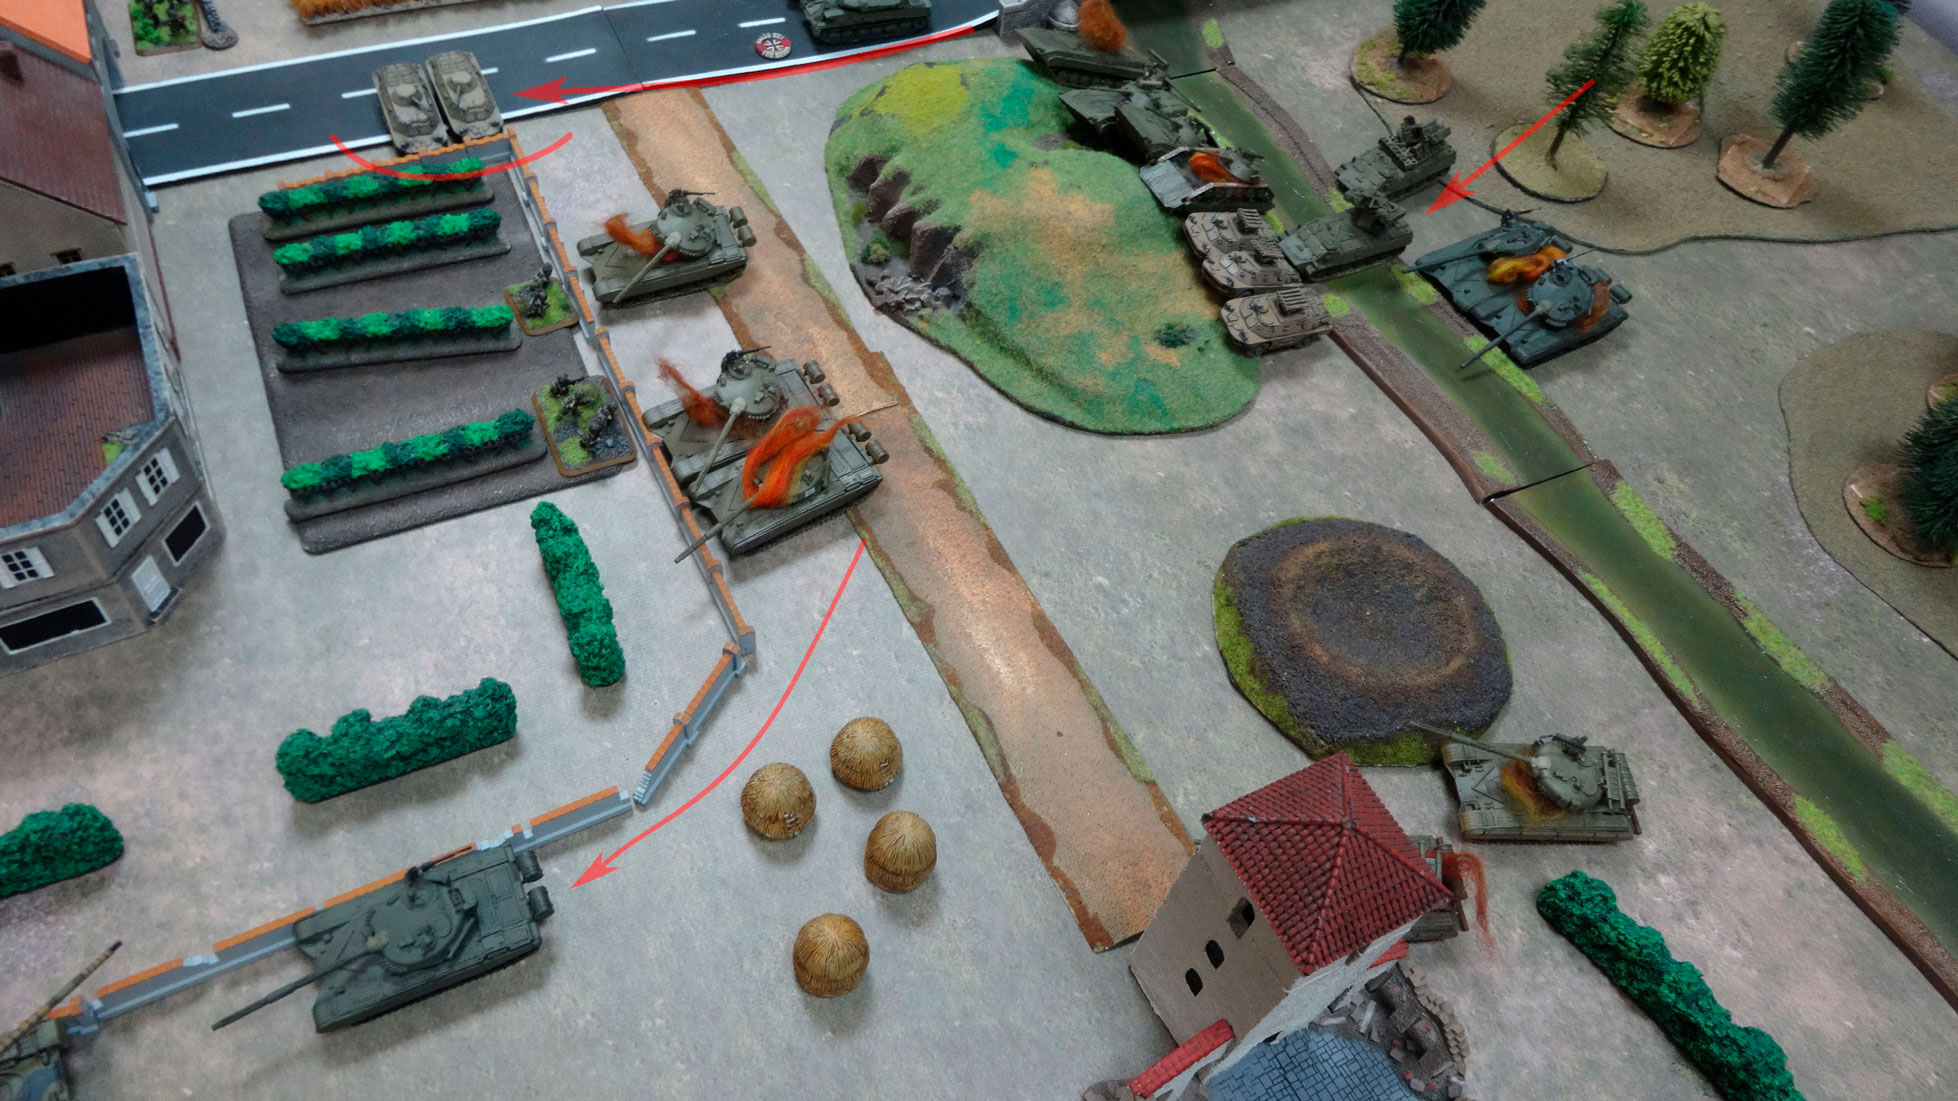
All the firing from the tanks and Millans focused on the T-64. It was possible to bail the tank comander and destroy 2 out of 3. Then the third will fail the moral test and retreat.
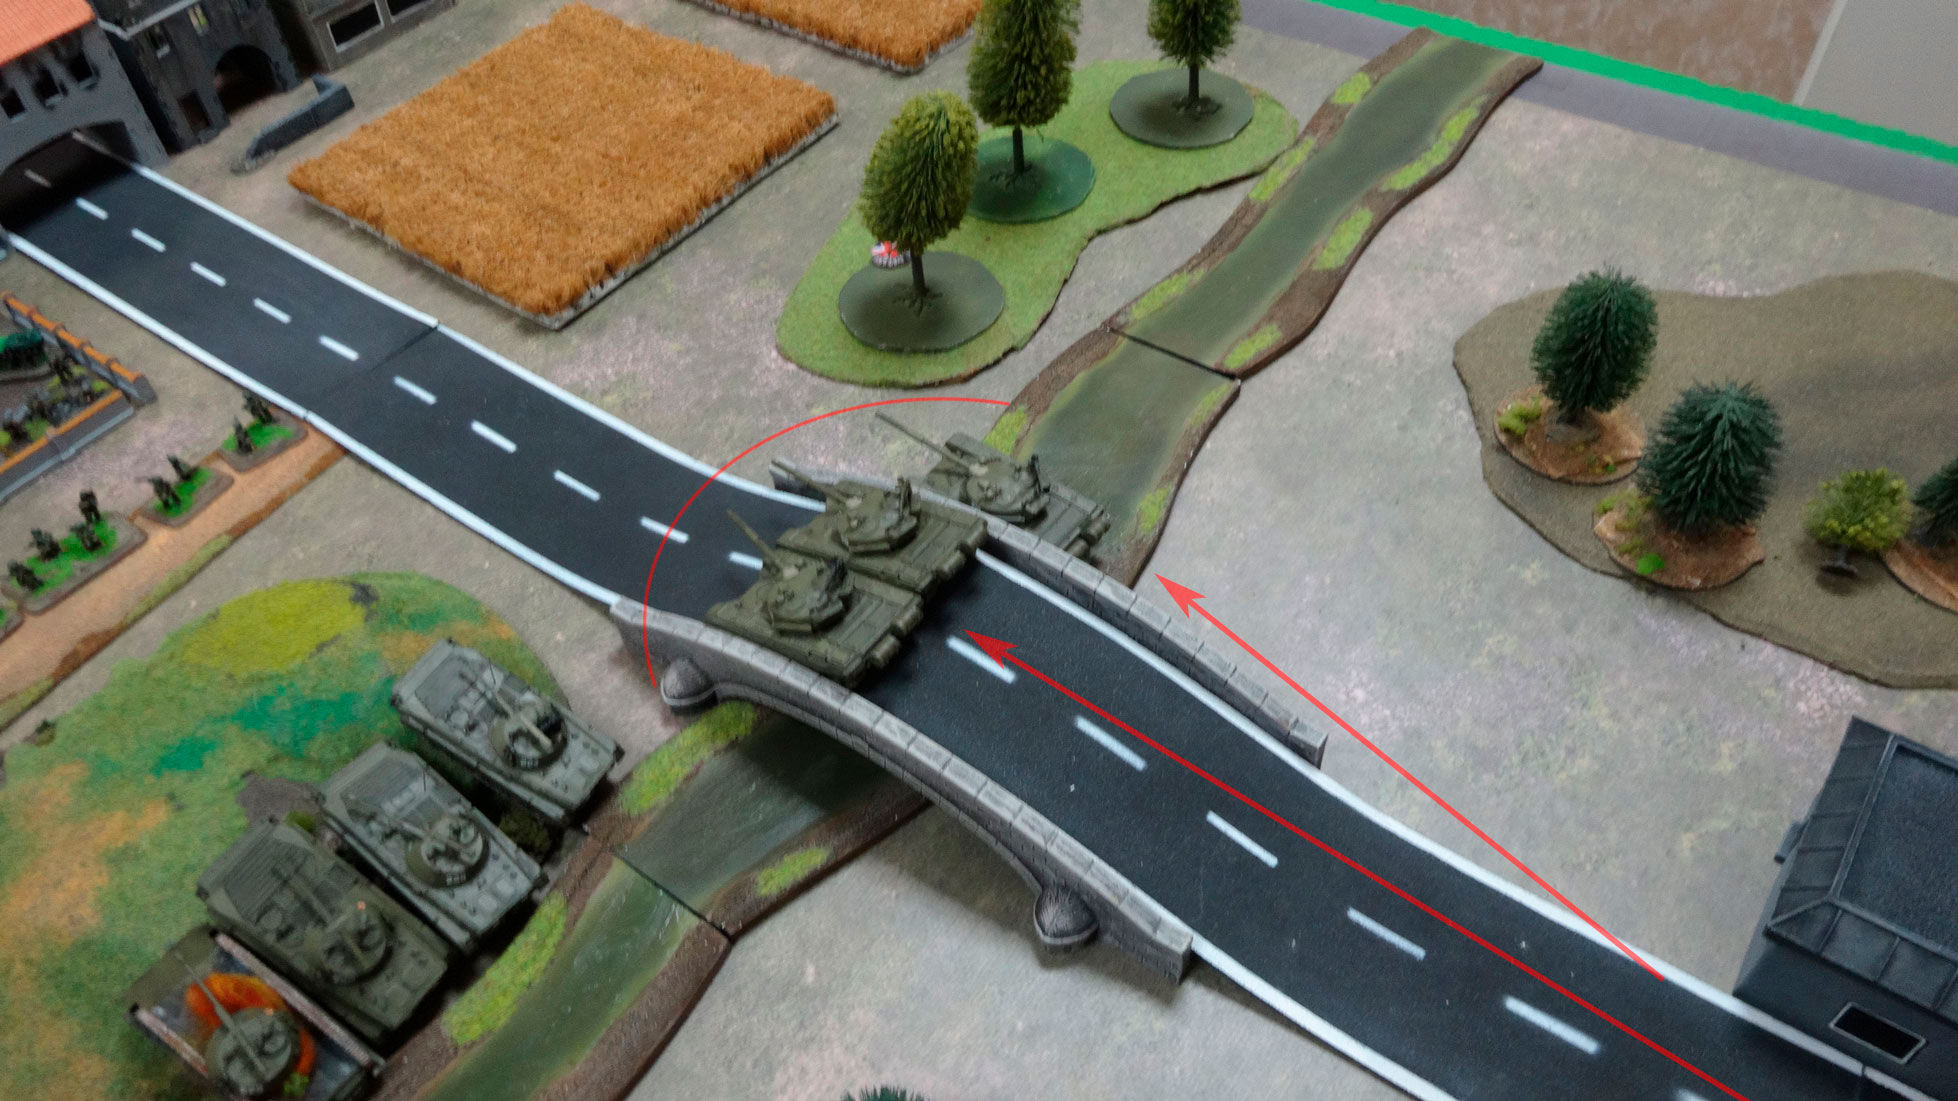
The second group of T-64 is rapidly approaching. Going to the bridge and to the ford north to the north.
All the others fired on the infantry in the street and a little on the infantry in the houses. All this shooting had practically no results. Insignificant losses incurred infantry detachment in the northern house. The group in the courtyard behind the fence could withstand the fire without loss, although they were pined.

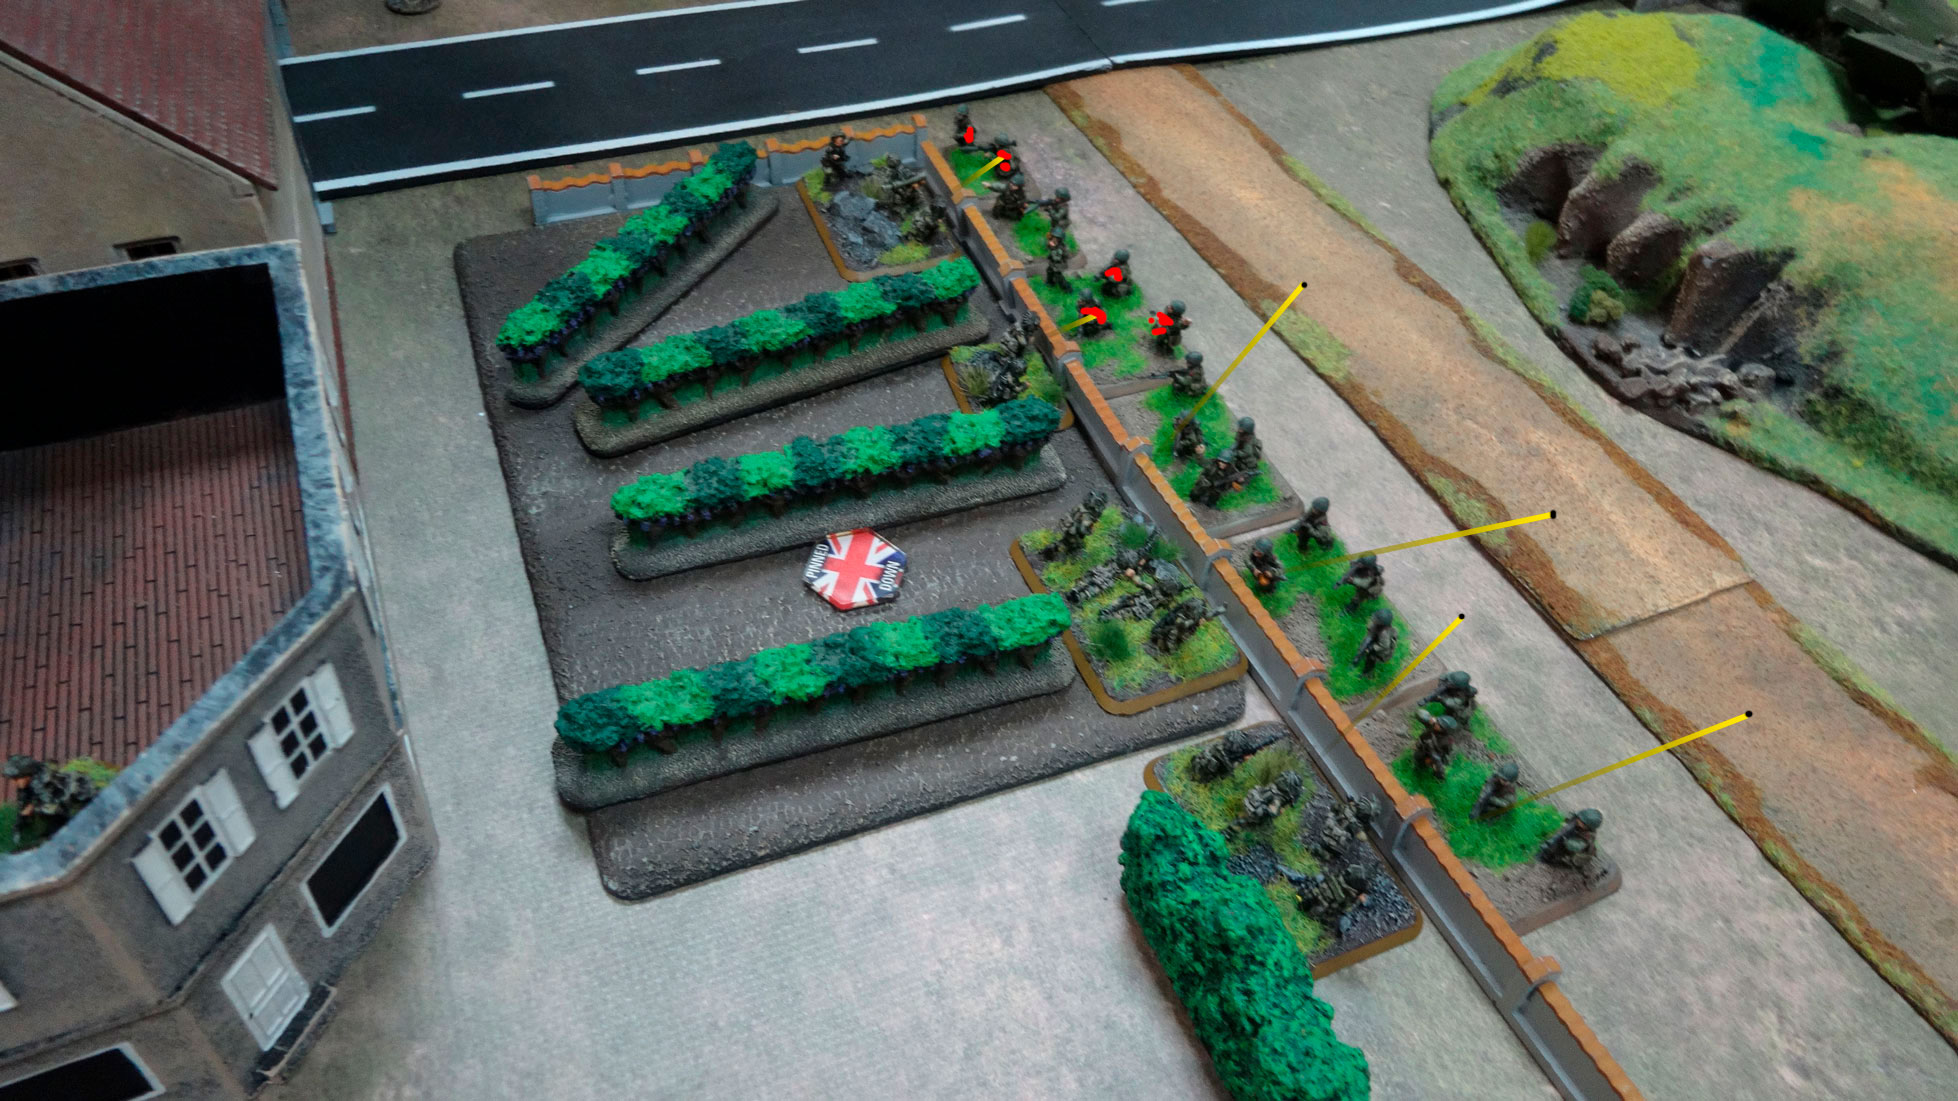
Pined British managed to hit five times out of six! Fortune in the second turn was clearly on the side of Brits! Charge failed!
My second turn. The infantry fails to unpin themselfes, and no reserves. Moving the Chiftenes to a new position, that would try to knock out the tank comander. The AT teams runs from the house that was shot by the artillery to the neighboring one.
All out shooting managed to destroy almost all the enemy infantry, successfully caught them in open terrain. Surviving Soviet soldiers retreat. While shooting infantry AT's did not bring any results.
The Soviets turn starts with reserves. The T-72 shows up. Pushing to position one is stuck in the forest.


The shooting of Soviet artillery did not bring any results.
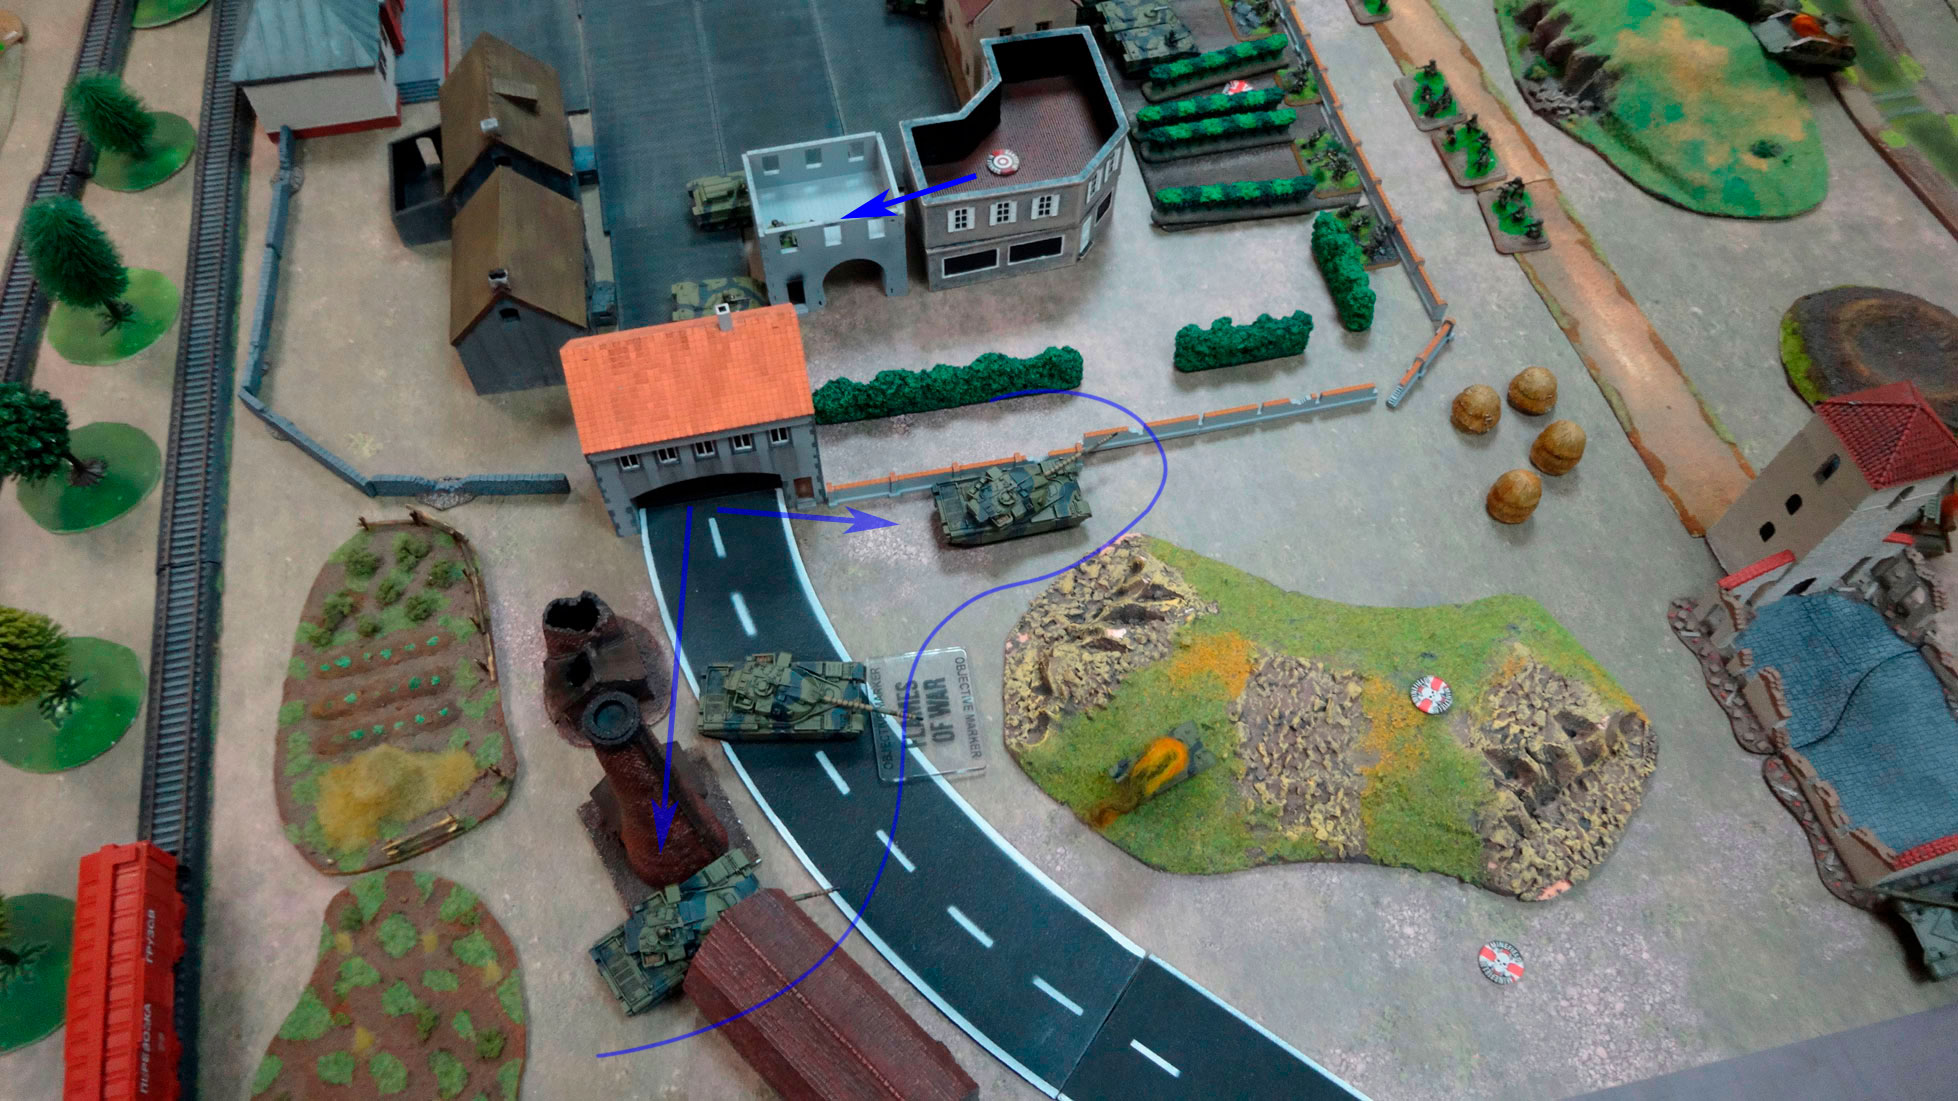
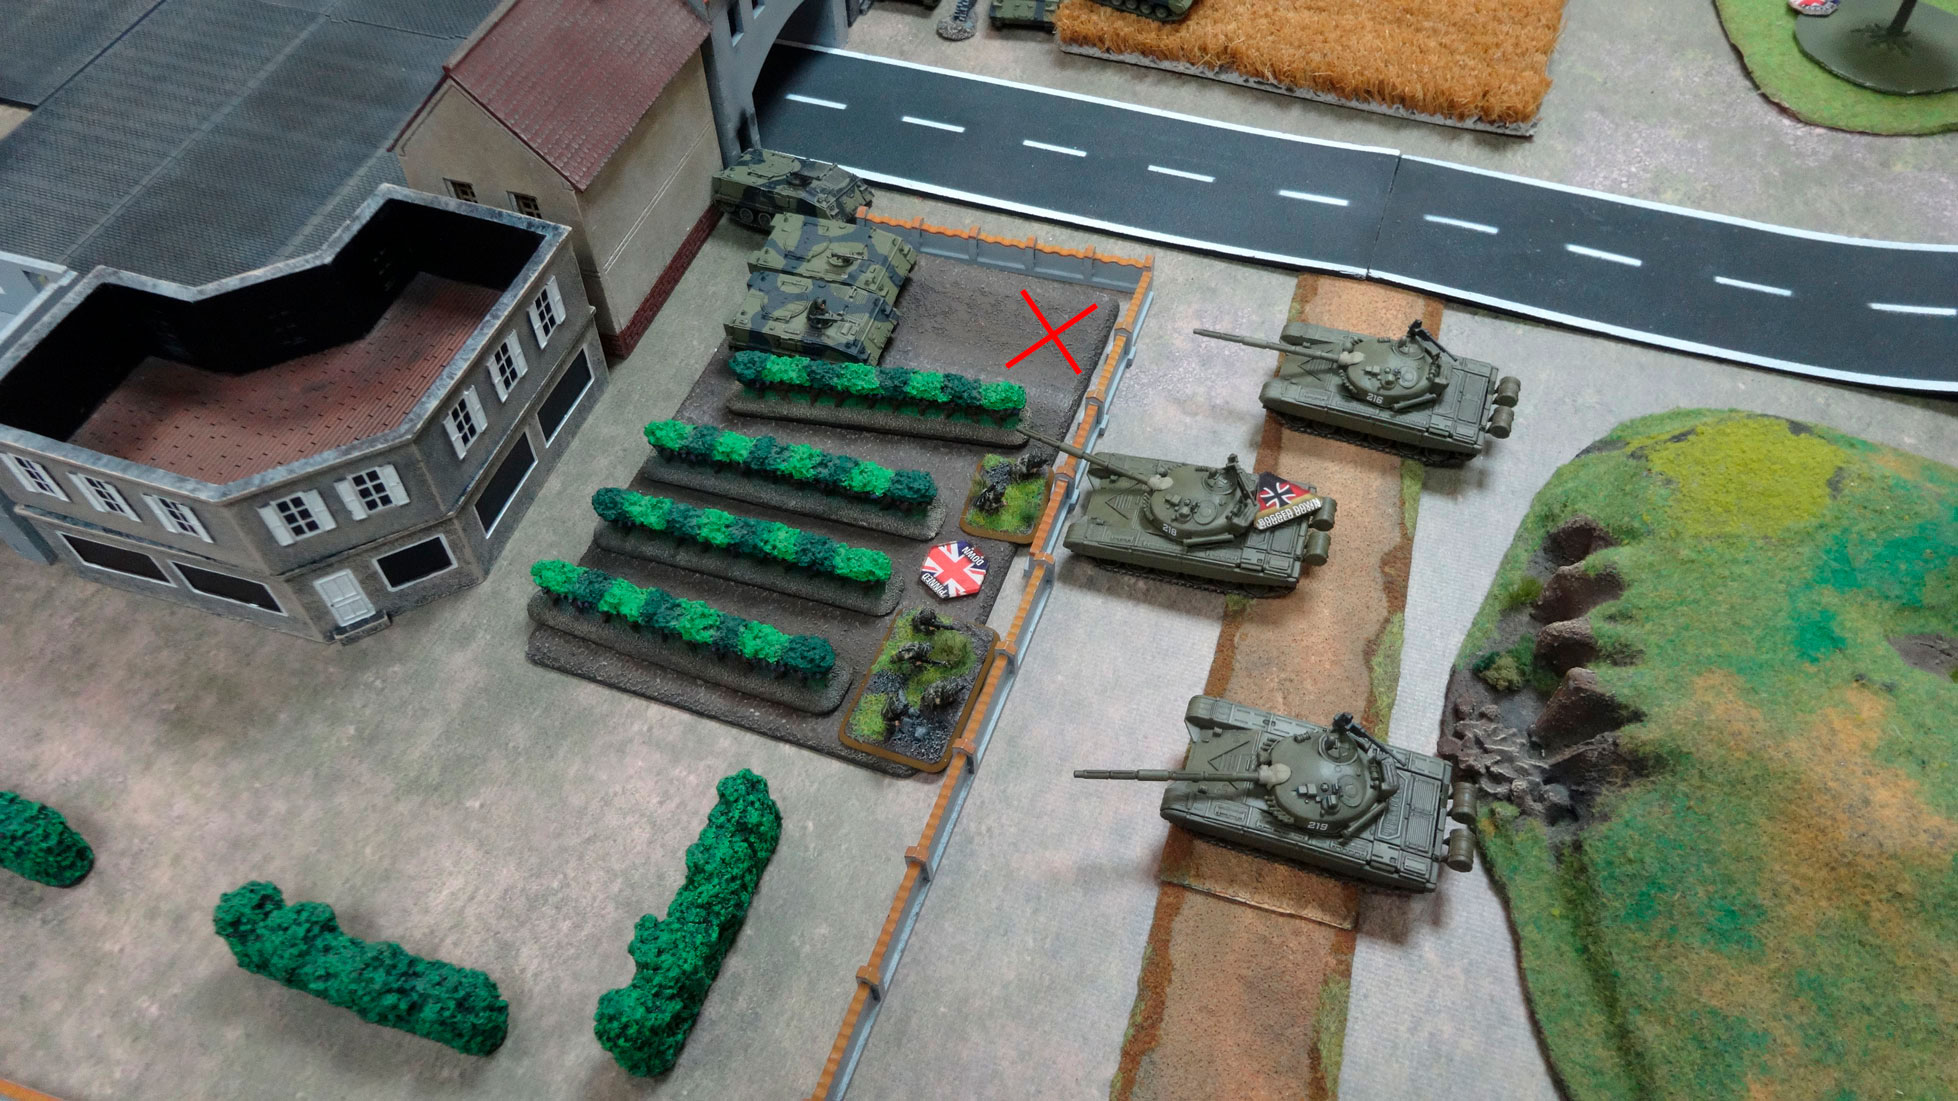
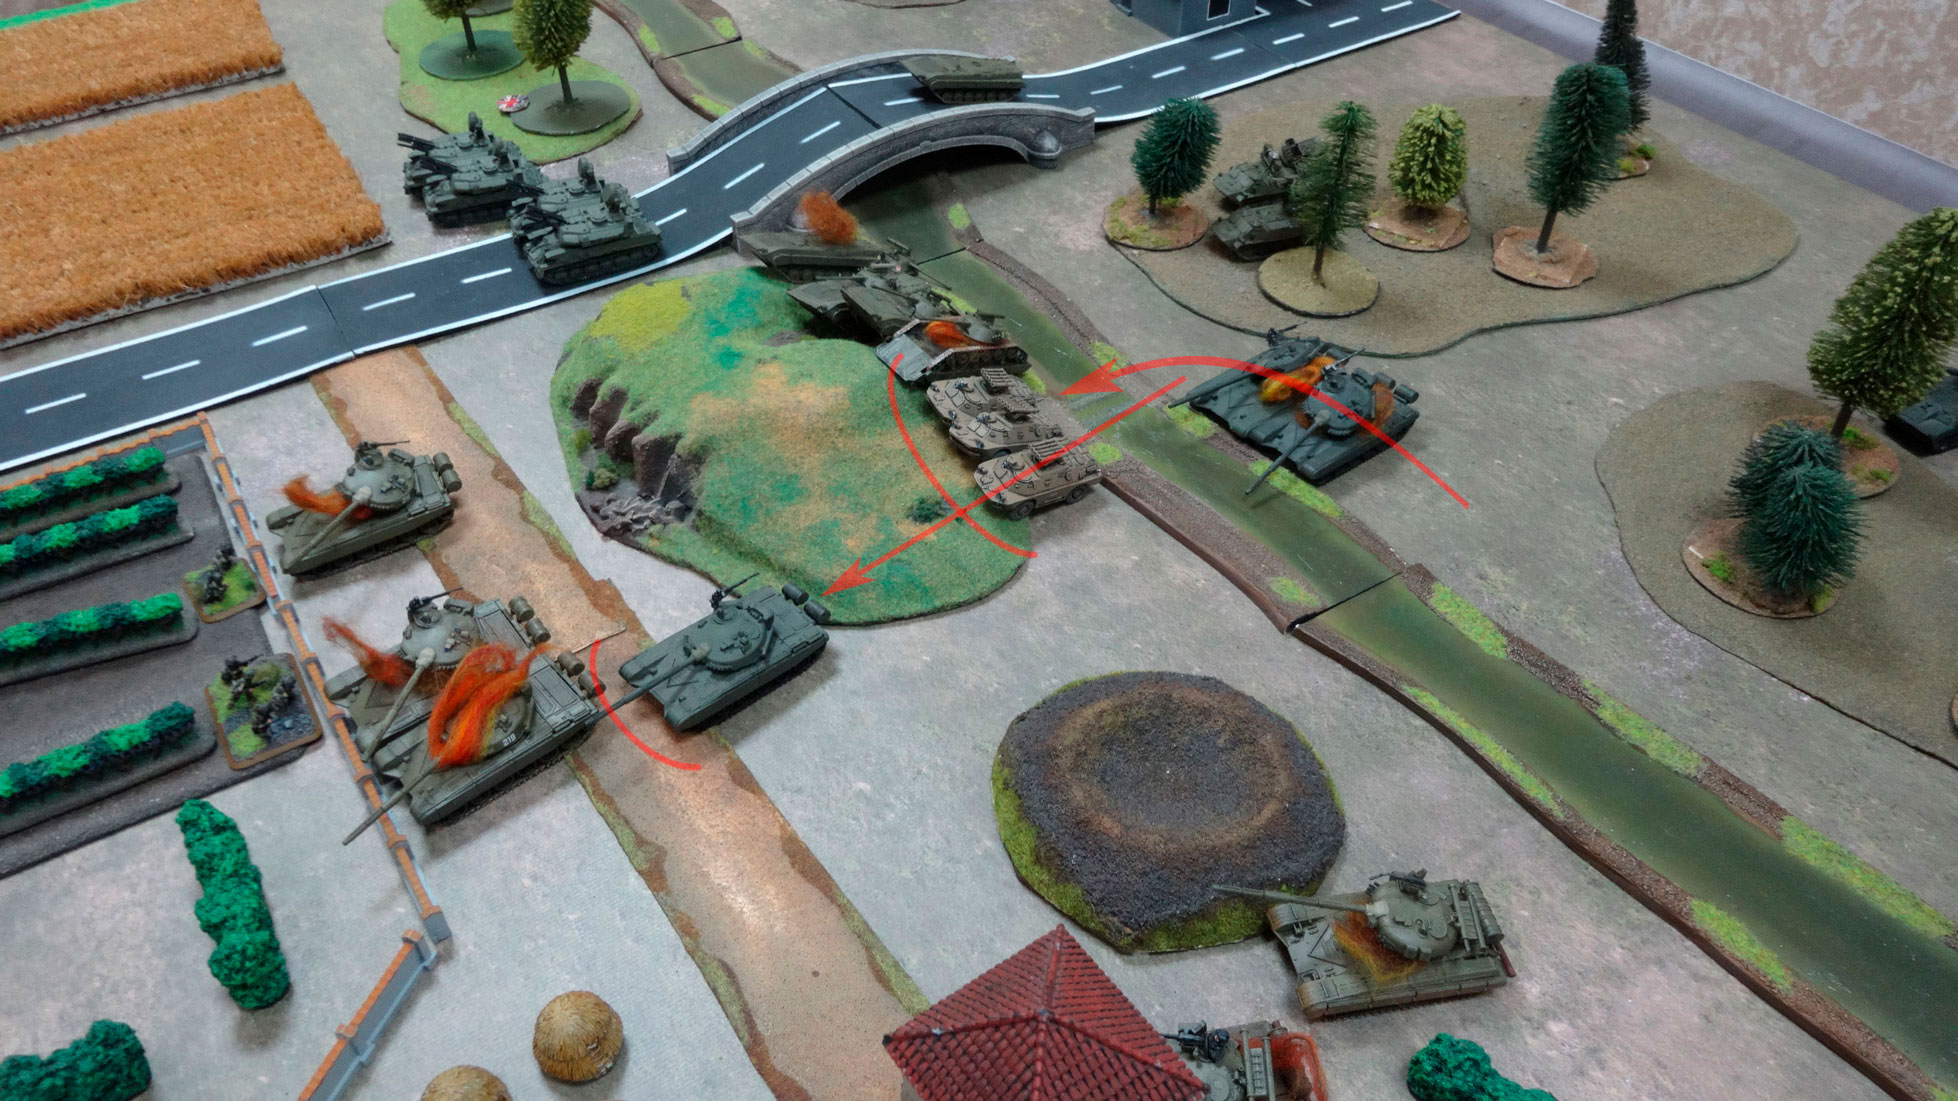
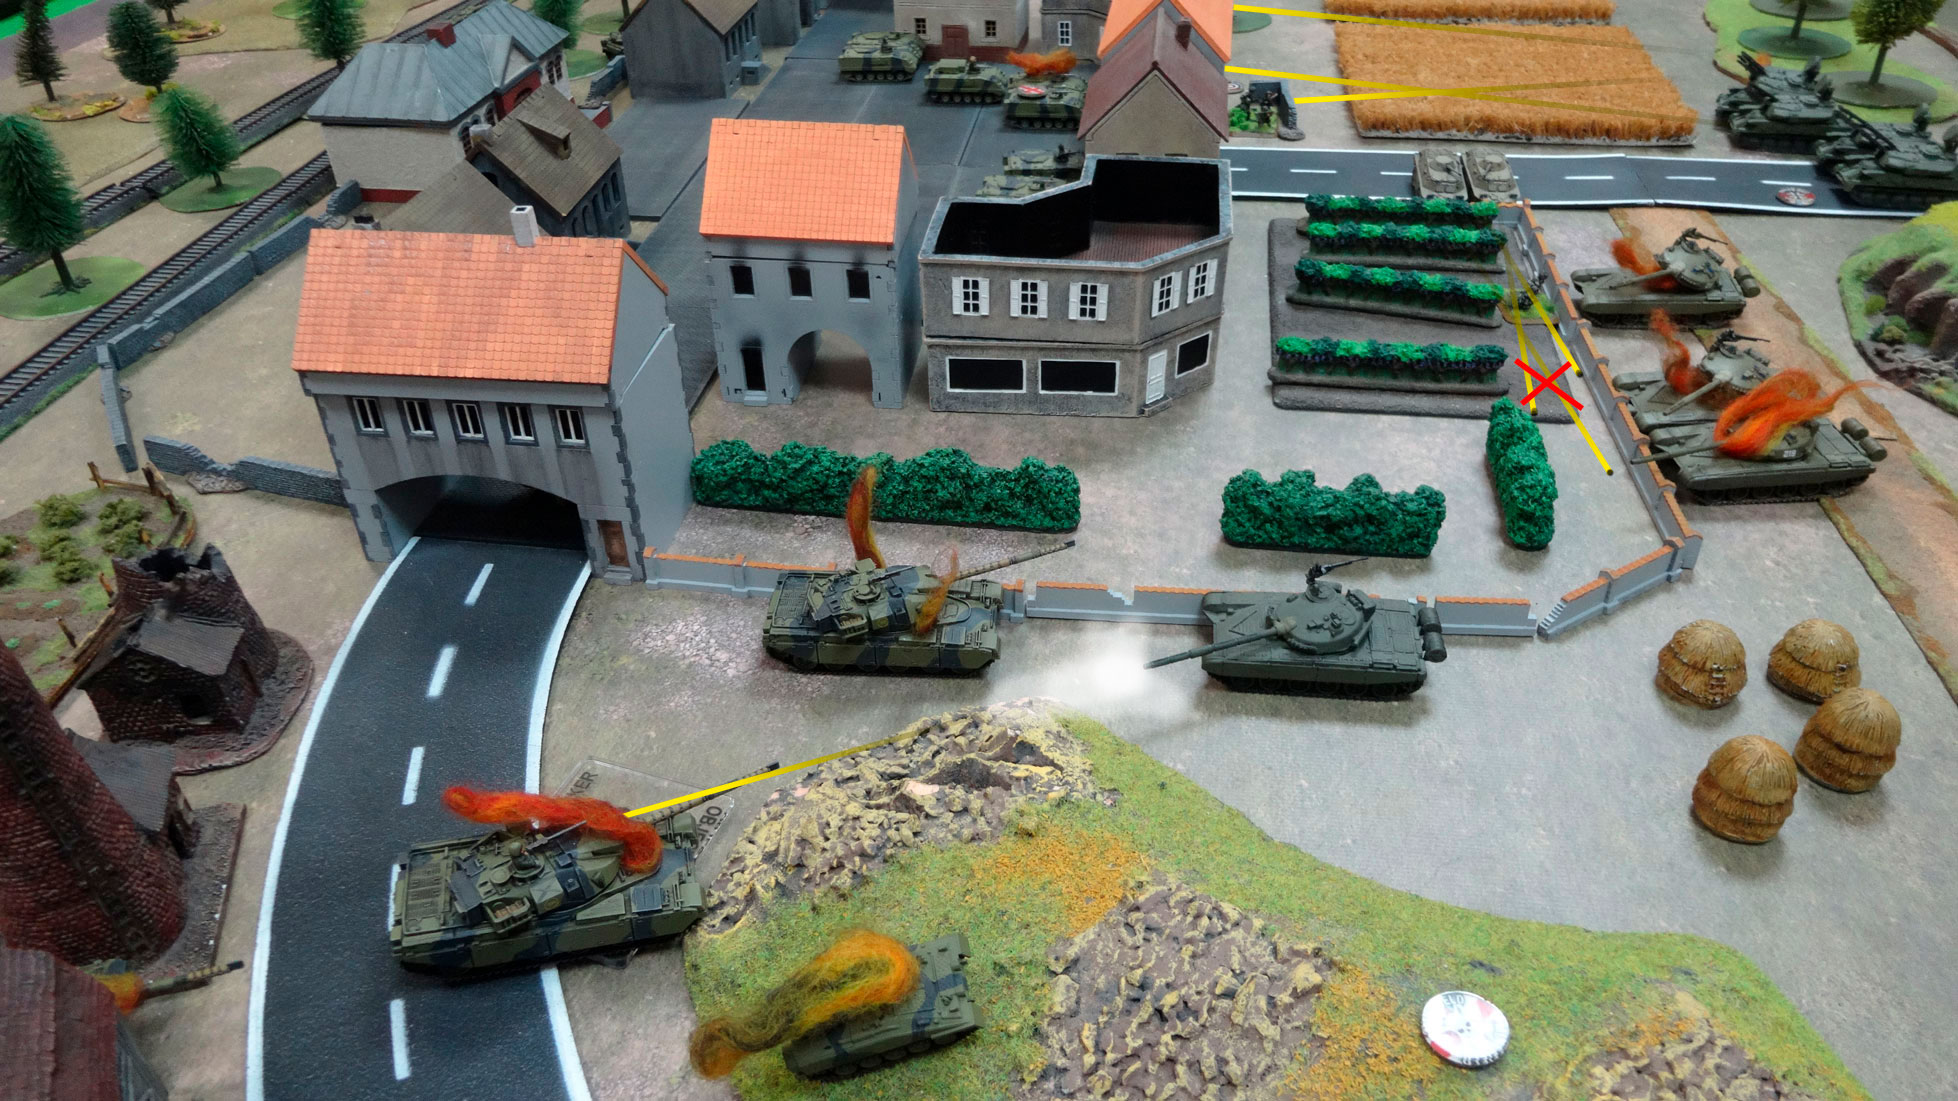
Immediately after the shooting, the soviets are trying to crush the British with the traks of their T-64. During the offensive, one tank gets stuck and does not participate in the assault phase. The remaining ones can get out the Carl Gustav team. The British holds and the T-64 eventually does not manage to continue the fight, and they are retreating. Nevertheless, this is moral test for me, but I successfully pass it.
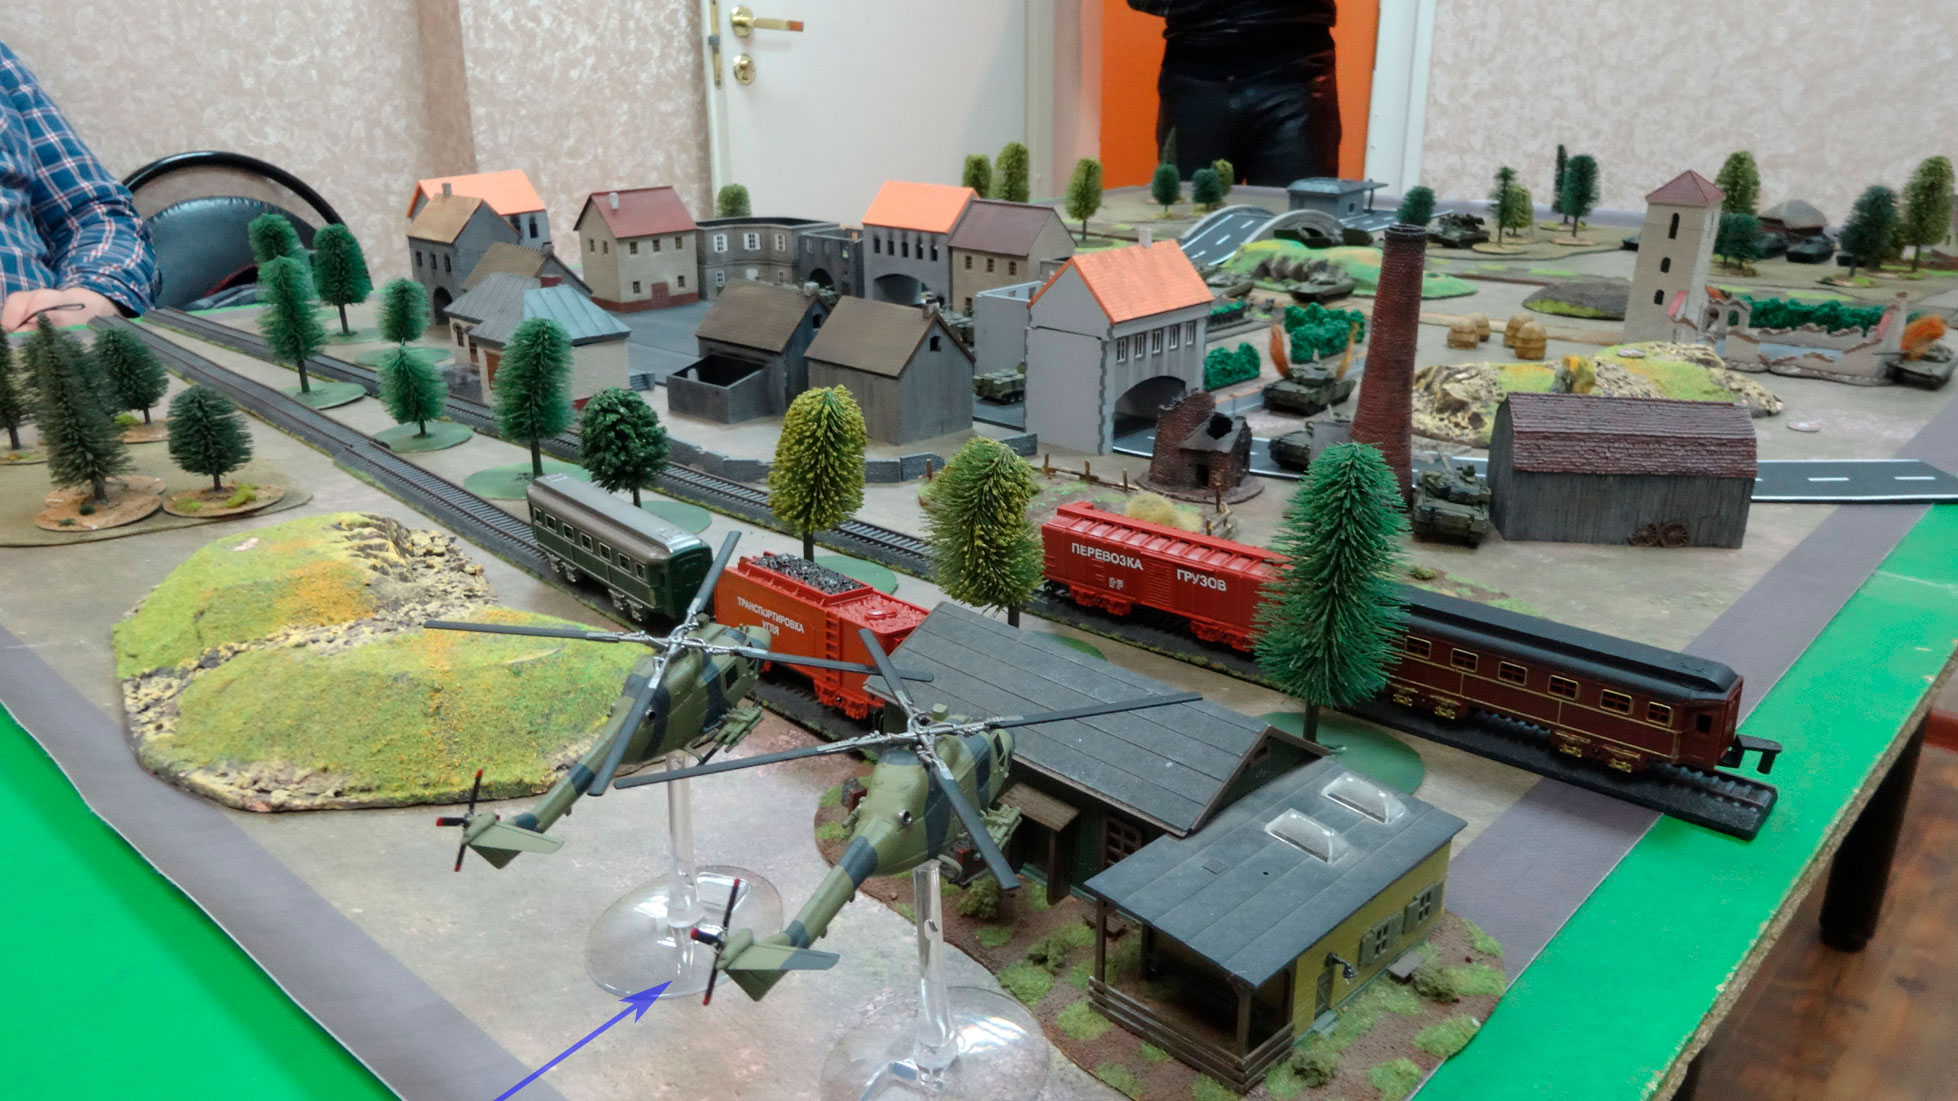
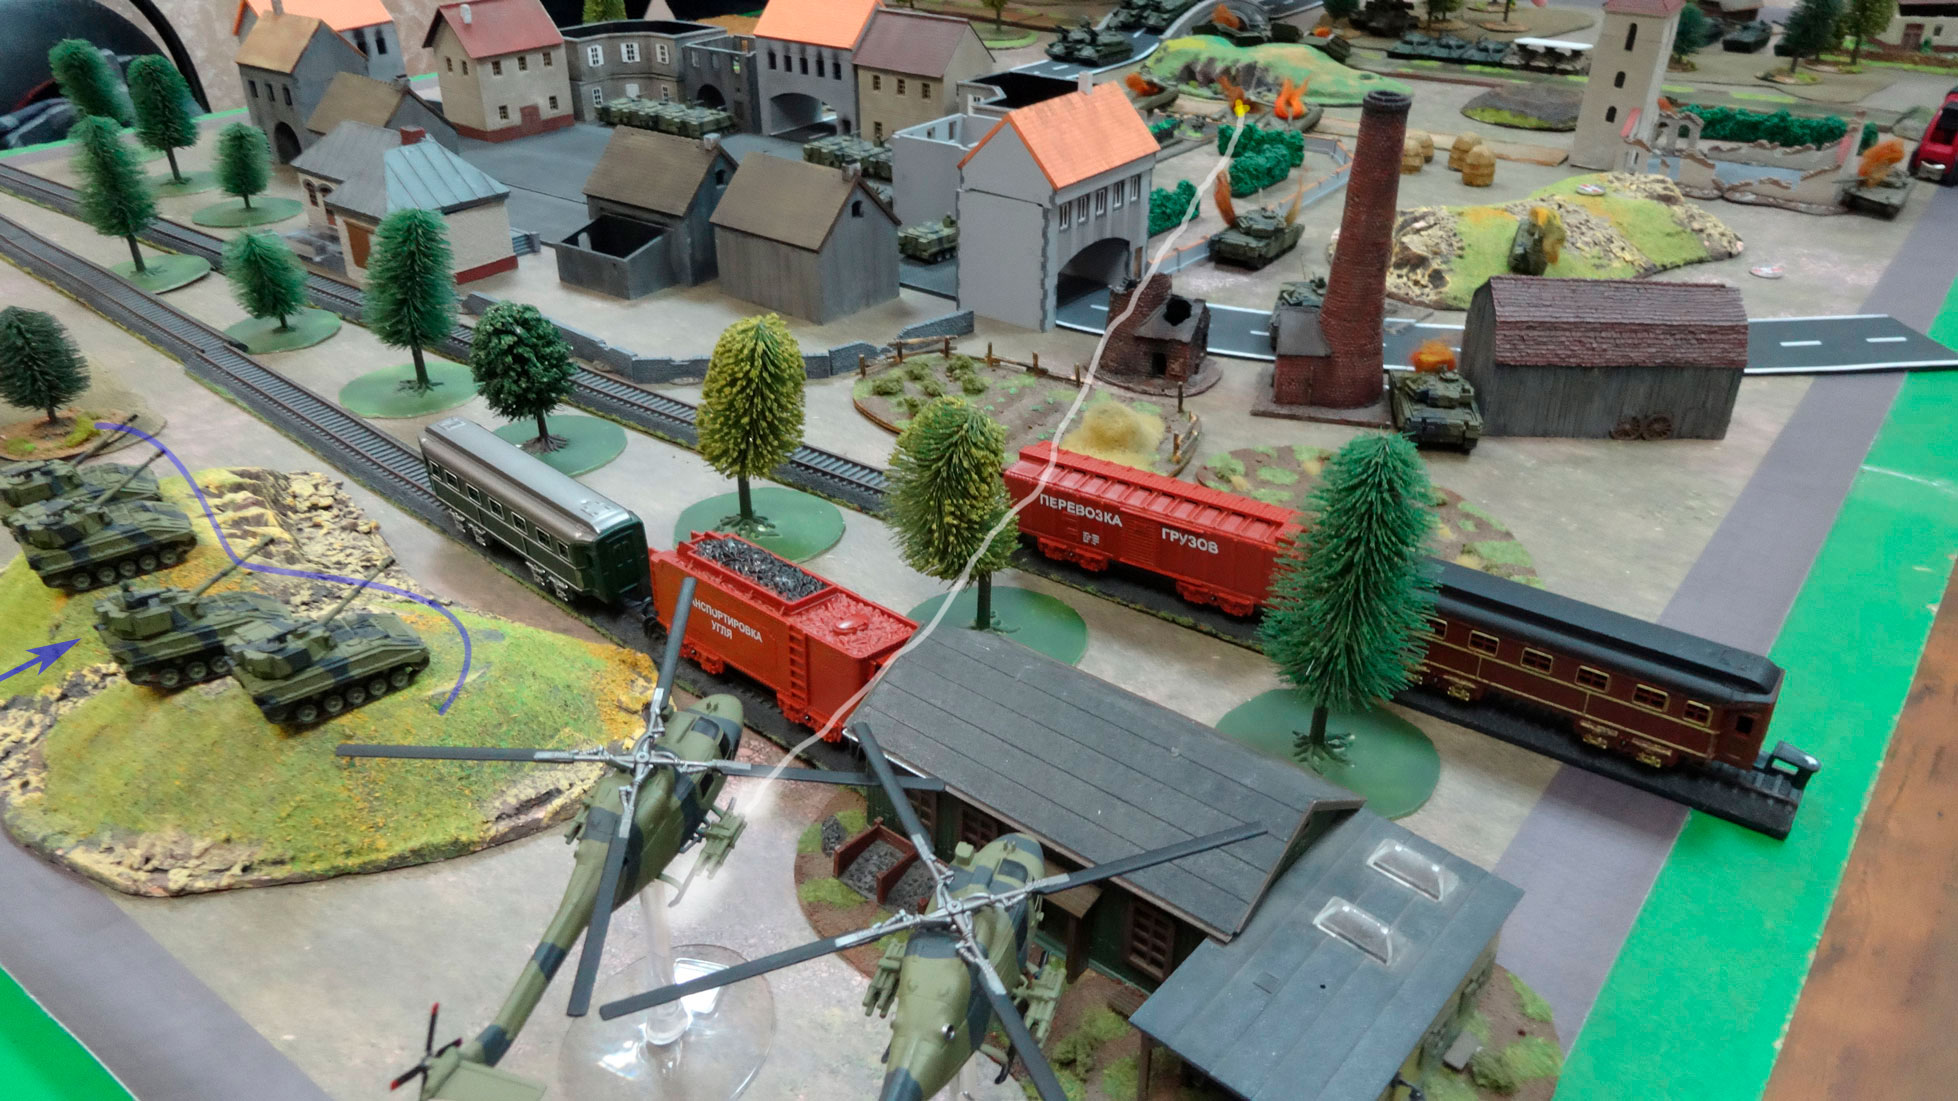
My turn. Can't unpin the infantry, but the first reserves came out. 2 Lynx are over the battlefield hiding behind freight cars and railway depots.
A small movement of infantry, settled in the northern structure. Carl Gustav team decided to get closer.

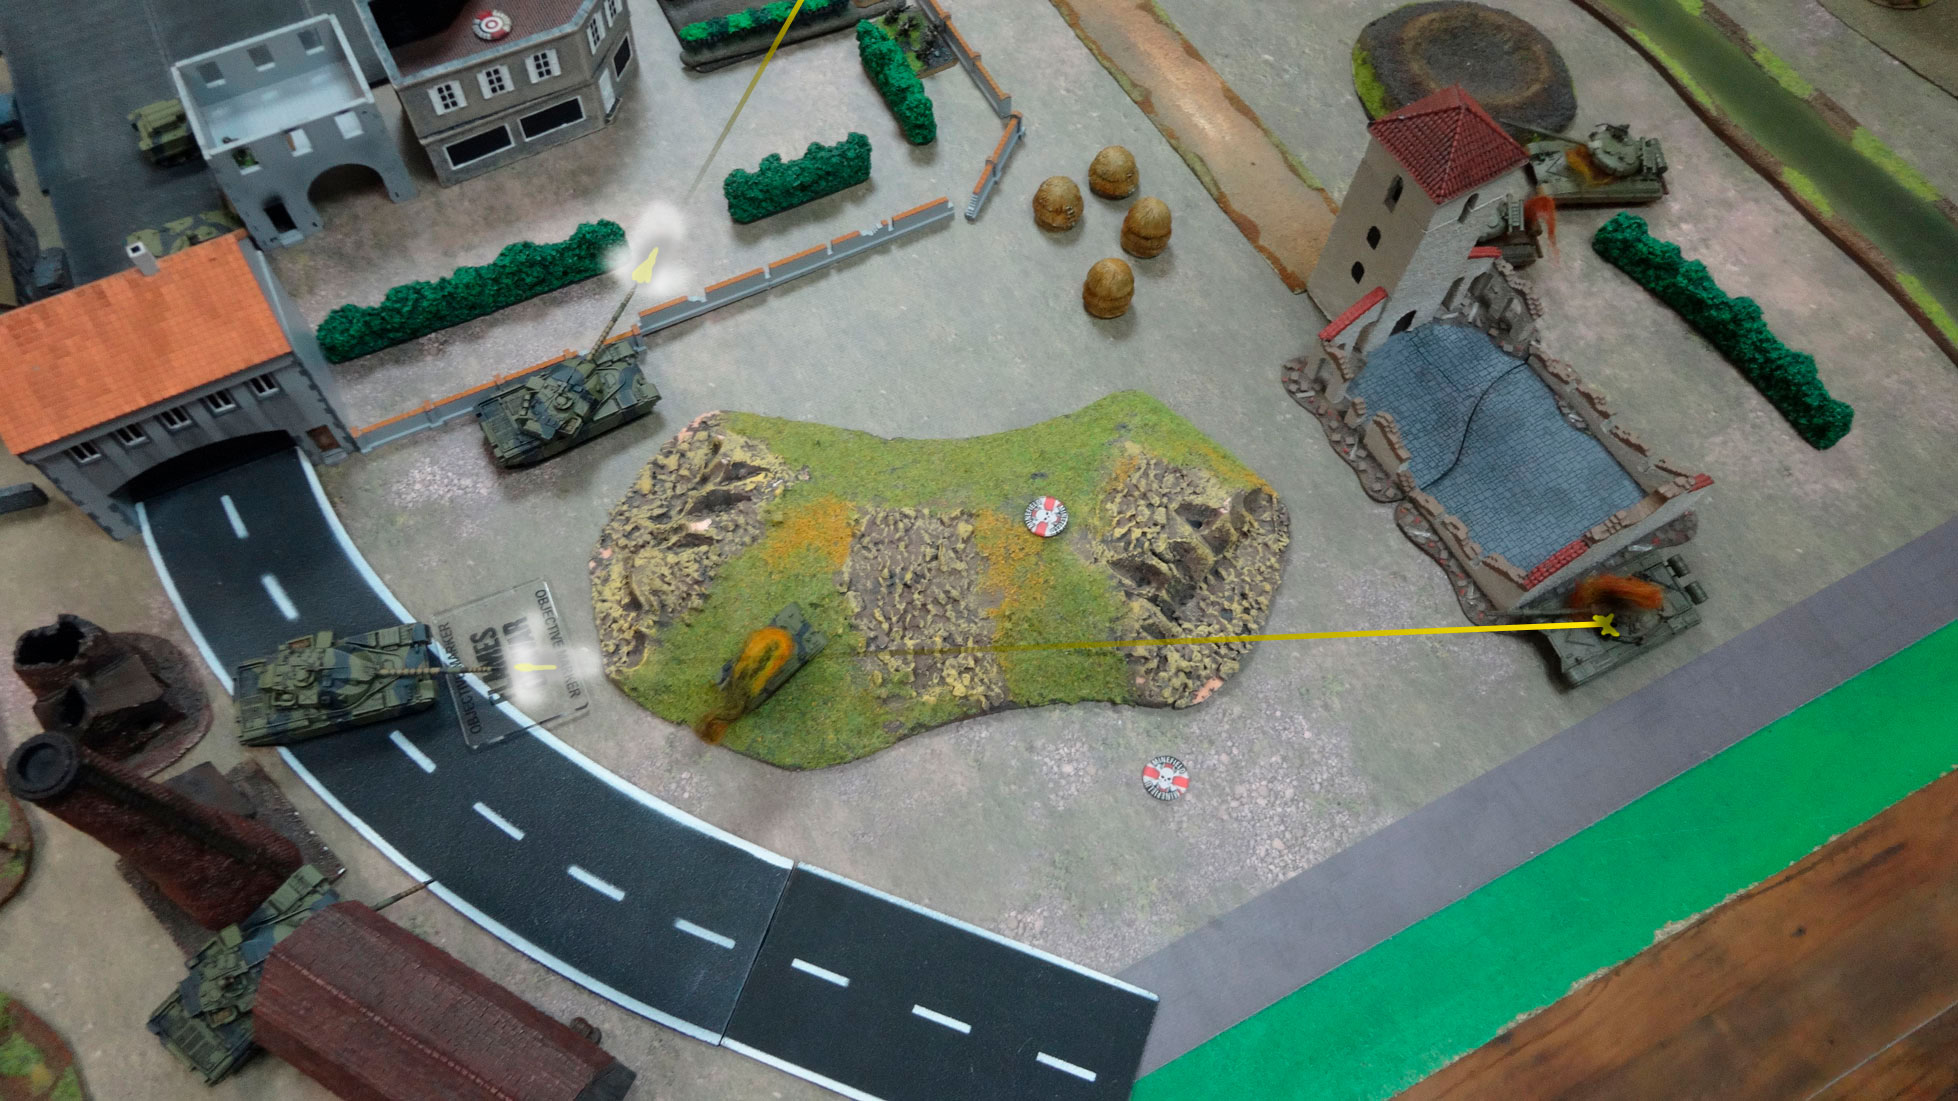
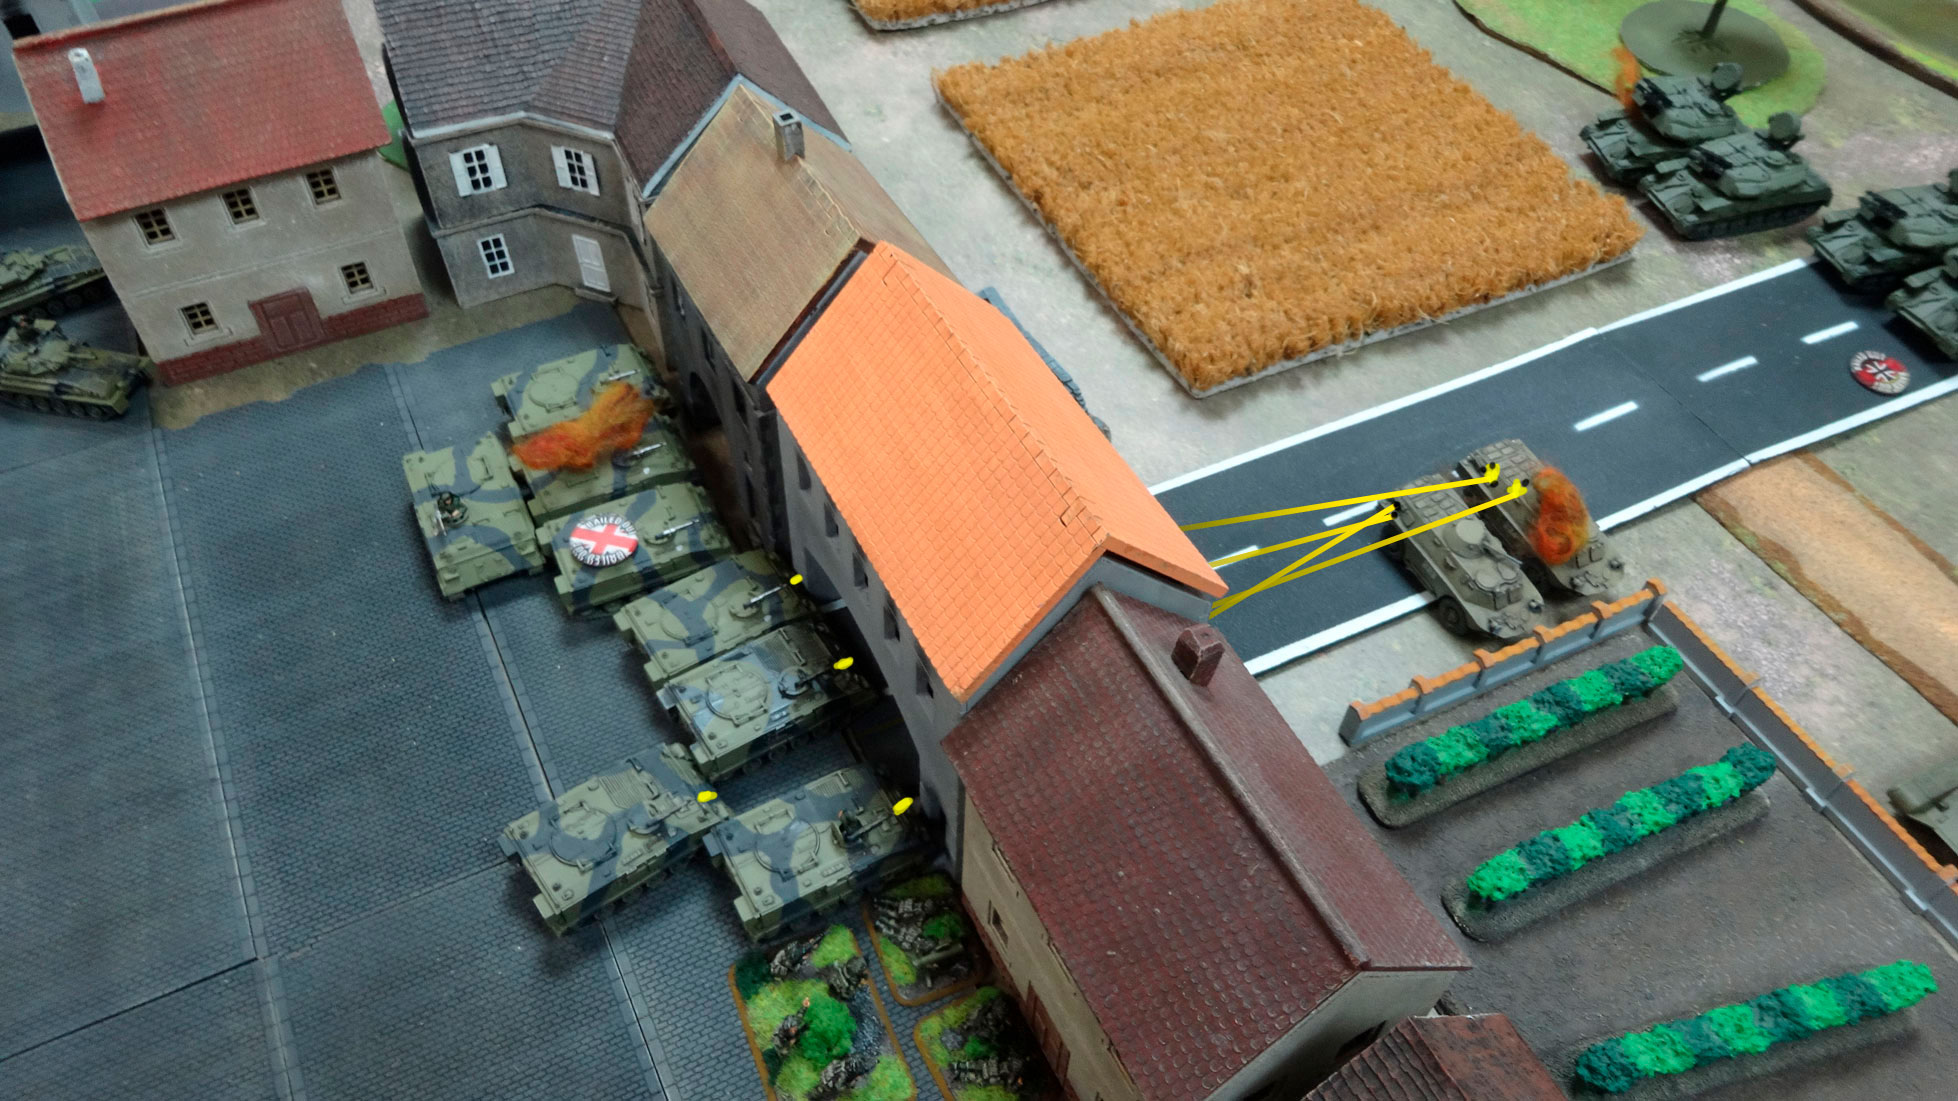
All that could shoot on the T-64s, (Chiften and infantry Milans), all fired at them. As a result, they burnt the jammed one and bailed out another. These losses are enough to force the Soviets to retreat, but they did not succumb to panic.

The fourth turn was very fast. Shilkas and Spandrels came out from reserves. Small movements of T-64. Shooting T-64, which could burn one Chiften and bail out the crew from the second, proved effective. But the surviving British tankmen refused to retreat!
The British infantry was able to recover and bail out one T-64. Surviving Soviet tankmen, also, refused to retreat!
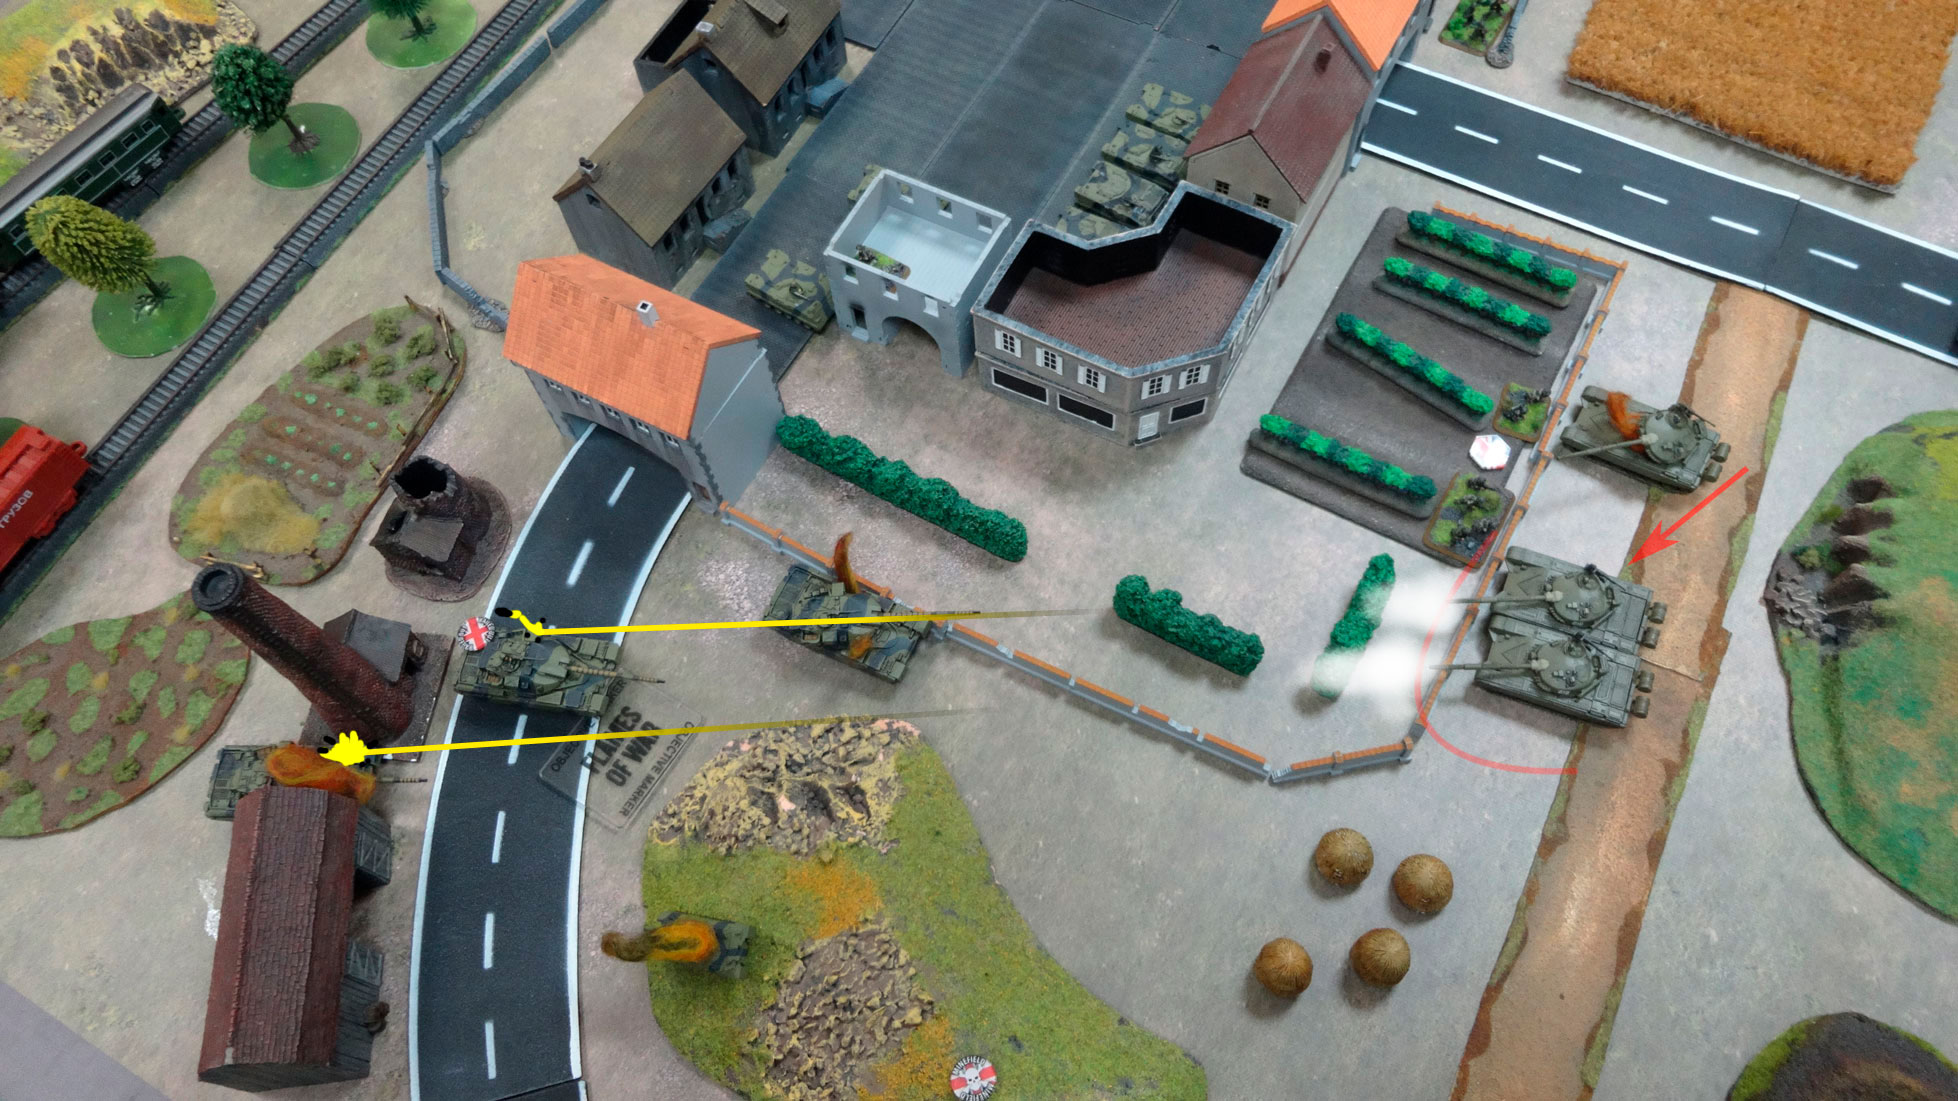
T-72 and Spandrels occupy positions on the bank of the river (pic - Spandrels are successfully smoked by British artillery).

The shooting phase did not give any results. Tanks and Spandrels unsuccessfully tried to knock out the last Chiftein. Artillery and Shilkas, shelled the infantry in the house.
The British continue to slowly develop reserves. Abbot battery took a position on the hill behind the railway. Helicopters were able to hit the last T-64. Infantry Milan knocked out two T-72s.
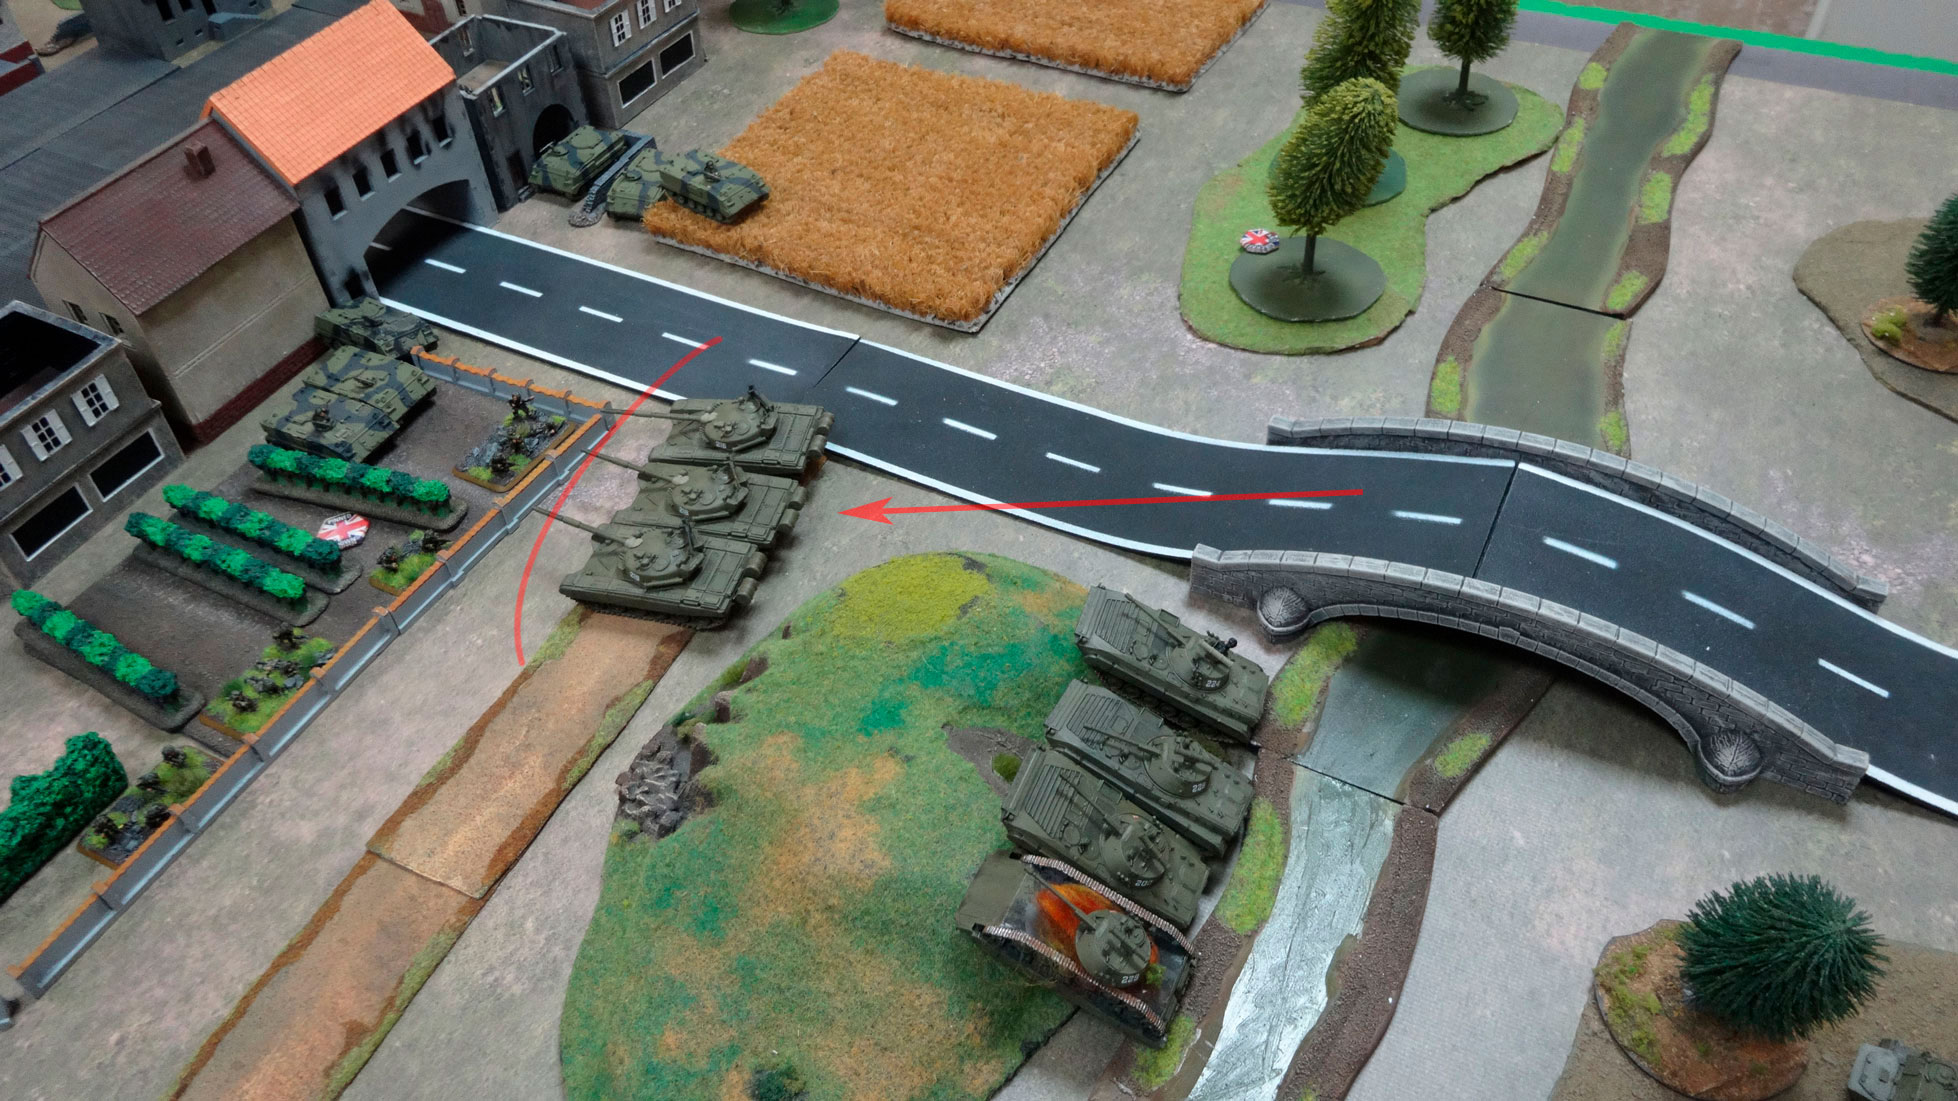
The Soviets throw their last forces into the attack. The T-72 overcomes the ditch and approaches the burning T-64, and the Spandrels take a position on the back slope of the hill.
Shilkas line up for shooting and they are joined by the last reserves - two reconnaissance vehicles.
The Soviets concentrate fire on the British infantry. It turns out to take out one team from the house and pin the rest, as well as an artillery shell fired at the house damaged several APCs assigned to the infantry.

The British have there Scorpions came from reserves, they want to support infantry in the northern part of the city, in case the Shylks are trying to reach the objective near the railway station. Along the way, part of the unit gets stuck, overcoming the rails.

Soviet trun. Everything is put forward. The T-72 is approaching the Chiftein. BRDM move to the flank the infantry. Even Grophers leave the forest to attack Lynxes.
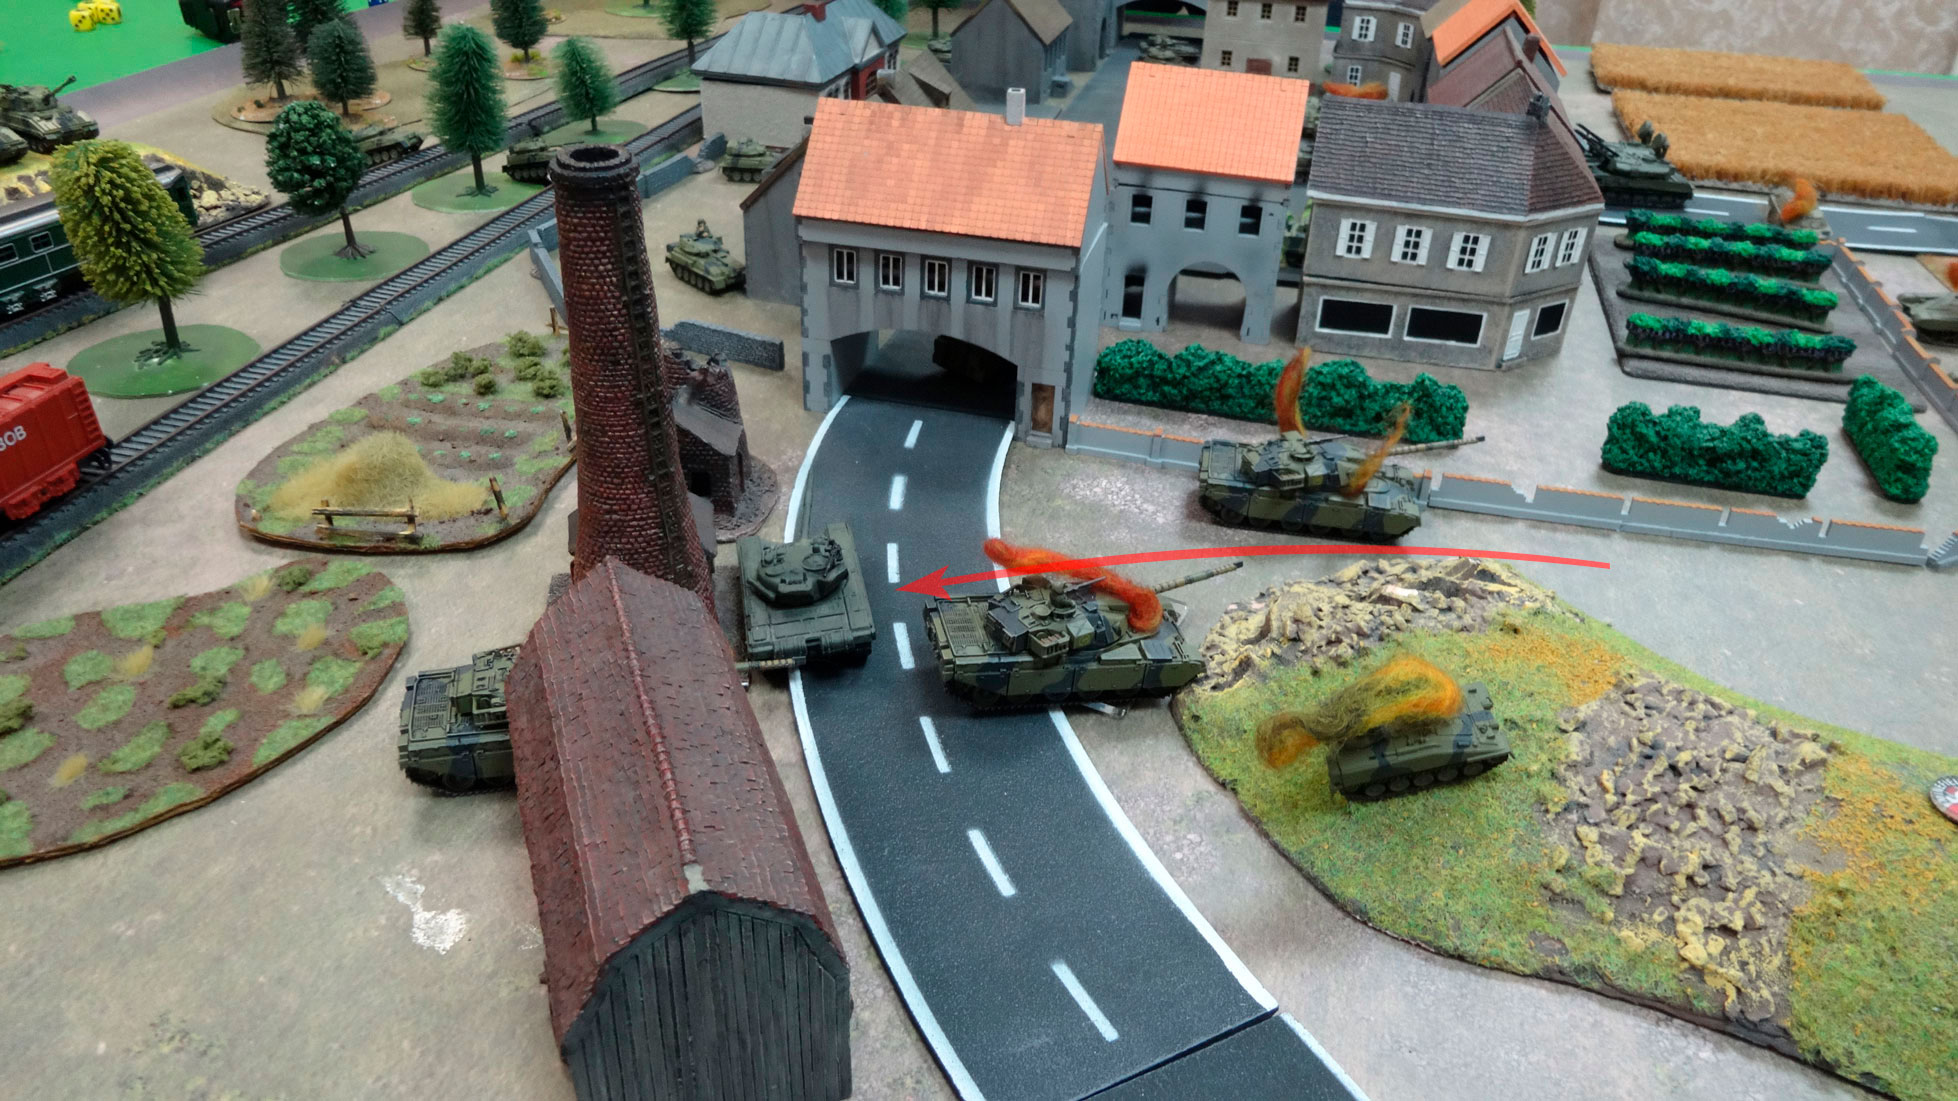
Approached T-72 on the run destroyed last Chiftein. Now on the southern flank of the British there is nothing, objective is completely open. It remains to take it. BRDM shoots defenseless infantry, and the last survivors flee. Shooting Shilkas and Carnations on the building and Gropher on Links did not bring results.
Scimitars showes up, they also need to overcome rails and fences, and some of them do not cope with this task.

A desperate maneuver takes place in the city. The command moves the infantry from the northern building to the south. APCs covers off the entrances to the city to cut off the enemy from the infantry. Scorpions brace for defense.
A successful Abbot barrage fell into the cluster of Soviet cars, destroying one Spandrel and one Gropher.
The Soviets continue to advance, hoping to consolidate their success in the south. T-72 occupies a strategic objective on the approach to the city. Spandrels and Shilkas come close in all directions.
Unfortunately the shooting does not bring the desired success, all losses of Britain on this turn are only a few FV432 armored personnel carriers, all the targets that can threaten the tank at the point were unscathed.
NATO turn. The British have time to pull up the necessary forces to the southern part of the city. The scimitars will not allow us to capture the objective and the infantry brought with them AT means.
The T-72 heroically still fired a turn or two, until eventually it was set on fire by the Milan missile. At this point, the opponent understands that the forces and means for victory no longer exist and considers their defeat. Only the Carnation battery and the mobile observation post remained alive.
Battle Report Author
Army Lists Used In This Battle
Recommend Commander For Commendation
Share this battle with friends
CorsacWins

Nice report!! Good Win!
Very nice models, table and excellent AAR well supported with pictures
wow! Late to arrive but great report!
Nice! Very nice and congrats.
Great report and Congrats on the Win!
Great report!