Fought At Amsterdam
2232 days 2 hours 4 minutes ago
A bridge too far
50 POINTSThis again was meant to be a quick mission but turned into an epic battle. We used 50 point armies but changed the mission that was Seize the Bridge just slightly. Instead of reserves arriving at the start we made them delayed and arriving at turn 3.
Situation: Intelligence reports the heroes of the revolution are pushing all over the front and NATO are on the retreat and the great victory over the capitalist scum is very near. NATO have thrown together small battle groups to try and stem the tidal wave of victory.
Enemy: Intelligence reports the remnants of a Panzergrenadier Battalion with supporting elements to be defending the bridges. Expect Leopard 1s only. We have air-superiority in the local area of operations.
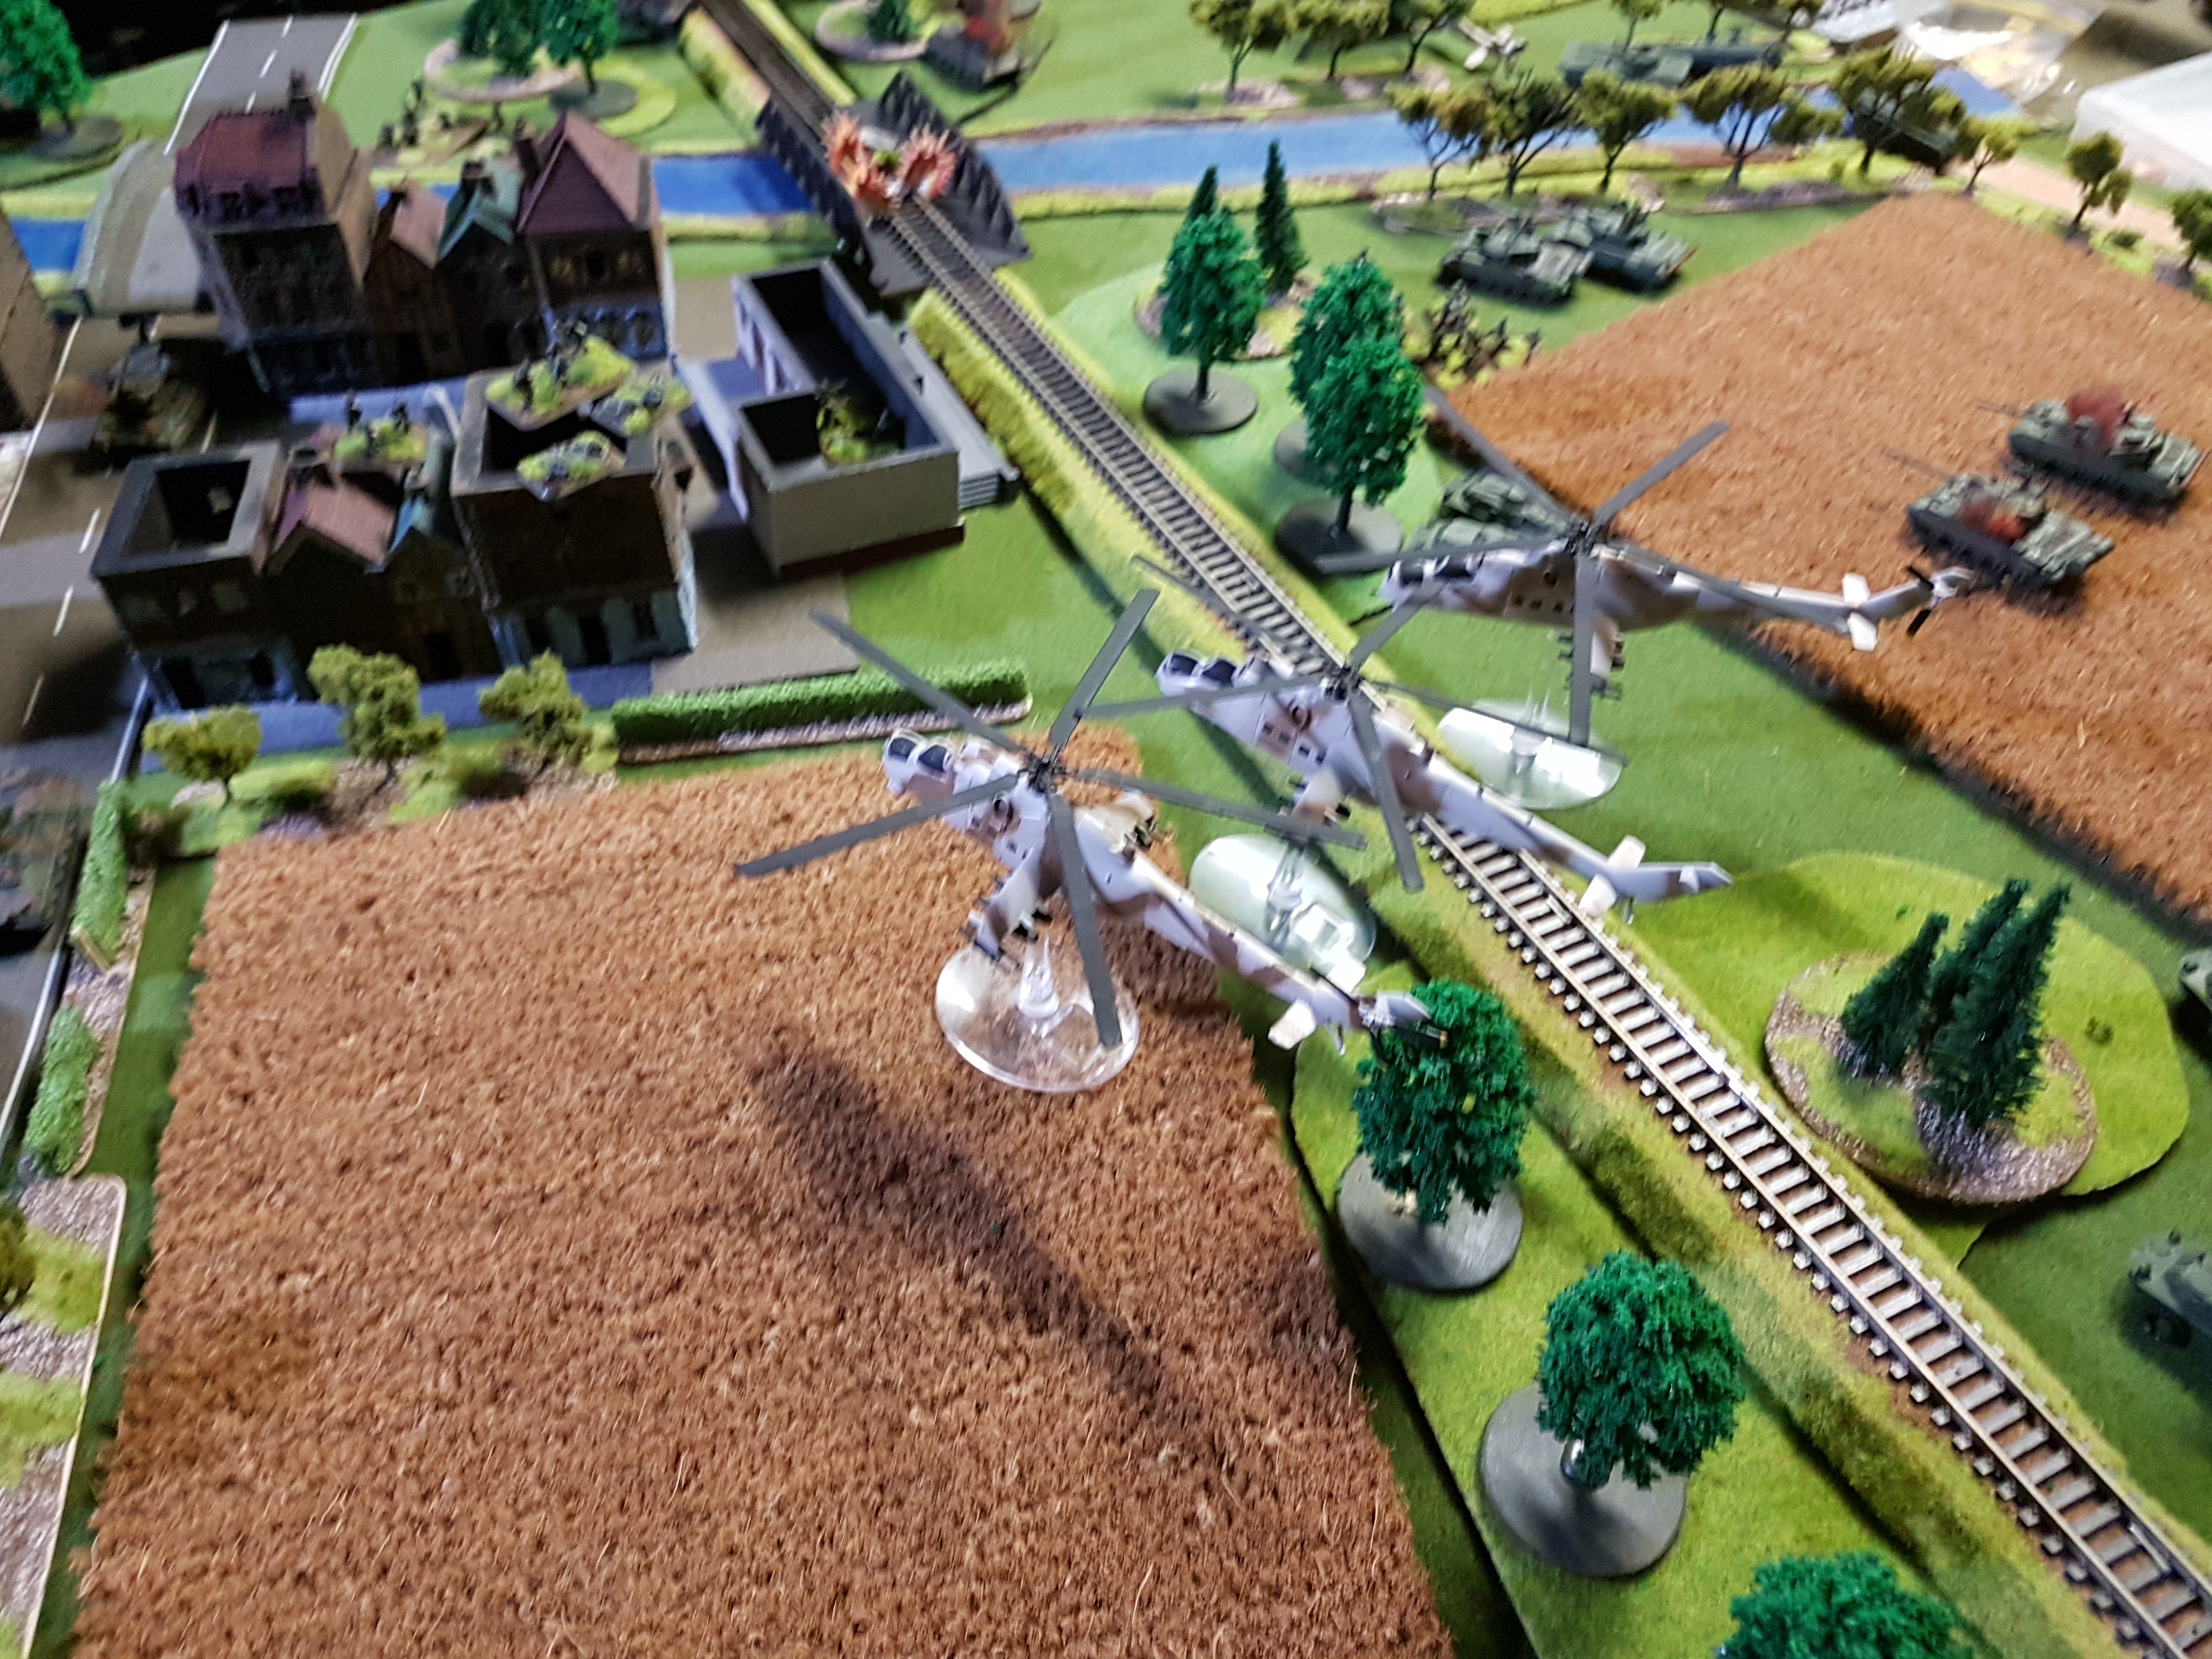
Friendlies: Your battle group will consist of a small Panzer Battalion of T55 and a Motorshutzen Battalion mounted in BMP1s and BMP2s. You have a dedicated battery of 2S1s and a Flight of for the MI-24 Hinds with a small detachment of Airborne Troops for the mission.
Mission: Regiment Rudolf Renner is to seize the bridges over the river Nederrjin in order for follow up forces to exploit the advance into Amsterdam.


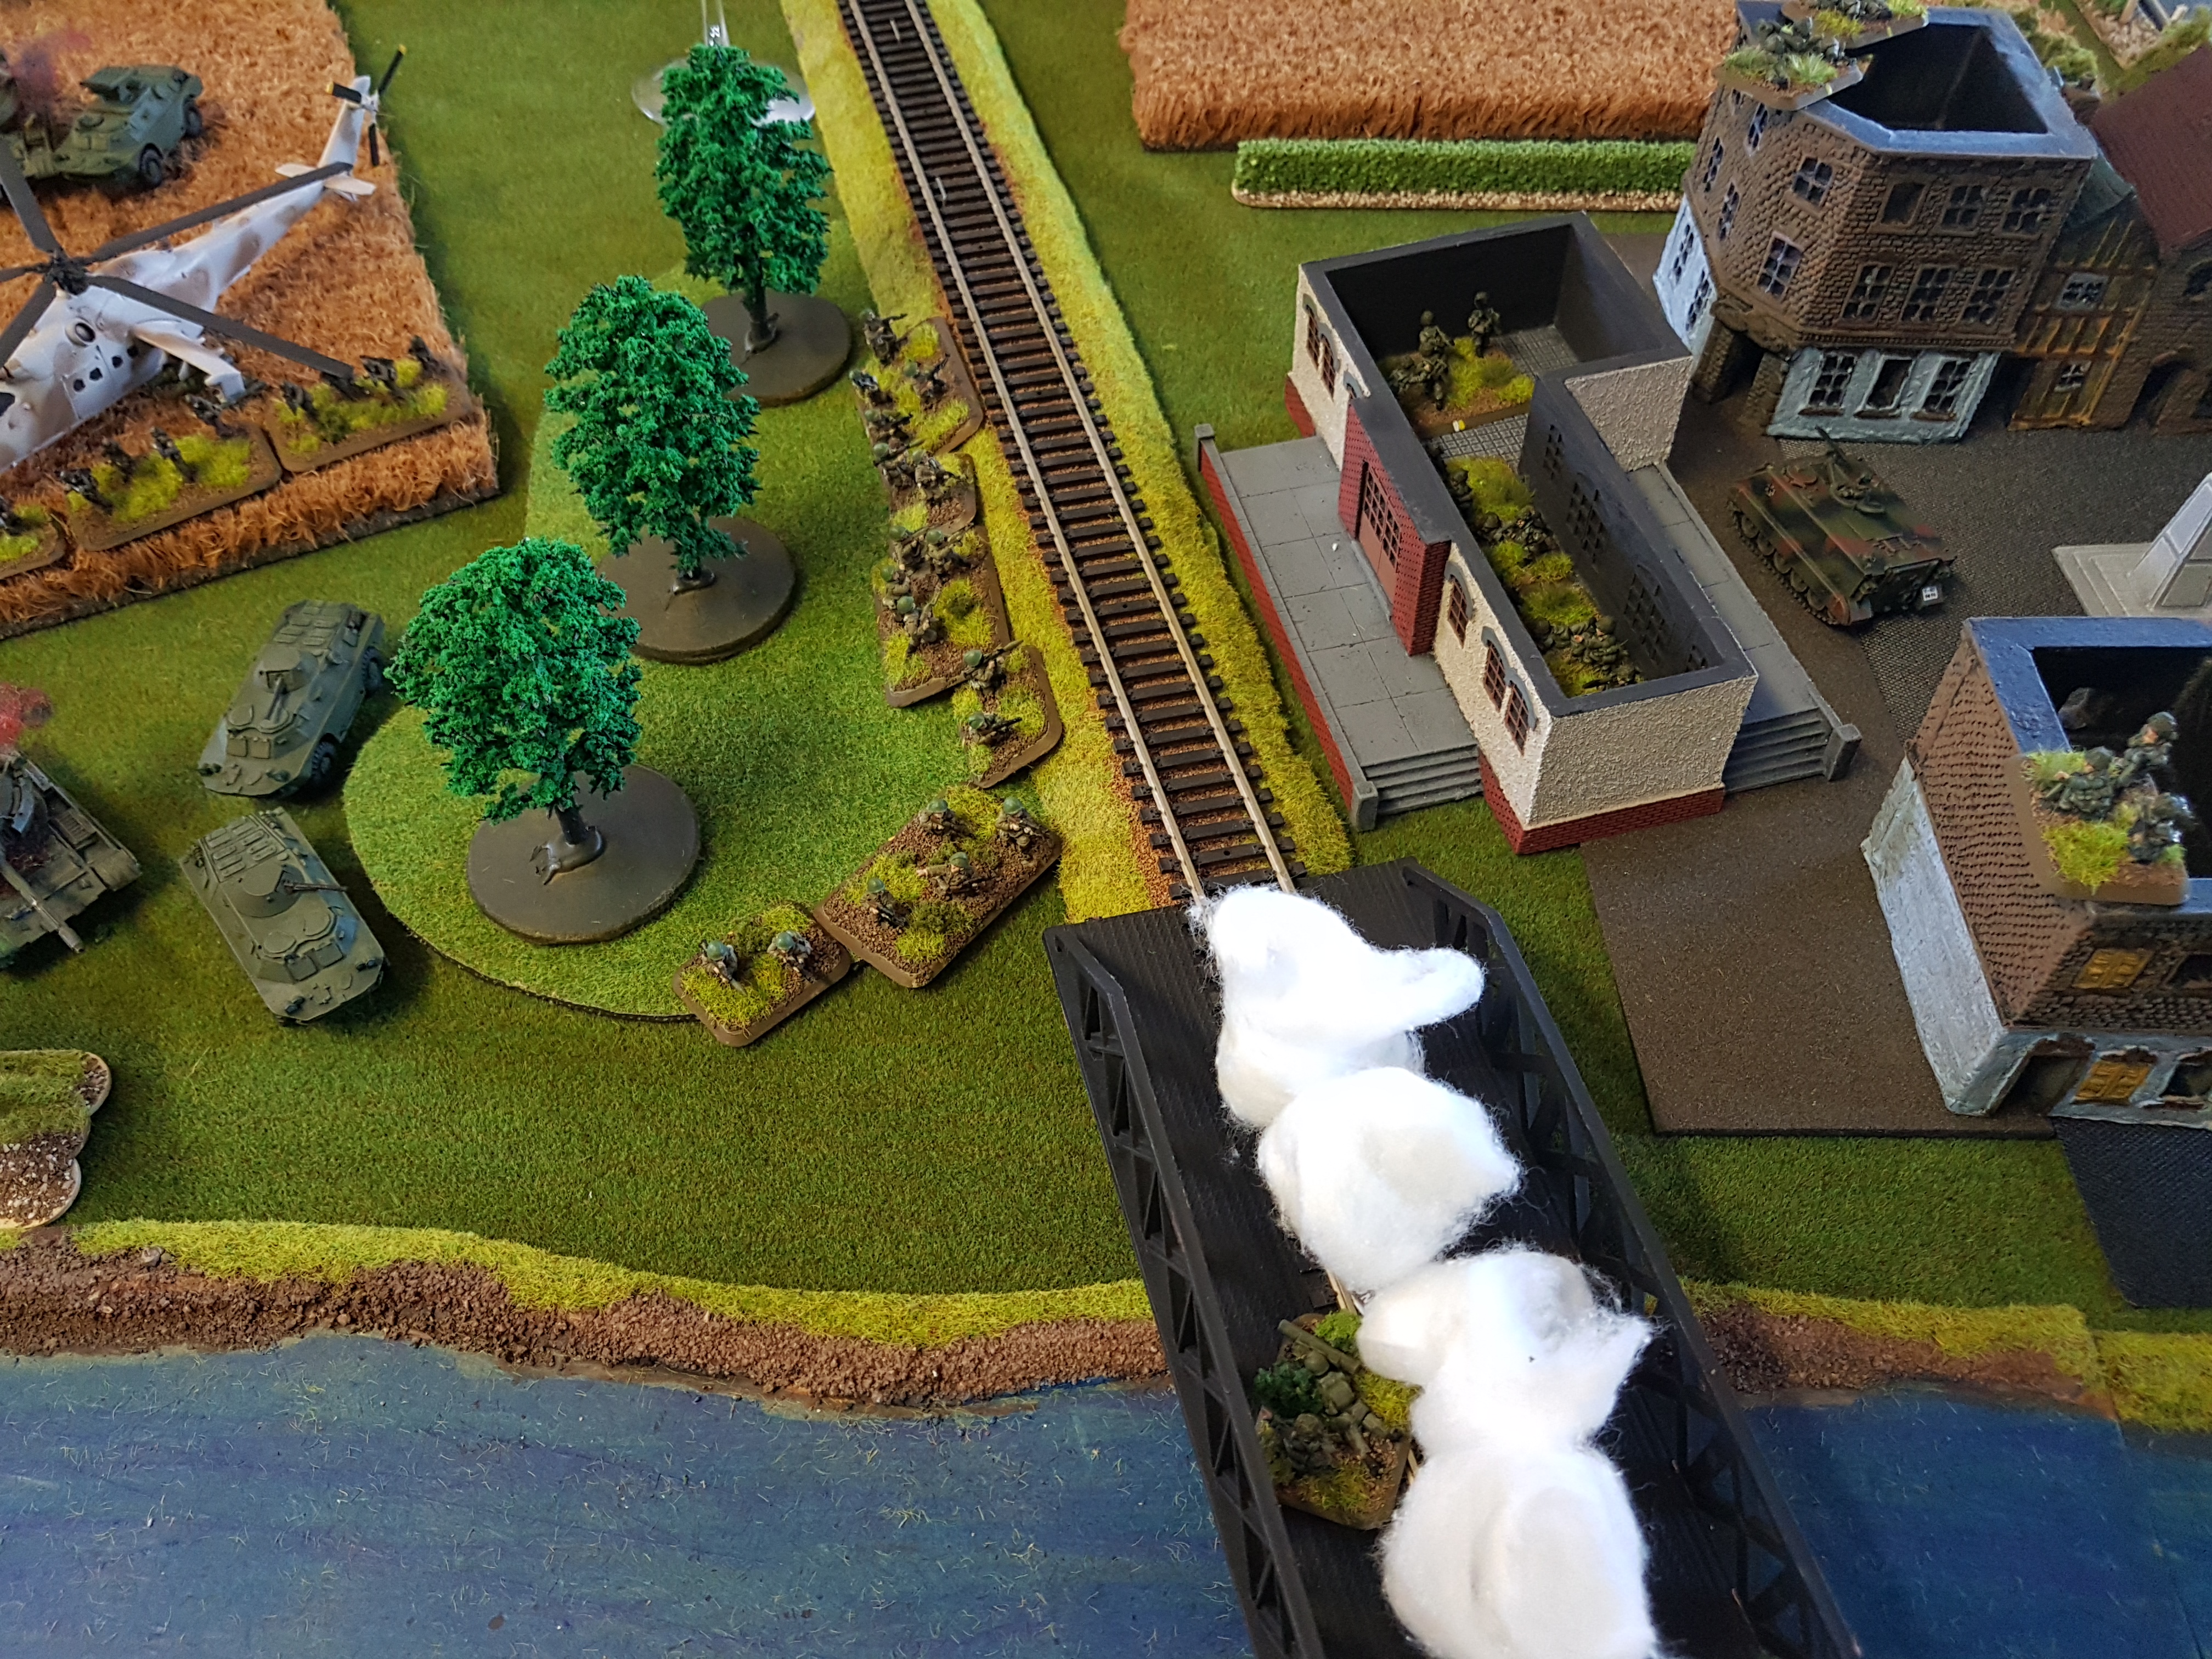
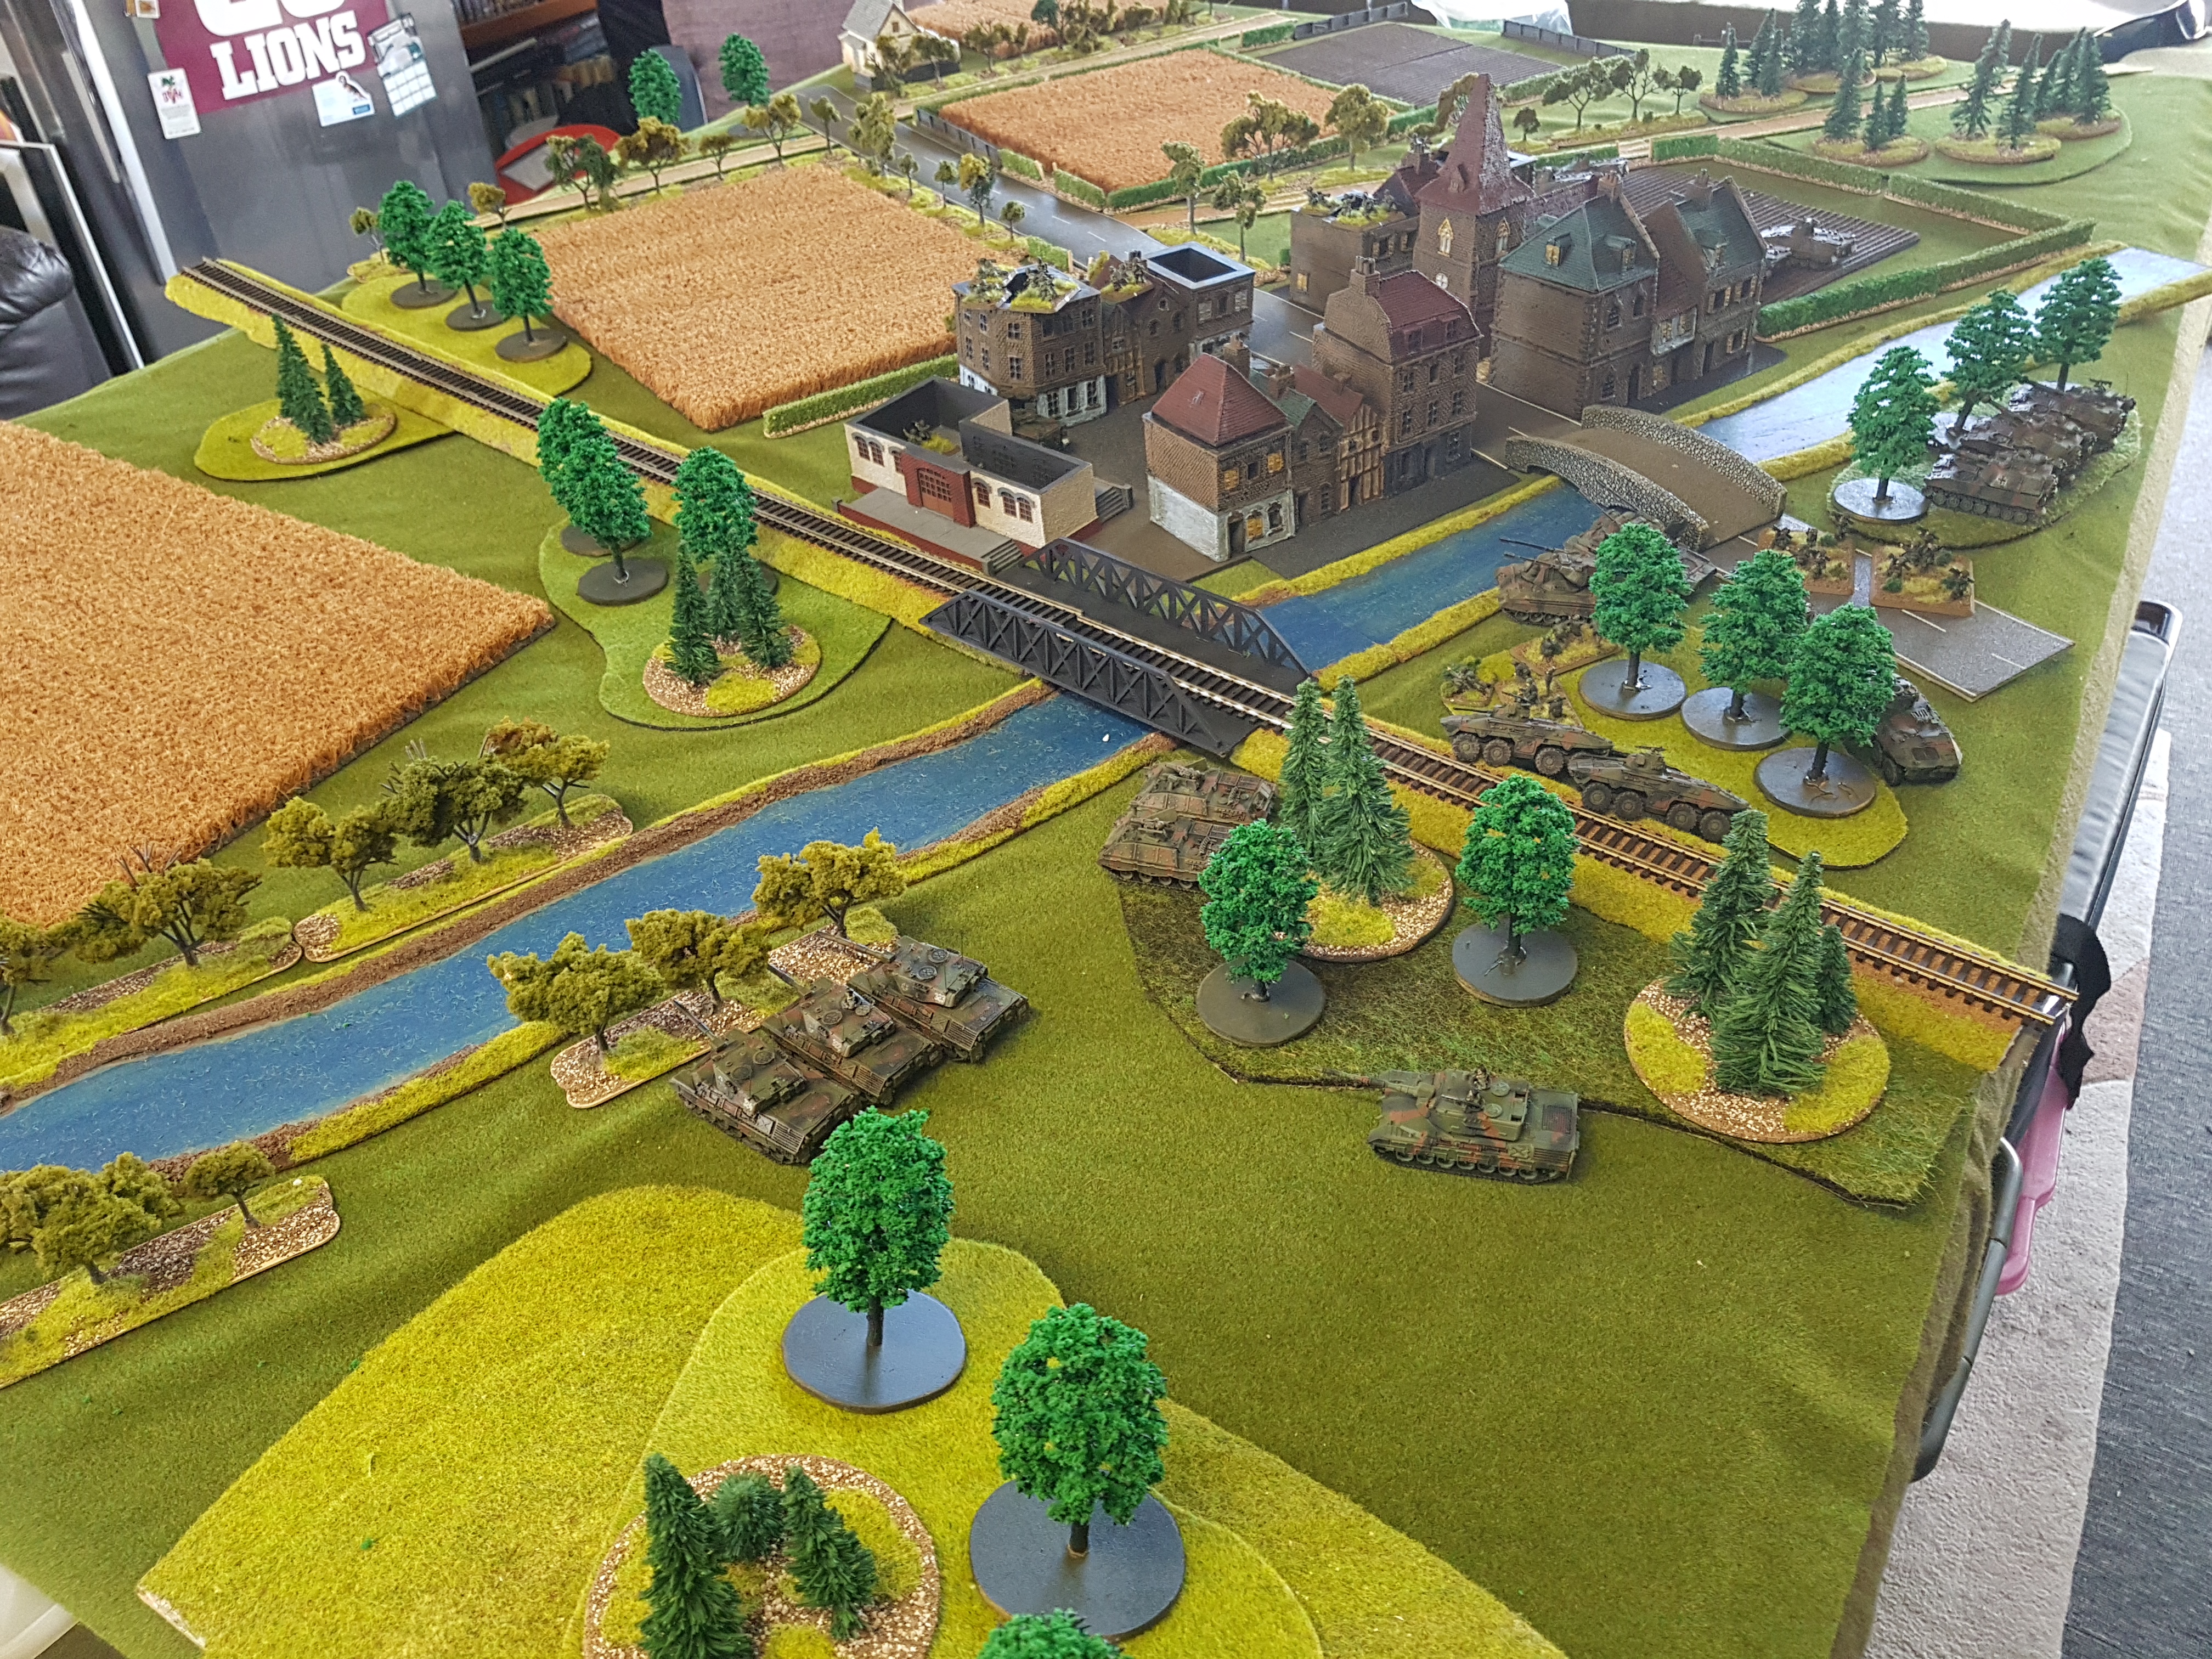 Defenders deployment of the bridges. Tanks and tank-hunters defending the rail bridge. A panzergrenadier company in the village with their Marders in the fields to the side and artillery occupying the forest to the rear of the village.
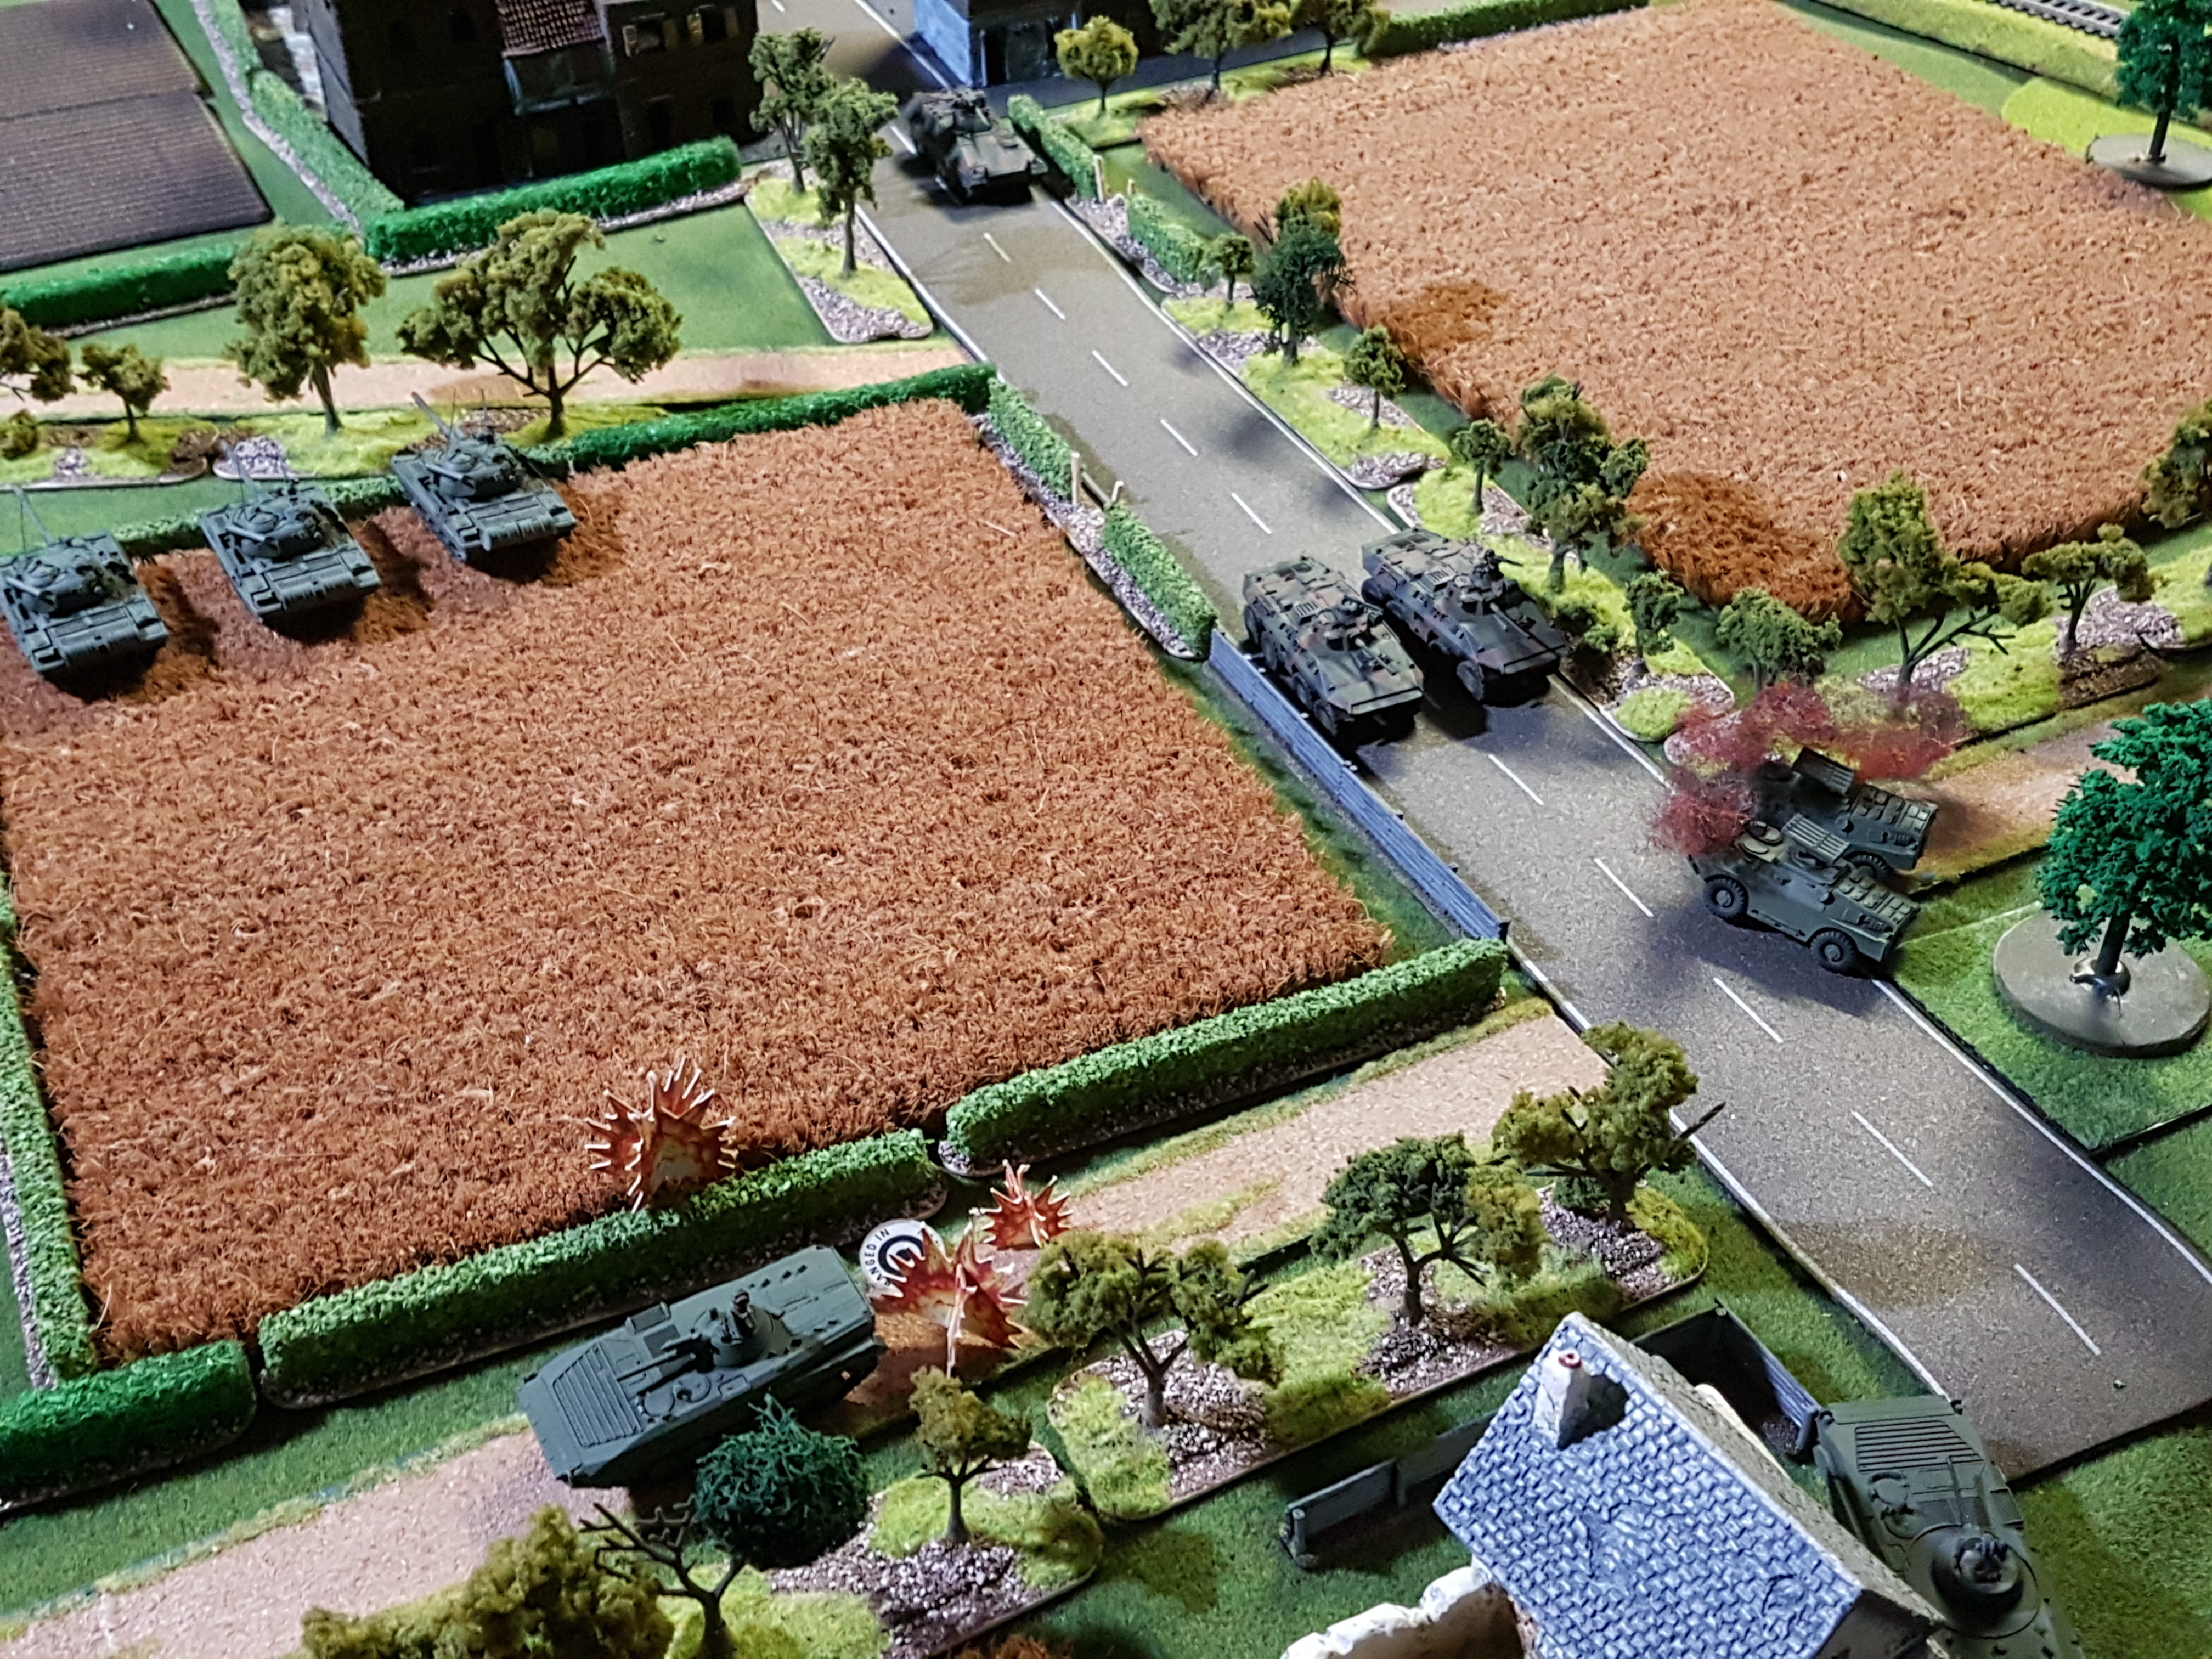
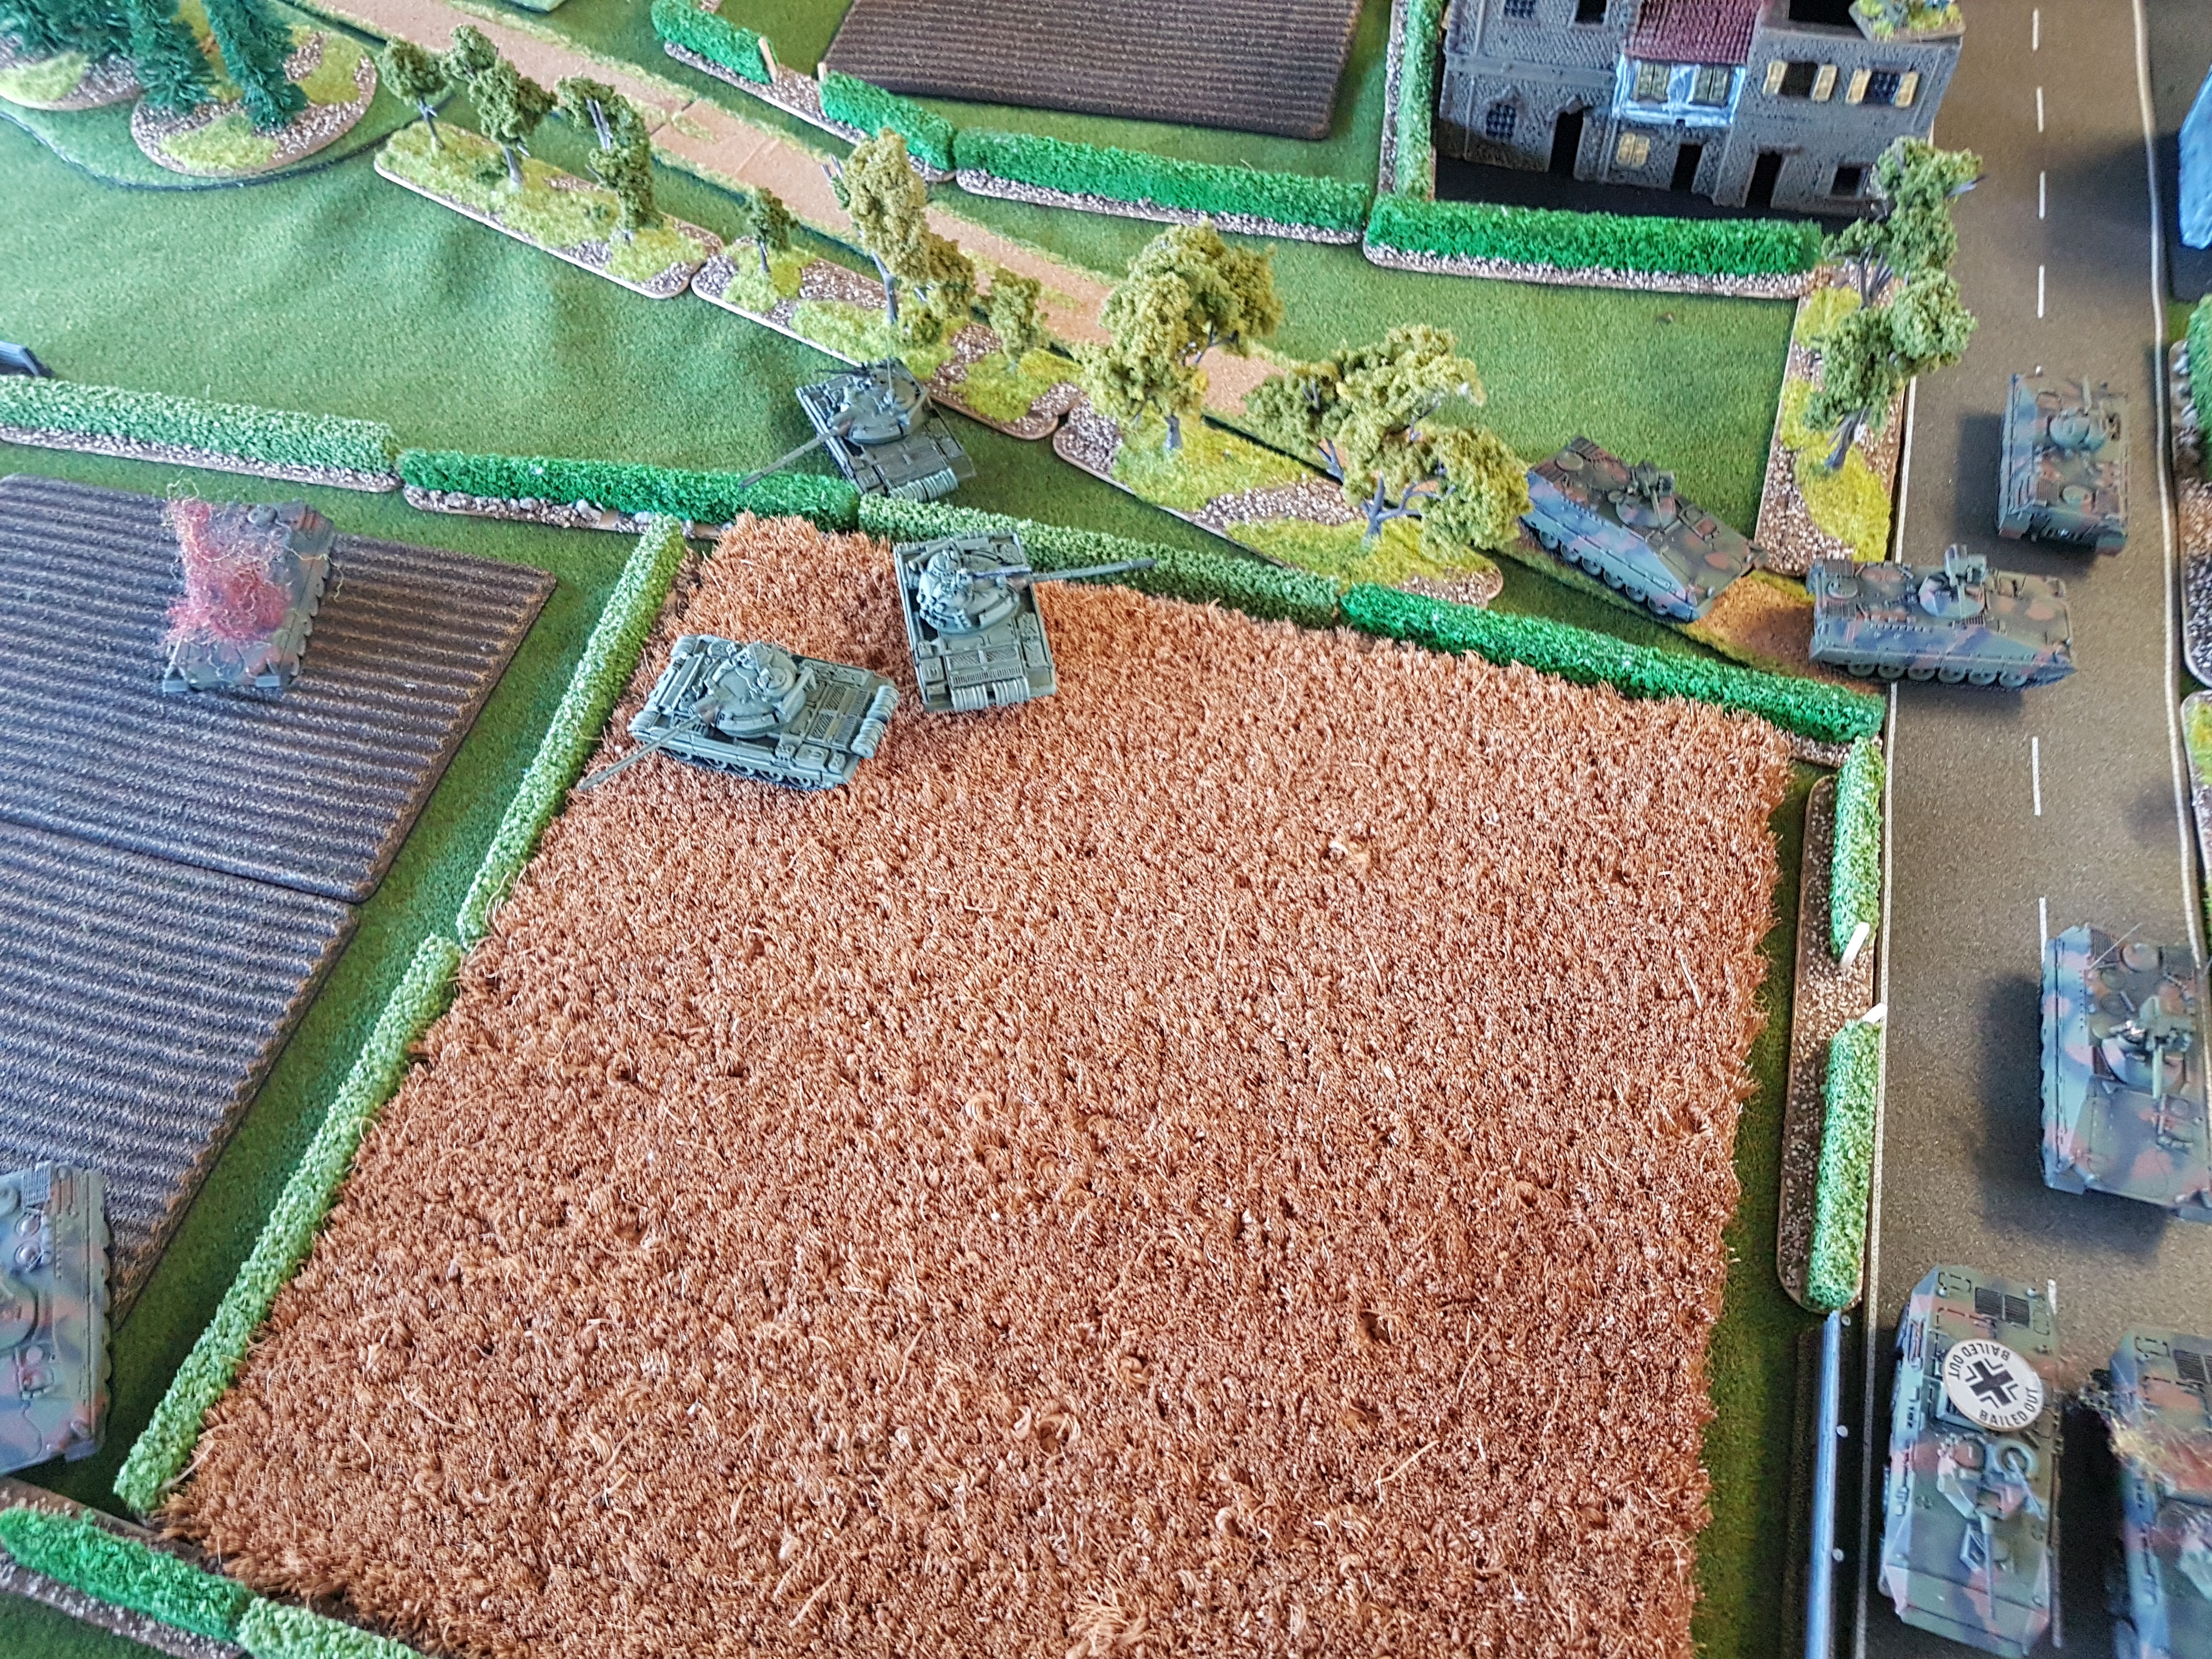
 The gallant heroes of the revolution advance with a reinforced tank and BMP2 force through the fields with ATGW covering down the train line and air defense in over watch.
 2S1s set up position in a field covered by a tree line while a small company of T55s and anti-tank Spandels cover down the road.
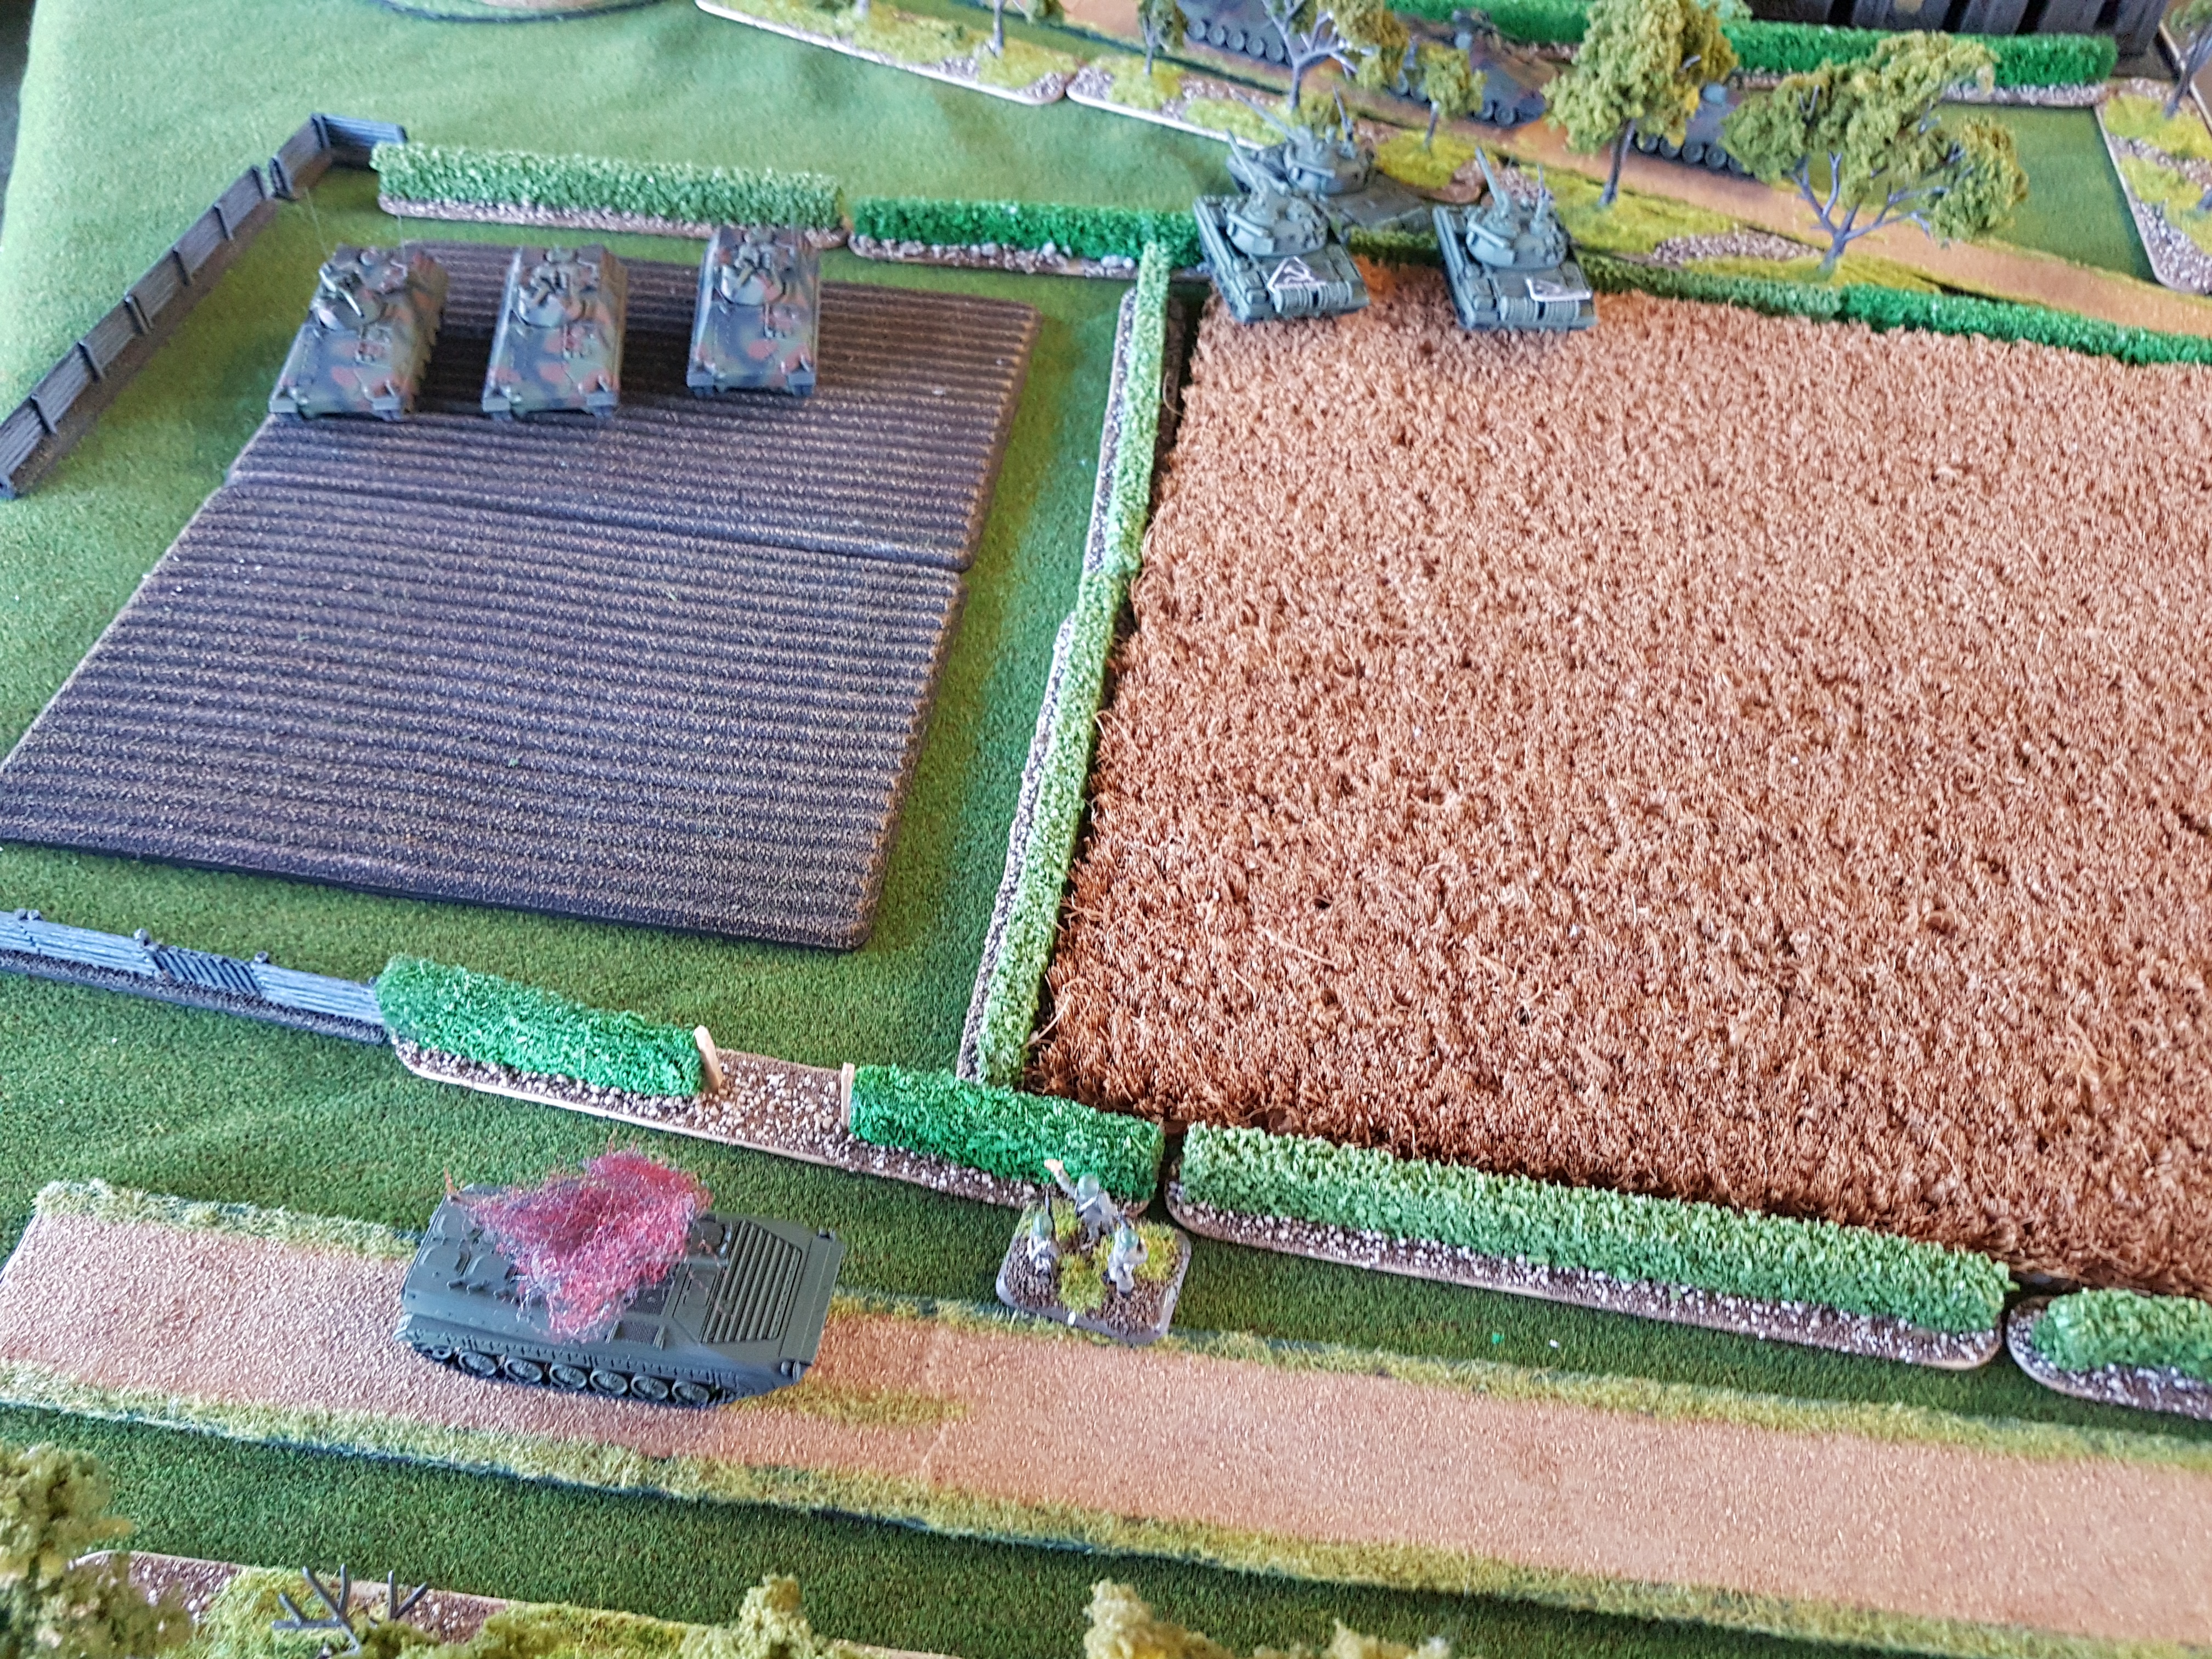
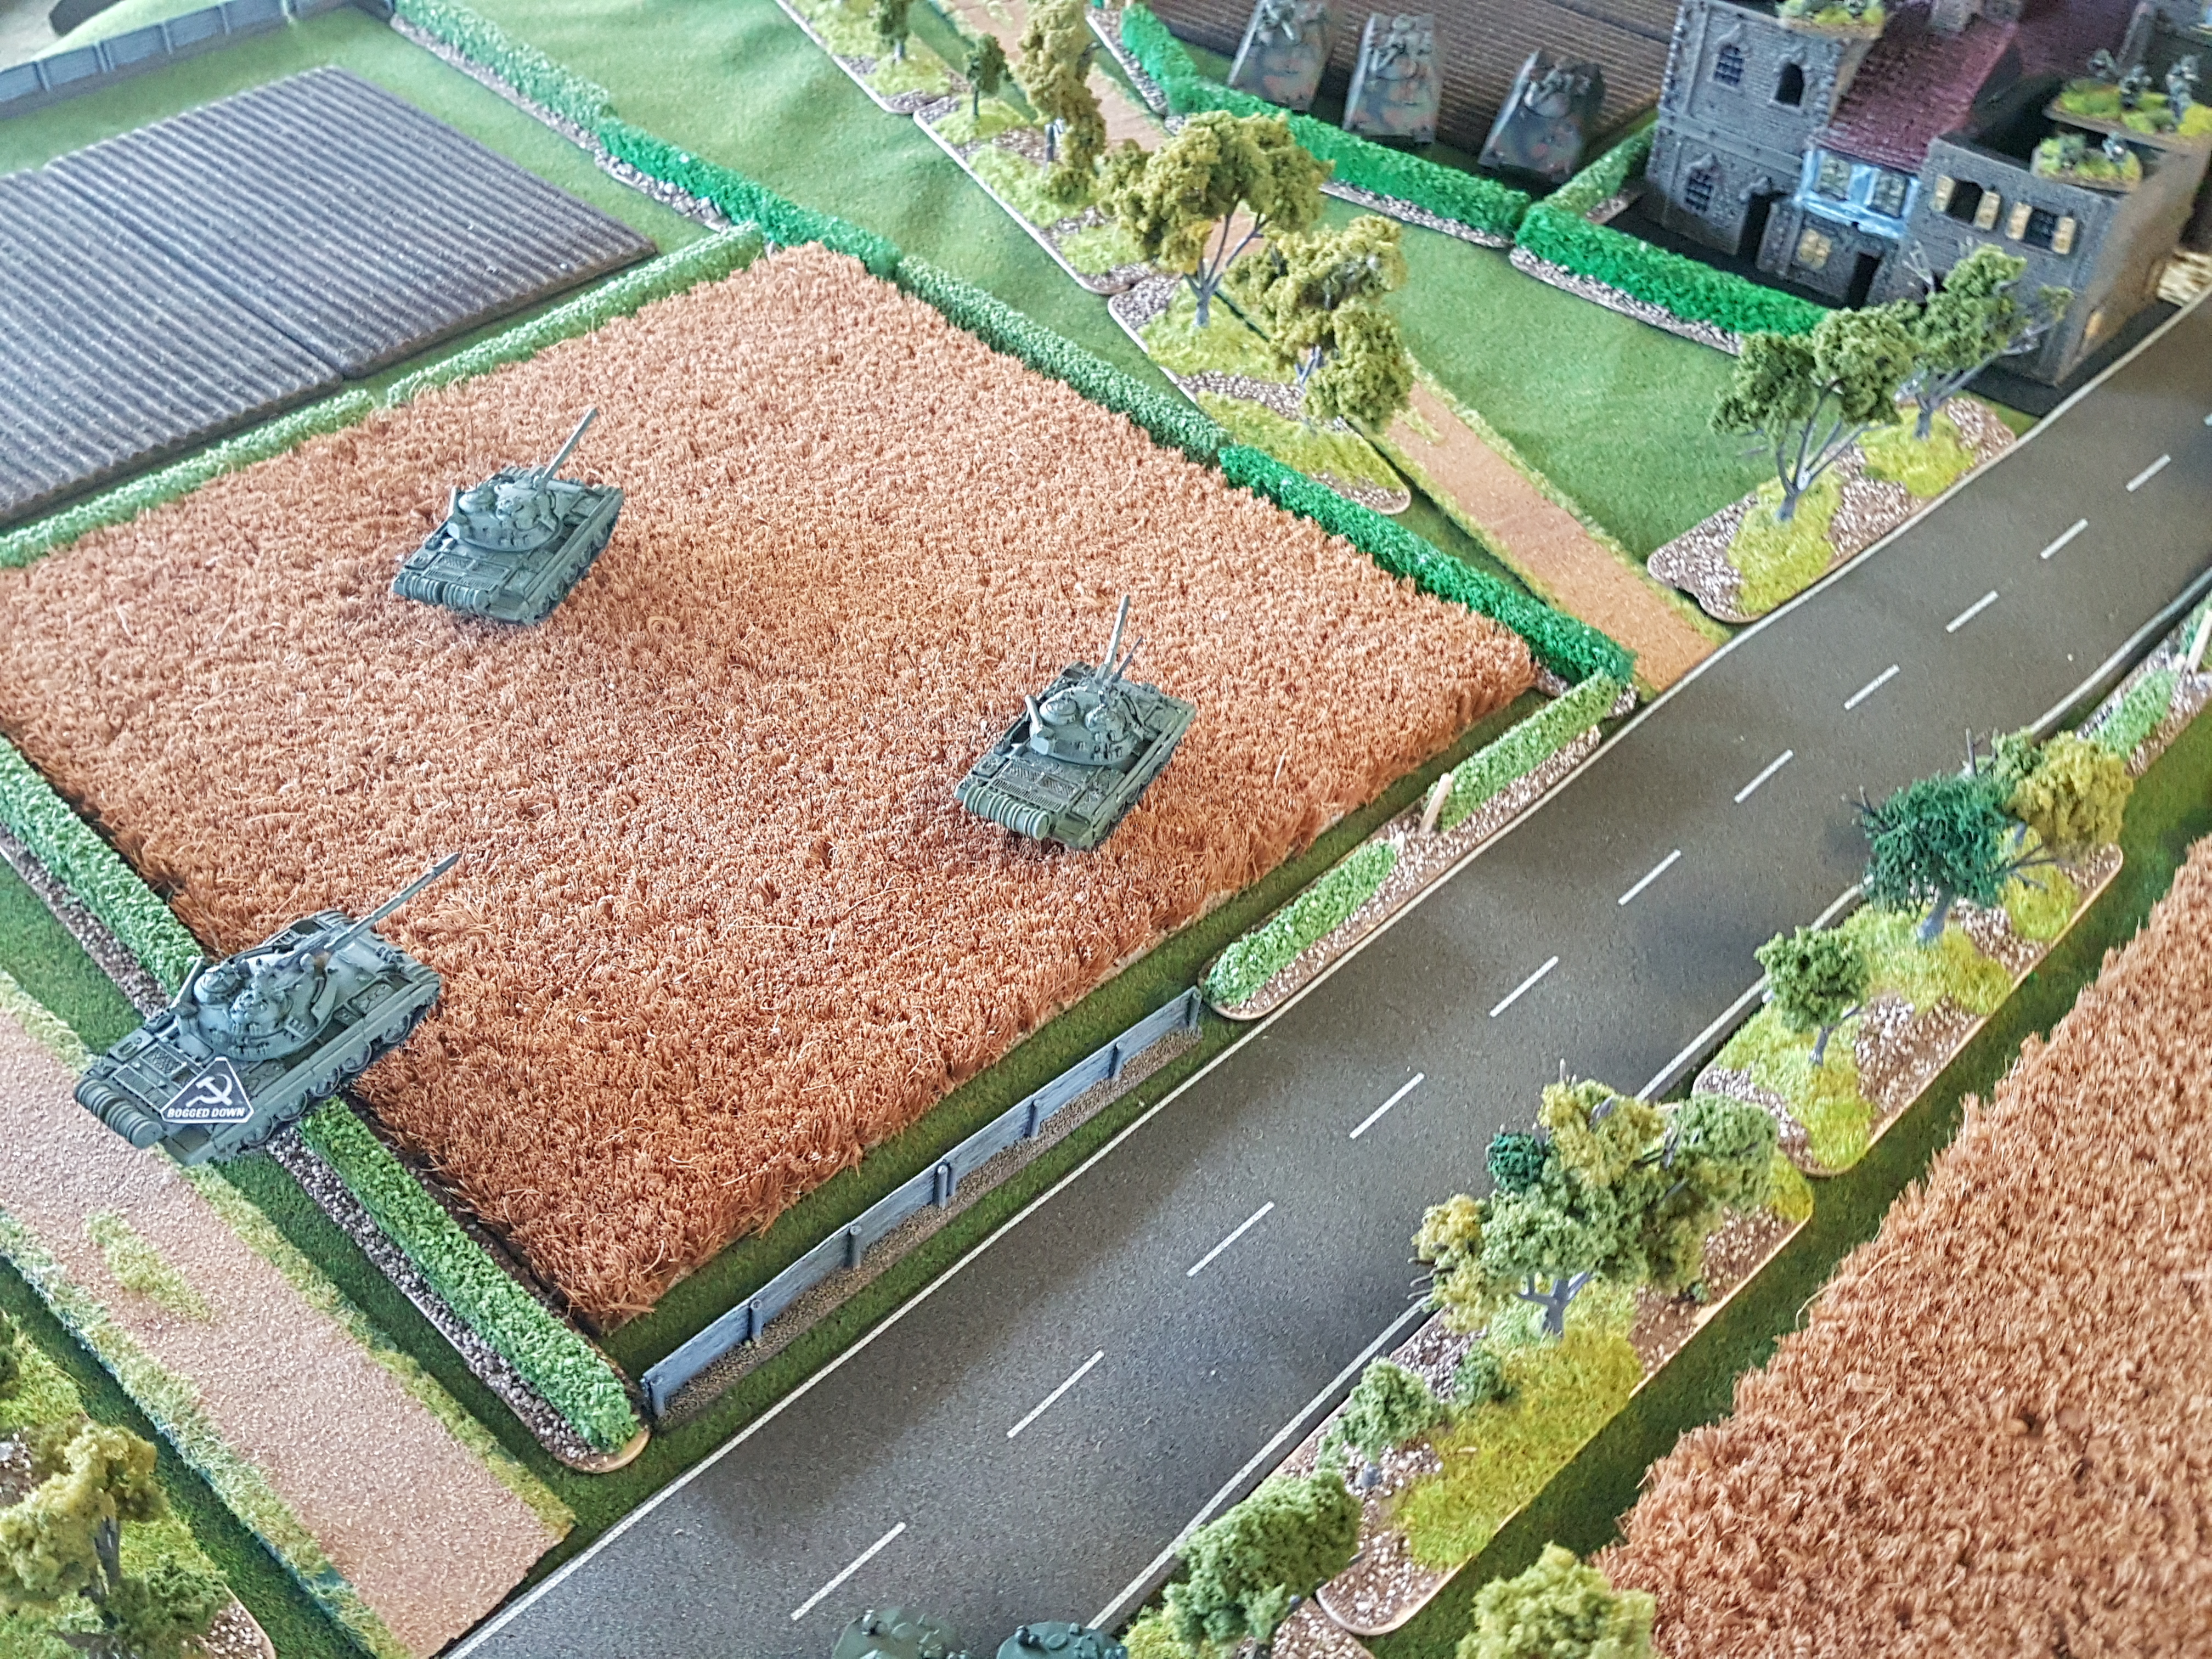 The left flank advances as well; however one of the drivers fails to take the crossing properly and gets caught up on the hedge around the field.
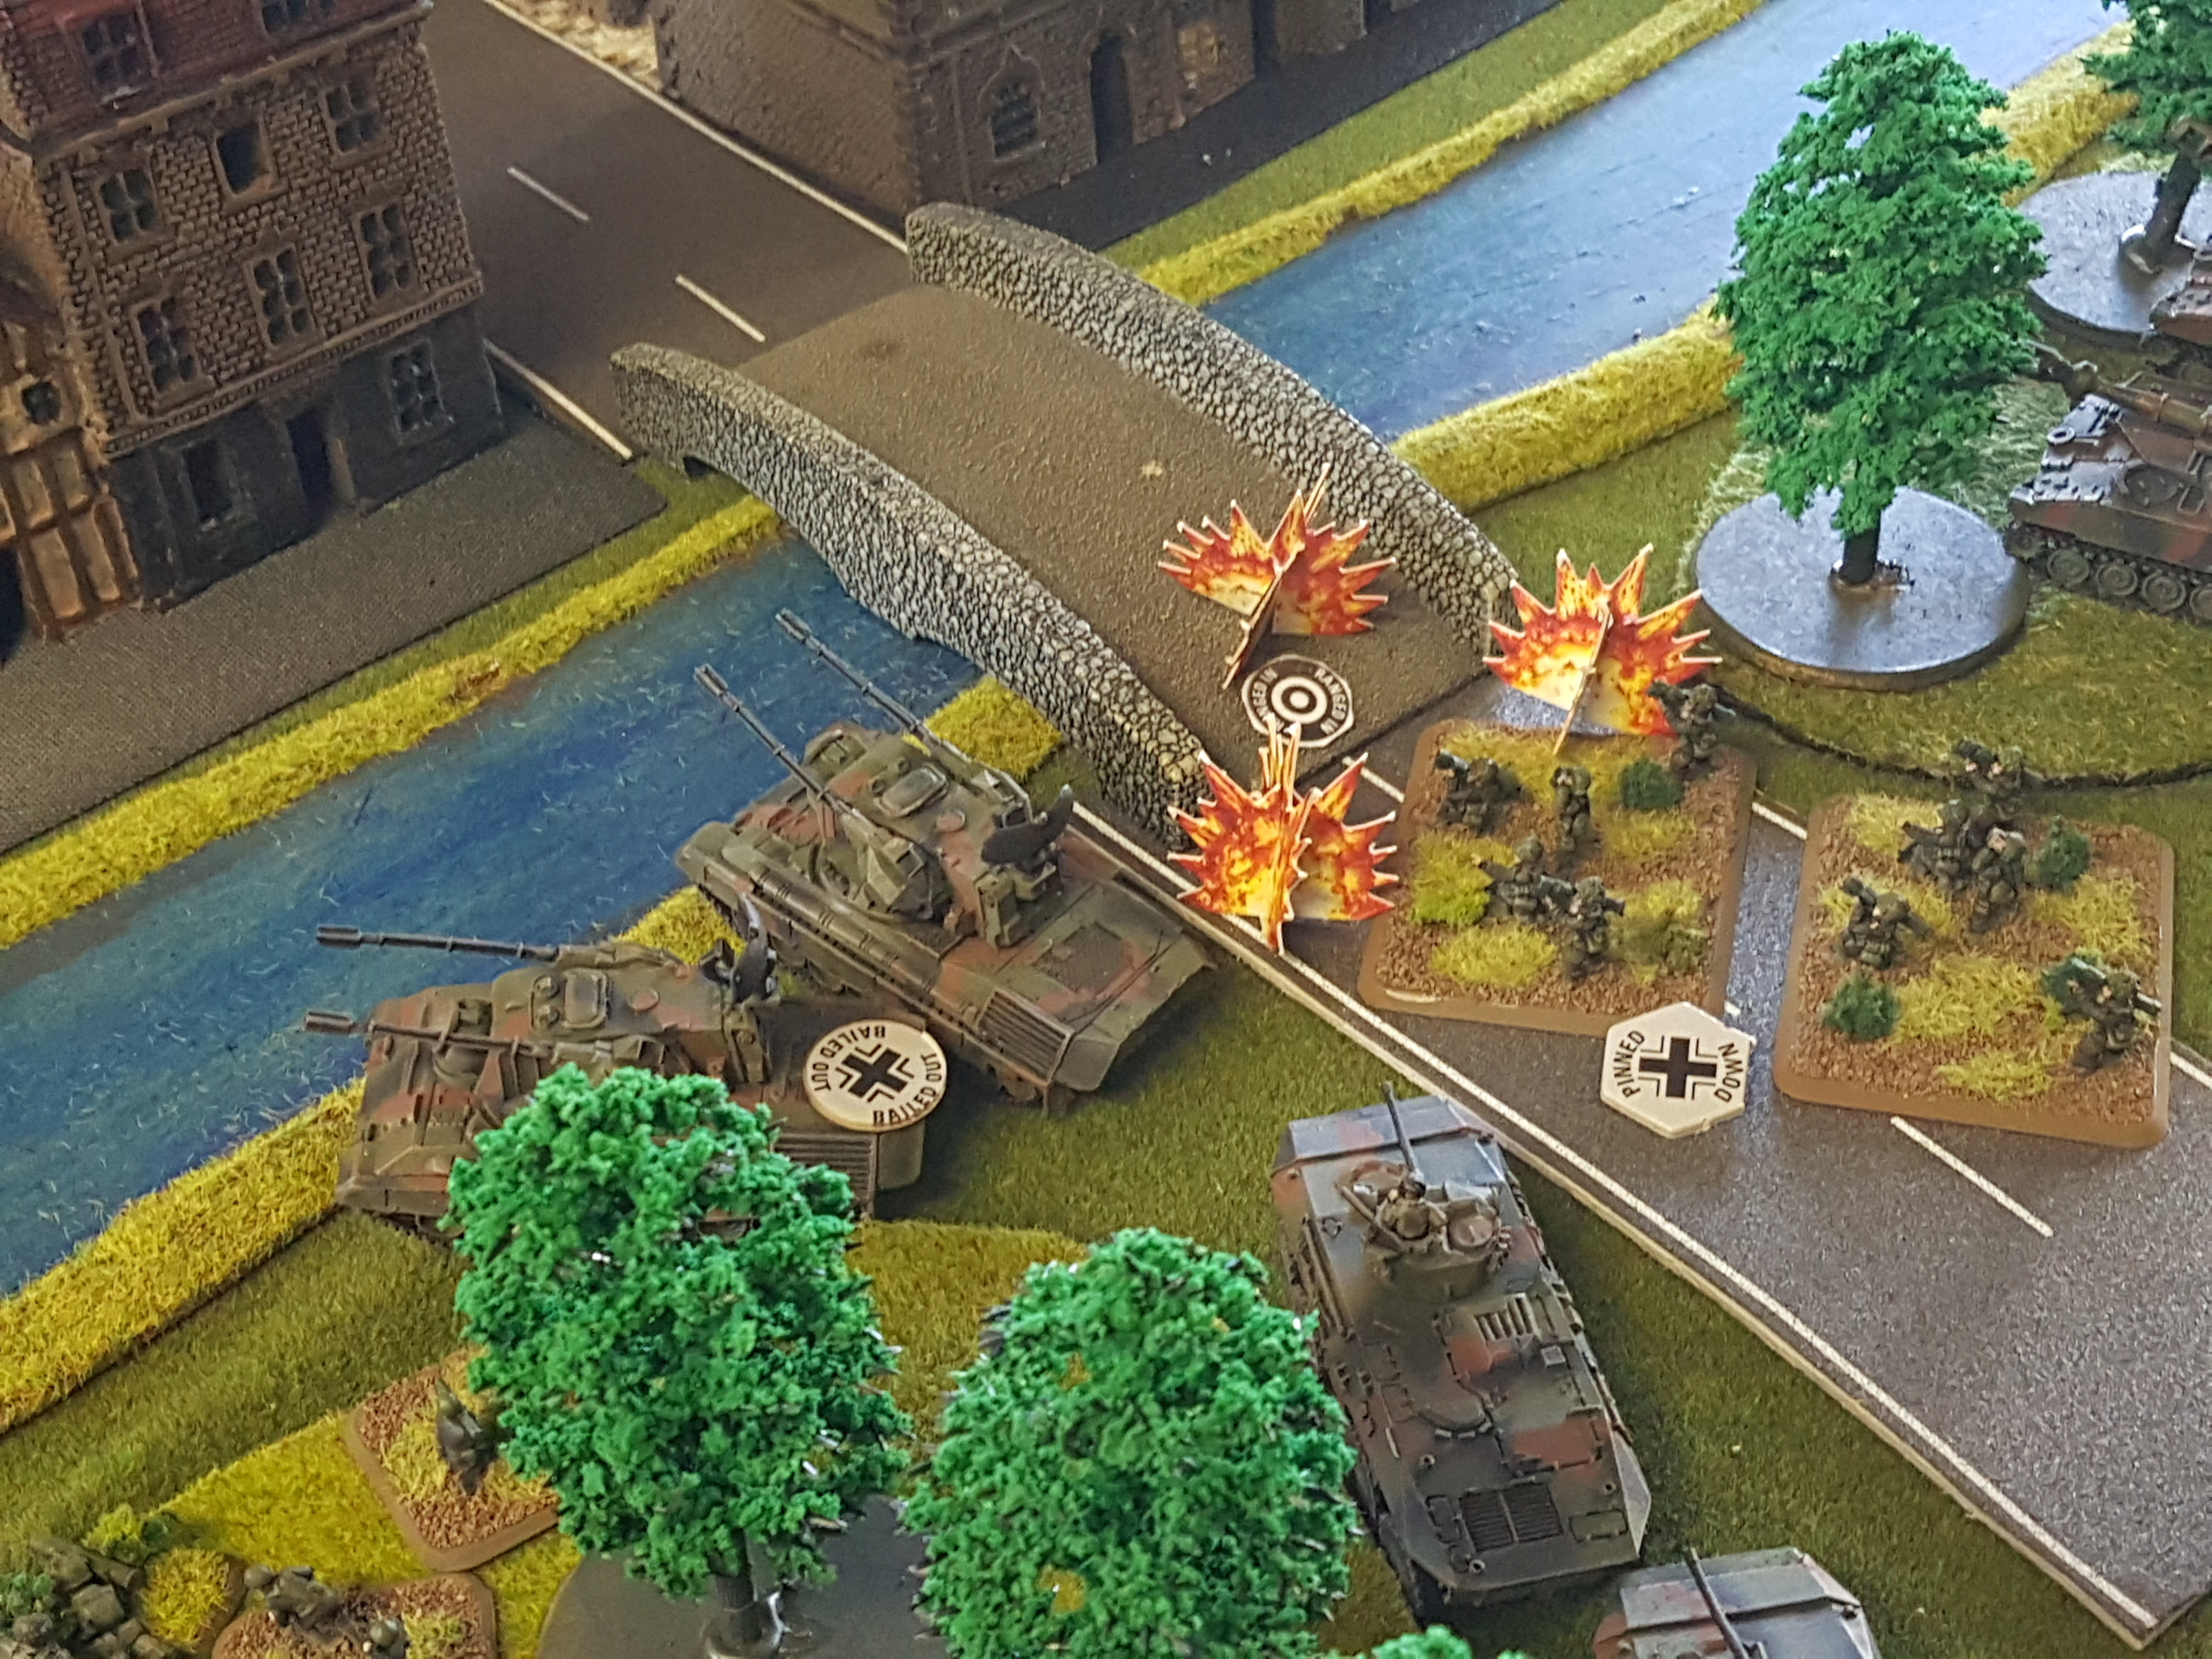 The observer seeing the air defense on the bridge and calls in artillery on them, pinning the Redeye teams and forcing a Gepard team to bail. The Spandrel ATGW covering down the train line see a Luch patrol and try to engage them but the wires get caught up in the trees.
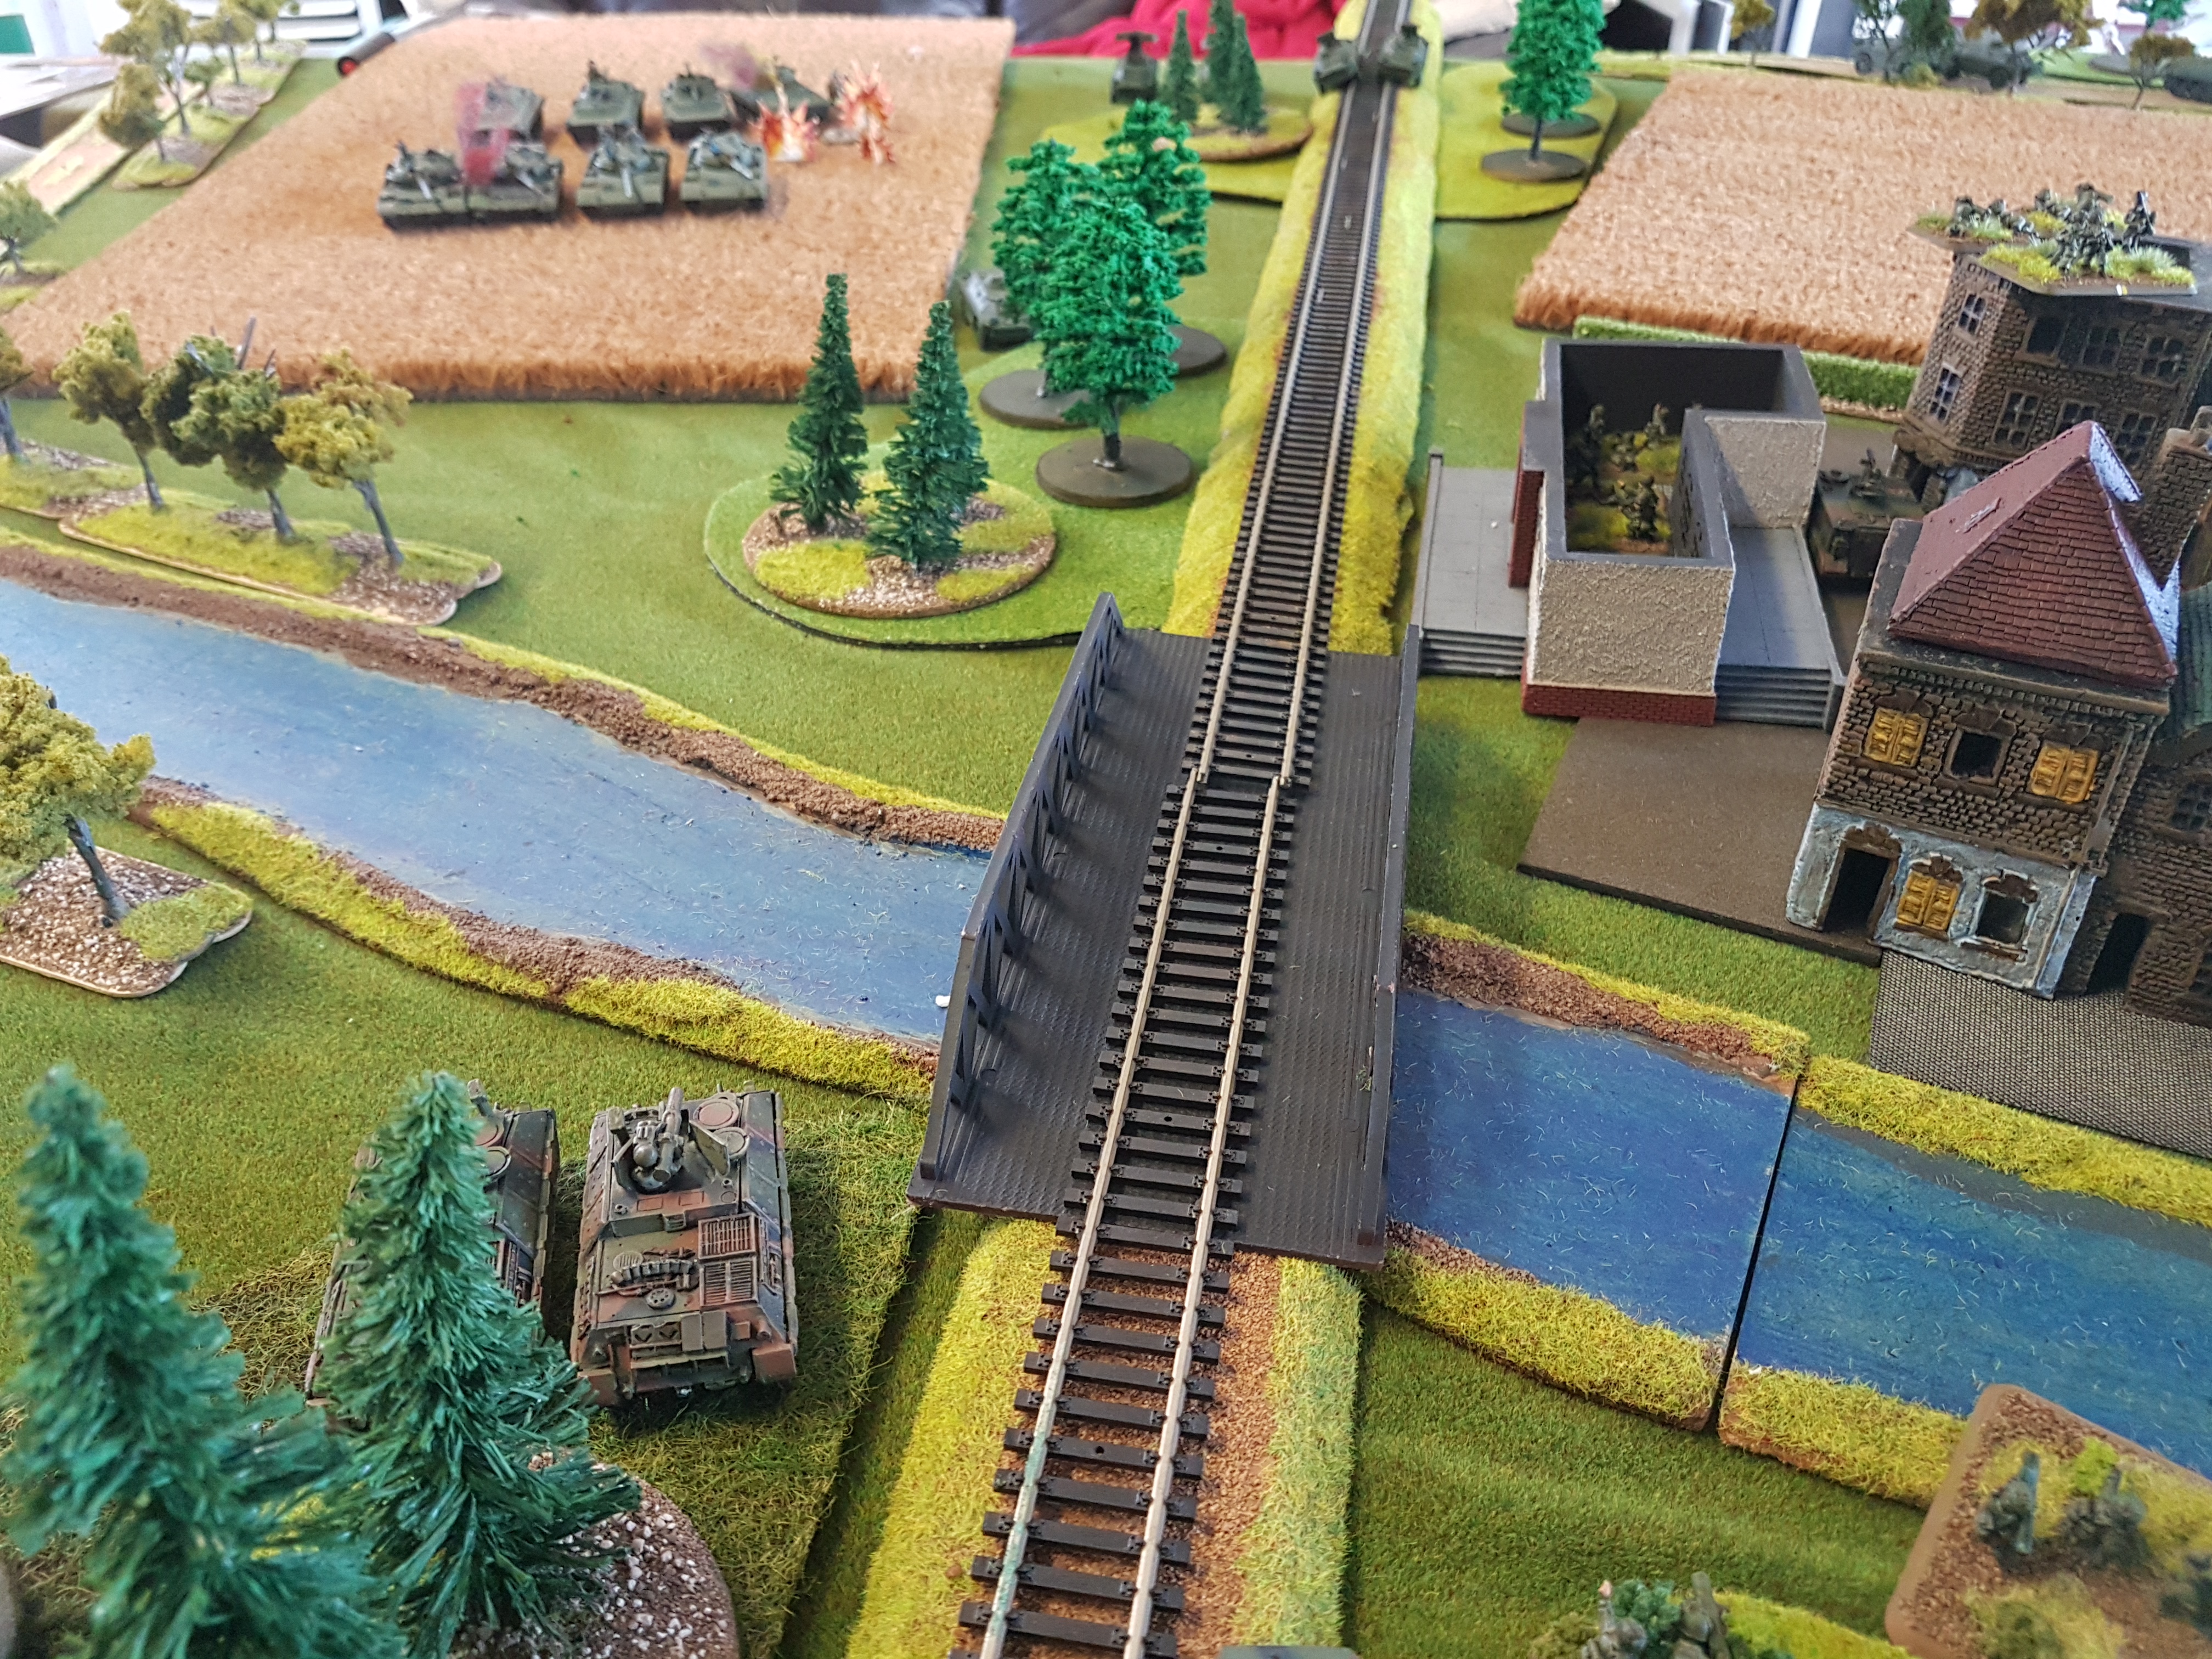 The panzerjagers in the trees engage and destroy a T55 while artillery falls on the BMPs destroying one. Luckily one of the occupants survived.
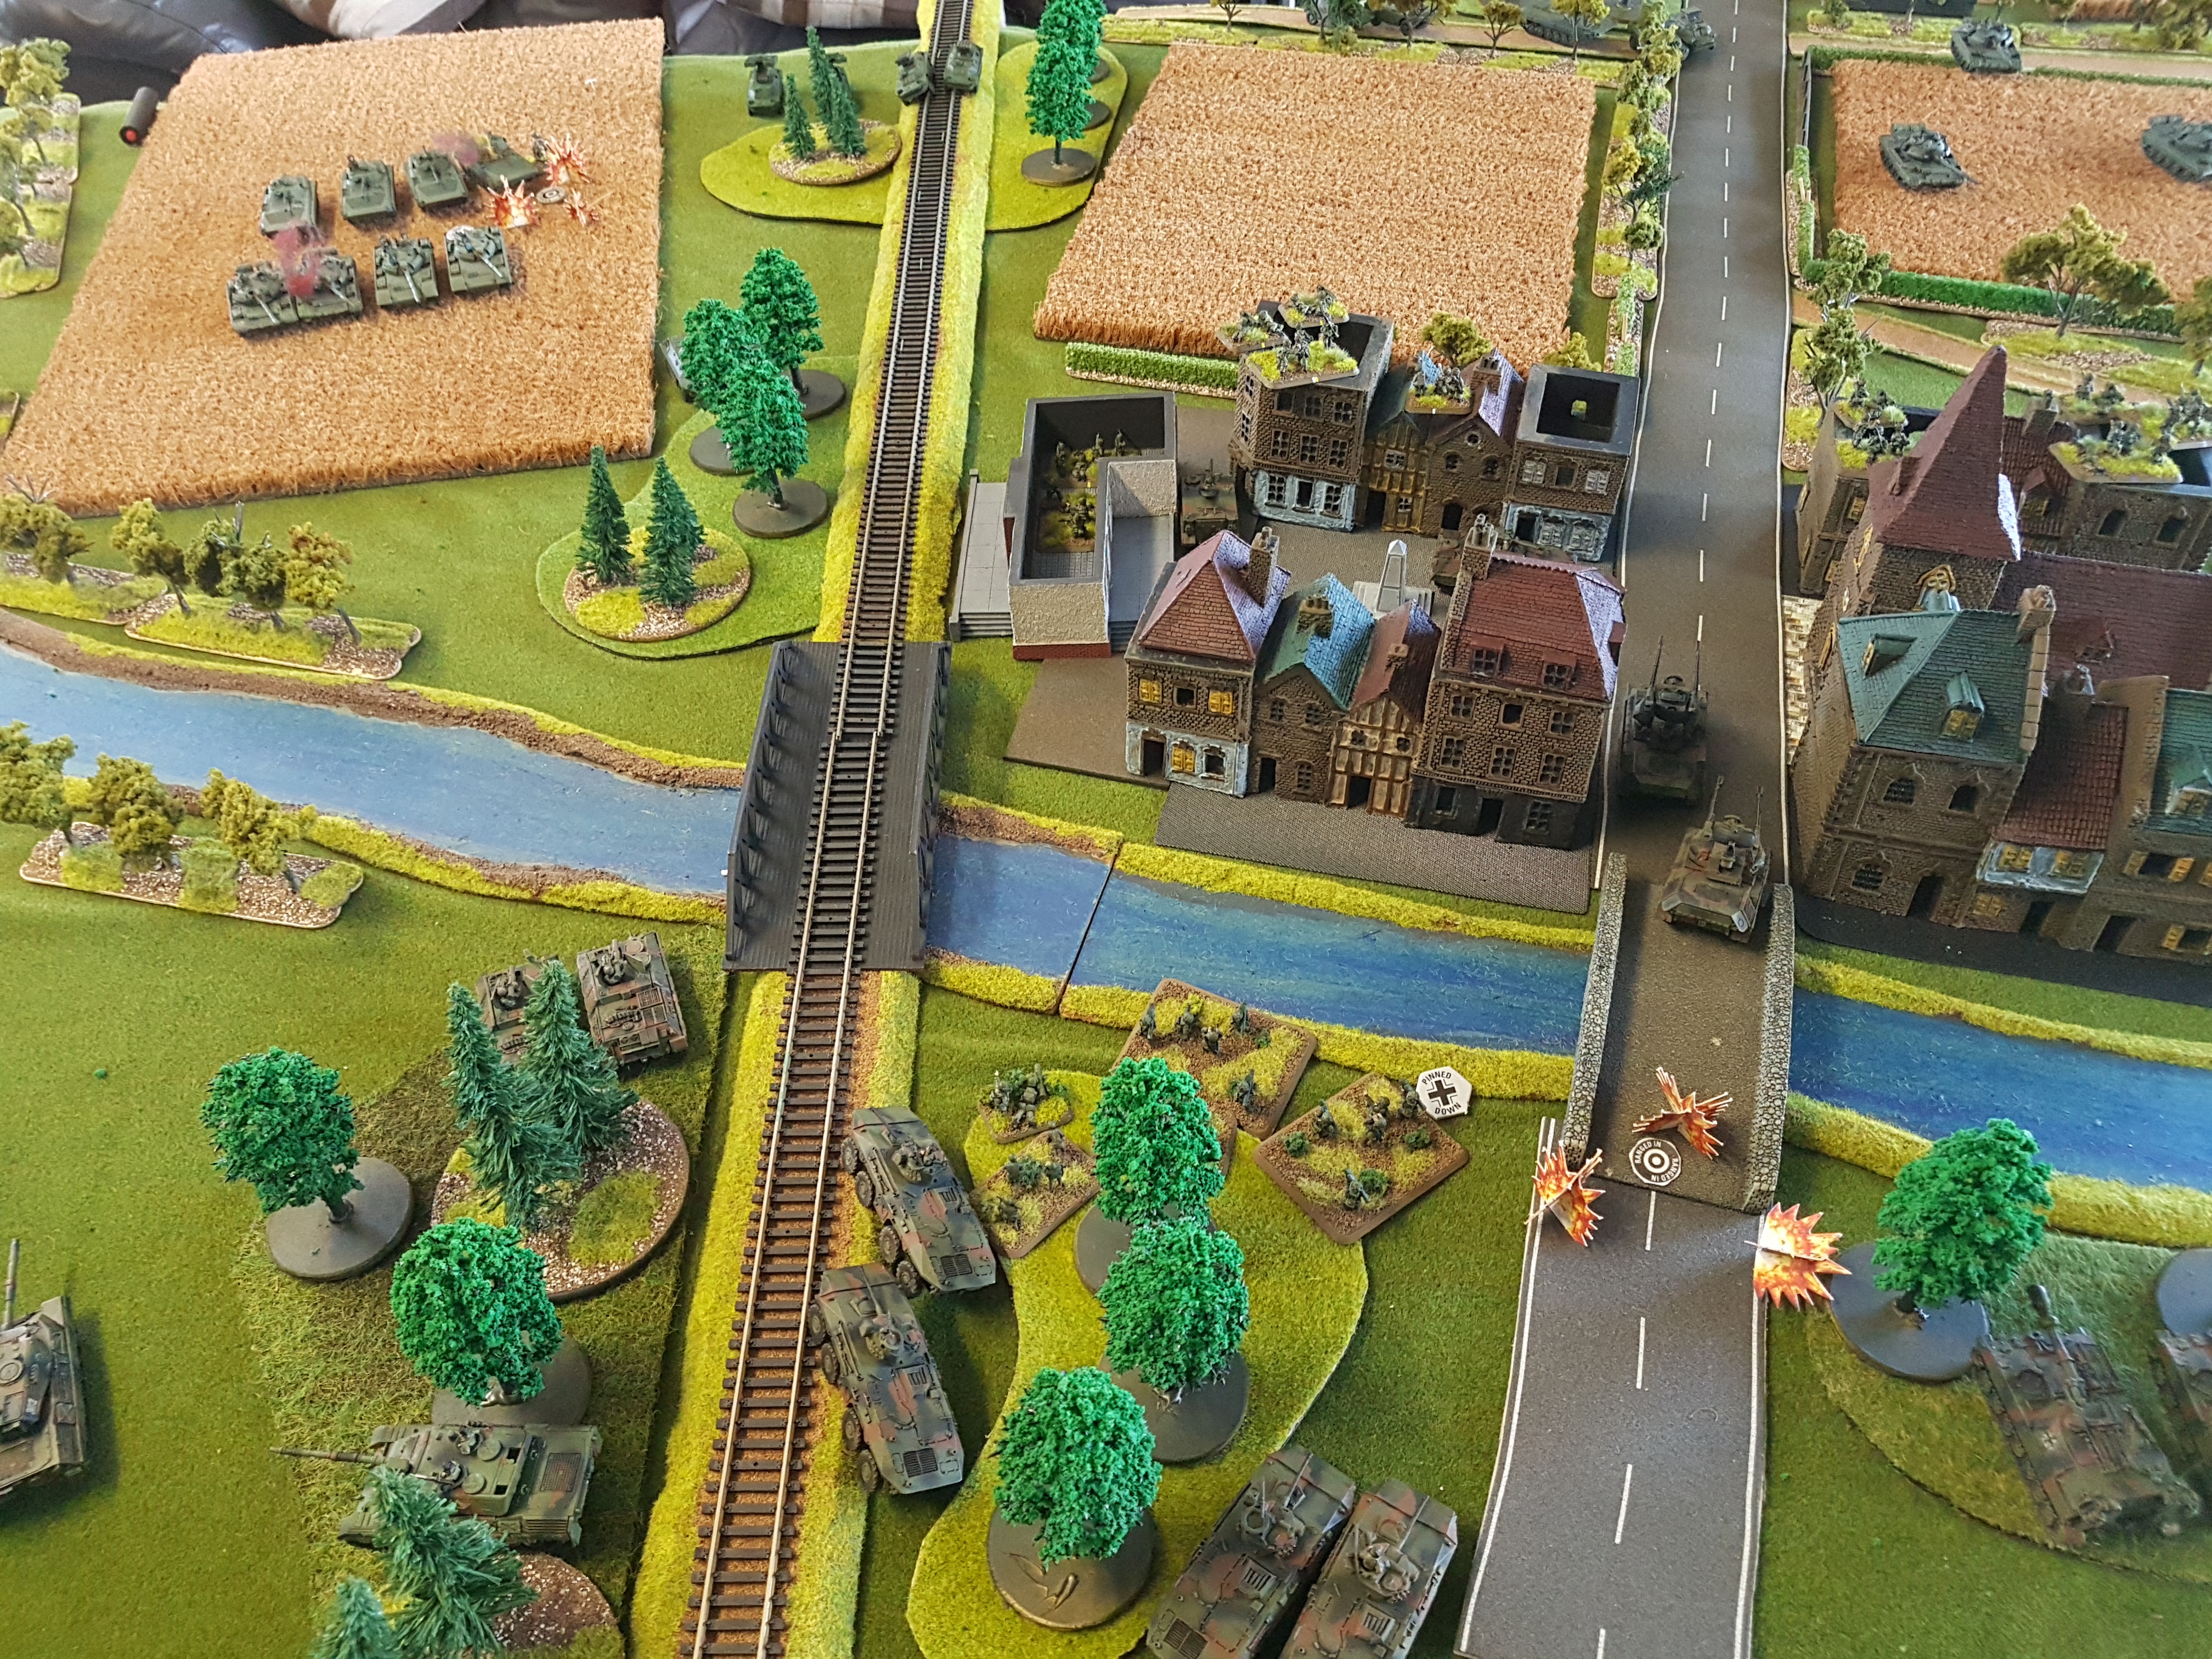 ATGW missile fire came from the village towards our gallant troops but failed to hit anything. The air defense unit defending the bridges was seen moving forward out from under the artillery barrage.
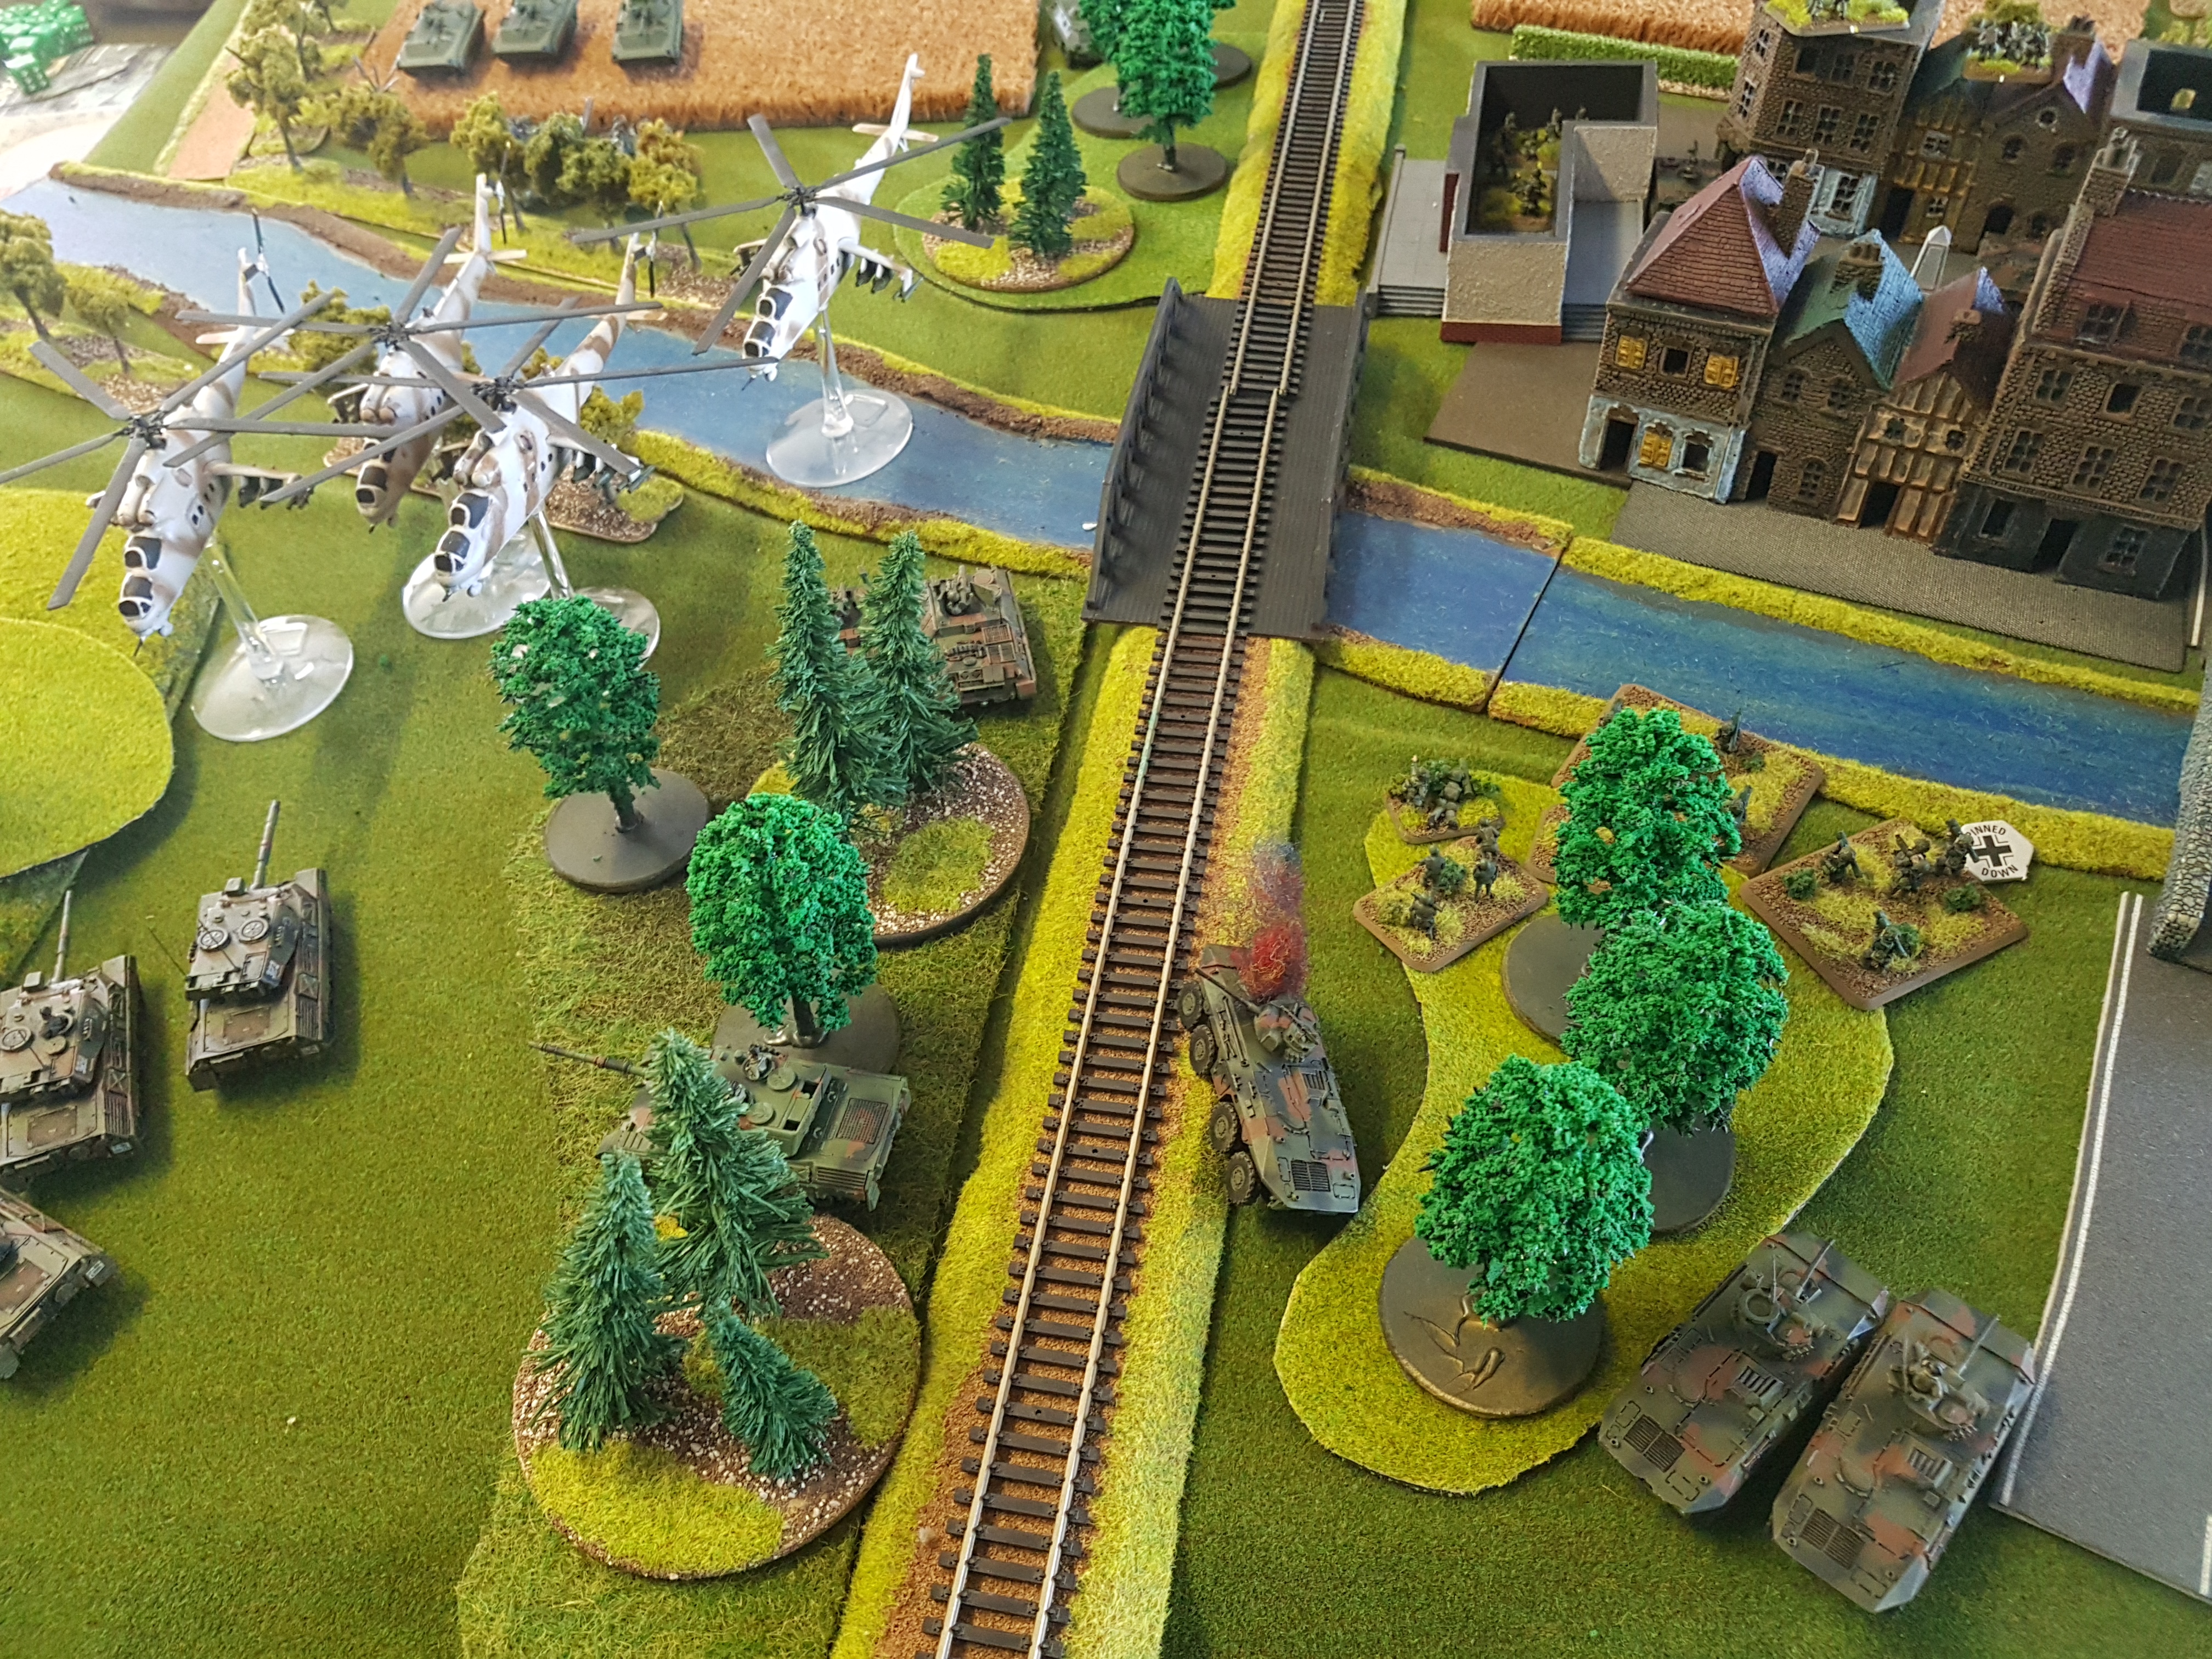 With the air defence moving the Mi-24s swooped in and engaged the Leopard 1s, however they were too eager for their first kill and flew too close to use their missiles. The Panzerabwehr unit again engage the Luchs this time destroying one which makes the other decide it has better places to be and leaves the battle field.
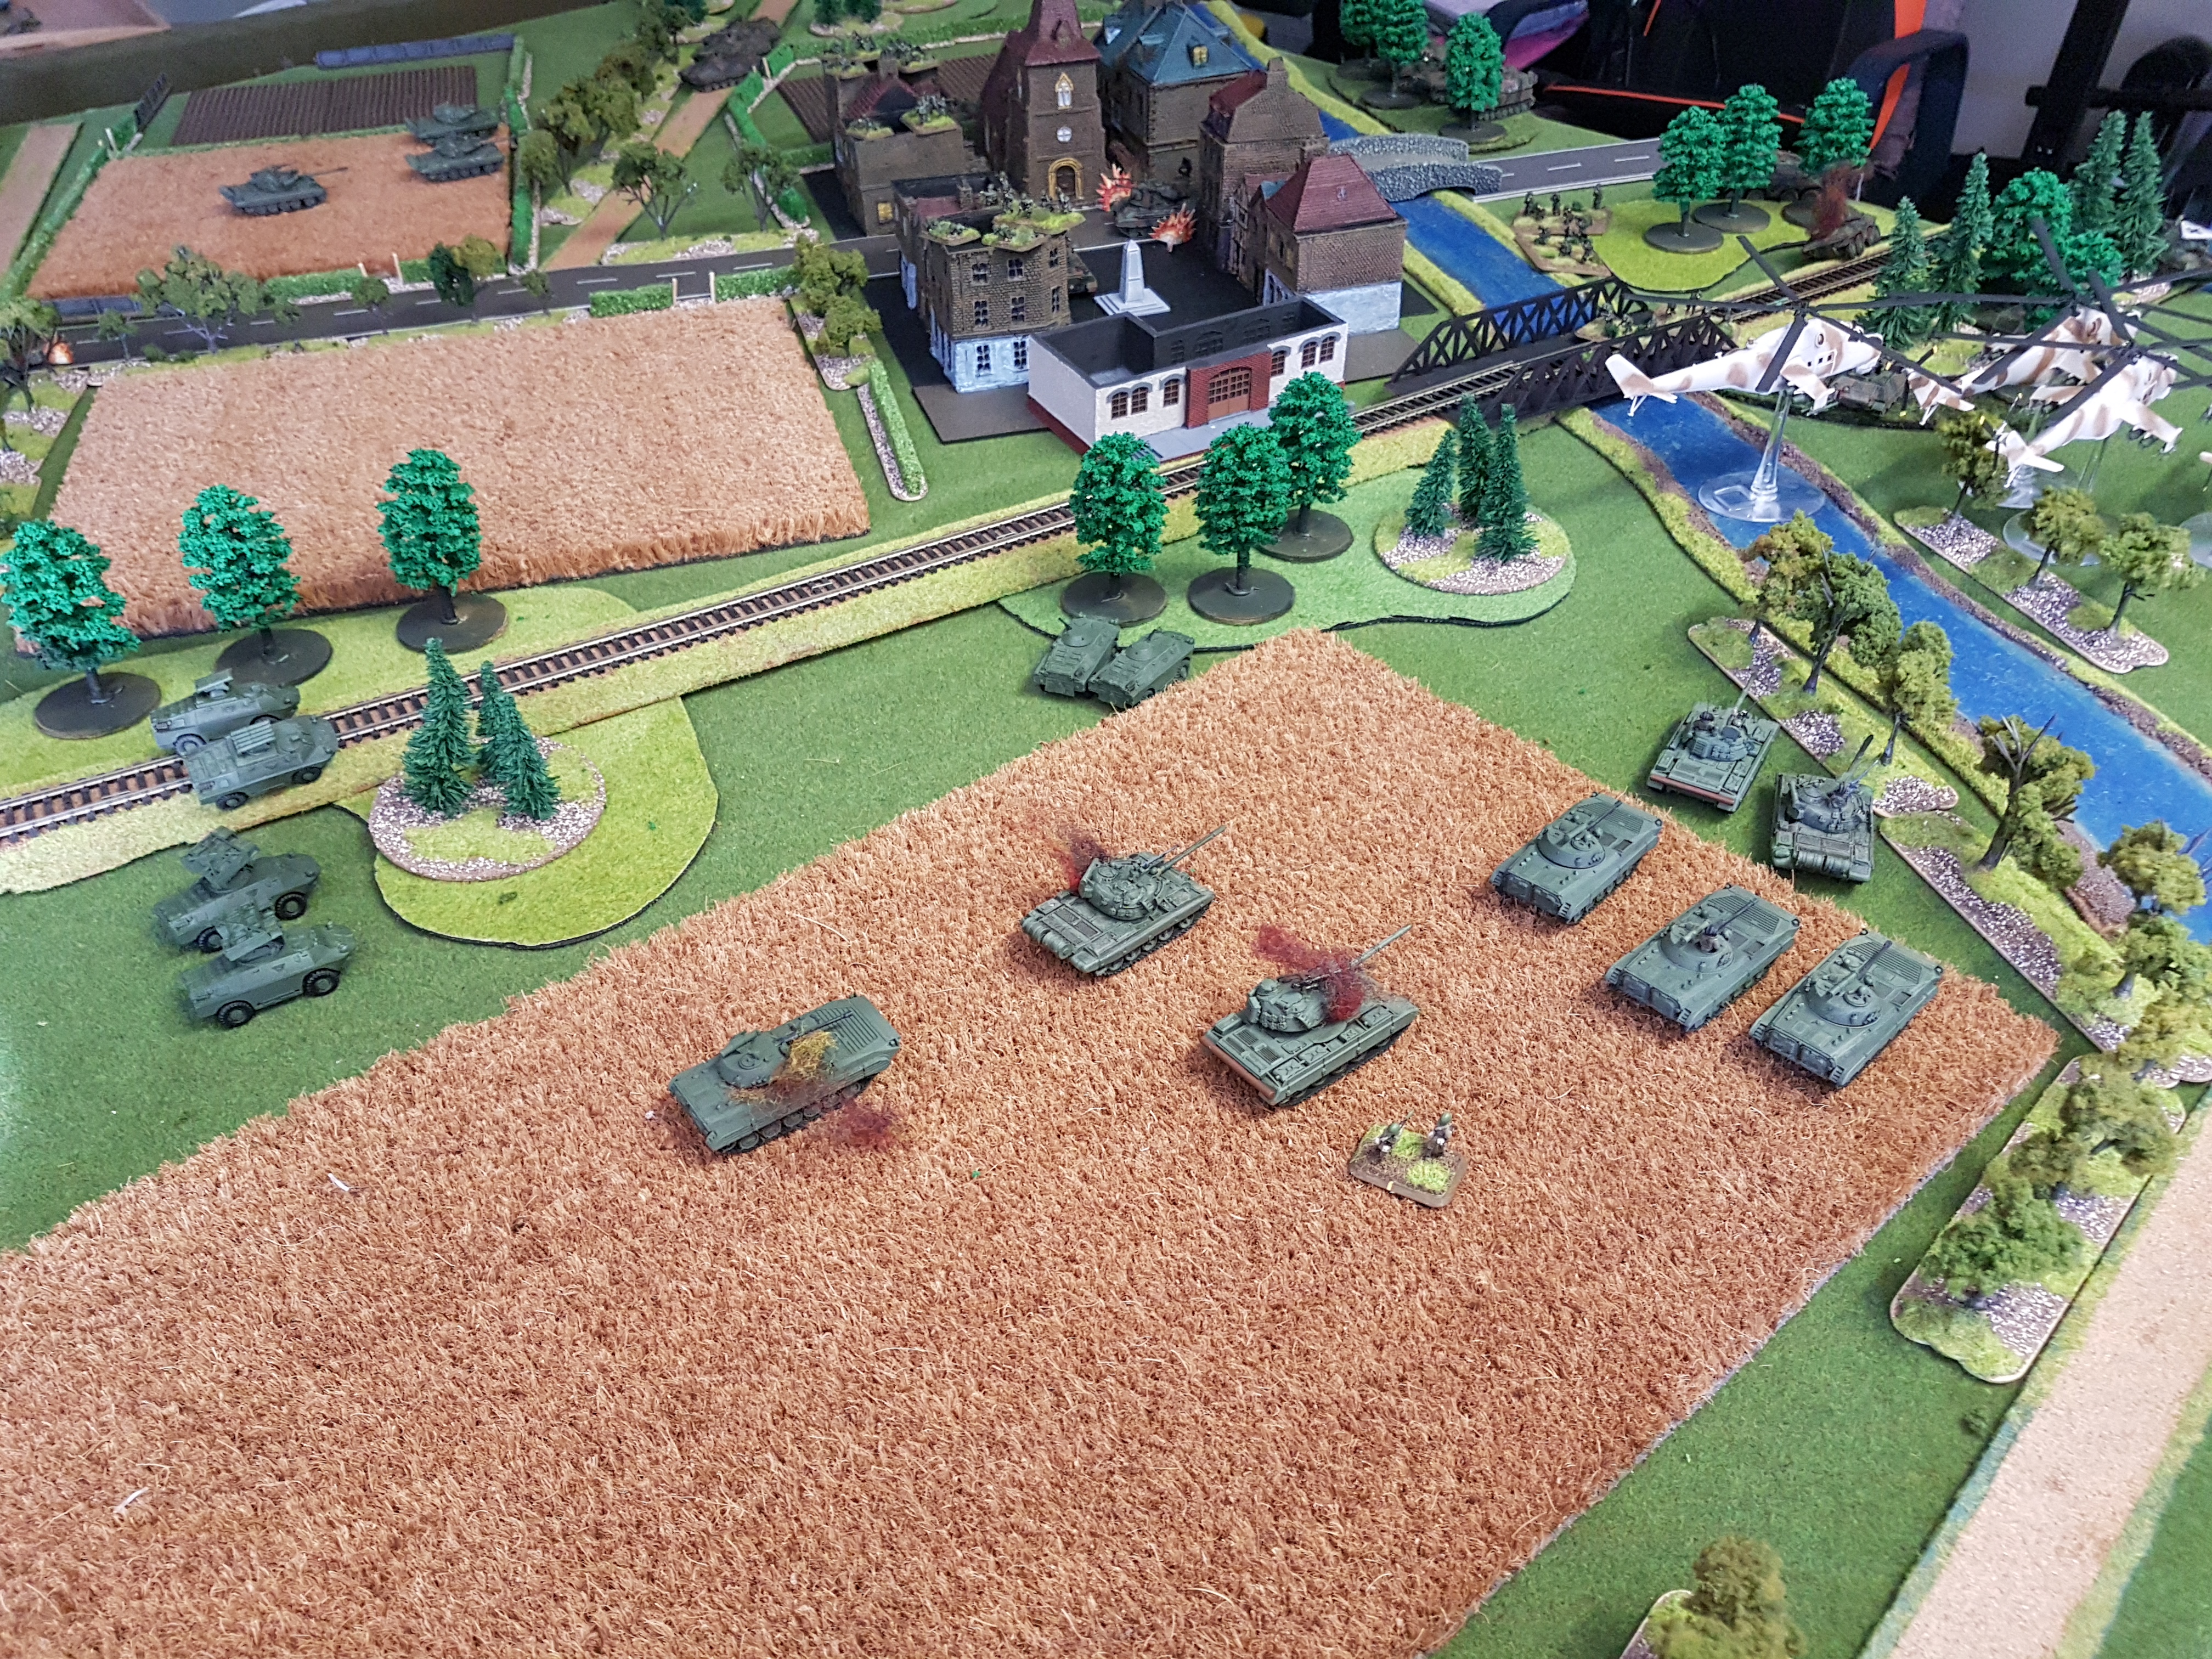 The T55s and BMPs continue their advance through the field using the tree line as cover. The observer sees the enemy Gepards and calls in artillery on them, destroying one which makes the other flee the battlefield. On the left flank the T55s continue to advance while covered by the Spandrels.
 In response the capitalist swine move a small infantry platoon forward and occupy the rail bridge, while their Leopard 1 platoon move back into the tree line waiting for the gallant heroes of the revolution that they know are coming.
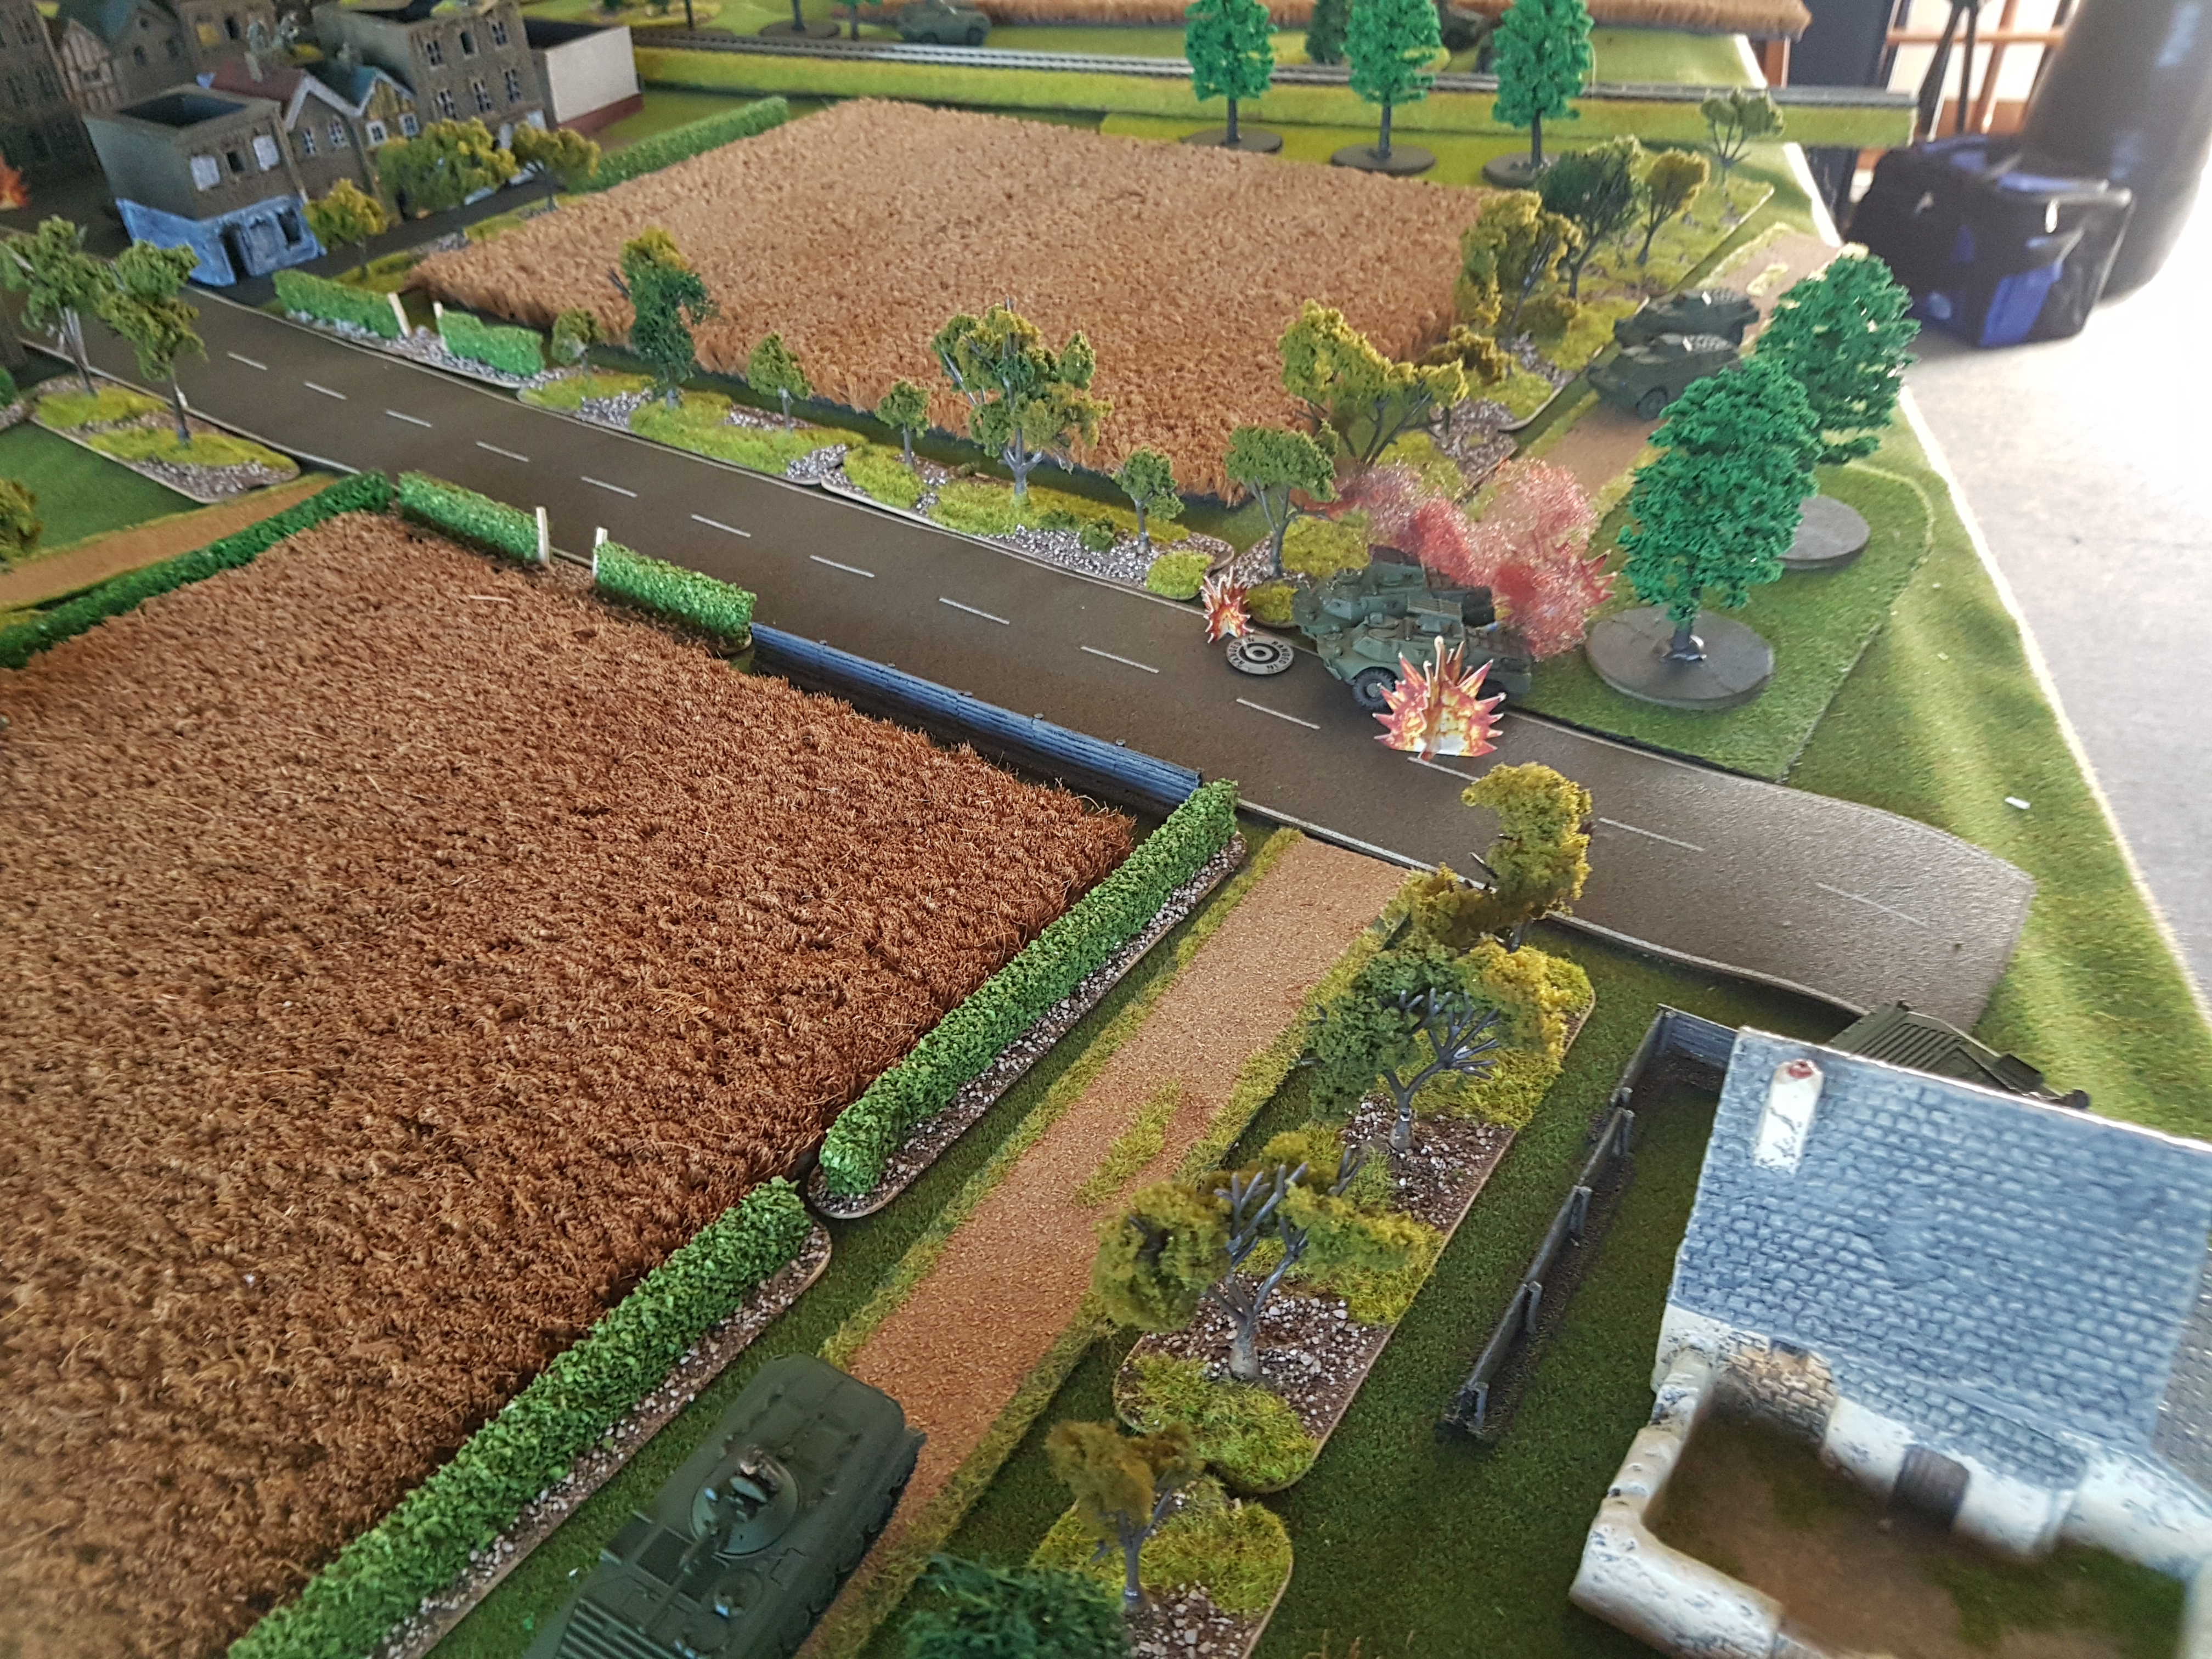 While the troops that have occupied the village call in an artillery strike on the Spandrels destroying them both.
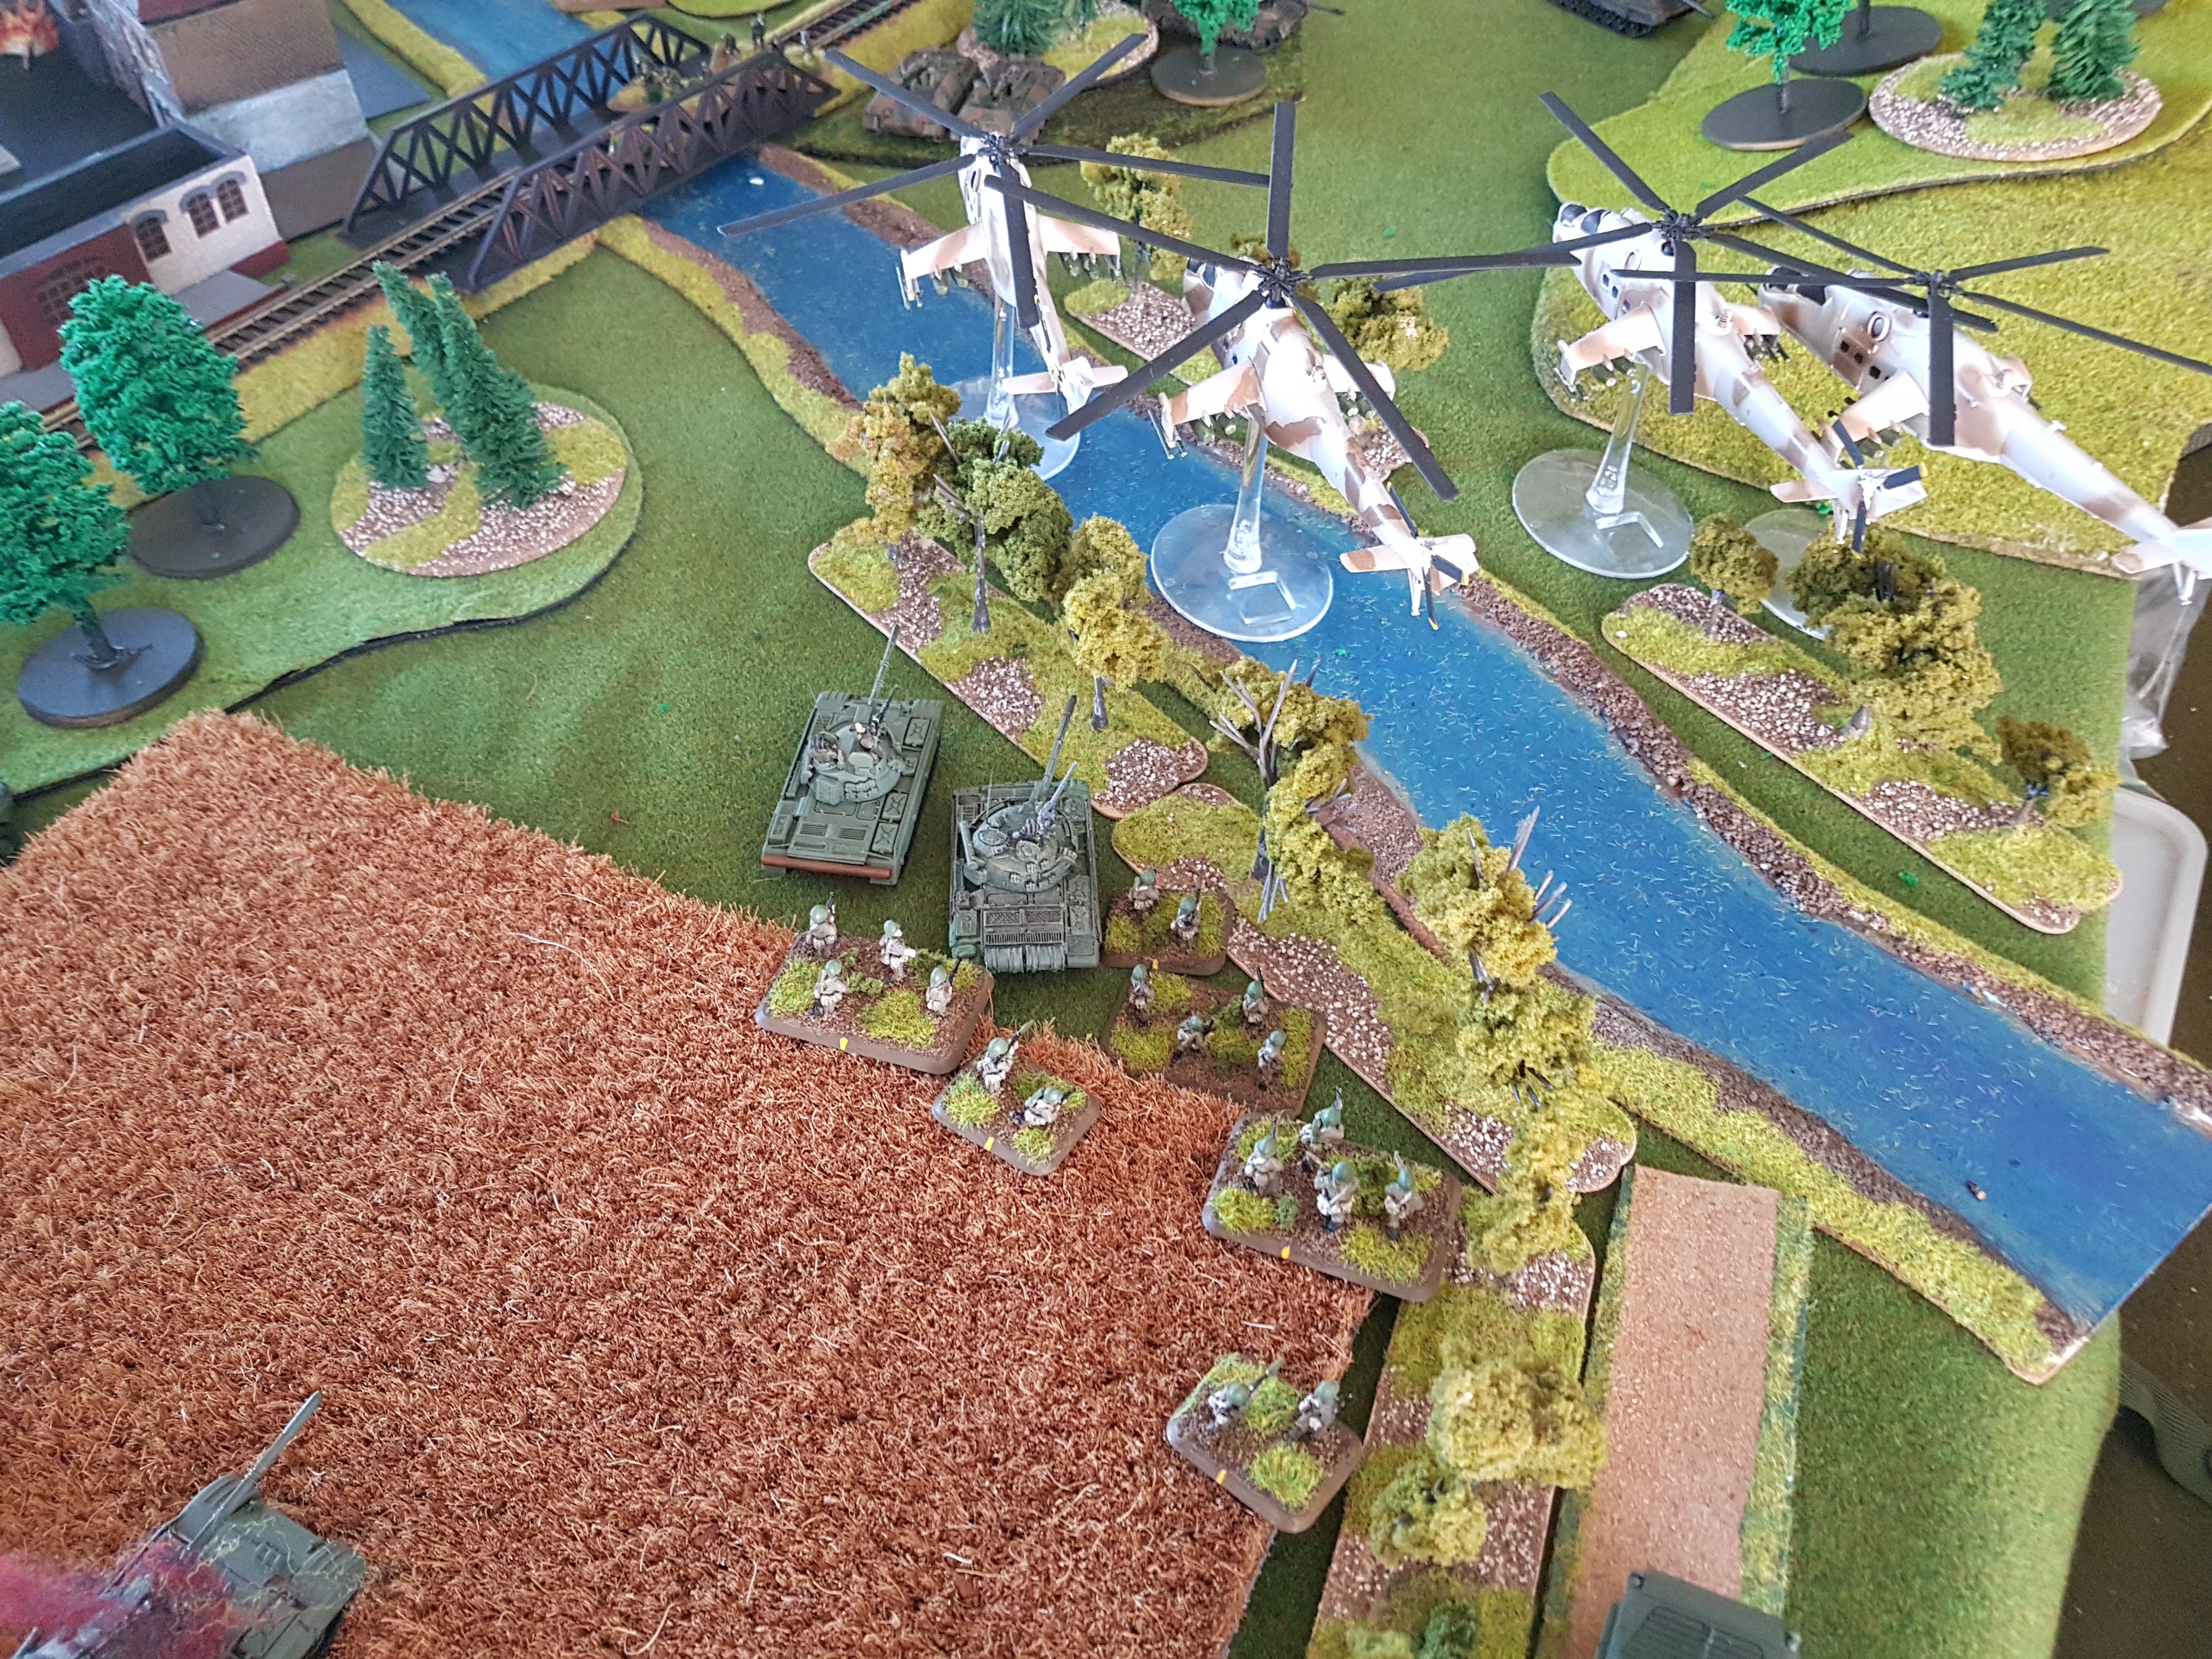 The right flank continues to advance with the T55s taking cover in the tree line while the infantry dismount from the BMPs. The MI-24s re-orientate to engage the panzerjagers and Leopards.
 And just before they fire the enemy anti-air manpads fire their SAMs brining down a MI-24. Artillery is called on the enemy troops advancing across the rail bridge killing a team and pining them. The surviving MI-24s engage and destroy a Jaguar which causes it partner to flee the field. That's 3 NATO units now that have broken. We can almost feel the victory coming......
On the left flank the T55s move up to the edge of the field taking cover behind the tree line, why the BMP Commander moves to a new position.
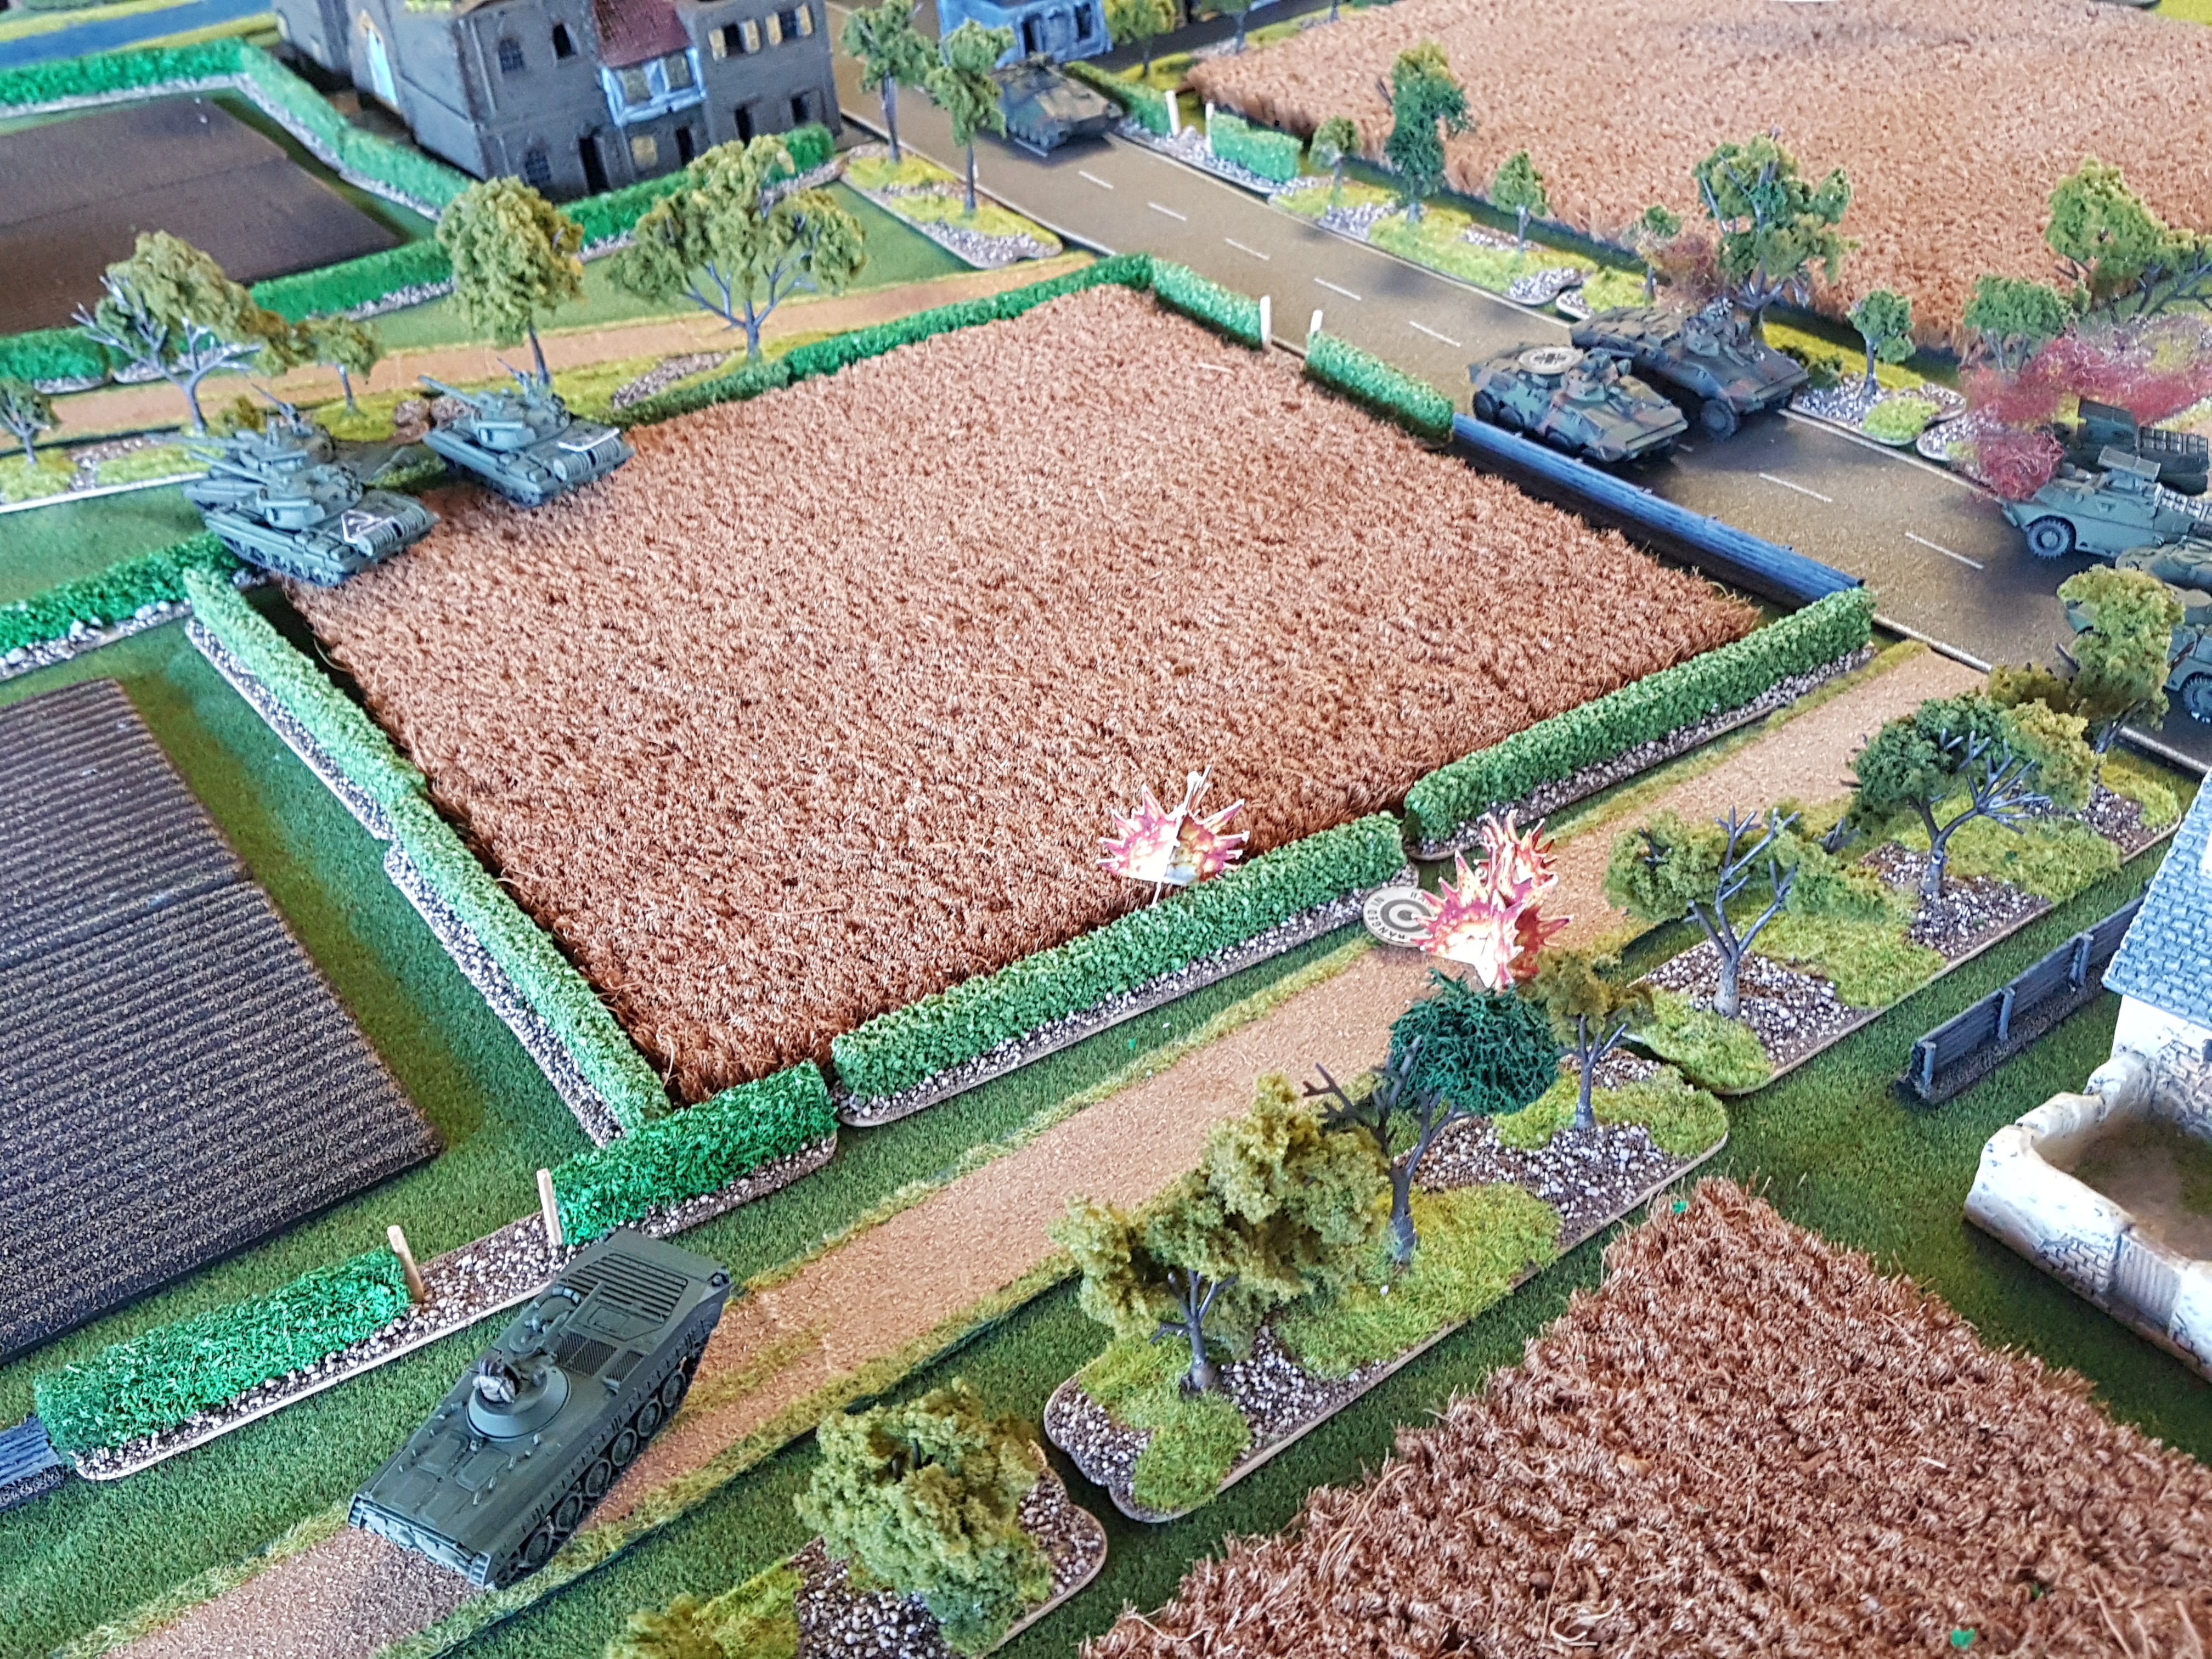
 NATO are feeling the pressure and send a patrol of Luchs and a Marder down the road trying to take some pressure off their left flank. They also call in some artillery on the BMP Battalion Commander who is moving position.
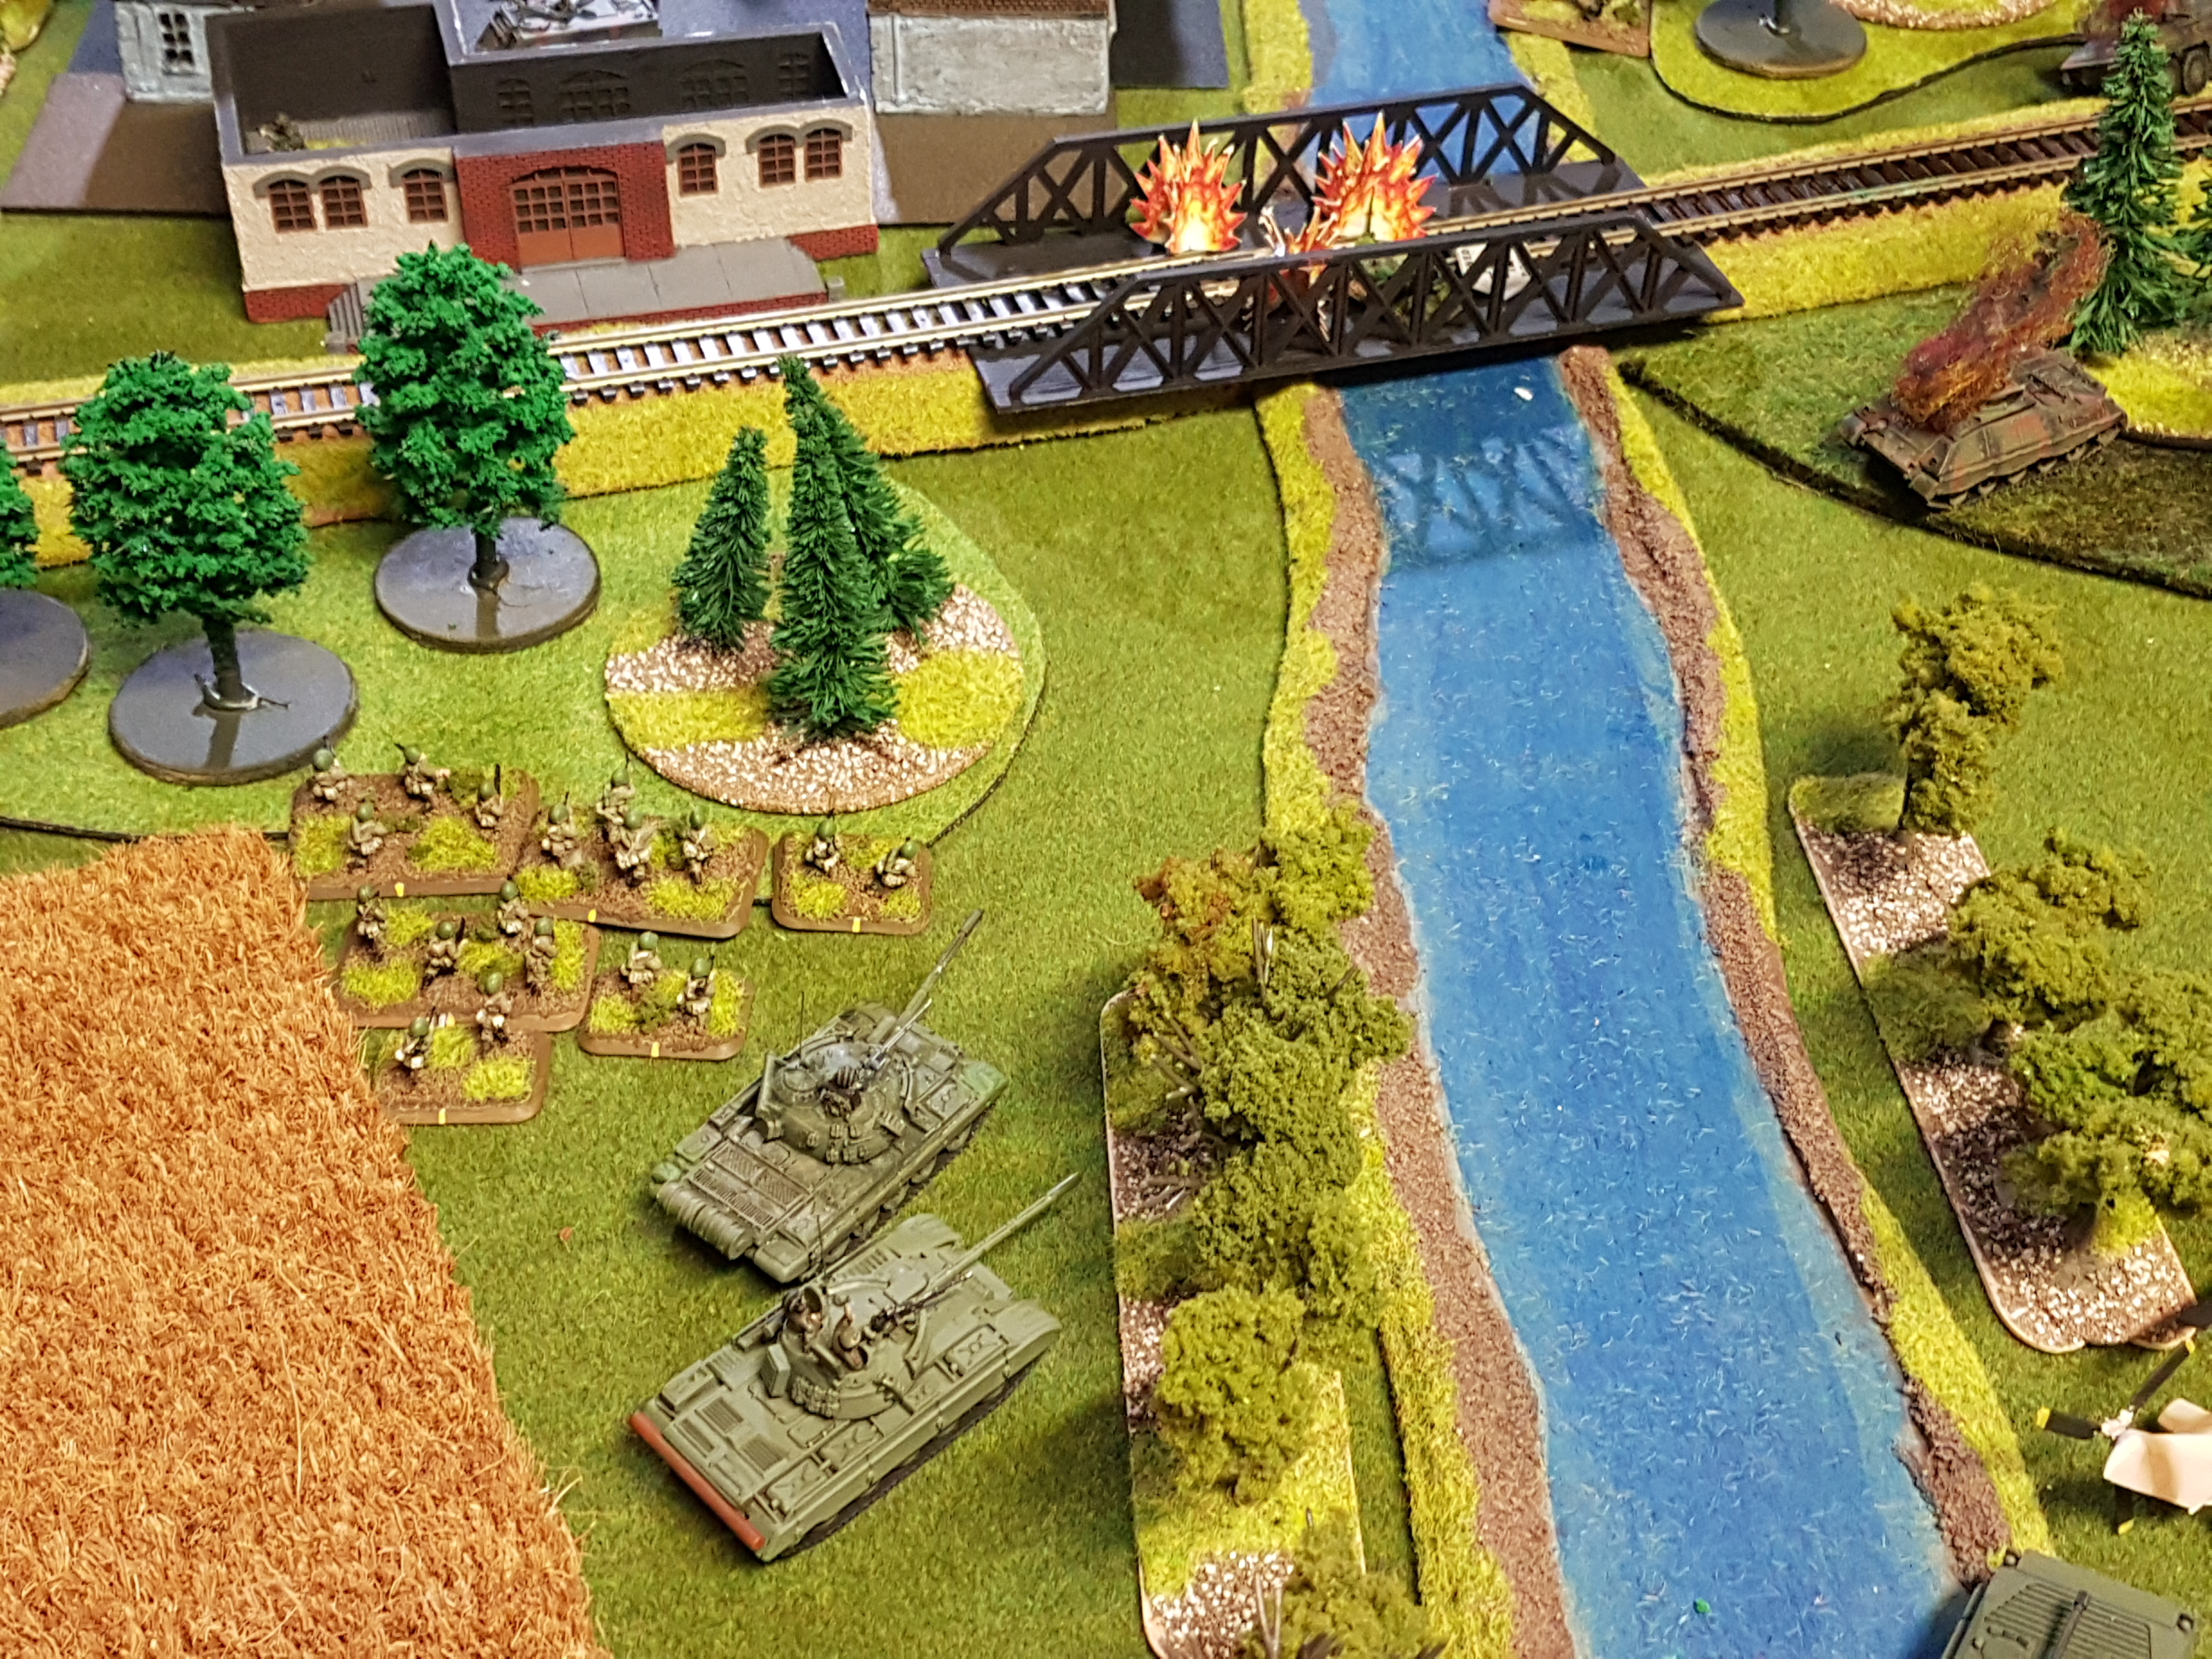 The gallant heroes can sense victory is near. The infantry advance on the rail bridge while the tank commander calls in artillery on the enemy that have occupied the rail bridge.
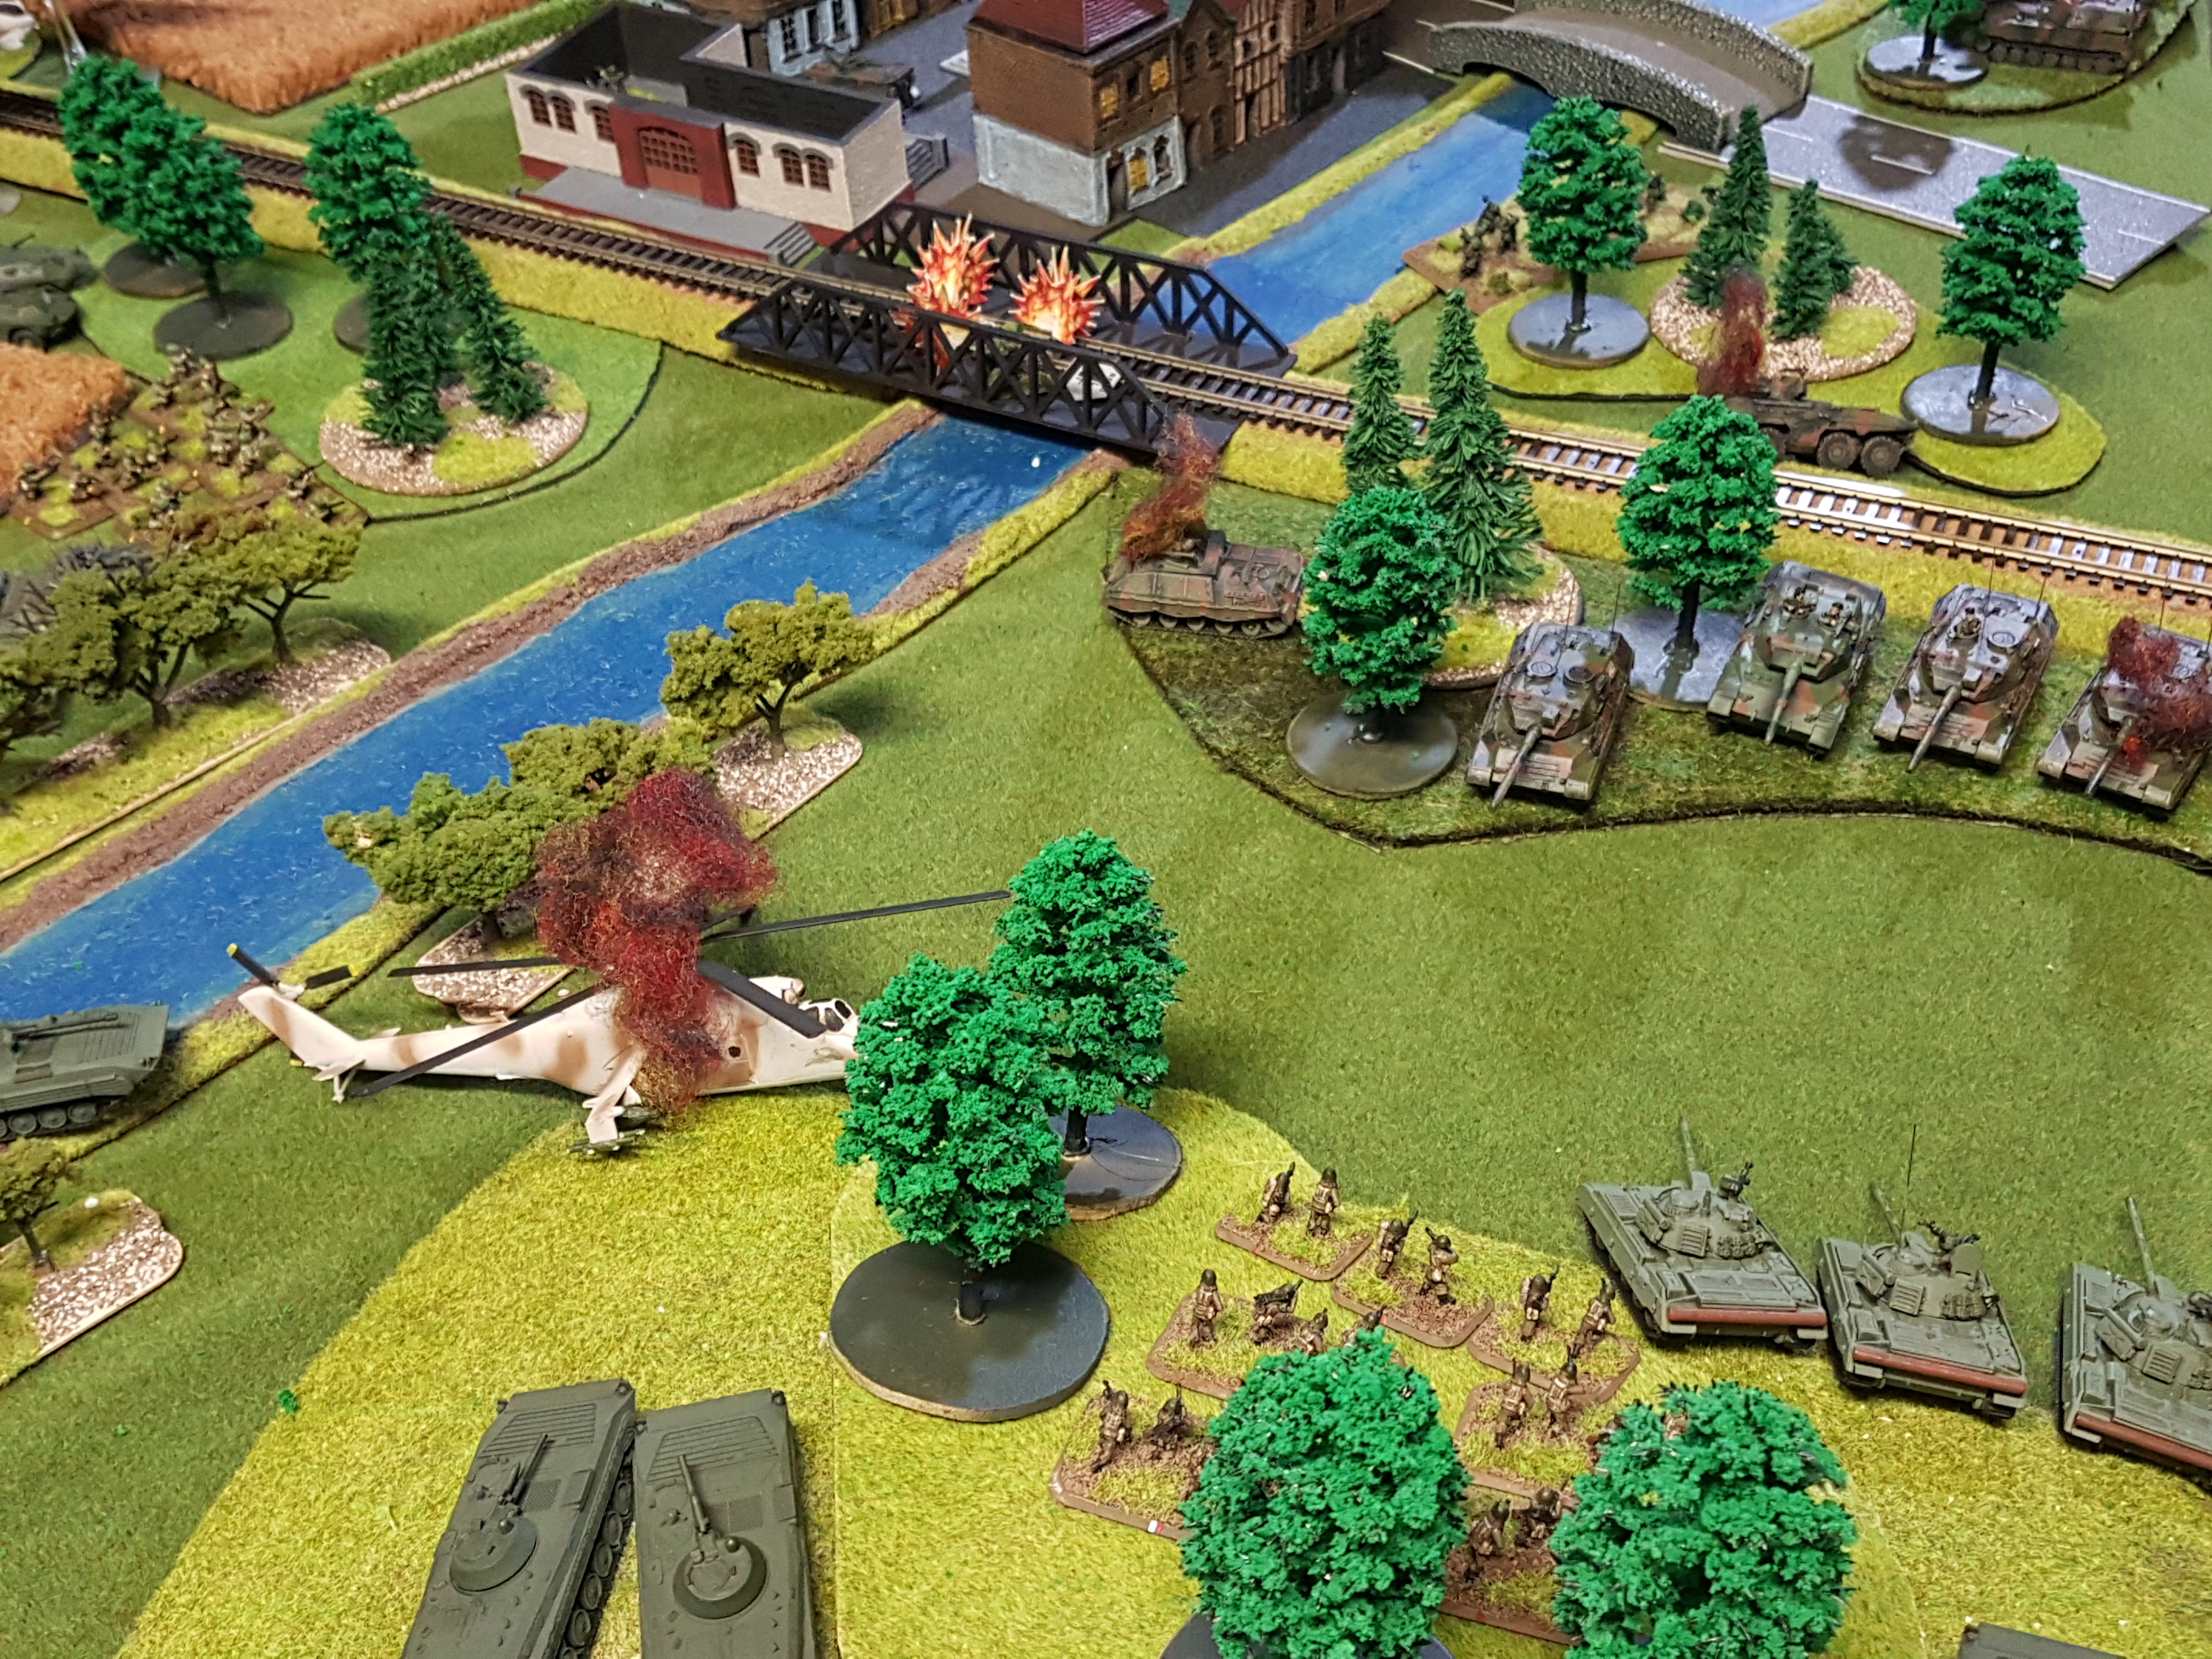
 On the left flank the T55s went to continue their advance but two vehicles misjudged the hedge line and got caught up in it (driver training will be required if they survive). The Battalion Commander and a patrol of BRDMs engaged the Luches destroying one and forcing the crew of the other to bail.
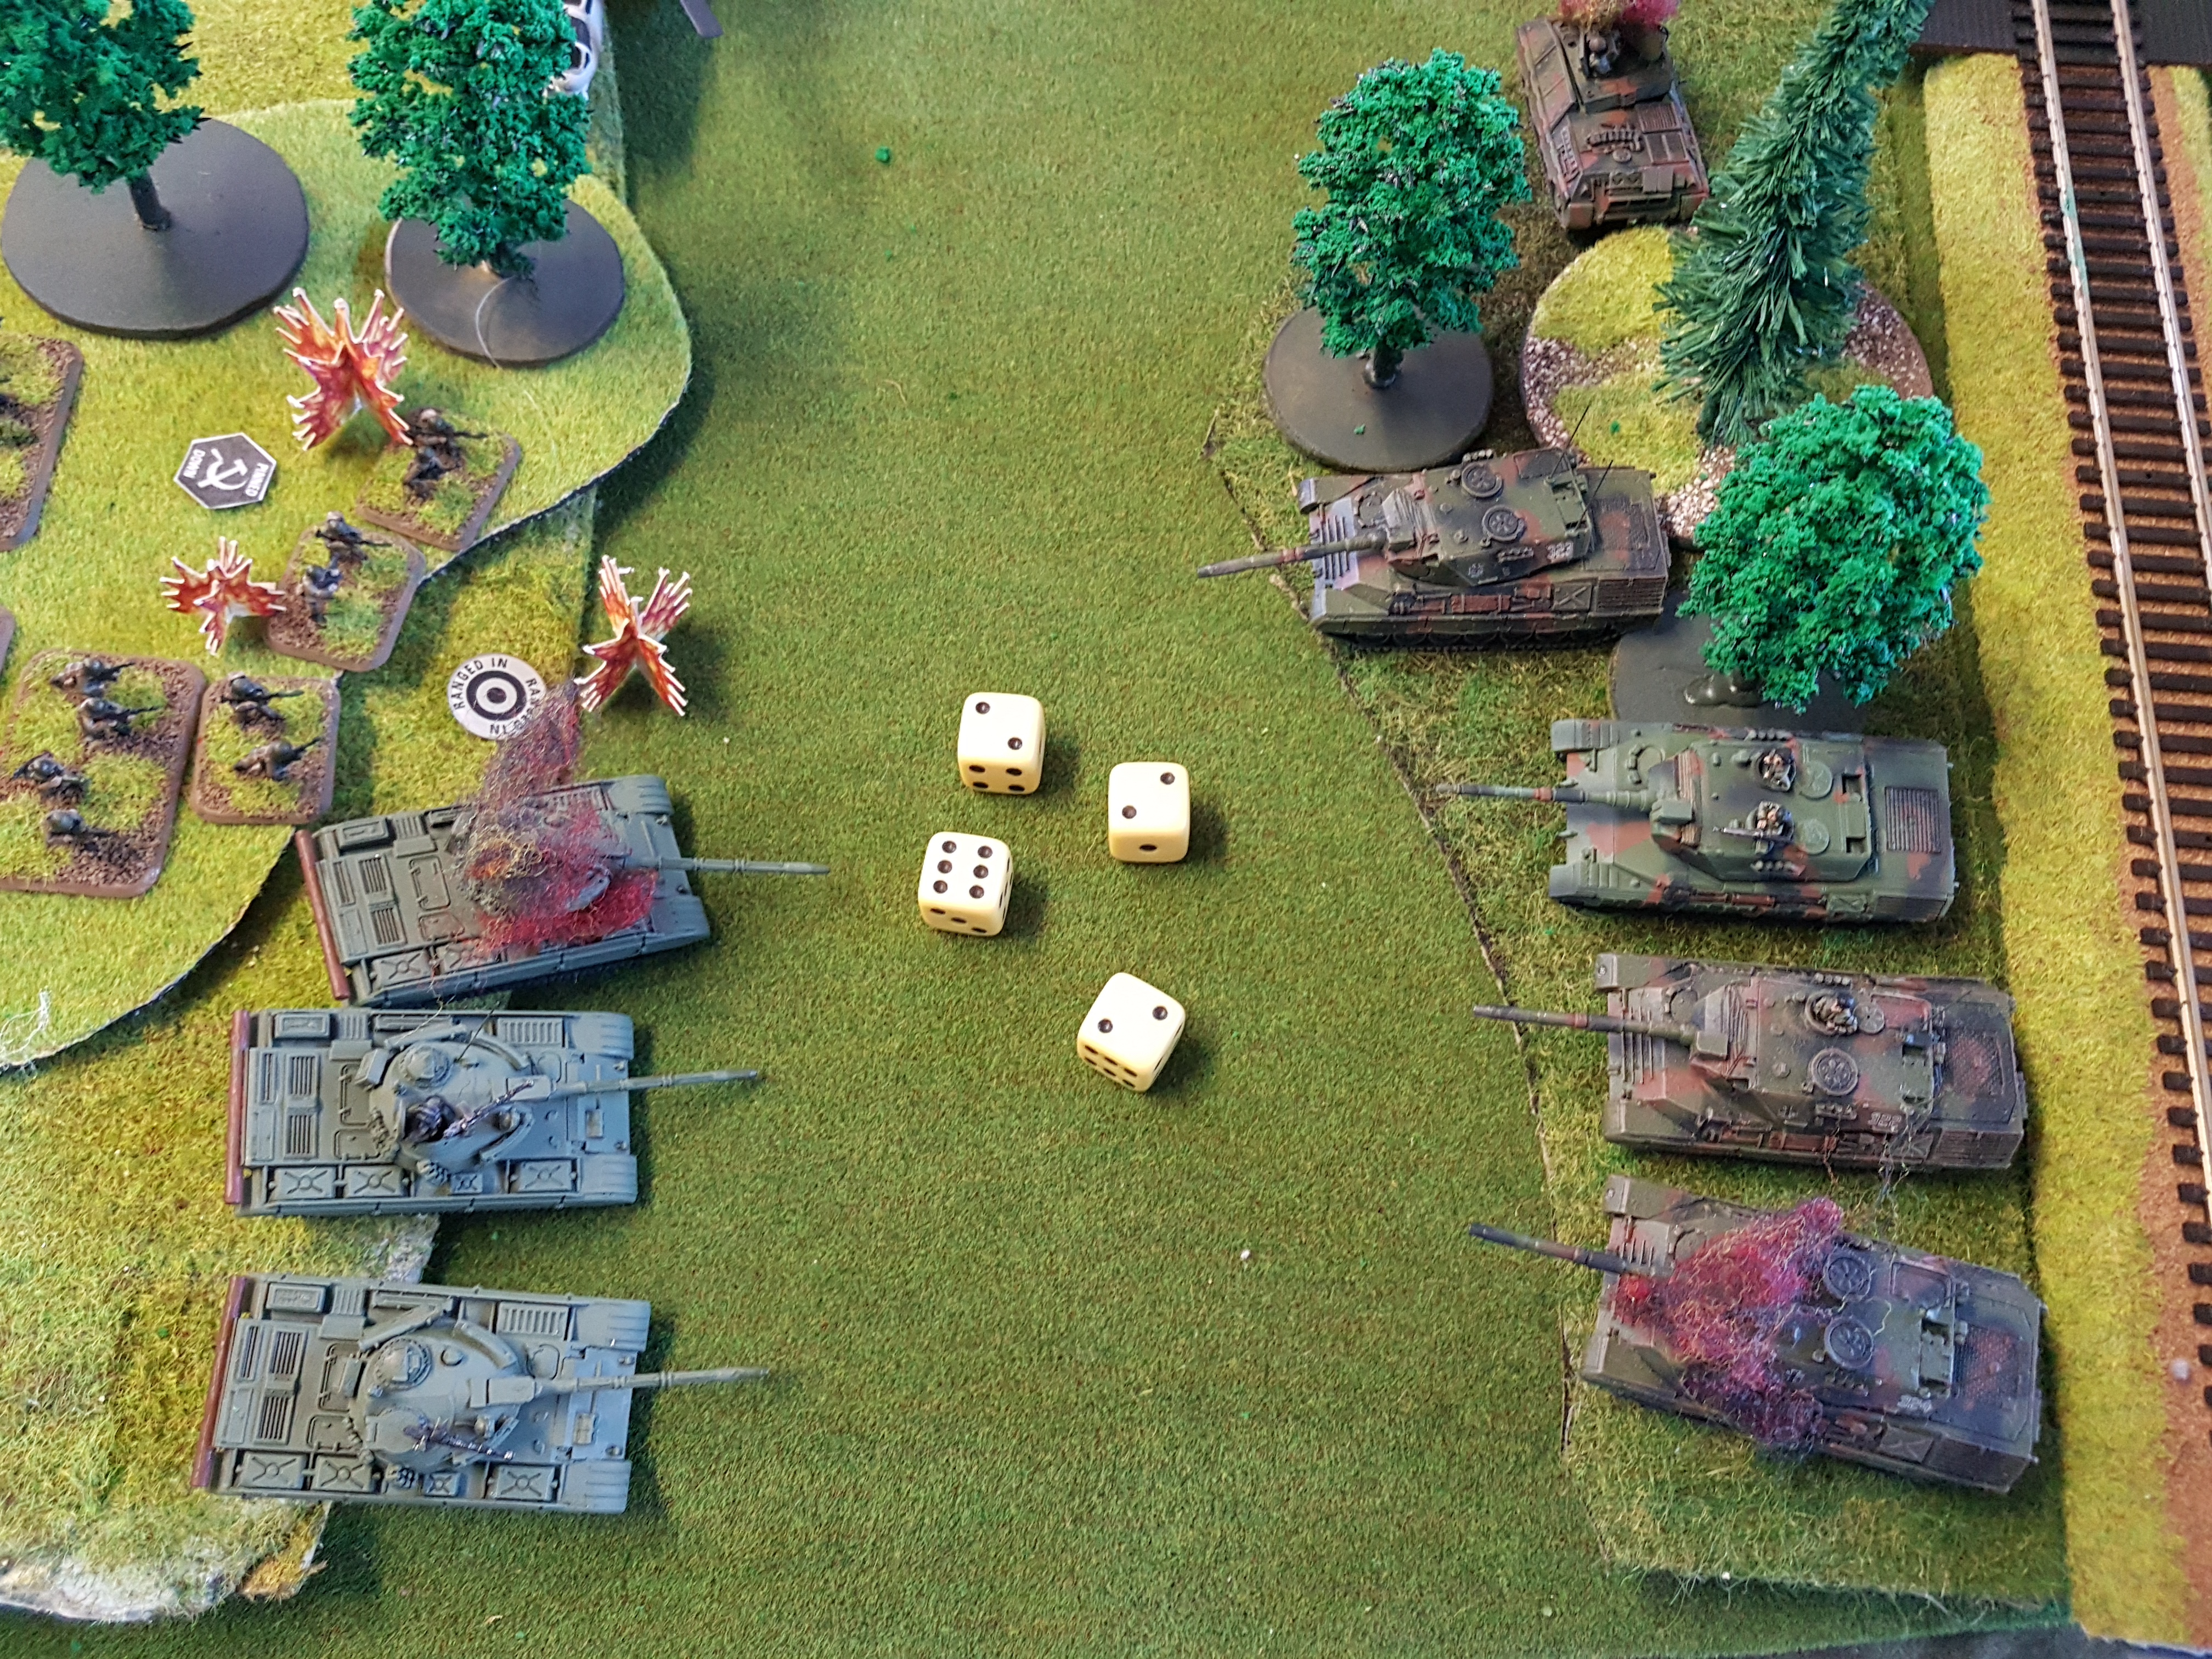 NATO now respond to the arriving troops and engage them with direct fire from the Leopard1s while the tank commander calls in artillery on our gallant hero infantry.
NOTE: The "Gods of Dice" were not on Mike side the whole game. Needing 3s to hit my T55s he managed to roll three 2s. He then tried to engage using his Milans in the village that had a clear shot and rolled two 1s......
The Milan team on the Rail Bridge did manage to hit and destroy on the the T55s that were in the tree line.
 The Marders on the NATO right flank advanced forward past the T55s and engaged and destroyed the commanders BMP. The valiant hero managed to roll clear of the wreckage to continue the flight.
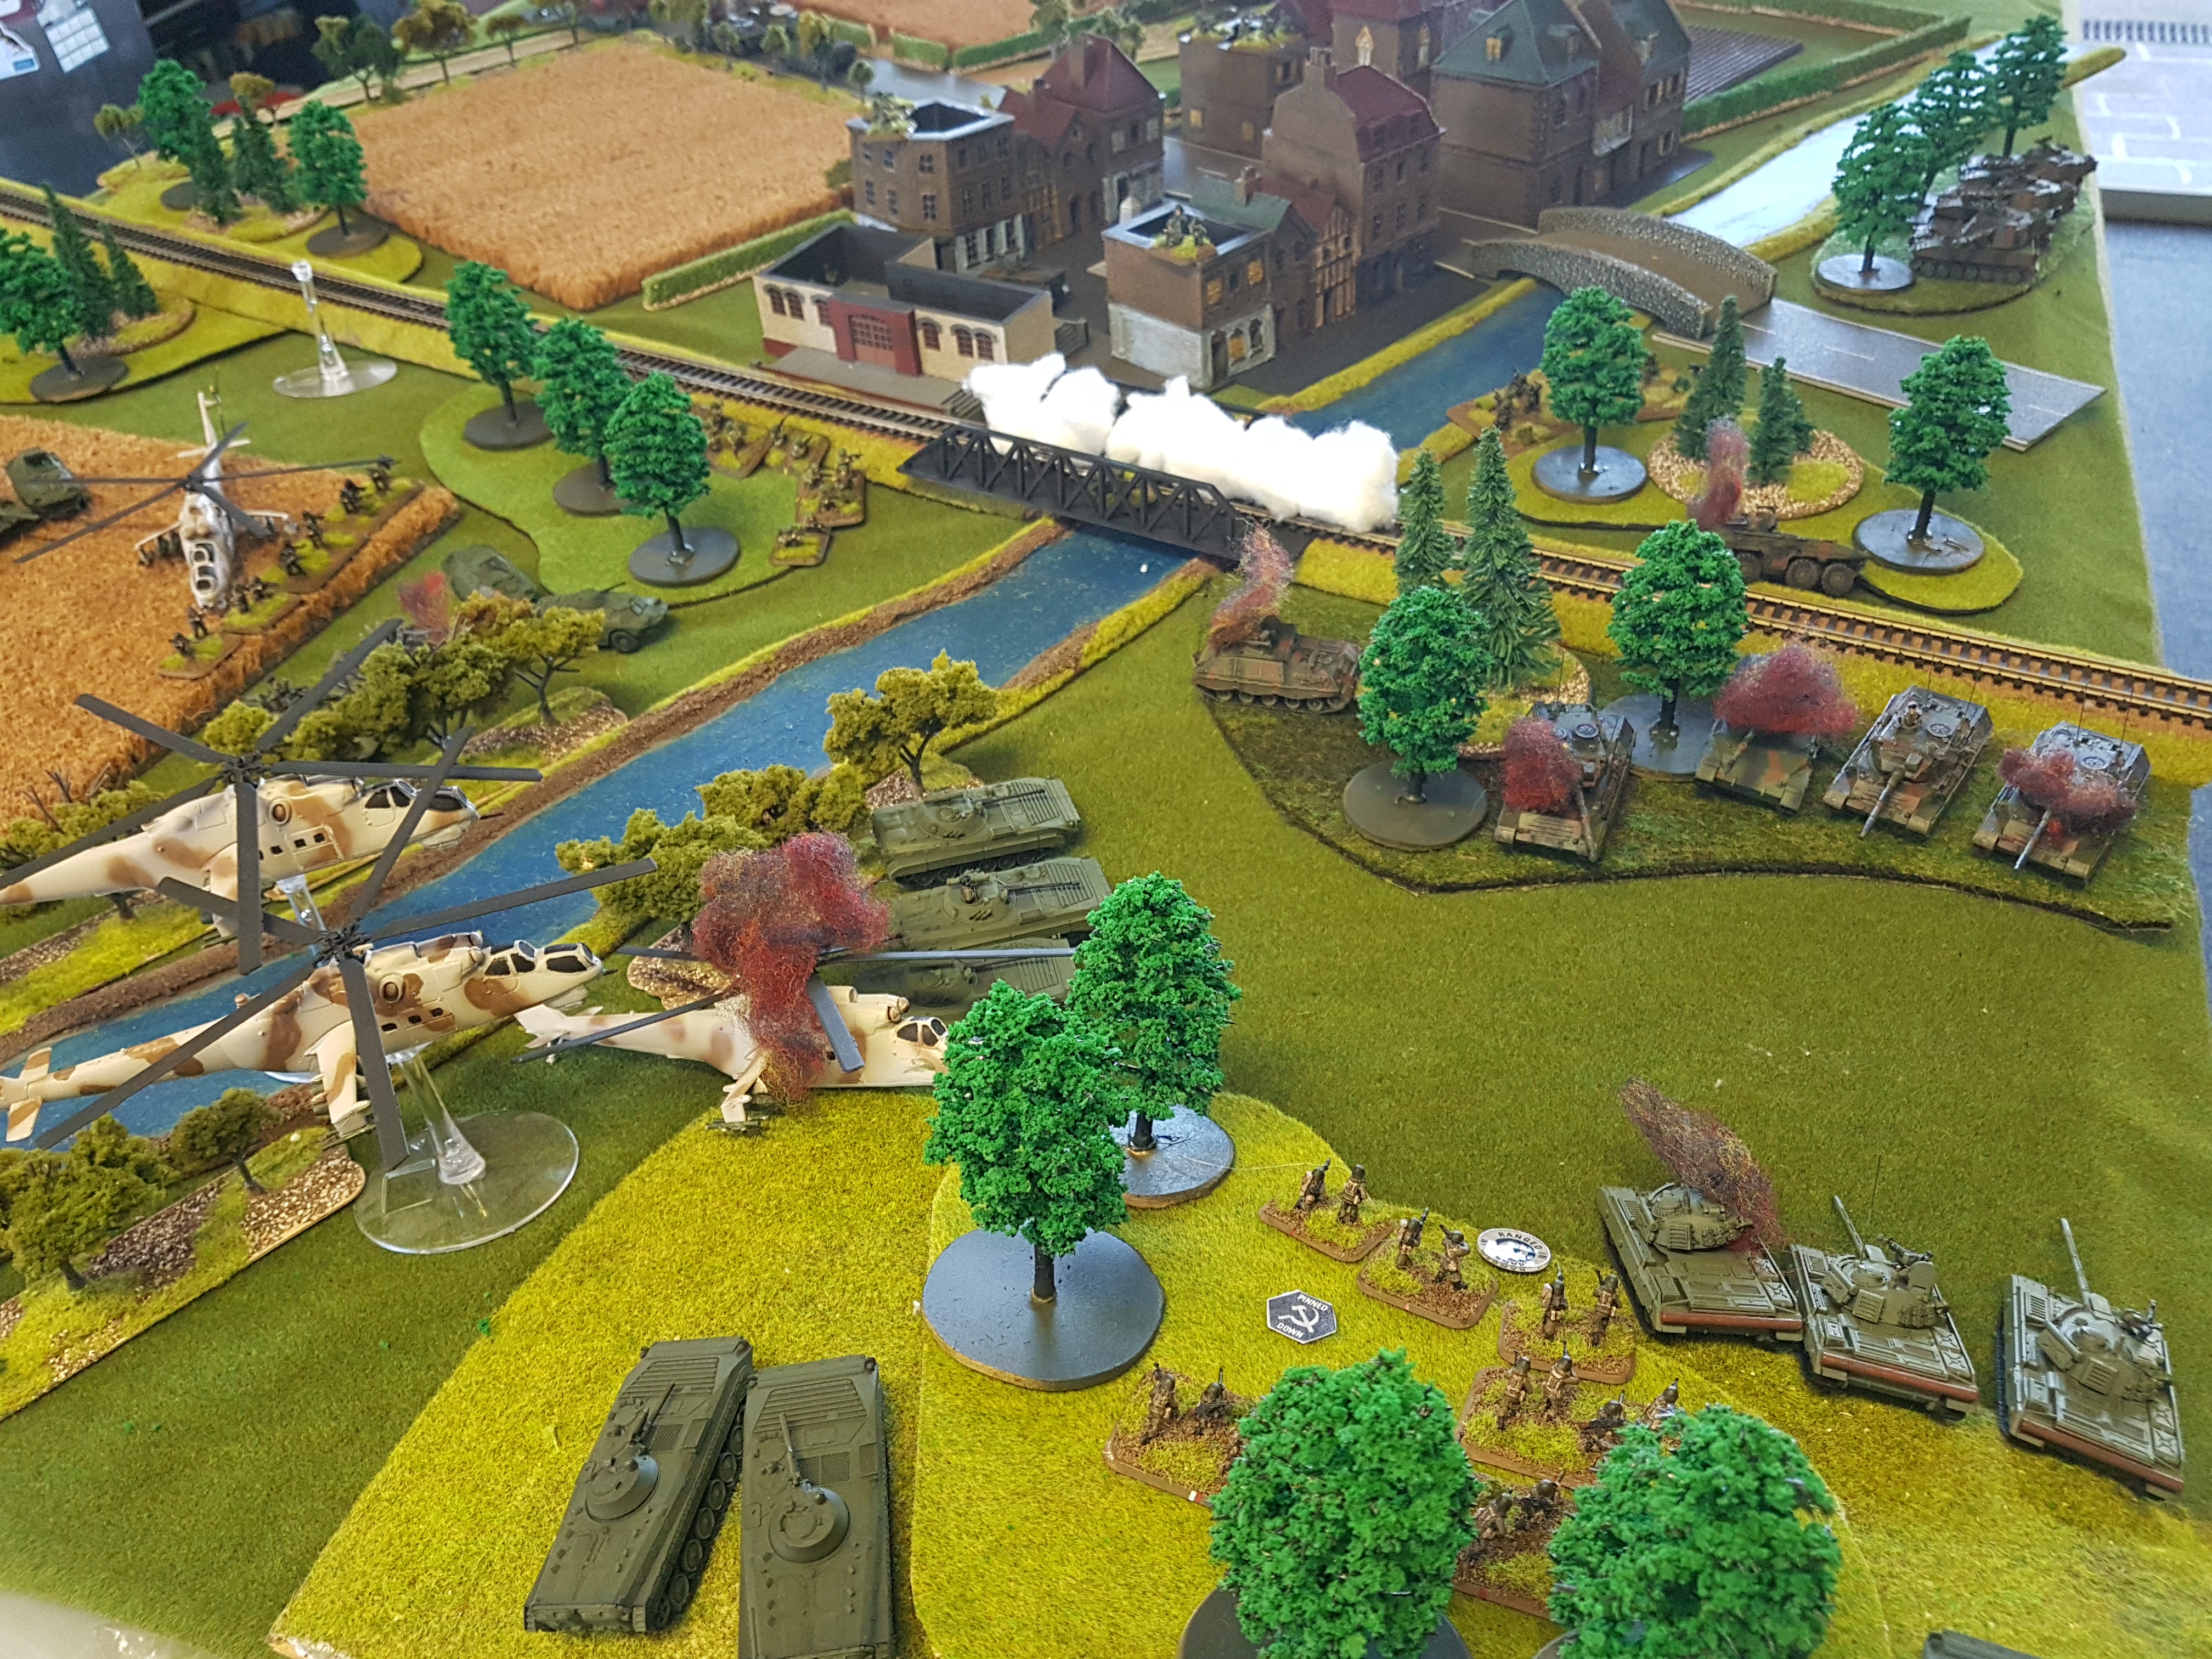 The reinforcements officers try to rally their troops but the sight of the Leopards in the trees across the field freeze the troops where they are. The T55s are not so worried and engage and destroy another two. The HINDs drop their troops in the field so they can join the assault while the other two swing around to add their fire. To cover the MI-24s the T55 Battalion Commander calls in a smoke bombardment onto the bridge covering it in smoke.
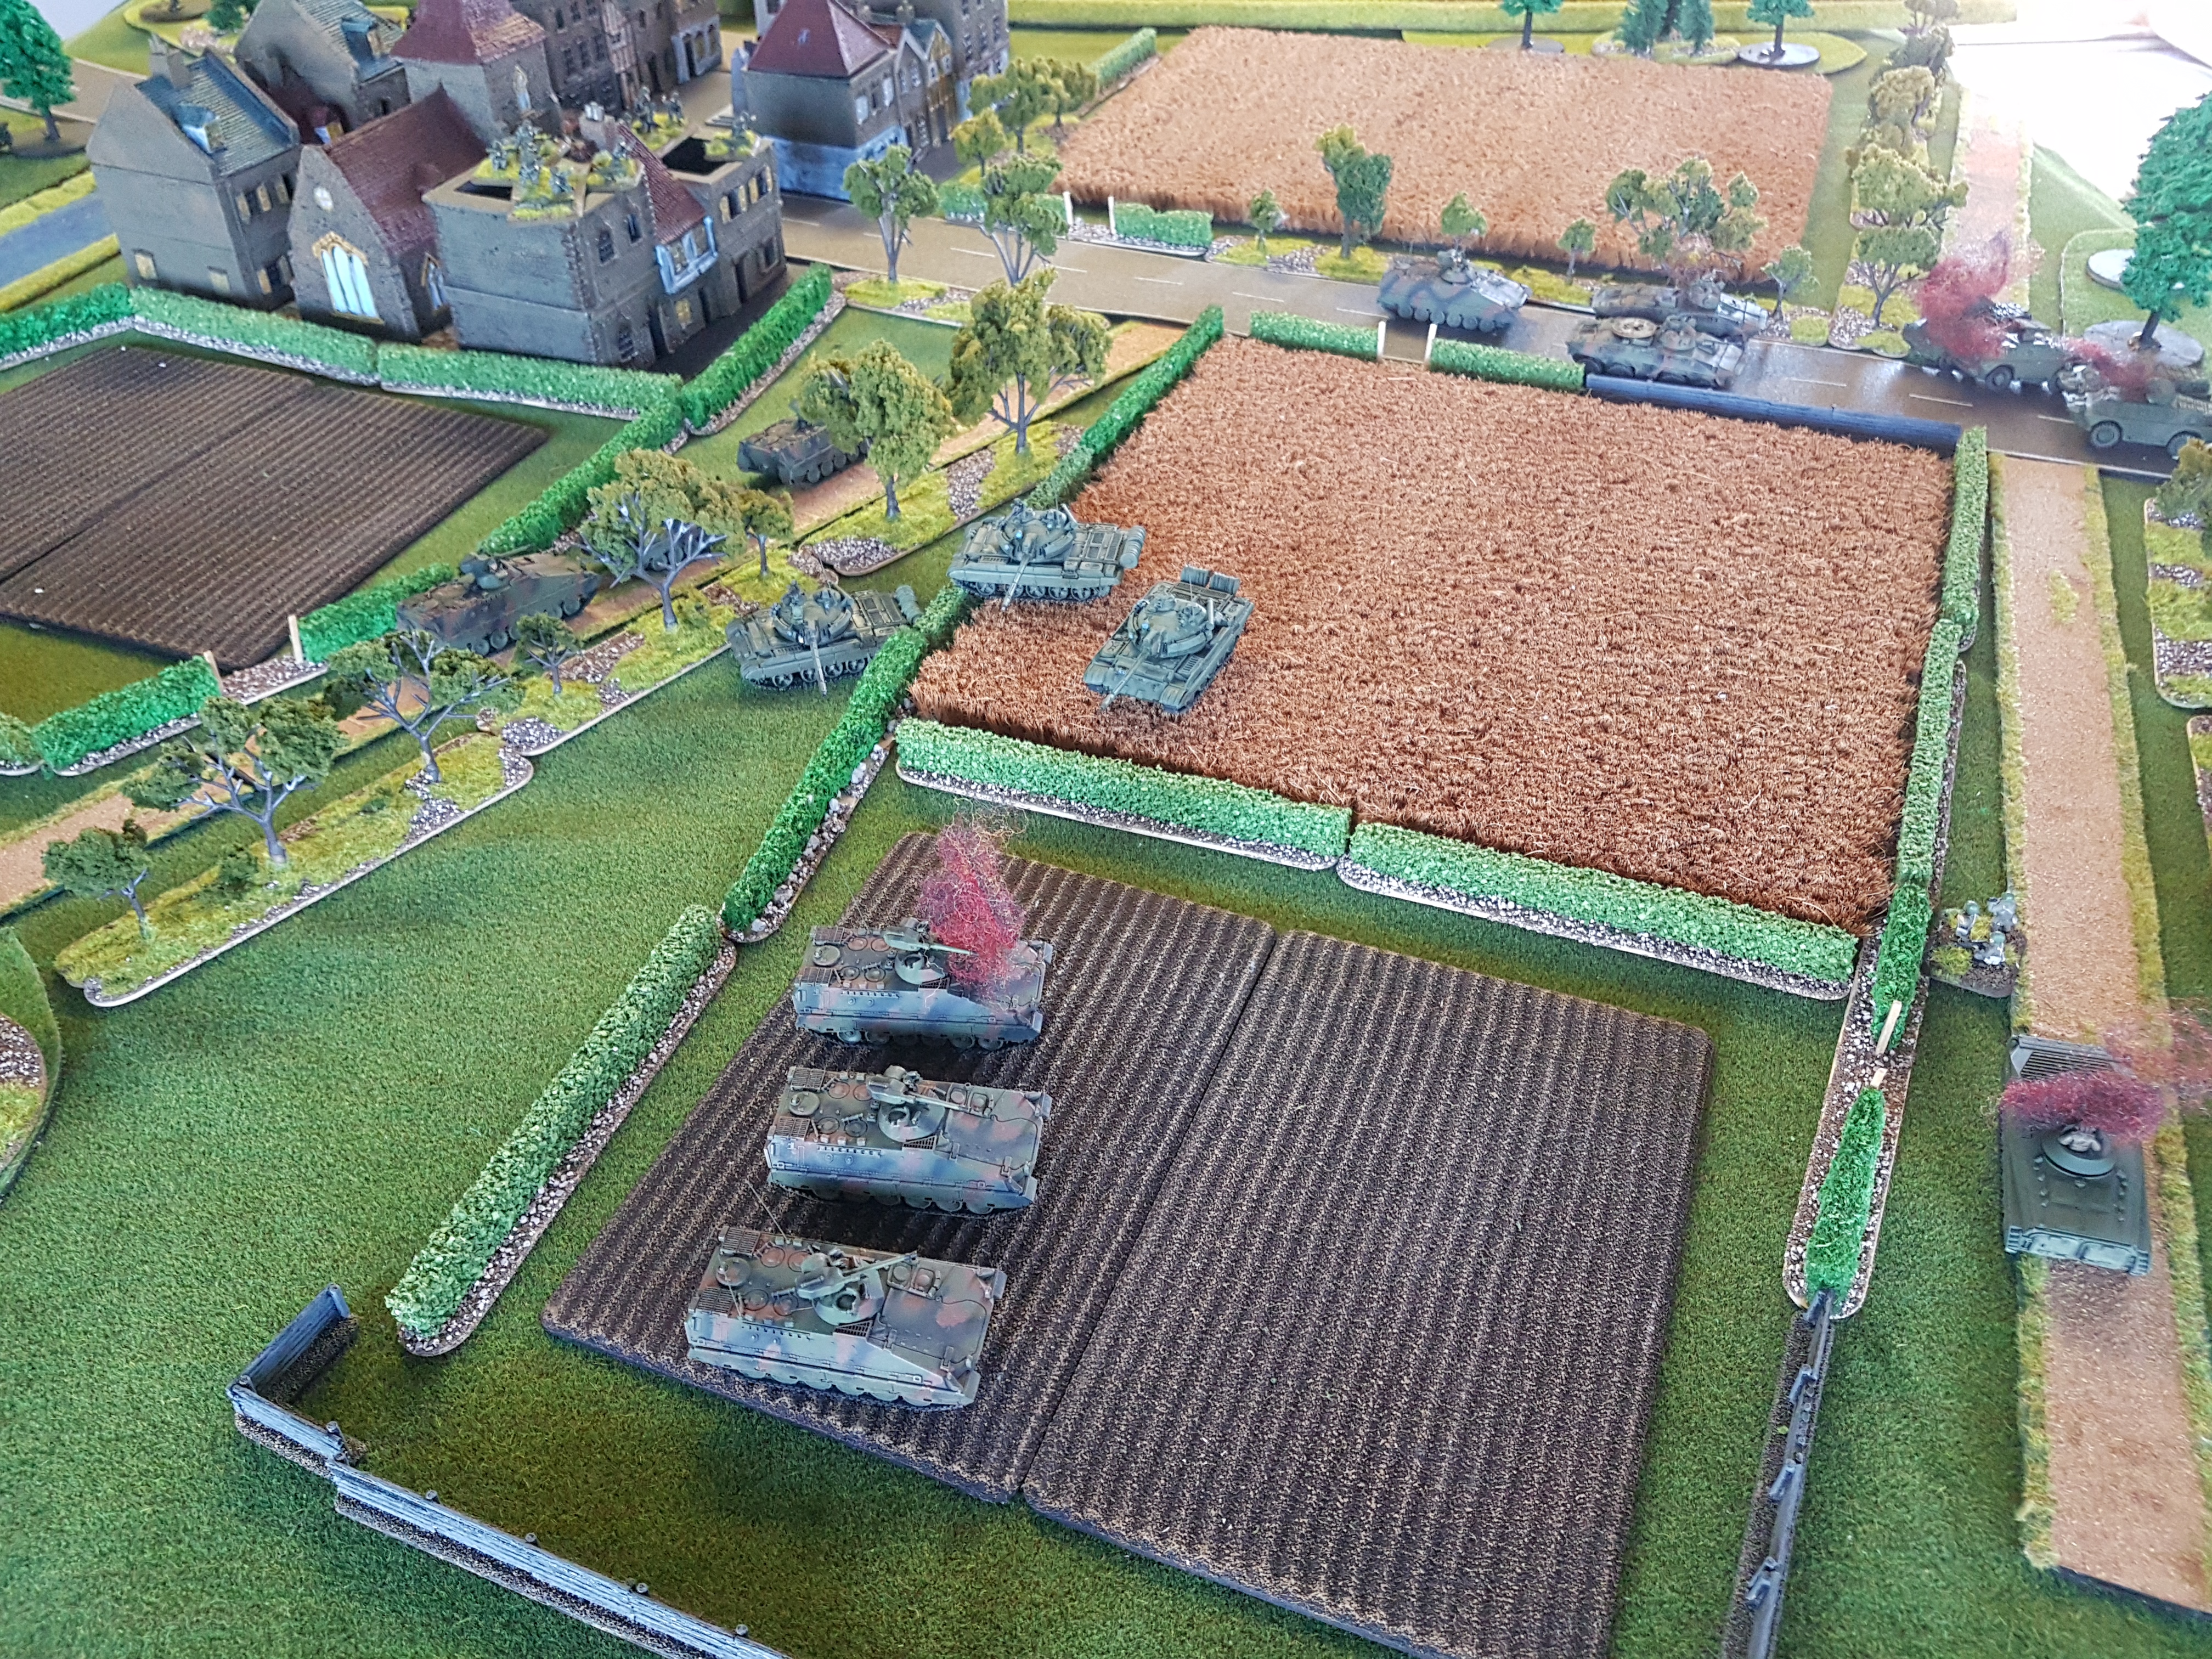
 The dismounted troops from the BMPs advance forward and engage the enemy that have occupied the train station. The BRDMs move around the forest to support the intended assault and try and dislodge the pesky Milan ATGW that refuses to budge from the bridge.
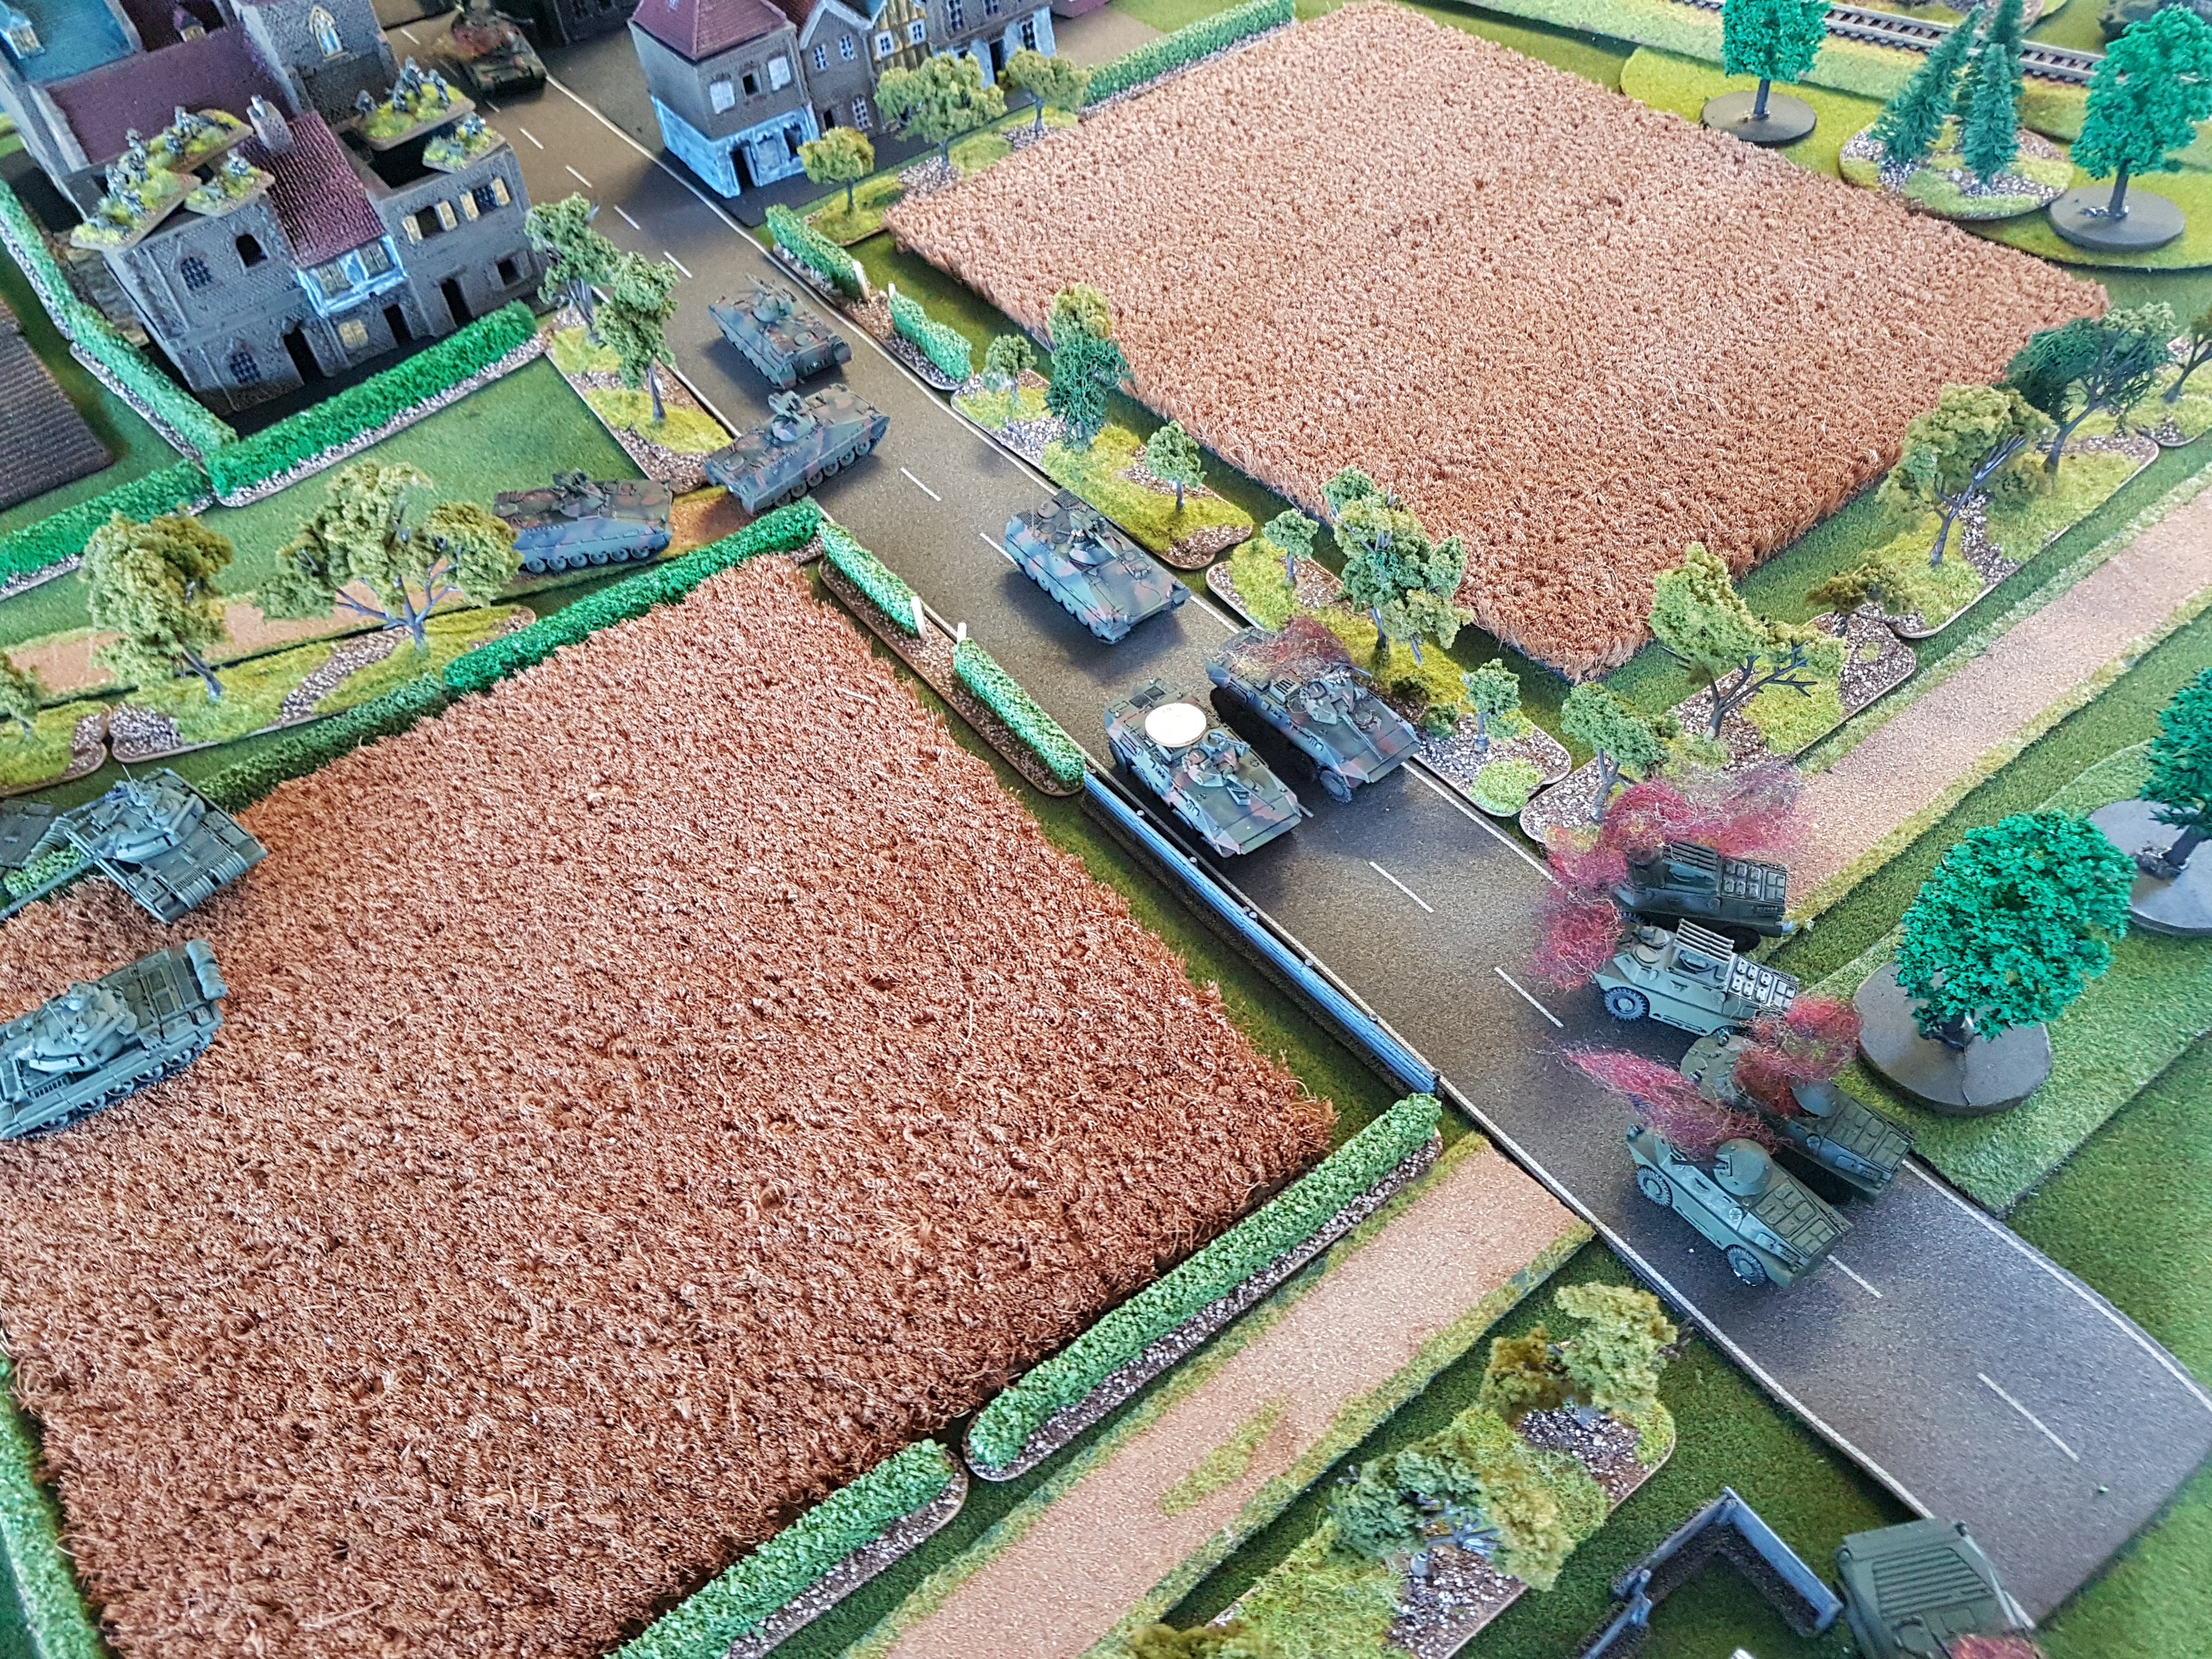 NATO move a Marder platoon around from their right flank to try and support their crumbling units there, while the Company Command vehicle engages and destroys our observer in his BMP....
 while the other Marders move forward and engage and destroy a 2S1 and try and destroy our valiant hero who refuses to die.
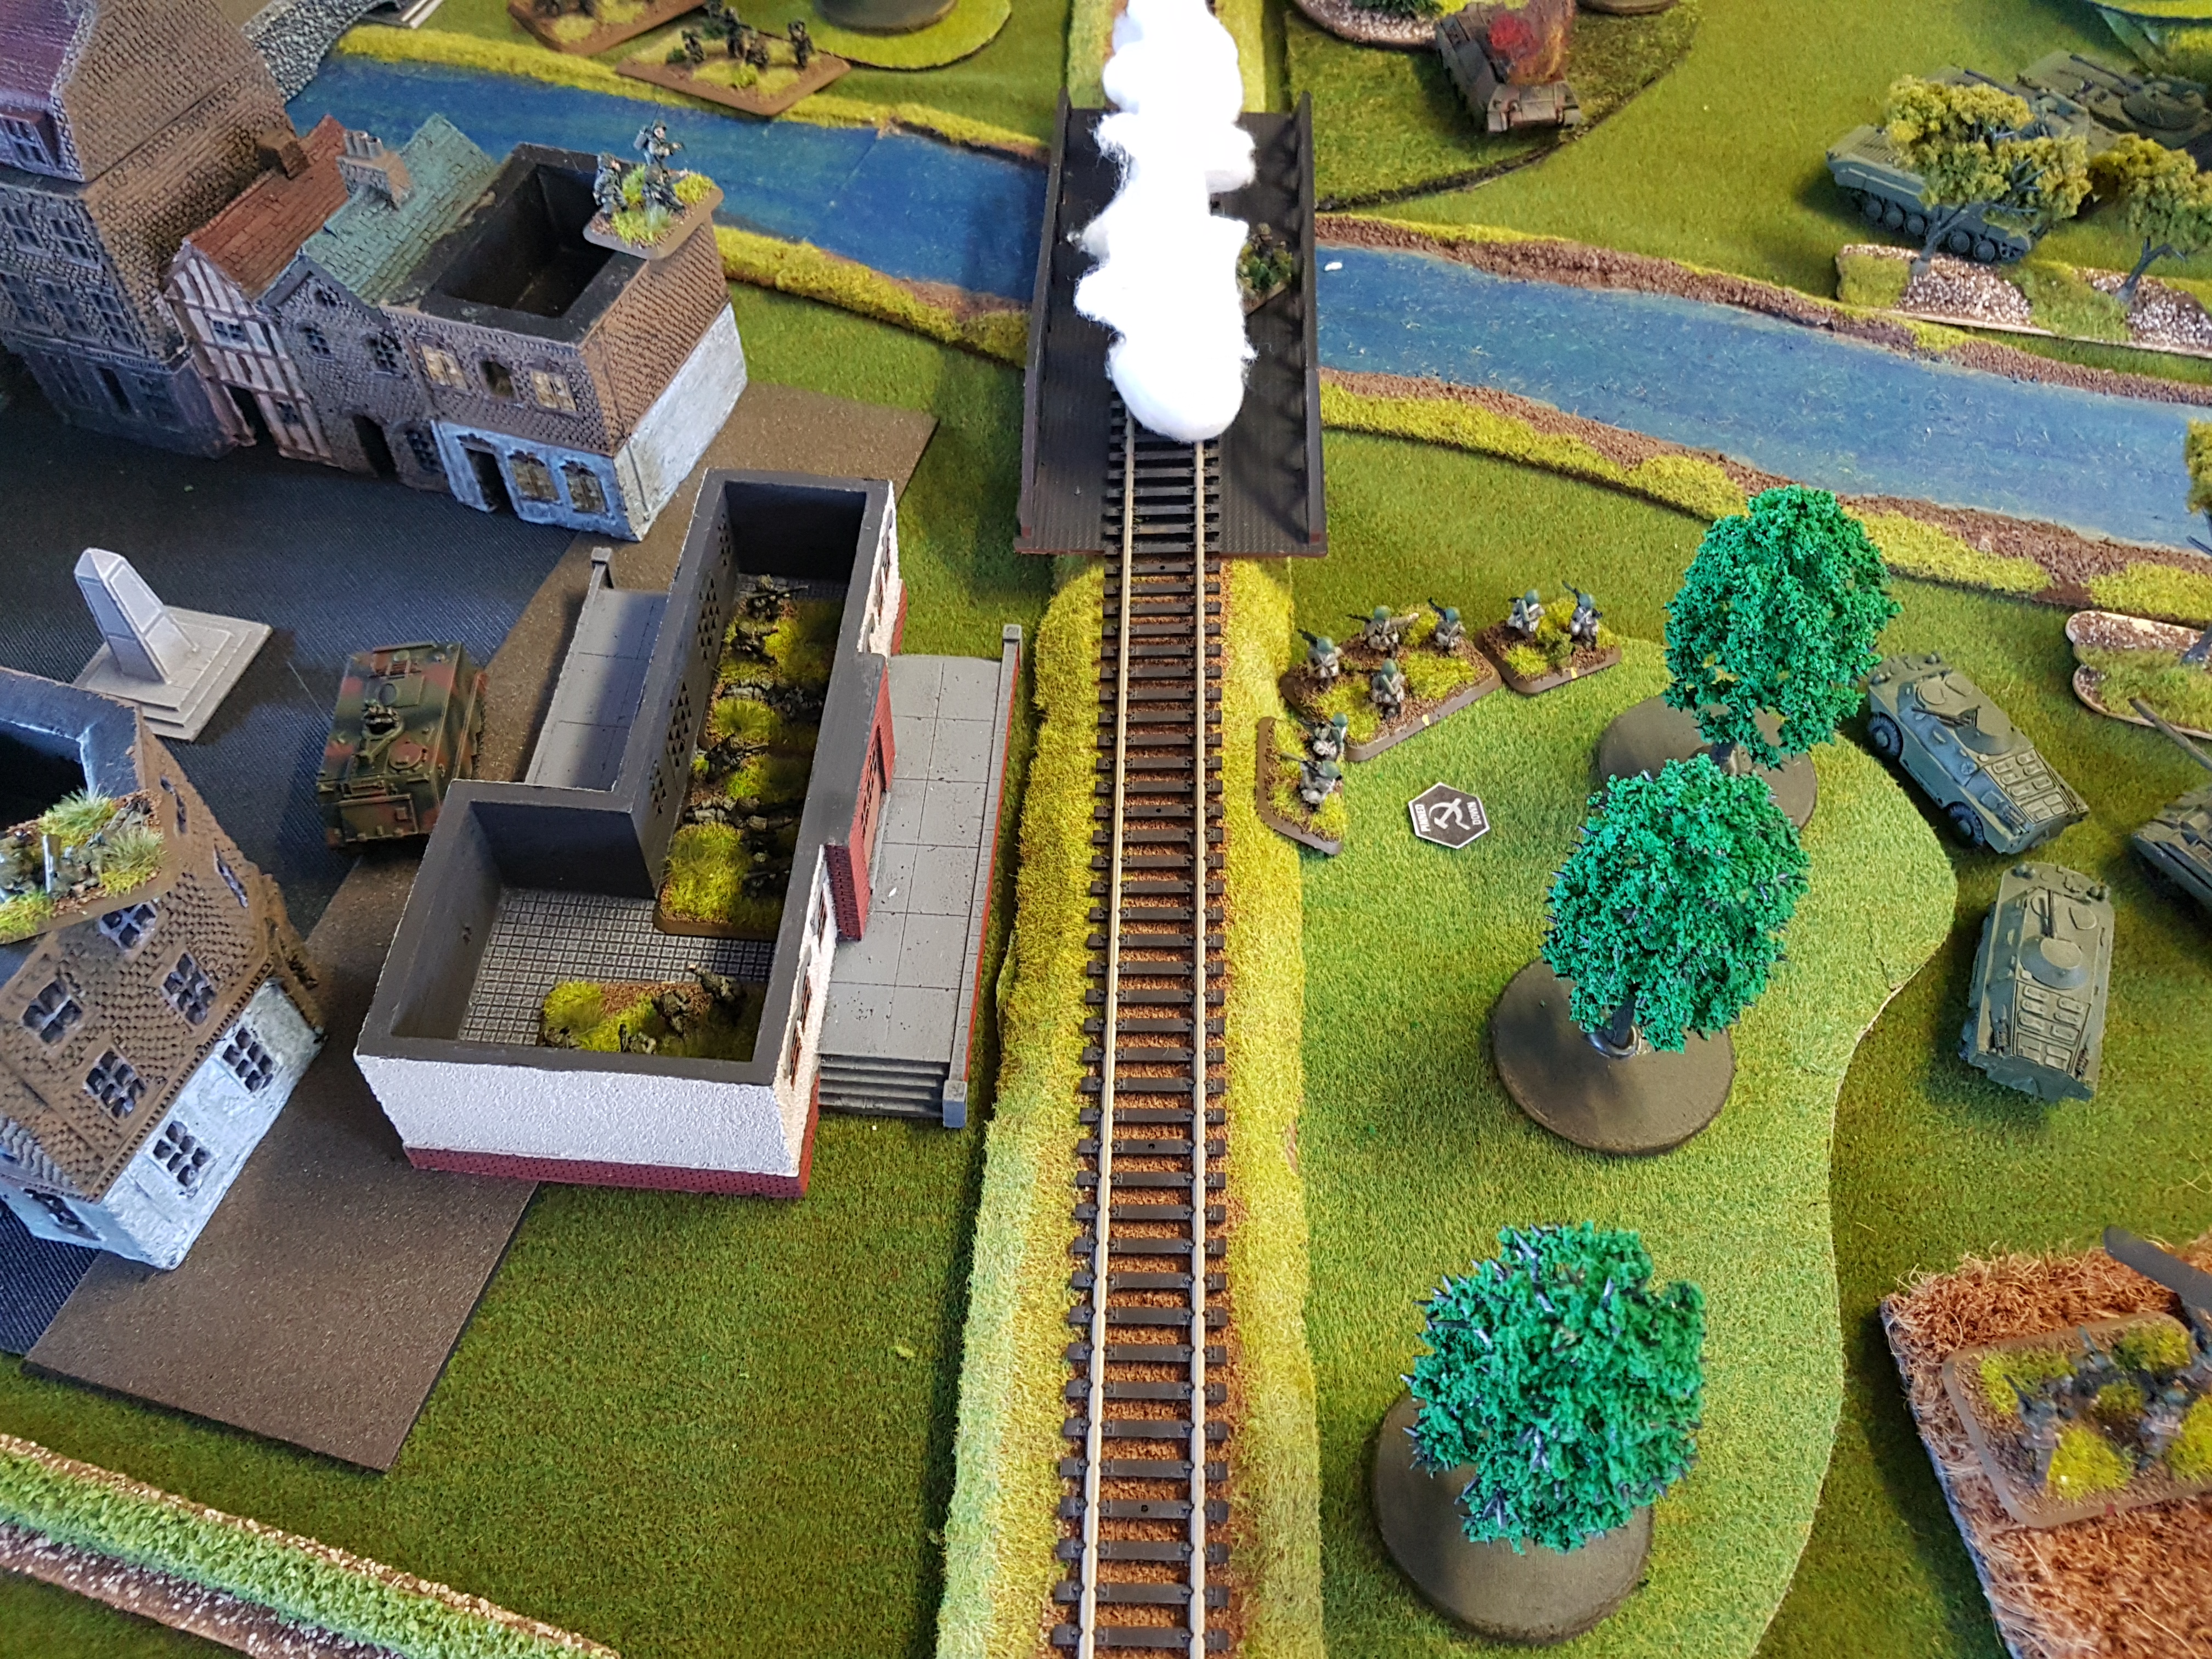 while the NATO troops that have occupied the train station return fire cutting the heroes that were in the woods down with their MG3 fire, while......
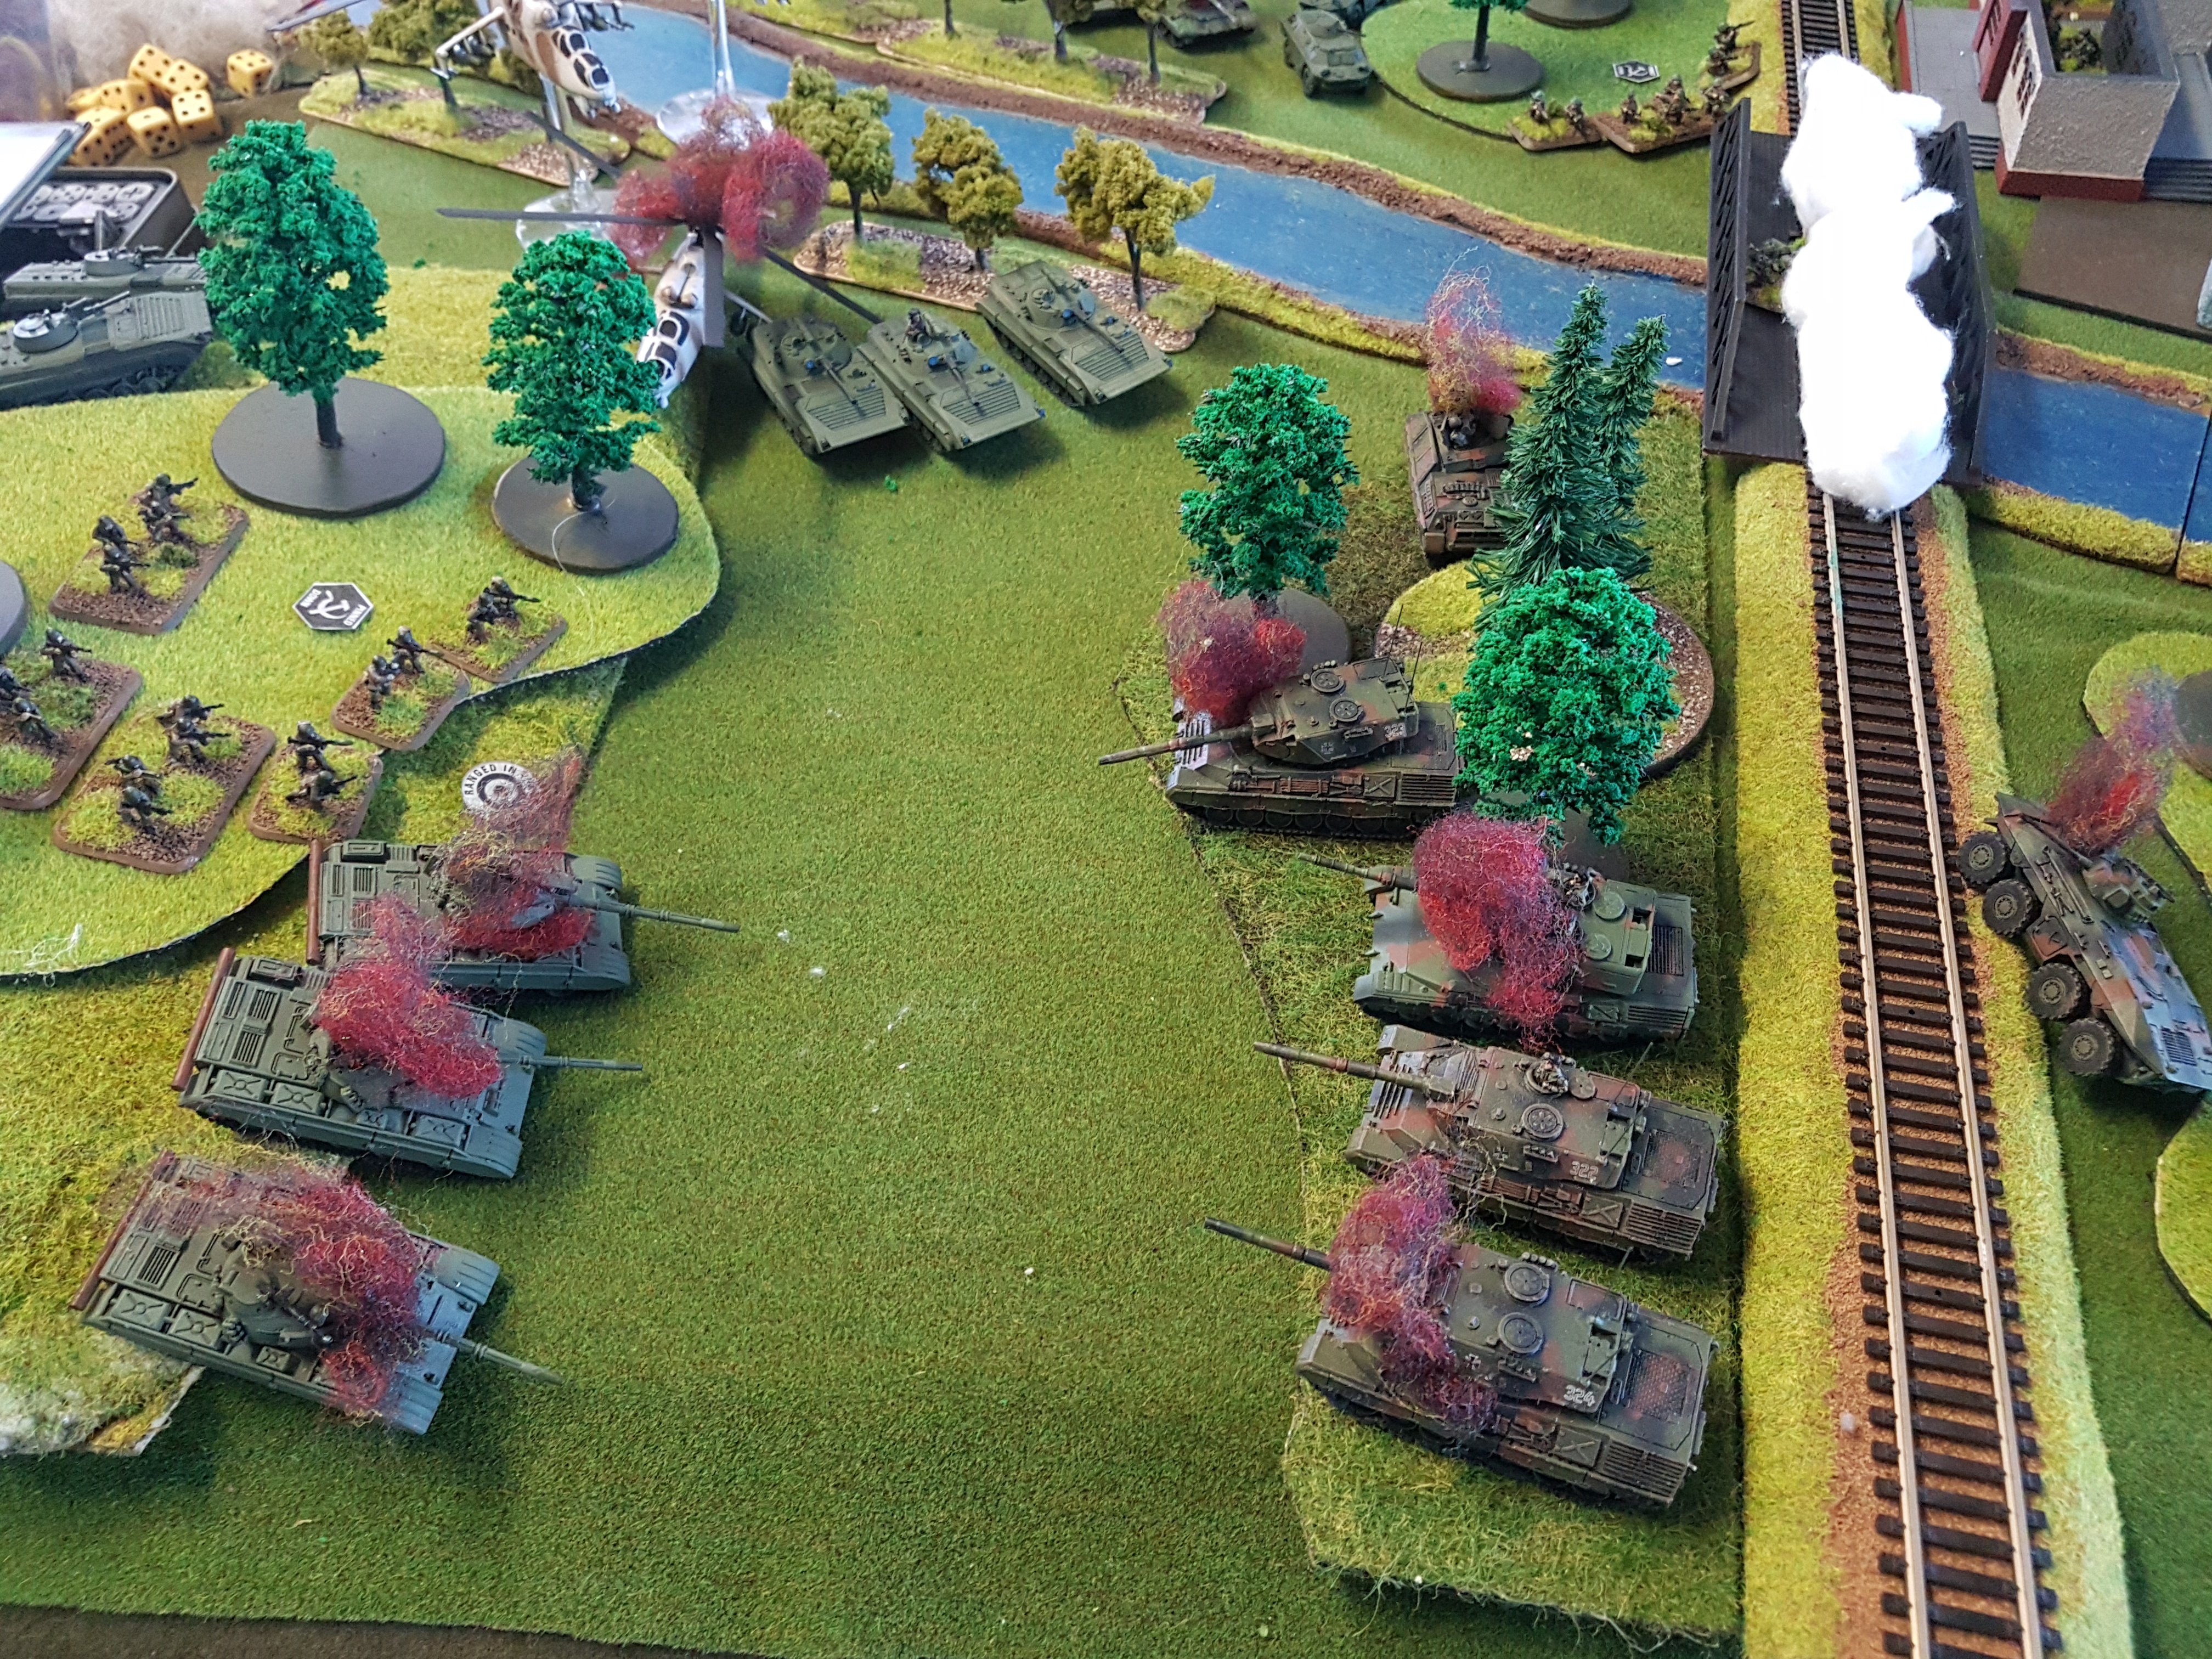
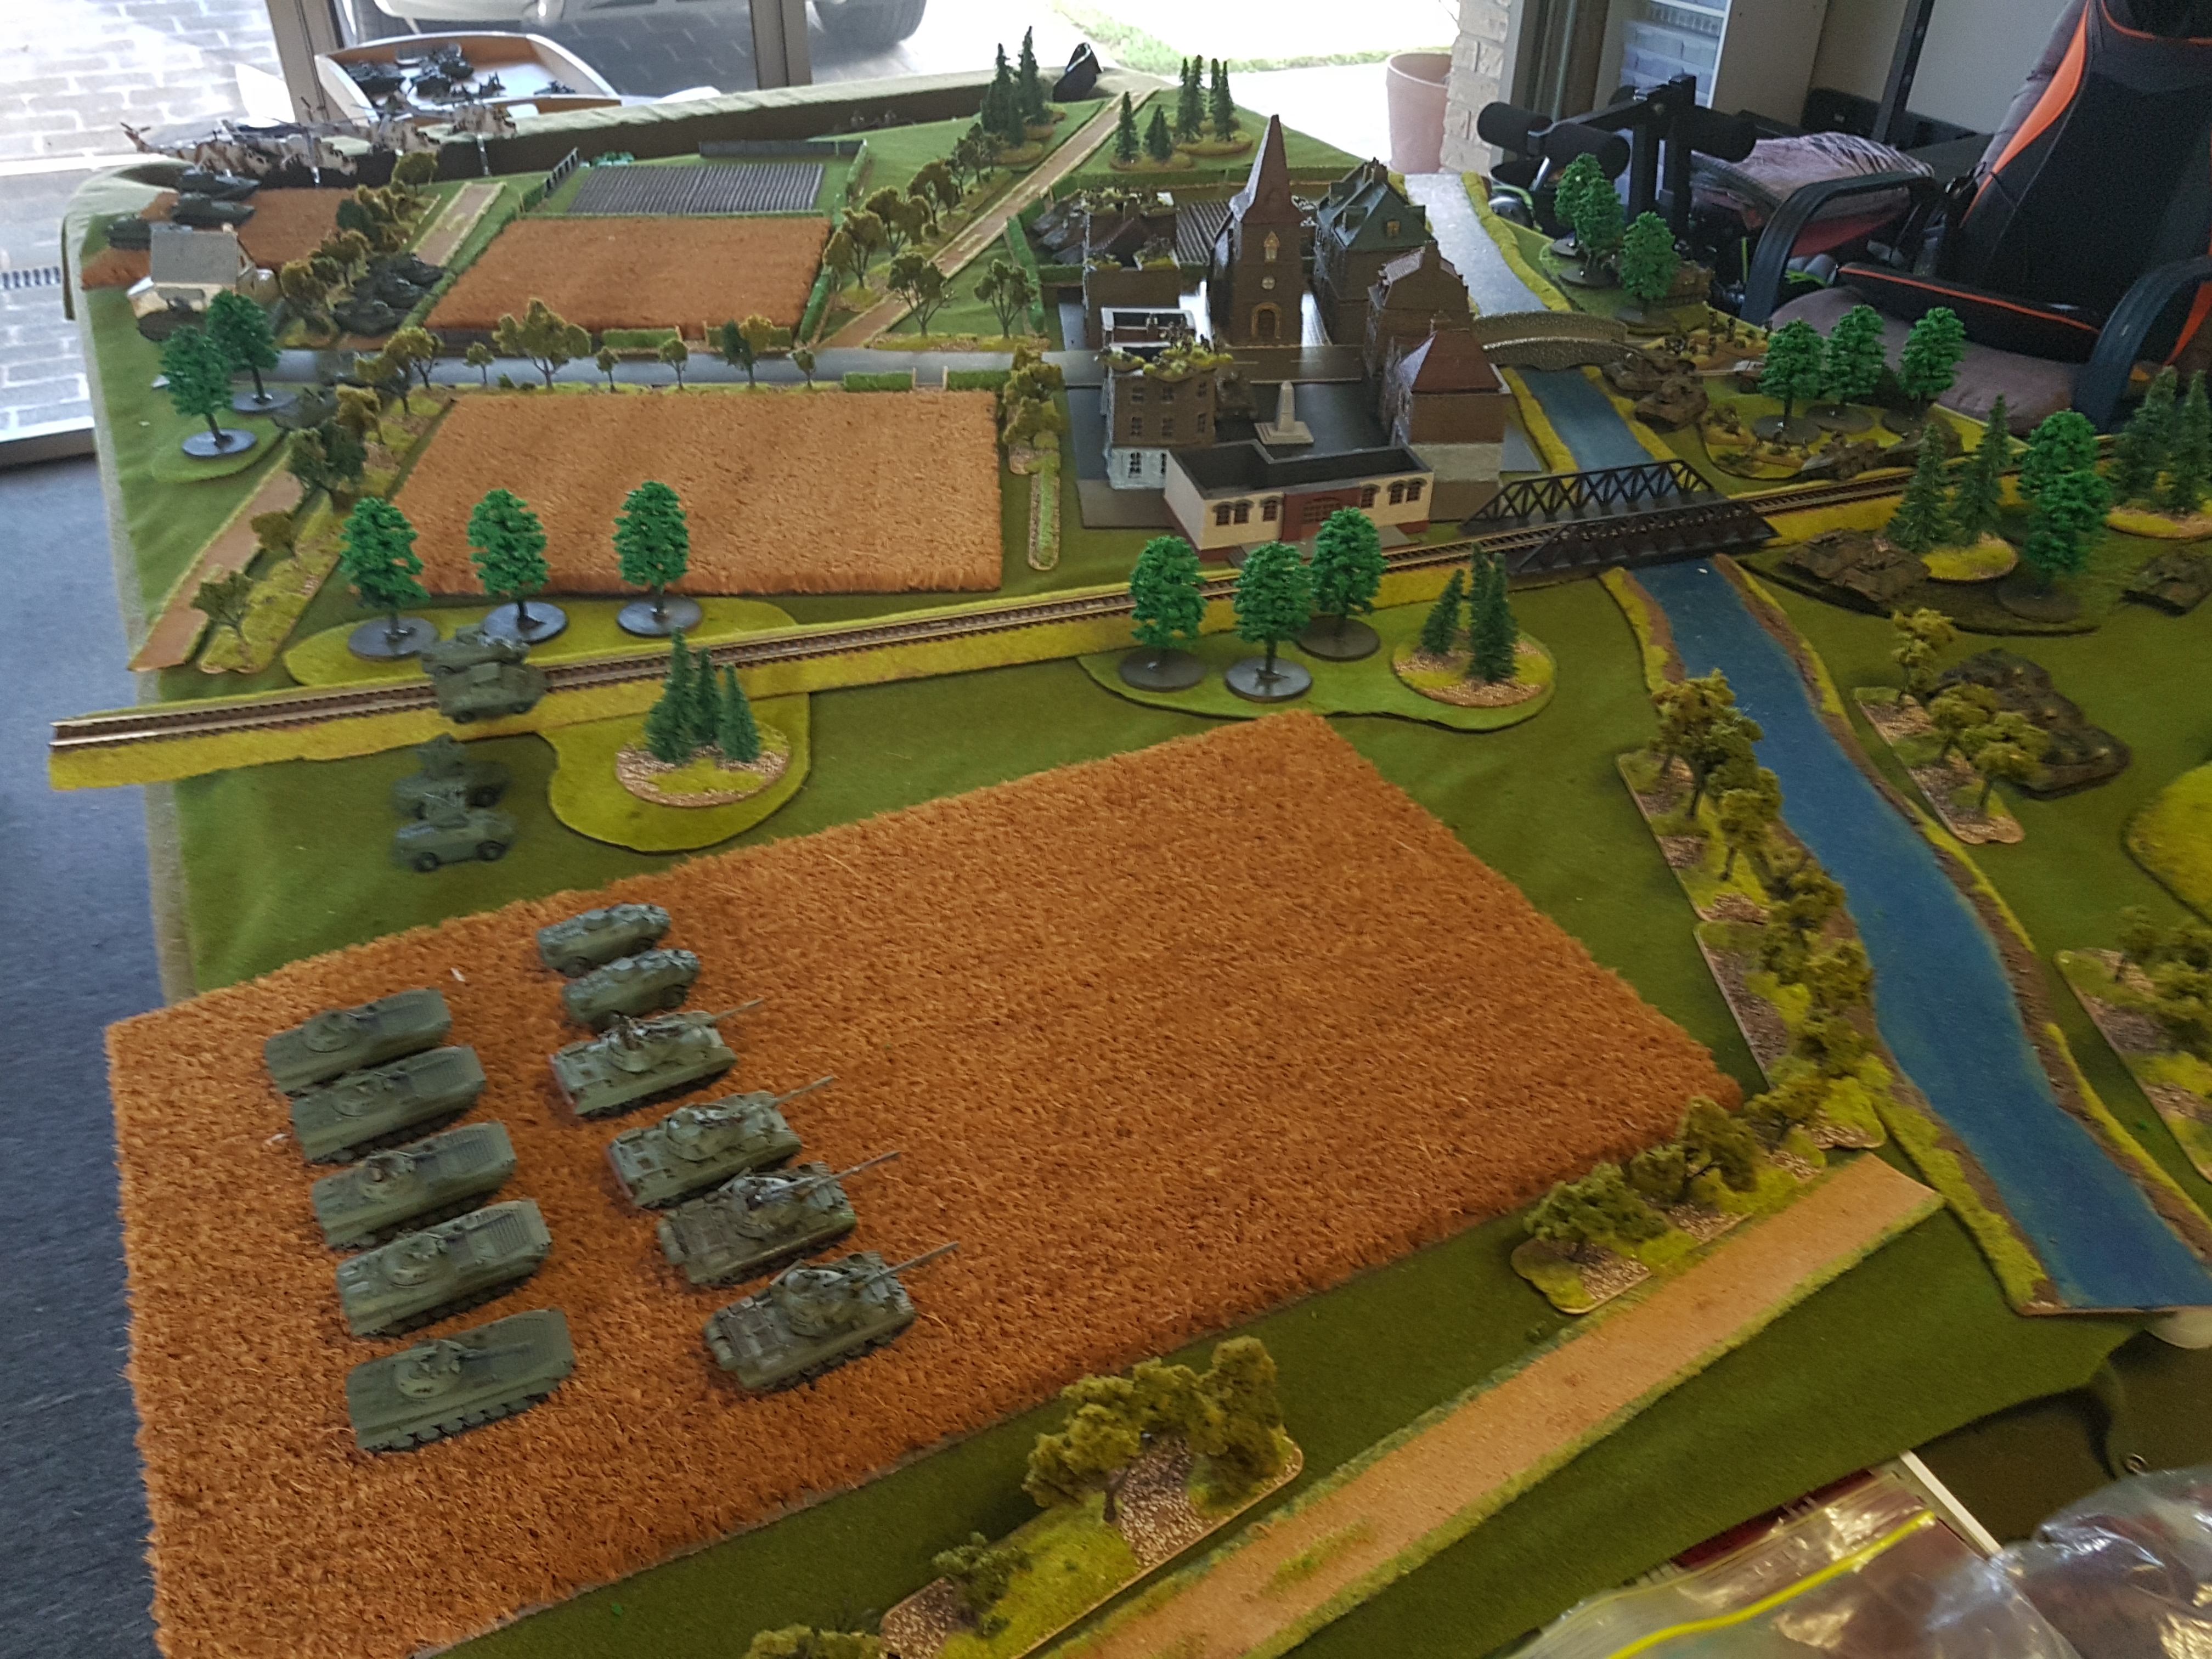
This is now turn 6... the Gamblers turn as my dad calls it. Where it's make or break it. I have troops ready to assault the NATO troops in the train station that will be supported by a pair of BRDMs. I have some BMP2s ready to move to the rail bridge and clear it of the lone pesky Milan ATGW that refuses to die. I also have 4 BMP1 ready to deal with the lone Leopard in the forest. On the left flank I have 3 T55s that can smash the Marders that have managed to get behind my rear. I also have 3 MI-24s flying around causing all sorts of trouble.......... Cry Havoc, let loose the Dogs of War...
 On the left flank the T55s rotate to destroy the Marders that have managed to get behind them and also engage the other Marders that have moved to try and reinforce their crumbling forces at the rail bridge.... but fail to hit anything. It looks like they will also have to attend gunnery practice as well as driving.
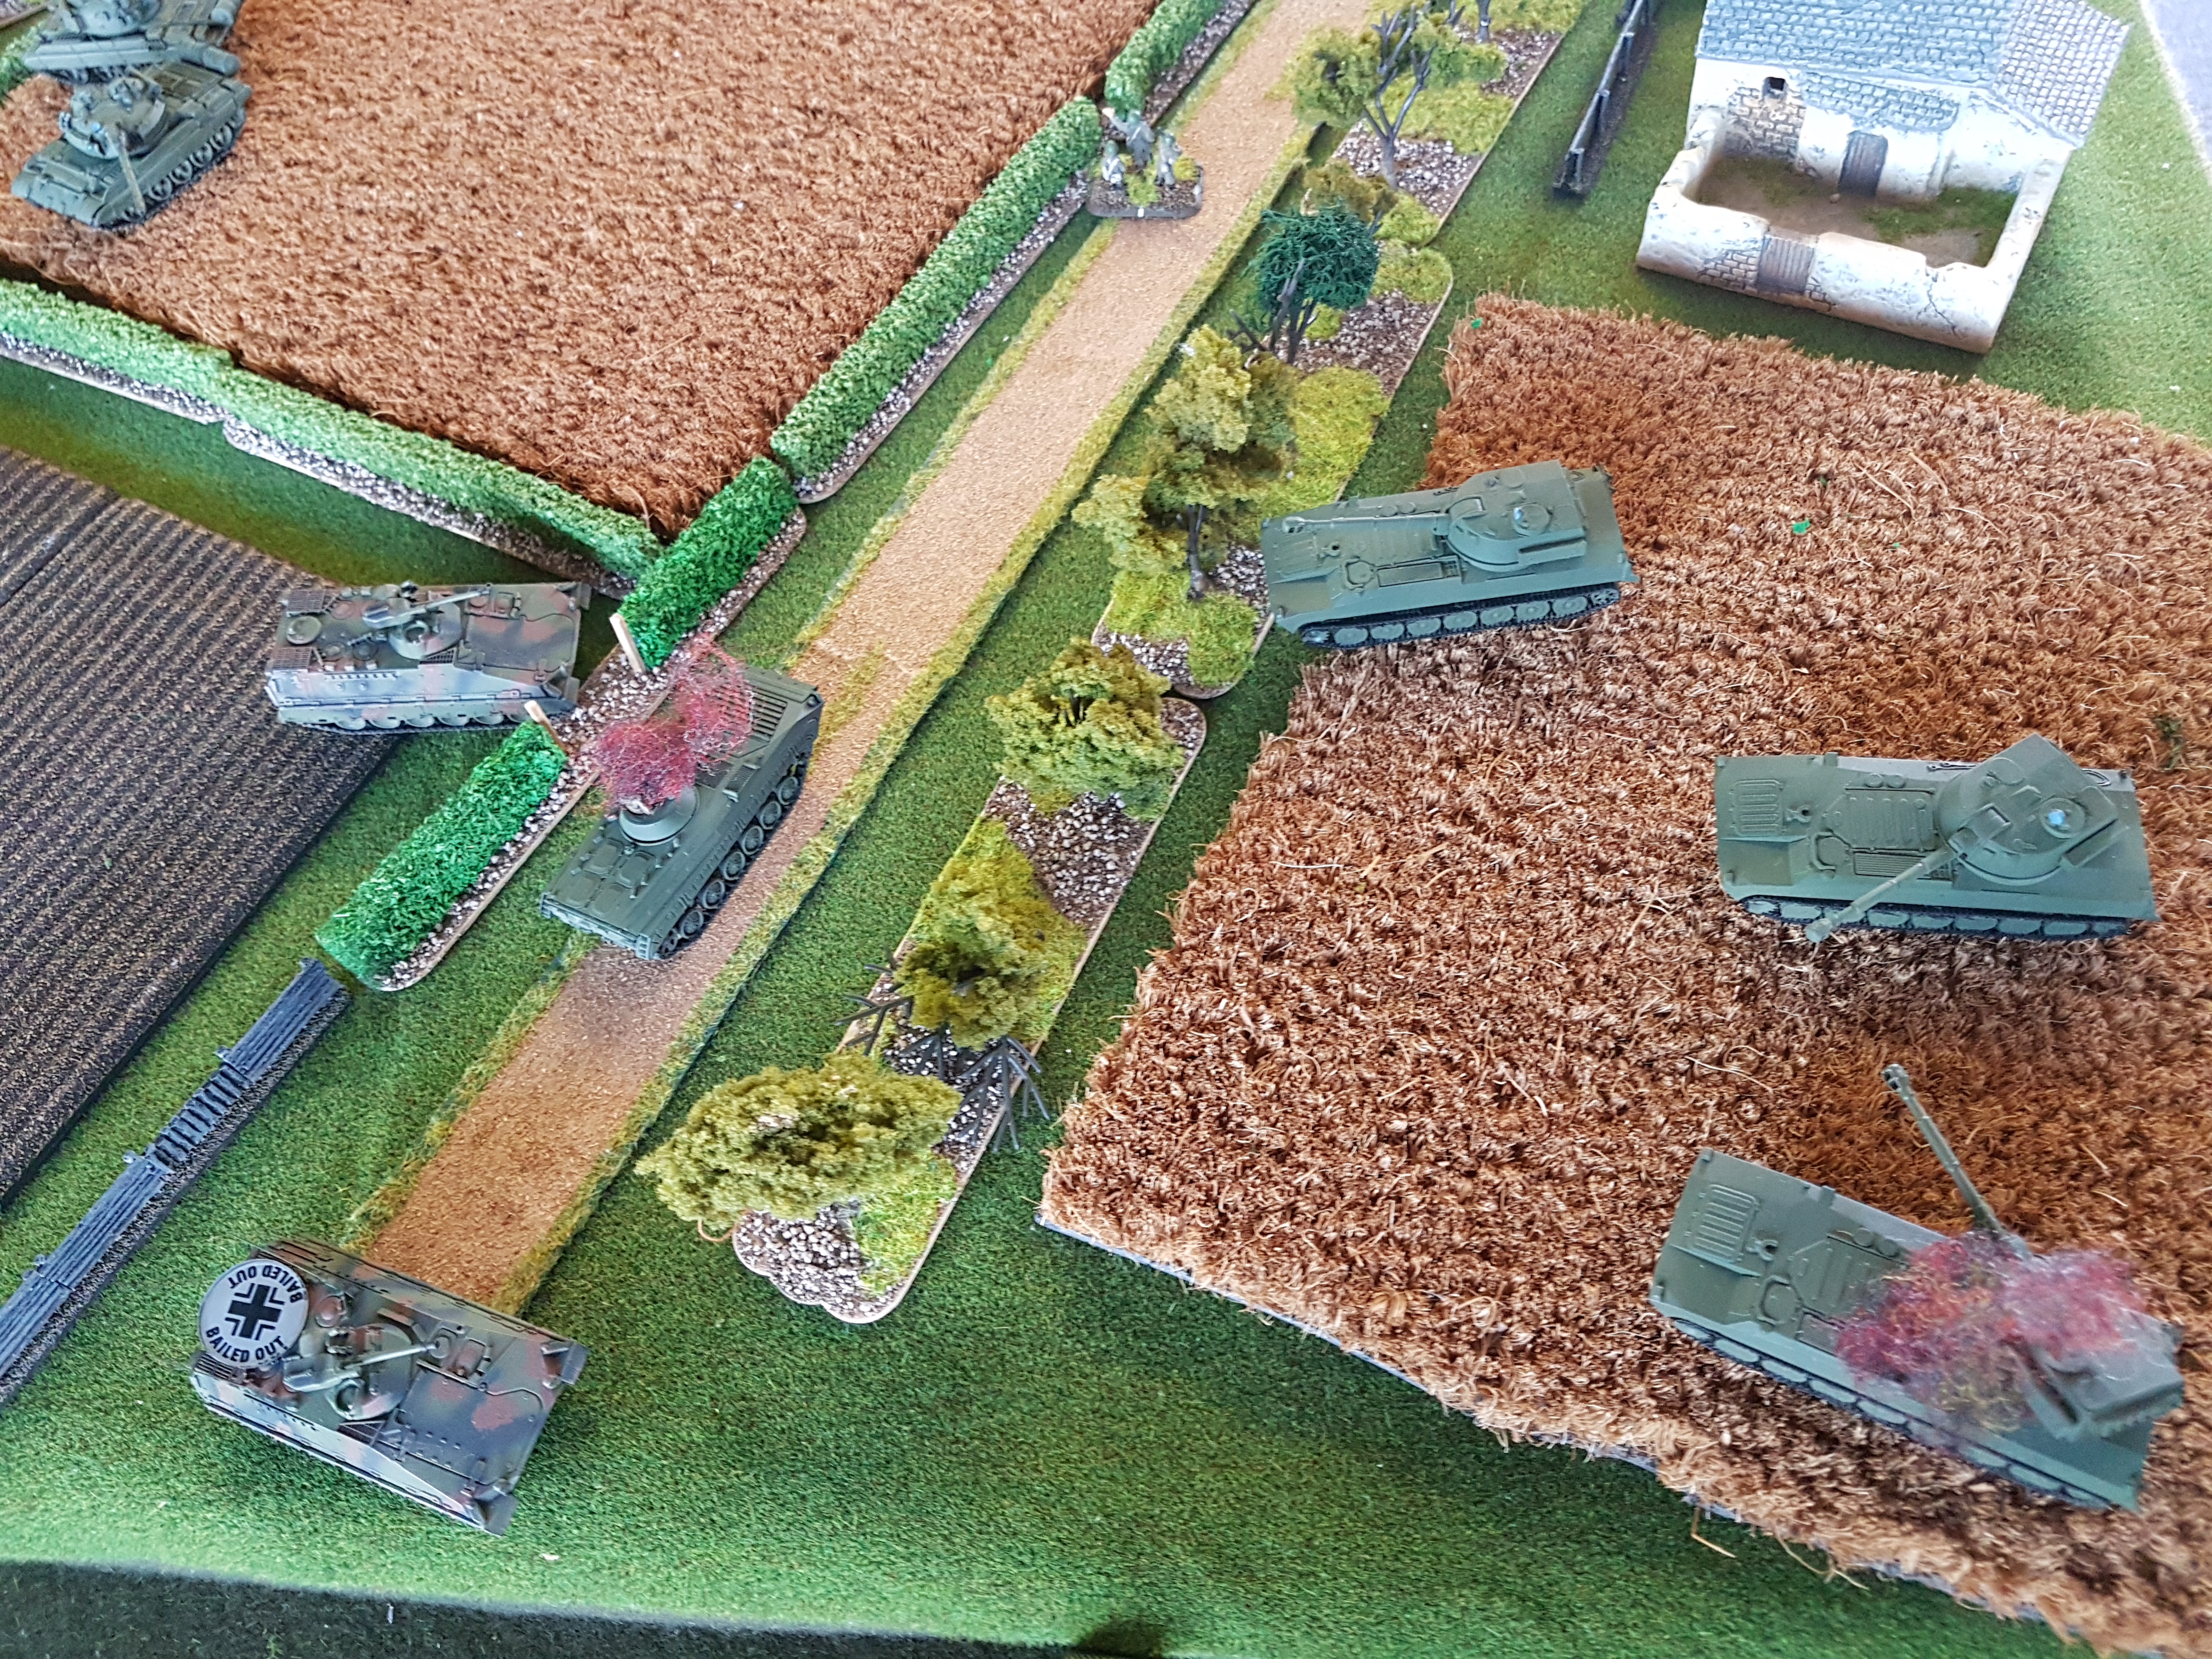 The 2S1s now take the battle to the Marders with direct fire. They manage to hit one forcing the crew to bail.
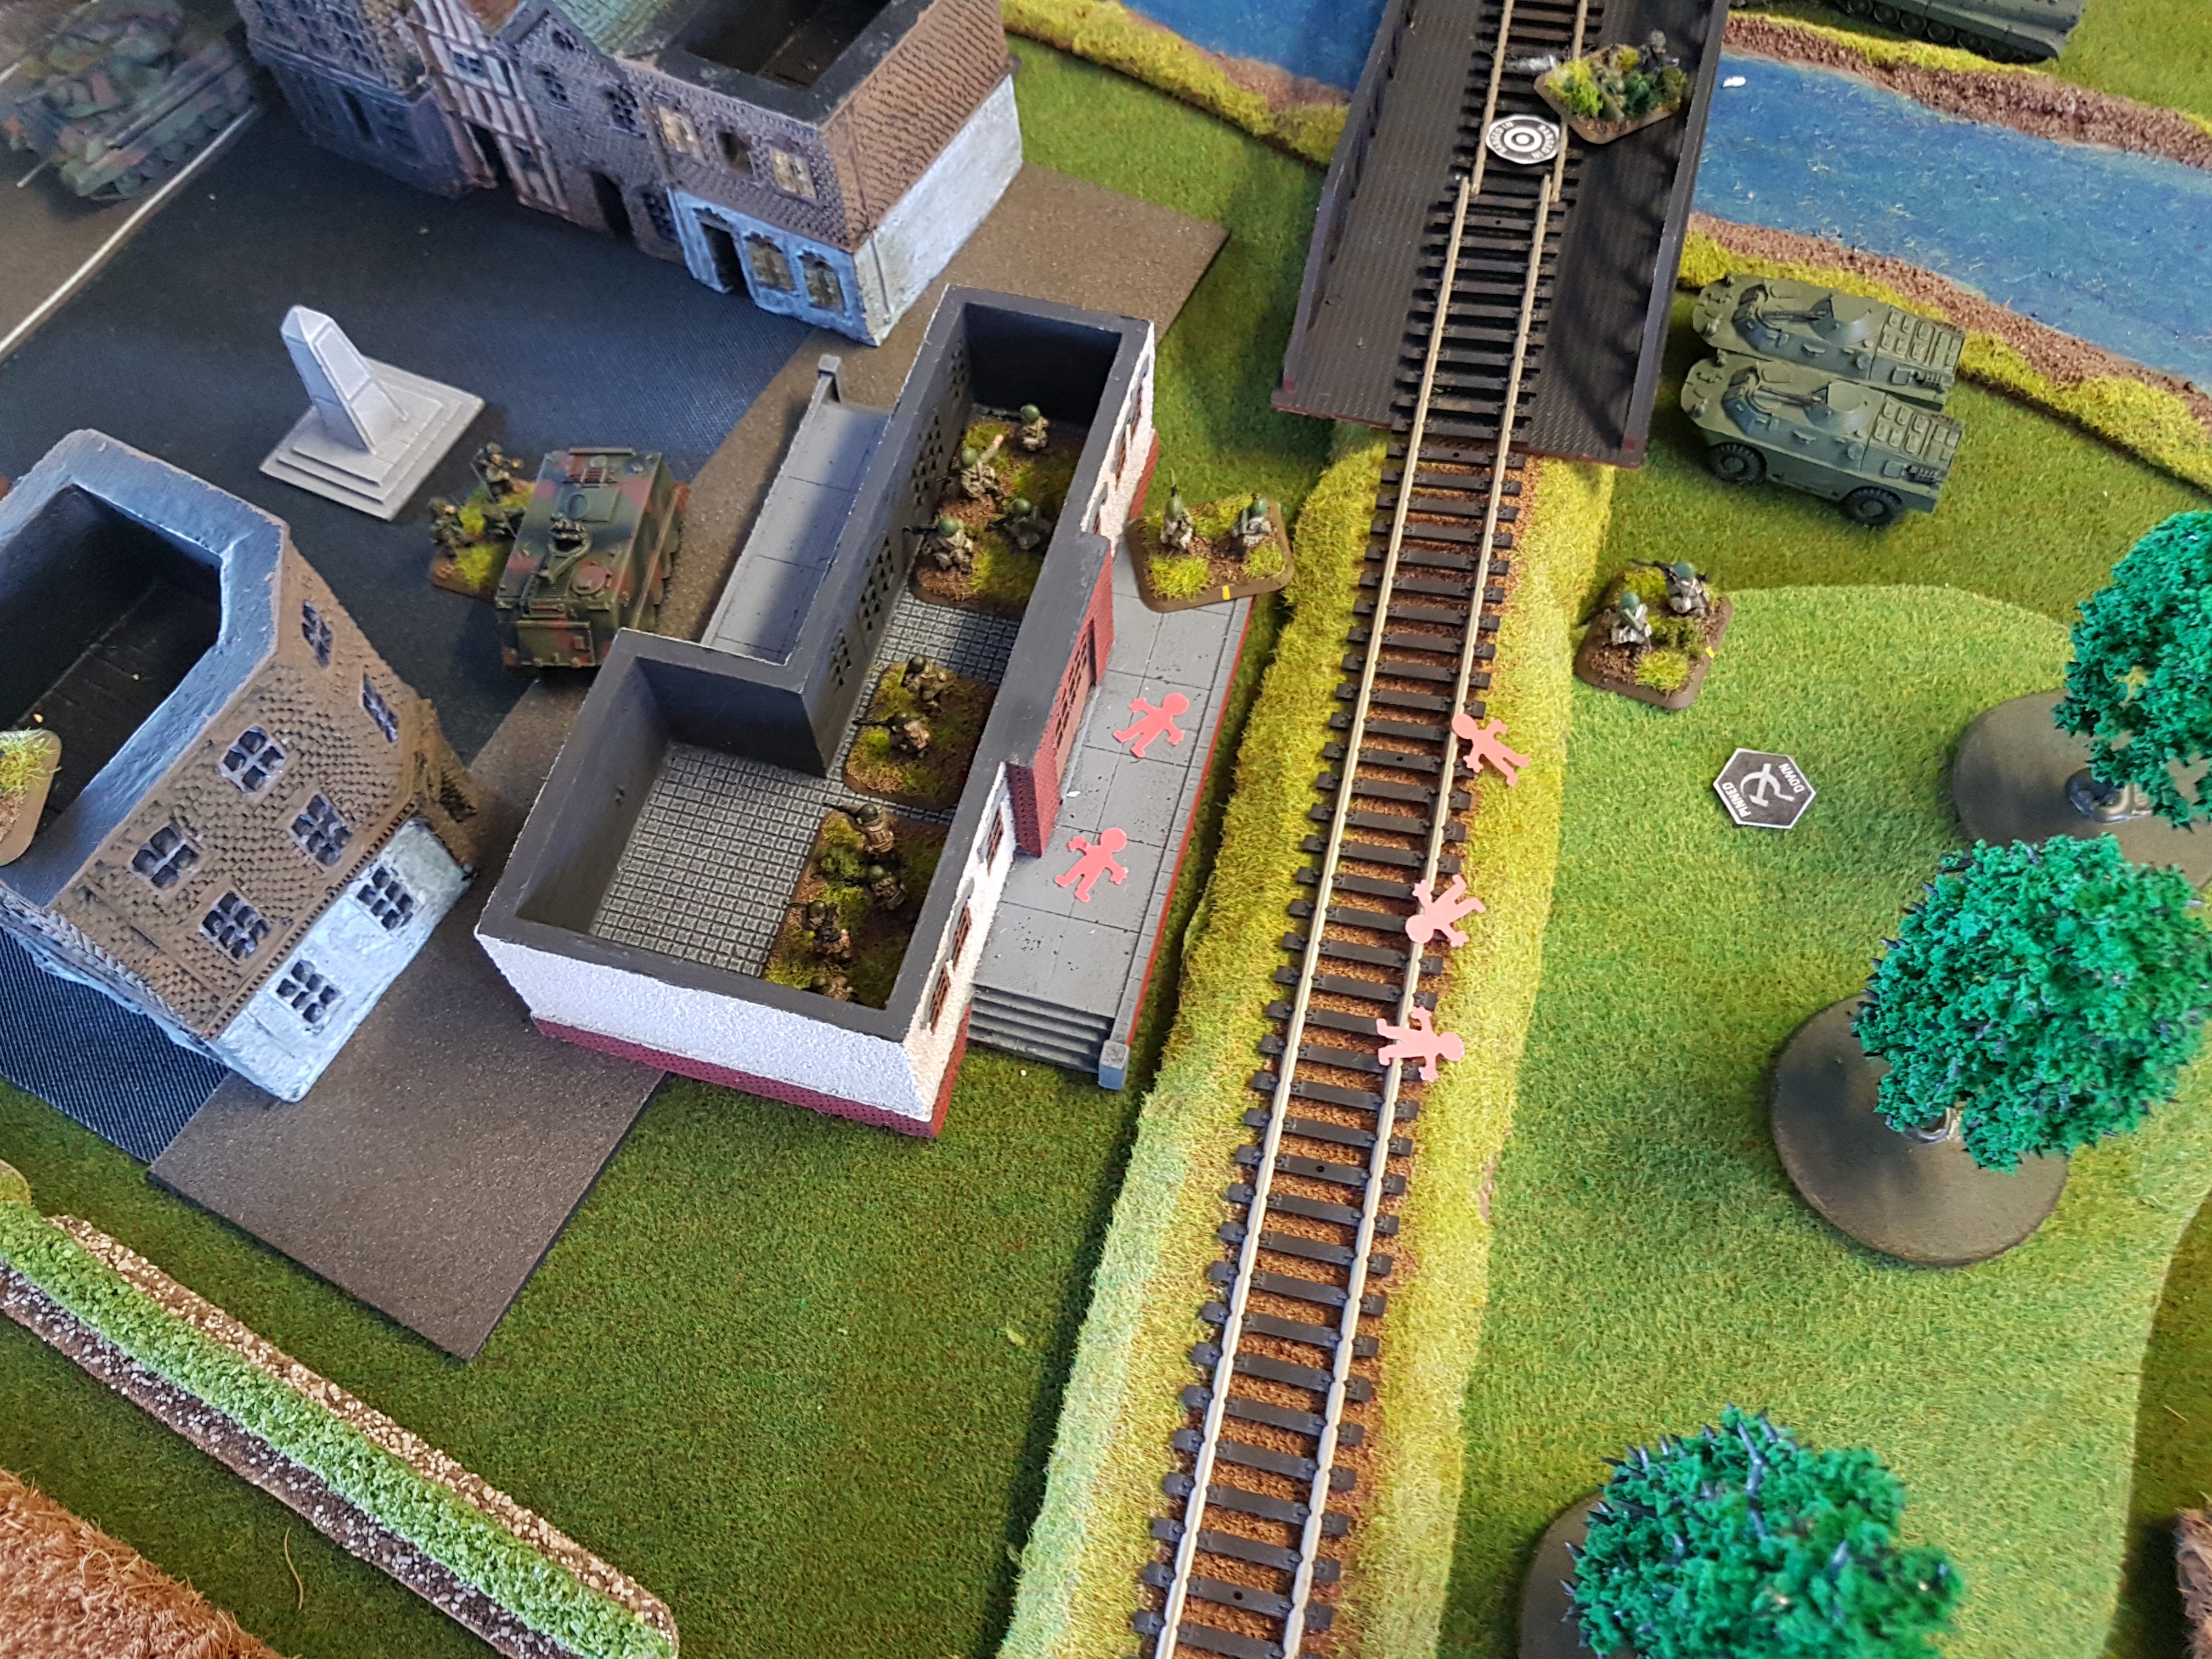 On the right flank the airborne troops move up and engage the troops in the train station supported by the BRDM2, while the BMP2 move through the woods to kill the lone Milan ATGW. The BMP1s engage the last Leopard with direct fire. The troops on the hill failed they morale and remanded pinned.... end result was the BMP2 failed to clear the one Milan ATGW, the BMP1s failed to hit the Leopard, but the airborne troops managed to assault the train station and clear the enemy out, not before loosing some very gallant troops.
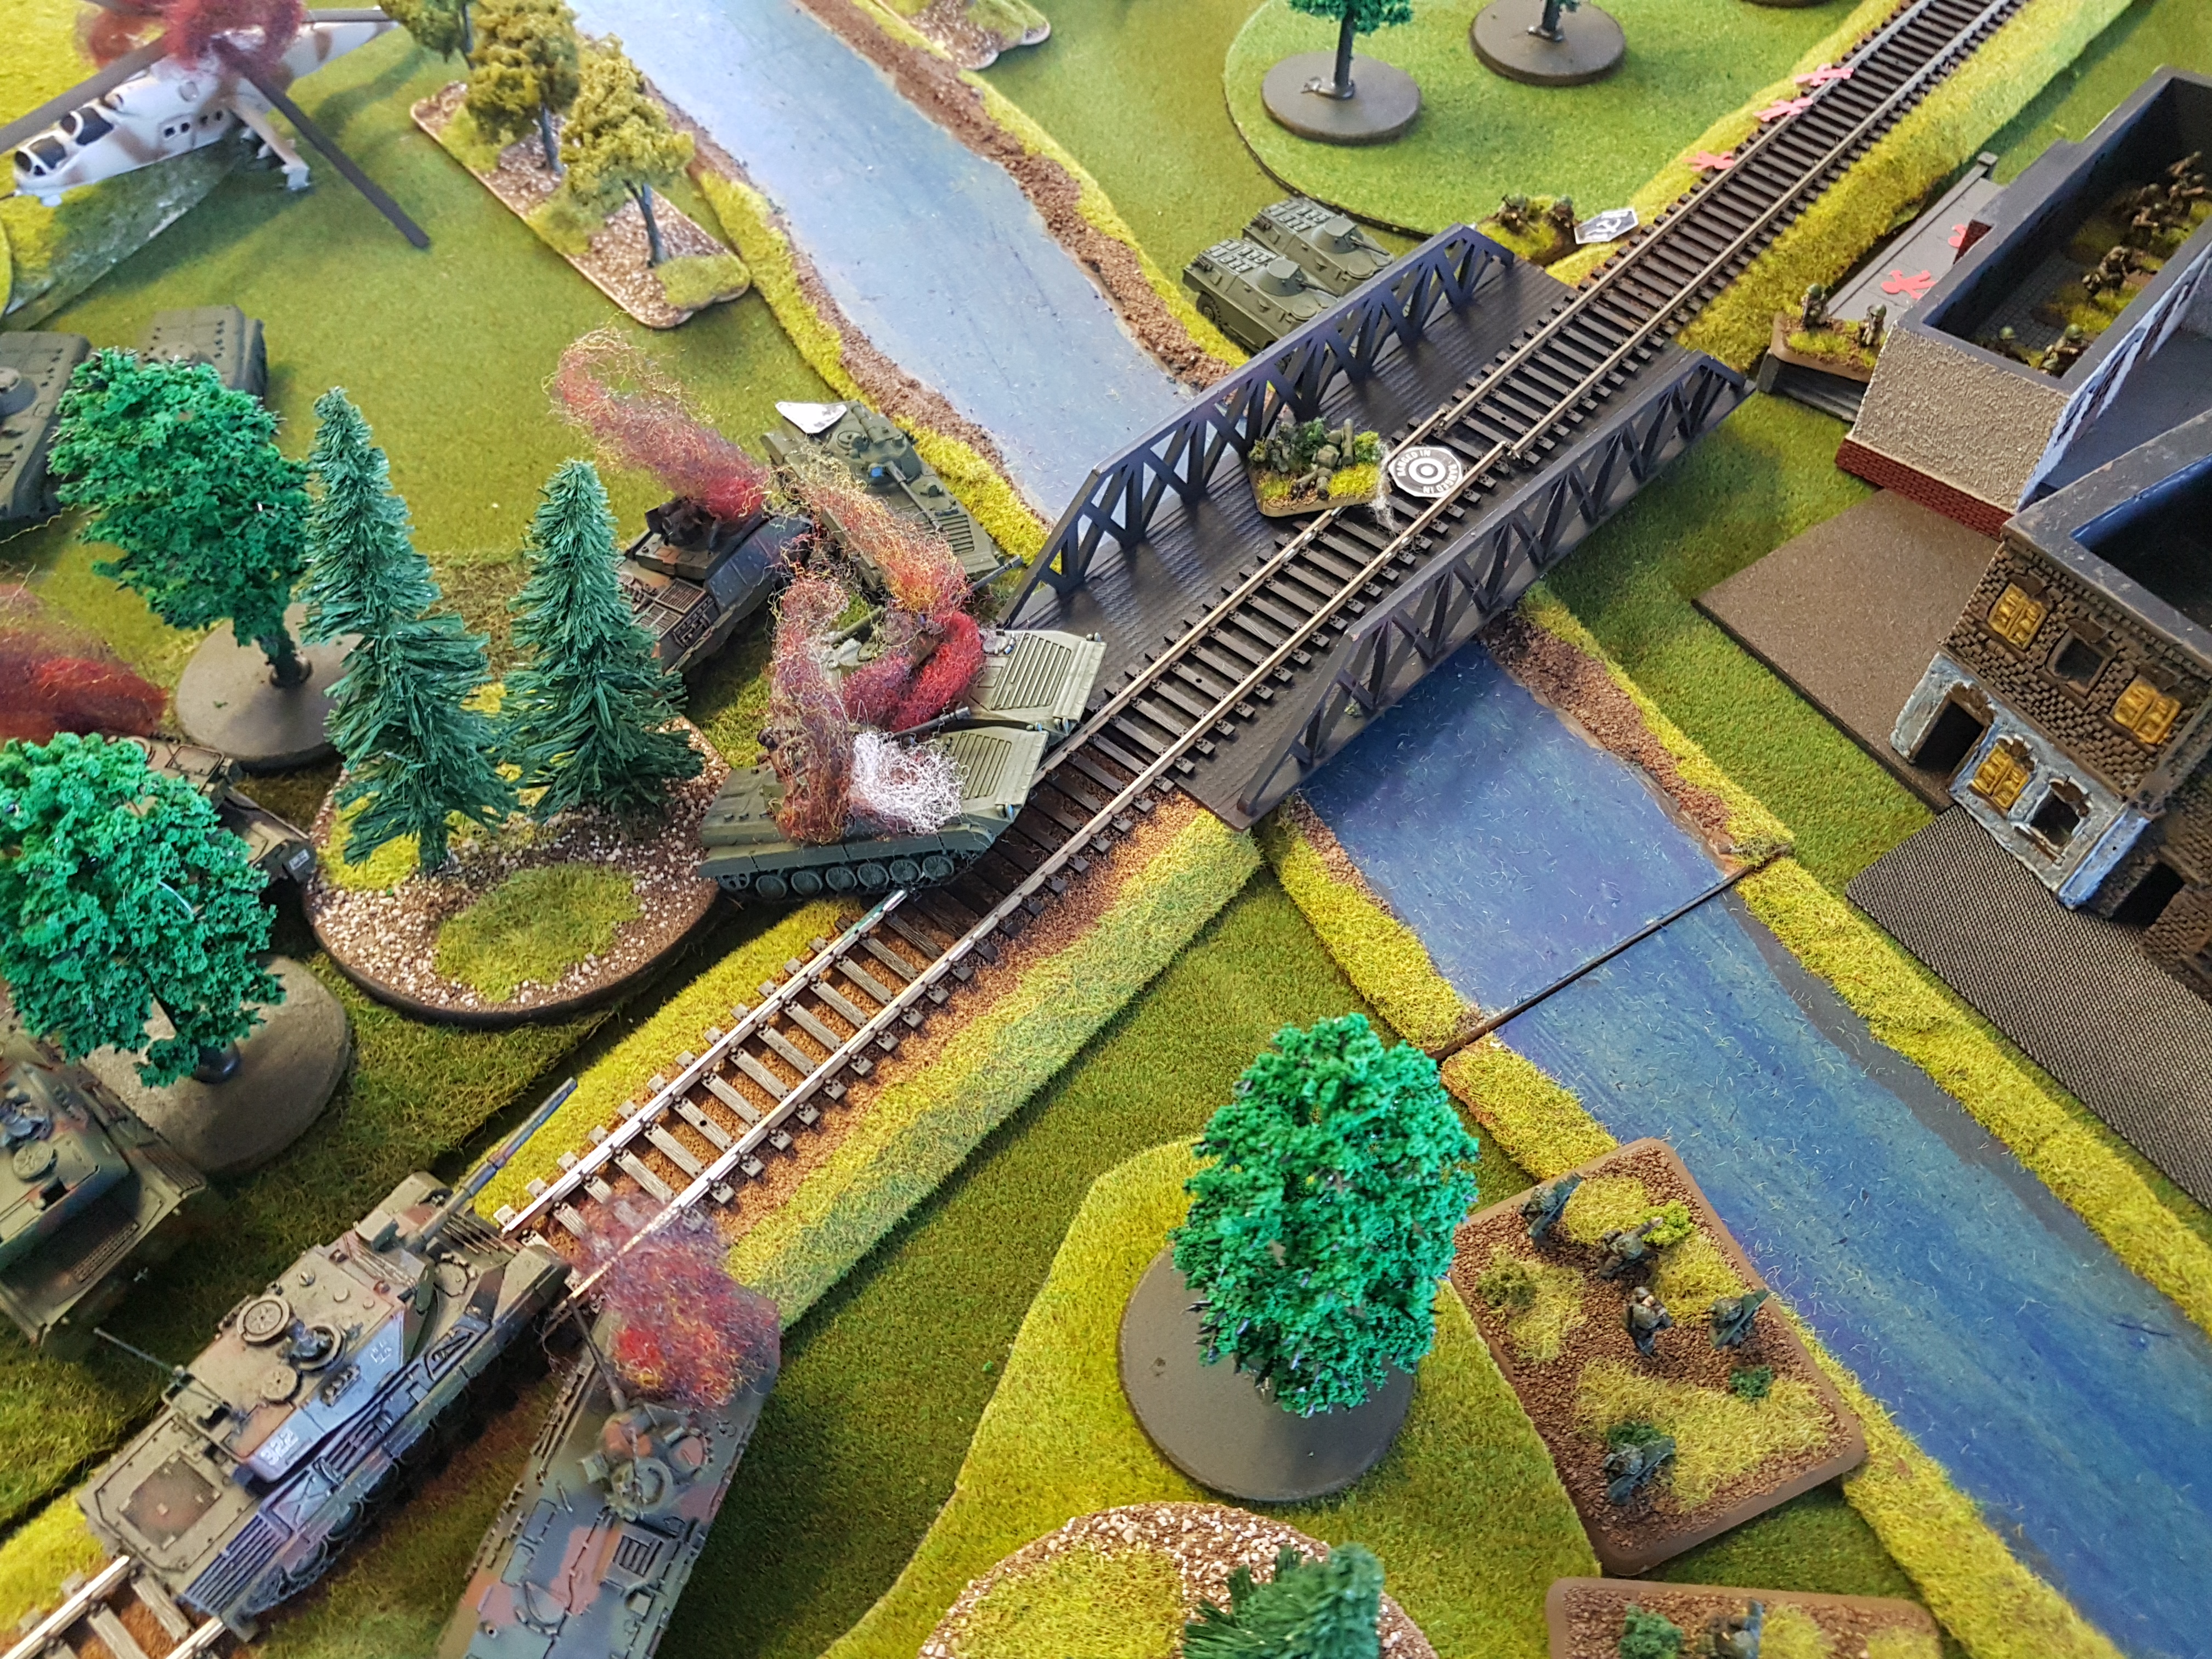 NATO response... the lone Leopard moves onto the rail line and destroys the BMP2s, while on the left flank.....
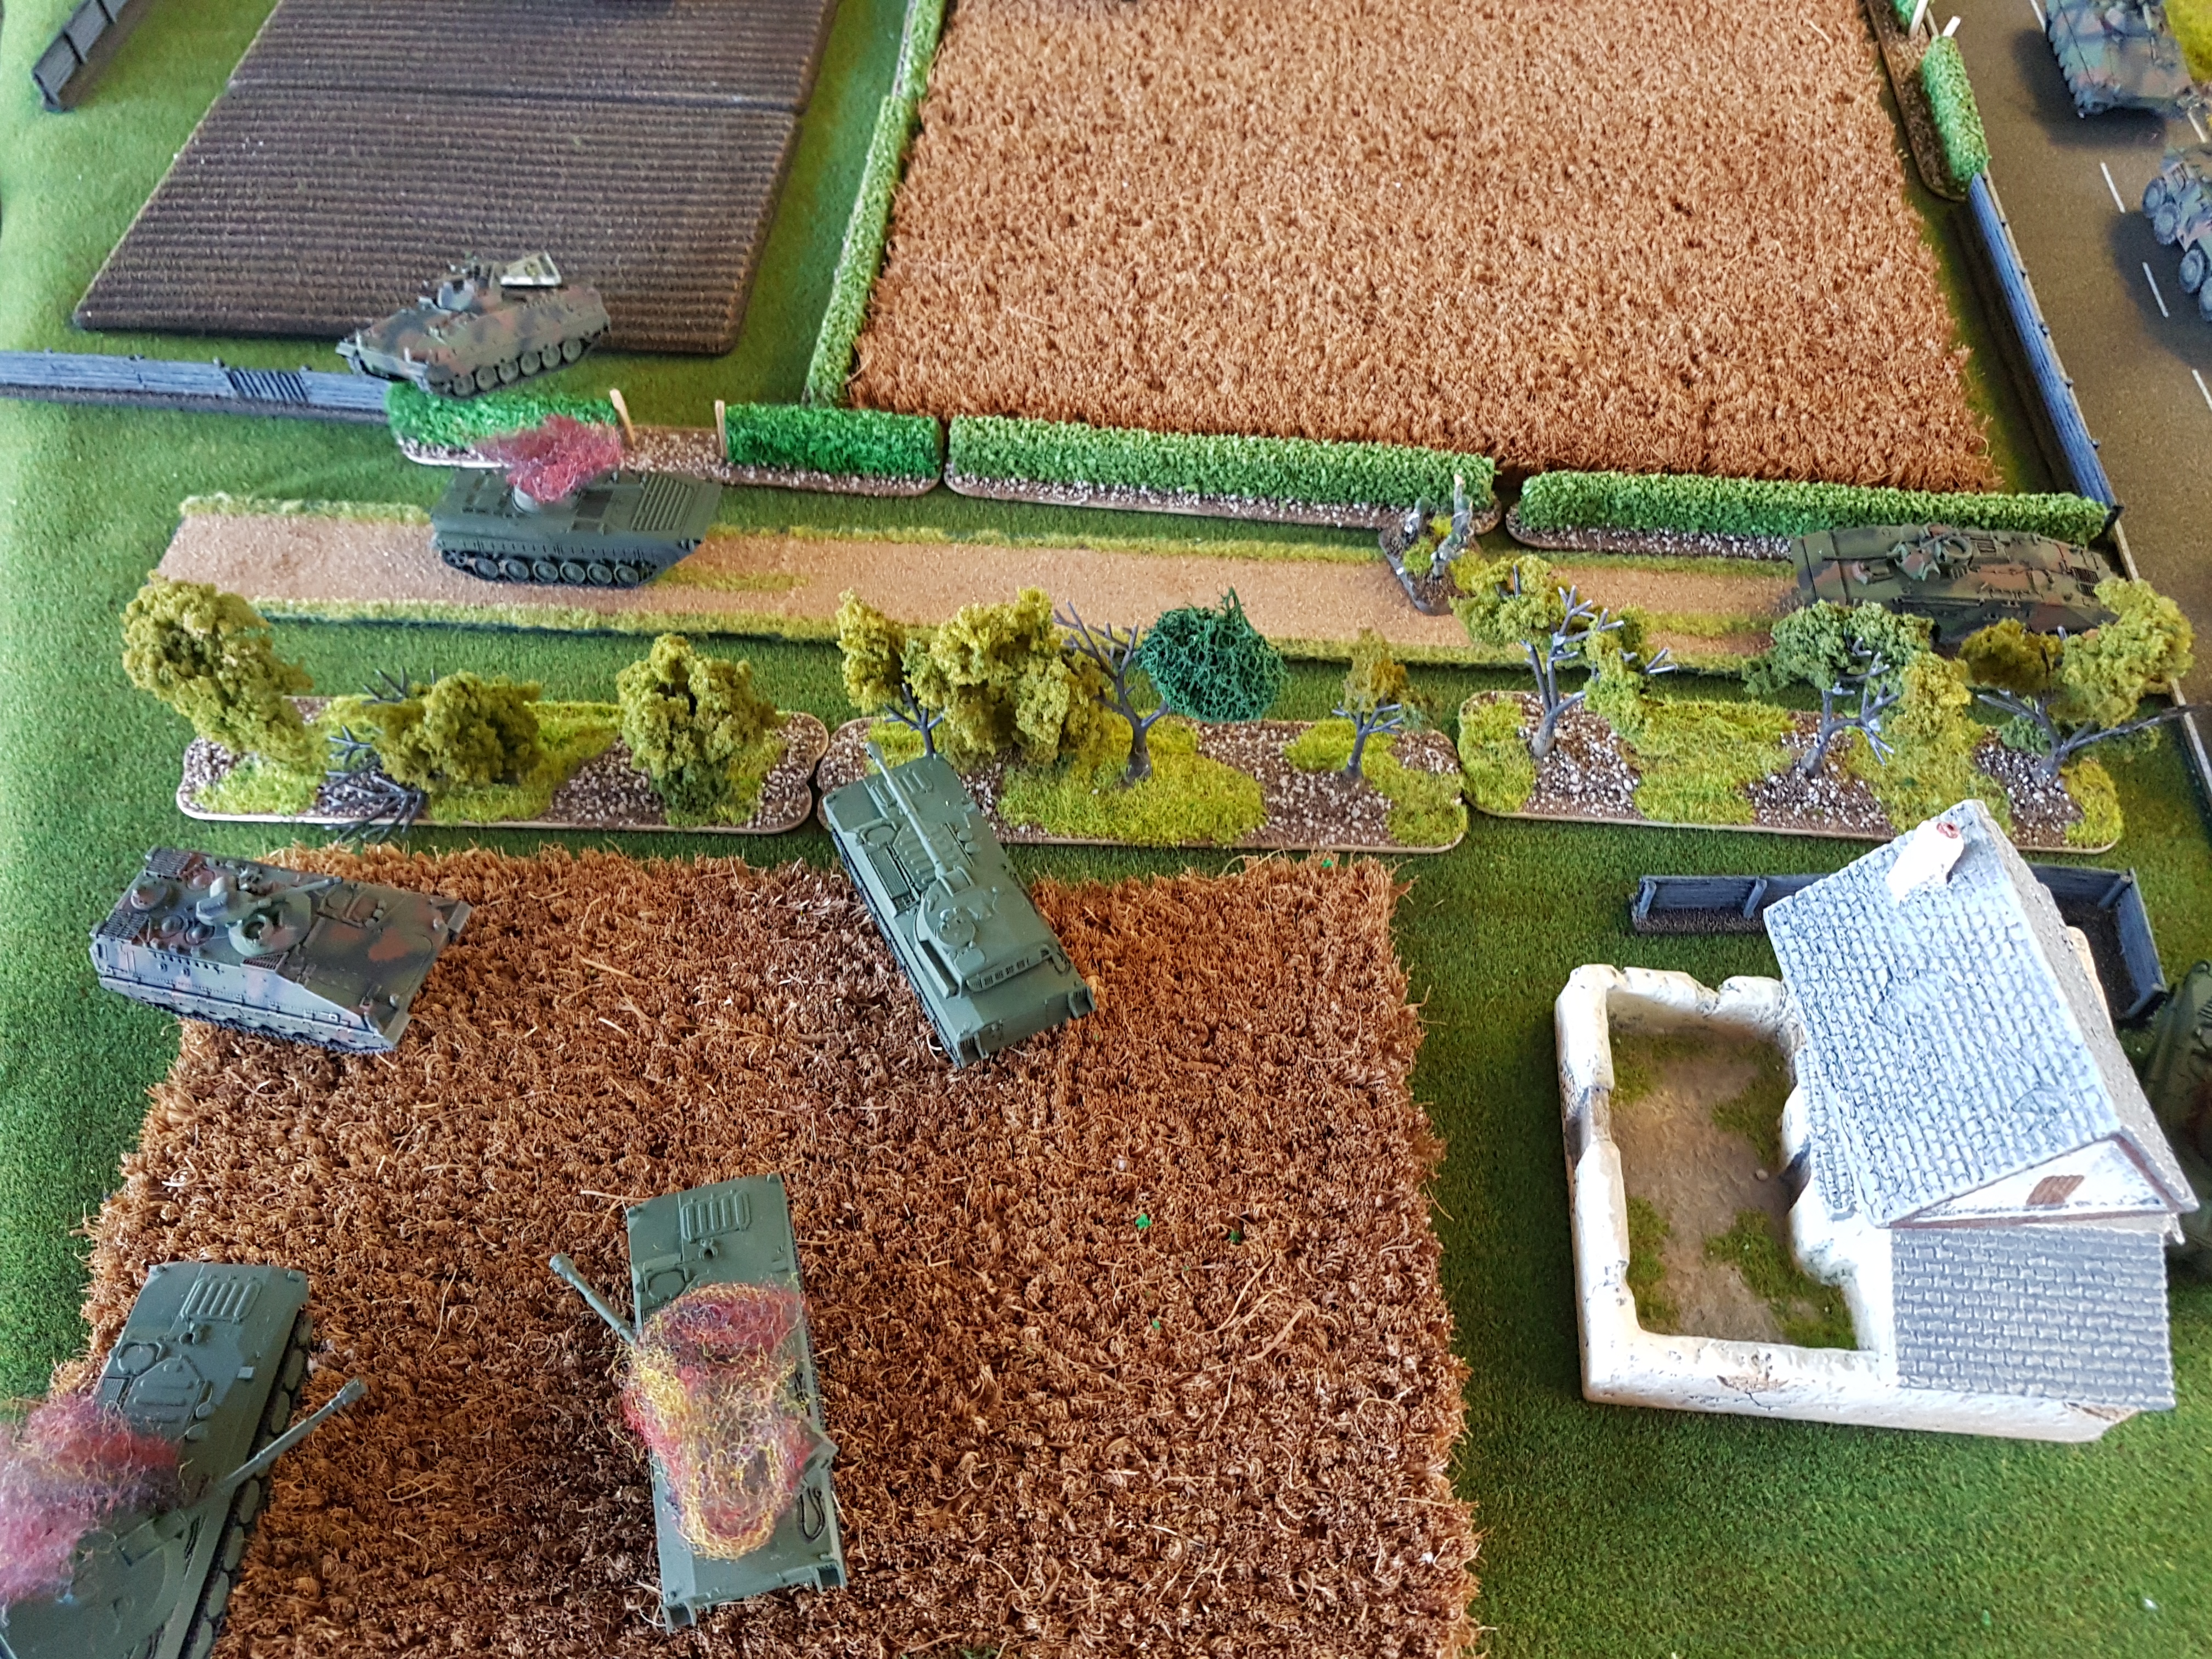 the Marder remounts and then destroys another 2S1, while the remaining Luch tries to kill our valiant hero, but fails to hit him.
Summary:
We set a 6 turn limit on the game, so the game timed out with NATO still holding both bridges, but only just. With that we called it a draw.
Some very good learning points.
1.You might notice on my army list that my Spandrel zugs were 3 strong, yet there were only 2 in each zug on the table.... yes thats right, I forgot to put them down.
2. Know the weapons your units have. Twice I got too close with the MI-24s and couldn't use the missiles.
3. Don't try and do too much at once with your units. I had a unit of 3 T55s engage 3 different units. Centralize my efforts onto the one target.
I have the same scenario/mission against my dad this weekend using the same table but I'm defending this time. I will use the points learnt and see how it goes.
Col. Ivan-a-drinksky out....

+++
your reports are 1st Class (worth a commendation and a 9/10) but personally I’d like them more if you did a little more winning!
I got the idea about marking infantry loses. I wanted some way where you could represent infantry losses.
nice clear pics and great table set up, looked like a nice battle! well done
Really nicely painted models in this. Also, yeah I find a lot of my 50pt games turn into a huge battle for some reason, it’s just a good point format I feel.
By the way, what are the little red human silhouettes for? Are they marking infantry? Good report!
Want to come back, what a great looking terrain table you have there – allowing all kinds of tactical options
and caught the only river in the Netherlands with trees along its bank is river MAAS 🙂
Hard fought and well reported
Gorgeous terrain, table and models! Such good pictures as well, commendation on enjoyable report, you’ll take those bridges next time.
Oh, and get yourself that drink, Ivan. You earned it!
(please note, it is rare for me to commend an OPPFOR Officer, but in this case, military professionalism demands it).
Top notch table and AAR. You very nicely capture the ebb and flow. Sad to see a draw as both sides fought well.
Wow! That one had me seriously wondering who was coming out on top. Your table is excellent and the models look great as well. I especially loved your explosion markers.
Well fought!
I like the models and your table! Very nice report!
Very nice terrain. The railroad bridge next to the road bridge adds to the real-world view. Nice touch.
Very good report mate. I thought you were going to use a map and try and link in videos??? Very good all the same. Look forward to ripping your troops apart on the weekend.
That is a gorgeous table! Excellent batrep Comrade!
What a beautiful terrain table!
Smart & Complete AAR with excellent pictures Tovarich Ivon
your getting there! – & these HINDS are hairy !!
thx for sharing
Four Hinds are an intimidating sight. Need to deal with them quick or they will run riot