Fought At Ruhr
2205 days 21 hours 6 minutes ago
Combat at Grundsteinheim
100 POINTSBritish and German troops make a last ditch effort to cut the route to Paderborn. An E-battle: the counters are the game
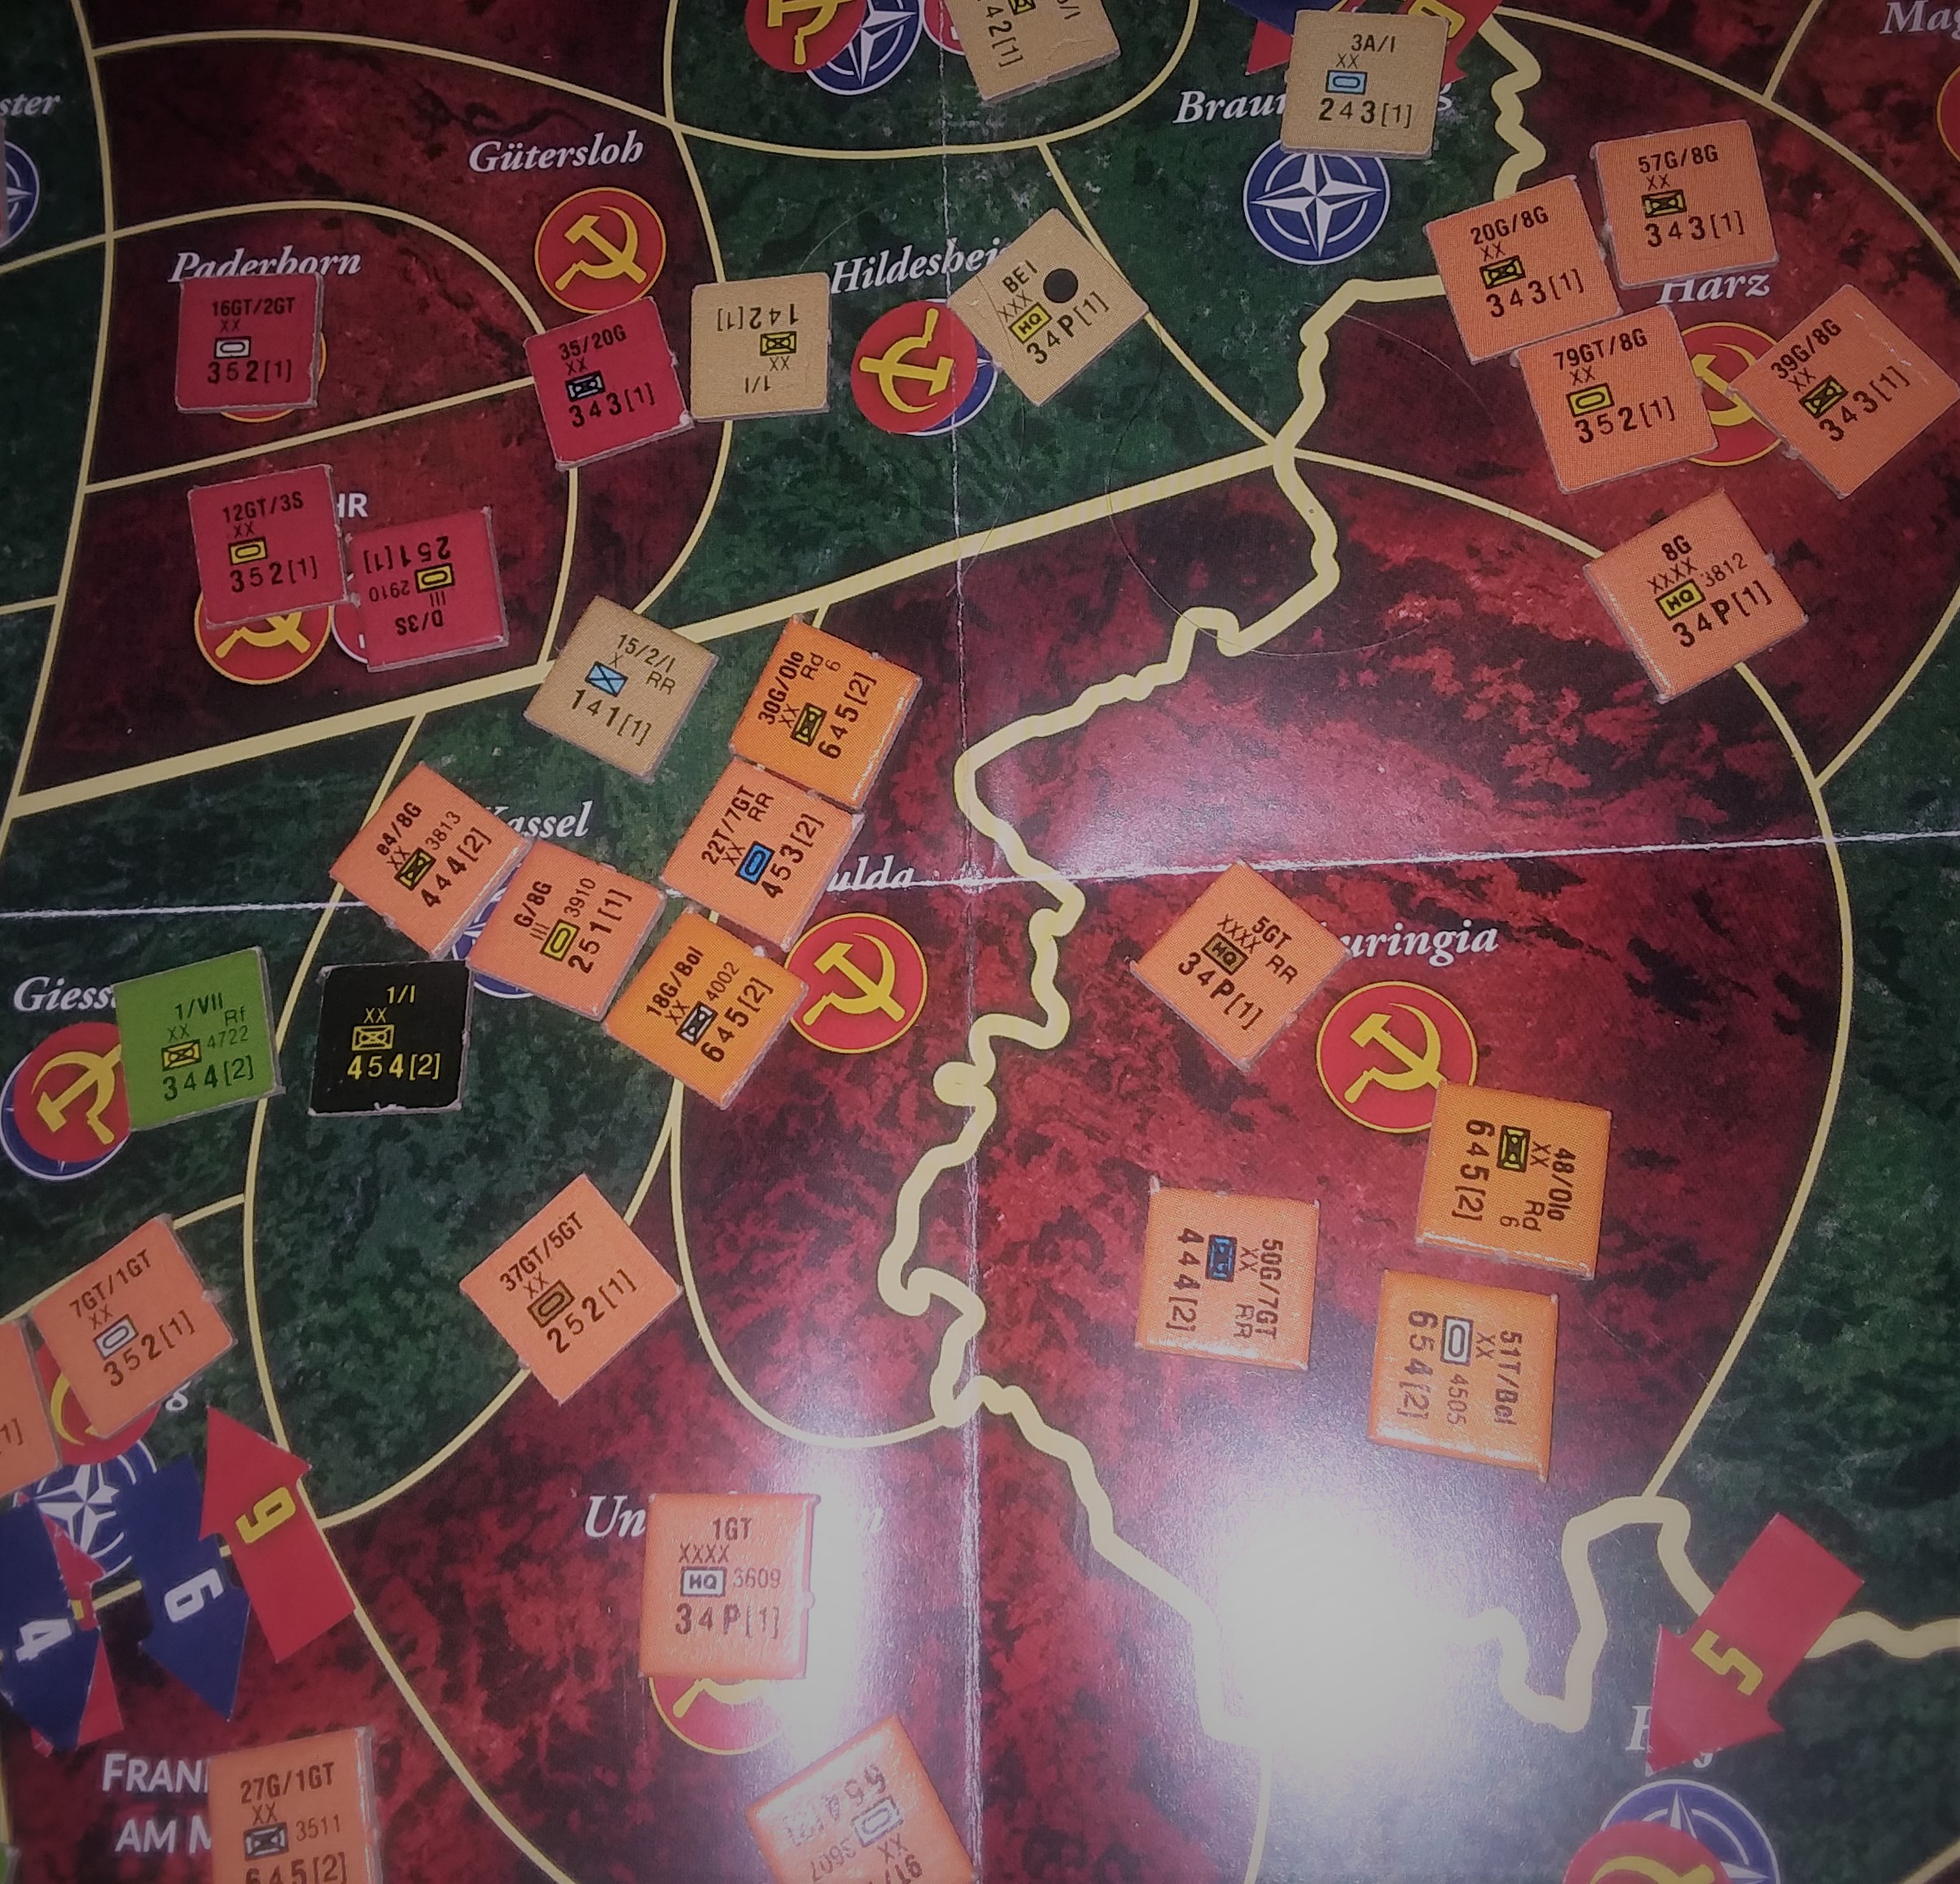
No sooner had the 4th Motorisierte’s scouts reported contact with a patrol of 3rd Shock Army, than a new problem asserted itself. Two, in fact. American forces had surged across the Rhein to the west, and some were pressing on through Giesen to disrupt the progress of 1st Guards Tank Army.
But also, a kamphgruppe of the 2nd Panzer Grenadier had regrouped with more of the British 2nd Division’s verdammt Green Howards. They had established a road block near Grundsteinheim.
Niemand had no great love for Americans. In his opinion, their refusal to go home long after their presence was required to protect the ‘West’ Germans was the main reason for the war. Absent their garrisons, an incident in the verdammt Persian Gulf would have not resonated here. No matter who controlled the Persian Gulf, its oil would sell in Europe, and all that mattered was the price. Europe would pay it. But the Americans had rattled their sabers, and now Germany was paying the price.
But…as tasty as destroying an American kamphgruppe would be , the 4th’s mission was to clear the route into Paderborn, and detouring fuel trucks around the roadblock would be…inconvenient.
Business, therefore, before pleasure.
 Overhead of sector. Grundsteinheim isn't Kassel anymore. Fighting occuring just off top edge of this map
SETUP
BH and I played NO RETREAT, a sensible scenario given the operational situation. It also gave him the benefit of minefields.
We used the forces from the previous meeting, saving time from organizing troops. Again we were playing multiple formations, using infantry, no air. BH took the Gepards to see how they worked.
BH laid his minefield on the western half of his deployment, defended it with the German infantry, hid the Gepards, put the Jaguars in ambush, and put the Marders where they could get to support a potential breakthrough of the mines. He deployed the UK formation on his eastern flank, where they covered the wooded hill.
I had no particular desire to charge through dug in British infantry. The minefields became my target. My setup covered every possible firing position that could see the Germans, and of course anyone not in my original deployment area was occupied by T64s and T72s on beginning movement. I used spearhead to bring the East German infantry into striking distance of the mines. The Soviet infantry could not possibly make it, so they initially took on a support role.
The battalion commanders of the two battalions were close by so they could motivate the mine sweepers into the field. And modify their skill check, etc.
Turn 1
The East Germans made it into the minefield and were pinned for their efforts. Every unit lit up the visible infantry. Shells rained down on the German infantry, too. But all those dice marginally pinned both the West Germans and the 1st UK platoon. Each unit lost a Milan team to a failed save. Tanks and missile launchers posted on the hill in my rear had no target on the infantry so they concentrated on the Marders, killing two with 12 shots. The third failed morale.
BH rolled reinforcements and on came the Chieftains. His units unpinned. He parked them at the edge of gun range but in the clear and started a duel with the T64s. 2 hits but I bounced one and the other was a match for a bail. The 1st UK Platoon rolled a ‘1’ on a blitz attempt and so stayed in place. The German Milan fired, missing. BH’s infantry fired up the Russians and pinned them, killing 2. BH placed the Jaguar ambush, and fired them, getting two hits, one of which I matched, and one of which he failed firepower. Two more bailed tanks, one T64 from a different company, and one a T72. No morale required.
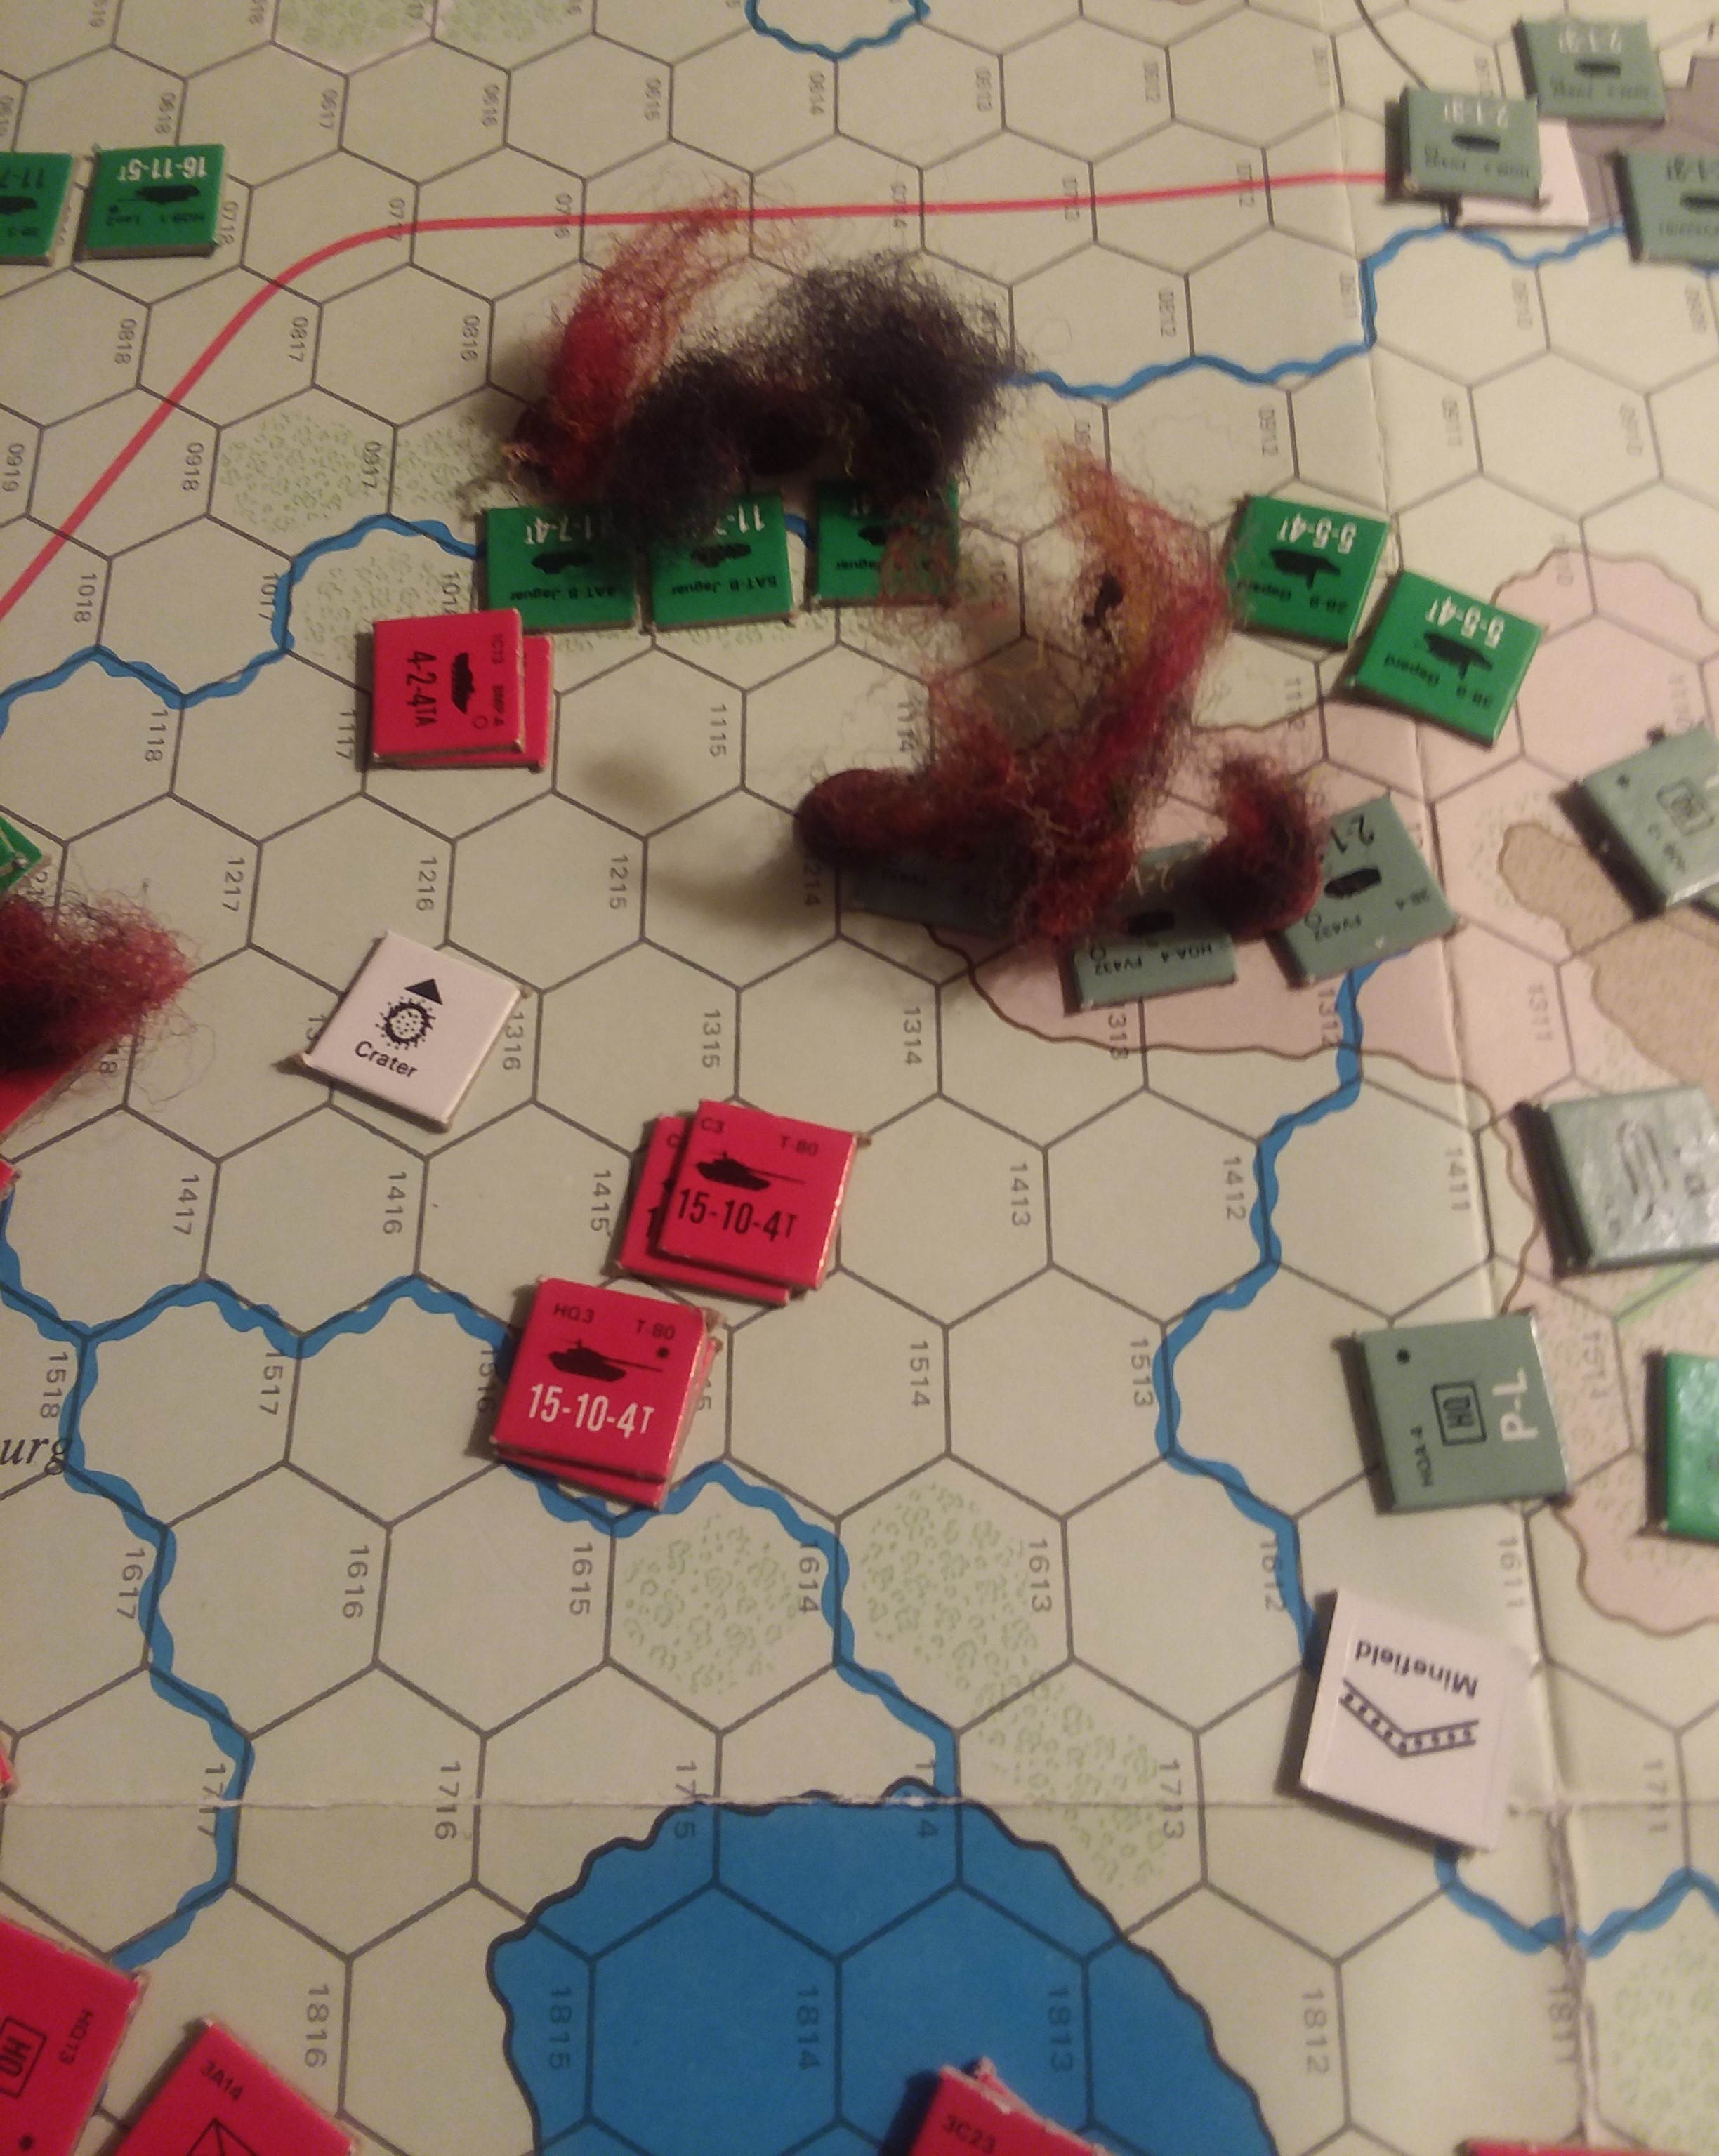
 Grundsteinheim after PACT Turn 2. One minefield removed. The die is to keep me from being confused when selecting pictures - one battle earlier was Grebenstein, and I anticipated (correctly) getting confused
TURN 2
For once everybody remounted and rallied. Proximity of the BCs helped with the critical infantry units. Up came the minefield and my tanks flooded into the town, with 8 BMP-1s leading the way. The tanks targeted by the Chieftains rearranged themselves and fired on the Chieftains, killing one and bailing the other. Morale check passed. The tanks that entered the gapped minefield lit up the Jaguars, killing two. Later missile fire and T55s on the hill in my sector finished the last one.
The minefield was still interfering with access to the German infantry, so the Russians took their turn. With the T64 BC assisting, they made it in and incredibly, did not take a hit. The Russian infantry, both AGLs, and my BRDMs handily pinned the West German infantry but the UK barely got pinned. With lots of 5+ saves required, the Germans lost their other Milan.
BH couldn’t get his Chieftain to remount, and didn’t get reinforcements. But both infantry units rallied. Sensing doom, he blitzed his 1st UK infantry platoon, leaving second platoon to block the road. He also dashed his FMV432s to get them to where they might fire next turn. The whole UK unit rushed down the hill and some teams even made it to German positions. I still had enough stuff uncommitted that flashing up the road wasn’t improbable, and all he had in his rear was mortars and FMV432s. A group of BMPs would have had a field day. So keeping the road blocked was a risk he couldn’t avoid.
The fire pinned the Russians again, killing a third stand, but not the one in the minefield. His Chieftain fired two rounds, long range with cover, and I again produced a ‘4’ to match his single hit. Bailed T64. No Milans in position.
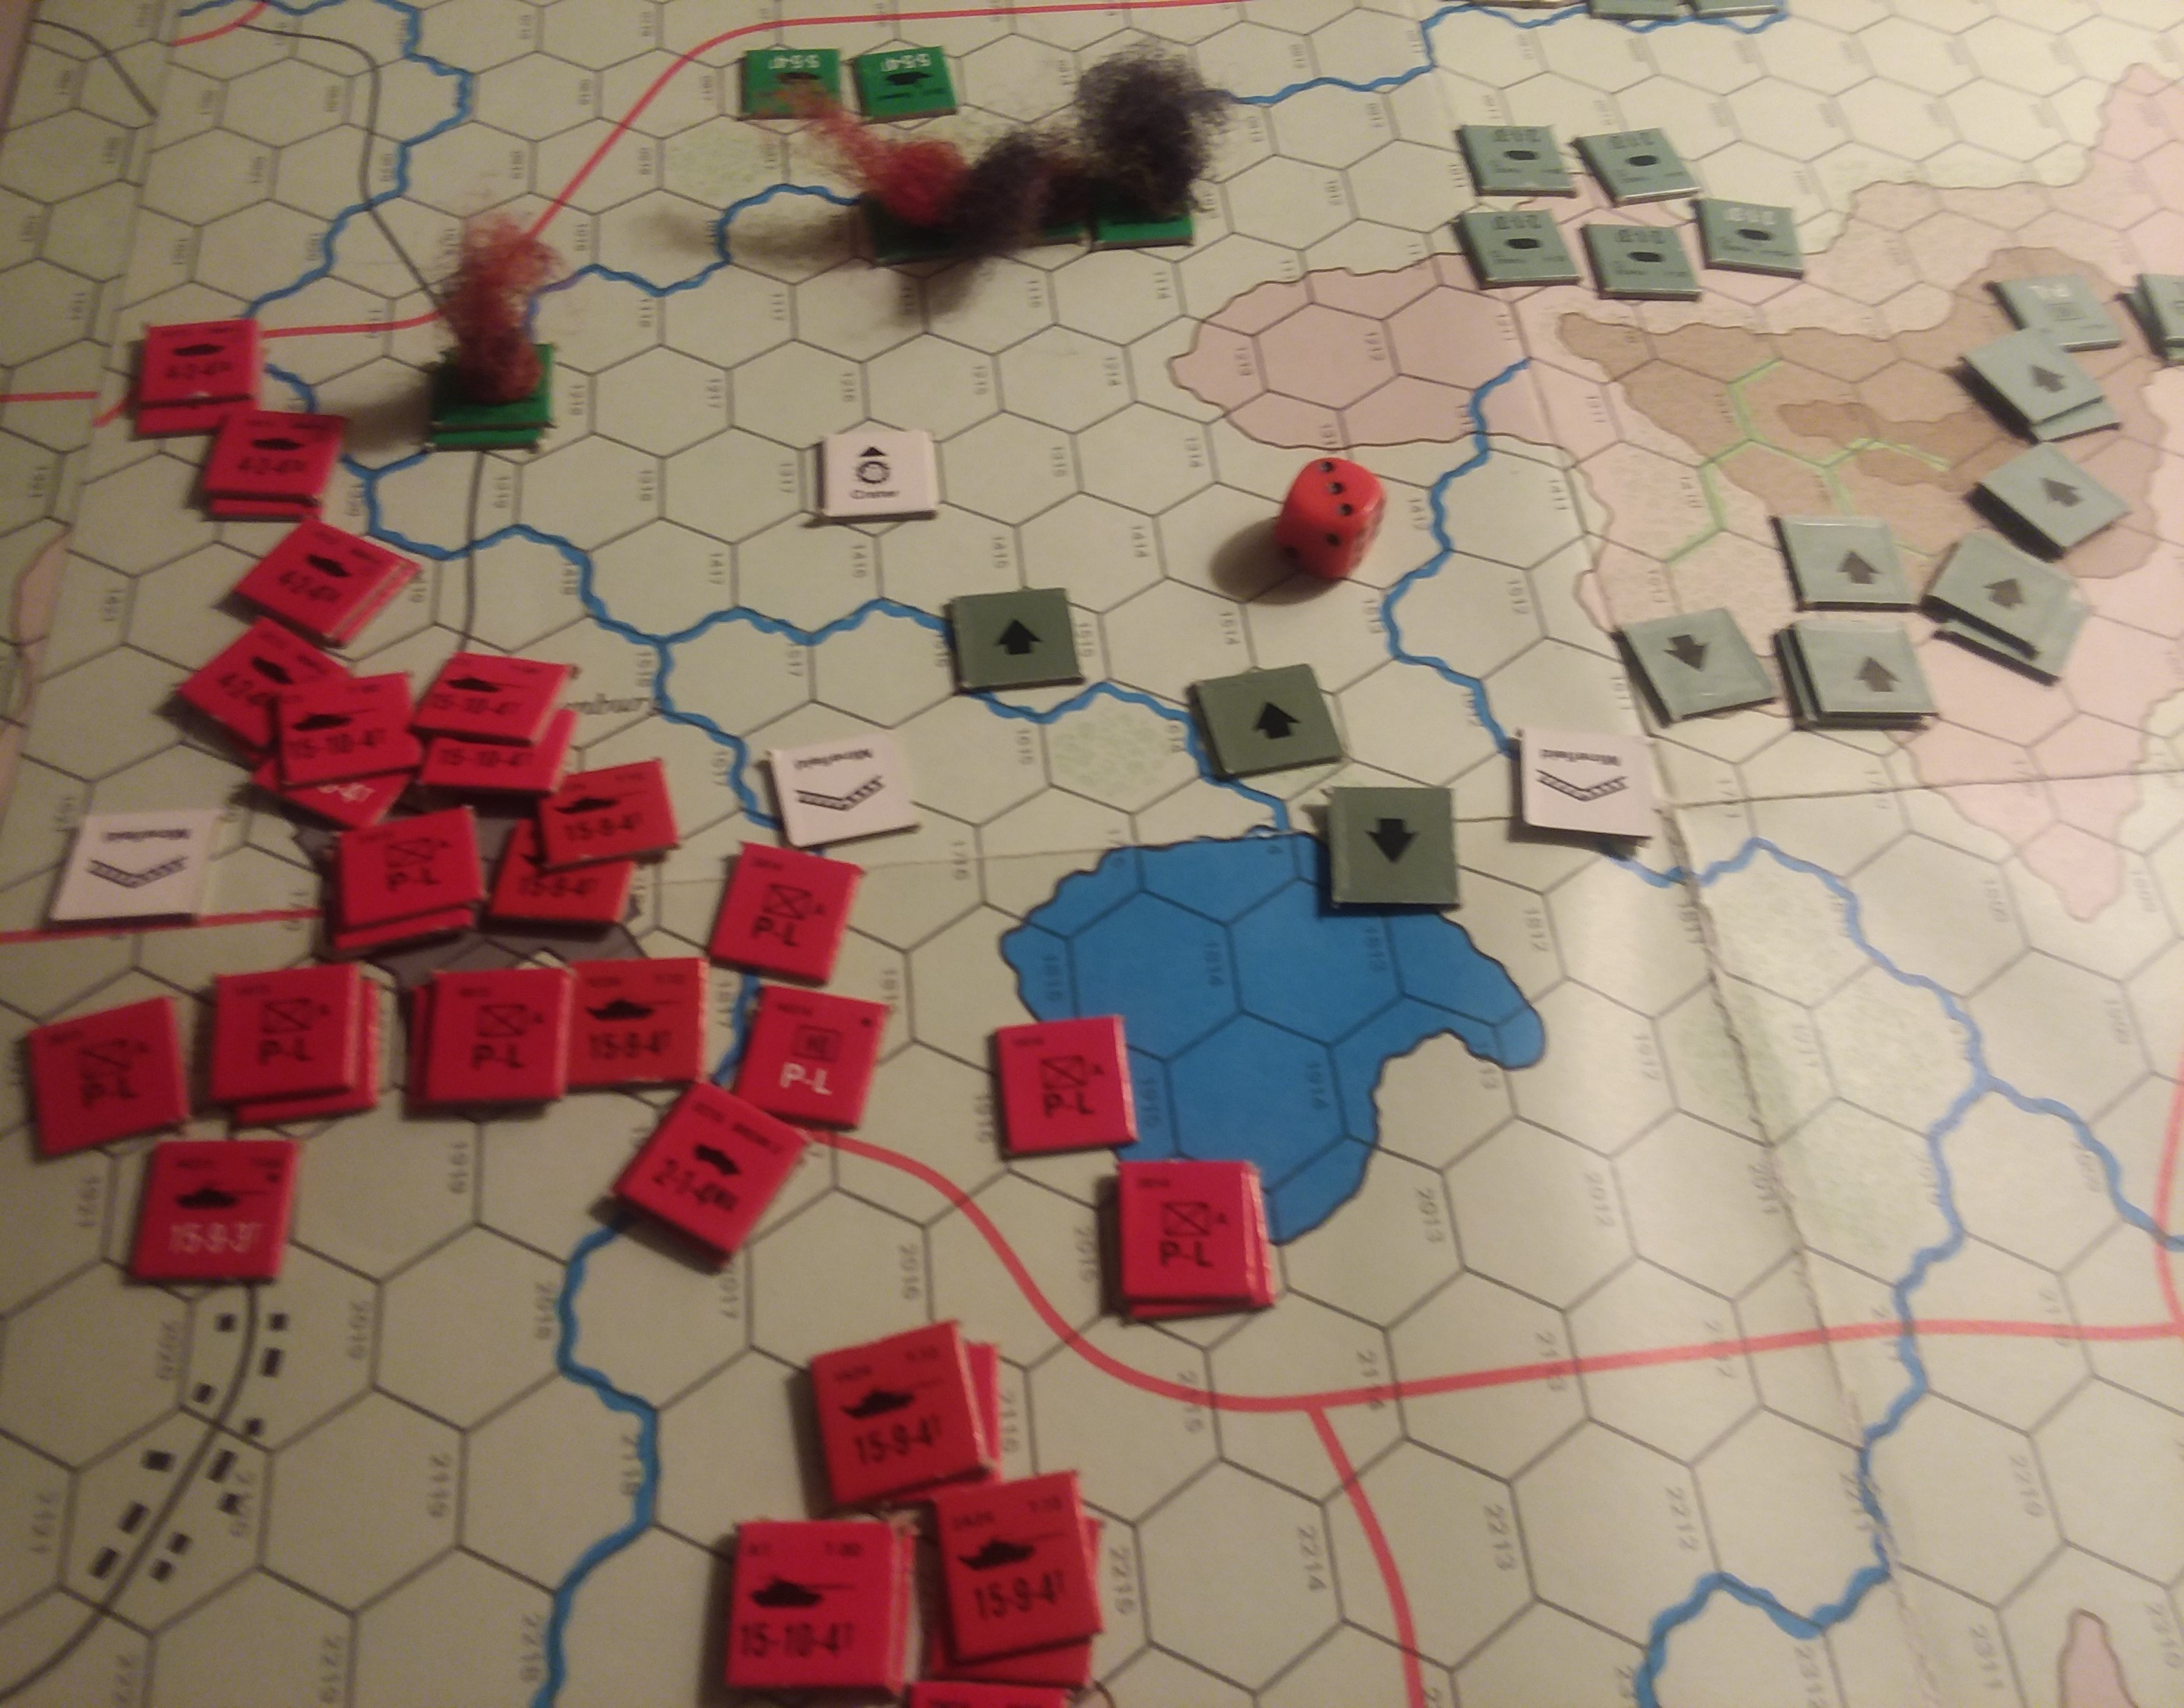
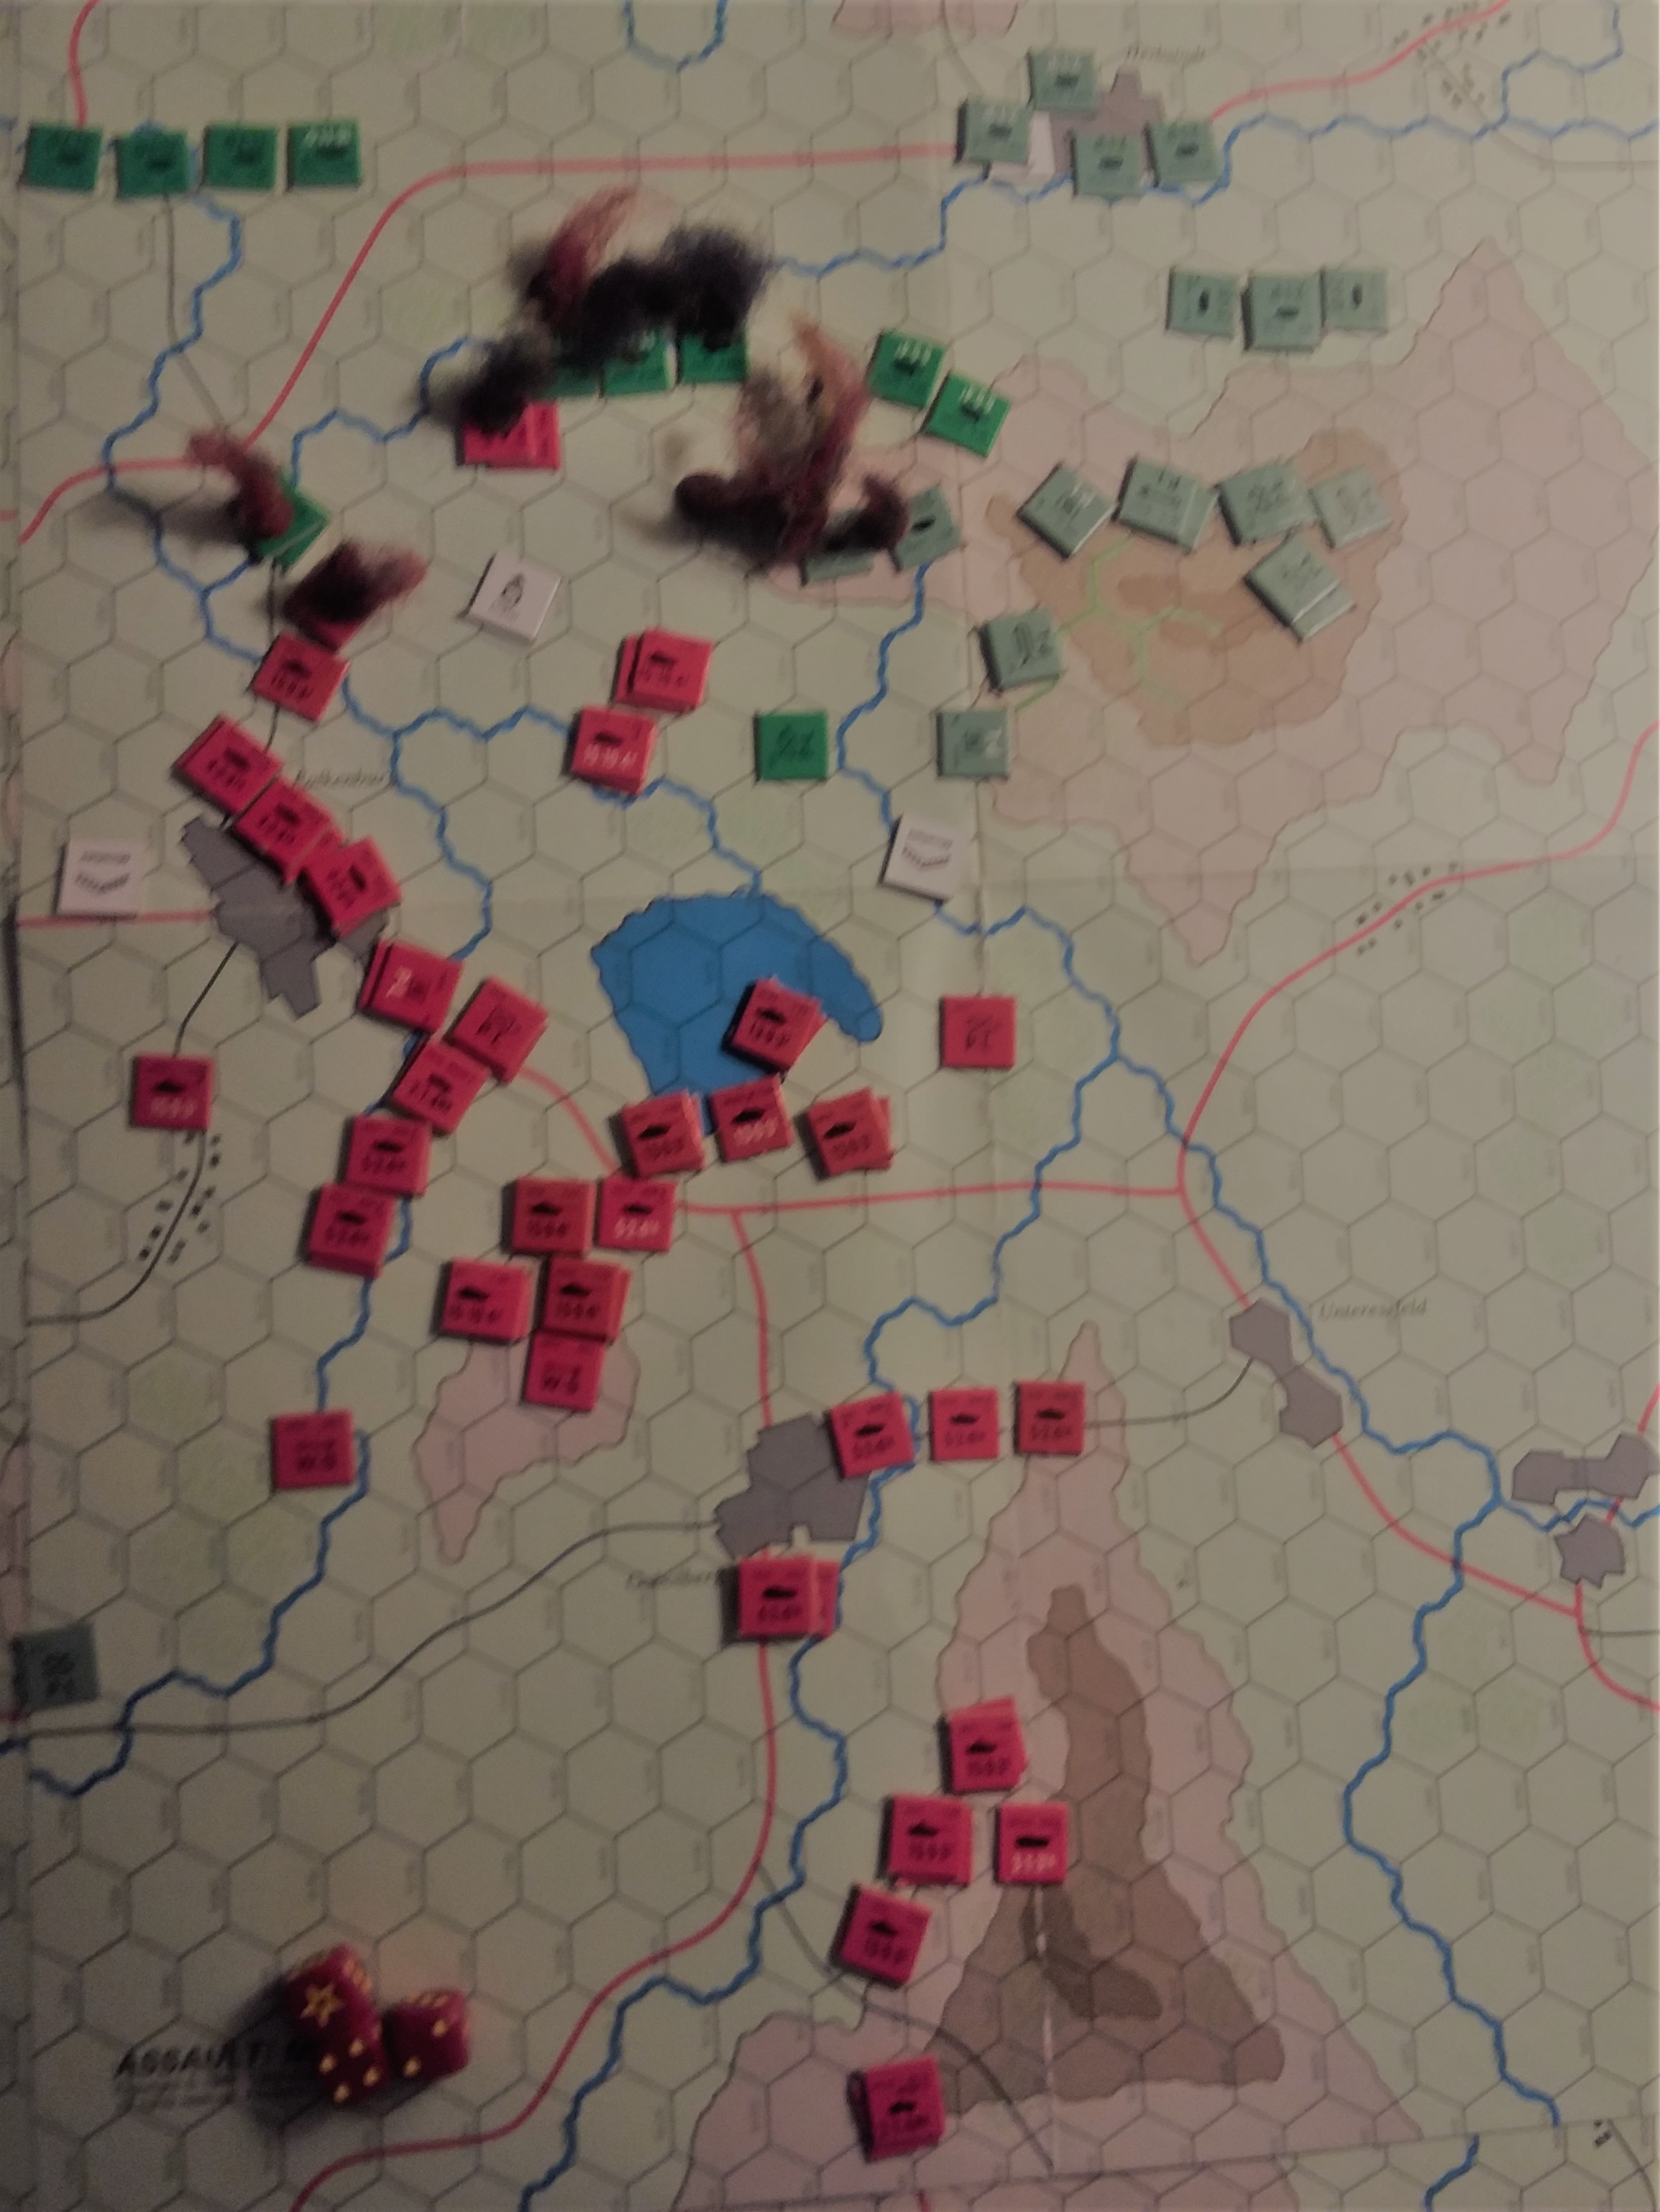
 Grundsteinheim at end of NATO turn 3. The 'Crater' is the objective. Just off picture to left (you can see the smoke) is my T72 unit. The pale green counters coming from right is the furthest advance of his 2nd UK platoon - can't reach assault range
TURN 3 – Lifted another minefield. I basically encircled the UK and German infantry. The long range duel with the Chieftains killed both finally. The Soviet infantry rallied and the bailed T72 remounted. East German infantry moved up to assault positions, as did the two Soviet teams. Masses of machinegun, AGL, AK ripped into both units, pinning both, and killing half of the UK teams. The Germans managed to avoid a casualty.
Assault. First two Soviet teams made the attack, and missed. BH made his counterattack, adding a British team, killing both the Soviet teams. Eventually, morale check failed. Next, the East Germans waded in, losing a stand to defensive fire. Killed two West German teams. Counterattack. Counterattack. Counterattack. Two East German teams survived; they would pass morale. But the UK lost two more teams. Now came the tanks, first 3 T72s. Defensive fire missed. One dead UK stand, and pulling away from the T72s left stands in open for the T64s. Defensive fire hit but bounced. Love Dolly Parton. Another dead Brit stand. Brits counterattack, but their hits cause no damage (no 1s rolled). The West German stand misses. I counterattack (the Soviet BC is there) and kill another Brit stand, and suddenly both units have one stand left and fail their counterattack roll.
BH needed to throw all the junk he could into the fight, but unfortunately the 2nd UK platoon could not get there, their tracks and the hidden Gepards were too far, and the UK 1st platoon’s lone survivor decided to didi-mau, taking his surviving FMV432s with him. BH brought the LEO Is on as a reinforcement, but they couldn’t get to shooting positions on the T64s so were satisfied with shooting up the T72 platoon, leaving one bailed and two burning despite the range. Morale failed.
BH declined to have his surviving grenadier stand assault my BC’s tank, and so, when it was my turn, game over.
 Grundsteinheim final act of defiance - declined. 1 team would have to survive 16 defensive fire shots (likely 8 hits) and then outroll a counterattack 3+
HOT WASH
There’s a doctrine about mines that says unless you cover them with fire, they are just a delay on the enemy. BH had one hex of mines not covered, and that’s where I went, and it worked. That’s pretty much all there was to this battle. Even if every AT weapon BH fired the first turn had killed a tank, I still would have enough left to deal with three Chieftains, and three Jaguars. The Leo Is would have faced off against 16 BMPs while my T55s dealt with interference and the surviving T64s made the assault.
A different way to deal with this was to put the Brits on the table and kept the Germans in reserve. This probably would have led me to attack on the eastern side of the field, avoiding the mines completely. The Brits would have greater AT firepower but two infantry units would have found it difficult to defend both sides of the field. The Milan unit is relatively ineffective in infantry combat, and doesn’t hold the line against BMP assaults worth beans.
Aftermath
The Leopard tanks beat a hasty retreat and Niemand turned his attention to the southwest, where an American brigade was reported deploying to attack back at Lichtenau.
Battle Report Author
Army Lists Used In This Battle
Recommend Commander For Commendation
Share this battle with friends
bayankhanWins

another done
Congratulations on a fine victory!
In some sense, yes. I used to this for a living, real world; I always said the Army paid me for that which I would otherwise do for free. I’ve been gaming as a hobby let’s see, 50+ years, paid as staff stringer by a gaming magazine for most of decade. I used to do what the Army calls OPMode Mission Profiles and Cost and Operational Effectiveness Analysis on a calculator, basically statistical analysis of weapons system performance. It would be a surprise if I didn’t win a lot. Nonetheless, people at my store routinely beat me, but the ones that do have chosen not to invest (time, money, painting) in Team Yankee. I mostly get thumped in FOW3&4 and Blood and Plunder
So to paraphrase Richard Gere in First Knight, to be truly good you have to practice relentlessly studying your opponents, wait for the moment when the battle hangs in the balance, and not care if you win or lose.
Job well done. You are one big winning machine.
Congrats Comrade. Another great report and read