Fought At Amsterdam
2237 days 10 minutes ago
Combat at Busslo
100 POINTSPodkolvnik Bayan Khan surveyed the battle orders one last time. 2nd Guards Tank Army had been agitating for some action since the shooting started nearly two days ago, and 1st West Front had been agitating for release of the Polish Tank Army currently hovering near Bremen-Hamburg almost as long. Stavka and Western TVD had something in mind; that was clear from the message traffic Bayan could read on his occasional visits to the Forward Command Post.
Unable to get a tank army, the Front Commander had turned to Bayan’s 5th Frontal Reserve Tank Brigade. Bayan had been the Front’s go-to leader at the end of the first phase of the campaign, spearheading the 3rd Shock’s drive into the Ruhr sector, and getting as far south as Kassel before the campaign ended. He had lost nearly 60 tanks in that drive, but half had been mobility issues, recovered and corrected by his support echelon since the ceasefire. So the 5th now had 123 T64 tanks, and out of the goodness of his heart, the Frontal Commander had attached a battalion of T55s driven by replacement crews, each crew led by one of Bayan’s veterans returned from hospital. So now he had 4 tank battalions, a total of 164 tanks, bigger fuel headaches and less combat power than at the start of the campaign. On the other hand, NATO had been losing tanks at similar or worse rates, and every tank lost in a retrograde operation is usually irrecoverable. Certainly Bayan made it so, incurring KGB and GRU ire by blowing up every wrecked or bogged tank he came across. The Great Khan had warned not to leave live enemies behind you, and Bayan embraced his distant ancestor’s principles of war, although his behavior to prisoners and noncombatants was regarded as suspiciously chivalrous.
GRU speculated that the British 43rd Division on the opposite shore of the Ijssel River was down to 30 Chieftains, and shortly the British would be forced to begin feeding their ancient Centurions into the line. The GRU had been spouting similar yak turds since the beginning of the campaign, and Bayan was counting on a tough fight.
The plan was simple. The East Germans of the 8th Motosierte Division had a bridgehead on the west bank of the Ijssel that they had seized in the waning hours of the last phase of the war. The base of the bridgehead was Deventer, and the towns of Steenenkamer and Wilp formed the outer edge on the west banl. The 8th had thrown up two ribbon bridges adding to the existing ones and the Dutch Air Force was wearing itself out attacking into a division’s worth of flak trying to drop them, and not doing well.
The Front Commander’s cunning plan was for the 8th Panzer Regiment and some of the MRRs’ tank battalions to infiltrate the bridgehead, and then for the 27th Schutzen Regiment’s BMPs to suddenly cross the Ijissel amphibiously under the cover of a massive smoke barrage. It sounded like a lot of tanks but 8th Panzer was down to 54 last Bayan heard, and the MRRs were sporting 20. Still, 80+ tanks in full cry ought to attract 43rd Division’s attention. Then the 28th Schutzen’s infantry would conduct a deliberate attack. Finally, Bayan, with his brigade, augmented by a Polish battalion from the 1st Polish Motorowe Piechota Division in BTR60s, was to cross south of Deventer. The assault crossing would be in swimming in infantry vehicles, but as soon as they were in the water, his engineers, an engineer company from 2nd Guards Army, and Polish engineers were to start on three ribbon bridges. They would race, and the crossing point crossing point near Gorissel was just over 100 meters. A puddle compared to the lower Vistula much less the Dneiper where Soviet and Polish engineers annually raced to build bridges. The engineers predicted an hour, according to norms. Bayan would be happy with two.
Bayan had declined much in the way of fire support. In his opinion that would just tip the British that the 8th’s attacks were diversions. The ground was comparatively flat here, and the slight rise to the west was fringed with a wood lot. Perfect battle position for British infantry. Solution, a quick airstrike with fuel air explosives and incendiaries. Infantry wouldn’t stay in a forest fire, and the still August night would allow the smoke to accumulate quickly. Quick, effective, and unlikely divert attention from the diversion. A smoke barrage would add to the confusion.
After the brigade crossed the river, his job was to destroy any enemy armor that tried to interfere with follow-on crossings by the Poles. 8th Motosierte was going to Appeldoorn, and maybe Utrecht beyond. The Polish First was turning south, heading for another assault crossing.
Bayan looked at his watch. 2200 hours. The artillery began to the north. The fury of the barrage lengthened as the Combined Arms Army and Front level artillery lent its weight to the mission, ripping paths through minefields, shredding wire, making men doubt their courage.
2215. Six Su-22 attack aircraft provided by the Poles streaked overhead. They were targeting the chain of villages beyond the woods, and in point of fact, acting as bait to draw fire from enemy missile teams in the woods. Several rockets arched overhead but failed to track, and the Su-22s dropped conventional bombs and PTAB cluster munitions on obvious vehicle parks in the villages of Busslo, Haansraat, and Gietello. Then they streaked away. Pauses in shelling to the north allowed more Su-22s to strike targets there.
The noise from the bombs falling 3km away from his command post was still loud, and at least one secondary explosion marked a munitions truck or small dump. In the noise from the explosions Bayan almost missed the second wave. Four Su-25s flew overhead, at just over stall speed, and launched their KH-25 missiles at Rolands who had foolishly given away their position by firing missiles or by turning on their search radars.
The final move was a single AN-12 cargo plane lazily crossing the river as confusion reigned. The weapon was a copy of the US CBU-55. The AN-12’s unthreatening posture and the destruction of at least two Rolands discouraged further firing; besides, the air was still filled with chaff dispersed by the SU-22s and SU-25s. Fifteen parachutes marked the dispersal of the devices. A minute later a 3 kilometer-long stretch of forest exploded into flame. Bayan gave the order. Another minute, and the engineers were streaking to water’s edge in their Graz trucks with their PMP bridges.
Operation Seyber was underway.

The Game
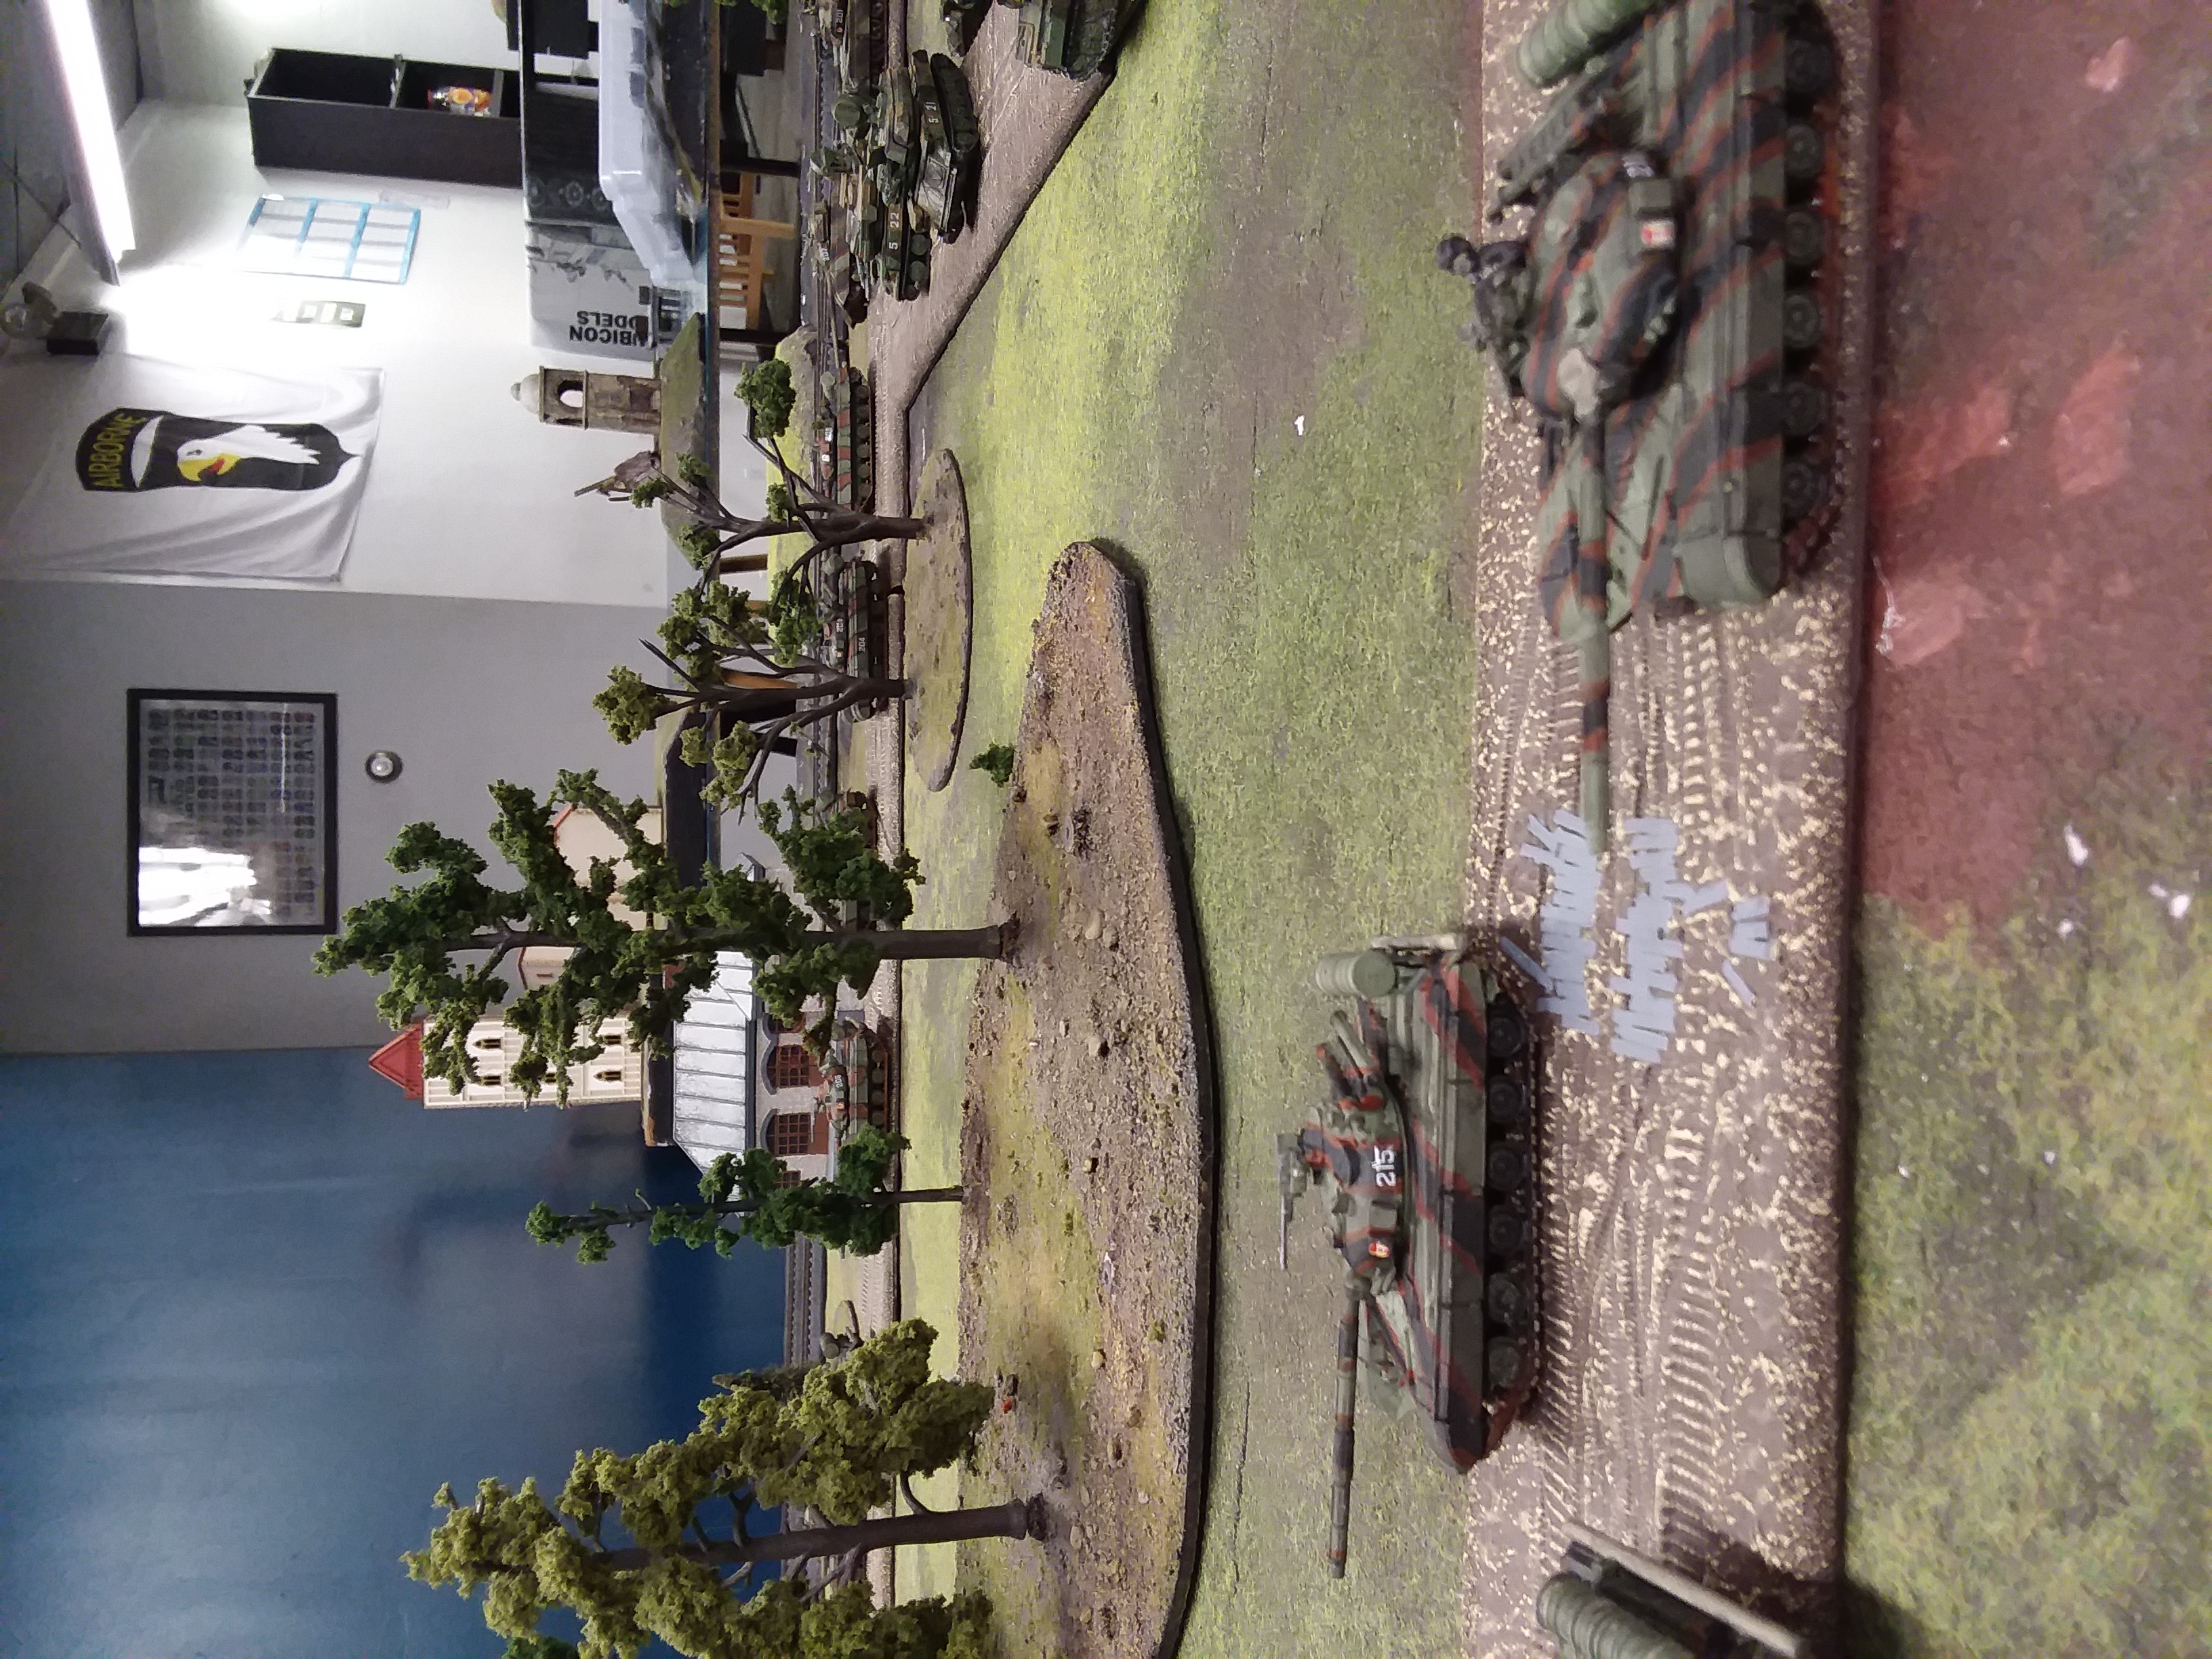
This is a TELE-GAME. BH, a friend of mine from the Army, and I both own GW’s 1980s period Assault game. This includes counters for multiple Soviet and NATO battalions, and battalion counter mix is just the right size for NATO platoons and Soviet ‘companies’ i.e. battalions. For example, in the counter mix a British battalion has a HQ, 3 companies with 3 platoons and an HQ. So the Company HQ and A company become the infantry platoon’s GPMG/LAW teams, the Company B’s infantry teams become Carl Gustav, and the Company C infantry teams became the MILANs, and Company C HQ became the mortar. Keeping track of this is a bit tedious, especially when you have to write it all down and send it by email and wait for a while. One lesson we took away from this is that infantry games need to be smaller to be practical. It took a week to resolve this even though the game lasted 1 prebattle turn and 2 turns. This is much more practical for tank vs tank. But doable, and for those of you who have career patterns that see you moving around a lot, like the American military or electronics industry, this type of thing might be a way to stay involved.
To repeat, this game was done by email. No computers were harmed in the process. Dice rolls are done by specifying the attacks in an excel spreadsheet and applying the random number function. If you don’t trust your opponent you can use the newspaper to generate your random numbers. That’s how I wargamed by snail mail back in 1985, so it’s period appropriate.
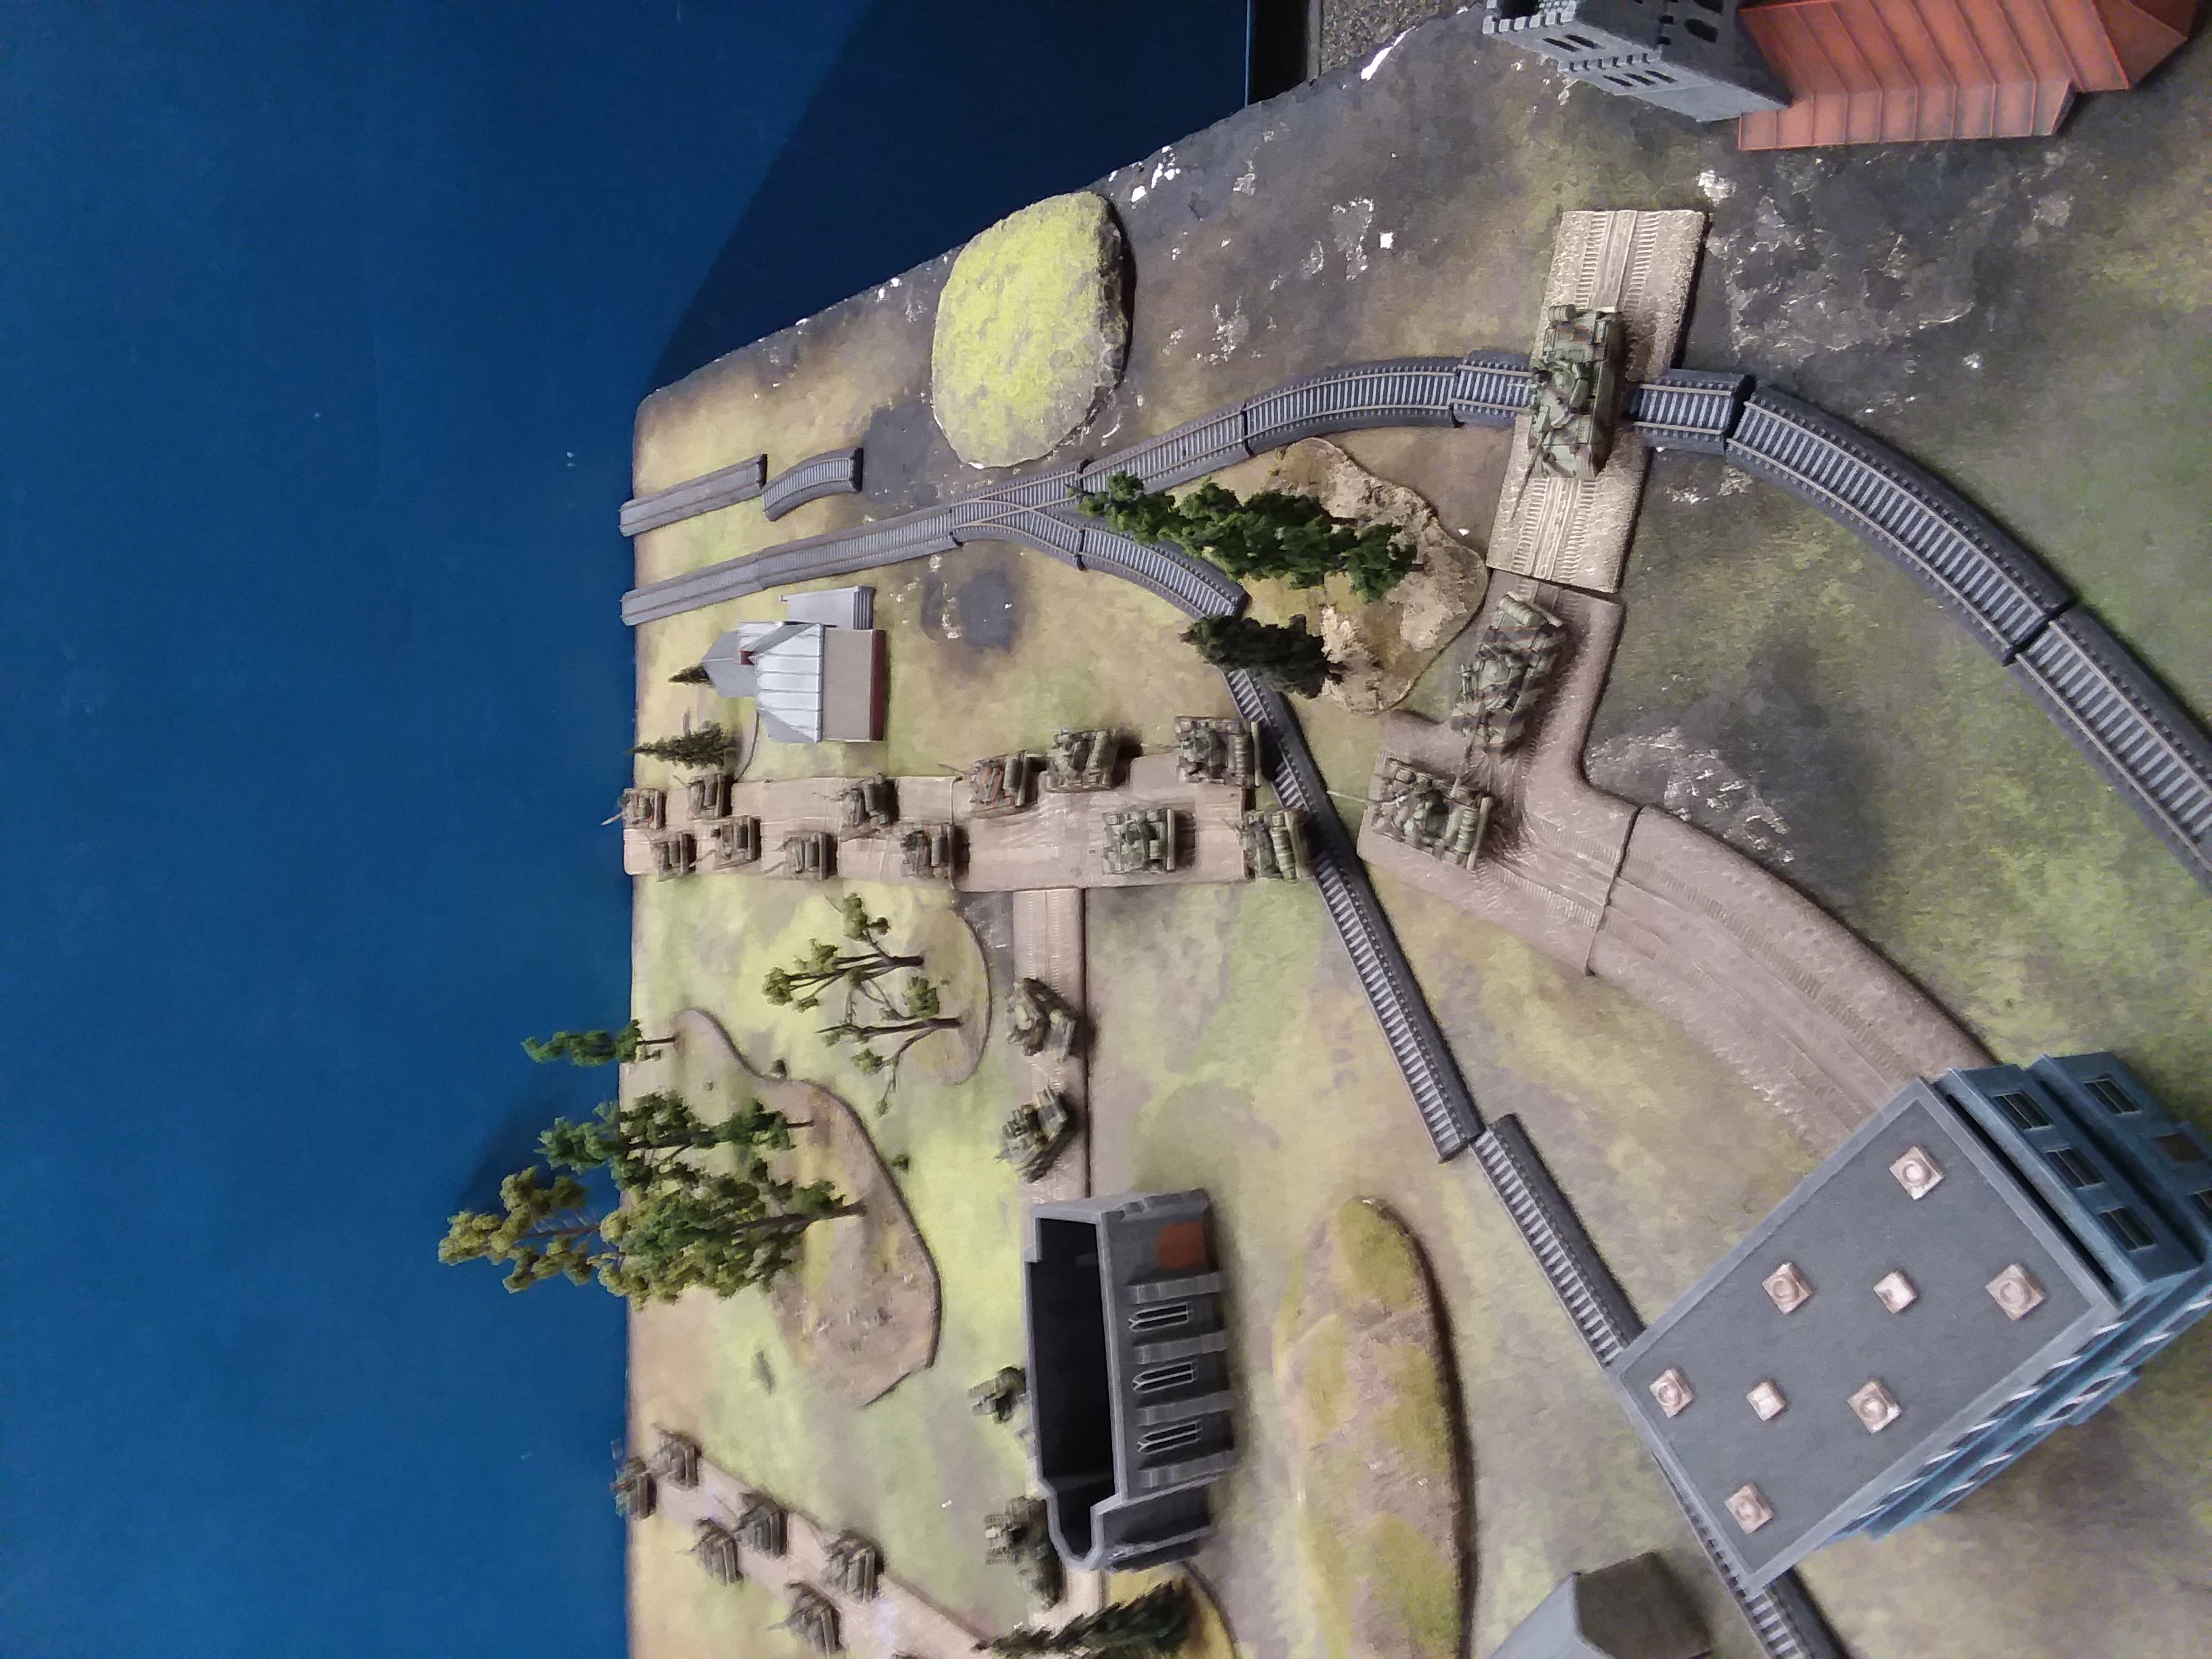
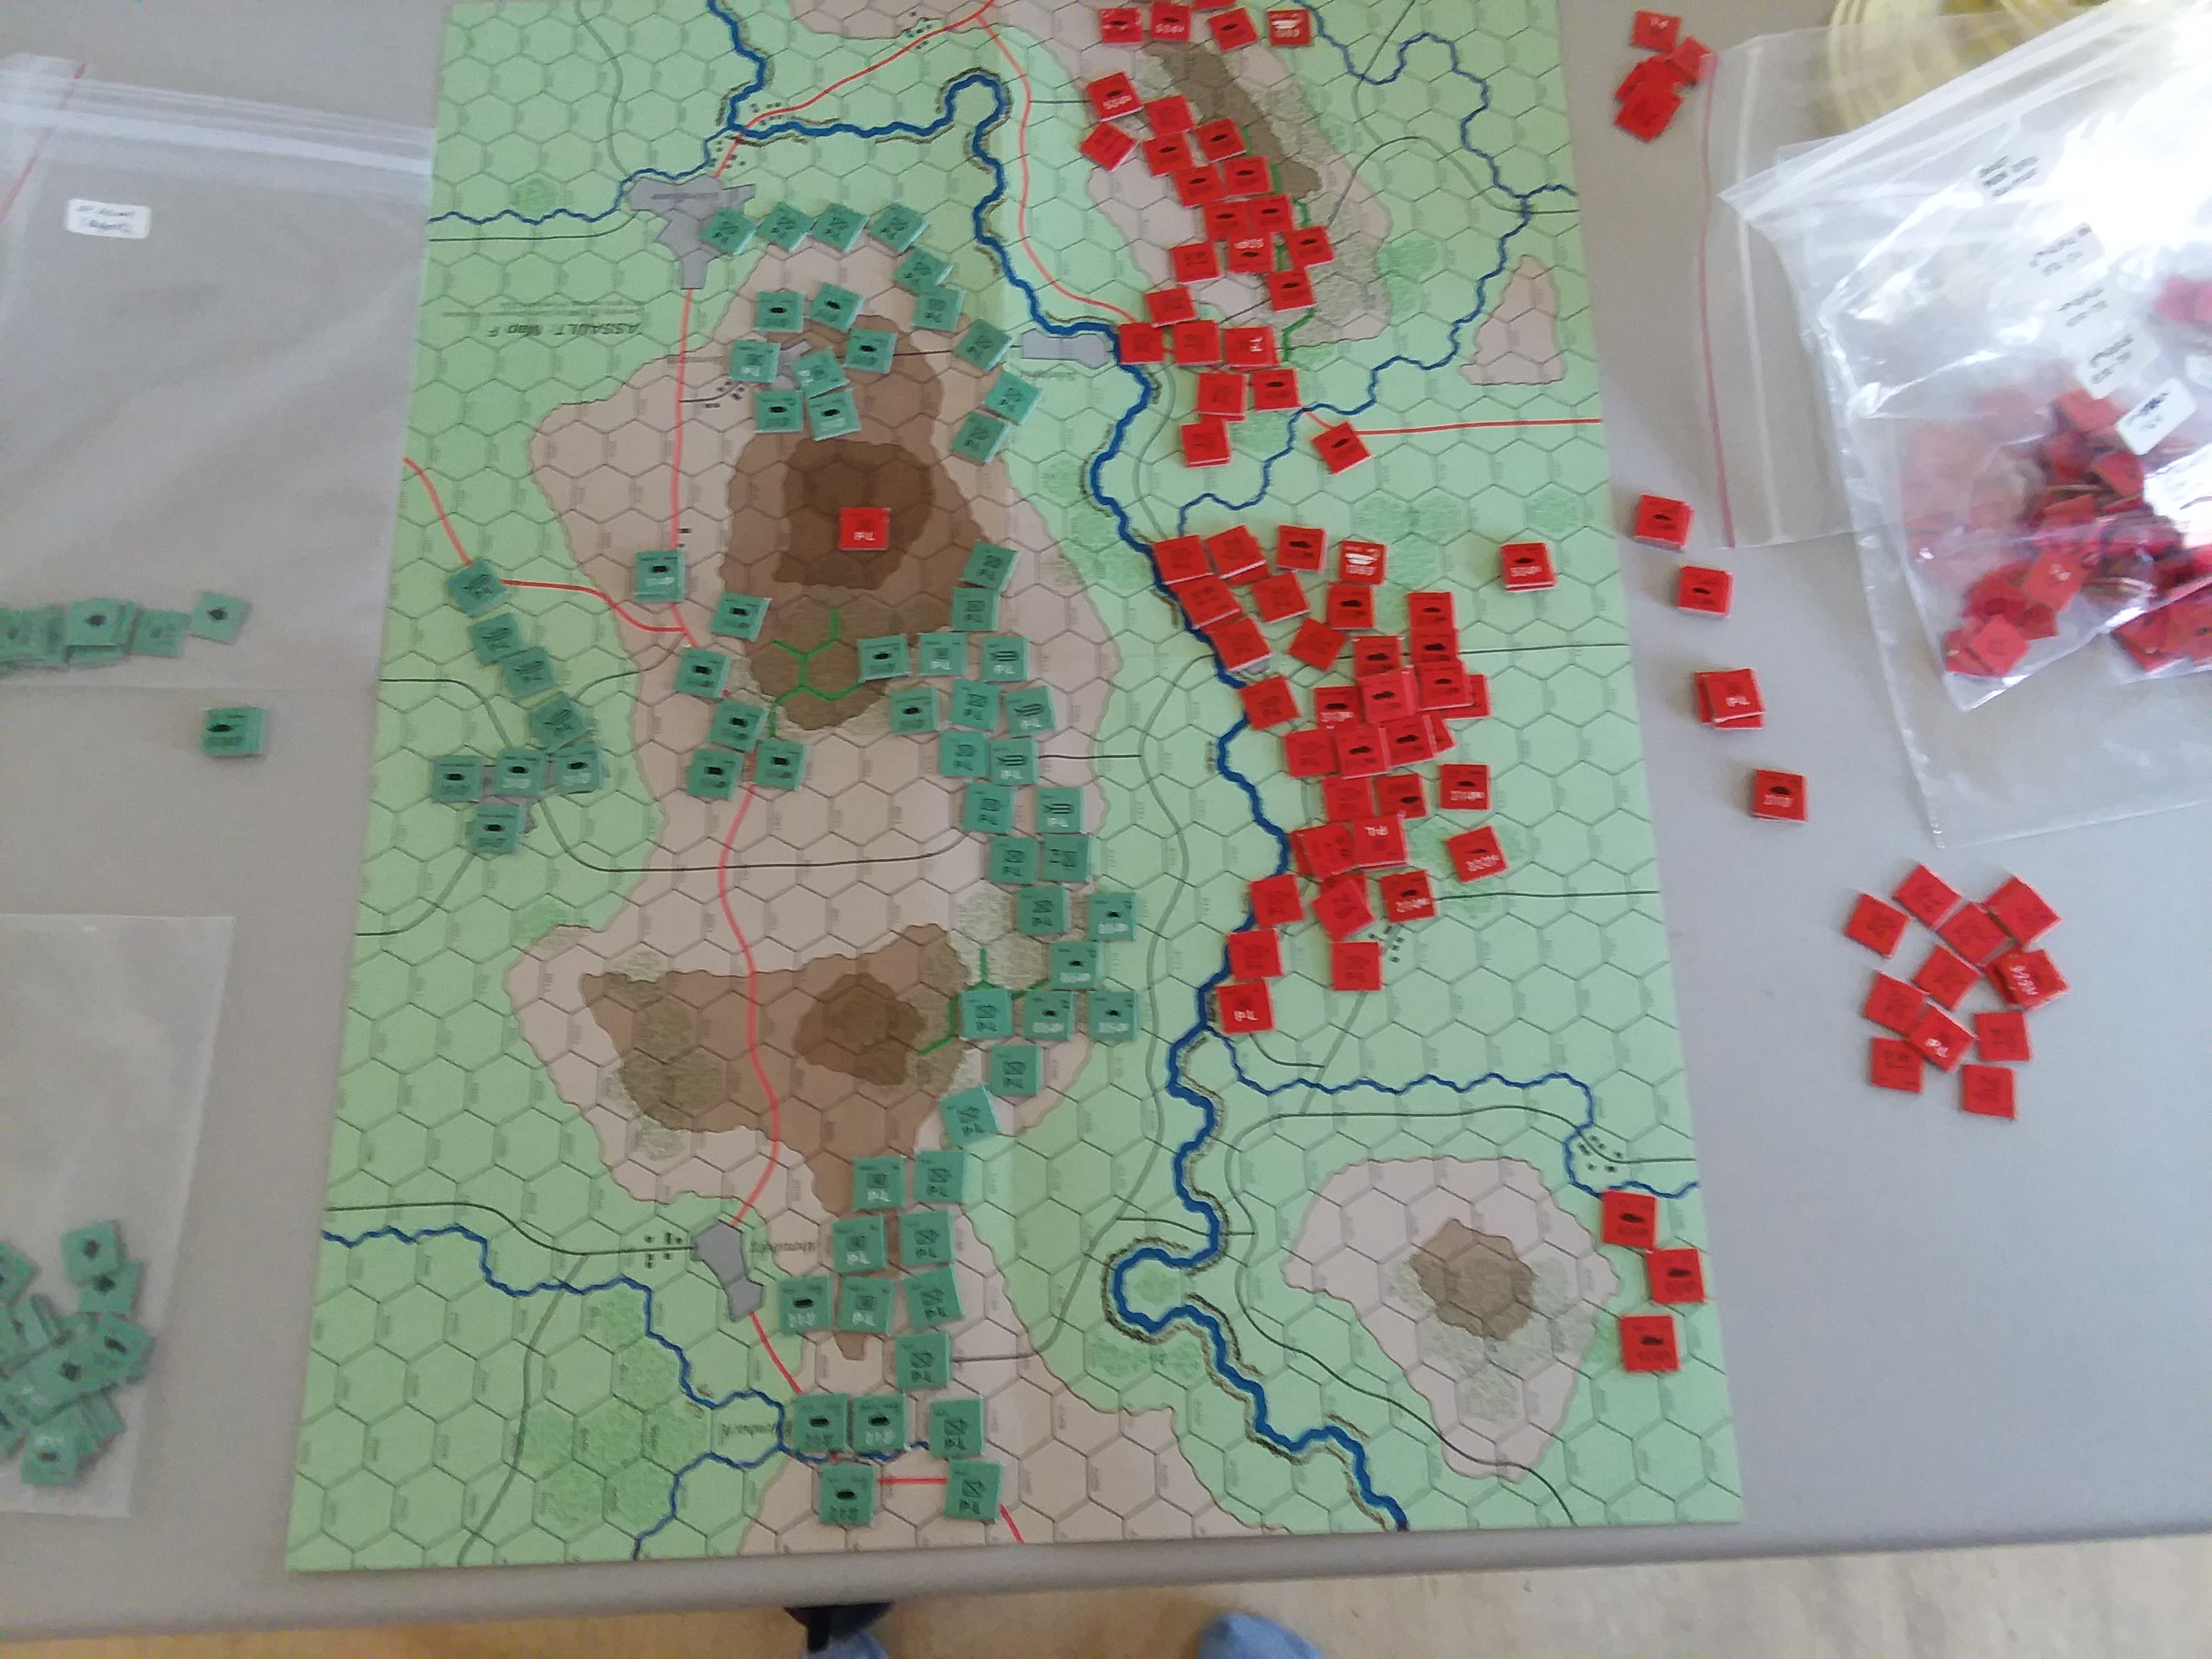 Start of Busslo fight Busslo is in upper left-hand corner. Soviets are on top right; Poles lower right
THE Terrain
It’s easier to do quick terrain on a table top and make a map after a visit to a craft store for colored felt to supplement your pretty terrain you bought from BF or other vendors. With games like Assault, you shuffle through the available maps (there are eight in the complete set) until you get one that works. The river crossing maps are, unfortunately, based on the east-west rivers in the American sector like the Neckar and so you have a hill looming over the river crossing, unlike my ‘selected’ crossing site in Netherlands.
We dealt with it, and all the nonexistent (real world) crossings by deciding the game map was the game map.
The Scenario
This is a ‘DELIBERATE’ Assault Crossing, a variant of NO RETREAT. The defender has an ambush, DELAYED and SCATTERED DEEP RESERVES. The Defender gets one minefield for every bridge that crosses the principle river (not for tributaries in his backfield). On a table top, the river has to be ‘adjusted’ so the bridge/ford has an exit into his setup area and an exit in neutral territory. Otherwise the river can loop around. The defender’s mines can only be placed on the neutral side of the bridge, representing mined approaches.
The attacker places one objective within 16” of the defender’s base line.
To win the attacker must control one bridge (just like an objective) and his attacker-placed objectiveas per normal rules. Or, alternatively, the attacker may control two bridges and CONTEST the attacker-placed ojective. To win, the defender must destroy the attacker’s ability to cross the river (yes, you may blow up the bridges –read on). If, at the beginning other defender’s turn, there no longer is a capability for the attacker to win, game over.
BUILDING A BRIDGE. The attacker gets, free, two bridge building units. Graz trucks carrying the PMP bridge or similar NATO technology come to mind. The defender rolls a die for each truck; this is the number of 4” bridge sections carried by the truck. Keep rolling until the bridge sections carried by the truck equal the number required to bridge the river. Normal rivers require 1 section, large 3 sections, and medium, 2. These represent rivers 200 meter or less wide, 400 meter or less, and something larger than 400 meters.
The truck can build a bridge section any turn it begins in contact with the river. It may blitz to contact the river. There is no skill roll, just put something representative of a bridge on the water. The turn after it touches the other side, it can be used.
Built bridges have a 4+ bridge save. Trucks have a 5+ truck save. You must make a firepower roll to destroy a built bridge. The truck loses a section to every hit. When removed from play by cumulative casualties, it counts as a platoon destroyed.
Existing bridges are presumed to be concrete bridges with structural steel. The mines on the enemy end of the bridge are presumed to indicate intact demolitions as well as mines. The attacker neutralizes the demolitions by removing the mines in the normal fashion. You cannot damage an existing bridge with direct fire weapons that are not brutal. You can damage them by hitting with brutal weapons or a bombardment. A bombardment treats each 4” section under the template as a target. It also rolls 1hit dice for each section still on the truck (having six trucks would be neat, but unnecessarily crowd the table. The bridging trucks don’t take up much room. Deployed bridge sections get the 4+ bridge save from bombardments. Concrete bridges get a 3+ bridge save. Firepower rolls are required to destroy a bridge section.
A bridge with intact demolitions can be blown up. To blow up the bridge, it must be your turn fire step. You must have an infantry stand within 4” of the bridge. The infantry stand must be in command of its unit leader, and the unit leader must be in command influence of his formation commander. (Any formation commander if the unit is a support unit). Neither the infantry stand nor the unit commander may fire.
That covers most of the goofy rules we used. Except for prebattle bombardment.
PRE-BATTLE BOMBARDMENT
One thing that has always bothered me is the free minefields in the defensive scenarios. Any battle where the defender has had time to prep by putting in deliberate minefields was usually compensated by the attacker having time to plan a pretty serious artillery preparation. But the attacker doesn’t get artillery preparation for free. And one feature of PACT planning for deliberate minefields was to shell them. You can’t readily eliminate all the mines in a minefield, but by using a mix of airburst and ground burst munitions you can create a visible path where most if not all the mines are neutralized.
So my thought is every minefield gets an equal and opposite artillery barrage. Randomly determined by a table. This battlefield, however, would generate five minefields and that seemed excessive. So I went with 3 preplanned airstrikes as described in the script.
The SU-22s were equipped with iron bombs or the PTAB A/B submunition cluster bombs. The later are like Rockeyes on steroids, so I rated them the same as the submunition in the Tornado (which by the way I think is grossly overrated). The SU-25s everybody knows. The fuel-air explosive, a copy of the American M121 bomb (you can see Hollywood’s impression of such in Rambo III with a single payload delivered by Hind). I rated this like the Rockeye.
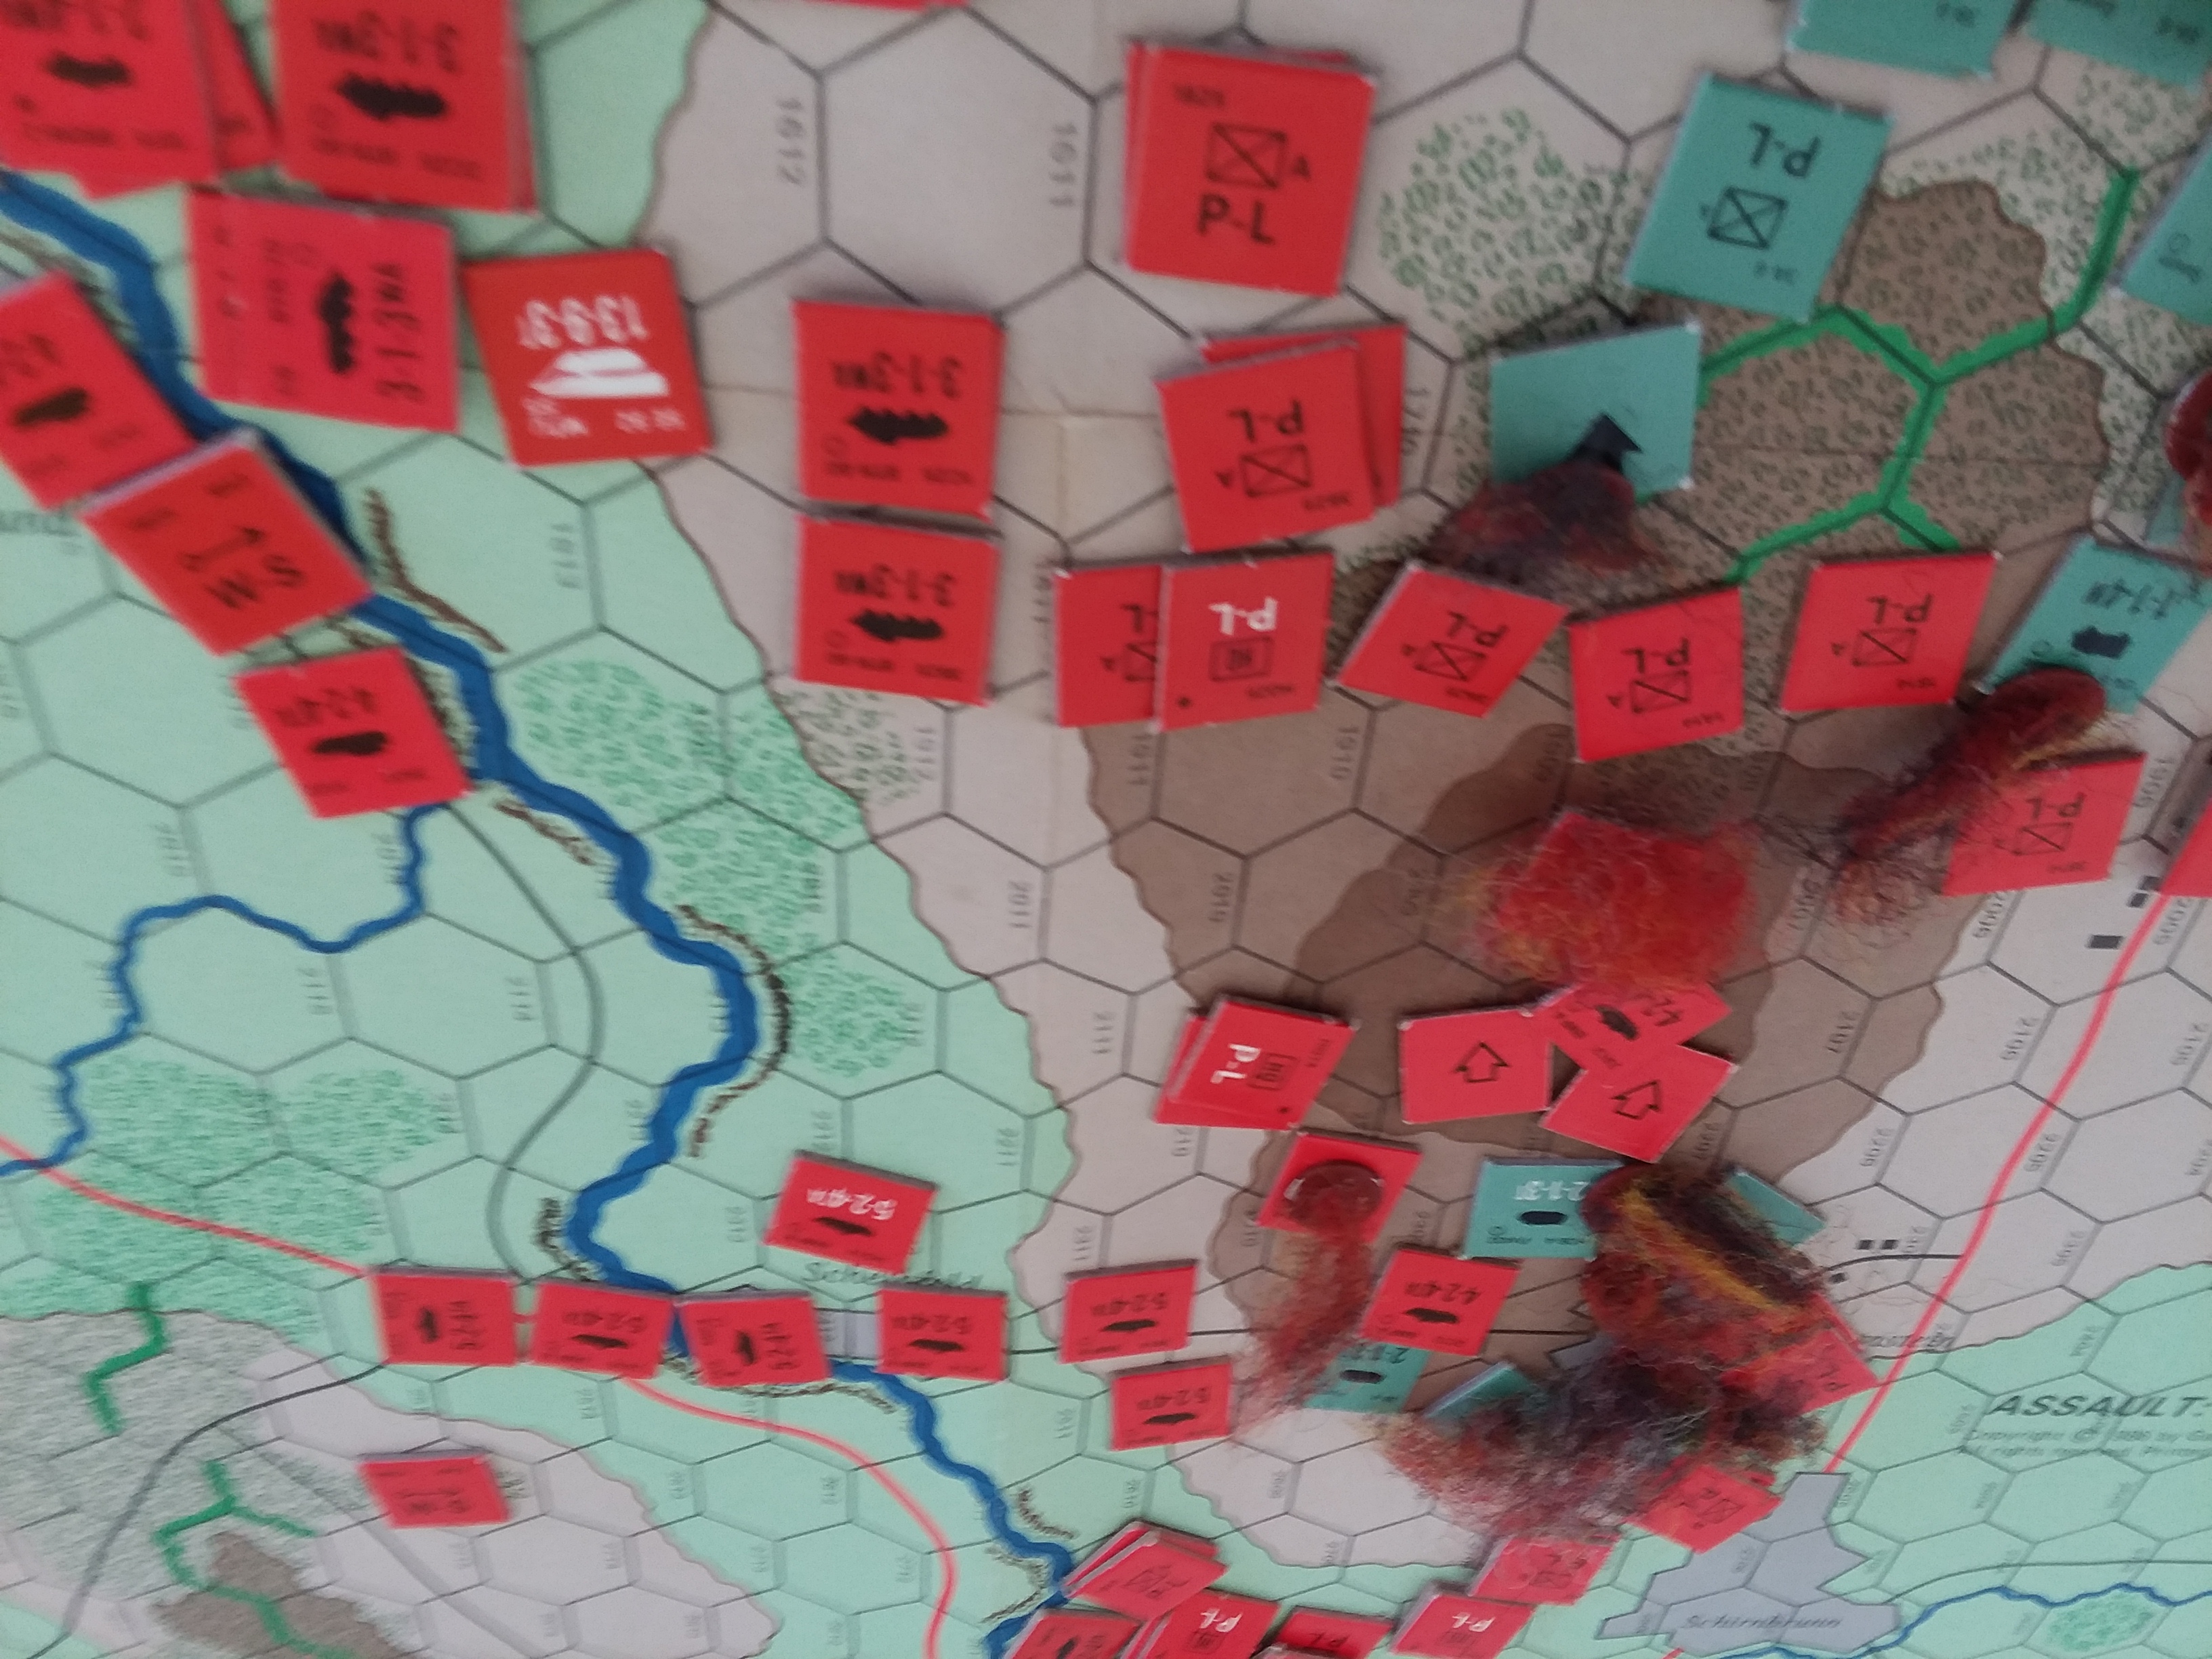
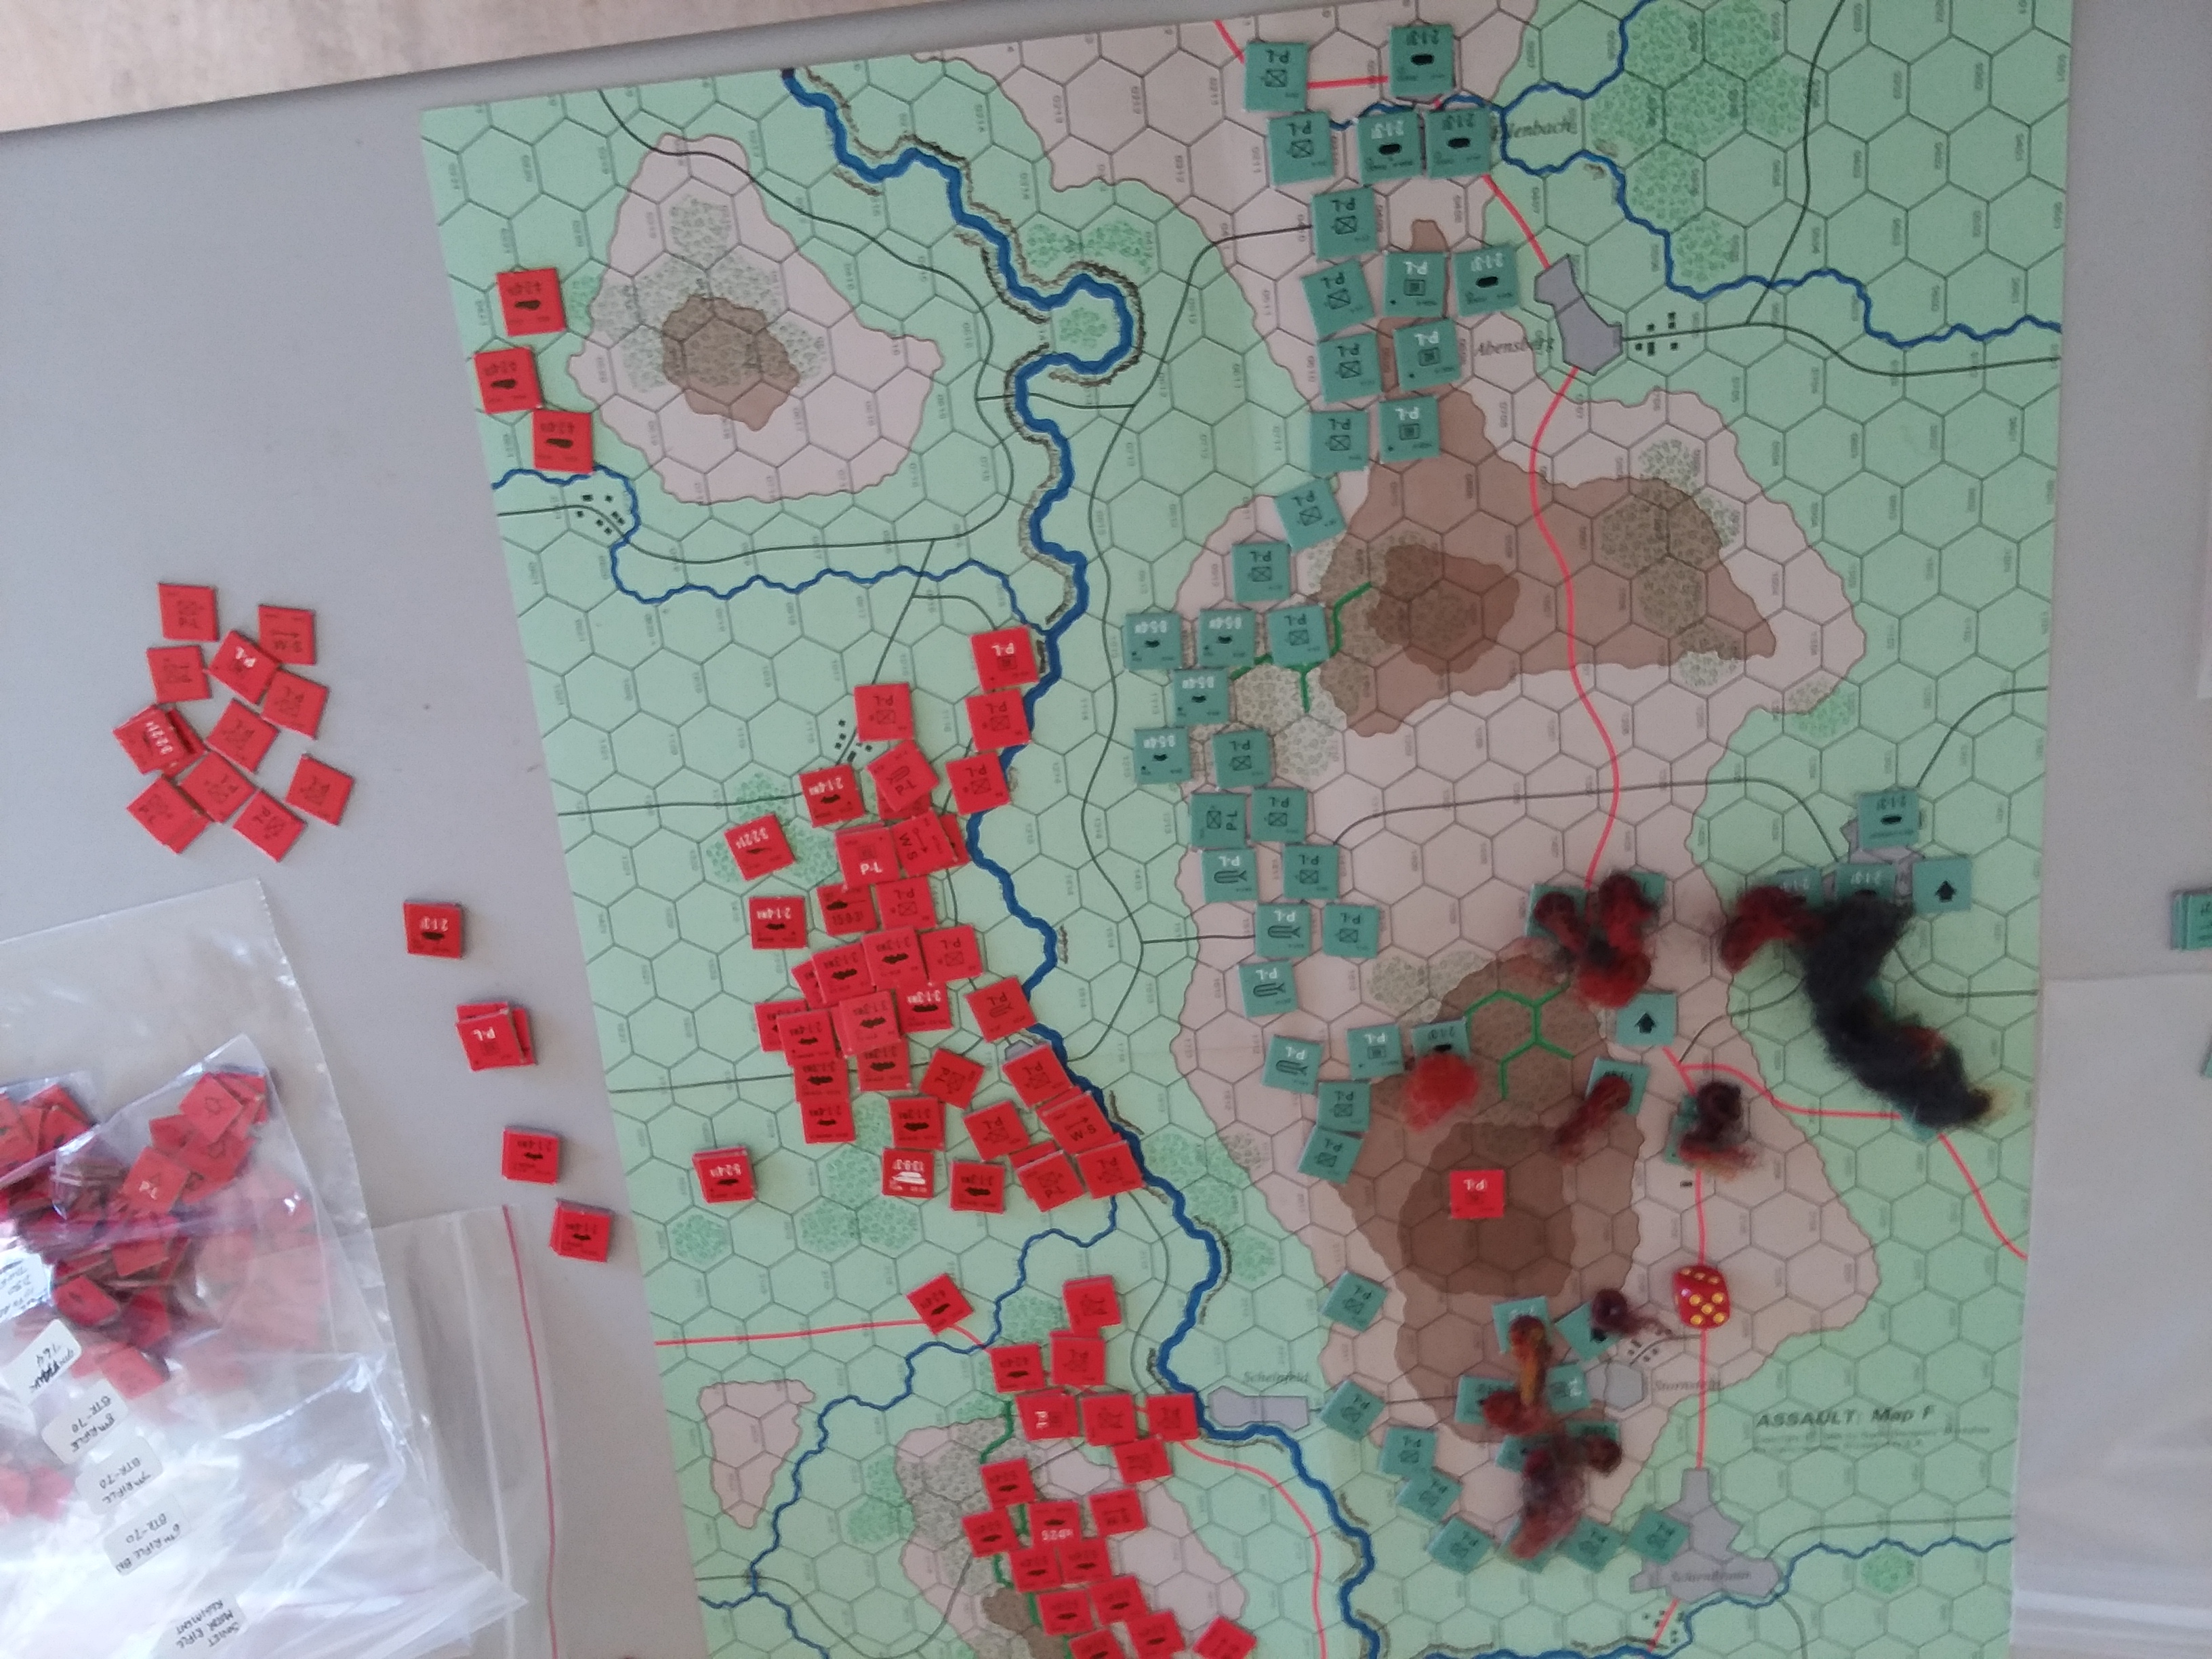 After the airstrike - and yes, the interaction between camera and website has spun the picture. North is the bottom
This took a lot longer to copy moves and combat results than it seems...
THE GAME
BH took a mechanized company, 3 platoons big platoons, FV432 mortars, Milan platoon, Spartan MCT, Scimitars, Chieftains, Abbots, a Cavalry Squadron with Swingfires, plus Blowpipes and Rolands in support. He kept the mechanized company on the table with the Rolands, less the Chieftains and Abbots for his on-table force, wanting to keep the high value stuff of the table until the airstrike was over. His ambush was the Spartan MCT.
My force was a Soviet BMP battalion from the 5th Brigade and a BTR Battalion from the 1st Poles. The companies were small companies. The BMPs included 12 BMP-2s, 13 BMP-1s. The Poles had 15 BTR60s. 6 Spandrels and 3 Schturms provided heavy antitank. 6 2S1s in two batteries (one Soviet, one Polish) provided artillery support. 4 Hinds carried a Soviet rifle company. 4 BRDM scouts as well.
BH’s force made an awesome display. As you can see, he lined the hill with GPMG, Milans, Carl Gustav, putting 4 Scorpions in the line to fill a gap. The FV432 transport was in the rear, ready to move up with to fill gaps.
I ignored the southern (left) end of the line, putting the Poles in opposite his center. The Russians were in the north, on my right. A combination of spearhead and friendly terrain allowed a couple teams to set up in minefields, which disappeared on turn 1. Problem with a river shaped like the real world. Usually you don’t have a ‘straight’ line that says ‘cross ye not lest you cheat.’
Airstrike
I followed my script, sending in the Su22s ‘first’ to deal with the Rolands. Initially I had thought to split the planes up into 3 2-plane groups but after reviewing the rules decided that was going to produce a big bloodbath so 6 SU-22s attacked the Rolands and the mortars with PTAB. I discovered that night is your friend with airstrikes, something I hadn’t considered before. The Rolands tossed 12 dice hit 5 times. I saved 3. He missed one firepower. The FV432s belonging to No.2 Platoon and the Company Commander fired on the SU-22s as well, turning out to be a big mistake, as it lit up No.2 platoon. I dropped 1 SU-22. The Rolands were no longer GTG so they were hit on 4+ (night, +1, 5 planes, -1). Three Rolands and 2 mortars exploded (the fireball mentioned in the backstory was doubtless a truck load of Rolands or mortar bombs).
Next came the Su-25. First time in my life I strafed with them. I decided that the British No.1 platoon FV432 was the biggest threat to my cunning plan. The FV432s missed their return fire. Also, as it turns out, a mistake. So I strafed. 15 dice yielded 3 hits, 2 dead, 1 bailed. Then the AN-12s dropped in, and I focused them on No.1 platoon, killing another FV432, one Carl Gutstav, the light mortar, and the attached CPMG.
Turn 1
I resolutely marched forward, convinced, despite the modest success from the airstrike, that the British infantry would stop me cold. As mentioned, three minefields disappeared thanks to people starting in them as a result of Spearhead. My infantry swarmed across the river dismounted in the center, while the BMP-2 companies worked their way around the northern flank. Three BMPs from No.2 Soviet company actually swam the river, three others crossing the nearby bridge. 3 recon BMPs failed their cross checks. The Hinds flew to the north corner of the map, prepared to assault into Busslo.
In the center the BMP-1s swam the river while the infantry swarmed across a bridge. One Polish company focused on the sector where the 4 Scorpions held the gap between the No.2 Platoon and No. 3 Platoon. The other Polish company went after the Milans holding the saddle. The No.3 Company of the Soviet BMP battalion went into the sector forming the joint between No. 1 Platoon and No.2 Platoon, now lit by burning FV432s.
Nothing left to do but shoot, and my shooting was pretty much constrained by what I could see, and doubly constrained by enemy infantry concealed, gone to ground and night. Put simply, 18 dice required to force one infantry save. 90 dice for a pin.
There were exceptions. The FV432 platoon in the saddle between No.2 Platoon and No.3 Platoon was in the open, had lit itself up, and thus was merely 5+ to hit, and I had 6 ATGM – 3 Spandrel and 3 Schturm – on opposing high ground. I also had the Observer up there. So I dumped the Polish 2S1s into the area, catching all 5 FVs and 2 teams from No.2 platoon. Hit 3 FVs and produced a 5 for one of the infantry teams. The infantry saved, of course, but that pinned No.2 platoon. The FV432s took 3 hits and one died one bailed. Then 6 ATGM streaked in and killed 2 more, and morale did the rest.
The same thing happened on the north flank to the FV432s already chewed up by the airstrikes. Here the predators were 3 Spandrels and 3 BMP-1 recon on high ground. No artillery. But there already were 3 destroyed/bailed vehicles here, so 3 missile hits finished the platoon.
The only other effective fire was a luck shot. 3 Spigots from the Polish battalion streaked in and 2 rolled sixes against the Scimitars. Then the spreadsheet popped two 5’s for the confirmatory rolls. A direct fire 2S1 shot managed the same effect. Net outcome from waves of fire, 4 AGLs, dozens of AKs, vehicle MGs, BMP 30mm cannon, etc, was ….nothing. The fire wouldn’t even have pinned No.2 Platoon if I hadn’t accidentally hit it with the 2S1 barrage.
Then I sent in three infantry companies, confidently expecting to be slaughtered. NIGHT was really my friend. First, the British infantry was pinned, and my attack on the surviving Scimitars was through the wrecks of his two casualties. Night+Cover = 5+ to hit. The Scimitars score one hit, I saved, and trashed both Scimitars. BH decided not to counterattack with the flanking teams of No.3 Platoon…one was a MILAN team and the other a Carl Gustav, and he could see a ton of armored vehicles waiting for my infantry to get out of the way.
Poles 1, UK, 0. Then I assaulted the Milan Group in the center. The shape of the hill put only 3 teams in his second line in position to fire. 2 GPMG teams rolled 4 dice 4+ and the ATRR Team rolled 1 die 5+ and 2 hits two saves. Two dead Milan teams, and both platoons failed to counterattack, as did the MILAN transport section (this happens when you roll a 1). One of the FV432s bogged when it tried to back up and died.
Poles 2, UK, 0. The third attack hit the stretched out end of No.1 platoon. Here two stands were dead from the airstrike, so only one stand was available to target, and only one stand could join it in a counterattack. Minimal defensive fire, no hits. BH withdrew the only nearby stand into the burning FV432s after I killed the contacted stand.
PACT 3, UK, 0. So ended turn 1. No. 2 UK platoon’s position was badly disrupted. The Milan platoon was at 50 percent strength.
BH started his turn. The Company command teams were pinned as the result of bailing from a burning FV432, caught on the edge of the PTAB template. They couldn’t reach any friendly unit at this point, and so their influence was nil. BH proceeded to roll 1,2,2 and 3 for the pinned commander, No.1 Platoon, No.2 Platoon and the Milan platoon respectively. The surviving FV432 from the Milans was still in play, but would have to risk a +1 cross check to reach my objective. He chose not to take the risk, and threw the only mobile unit in his army that could reach the objective, 2 Milan teams, to contest position. There also was one team from No.1 Platoon that contested at this point. He attempted to dig in No.1 platoon, and succeeded, and did the same for No. 2 Platoon, and failed. A die roll for reserves produced none.
BH counter attacked the penetration by my No.1 Polish Company with his No.3 Platoon, and we succeeded in trading two of my stands for 1 before I fell back into the burning Scimitars. The rest of the Platoon moved smartly north to protect the saddle, in case there was another turn. But there wasn’t.
Turn 2
I started the turn by dismounting the Hinds normally, and using ‘follow me’ to move 10” into Busslo where my infantry could assault the west end of No.1 Platoon. Meanwhile the No.1 BMP Company made a hash of crossing the river, three BMPs blowing their cross checks (night is not my friend here).
I had managed to get 3 BMP-2s from No. 2 Company across the river last turn. This time the bridge was better suited to my needs so I blitzed the BMP-2s on the east bank and used that to leapfrog the dismounting stands across the bridge, bringing all 7 stands of No.2 BMP Company into play for an assault on the eastern corner of the ridge. The Battalion commander was accompanying the attack.
No.3 BMP company’s infantry moved up to contact the Milan platoon, closely supported by their BMPs.
No.2 Polish company moved close to No.3 BMP company, leaving room for me to repeat my barrage, and preventing leakers from any assault from pushing around No.3 BMP Company. No.1 Polish company waited for another assault. The Battalion Commander was with them and far enough up the hill to observe for the repeat barrage, allowing the real observer to call fire in on No.3 UK Platoon. Neither barrage accompanied anything, as did the direct fire of 3 2S3s. No.3 Platoon’s only casualty of the game was caused by AGL-17s firing across the river at the teams that survived the assault.
My other fire was pretty much mind numbing and largely useless. BMP-2 cannon and overwatching missiles hitting on 6’s managed to kill a stand from No.1 Platoon. I managed to kill one of the MILAN teams on the objective, and one team in NO.2 platoon. The fire lists from that turn ran to two pages.
The assaults went better, even though I stupidly sequenced them in the wrong order. First No.3 BMP company went in attacking the MILAN team and greedily attacking the HQ. I got lucky and killed a HQ team and the MILAN team, and his return with the second HQ team was a miss, and even more fortunately I made my counterattack roll and finished him off. That was not necessary, as all I had to do was get rid of the Milan team and one team from No.1 Platoon. I just hadn’t tumbled to that yet – No.3 BMP company had finished Turn 1 with two teams contesting the objective, and I already had two bridges.
Next I assaulted No. 1 Platoon with my airlanding company. They easily shook off one team’s defensive fire and killed it, and BH elected not to counterattack, and pulled one of the teams that had to retreat across the perimeter to join the ATRR stand currently hiding in the FMV junkyard. What I should have done was attacked with my BMPs at that point. The ATRR stand would have taken its shot, and probably died in combat (certainly that’s what would have occurred if the airlanding dice rolls were applied) and no further play would have been required.
That’s when I woke up to the opportunity, and launched the BMPs. 5 BMPs. How many BMPs does it take to kill two little infantry stands? Apparently, 5. He killed one with defensive fire from the GPMG team. I missed my first assault attempt, counter attack bailed one. I counterattacked again, missed again, and BH counterattacked back and bailed one. Finally I got a hit, and he rolled a 2 for his counterattack. Game over. PACT Wins, 6-1

HOT WASH
The first point to make is the outcome was a complete surprise to me. I expected 4-3, either way, as attack and counterattack raged over the objective. Put simply UK rifle teams are twice to three times as effective as a PACT team in close combat. Having both UK rifle platoons near the objective remain pinned on Turn 1, was, to put it mildly, a surprise. That effectively ended the game. (The odds against that, Captain, are 10 to 1). But…that does not mean the scenario doesn’t need work.
One problem is that the number of bridges, their proximity to my deployment area in some cases, and the consequence they I could set up in the mines. We never had a chance to check blowing the bridges; it happened so fast there was only one bridge where a stand was close enough to try it on his turn 1. Perhaps it needs to be part of defensive fire, as well.
My judgement is that the scenario will work best with 65 points, the normal 48 inch wide NO RETREAT Board, and perhaps one real bridge, never more than 2.
Night fighting was somewhat of a revelation. We mostly play combined arms forces, so night messes up my PACT forces bad enough that I avoid attacking in it like the plague. But…I rarely use strike aircraft, and normally defend, not attack at night. Suddenly the possibility of using the dreaded BMP spam or just BTR60s to put a lot of infantry into an objective looks feasible, because attacking through cover and smoke plus night is suddenly 6+…if the people shooting at you don’t have TI.
One thing that we learned – never do an E-battle with this much infantry. The fun:work ratio is too low.
Battle Report Author
Army Lists Used In This Battle
Recommend Commander For Commendation
Share this battle with friends
bayankhanWins

thanks for the explainations
congrats on the win, hopefully NATO can pull a win off you at some point
Thanks for the explanation on the counter use, it’s actually a nice thing to know that long-distance games like this can still be done.
Excellent AAR Tovarish podPolkovnik, as expected with the GRU so close on your heels.
I hope you didn’t damage my Datcha (cottage) there as it is was?? a beautiful recreational ares
My father in law also complains about my creative posting of pictures by mail, so I wont comment on the qualities of you hind jockeys any more
Very nice report tovarish!
Great report! Recommend
Wow…just wow. Awesome work Comrade Bayankhan, both on the report and the scenario!
HOT WASH
The first point to make is the outcome was a complete surprise to me. I expected 4-3, either way, as attack and counterattack raged over the objective. Put simply UK rifle teams are twice to three times as effective as a PACT team in close combat. Having both UK rifle platoons near the objective remain pinned on Turn 1, was, to put it mildly, a surprise. That effectively ended the game. (The odds against that, Captain, are 10 to 1). But…that does not mean the scenario doesn’t need work.
One problem is that the number of bridges, their proximity to my deployment area in some cases, and the consequence they I could set up in the mines. We never had a chance to check blowing the bridges; it happened so fast there was only one bridge where a stand was close enough to try it on his turn 1. Perhaps it needs to be part of defensive fire, as well.
My judgement is that the scenario will work best with 65 points, the normal 48 inch wide NO RETREAT Board, and perhaps one real bridge, never more than 2.
Night fighting was somewhat of a revelation. We mostly play combined arms forces, so night messes up my PACT forces bad enough that I avoid attacking in it like the plague. But…I rarely use strike aircraft, and normally defend, not attack at night. Suddenly the possibility of using the dreaded BMP spam or just BTR60s to put a lot of infantry into an objective looks feasible, because attacking through cover and smoke plus night is suddenly 6+…if the people shooting at you don’t have TI.
One thing that we learned – never do an E-battle with this much infantry. The fun:work ratio is too low.
Nice battle. On to the ports and crush the oppressors of the people comrade.